In my closet, there are two of these light, flowy tank-tops I bought a while ago at Kohl’s. I would have bought 10 more if they’d had them in my size or any other interesting prints. Alas, they did not. But with a little bit of sewing know-how, a little bit of bravery, and the freedom to choose any fabric under the sun, that became a non-problem because I could use those existing shirts as a template to make my own. So that’s what I did this past weekend.
How?
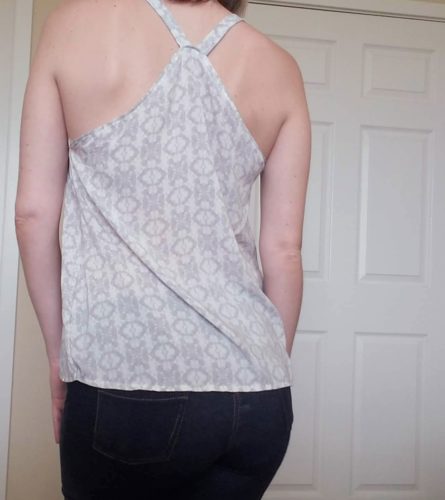
1Deconstruct. No, don’t go tearing it apart. But do take a good look at how it’s constructed. Identify the different pieces that are sewn together and how they’re sewn together, what attaches to what, what type of stitches were used, and so forth. My shirt was fairly simple: it has a front piece, a back piece, 2 straps, and some bias binding around the edges. The fabric was a sheer woven so there were no special stretch stitches involved.
2Decide. Are you going to mimic the shirt you have exactly? Are there things you want to add or take away or do differently for the sake of simplicity? For my shirt, I knew the narrow little bias binding around the raw edge would be something of a nightmare. The rayon batiste I was planning to use had a softness and drape to it that I knew would be difficult to bind even with a bias binding foot on my machine, nevermind making such narrow bias tape out of it. I knew it just wasn’t going to be worth the trouble. I also opted to construct my straps just a bit differently. The store-bought shirt had the seam running along the edge of the strap. I decided to have the seam run along the center of the strap so it would be hidden against my body.
3Research. Because the binding was not going to be an option for me, I poked around online and through my Sewing Book for hemming techniques I could use instead and decided on a technique I saw described on two different blogs. 1) theseamanmom 2) So Sew Easy
4Create a pattern. Lay out your garment on a nice flat surface on top of some tracing paper or pattern paper. Smooth out any wrinkles and arrange the fabric so you’re able to trace an outline around the individual pieces. Use some weights to hold it in place. Pro tip: you only have to trace half to make a pattern piece. You’ll then lay that pattern piece on the fold of your fabric for cutting so you get a nice symmetrical piece. For me, I laid out my shirt and traced half of the front piece first. I had to move aside the back piece in places in order to expose the edge of the front piece for tracing. There will be a little lack of precision, and not much seam allowance to speak of. You can draw that into your pattern and smooth out your lines after tracing. I did the same thing for the back piece. Because the straps were just straight pieces of fabric, I didn’t trace them but measured them instead, then drew out the rectangle at that same size. I did halve it so I could also place it on a fold while cutting. It makes cutting a bit easier to not have such long lines.
5Cut out your pieces using your new pattern on your chosen fabric. Here’s a little starting point on how to cut fabric using a pattern.
6Test stitches on fabric scraps. Here’s a little run-down on what testing stitches looks like.
7Sew and ADAPT. Sometimes, whatever is in your head might not work the way you imagined it would in the real world. That hemming technique I read about sounded wonderful and flawless on the blogs. But once I got to the point of simply basting a 1/8″ seam along my first seam, it all went off the rails. 1/8″ is laughably minuscule, especially on this fabric I was working with, and with the fabric edge being so close to the needle, there was no fabric on the one side for the feed dogs to feed so it was feeding crooked. I about lost my mind on that. So I adapted the technique. I kept the first 1/4″ basted seam, folded and pressed along it, and then folded and pressed another 1/4 over that so the raw edge was enclosed. I pinned it in place, and then sewed a regular straight stitch close to the upper fold. It worked well. I also knew what a pain it would be to try to do such a narrow hem around curves, so I opted to hem BEFORE I started sewing the pieces together.
The hemming is what took the longest on this project. It needed to be done around the bottom edge, around the neckline, and around the armholes. Once that was done, it was just a matter of sewing the side seams and attaching the straps.


I’ll be editing the pattern a bit for my next version, which I plan to make out of cotton voile. I’m thinking of tapering in around the waist for that one since the voile doesn’t have as much drape. It’ll be my first time making something out of voile so I’m curious to see how that fabric flows around the body. I keep hearing it’s great for summer wear, and love the fabric I got from Mood for it, so I’m looking forward to finishing the next one!
Leave a Reply