Well, no one can say I didn’t give this pattern a fair shake. And unless I come across fabric that tells me it really wants to be a Tsairi blouse, I have no plans to make this again.
I think.
There’s a voice in my head telling me to try this with a lightweight, fluid fabric that’s more stable than chiffon…
Shut up, voice.
About the Fabric
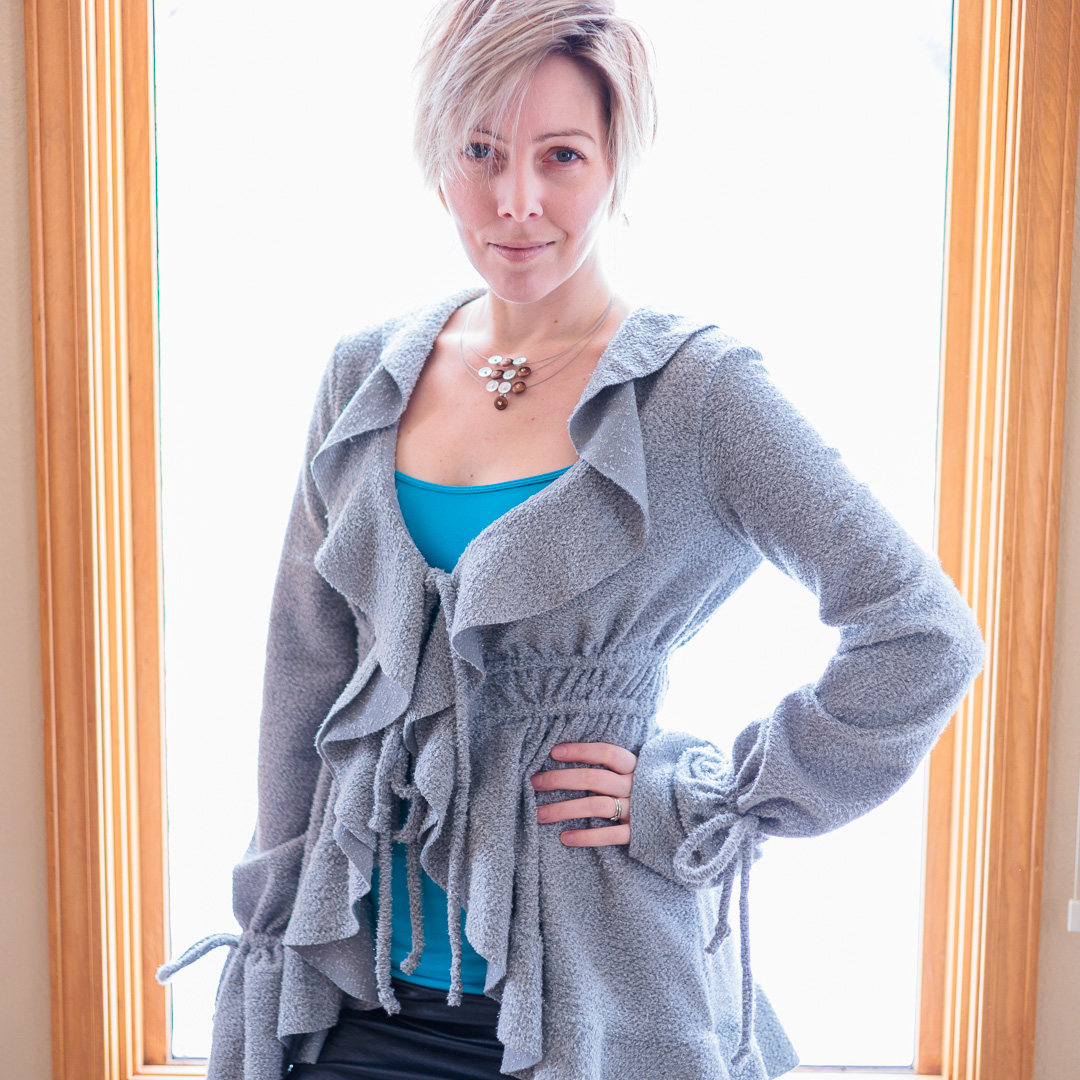
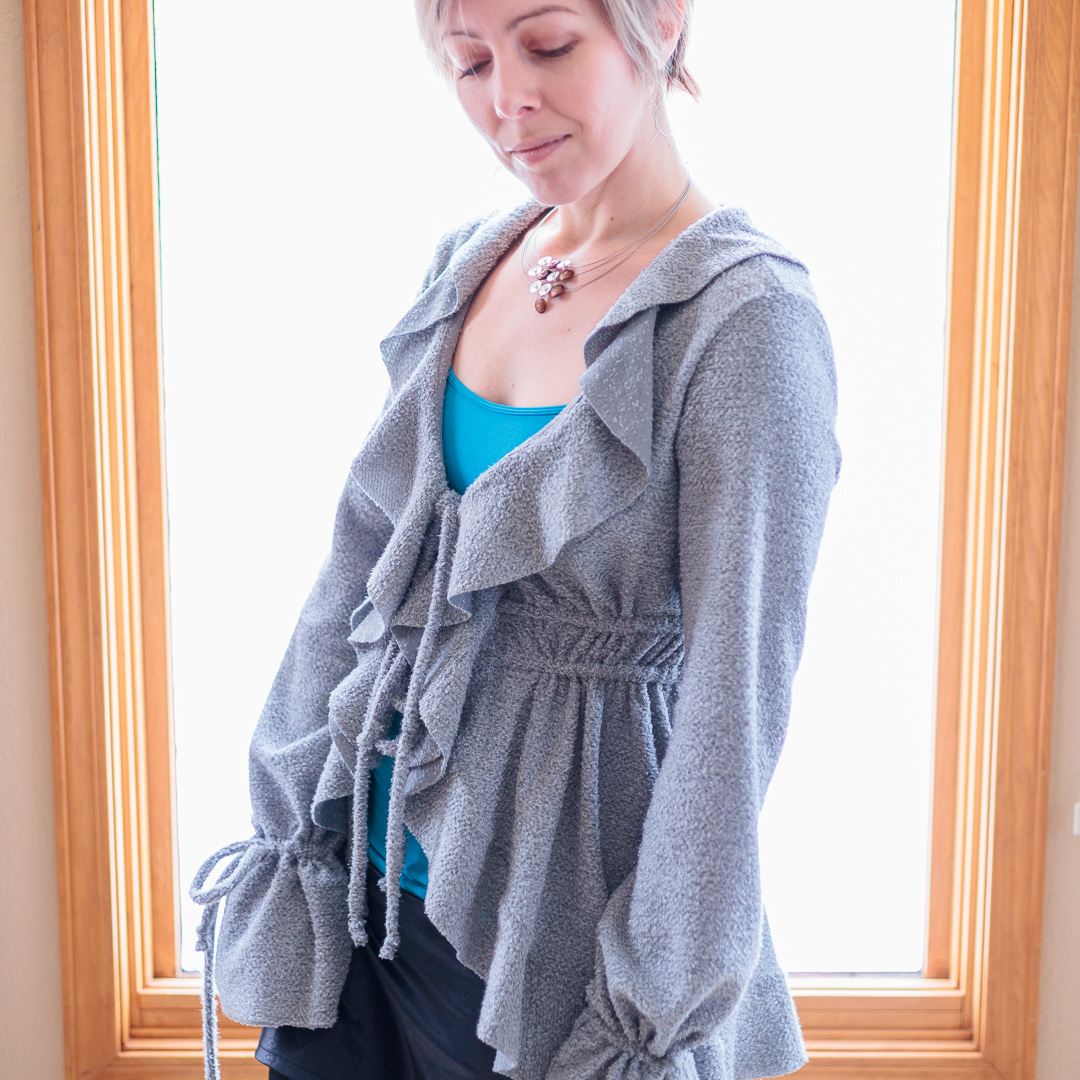
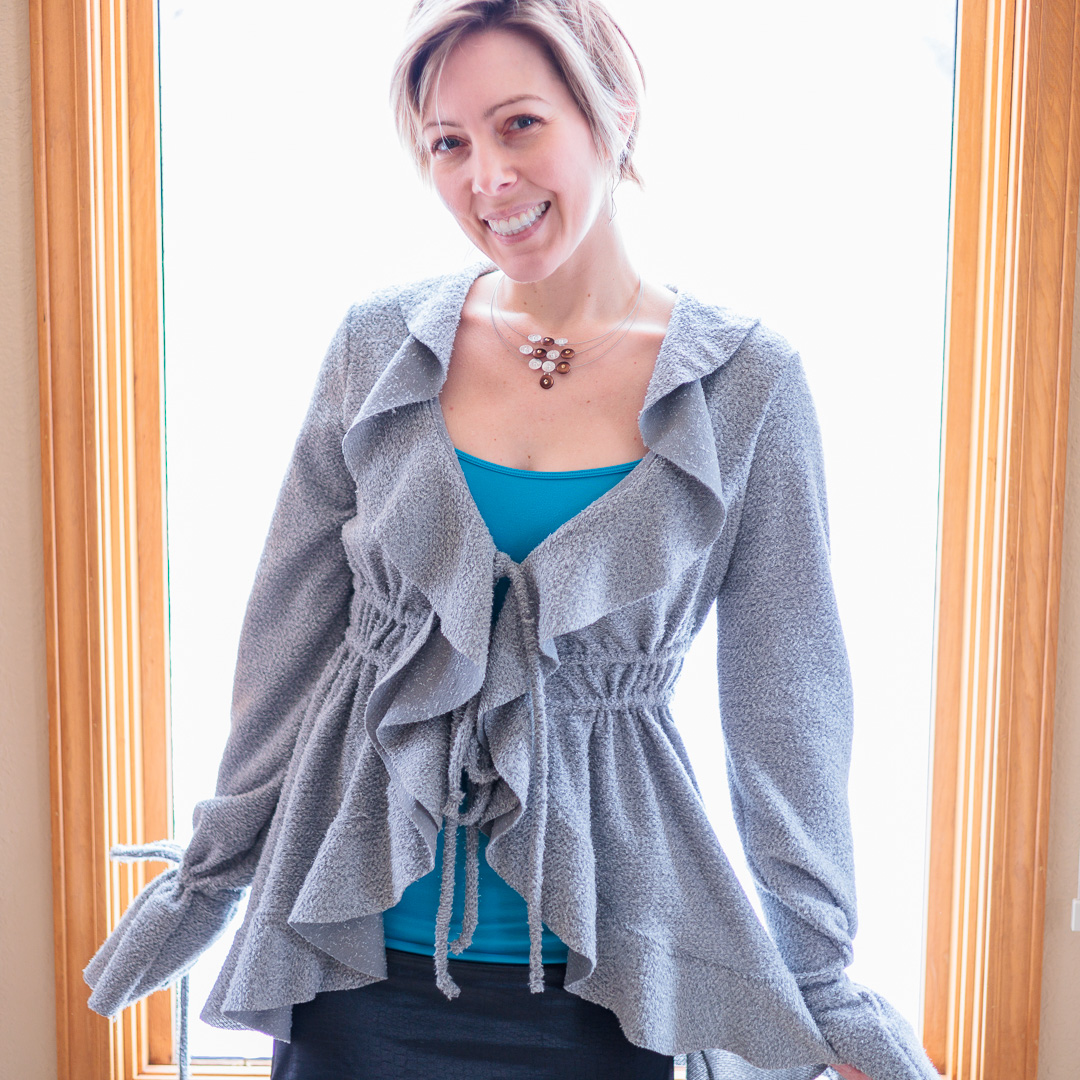
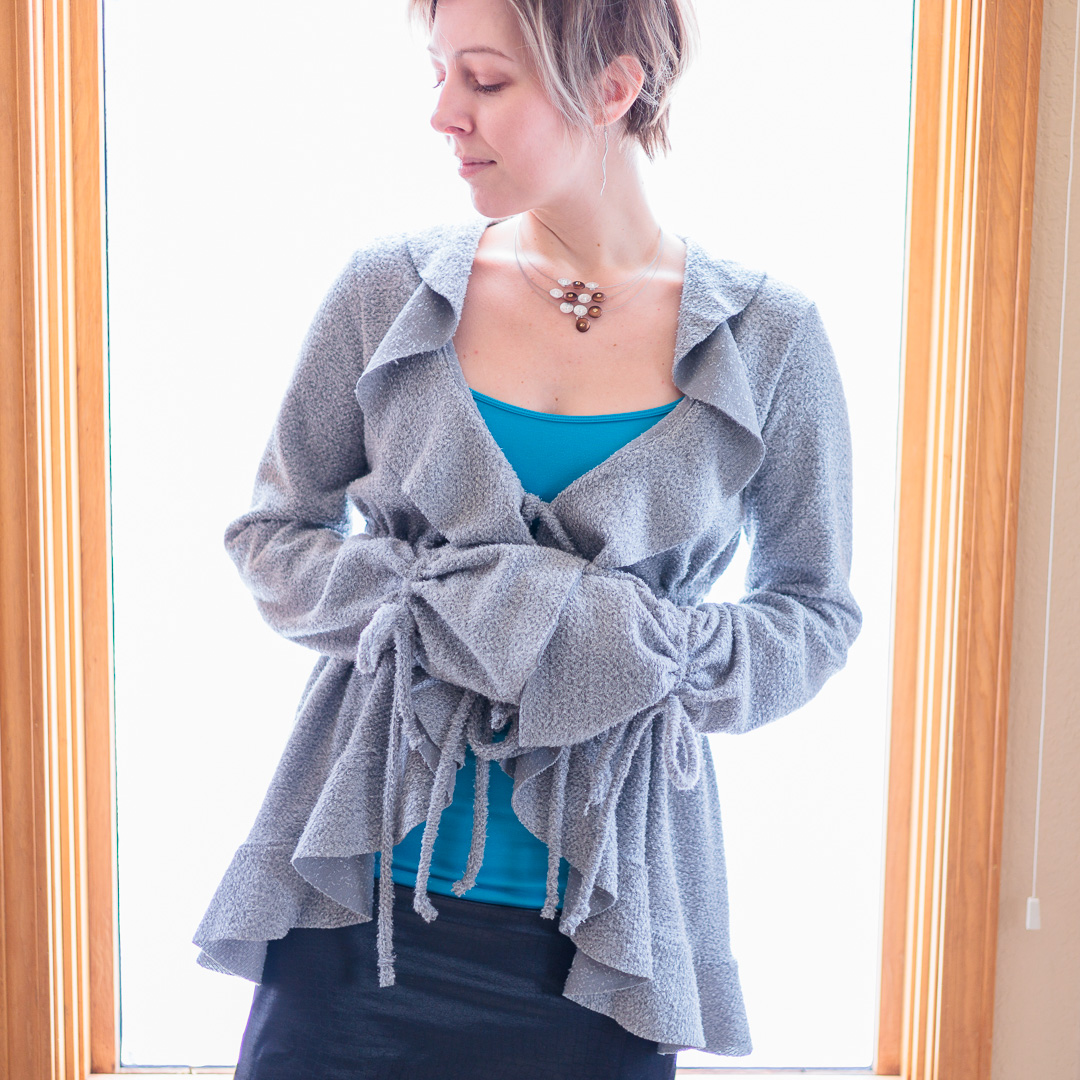
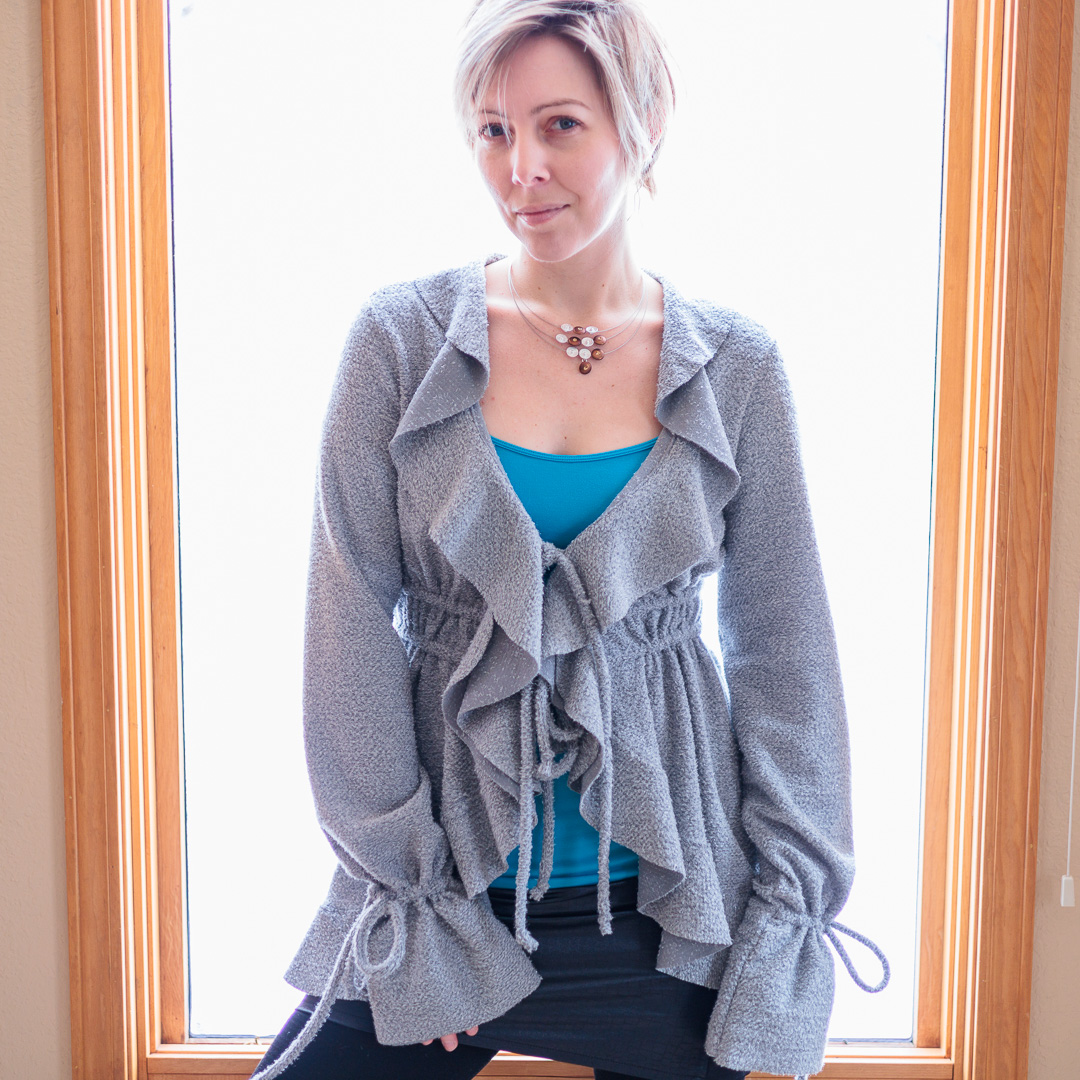
3 yards Heather Grey Shimmer Fuzzy Sweater Knit from Cali Fabrics
- FABRIC CONTENT: Polyester
- FABRIC WIDTH: 60″
- WEIGHT: Midweight
- STRETCH: None
Ole Tsairi here calls for “natural silk, artificial silk, chiffon, crepe de chine, viscose crepe, silk crepe, or silk satin.” But I thought, what if I tried a sweater knit? And whaddya know, this sweater knit has no* stretch. (*It actually has a little stretch.)
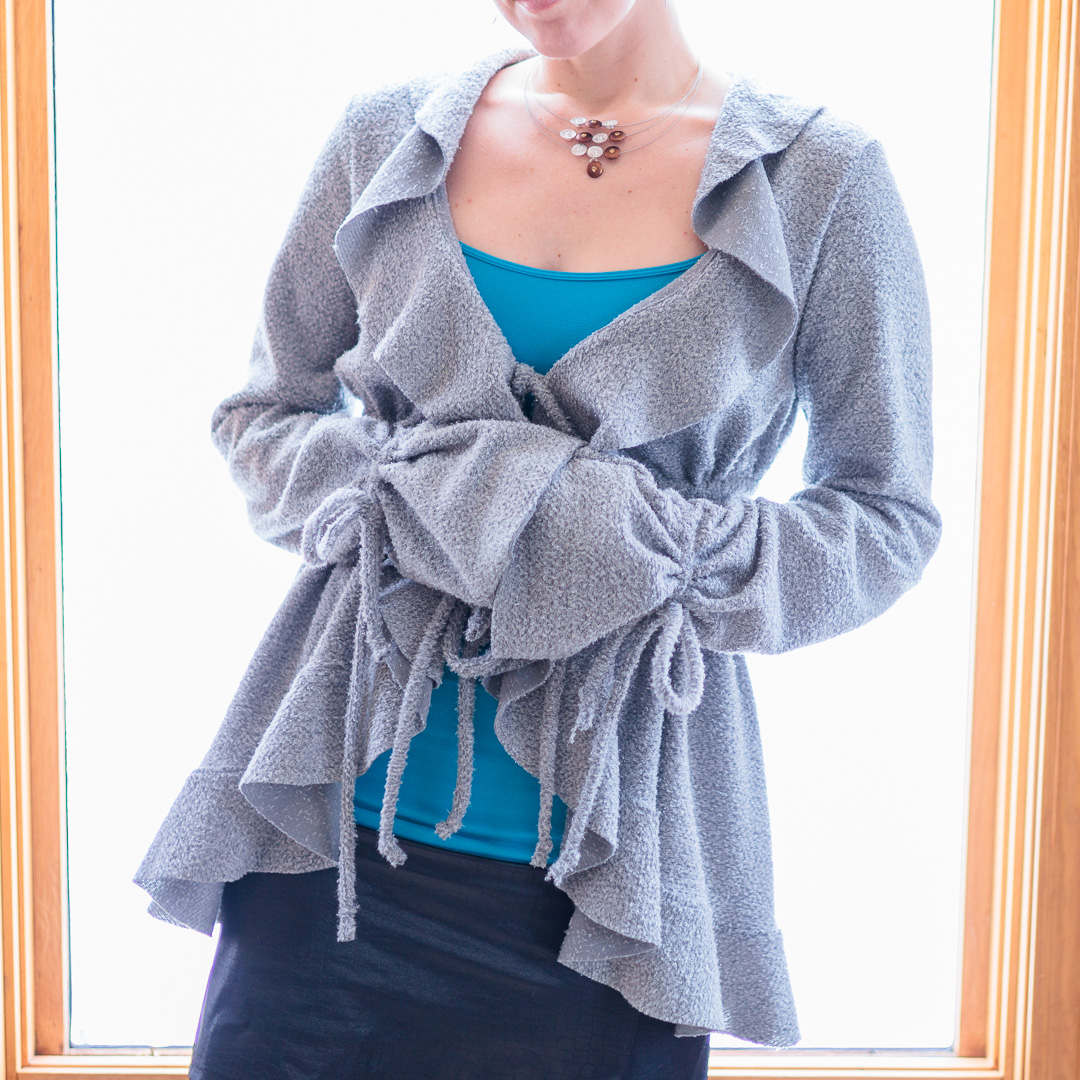
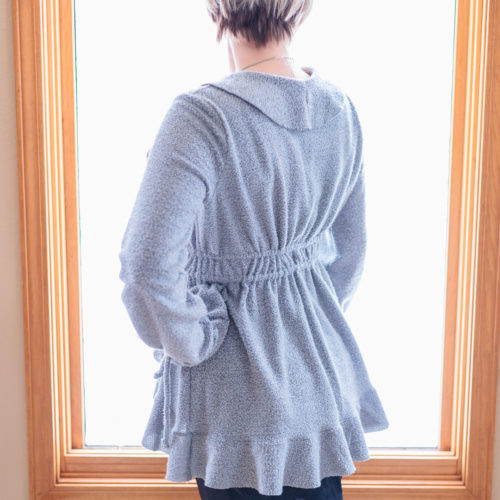
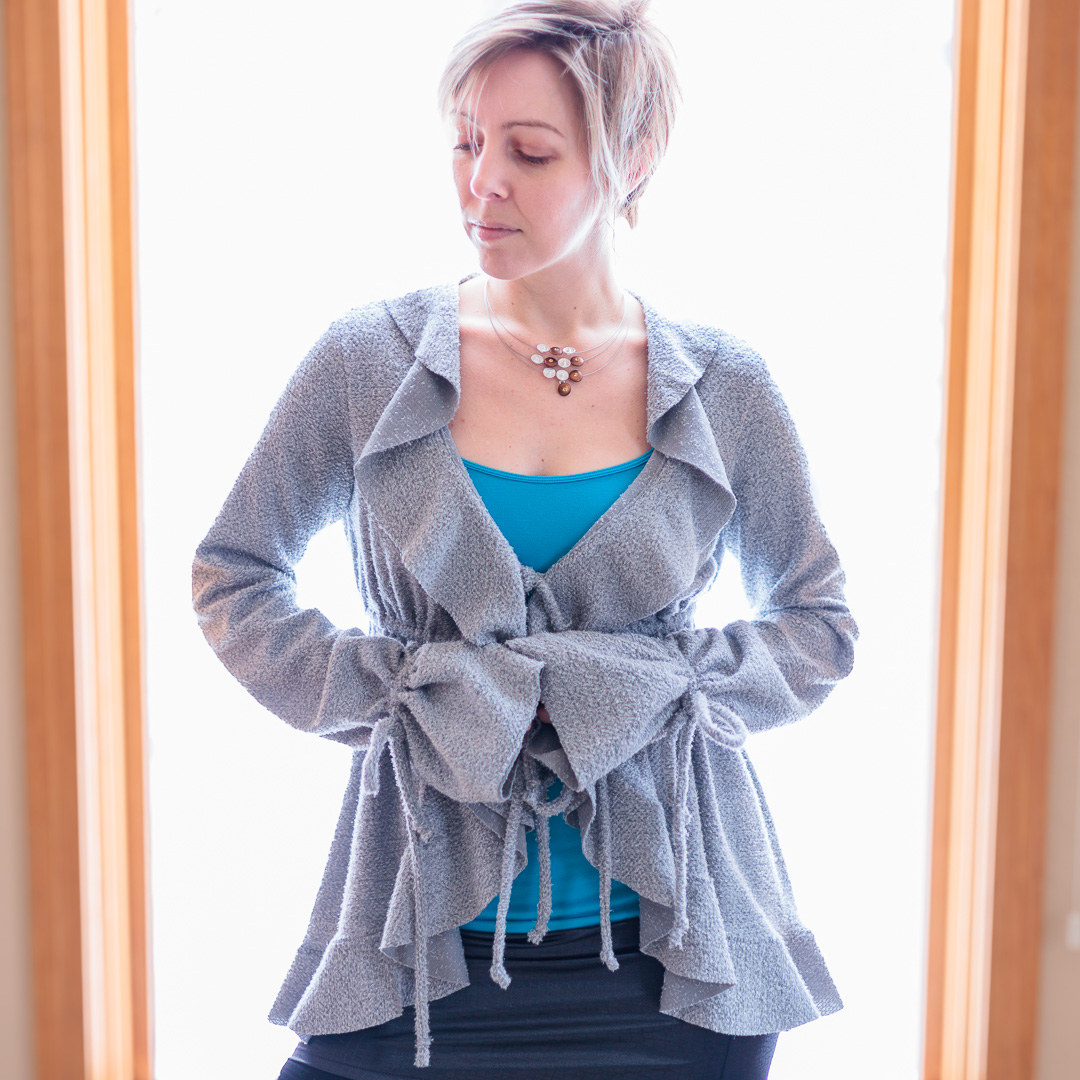
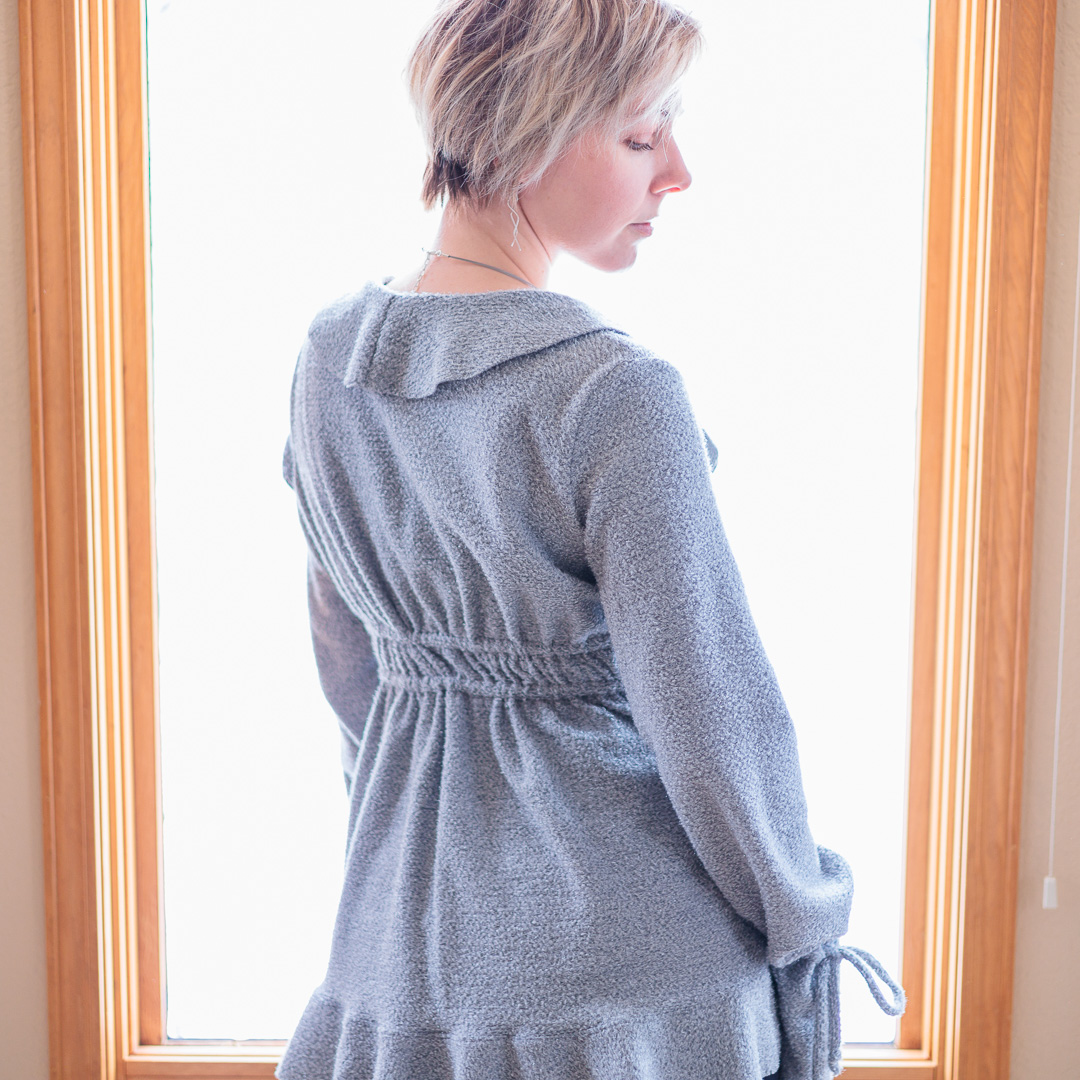
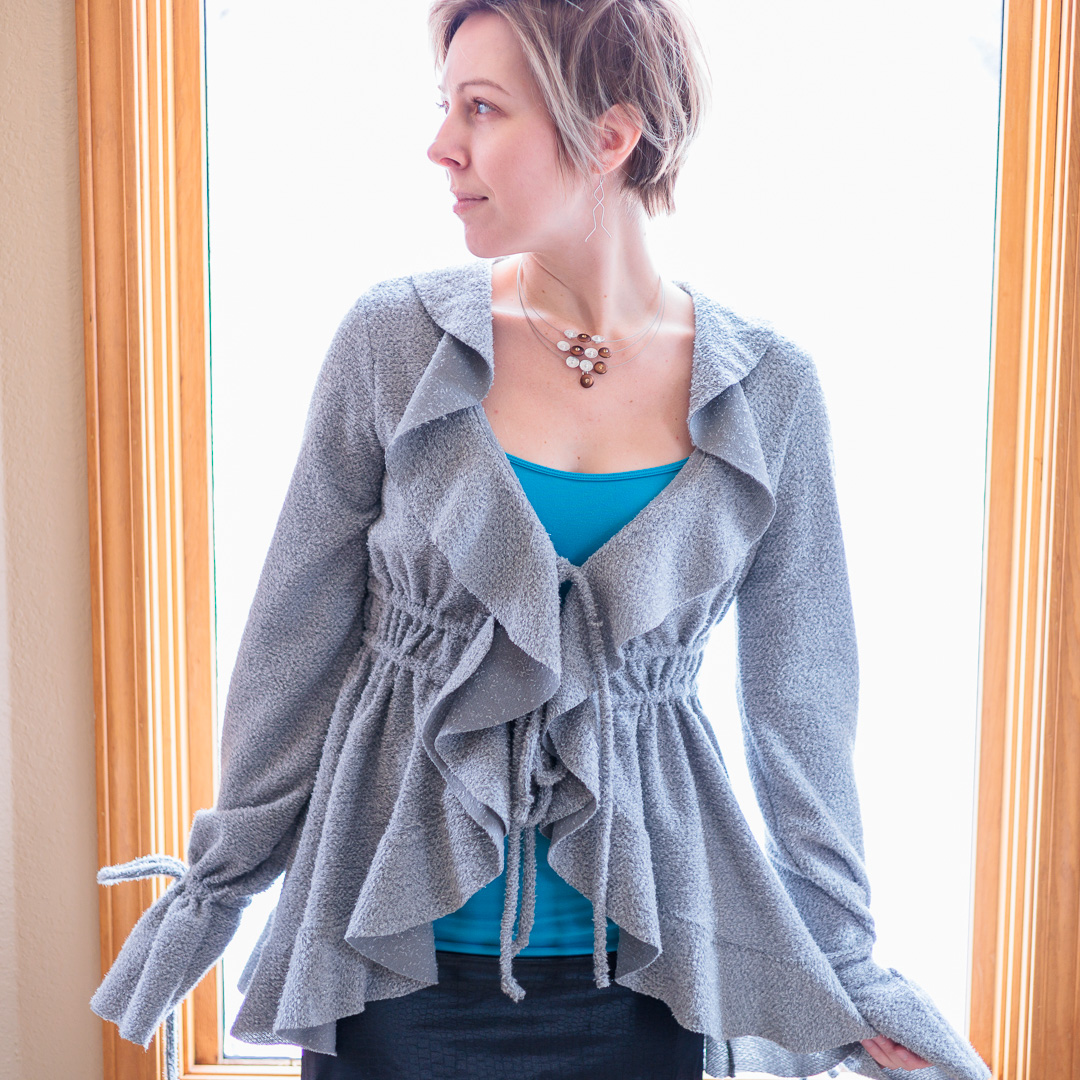
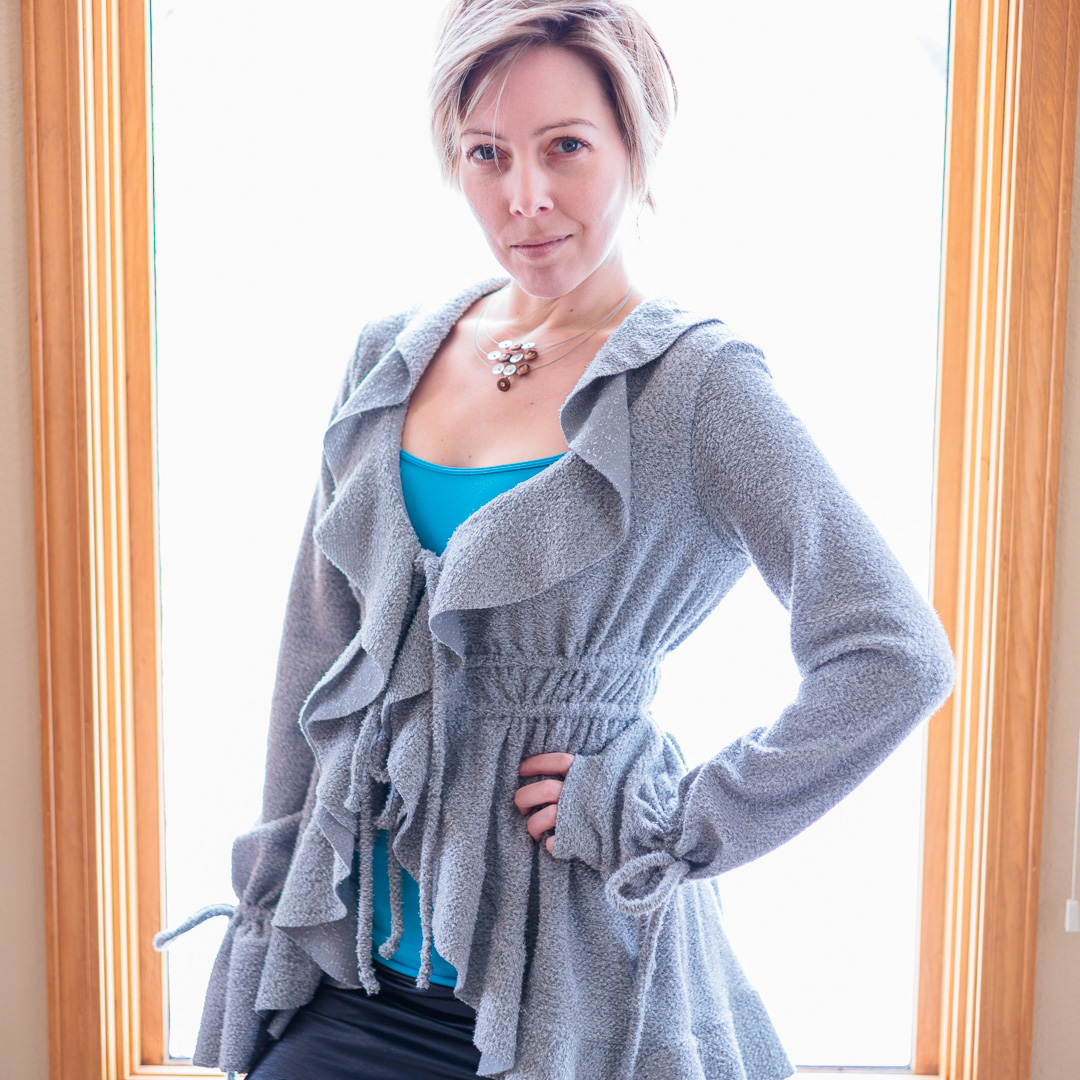
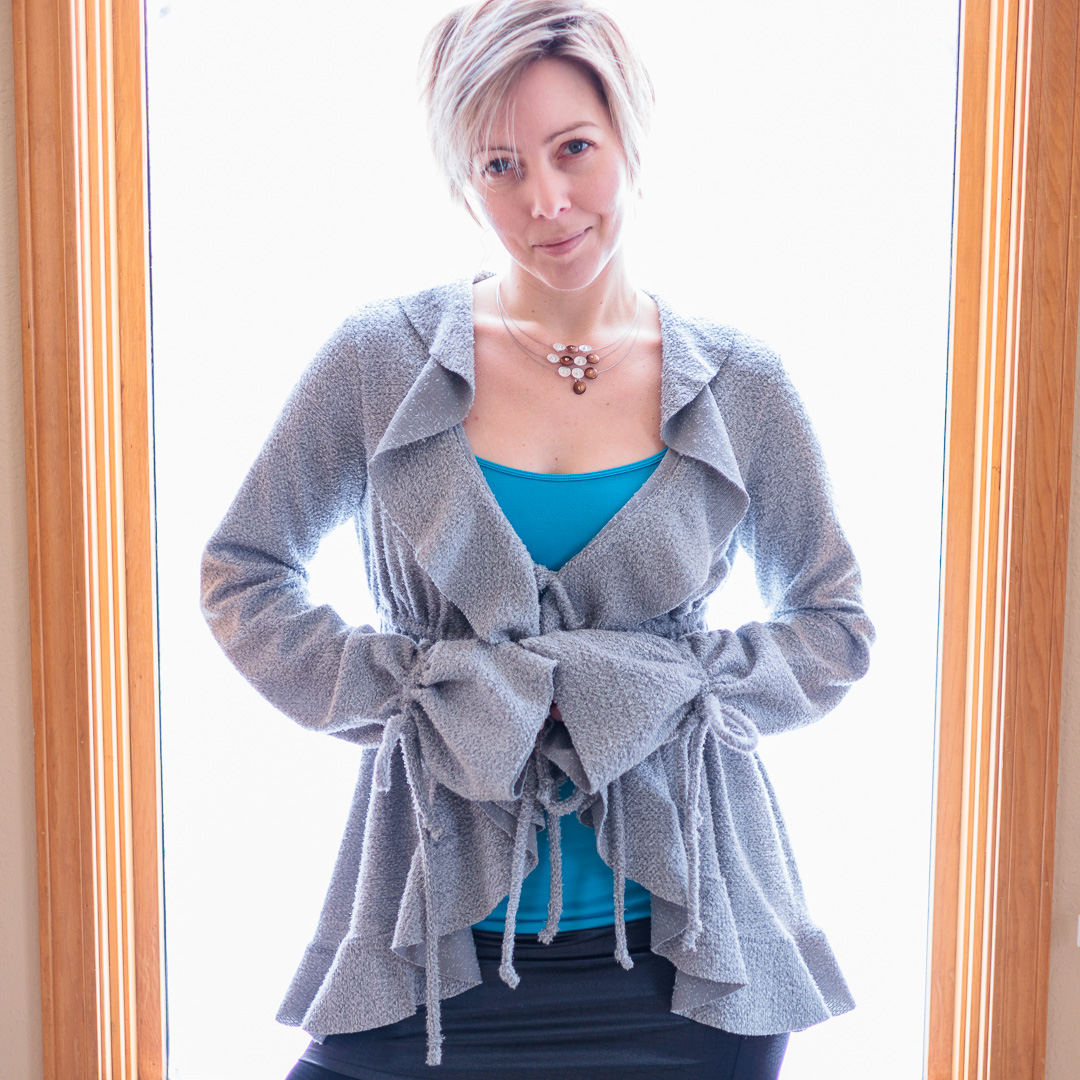
Super cute fabric, but glitter did explode thus. And I wish it was softer. Methinks all that shimmer is what’s making it scratchy. Not unbearably scratchy, but still…it’s not quite as cozy as it looks—except for those super long sleeves to hide my hands in. I do love that. And how lofty all the drawstrings turned out.
Glitter aside, it was very nice to work with. After wrangling chiffon into submission, it was a welcome relief to cut the pieces out of this fabric easily and accurately and transfer pattern markings I could actually see. It all came together very well and much more quickly since 1) I knew what to skip, and 2) I didn’t have to deal with all the drama of unraveling, woven chiffon seam allowances.
I wonder how the unfinished edges will hold up through washing. I might be okay if they get a little ragged; it might look cute.
For the casings, I used some leftover gray quilting cotton.
About This Make
- size 40
What I Did Differently
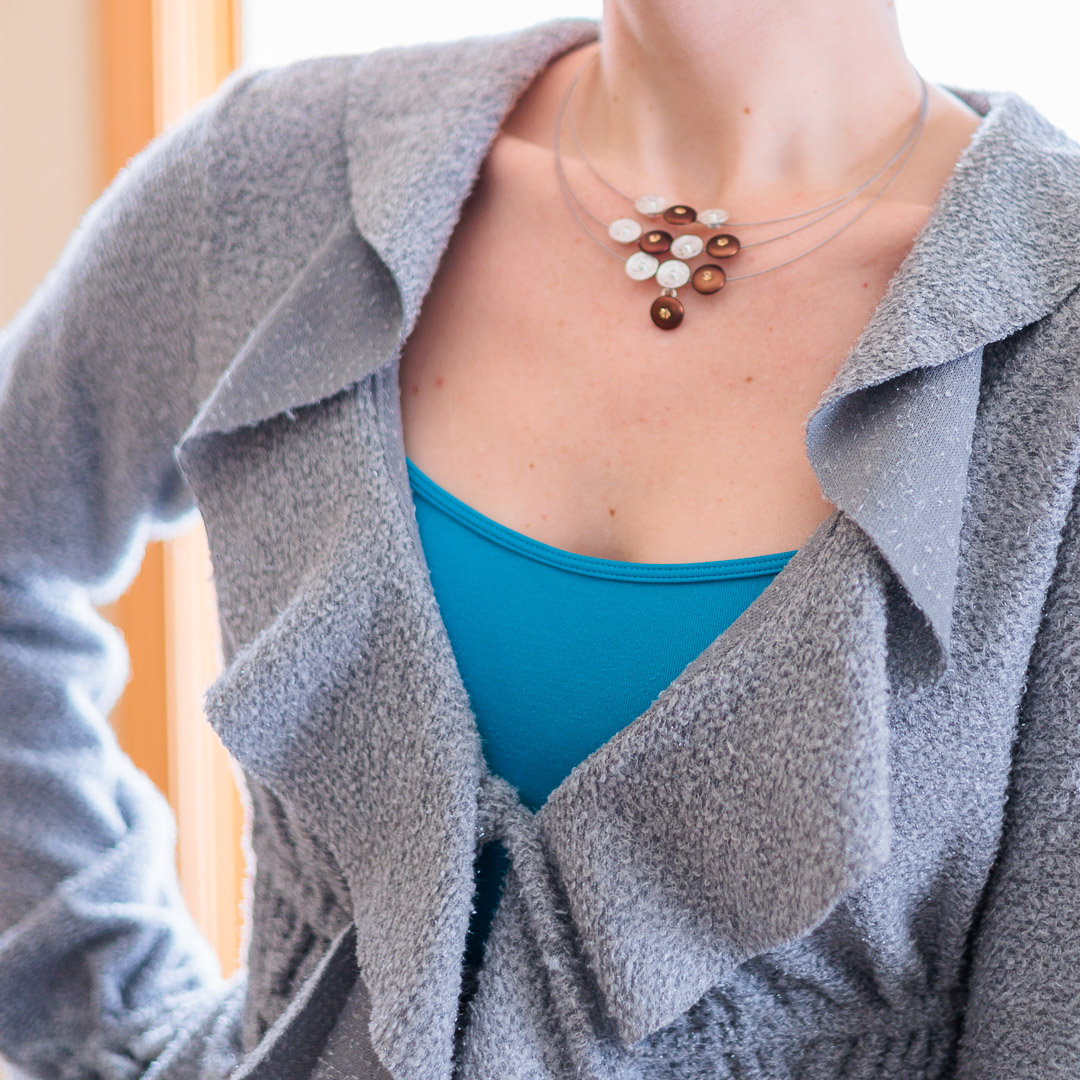
- Skipped the binding again and understitched instead. The bottom half of the flounce seam allowance (from the waist down to the hem) is stitched down in one direction, and the rest of it is stitched down in the opposite direction.
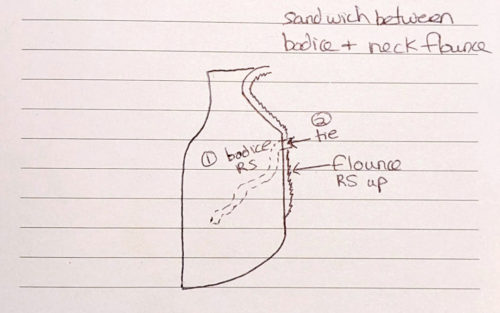
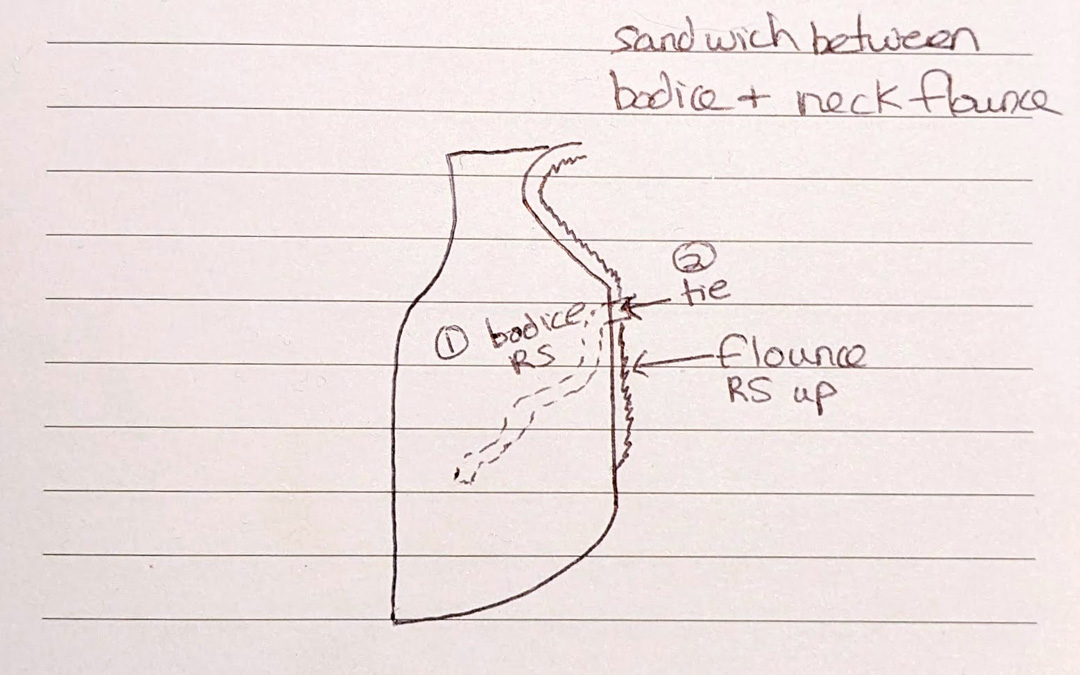
- Figured out how to attach the top-most front ties: sandwich the tie in between the bodice and the flounce in this order:
1. bodice (right side up)
2. drawstring (tie)
3. neck flounce (right side up)
The Shortcut Instructions
For anyone (or future me) who wants to streamline the convoluted instructions, behold:
- Sew butonholes on sleeves
- Attach sleeve casings
- Construct drawstrings
- Insert sleeve drawstrings in sleeves and baste
- Sew sleeve side seams
- Sew shoulder seams
- Sew bodice side seams
- Construct bottom flounce using front and back flounce pieces
- Construct neck flounce
- (Optional) Hem flounces
- Baste front ties to wrong side of bodice
- Baste bottom flounce to bodice
- Baste neck flounce to bodice
- Finish bodice/flounce seam
- Understitch flounce to bodice
- Attach bodice casings
- Attach sleeves
- Thread bodice ties

Notes for Next Time
- If using a main fabric with a little stretch like this again and casing fabric with no stretch, make sure to leave an ample bit of extra casing at the end of the seam as the main fabric tends to stretch beneath the non-stretch casing while sewing.
- I might want to nudge the waist casings down about an inch.

Project Settings
Sewing Machine vs. Serger
| Sewing Machine | Serger |
|---|---|
|
|
Sewing Machine Settings
| Presser Foot | Stitch# | Stitch Width | Stitch Length | Needle | Top Thread Tension | Application |
|---|---|---|---|---|---|---|
| 1/4 | 0 | 3.5 | 5 | blue tip | 4 | baste |
| 1/4 | 1 | 3.5 | 3.5 | blue tip | 4 | drawstrings |
| overedge (C) | 1 | 1.5 | 3.5 | blue tip | 4 | casings step 1 |
| overedge (C) | 1 | 3.5 | 3.8 | blue tip | 4 | casings step 2 |
| overedge (C) | 2 | 0.5 | 3.5 | blue tip | 4 | understitching |
Serger Settings
| Stitch Name | 4-thread overlock |
|---|---|
| Needles | R, L |
| Finger | B |
| Threads | 4 |
| Tension Left Needle | 4 |
| Tension Right Needle | 4 |
| Tension Upper Looper | 4 |
| Tension Lower Looper | 4 |
| Cut Width | 6 |
| Stitch Length | 2.5 |
| Differential | 1.0 |
| Application | seams |
Leave a Reply