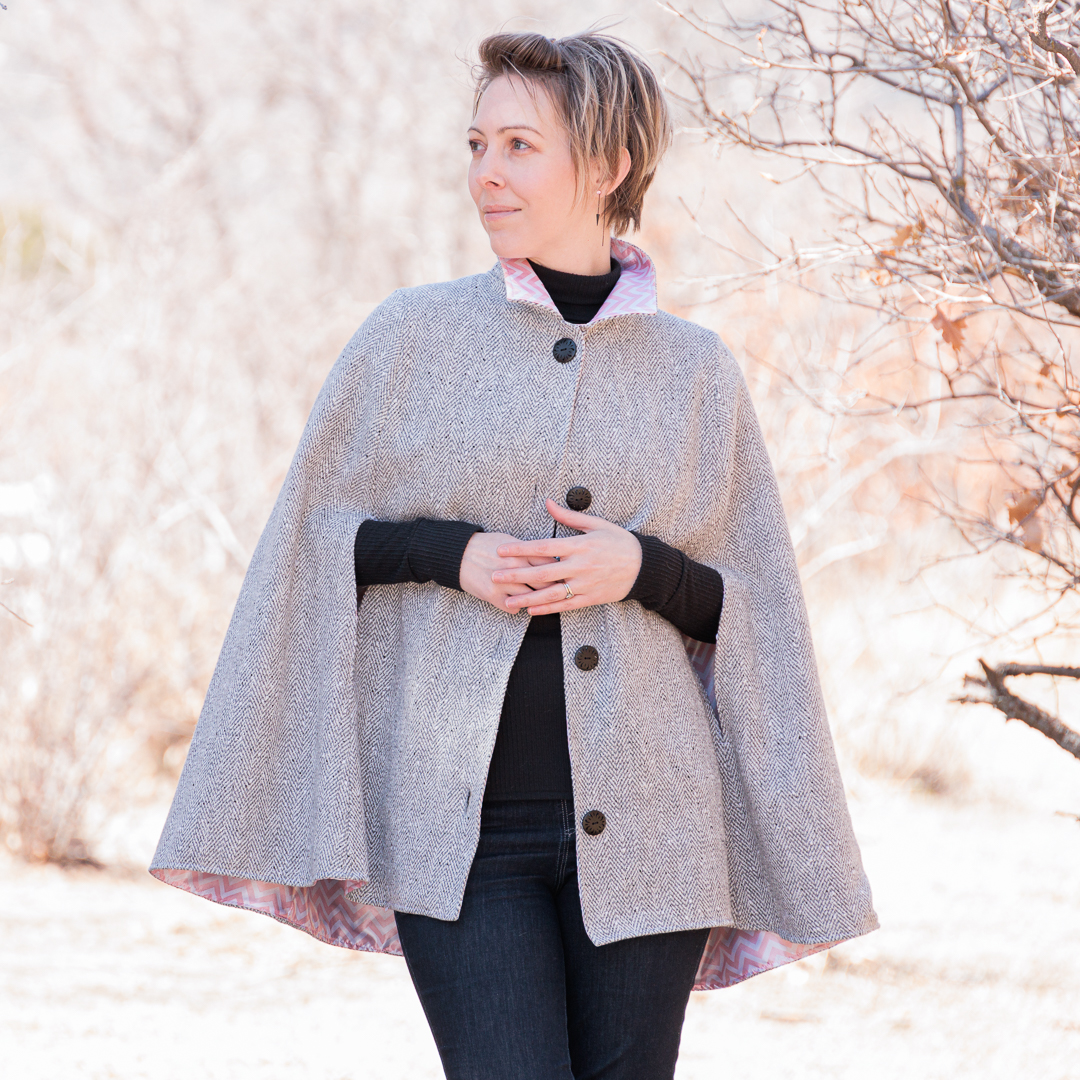
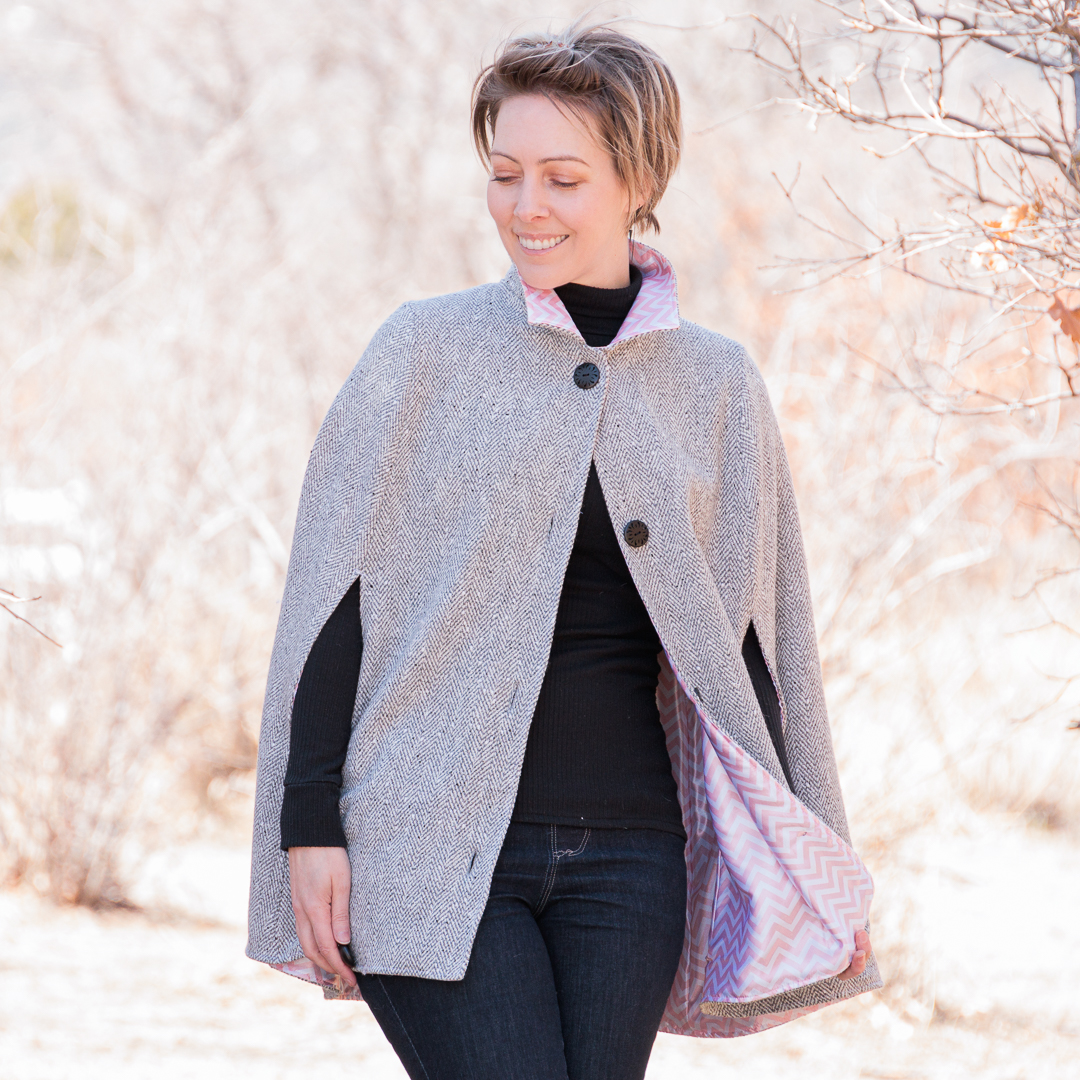
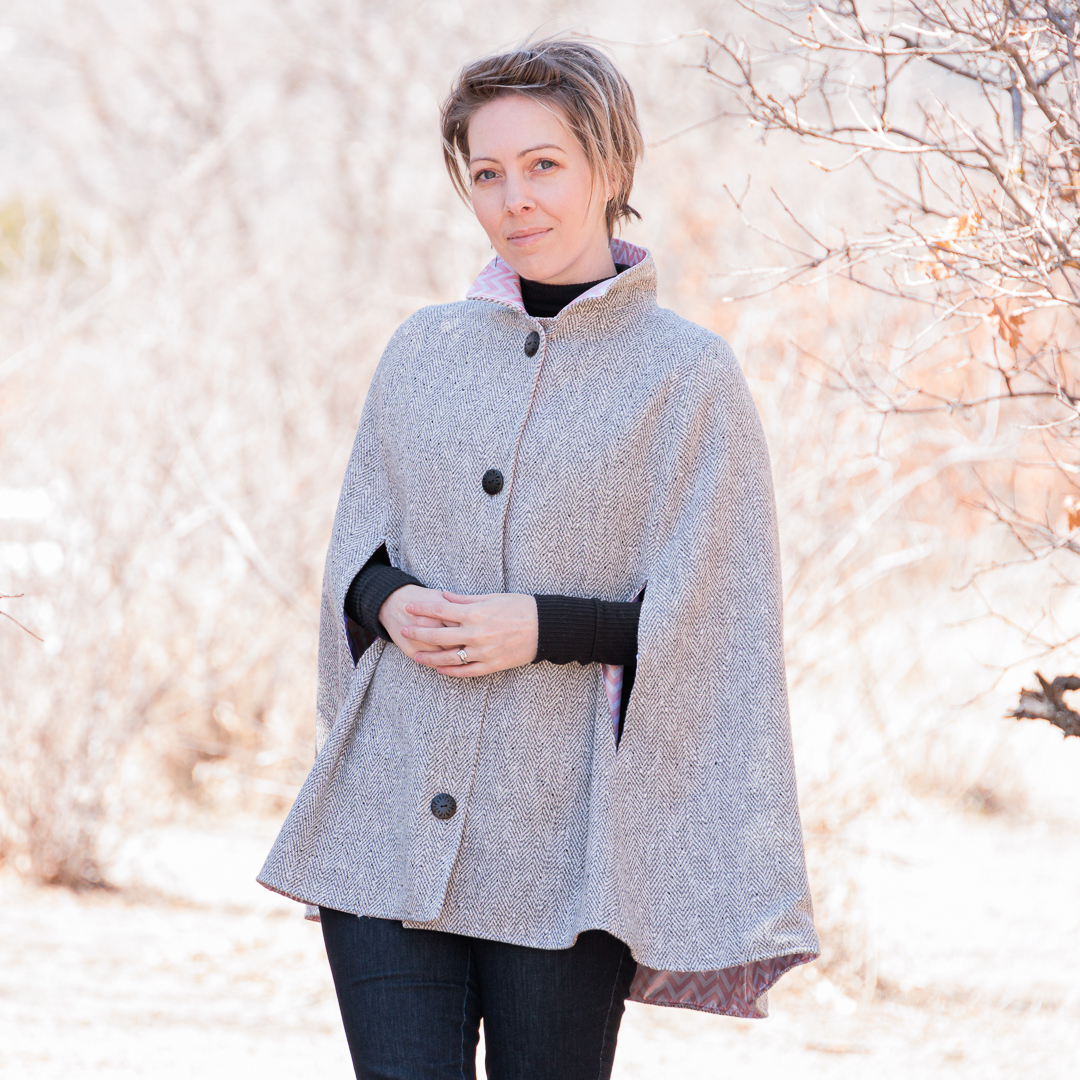
I have a vague memory of finding a discontinued cloak pattern that I really wanted to use for this herringbone wool. I don’t know if it was this specific pattern, or a pattern by another designer, but it doesn’t really matter now because my oh-so-favorite George and Ginger Patterns opened their vault for a few days and I snagged the retired Classic Cloak pattern. For $3. 🤯 And it is completely perfect in every way.
About the Fabric
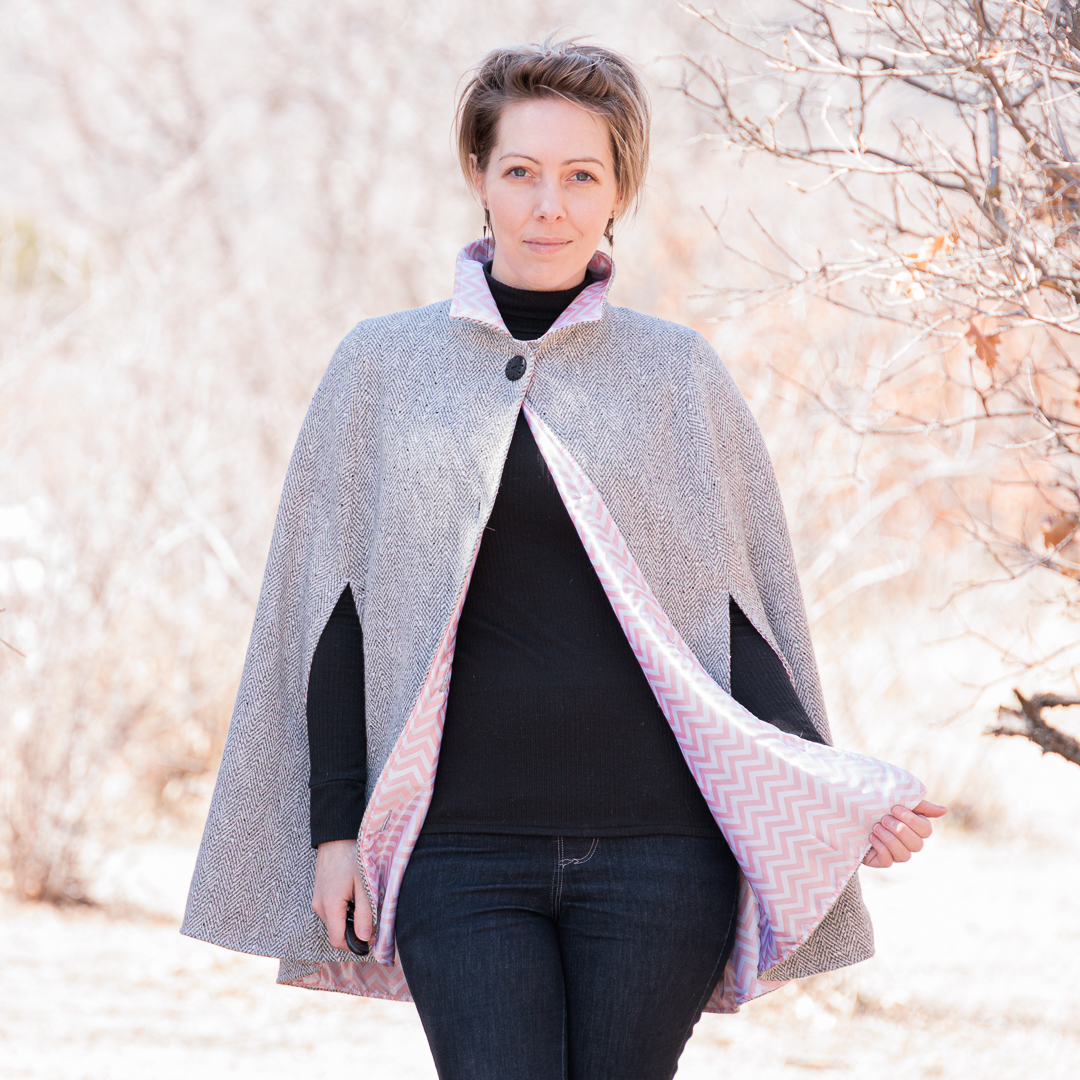
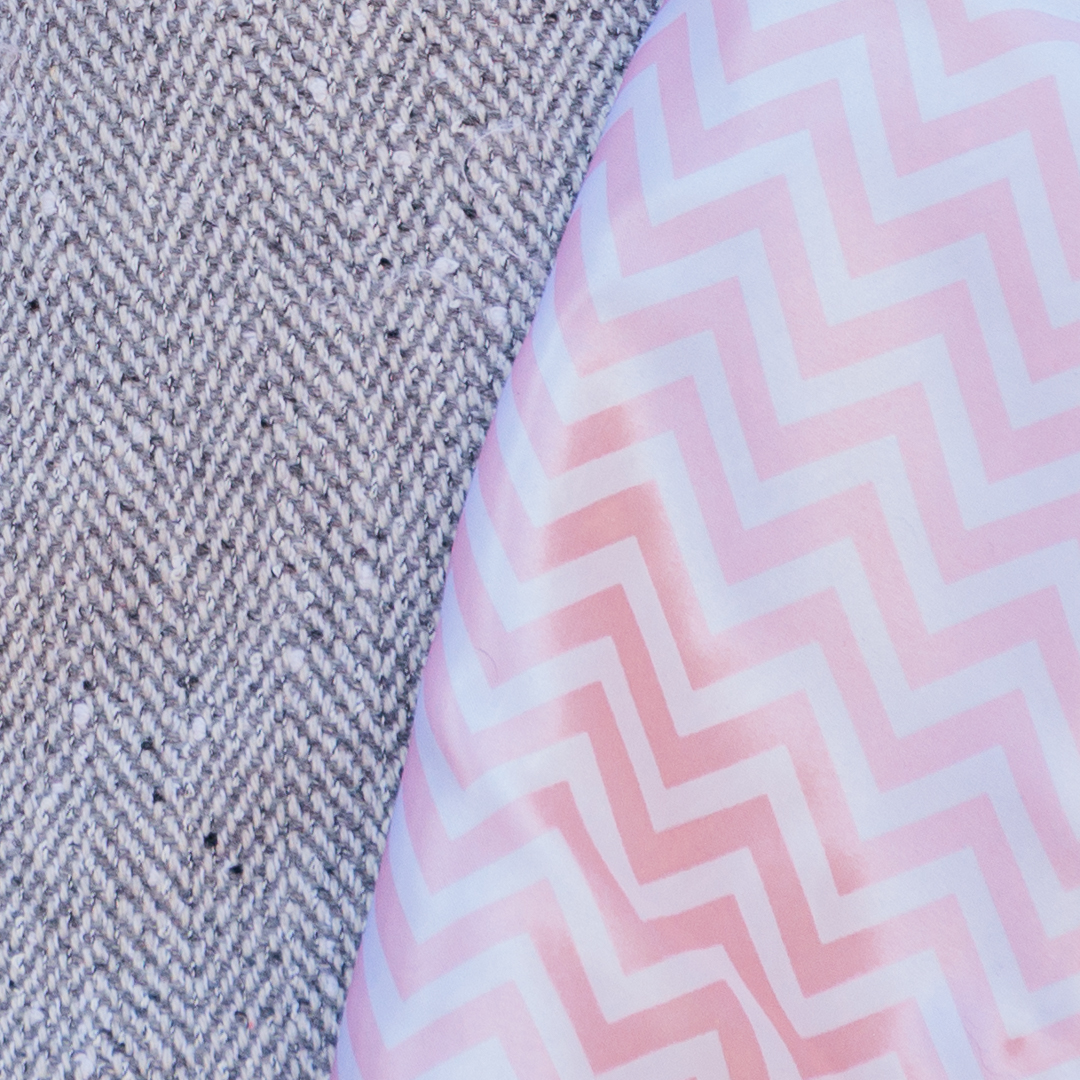
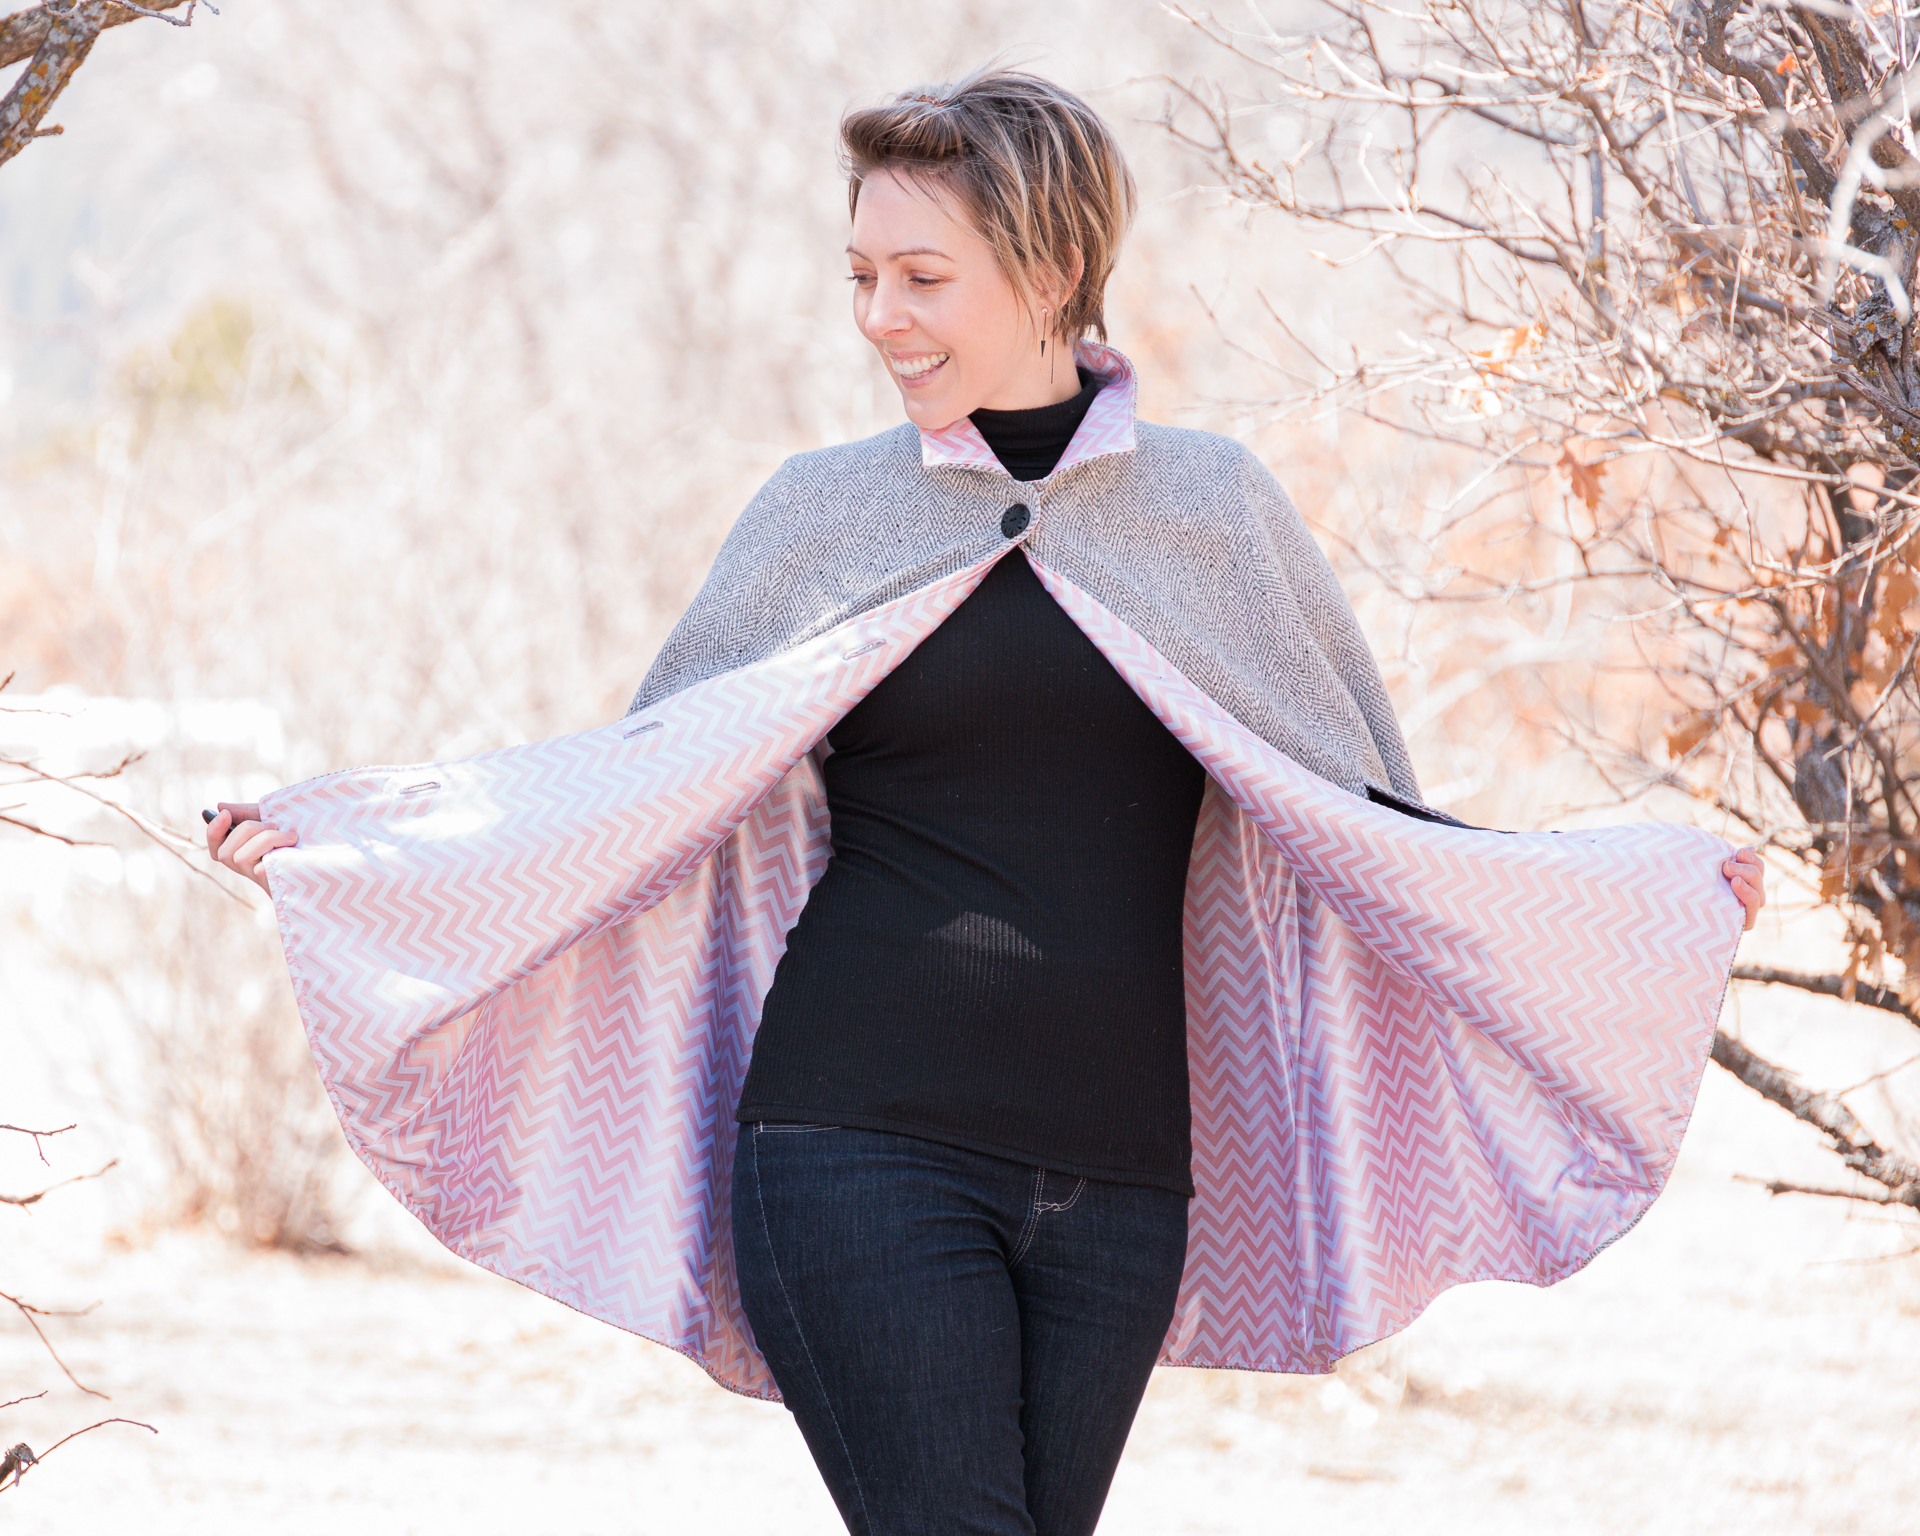
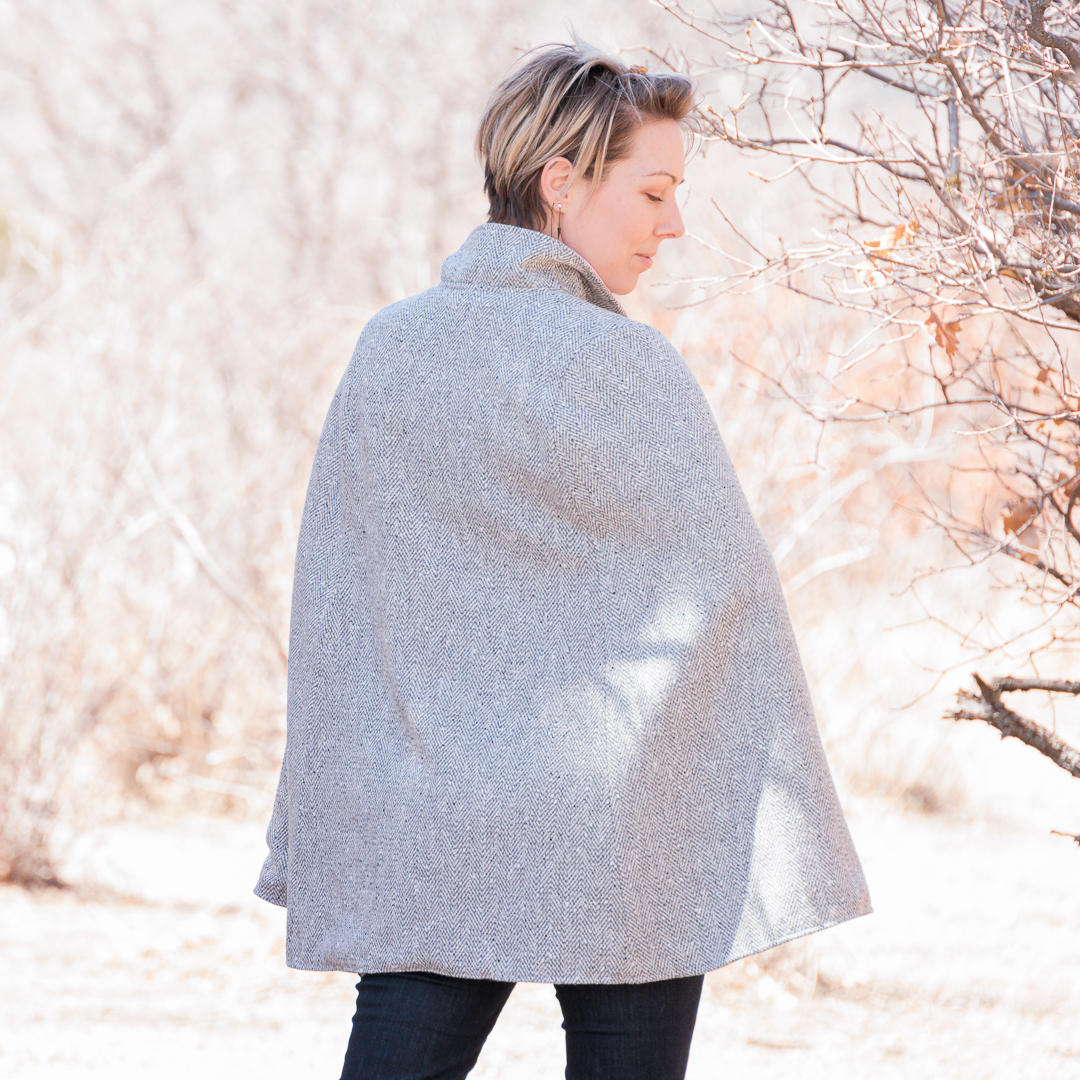
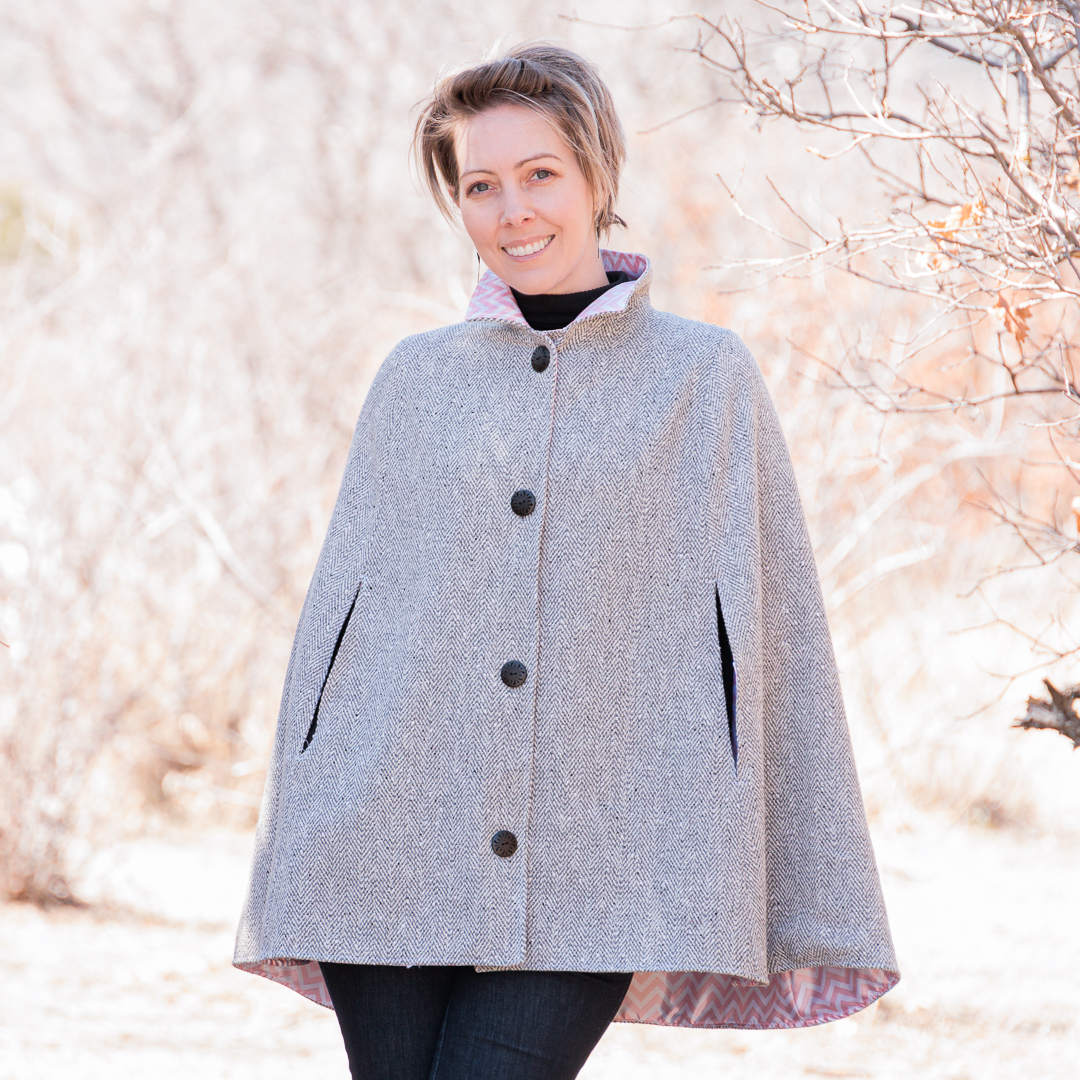
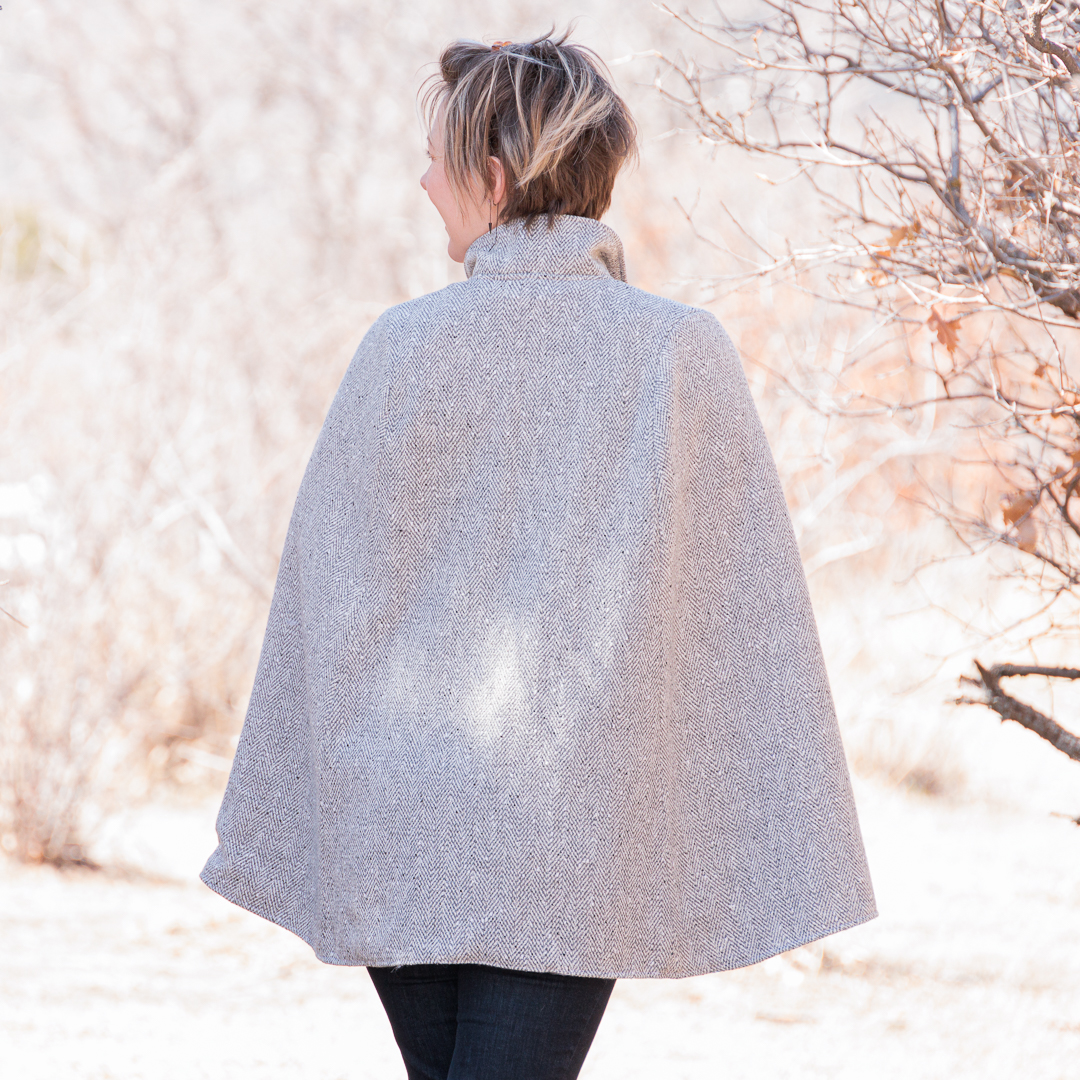
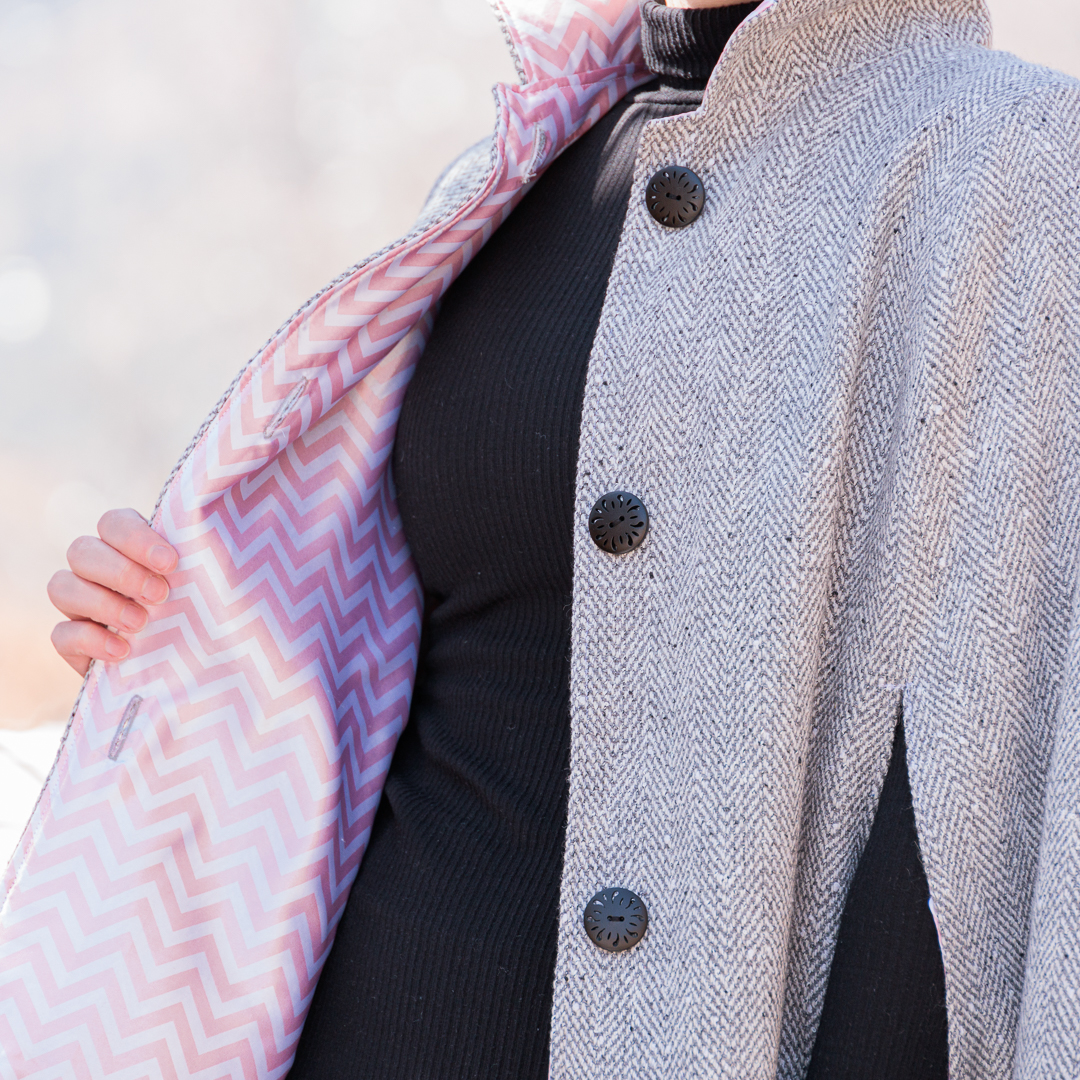
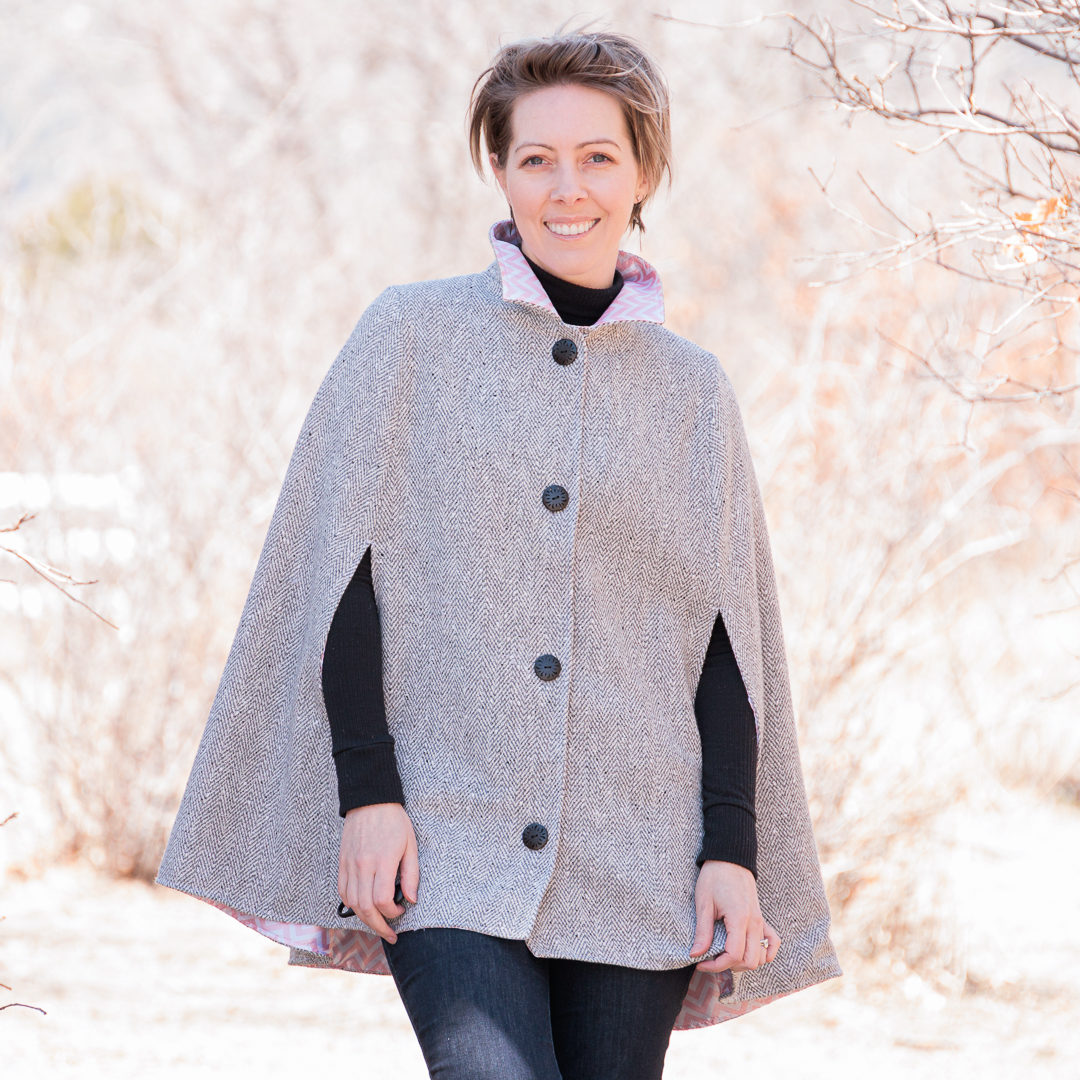
Main: 3 yards Heather Gray Herringbone Wool Coating from Surge Fabrics
- Fabric Content: 80%Wool/20%Poly
- Fabric Width: 58/60″
- Fabric Weight: ~19oz/linear yard
- Stretch: none
Care Instructions: Due to the wool content, this fabric and any garment made with it will require some special care. We recommend machine washing on the delicate/handwash setting with cold water and wool wash. They lay flat or hang to dry. Exposure to hot water or the dryer will shrink/felt the wool fibers.
Only my second time using wool, this particular wool is far less scratchy than what I used on my last Duchess Jacket thanks to the polyester blended in the fiber content.
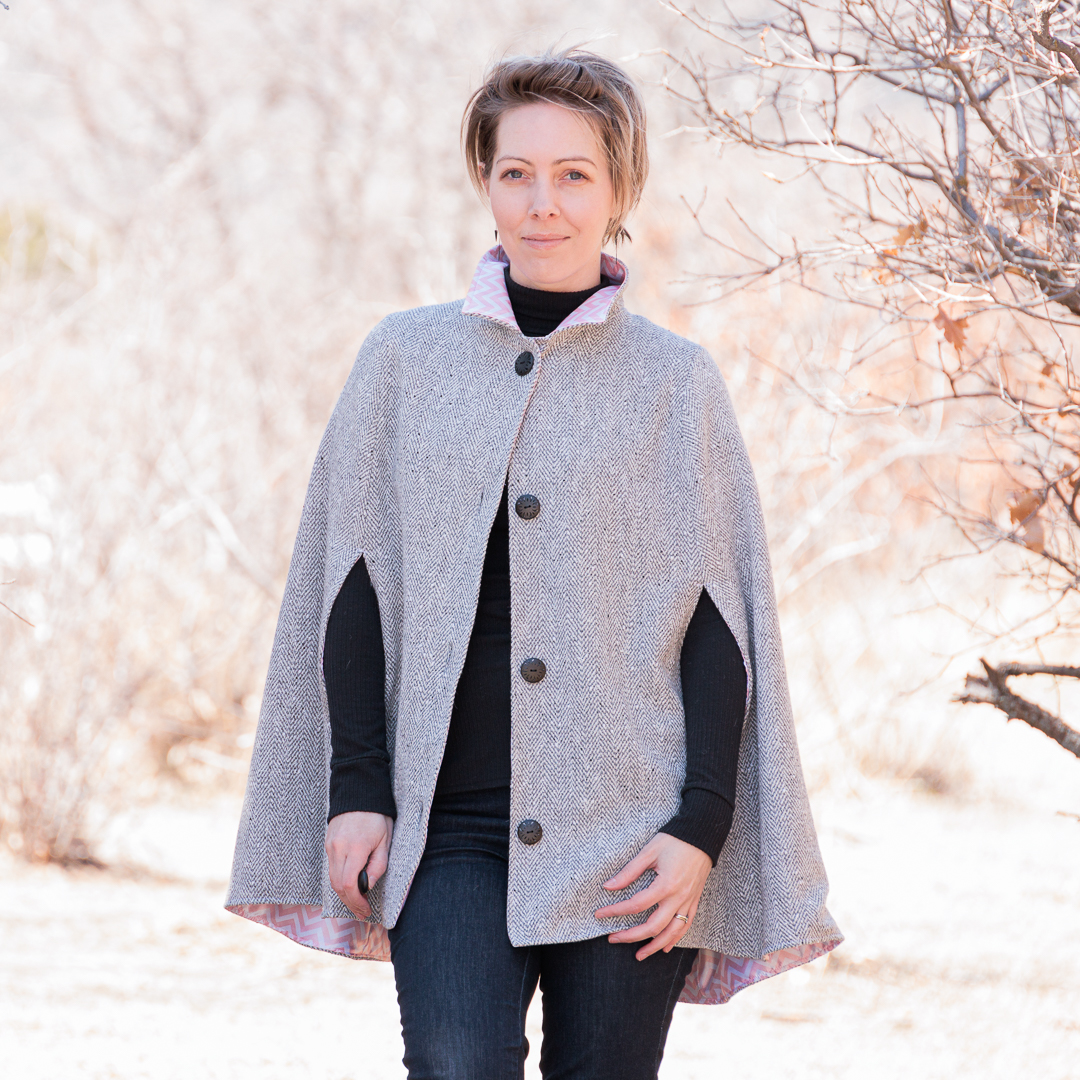
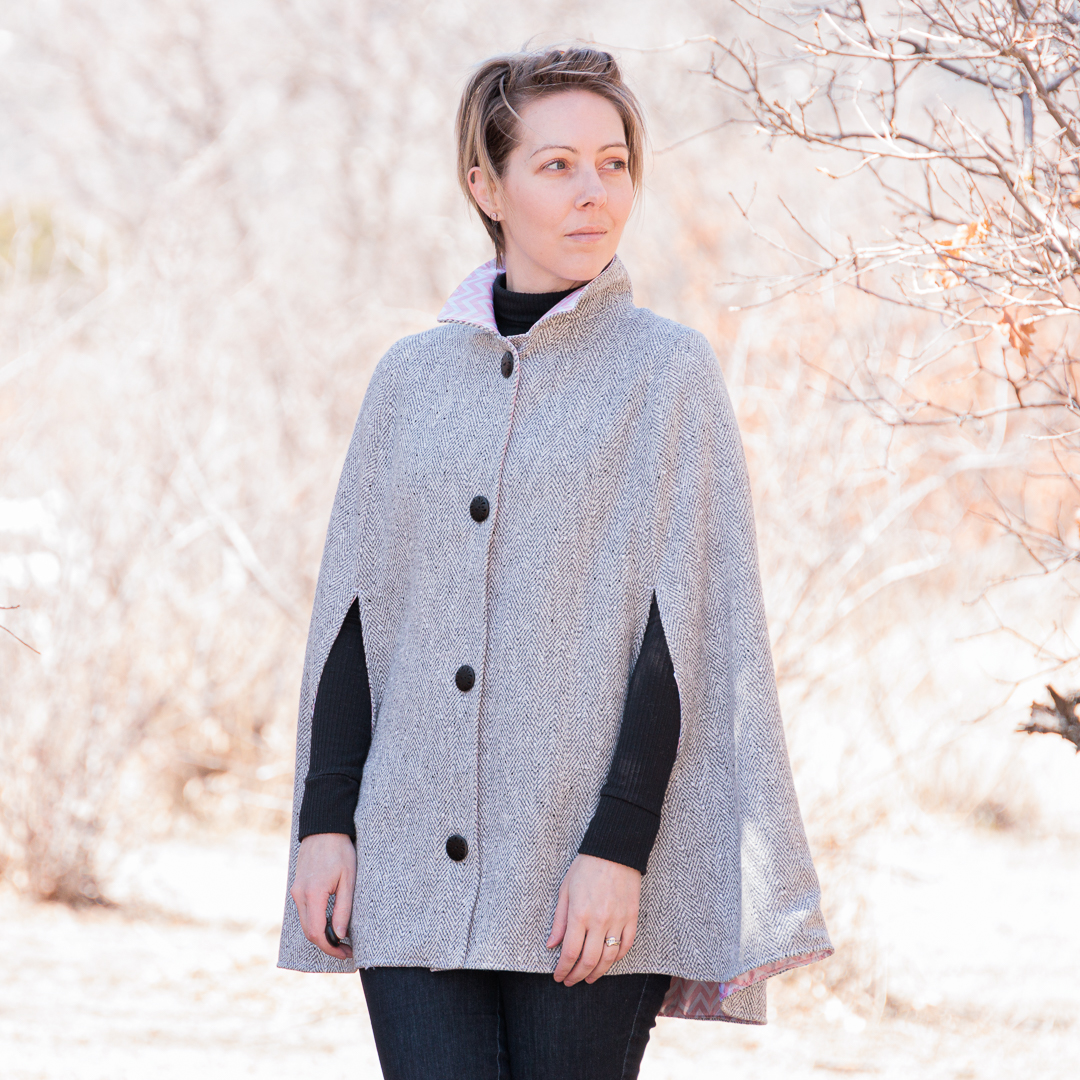
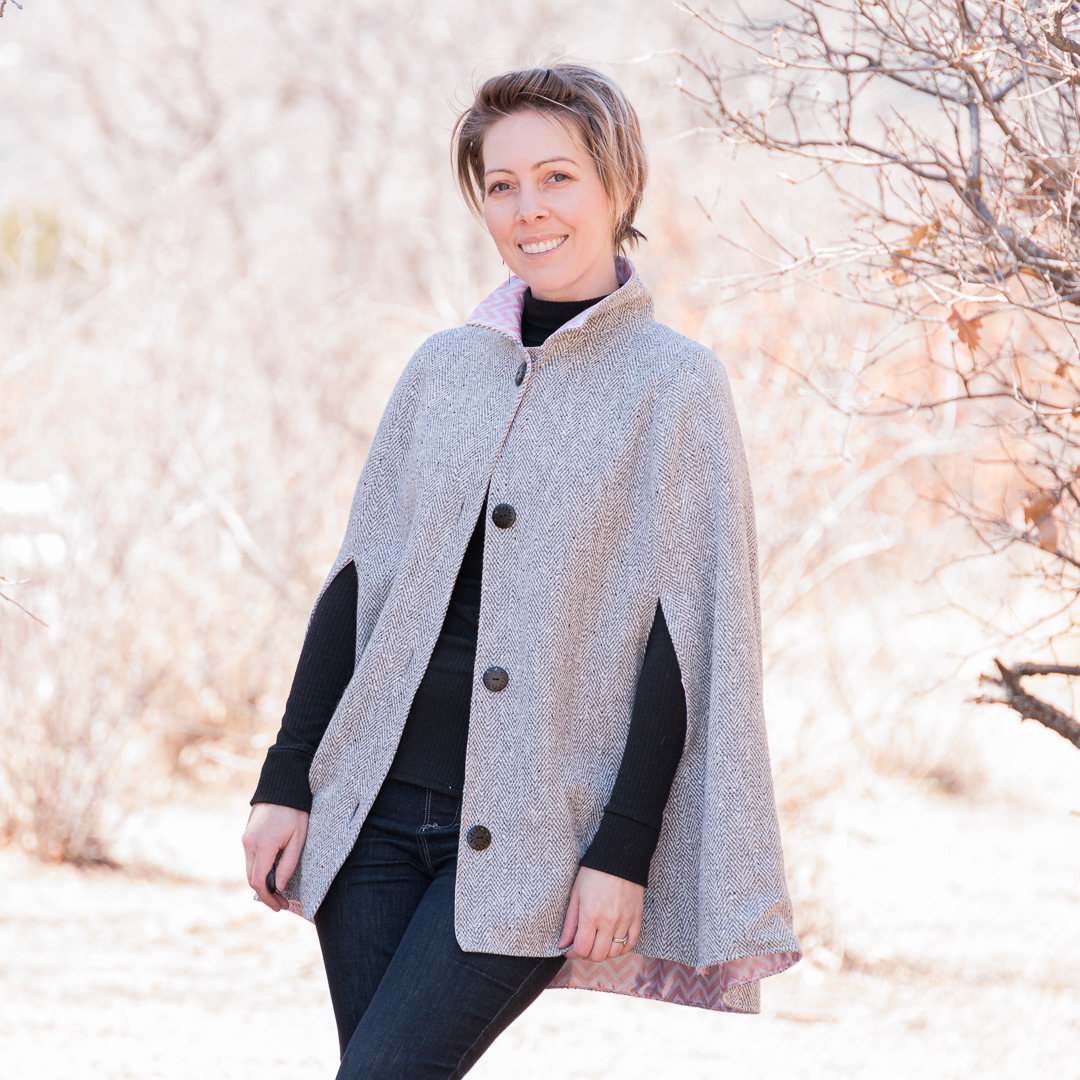
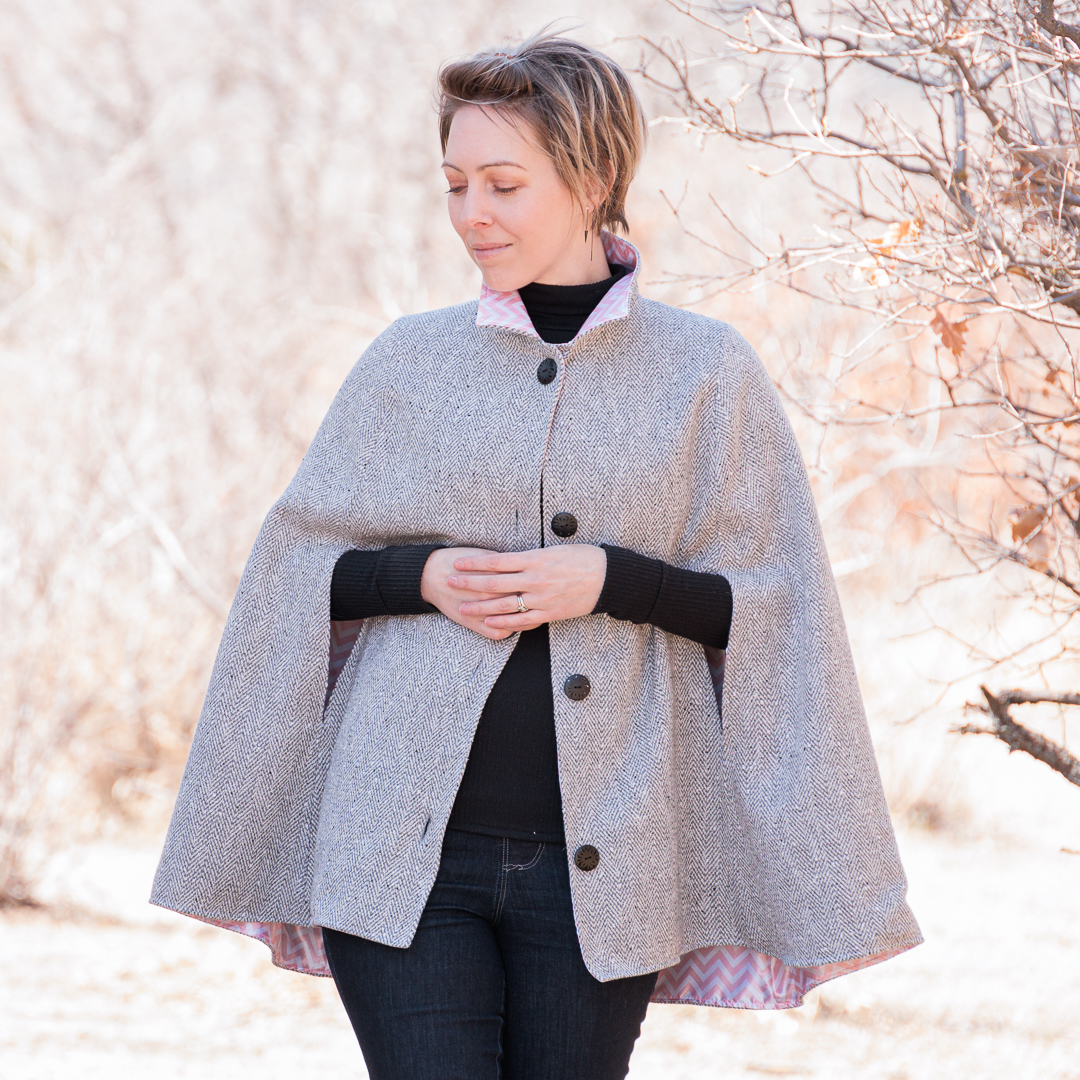
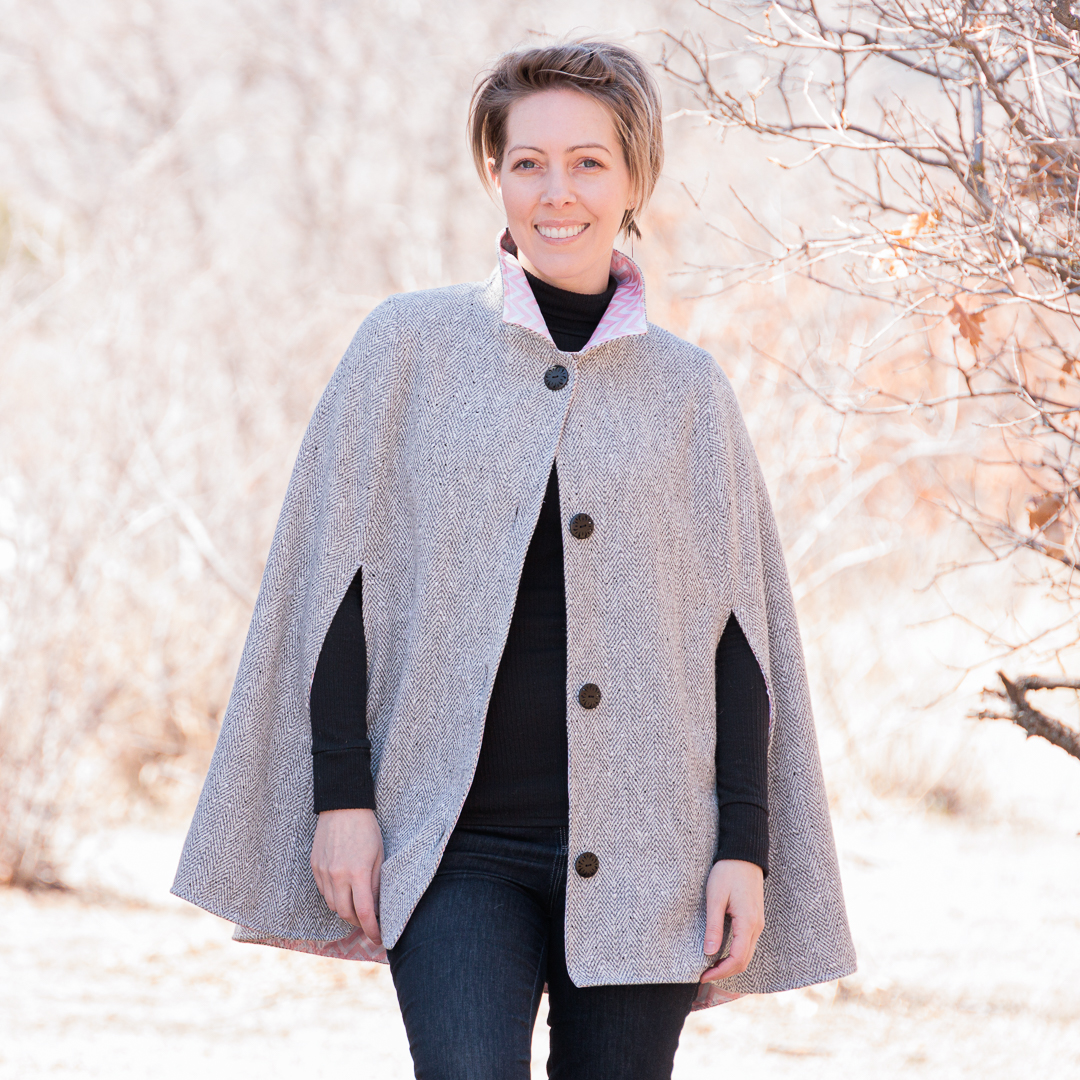
What surprised me about this wool is how well it drapes. I was a tad concerned about that because the tester photos for this cloak all look a little on the stiff side, which makes an odd silhouette to my eyes. Thankfully a non-issue for me!
I have a good chunk of this leftover.
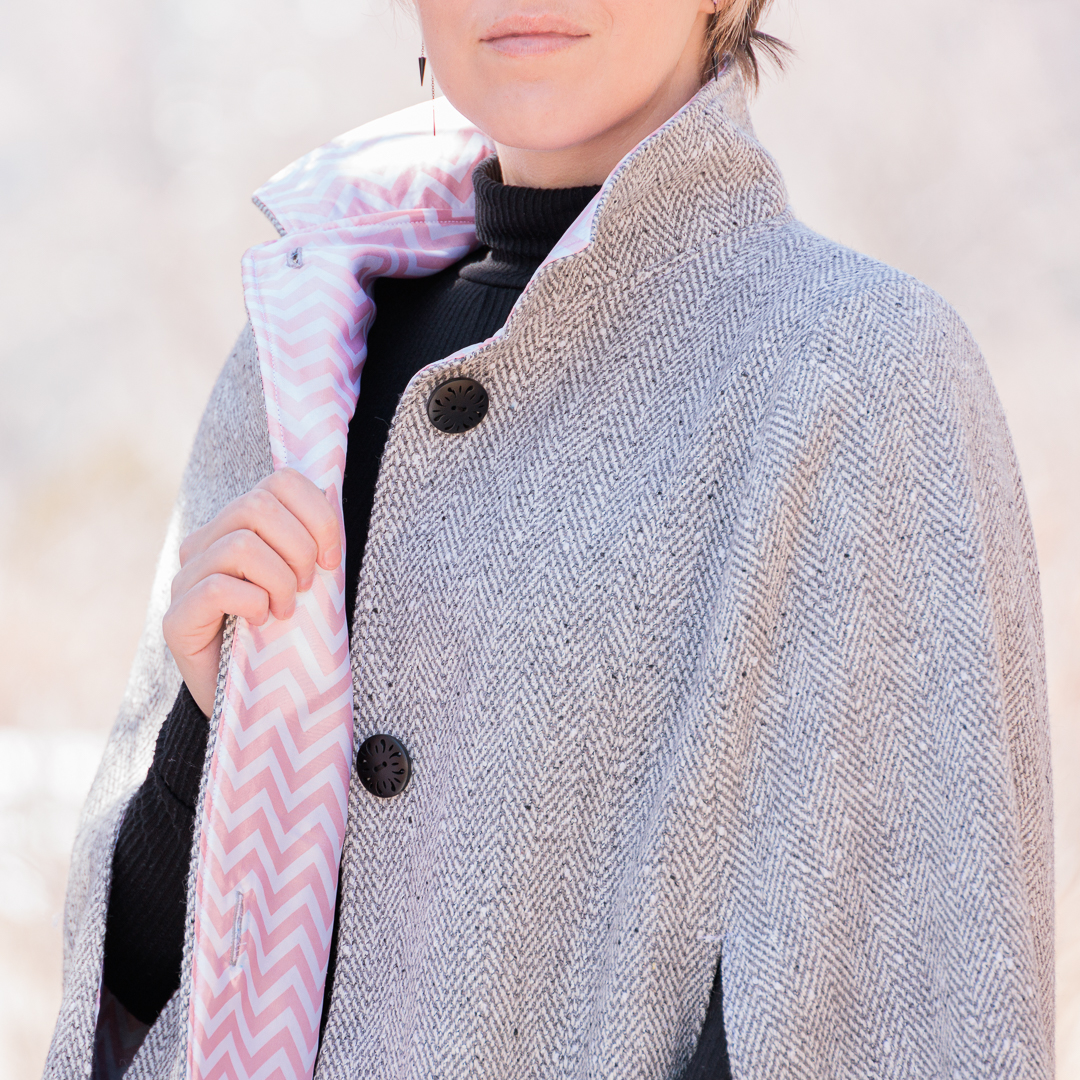
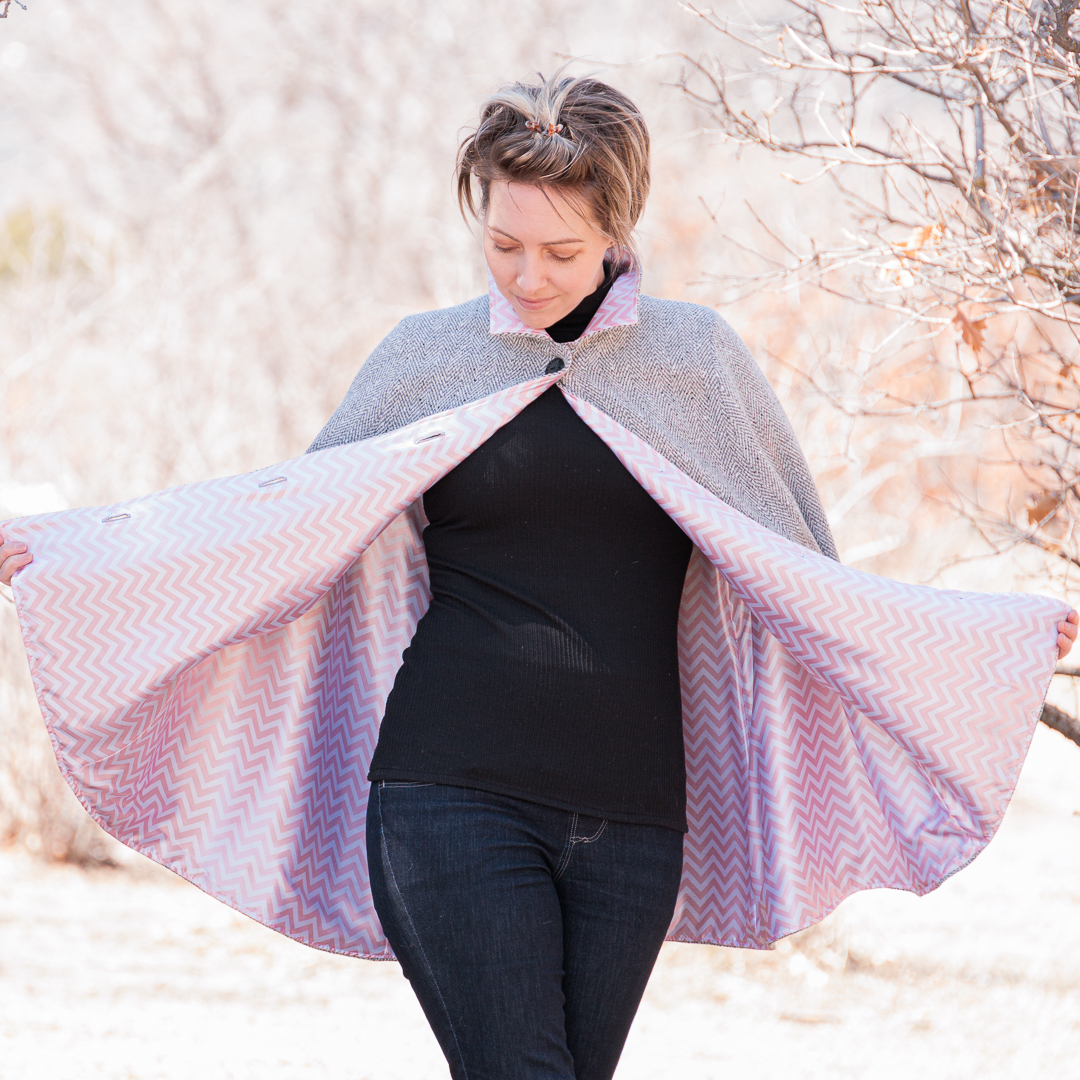
Lining: 3 yards Pink and White Chevron Charmeuse Satin Print from Cali Fabrics
- FABRIC CONTENT: 100% Polyester
- FABRIC WIDTH: 60″
- STRETCH: None
Satin is pretty self-explanatory. What was odd about this fabric is the chevron pattern runs along the grain, so I ended up cutting the lining pieces cross-grain so the chevrons would run horizontally instead of vertically. Turned out just fine!
Like chiffon, satiny fabrics trend on the shiftier side and it can be hard to keep the grainline straight while laying out your pattern pieces and cutting. This fabric wasn’t too bad as far as that went, and it has a luxuriously smooth texture and the perfect weight: not too heavy and not too light.
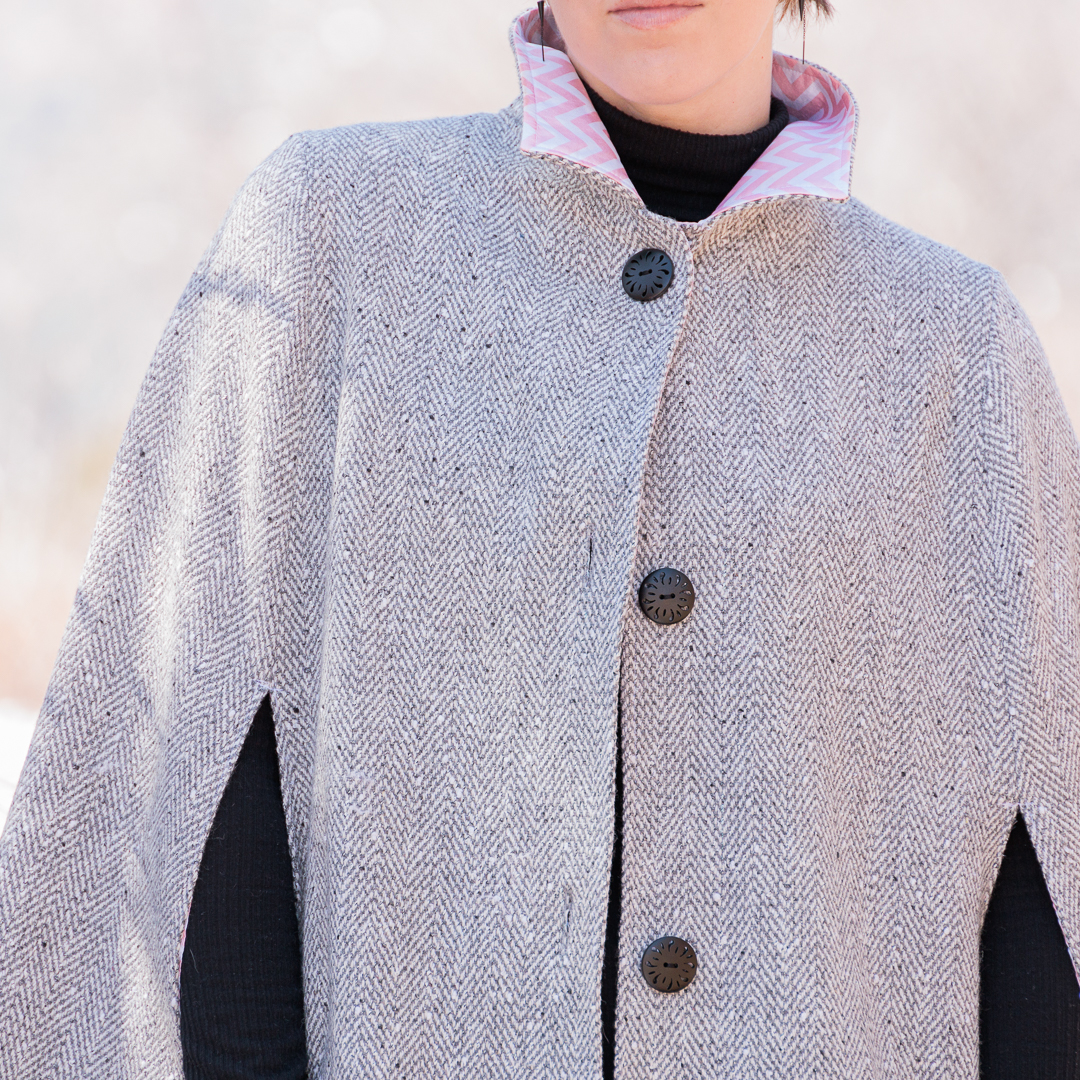
Other: I also used a tiny piece of quilting cotton for the collar hook, and fusible interfacing (heavy for the collar, and lighter for the buttonholes and hook.)
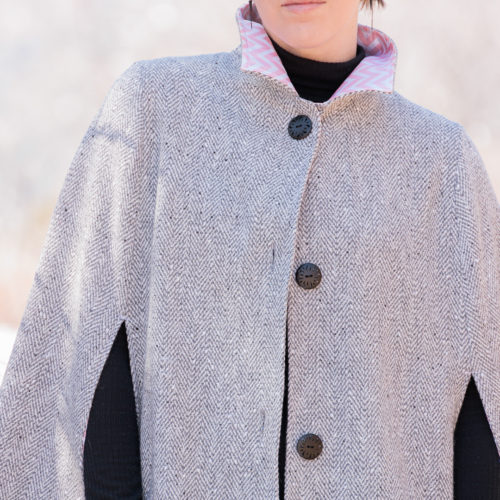
About This Make
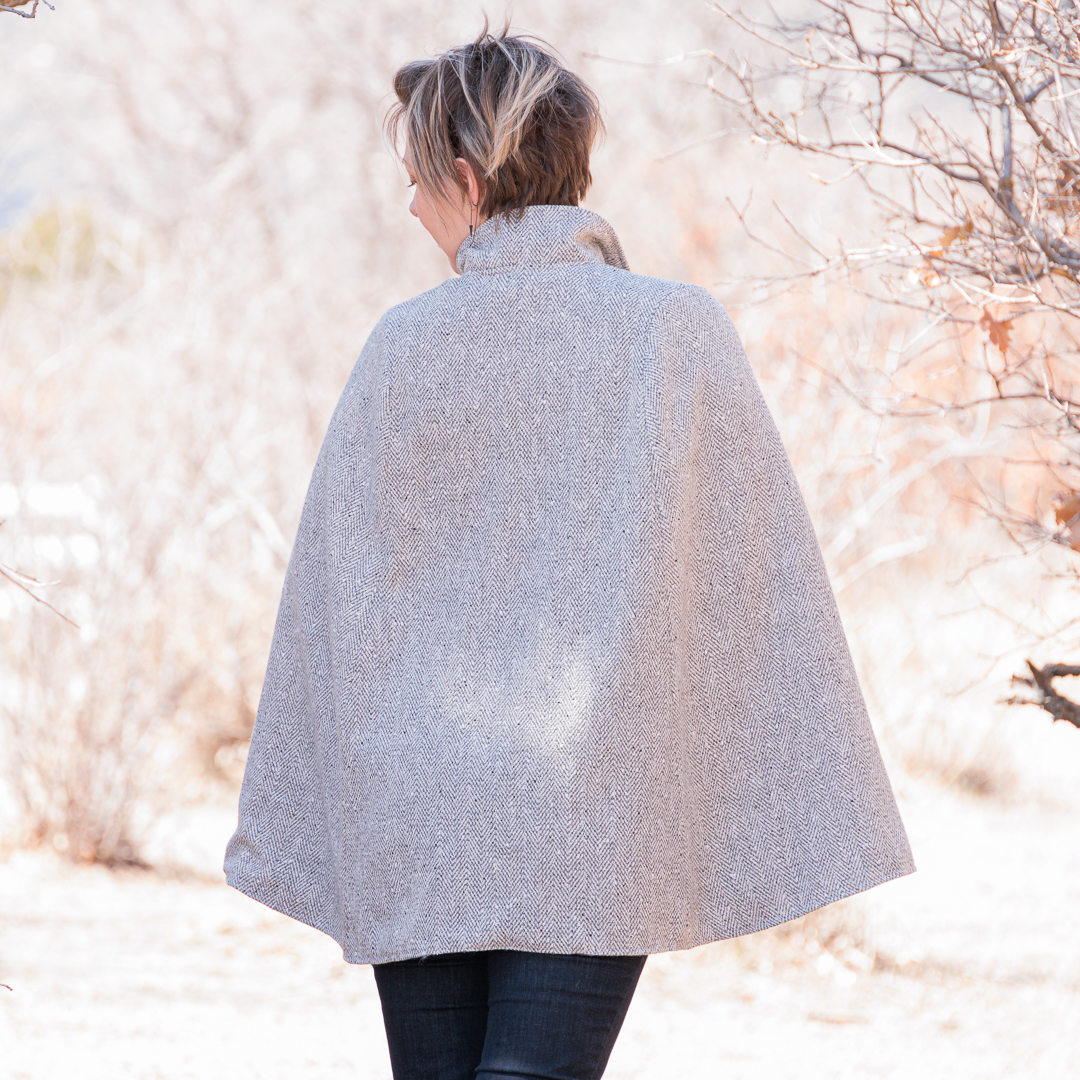
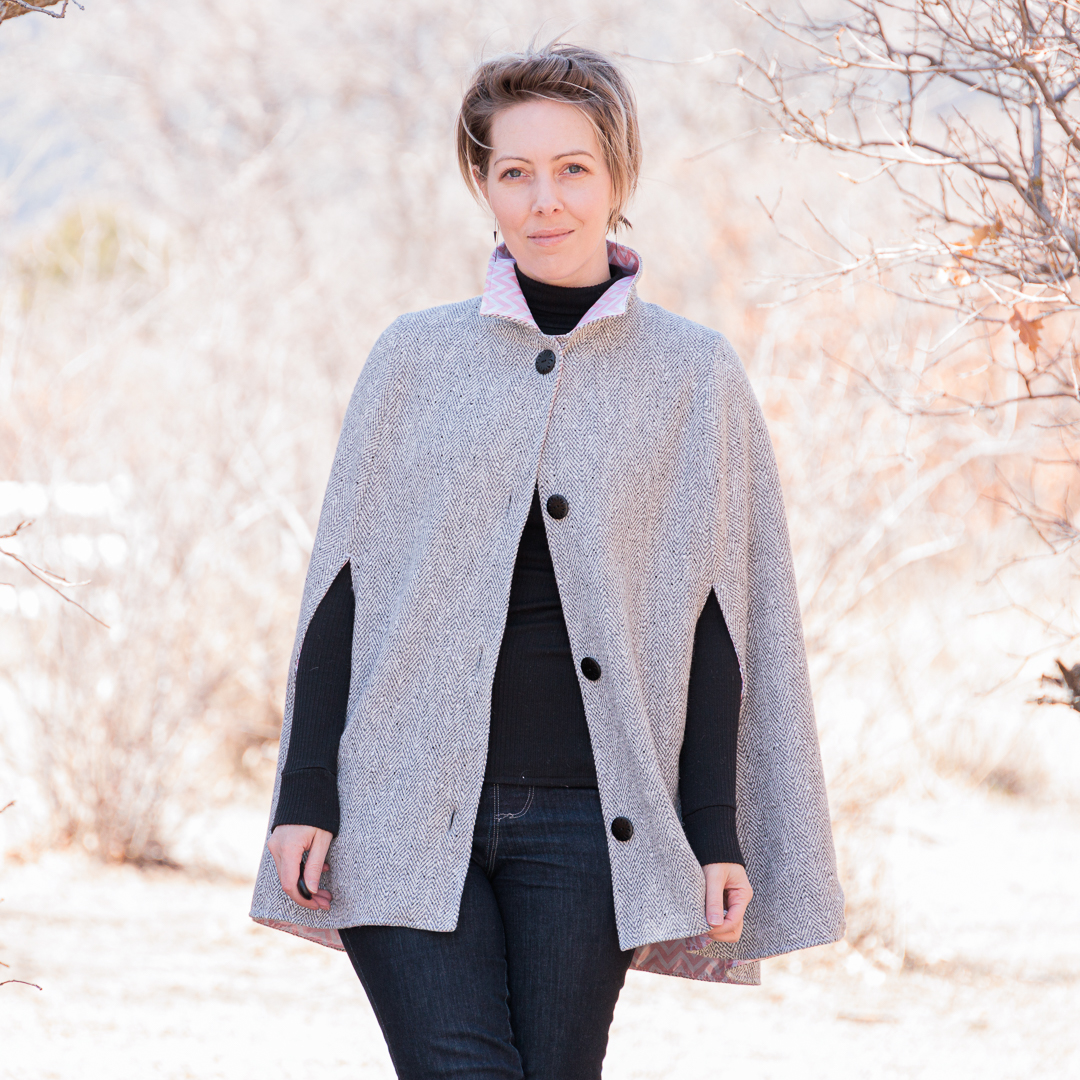
- size 8 (even though I fall into size 6, I wanted a little bit more room for layering)
- used length from size XL since the cloak looked a smidge too short to me on the tester photos
I bought the wool for this two years ago and had started tracing pattern pieces to make a Newlook 6535 cape. But then I stopped tracing because simply tracing a Big Four pattern is deeply annoying. And so the wool sat, waiting for me to work up to slogging through all the (highly ironic) extra that is a “Simplicity” Pattern. And as serendipity would have it, the George and Ginger vault opened before I worked up to the slog. And so the slog died. Huzzah!
About the Pattern
Ahhh, the relief that comes from diving into a George and Ginger pattern after the eyerollyness of Vikisews.
This pattern is so simple. I didn’t even make a test garment.
It’s just 6 pattern pieces that fit on a single A0 sheet. The only thing that adds any kind of difficulty is the simple fact you’re constructing a lining, and even that isn’t difficult; you’re just doing the same thing twice. The instructions are super clear and easy to follow.
What I Did Differently
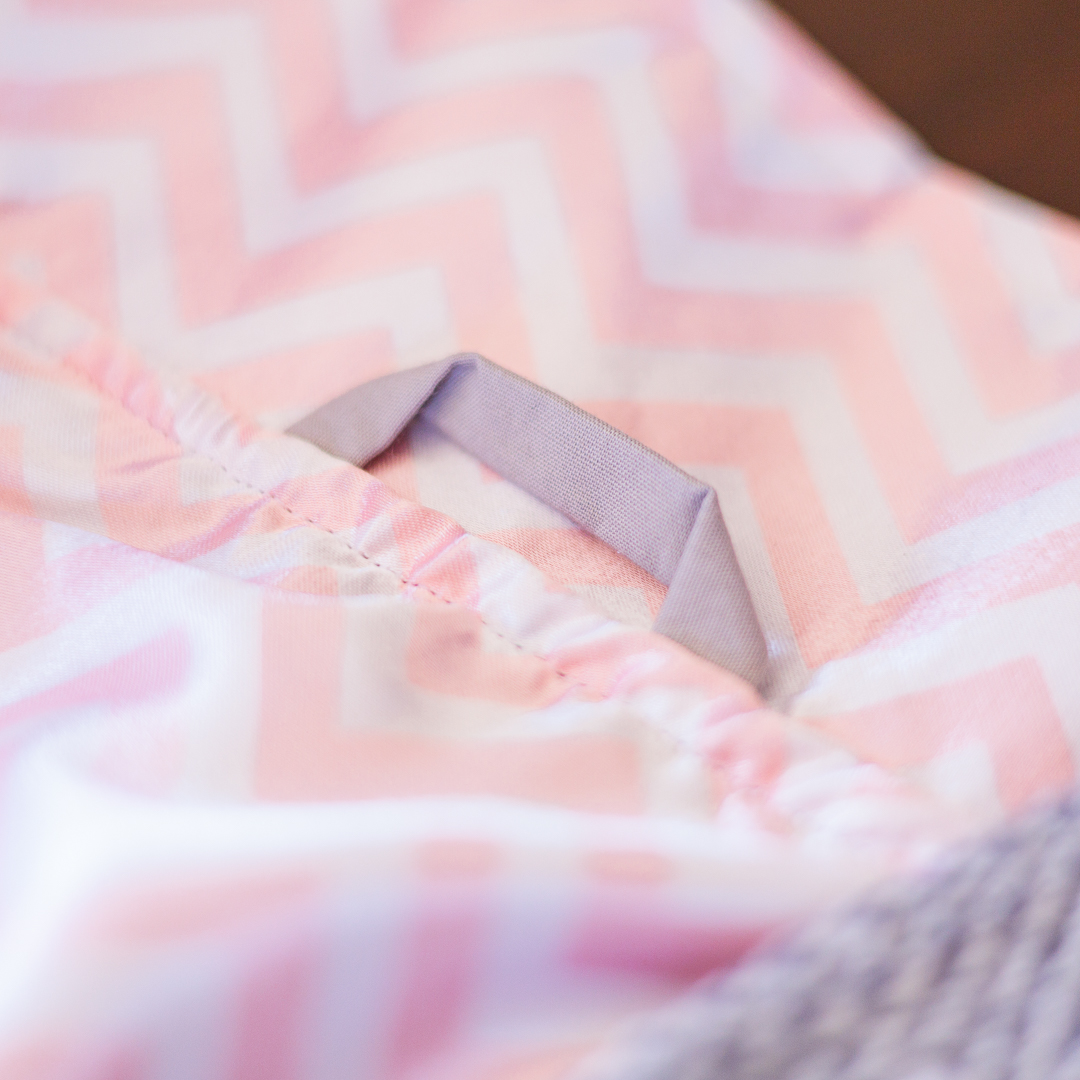
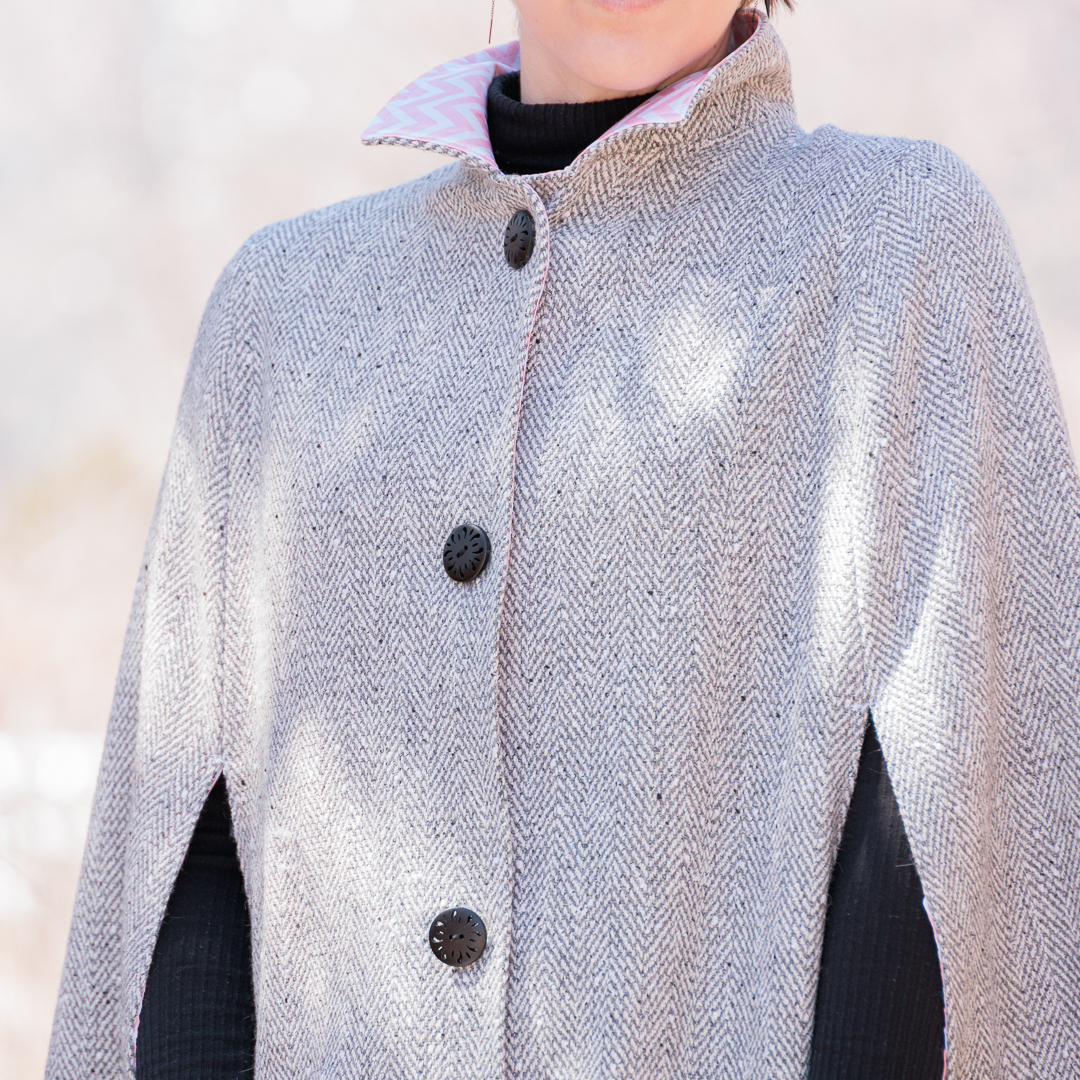
- Added a hook to the collar for hanging convenience.

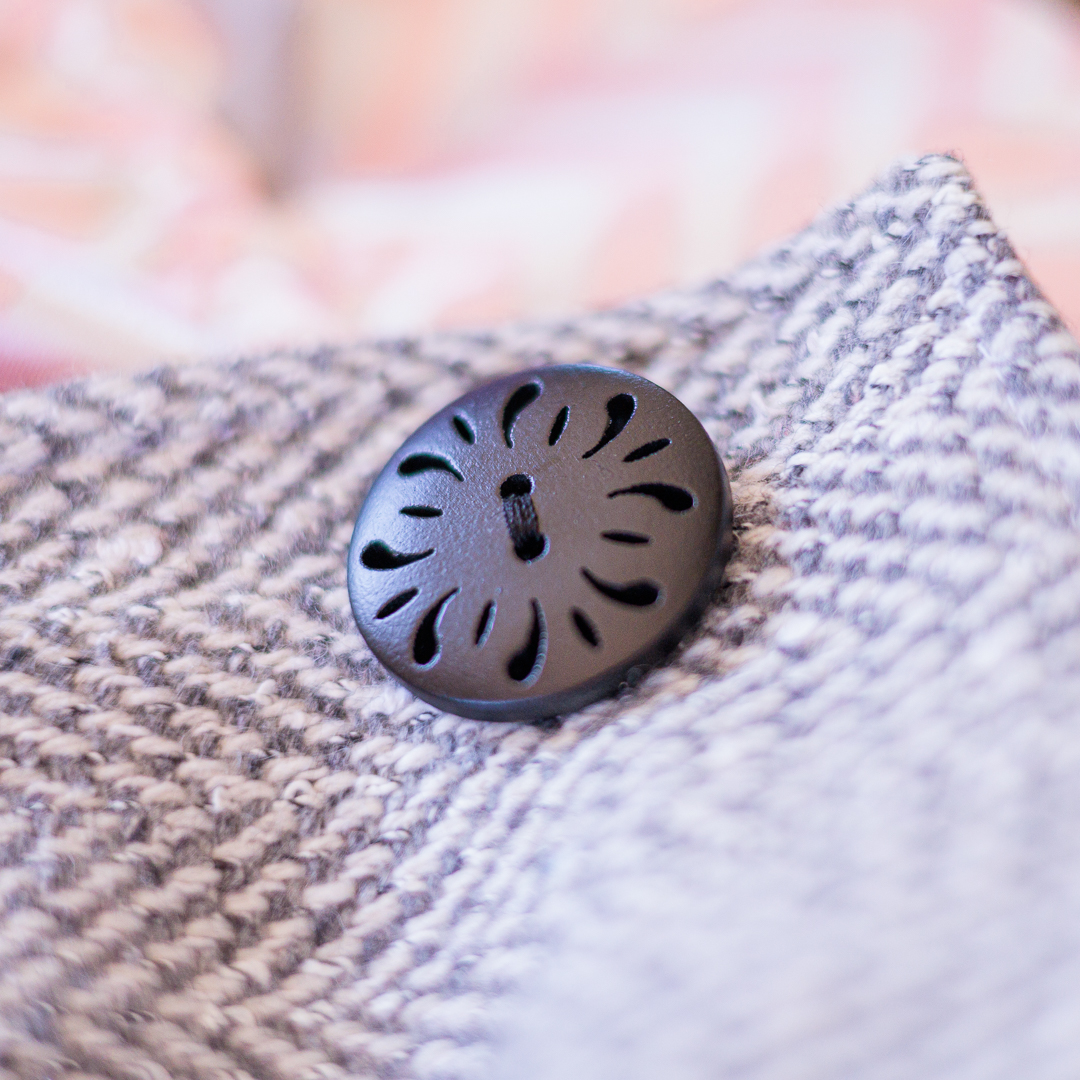
- Used 4 (super cute 1″) buttons spaced 6″ apart instead of 3 buttons 8″ apart. I got away with this thanks to the extra length I added.
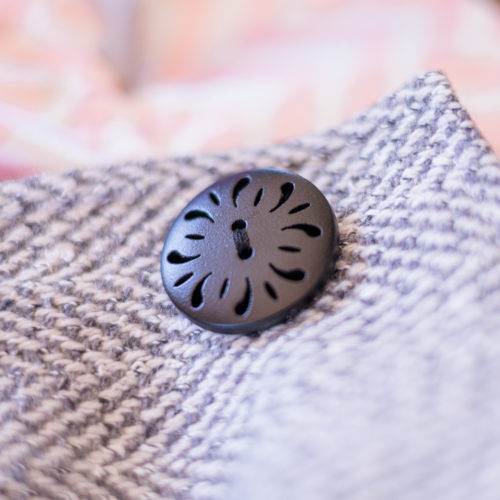
- Fused some heavy interfacing to the satin on the collar to stiffen it up a bit.
Notes for Next Time
- Try clasps instead of buttons, maybe? Then this cloak would be 100% reversible.
- Add a strip of interfacing to the button side of the front. The pattern only calls for interfacing for the buttonholes. You don’t have to use it on both, but it lets you decide which side to place the buttons at the point you’re ready to place the buttons.
- I envisioned some kind of flat pocket sewn into the bottom corners of the front pieces. That’d be cool.
- Could line the collar with something fleecy or minky or furry for a warmer version.
- Make it even longer!

Project Settings
Sewing Machine vs. Serger
| Sewing Machine | Serger |
|---|---|
|
|
Sewing Machine Settings
| Presser Foot | Stitch# | Stitch Width | Stitch Length | Needle | Top Thread Tension | Application |
|---|---|---|---|---|---|---|
| 1/4" | 1 | 3.5 | 3.5 | 90/14 | 4 | wool seams |
| 1/4" | 1 | 3.5 | 3.5 | 65/9 | 4 | satin seams |
| C (overedge) | 2 | 1 | 3.5 | 65/9 | 4 | arm opening topstitch (satin) |
| R (buttonhole) | 18 | 5 | n/a | 90/14 | 4 | buttonholes |
| T (button) | 6 | 5 | drop feed | 90/14 | 4 | buttons |
Leave a Reply