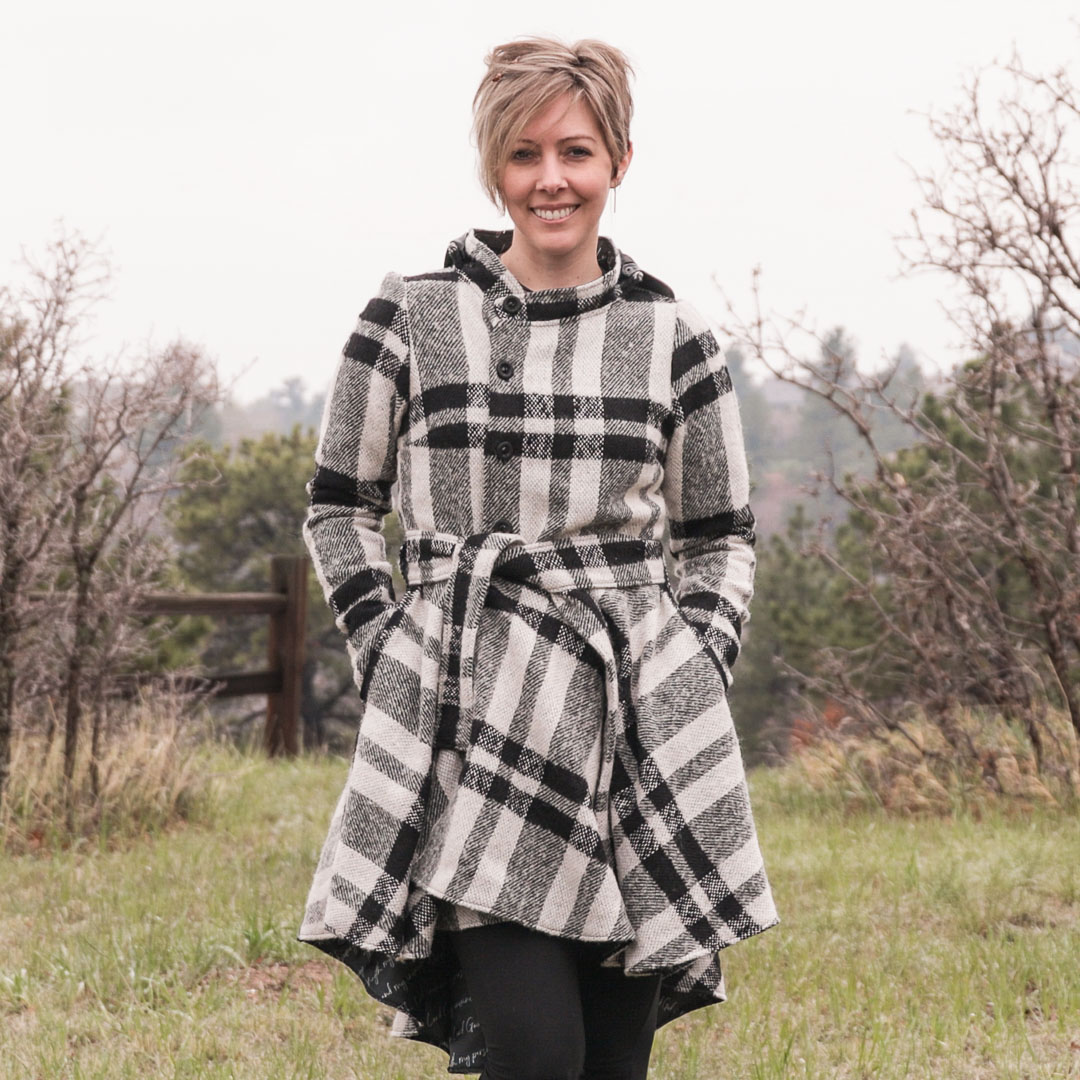
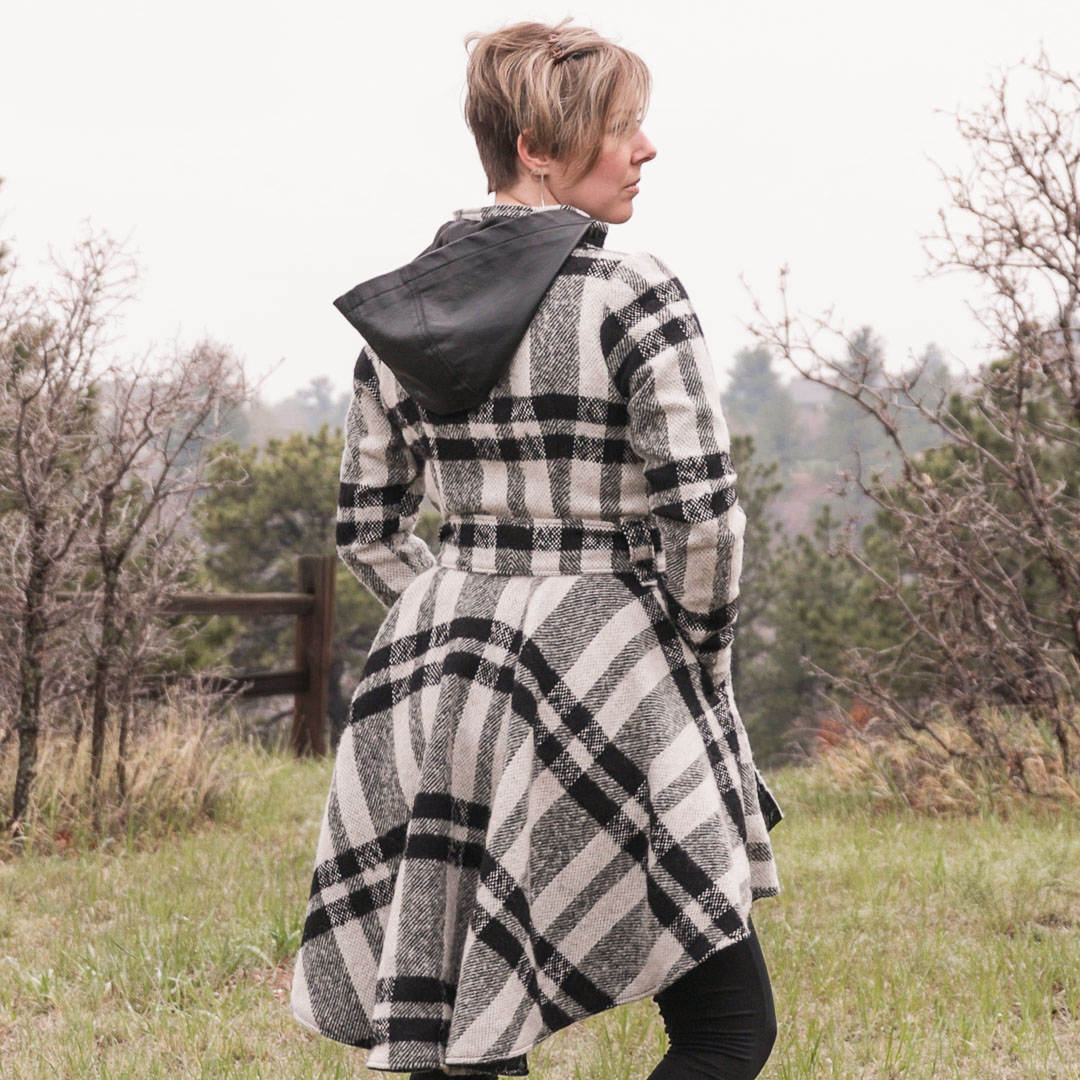
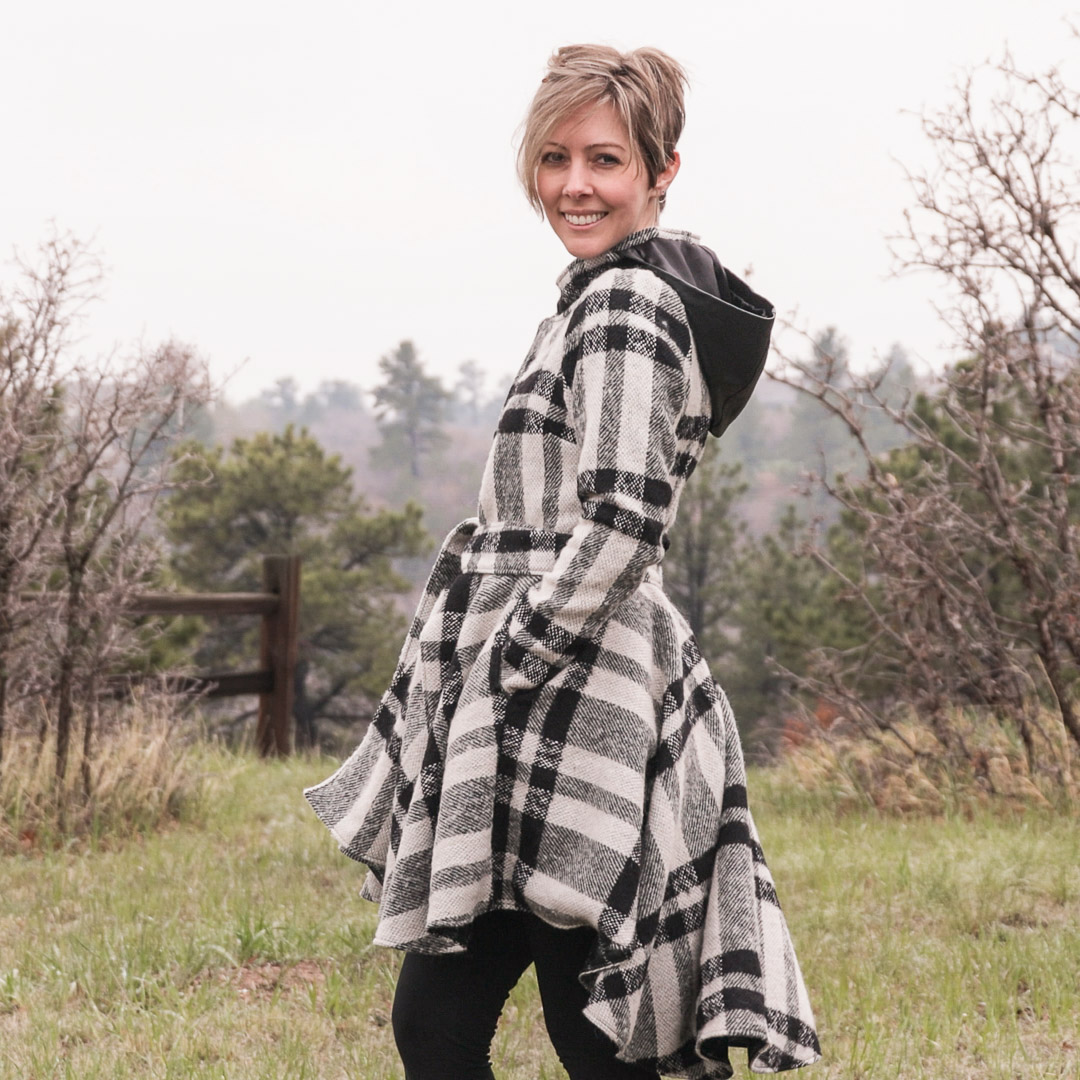
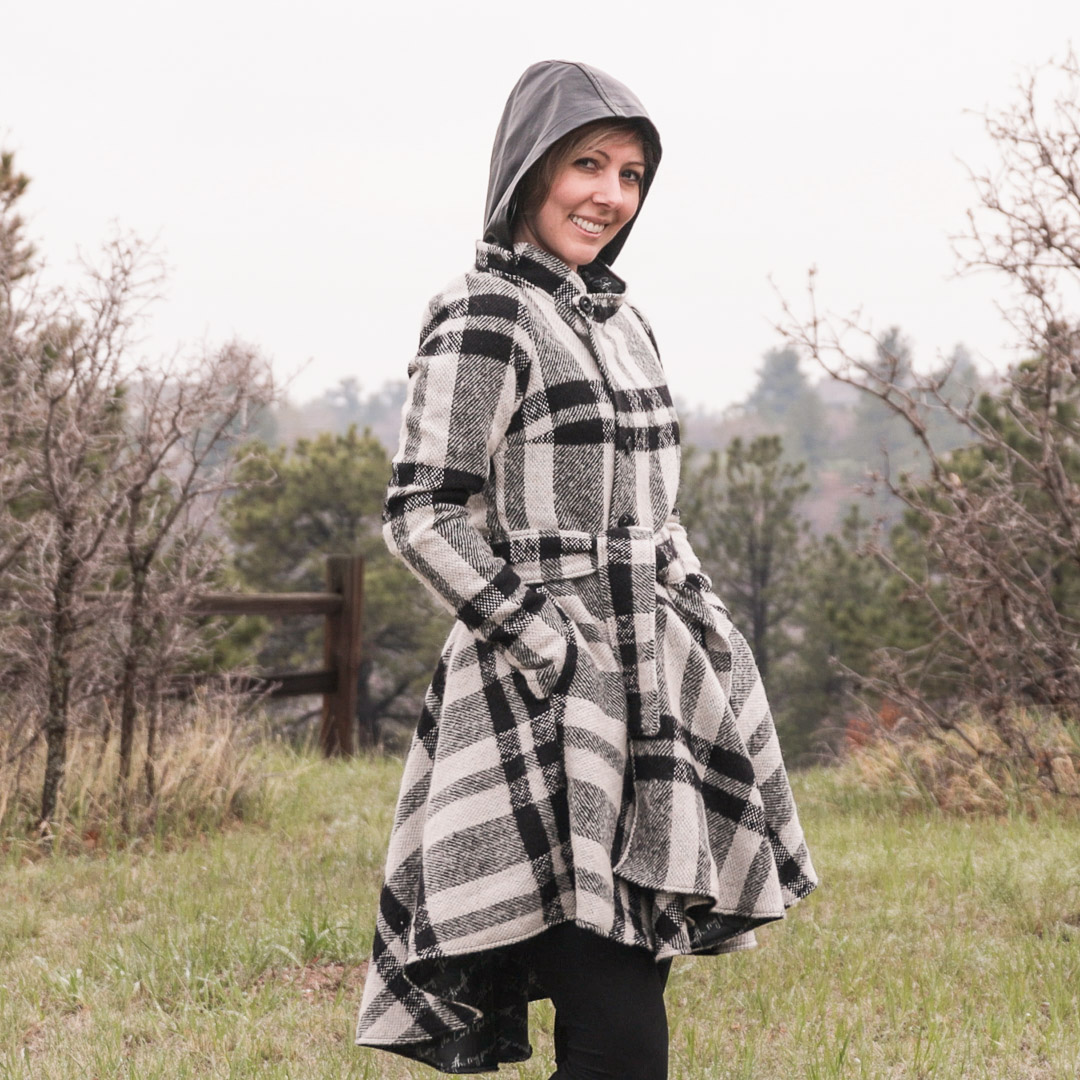
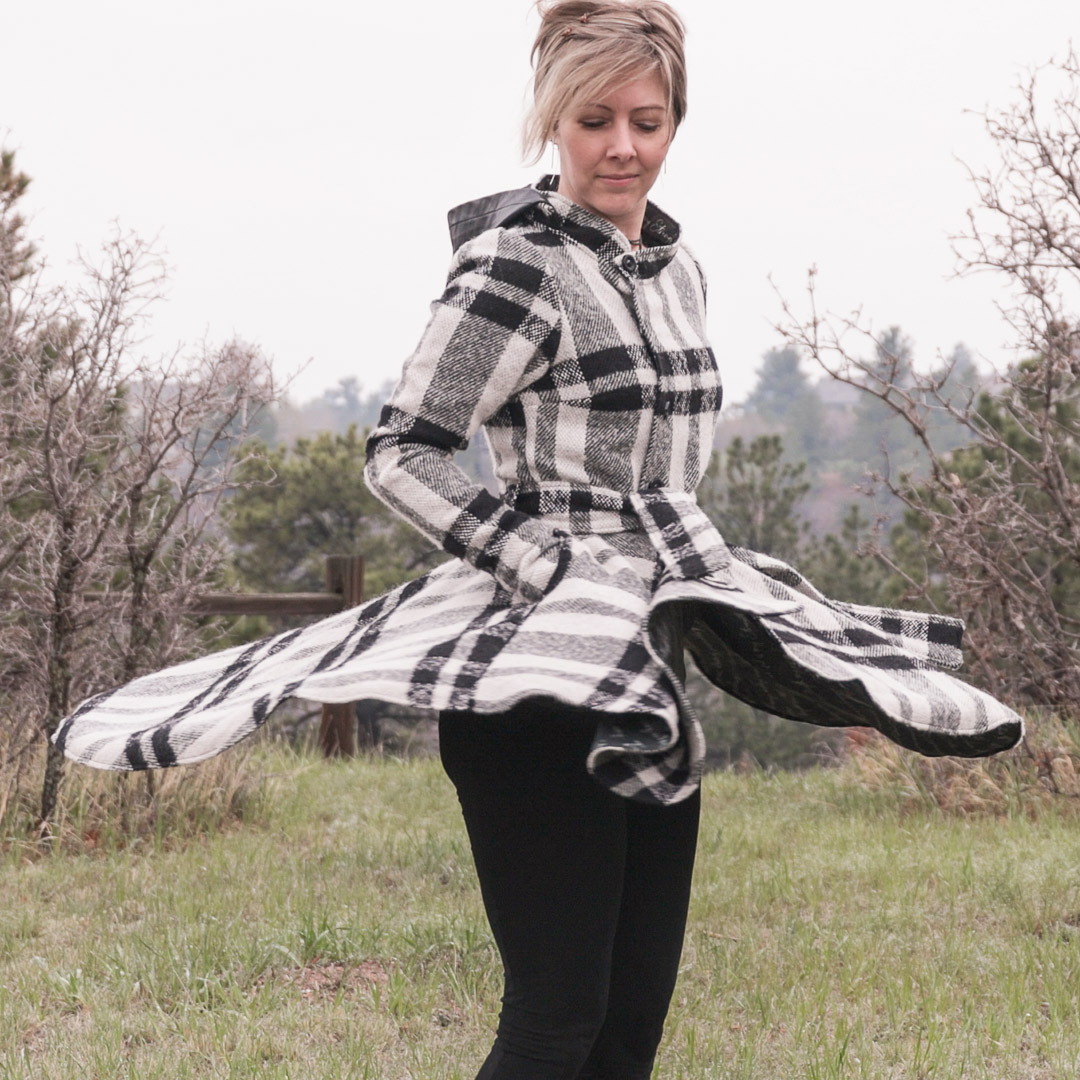
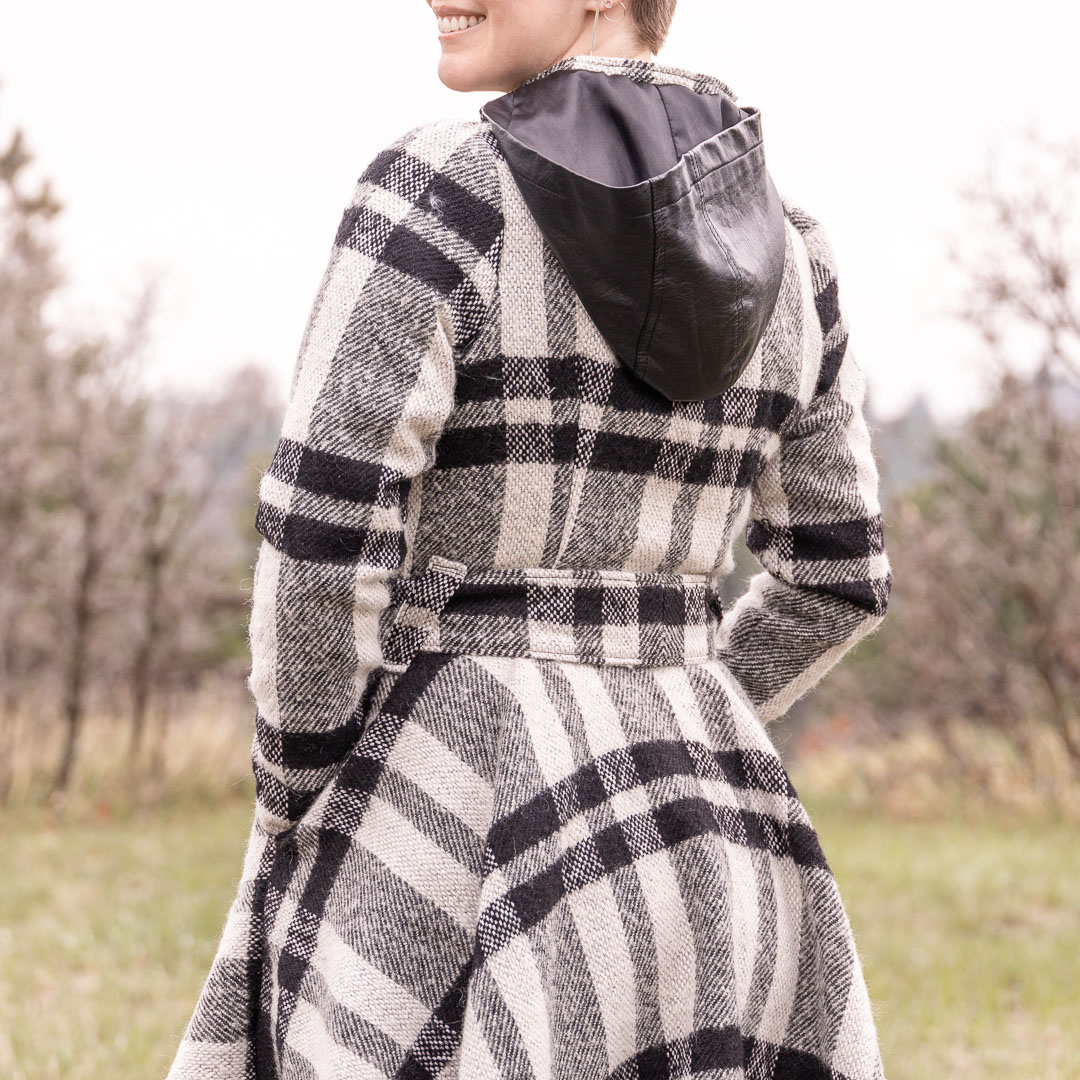
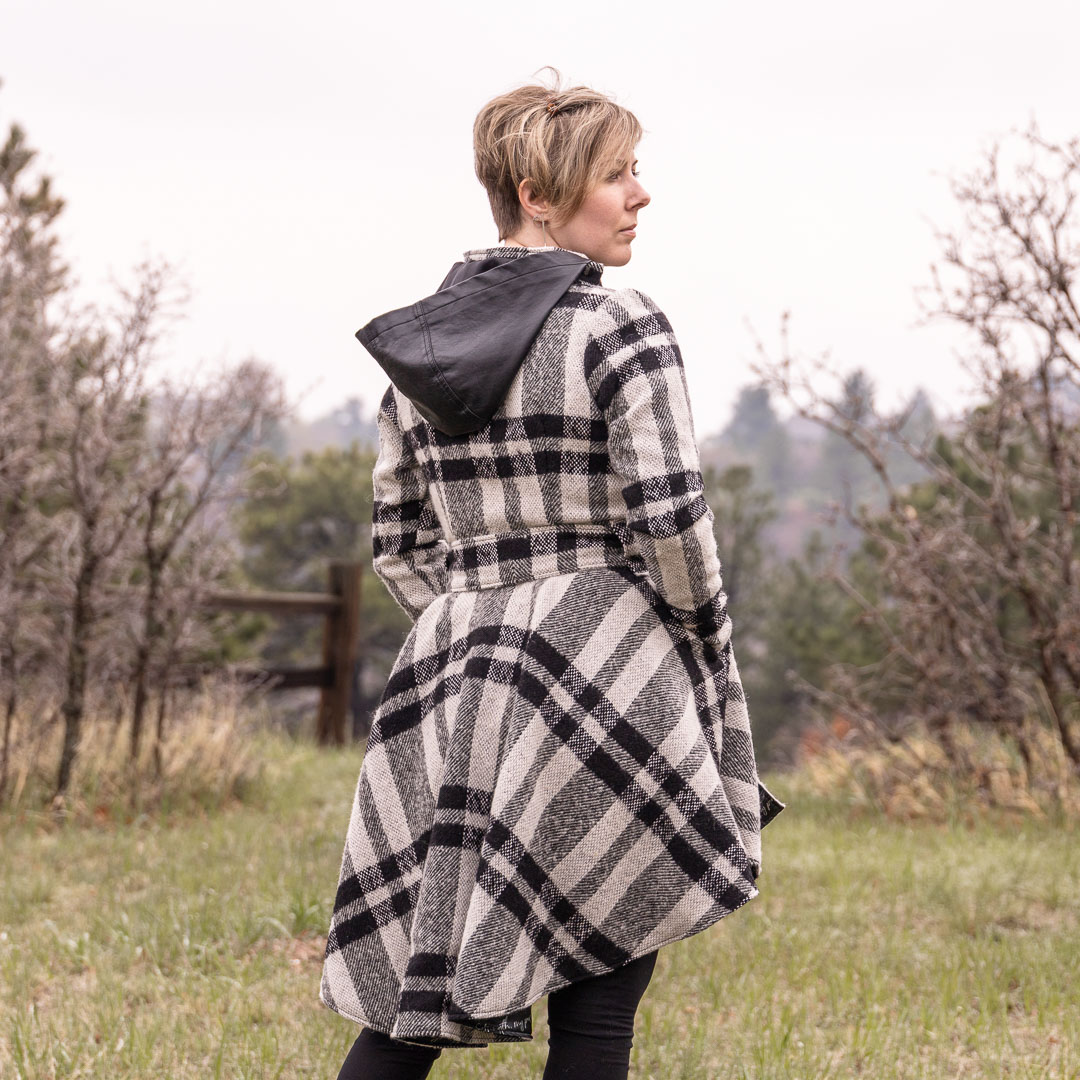
Behold my second Duchess Jacket, which I said I would never make again. Now I remember why I said that, and I’m going to say it again. I’m never making this pattern again.
Why?
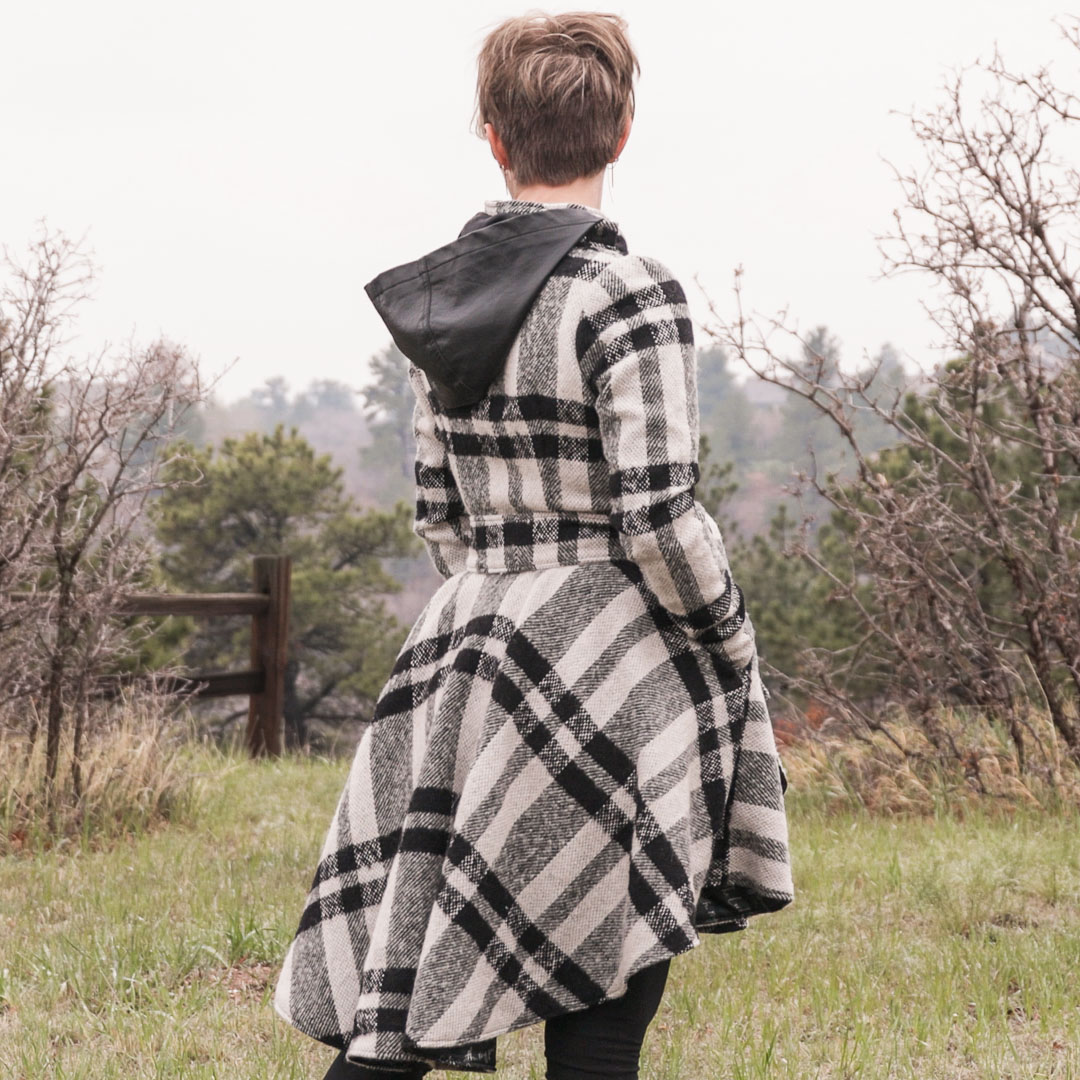
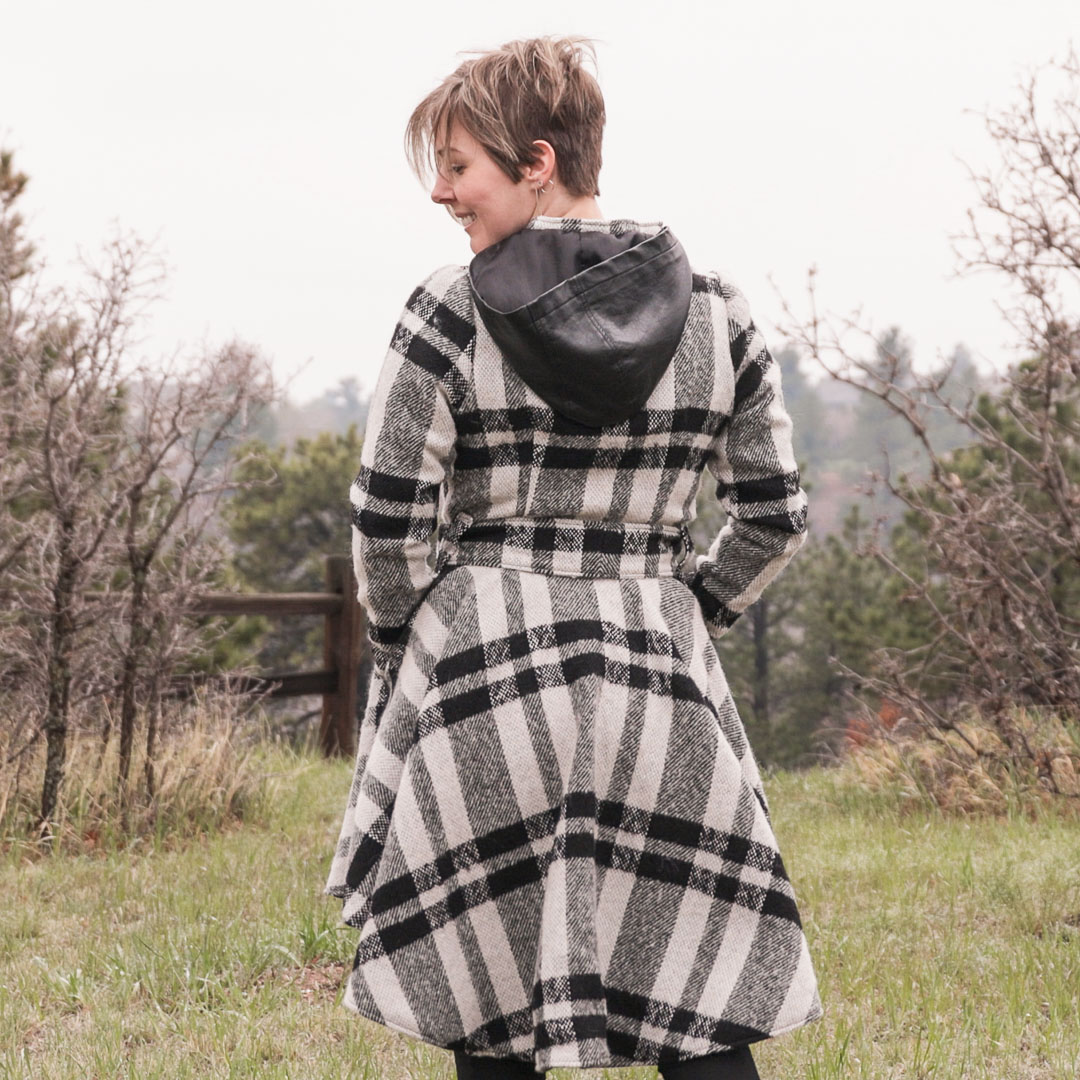
It’s just so much fabric to wrestle with around my sewing machine. And the same things that annoyed me last time annoyed me this time. I had to trim extra width off the skirt again to line up with the bodice—like a substantial amount: 1″ on each side. Adding the buttons and buttonholes is annoying because of the way the pattern lays on your body. The neckline is so gappy. And while I might look nice wearing it, I feel fat in it. No, that’s not the pattern’s fault; I’m the problem there.
So never again. I have two of these now which are great for dressy occasions: one with a super warm minky lining, and now this one with a satin lining that will play much better with long sleeves.
About the Fabric
Main/Self: 4 yards Winter Black Plaid, Wool Woven from Boho Fabrics
- Contents: Wool
- Weight: 19 oz
- Width of Fabric: 60″
- Stretch: none
This fabric was on the pricey side: $16.95 /yd. However, I saved 20% plus I had a $25 gift card. So it came to about $7/yd. Thank goodness, because I don’t know that I love it so much. It is so scratchy! Again, this is me being dumb and not realizing that wool is scratchy (unless you get a special kind like Merino.) But this wool is not special. It’s just wool. And it even pokes through my lining. /sad face.

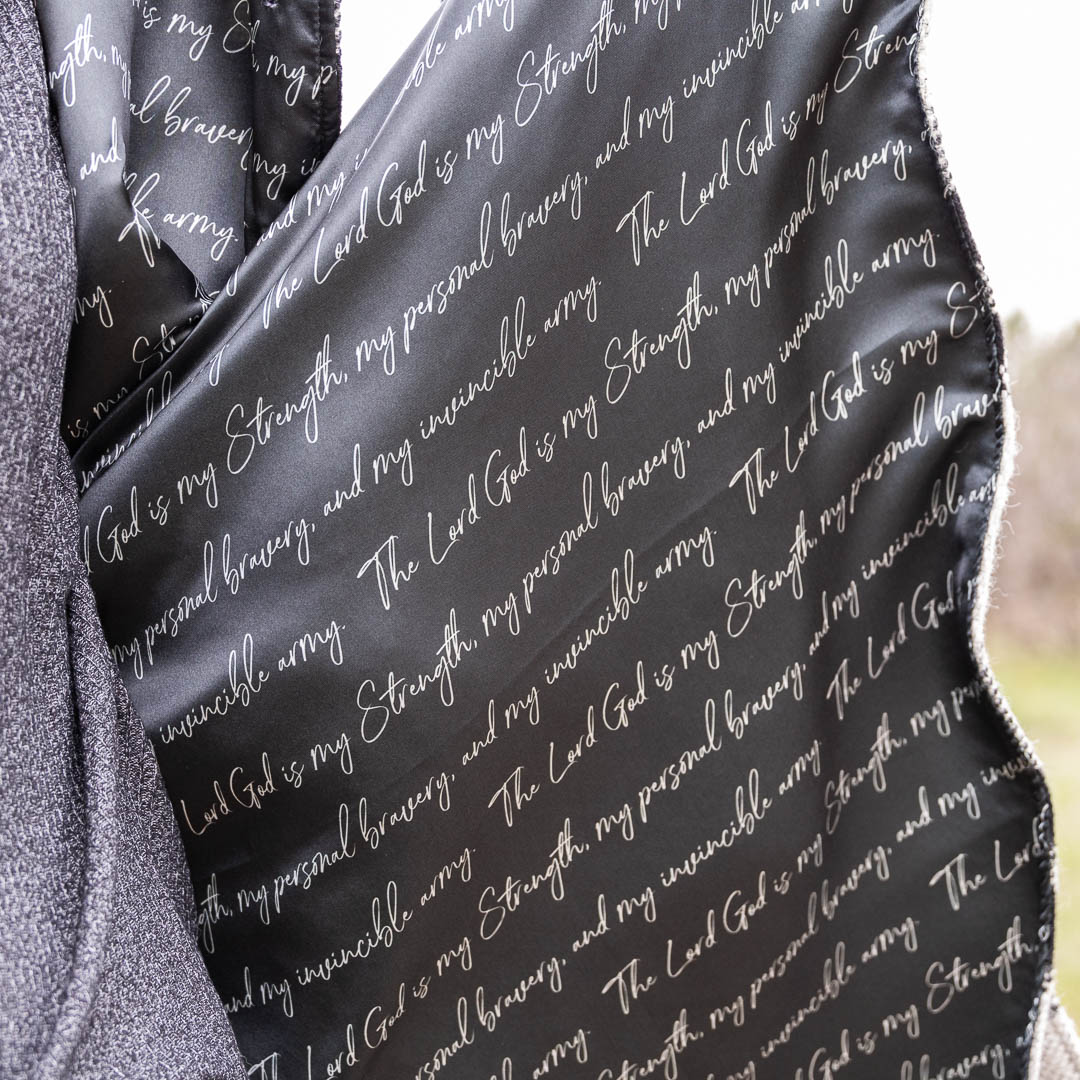
Lining: custom-printed satin designed by me from Spoonflower
- PRINTABLE WIDTH: 54″ wide
- WEIGHT: 2.2 oz per square yard
- FABRIC CONTENT: 100% polyester
- FABRIC CONSTRUCTION: Woven, Satin Weave
Ordered this during a sale in February so it was about $14/yd. (It’s normally $20/yd.) That’s twice what I normally aim to pay on average, but come on: I got to create a garment with a fabric I designed, and that’s pretty awesome.
I love it so much. Satin feels so good as a jacket lining, and making my very own design using this beautiful scripture—The Lord God is my Strength, my personal bravery, and my invincible army… Hab. 3:19a AMPC (read the rest of it; it is seriously so good)—is the icing on the cake.
About the Pattern
I blabbed about this pattern already after my first version. Knowing all that going into this version made it a lot less painful, especially because I drafted my own cheat sheet.
Options on This Make
- Size M
- +2″ to the sleeves
- +1″ to the bodice
- *3/8″ seam allowance
The Cheat Sheet
Fusible interfacing:
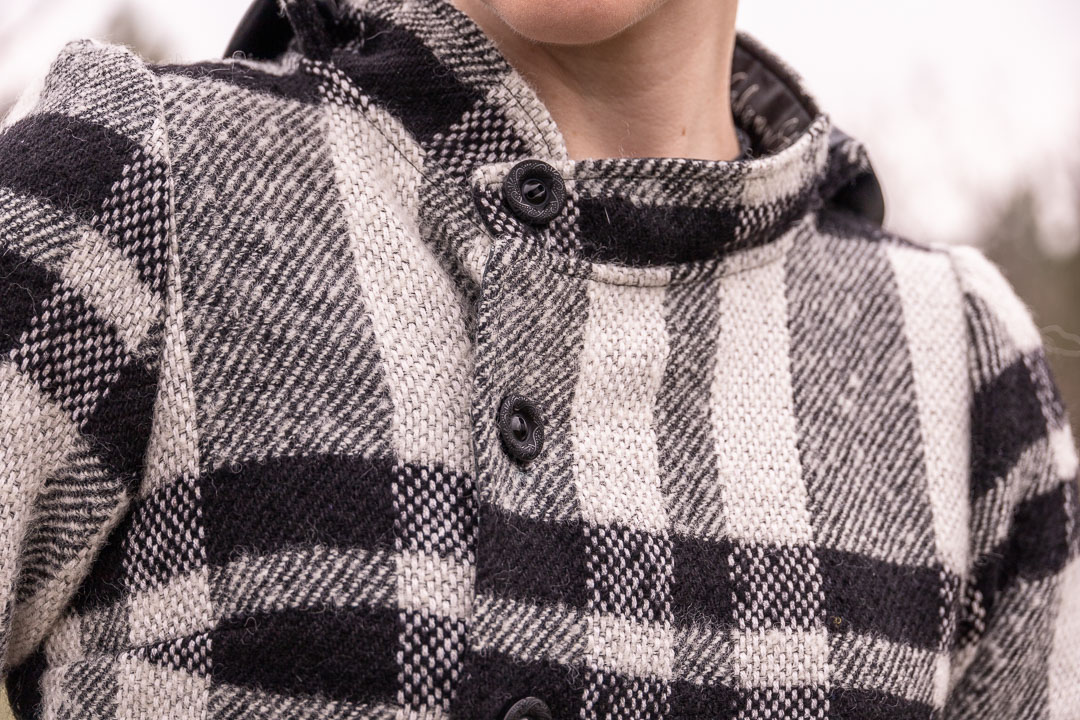
- 1″ wide fusible interfacing the front bodice openings to reinforce buttons/buttonholes. Fuse 1/4″ from raw edge, self and lining.
- Collar self and liner.
- Hood attachment.
- *Optional: Belt.
Construction
- Sew darts on front and back bodices, self and lining.
- Sew shoulder seams and bodice side seams, self and lining.
- Sew basting stitch along sleeve caps as marked, self and lining.
- Sew sleeve side seams, self and lining.
- Attach sleeves, gathering to fit. Self and lining.
- Sew skirt center back seam, self and lining. (I actually only have this seam on the lining, probably due to fabric width constraints. I don’t know why, if width allows, we don’t just cut this piece on the fold. Apparently, that’s what I did with the wool fabric.)
- Sew skirt side seams, LINING ONLY. *Check lining overlap coordinates with self overlap.
- Attach pockets to skirt self, front and back. Reference full instructions for orientation.
- Sew skirt self front to self back along side seams and pockets.
- Attach bodice to skirt, self and lining.
- Construct belt loops.*
- Construct belt.
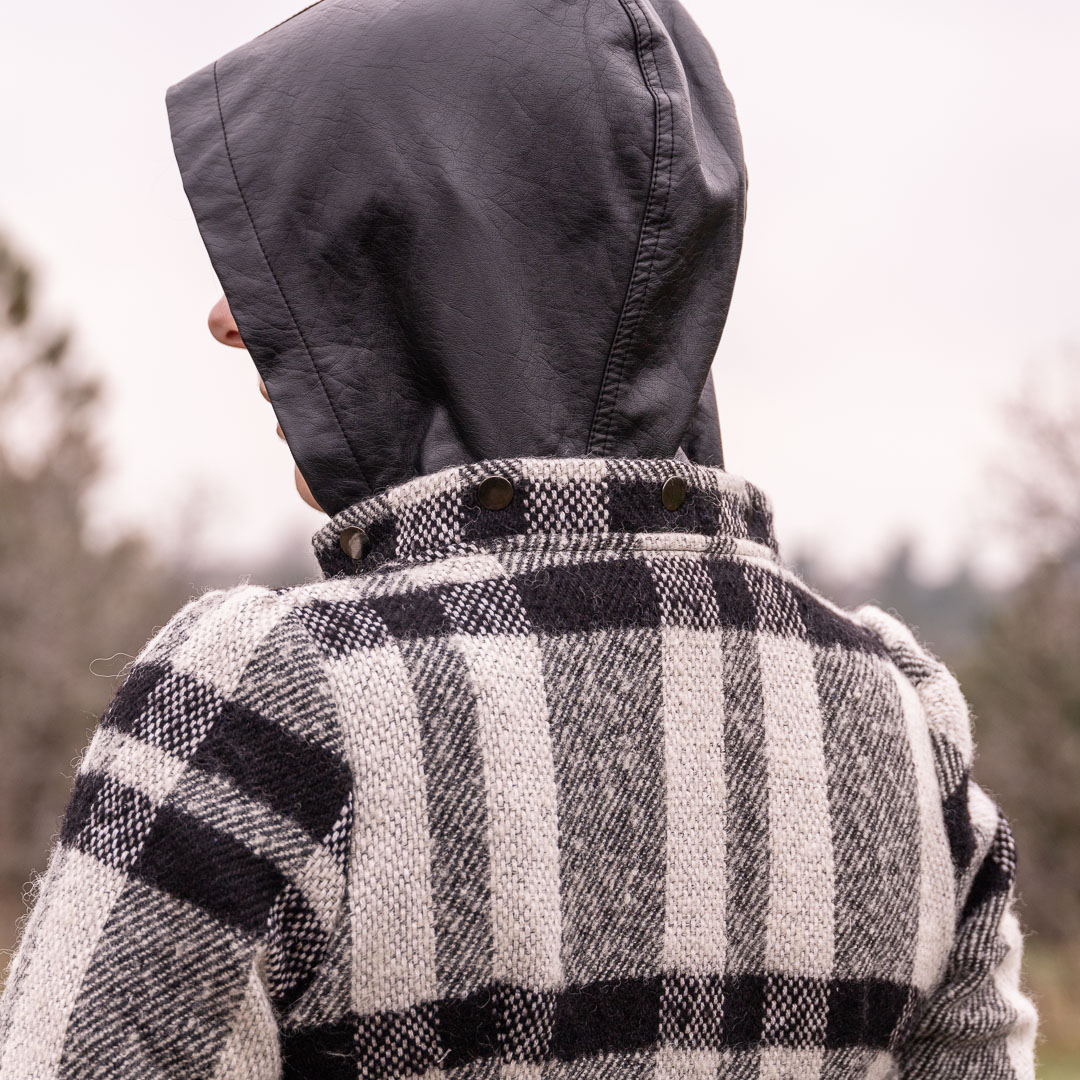
- Construct hood attachment.*
- Sew collar self to lining along sides and top edge. Topstitch.
- Baste hood attachment to self bodice neckline, centered, RST.
- Baste collar to self bodice neckline so hood attachment is sandwiched in the middle.
- Attach belt loops to self, RST.
- Sew lining to self along neckline.
- Pin and sew lining to self along the rest of the jacket, leave large gap (6″+) for turning. (I left 10″ which worked a treat.)
- Sew lining to self at sleeve openings.
- Turn RSO. Press. Topstitch.
- Add buttons and buttonholes.
*The belt loops and hood attachment were self-drafted additions. I have no idea why a coat pattern with a belt doesn’t automatically include belt loops, but it doesn’t.

Adding Belt Loops
I had to deviate from my original belt loops on version 1 because the wool is so thick. This time, I cut half the pattern piece out of wool, half out of the lining, sewed them right sides together as a tube, turned it right side out, and topstitched. Much less bulky.
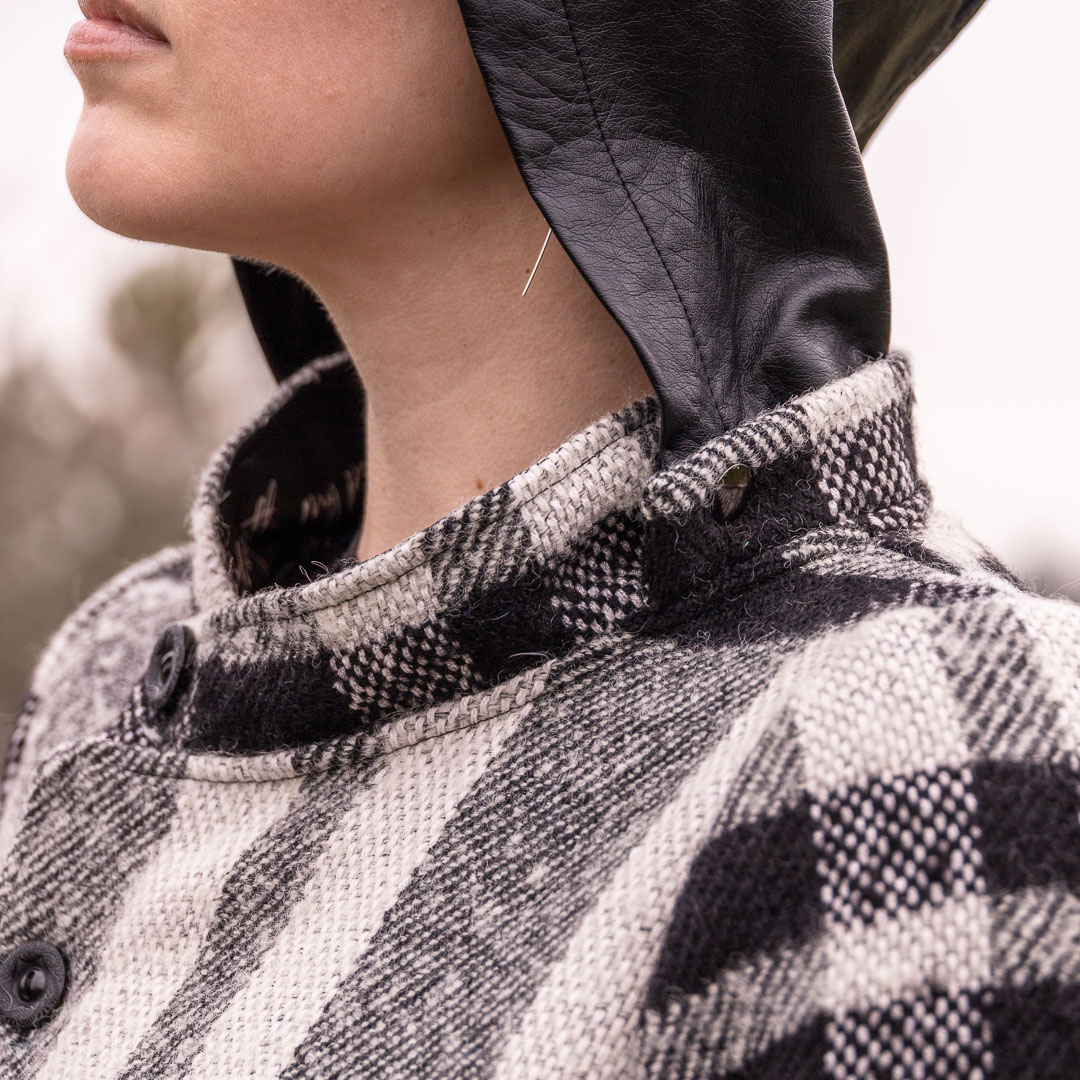
Adding a Hood Attachment
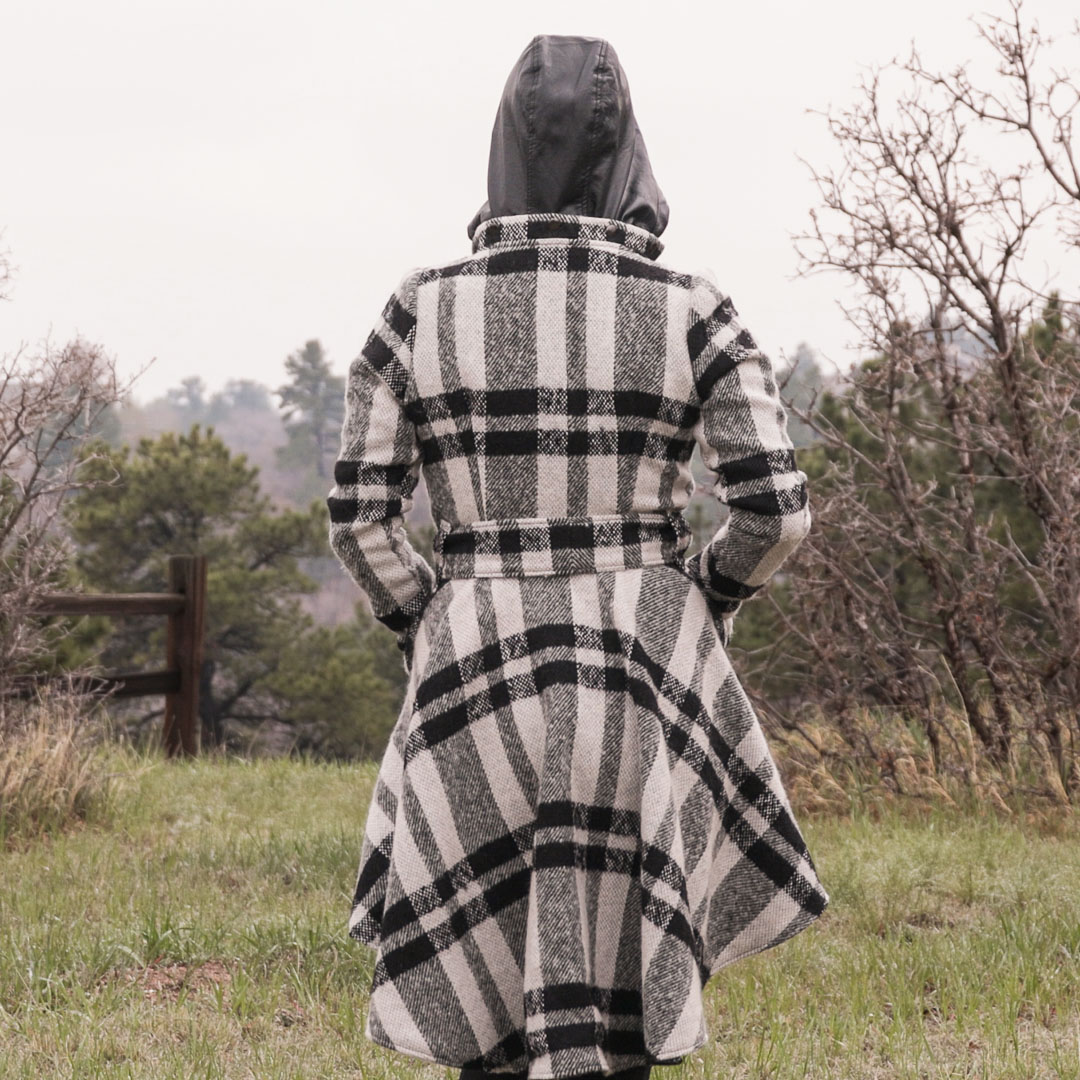
I glanced at the Ellie & Mac blog post about this hack, and then drafted mine based on a Hurley jacket I’ve had forever. I love the detachable hood on that jacket, and since that jacket is falling apart, I migrated it to use on this coat. And that involved a few things:
- Drafting the pattern piece.
- Finding the right snaps.
The Pattern Piece
It’s pretty simple. It’s just a square of fabric folded in half lengthwise and stitched along both short sides and one long side. Like I said, I based mine on my Hurley jacket so the existing hood would fit. I used fusible interfacing to make it more sturdy.
The Snaps
I expected the snaps to be more difficult to find, but the first thing I googled was the exact thing I needed. How bizarre. Stop reading my mind, google…and also thank you for reading my mind.
They are called s-spring snaps. I needed 15mm in gun metal. They came in a pack of 50 sets (cap, socket, stud, post), which is great so I could test them. Good thing I did, because I discovered I couldn’t get the cap post to fold over enough to hold the snap snugly, which also meant I couldn’t seat the other part of the snap in the socket.
My solution: a washer. I needed an inner diameter of 1/4″ and an outer diameter of 5/8″. That would simulate thicker fabric and so I wouldn’t need the cap post to fold over so far.
I already had a snap setting kit, which had the perfect size tools I needed for setting.
Tip: use a bonafide hammer with a metal head and not a rubber one.
And here’s a quick look at how I set one of the caps/sockets.
View this post on Instagram
What I Did Differently
- Left a 10″ gap for turning the jacket right side out. I think last time I only left 5″, which was a struggle. 10″ works way better.
- Skipped all the staystitching. I skipped it last time, too. Turns out it’s pretty unnecessary, in my opinion.
- Skipped all the convoluted measuring in the hood attachment hack post. It’s easier to just center it with the back bodice.
- Had to tug the lining down a bit at the side seams because it was pulled the wool upward and making that whole seam look bunched up. Sewed a bar tack on each side seam to anchor the lining in place and prevent that stupidity.
- Eyeballed all the buttons/buttonholes. I ignore the markings and visually place them in front of a mirror. I started with the button closest to the horizontal black lines on the bodice so I could get the plaid to match as much as possible. After attaching the button, I overlapped the placket and marked where its buttonhole should go with a pin. Rinse and repeat for each button and buttonhole. It’s tedious, but gives the best results.
Verdict
I’m glad I’m done making this one! I’m disappointed by how the wool feels and that it even pokes through my lining. I wore long sleeves as I was taking photos though, and it was actually really comfortable. So I have a strange mix of disappointment, accomplishment, and pride. If it weren’t for the lining fabric, I think disappointment would reign.
Project Settings
Sewing Machine vs. Serger
| Sewing Machine | Serger |
|---|---|
|
|
Sewing Machine Settings
| Presser Foot | Stitch# | Stitch Width | Stitch Length | Needle | Top Thread Tension | Application |
|---|---|---|---|---|---|---|
| applique (F) | 2 | 3.5 | 3.5 | 90/14 | 4 | darts |
| 1/4" | 0 | 3.5 | 5 | 90/14 | 4 | baste |
| button (T) | 6 | 5 | drop feed | 90/14 | 4 | buttons |
| 1/4" | 1 | 3.5 | 3.5 | 90/14 | 4 | topstitch |
| buttonhole (R) | 18 | 5 | 0.4 | 90/14 | 4 | button hole |
Serger Settings
| Stitch Name | 4-thread overlock |
|---|---|
| Needles | R, L |
| Finger | B |
| Threads | 4 |
| Tension Left Needle | 4 |
| Tension Right Needle | 4 |
| Tension Upper Looper | 4 |
| Tension Lower Looper | 4 |
| Cut Width | 6 |
| Stitch Length | 2.5 |
| Differential | 1.0 |
| Application | seams |
Leave a Reply