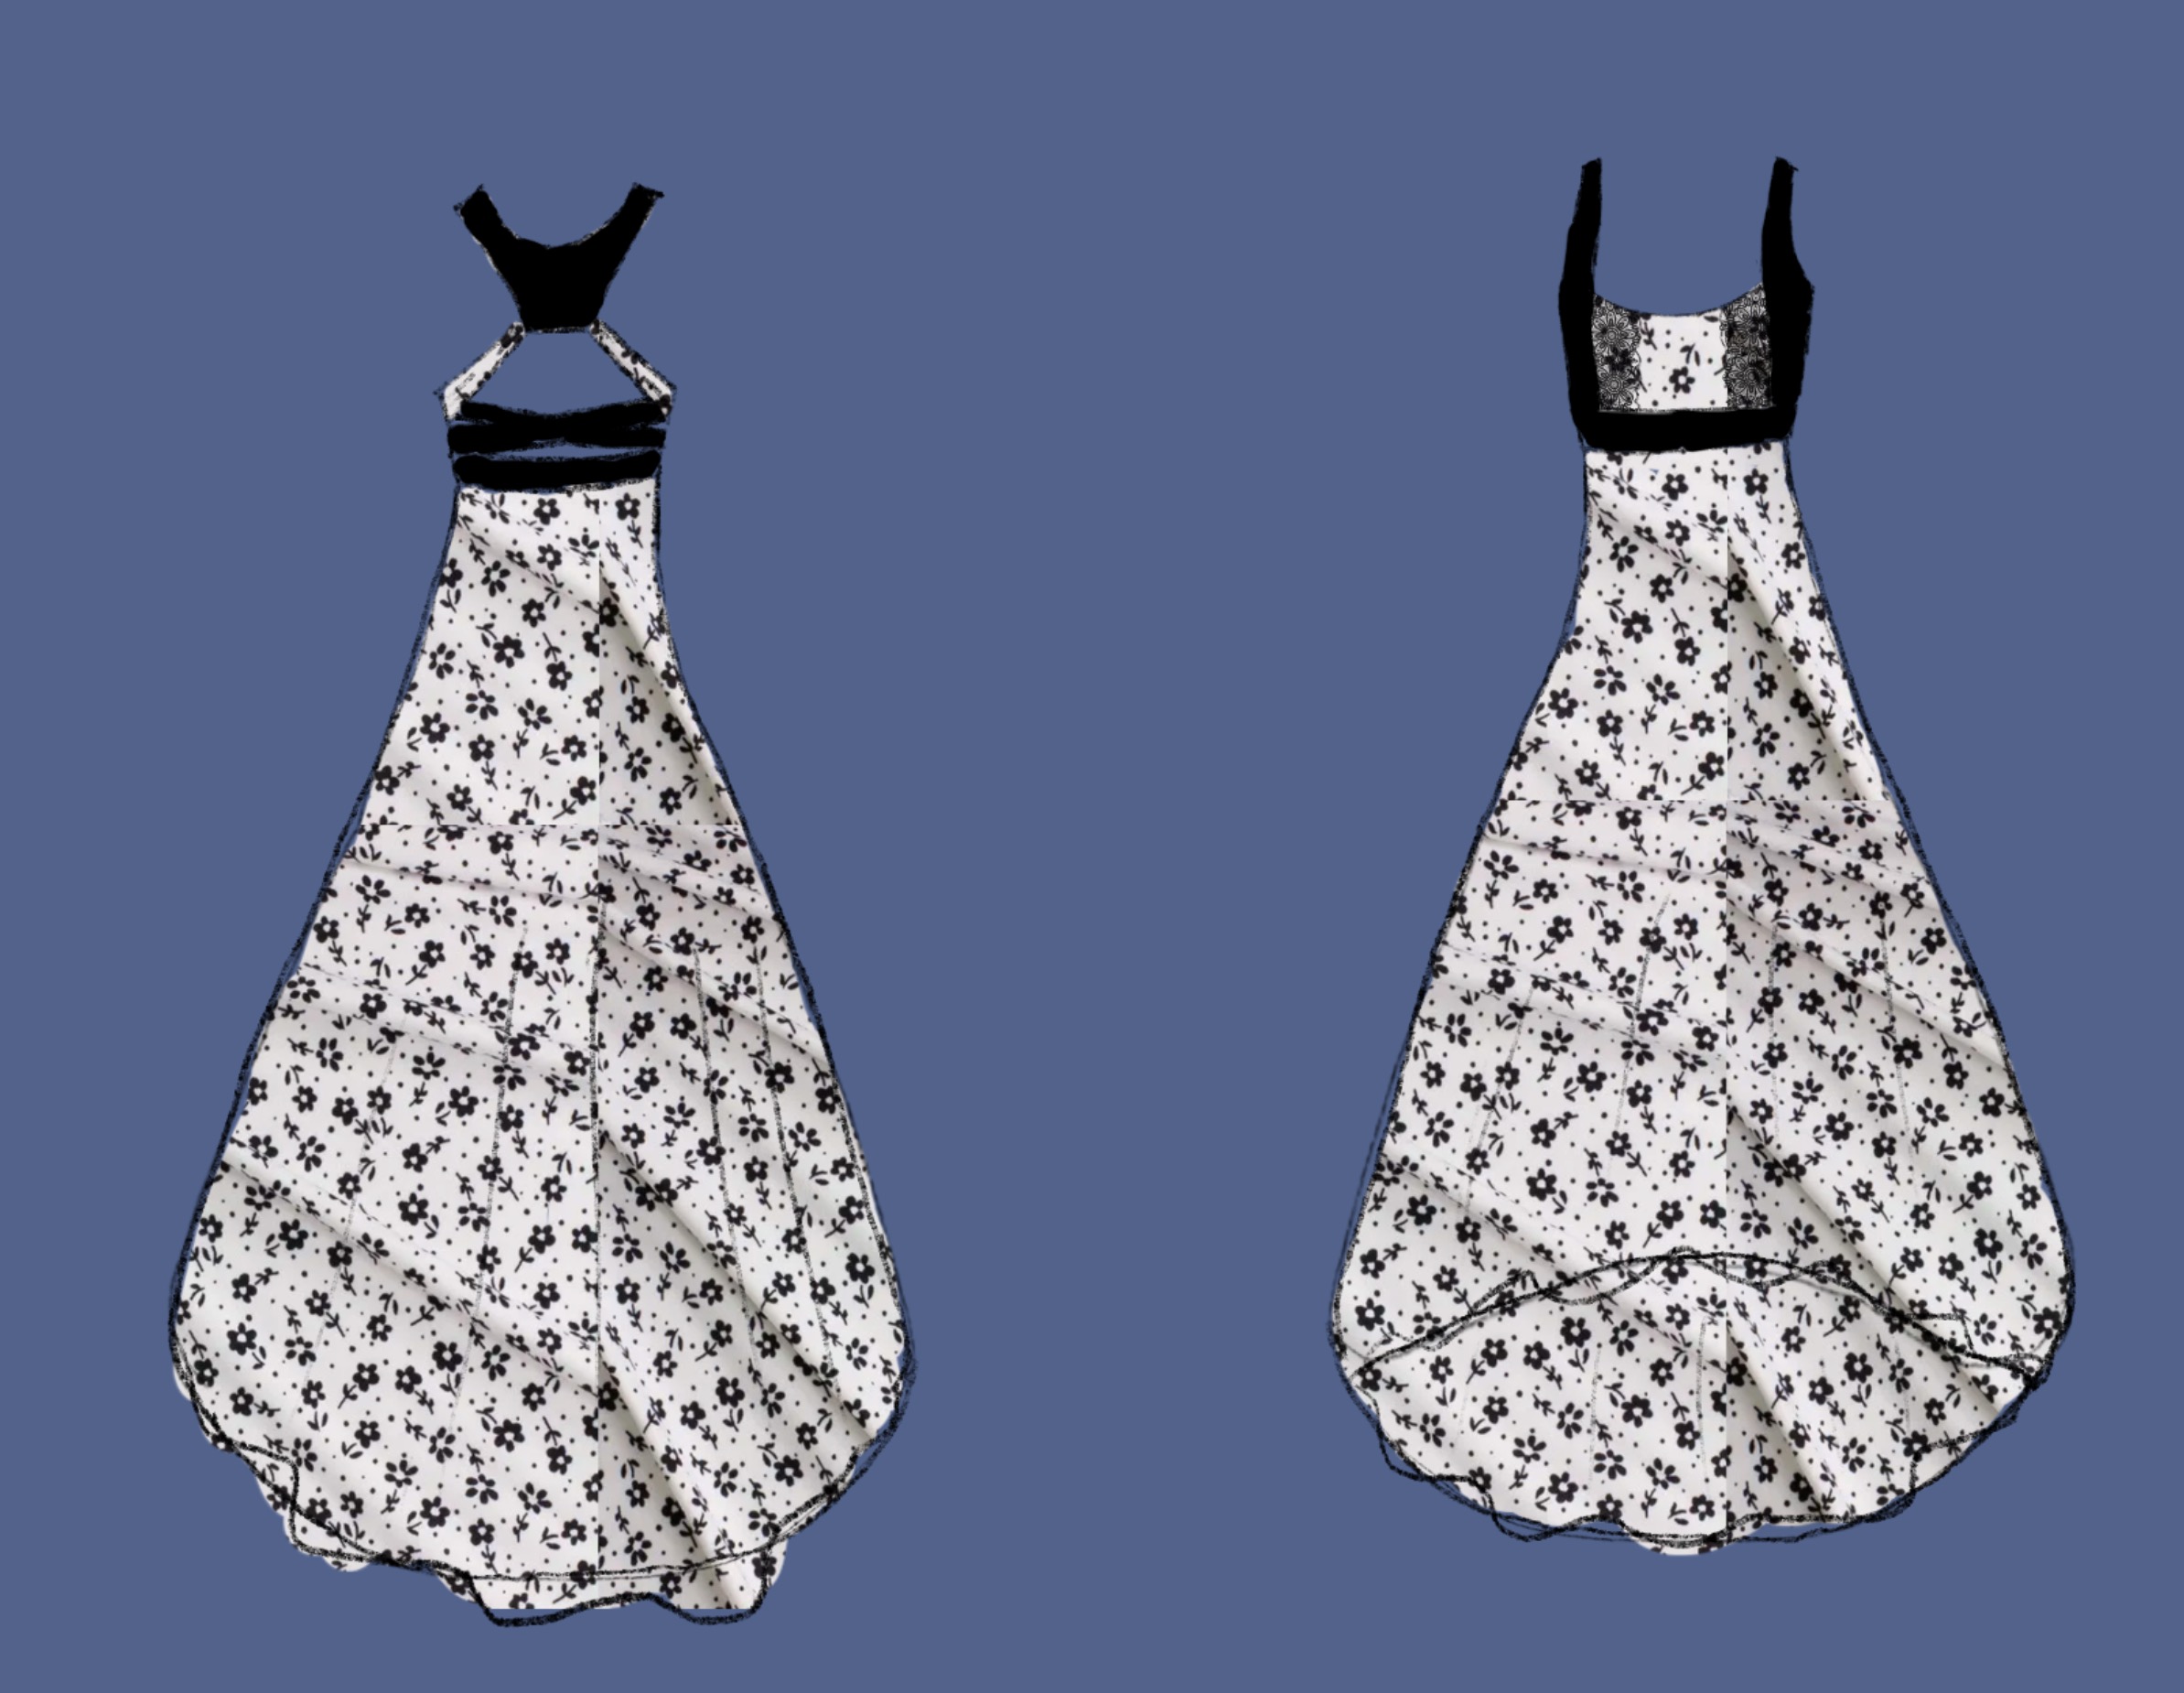
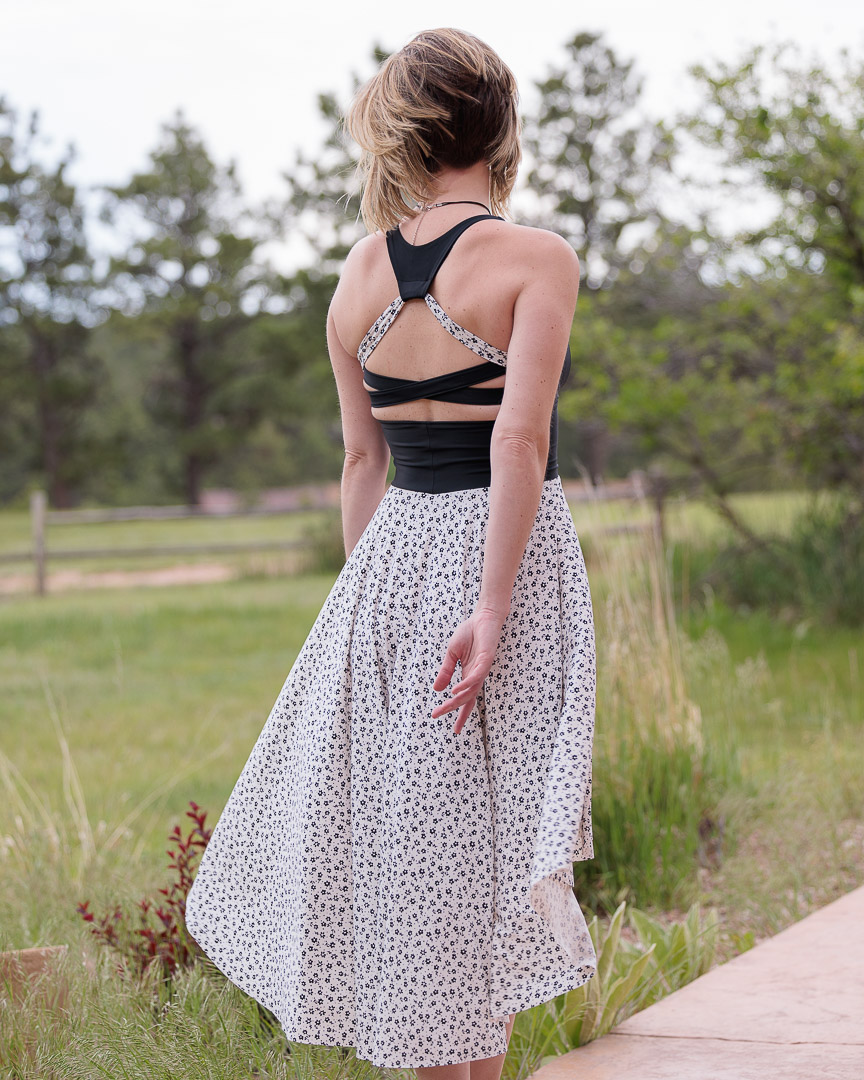
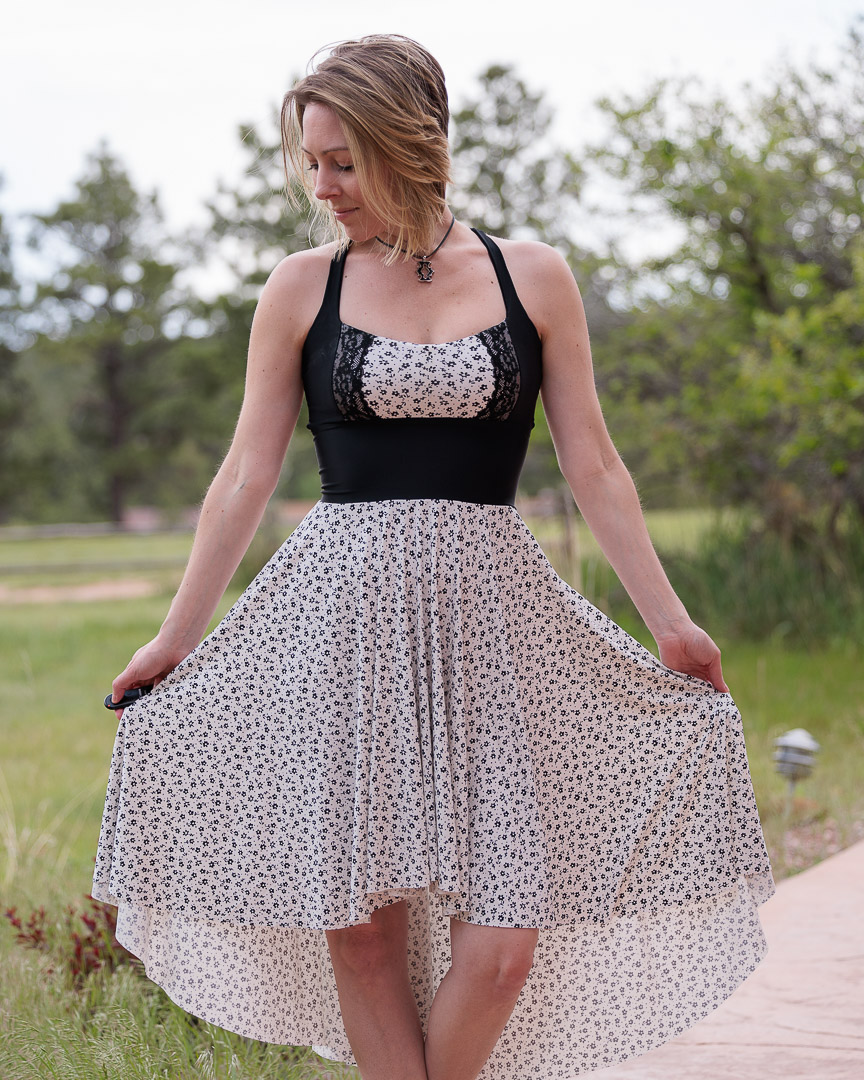
Another sketch comes to life!
About the Fabric
Main: Black Small Ditsy Floral On White Double Brushed Poly/Spandex from Cali Fabrics
- Fabric Content: 95% Polyester/5% Spandex
- Weight: 175 GSM Light Midweight
- Stretch: 125% Horizontal, 50% Vertical
Ditsy florals are one of my favorite fabric prints. So cute. So forgiving. Bordering on abstract (and I love abstracts.) So when this one listed, I naturally snatched 3 yards and knew it would one day become a flowy summer dress.
Accent: Swim/Activewear Solid in Black. Matte Nylon/Spandex Blend from Boho Fabrics
- 80% Nylon, 20% Spandex Blend
- Weight: 10.5 oz
- Stretch not provided. 🙄
Earmarked for a swimsuit to replace the one I salted to death for 10 hours at Iron Mountain Hot Springs (totally worth it), I thought this would be the ideal black accent fabric for several reasons. 1) That snappy recovery. After the recovery failure I experienced on my test version and there being no good way to add elastic to the front bra straps, I needed some snappiness. 2) Nylon spandex is so amazingly smooth and cool to wear. It also dries fast.
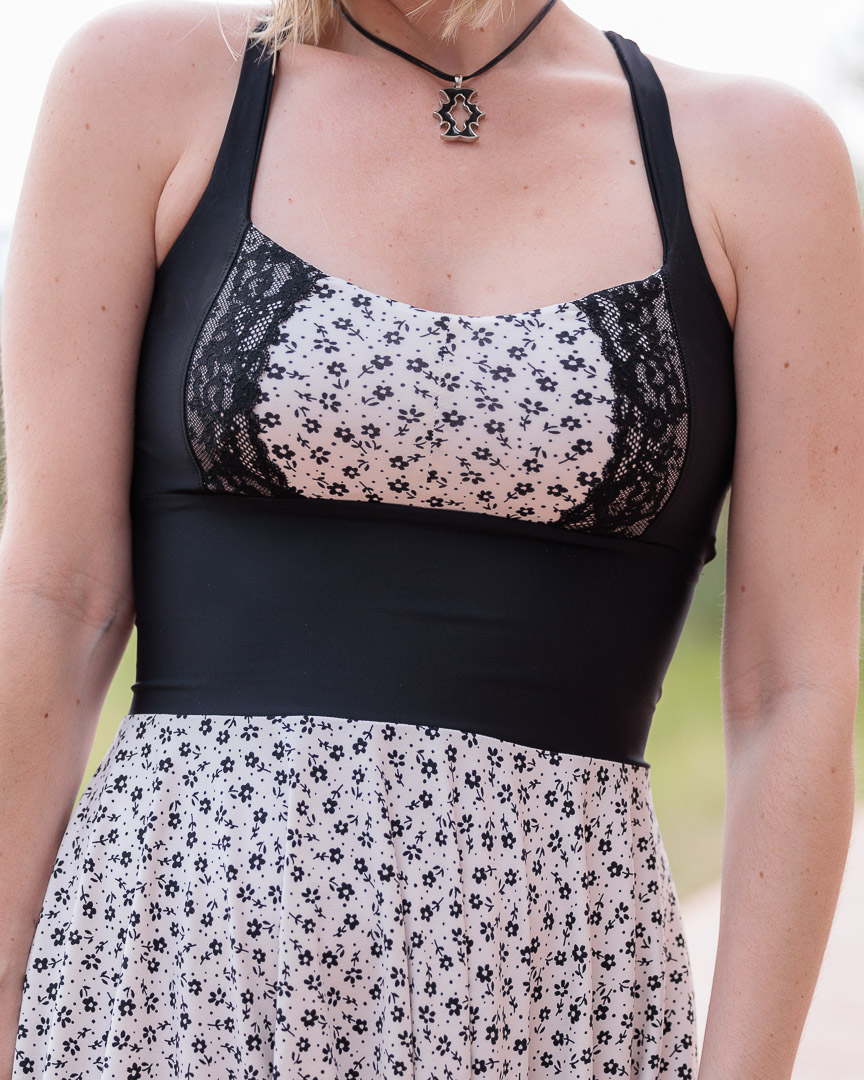
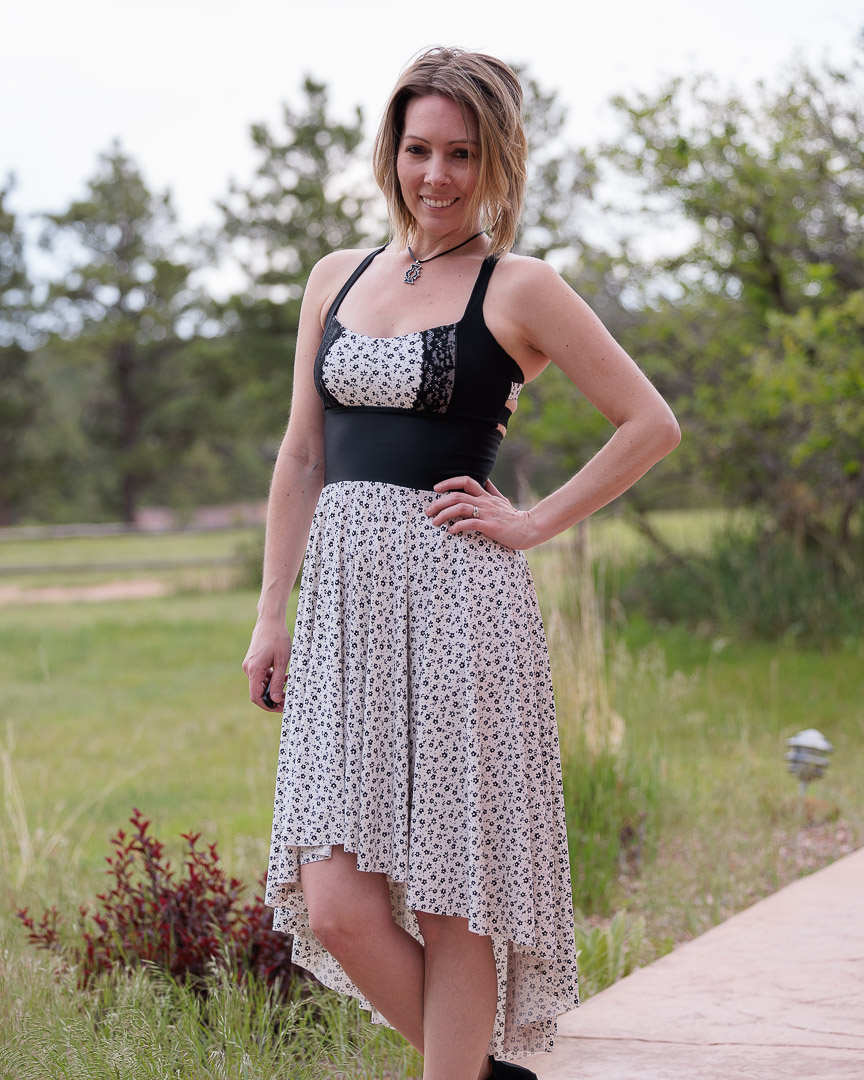
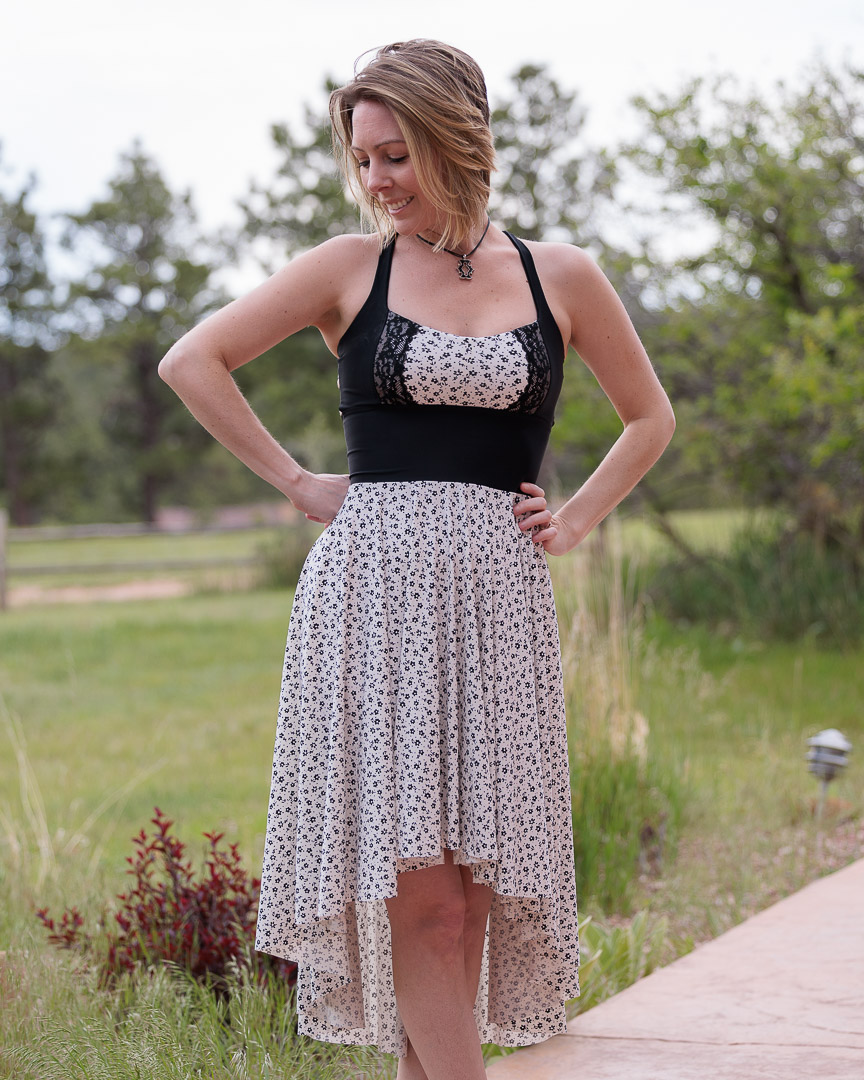
Lace: 2” black stretch lace from Sew Sassy
About This Make
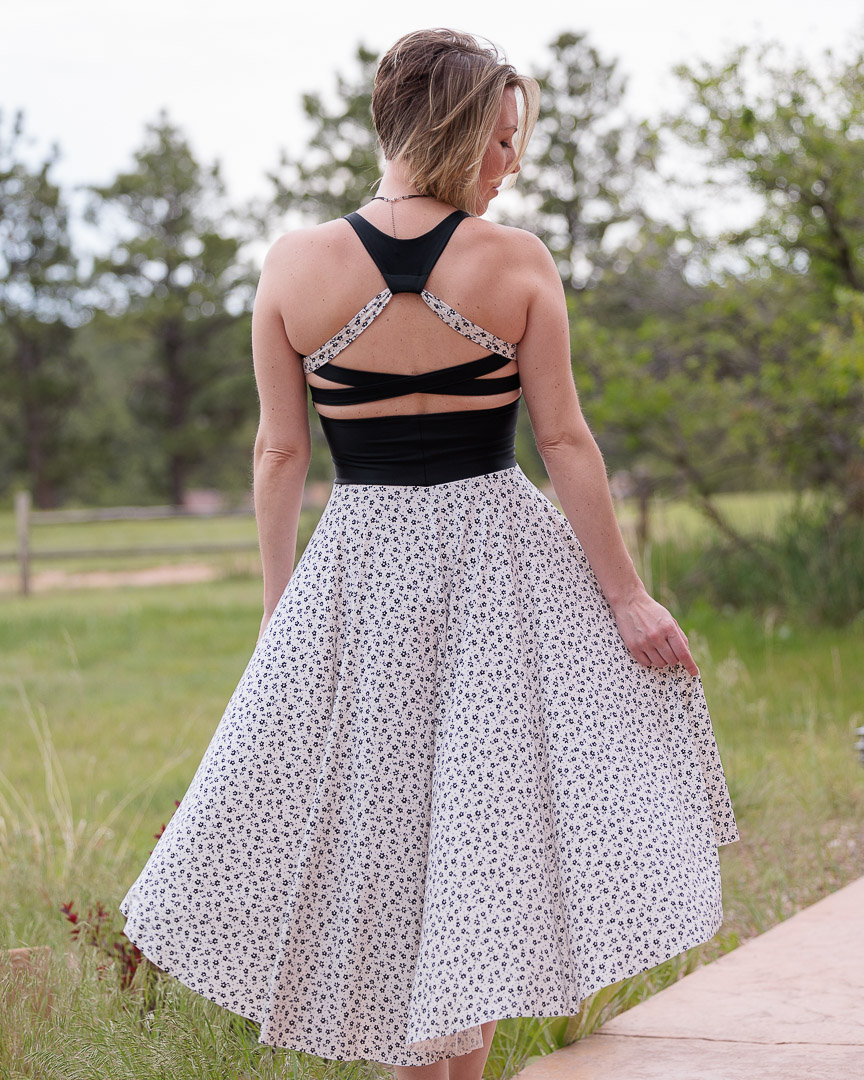
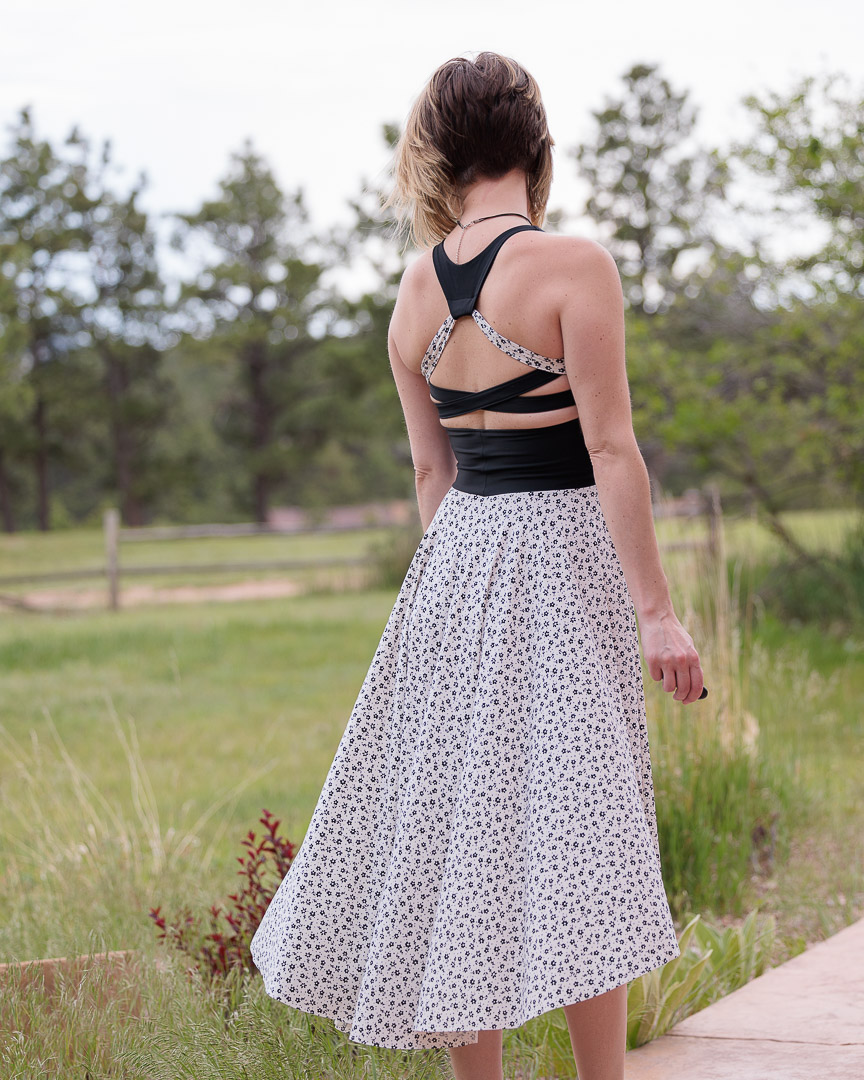
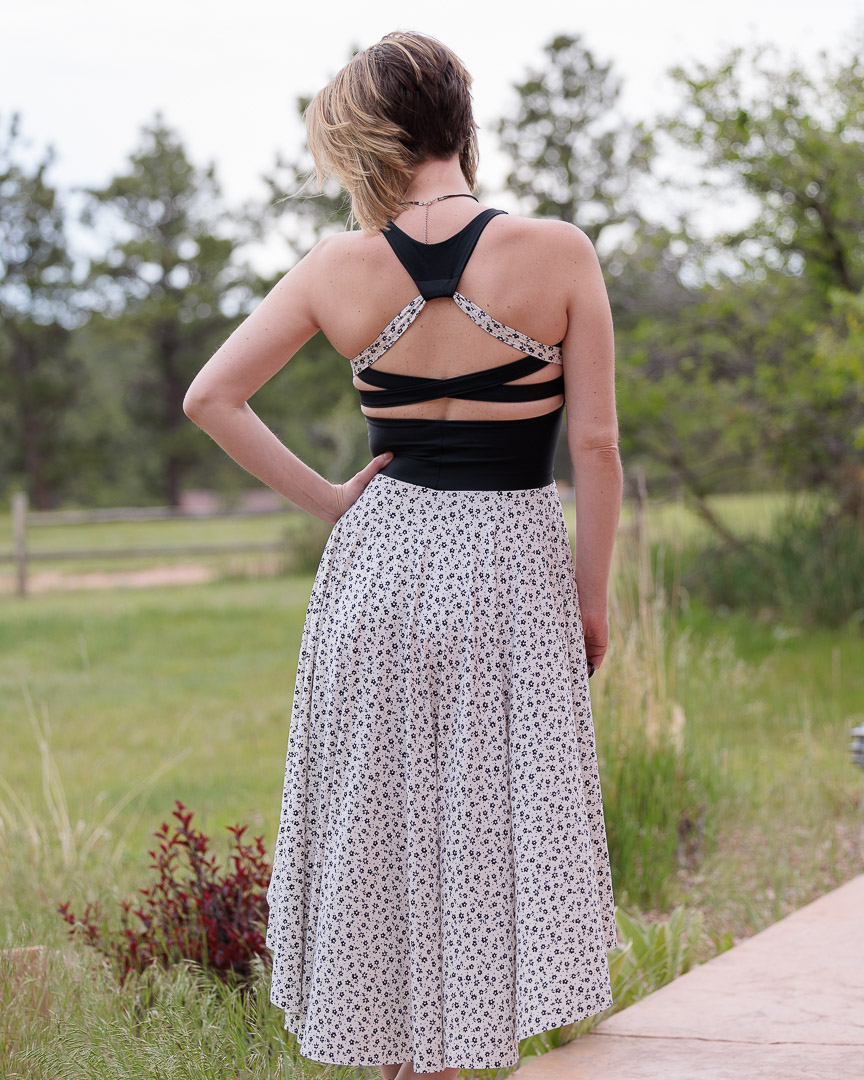
Top Front: Switch It Up, view I
- size 8
- C cup
- shortened front straps by 1”
- widened front straps by 1/2”
- raised side seam by 1/4”
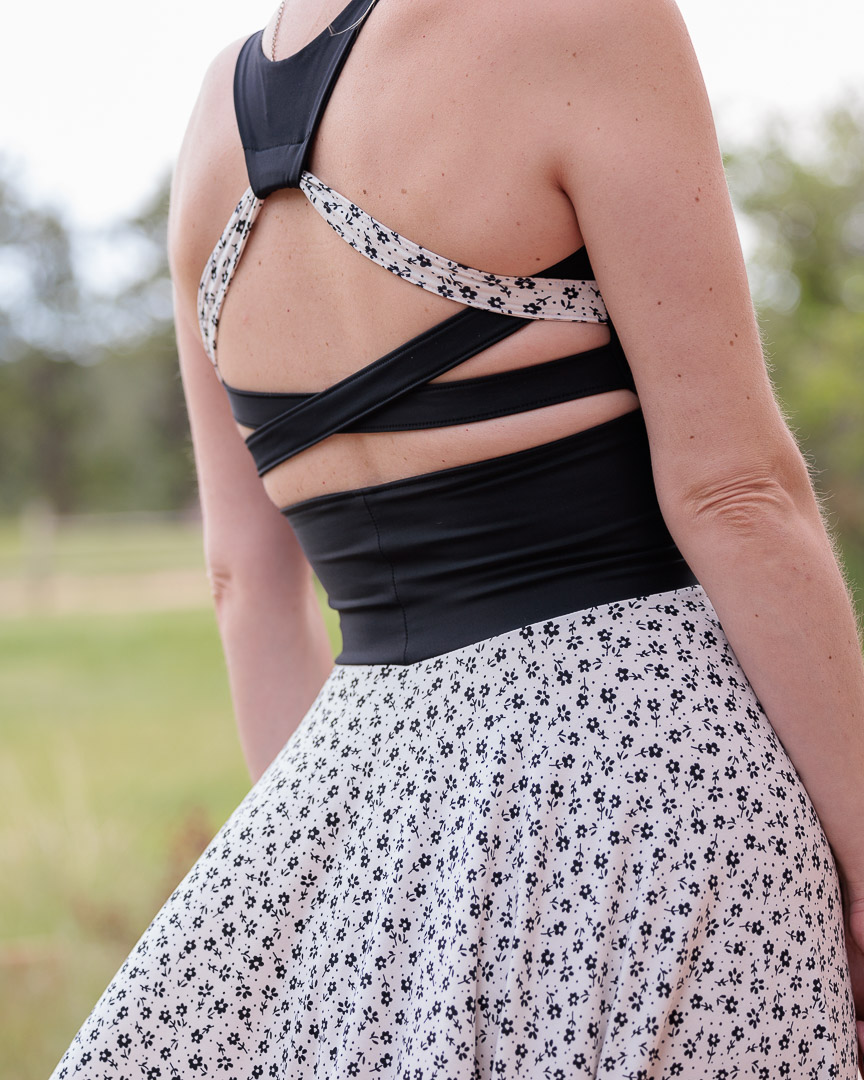
Top Back: Switch it Up, view T
- size 8
- B cup
Waistband: Switch it Up
- size 10 (for snappy nylon spandex)
- lengthened 1″
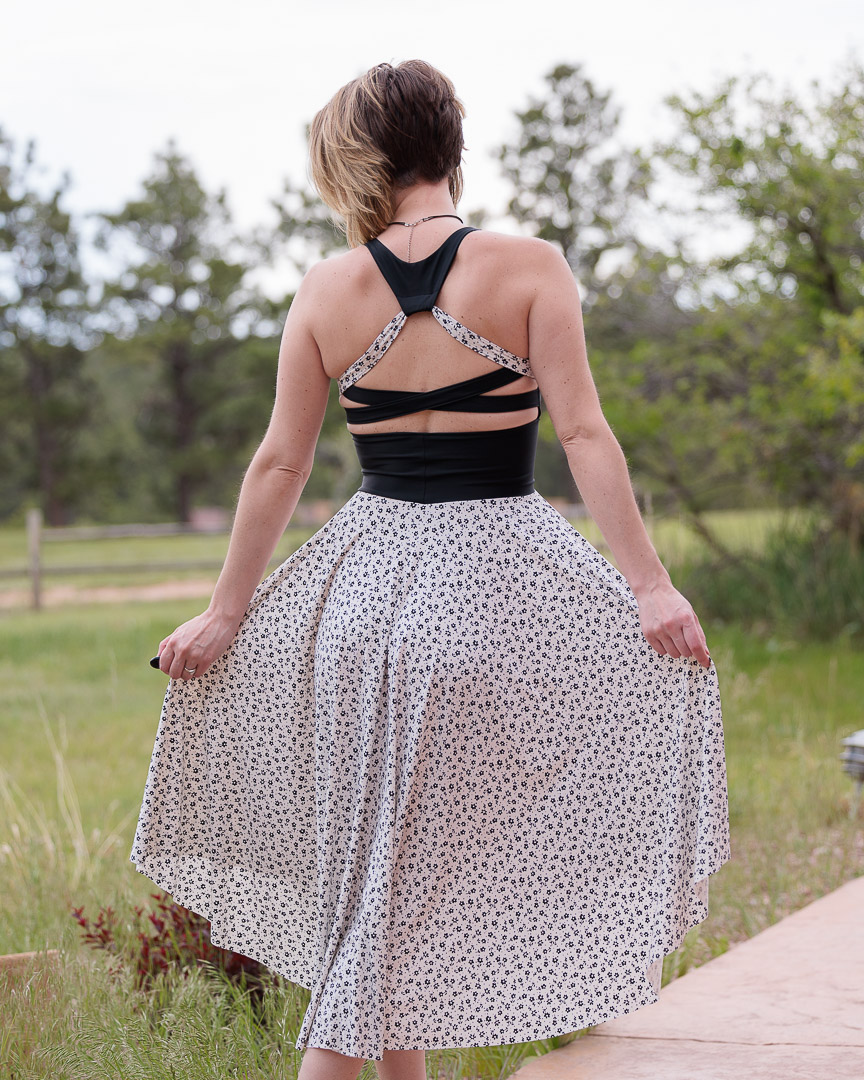
Skirt: Mix It Up
- size 4
- high-low
- dress (tunic) length + 11″
What I Did Differently
- Sewed an extra layer of white nylon spandex into the front against the outer fabric to make sure the bra pad inserts would not be visible through the DBP.
- Added 3/8” elastic to the white back band.
- Basted the waistband before attaching the skirt on my serger.
- Oops. I think I accidentally cut the black bra pieces cross-grain. Not a giant problem except I think the vertical stretch was a little less than the horizontal stretch. So that bra ain’t growing with wear at all.
- Topstitched the back of waistband.
- Used a C cup for extra length to accommodate bra pad inserts.
- Shortened and widened the front bra straps. That made sandwiching the back so much easier and I like the final width a lot more.
- Raised the bra side seam 1/4” for a slightly higher armscye which I like so much better.
Notes for Next Time
- Waistband could stand to be more forgiving but only if I use a snappy fabric like nylon spandex again. This is just a little difficult to slip on and off. A size 10 in a fabric with looser recovery (like DBP) would be too loose.
Project Settings
Sewing Machine vs. Serger
| Sewing Machine | Serger |
|---|---|
|
|
Sewing Machine Settings
| Presser Foot | Stitch# | Stitch Width | Stitch Length | Needle | Top Thread Tension | Application |
|---|---|---|---|---|---|---|
| standard zig-zag (A) | 5 | 1.0 | 4 | blue tip | 4 | seams / topstitch |
| standard zig-zag (A) | 0 | 3.5 | 5 | blue tip | 4 | baste |
| standard zig-zag (A) | 6 | 1.0 | 5 | blue tip | 4 | bra bottom baste |
| overedge (C) | 6 | 7 | 3 | blue tip | 4 | back bottom edge finish |
| overedge (C) | 6 | 6 | 3 | blue tip | 4 | edge finish |
| standard zig-zag (A) | 6 | 5 | 3 | blue tip | 4 | 3/8 knit elastic attach |
Serger Settings
| Stitch Name | 4-thread overlock |
|---|---|
| Needles | R, L |
| Finger | B |
| Threads | 4 |
| Tension Left Needle | 4 |
| Tension Right Needle | 4 |
| Tension Upper Looper | 4 |
| Tension Lower Looper | 4 |
| Cut Width | 6 |
| Stitch Length | 2.5 |
| Differential | 1.0 |
| Application | seams |
Leave a Reply