Choosing a Sewing Machine
When this crazy notion to start sewing came over me, I bought a book to help me get started (Sew Me! Sewing Basics: Simple Techniques and Projects for First-Time Sewers). I chose that one because it included sewing machine basics and a helpful checklist that guided me to choose my sewing machine based on the features I wanted.
But…there was one glaring omission on that list: It made no mention of a speed control. I mean more than that chintzy-feeling pedal on the floor, which seems like it would be easy enough to use: press the pedal harder to go faster and ease up to go slower. Just like a car, right?
Not quite. I wish I would have known how temperamental that pedal is. Press lightly to go nice and slow, but the machine just hums. Press a little harder, the needle moves a bit, then we’re back to humming. Press a little harder and suddenly we’re shooting across the fabric at light speed. Ohmygaaaaaa!
Not. Cool.
So, beginners, get you a sewing machine with something called a variable or adjustable speed control. It’s a slider or knob right on the machine that basically lets you limit the speed. Typically it only comes on computerized machines. Here’s a helpful article that talks more about that. If I could go back in time, this would be the first thing I’d look for on my inaugural machine.
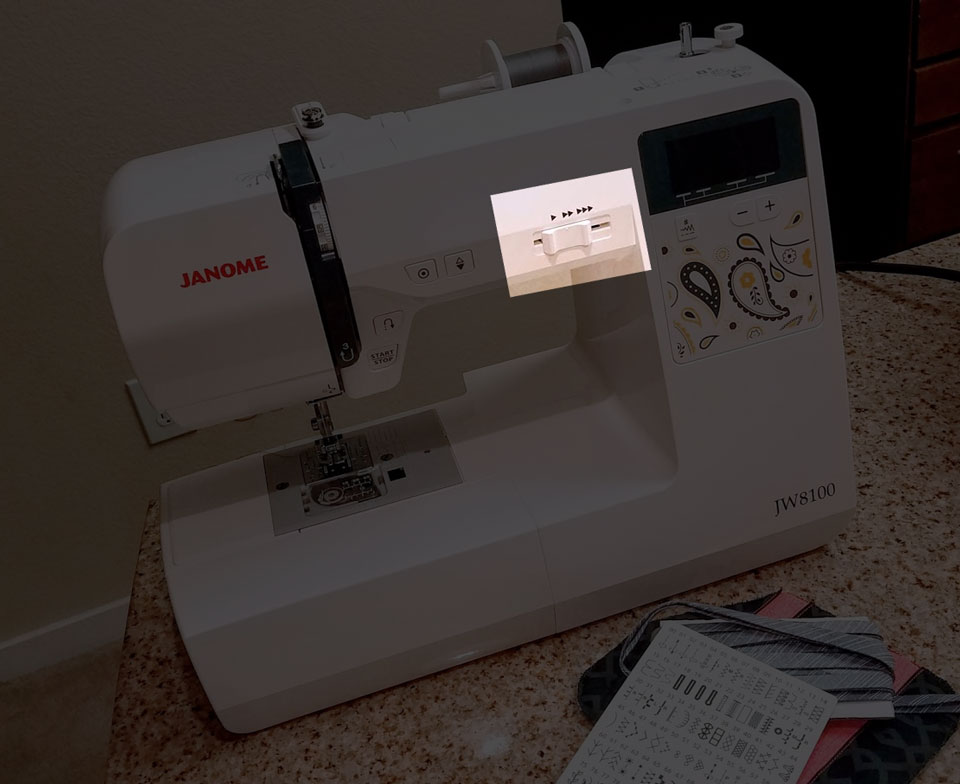
Variable/Adjustable Speed Control Slider
SIDEBAR
If, like me, you’ve already committed to a machine before knowing about the magical adjustable speed control button, there is hope. A little Youtube research by my husband gave me these little tips that actually are quite helpful:
- Before you press on the pedal, manually turn your flywheel enough to bring the needle all the way down into the fabric. Leave it there, and THEN apply pressure to your pedal. Something about the needle being down makes it easier for it to get going. Don’t ask me for the science behind it. Embrace the mystery.
- If, after you’ve pressed on the pedal, all you get is a humming machine that’s doing nothing, give your flywheel a little nudge and that should get it going. Sometimes I have to nudge it twice (maybe thrice) to get rolling, but that’s fine with me if it means I’m rolling along at a humane pace. I don’t need to murder my project. Or thread. Or fingers.
My Machines
My first machine was a Singer Heavy Duty 4423.
PROS |
CONS |
|---|---|
|
|
I replaced my Singer with a Janome JW8100. After six years of constant use and nothing more than basic cleaning/oiling, it is still going strong and I love it. I’ve learned to work around most of the cons in the list below, so many of them are non-issues* for me at this point.
PROS |
CONS |
|---|---|
|
|
So, what should I look for in a machine?
Well, that answer does depend on what you think you’ll want. Here’s a list of features to consider:
-
- Variable speed control slider. This means you’ll likely end up with a computerized machine. There’s nothing wrong with that, and I think, as a beginner, you’ll be really grateful if you have this.
- Stitches you’ll want/need. Do you plan on working with knit (stretchy) fabrics? You’ll want a variety of stretch stitches to play with, or at the very least a zig-zag stitch. Do you want or care about a bunch of decorative stitches? Do you want to be able to create a serged effect without having a serger? Look for overedge and overcasting stitches.
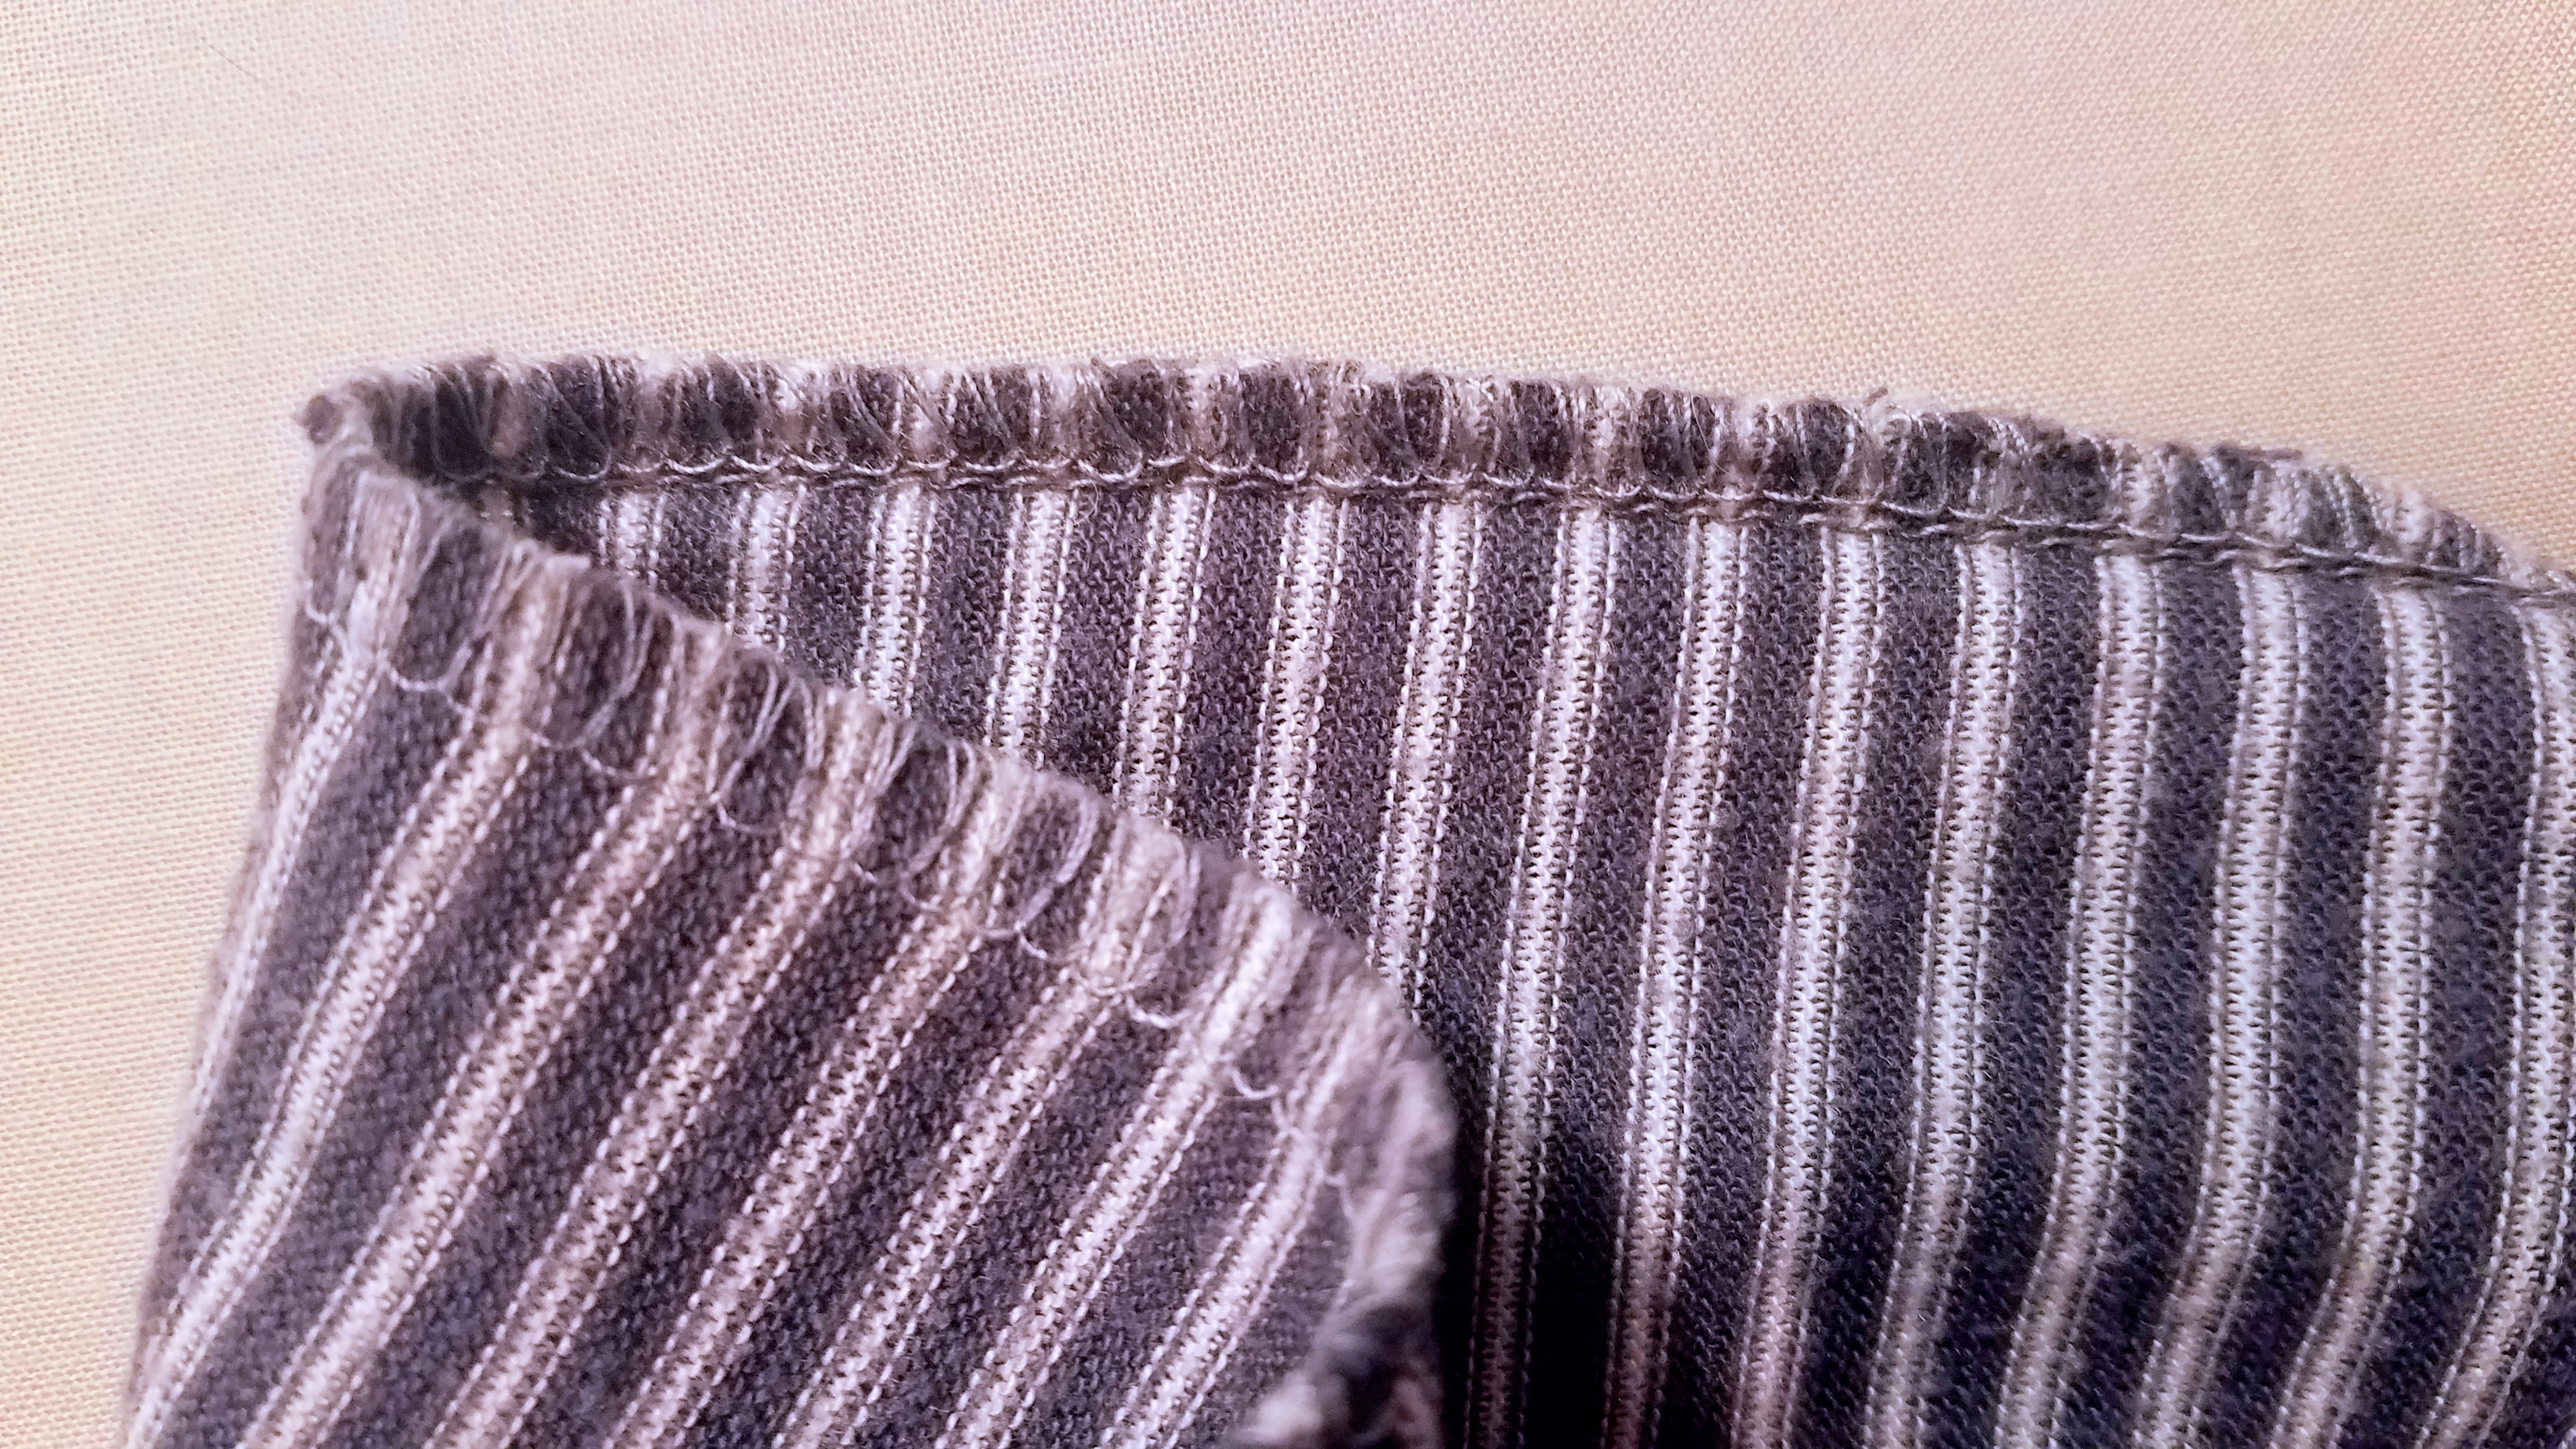
A serged edge using a serger.
- 1-step vs. 4-step button-hole cycle. I would vote for a 1-step cycle every day of the week.
- Adjustable stitch width/and length. Depending on how basic a machine you’re looking at, this can be pretty limiting. Settings that range from 0-5 for length and 0-6 or 7 for width will give you plenty of control.
- Free arm. Most modern machines typically have a removable piece at the bottom of the machine, leaving a little floating platform that you can slide tubes of fabric over for sewing around sleeves, pant legs, and more.
- Do you care about having an automatic threader? Automatic makes it sound motorized, and I imagine pricier machines might be able to do that, but for more humanly-priced machines, an automatic threader is just a little pull-down contraption that you wrap your thread around and then it pulls it through the needle when you slide it back up. Definite time saver, but maybe you’re not worried about that.
- Adjustable presser foot pressure. This is just another setting to play with to help you work with different fabrics. I used it on my Singer, although I could never remember how far or which way to turn it to get it back to where it started, so I’m not really sure how much it affected what I was doing.
- Adjustable feed dogs. This lets you drop the little teeth under the needle down and out of the way. Super handy for sewing on buttons. As someone who thought it was stupid to go through the trouble of sewing a button on using a machine when I could just do it by hand, let me tell you, the trouble of sewing a button on using a machine is SO worth it and really not as much trouble as you’d think.
Getting your first machine can feel like a major decision, but honestly, there is no wrong choice as long as you’re able to learn on it. Just don’t go dropping a giant wad of cash on your first machine. The bottom line is, you’re not sure what your preferences are when you start. And that’s okay. That will come with time and practice.
Do I regret that the Singer was my first choice and it kicked the bucket after only 3 months?
I only regret that it kicked the bucket. I learned so much in such a short time on that machine, and I loved every second of it. No matter what you get, at some point you’re either going to outgrow it, or you’re going to develop your own taste and style when it comes to sewing, so you’ll end up back in the market for something that suits you in the next phase of your sewing adventure. And that’s fine too. This whole thing is literally one unending learning process, and that’s exciting.