The First Hurdle: Finding the Pattern
I wasn’t about to corner myself into a single size again with a VikiSews pattern, which meant some digging around for a multi-size option of this top I wanted to try. It looked like it used to be available on IThinkSew.com, but the SERP sends you to a 404 error. Swell. The pattern is available on Etsy, but each listing is for a single size. Same on the VikiSews website. Megaeyerollbatman.
Which left me hunting for a printed pattern instead of a PDF, and most of those are over in Europe. The Minerva website doesn’t even ship outside the UK. I finally found it on a marketplace I never heard of called Fruugo. Shipping cost almost as much as the pattern, but that was okay with me because I’m getting all the sizes. I could only get about three sizes in the PDF versions for the same price.
Seriously, this is so stupid. Just offer multi-size PDFs. Even if it isn’t ALL the sizes. I’d be happy to try more of their patterns if they even offered a PDF with a range of three sizes. I typically don’t need more than that.
About the Pattern
Well, my beef with the Erica pattern was mostly about getting only one size. Having several sizes on this pattern, I can say it’s still annoying for several reasons. (Full disclosure, I pretty much set myself up to be frustrated with this one because I chose chiffon. Still, it didn’t have to be quite this frustrating. 👇)
- Didn’t come with printed instructions or printed size selection. There’s a QR code for instructions, then I had to visit the Viki Sews website to grab separate instructions for size selection.
- The different sizes aren’t color-coded; they’re just varying types of unlabeled dashed lines with one legend in the corner of the 8-foot sheet of paper, and the line treatments don’t vary enough. It’s a nightmare trying to dig out the right line in some places, and there are several lines I can’t even tell you what they’re for. Short sleeves? Crop top? Don’t know; none of those options are mentioned in the instructions.
- I conveniently fell in between sizes in every single major category: bust, waist, and hips.
- Most of the pattern pieces are really annoying shapes, especially with chiffon: like 4 spirally circles, and casings/ties cut on the bias. I’m sure there’s some “professional” logic to the bias-cut casings and ties, but in the real world where I live, it just seems stupid because
- It’s an incredible waste of fabric.
- Why do these things need to stretch? This is a woven garment: nothing else stretches.
- The blouse ties are incredibly overcomplicated: cut 4 on the bias and then sew two sets of two together at angles to make two ties.
- Why the heck would I ever torture myself with a binding on chiffon when I can just do a narrow hem?
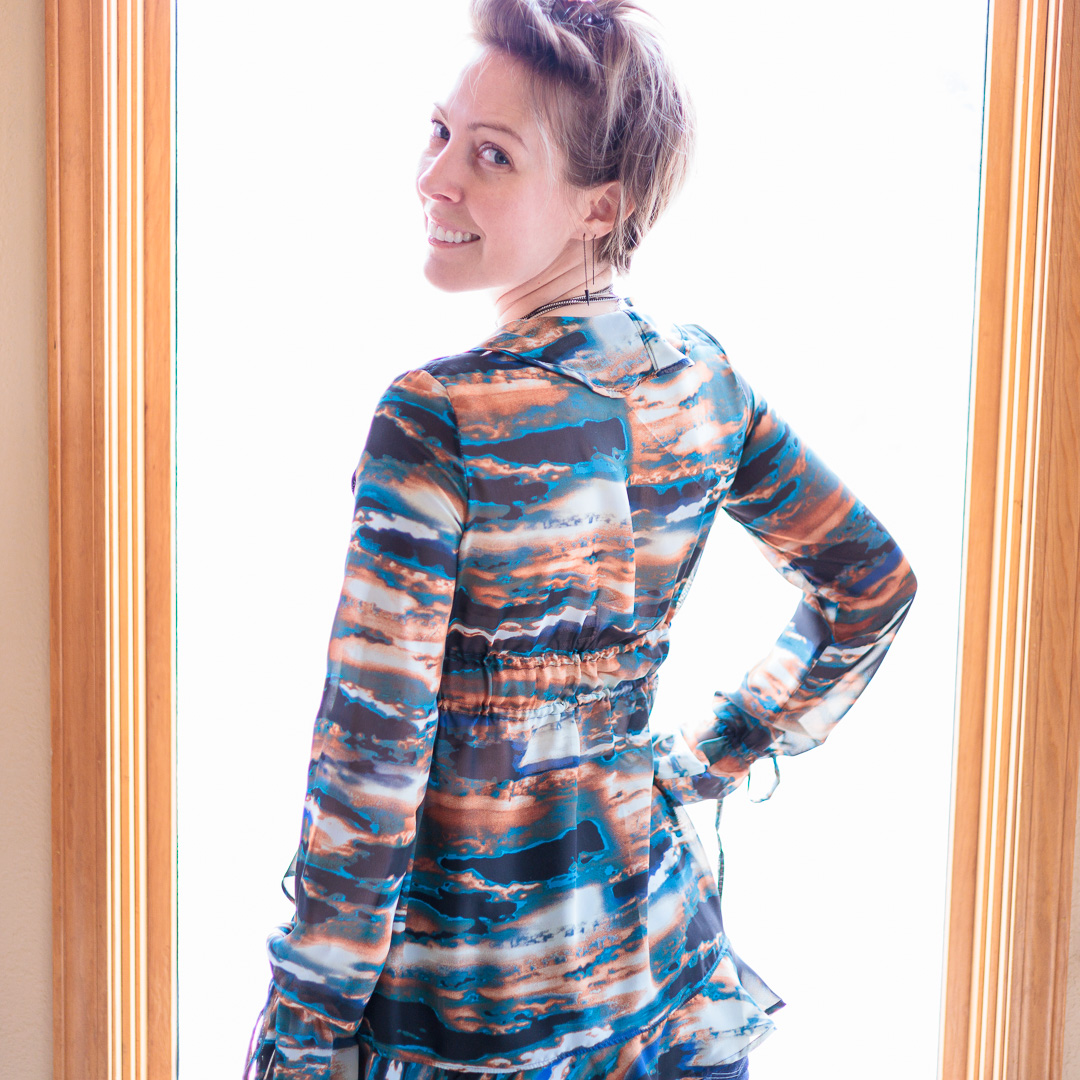
- All the annoying shapes made grading between sizes a nightmare. So I have flounce seams not lining up with side seams and had to trim one end of the neck flounce because it was several inches too long. Uhhg.
- The instructions required a lot of de-extra-ing. What’s one way to hate chiffon even more? Trying to press both long edges of a long strip of fabric under by 1/4″. Forget that crap. Oh: and trying to make any kind of large pattern markings (such as casings along the full width of the bodice front and back and sleeves.) Chiffon is such a shifty b****! Even with that aside, could we just not with the overcomplicating everything?
- The instructions are also confusing for several reasons.
- They use photos instead of illustrations. It may be personal preference, but I find illustrations so much clearer. It doesn’t help that the fabric they used in the photos is a busy animal print, which makes it really difficult to see what’s going on.
- Because of the above, all the steps for the flounce were not easy to understand. I may have done it wrong and salvaged it with some understitching, but the front ties are so not how they need to be.
- They over-complicated the instructions for most of the seams. What they should have done is have a separate introductory section that explains what a French seam is. And then in the construction details, just say “sew [piece] to [piece] with [sides] facing using a French seam.”
About the Fabric
2 yards Brown, Black, Teal, and Turquoise Grunge Chiffon from Cali Fabrics
- FABRIC CONTENT: 100% Polyester
- FABRIC WIDTH: 60″
- WEIGHT: Lightweight
- STRETCH: None
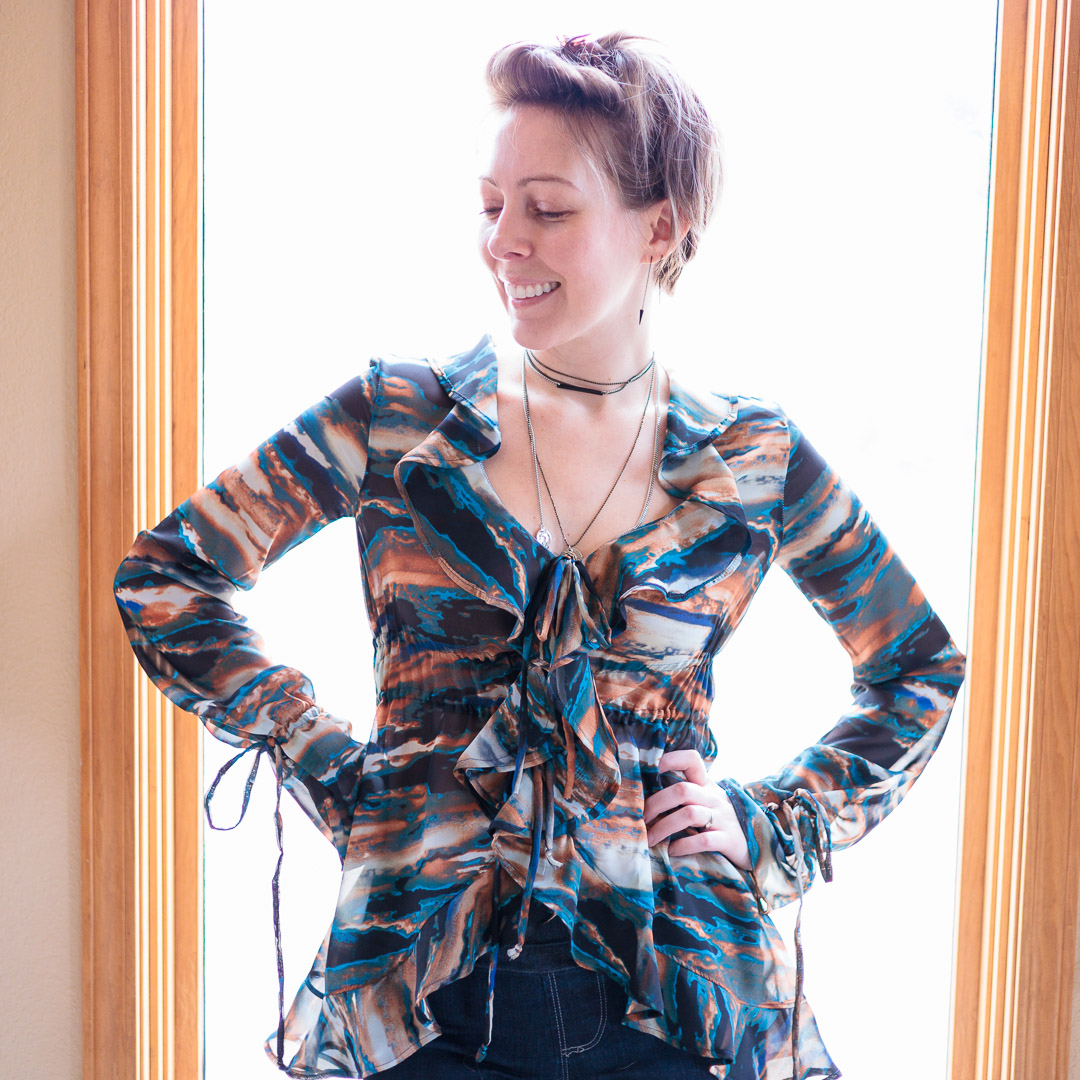
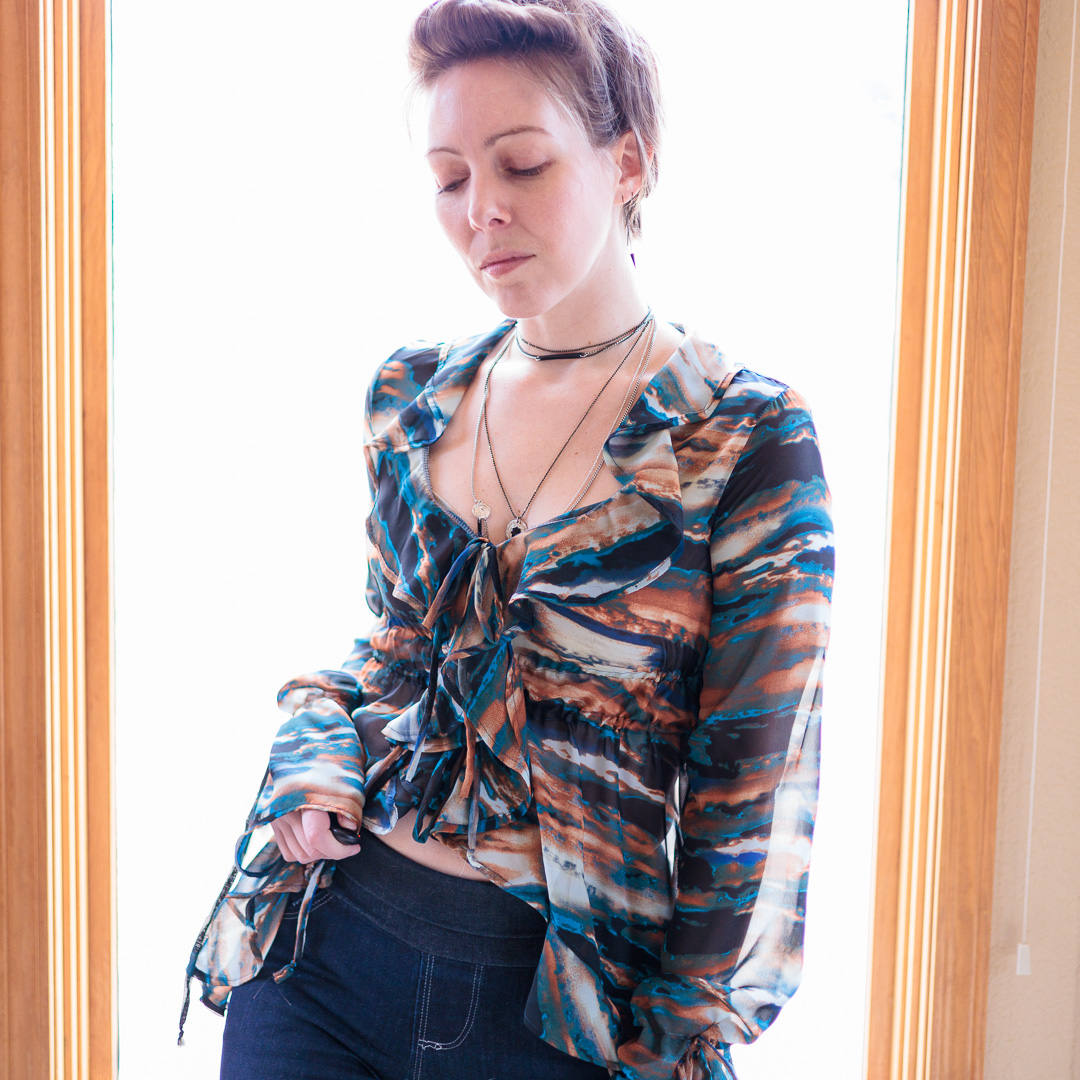
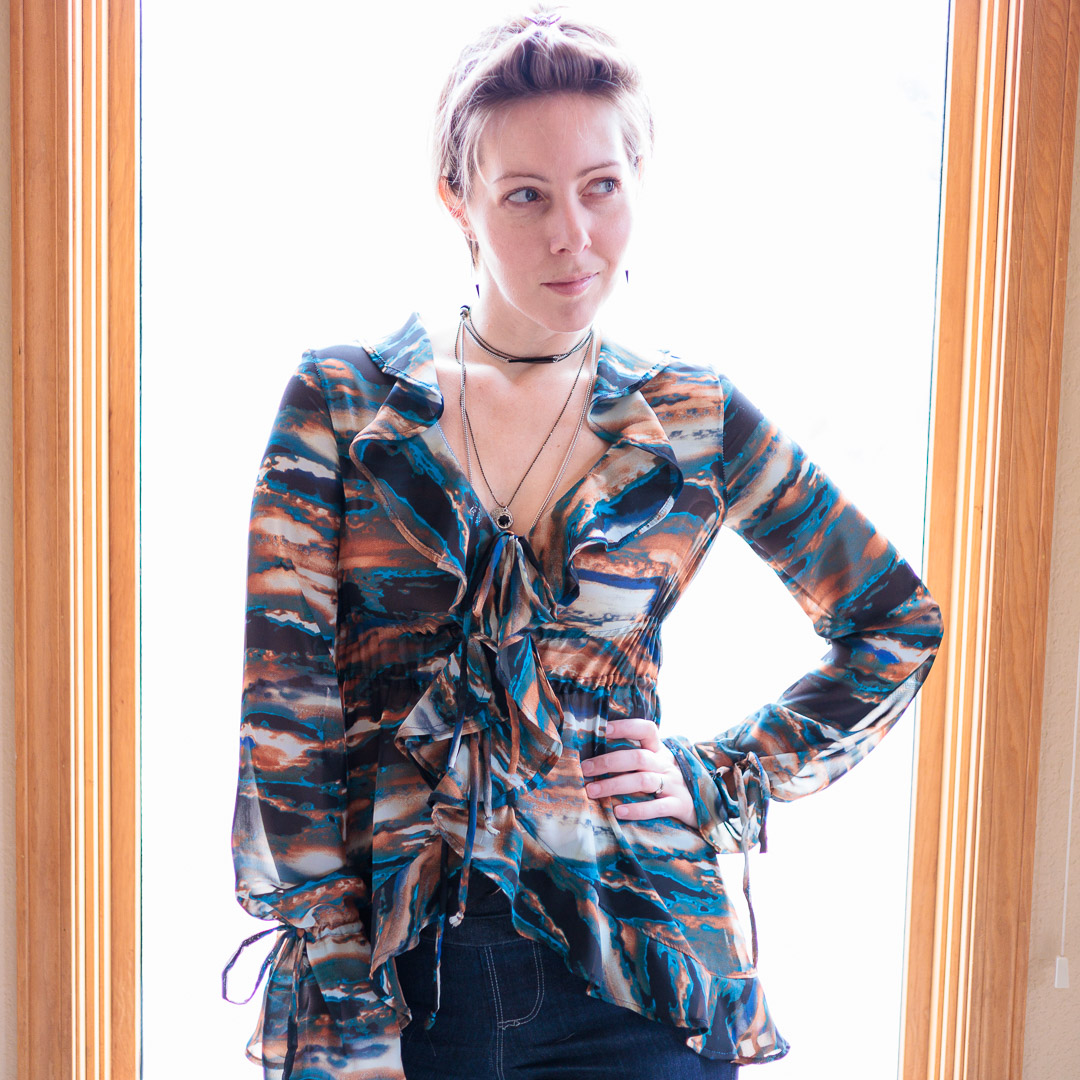
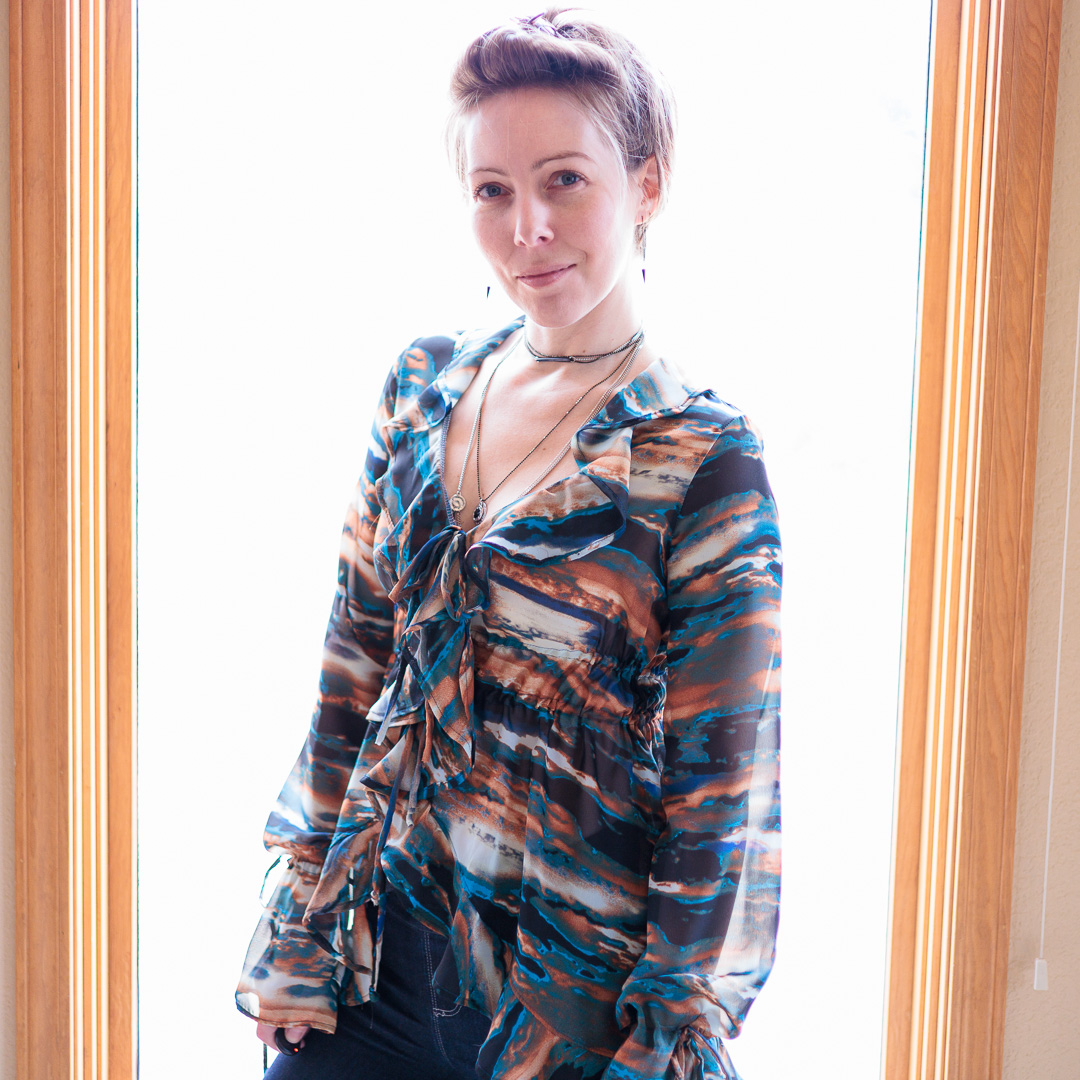
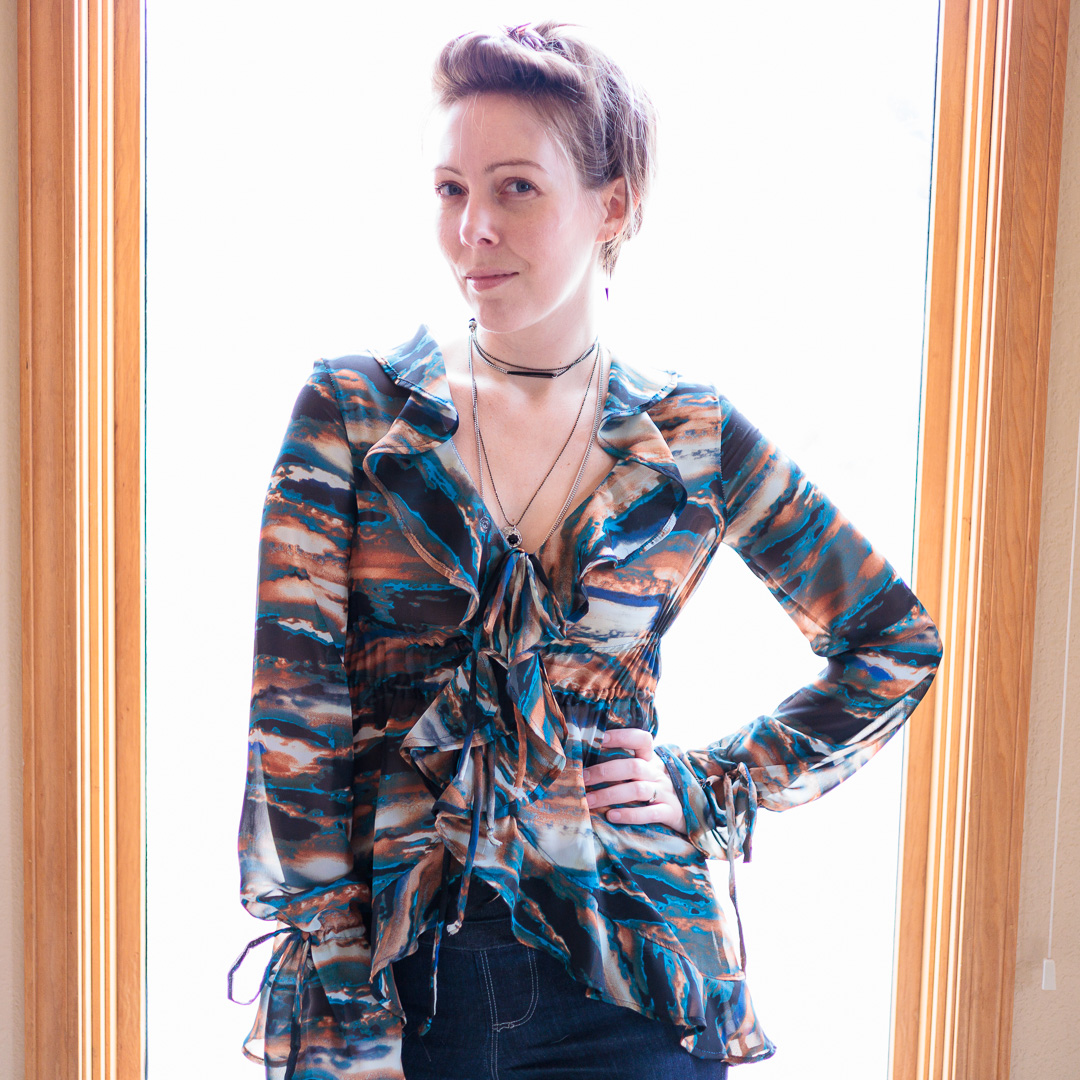
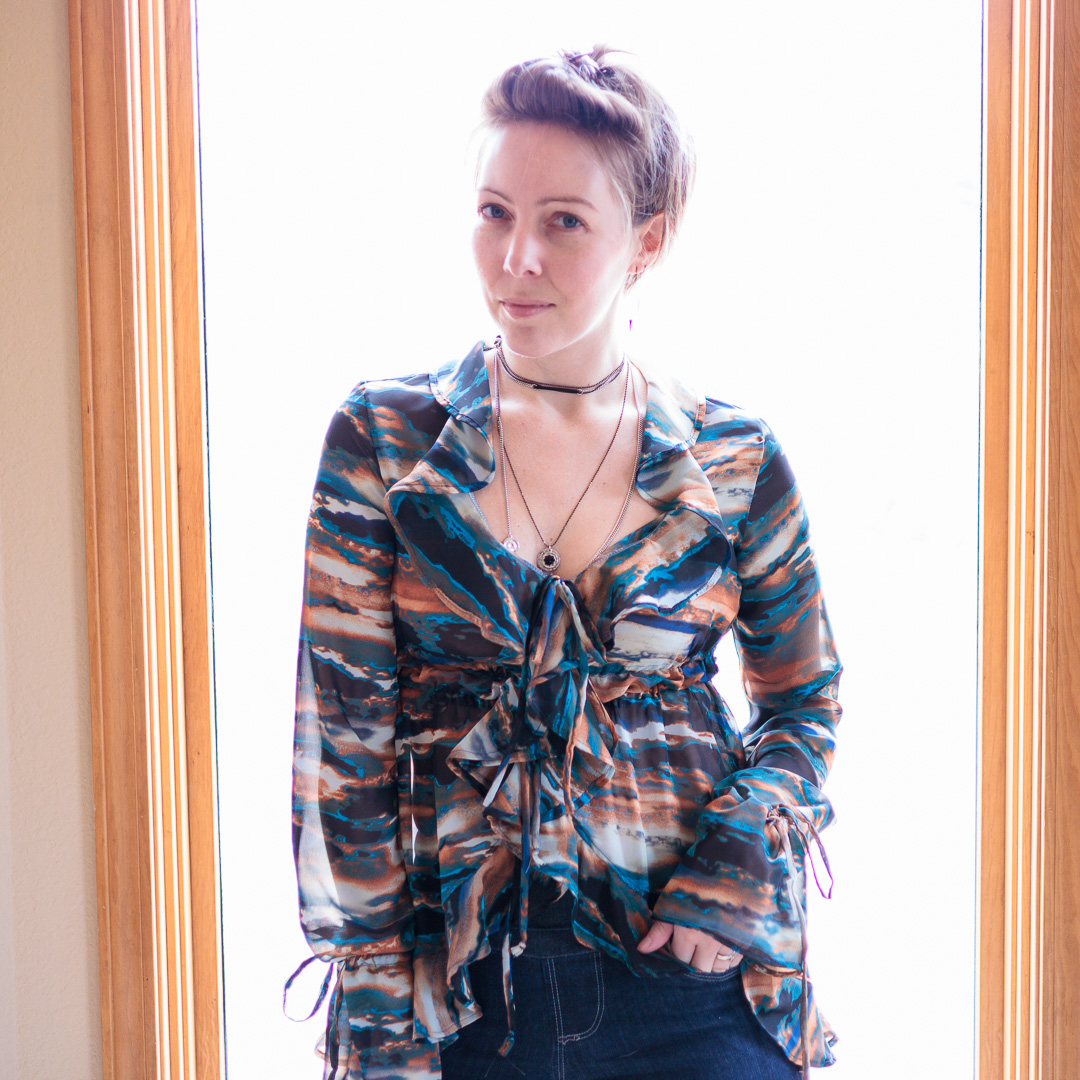
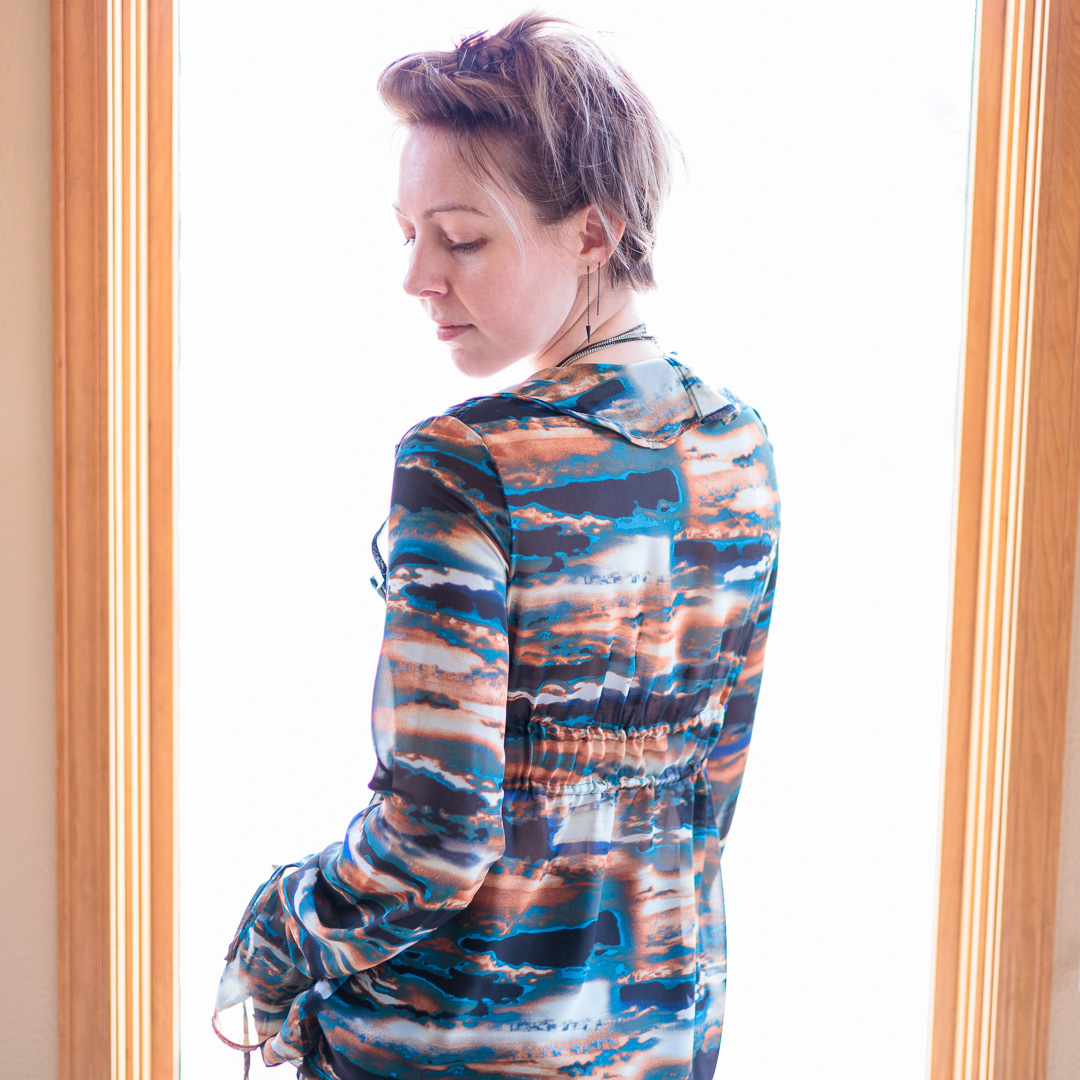
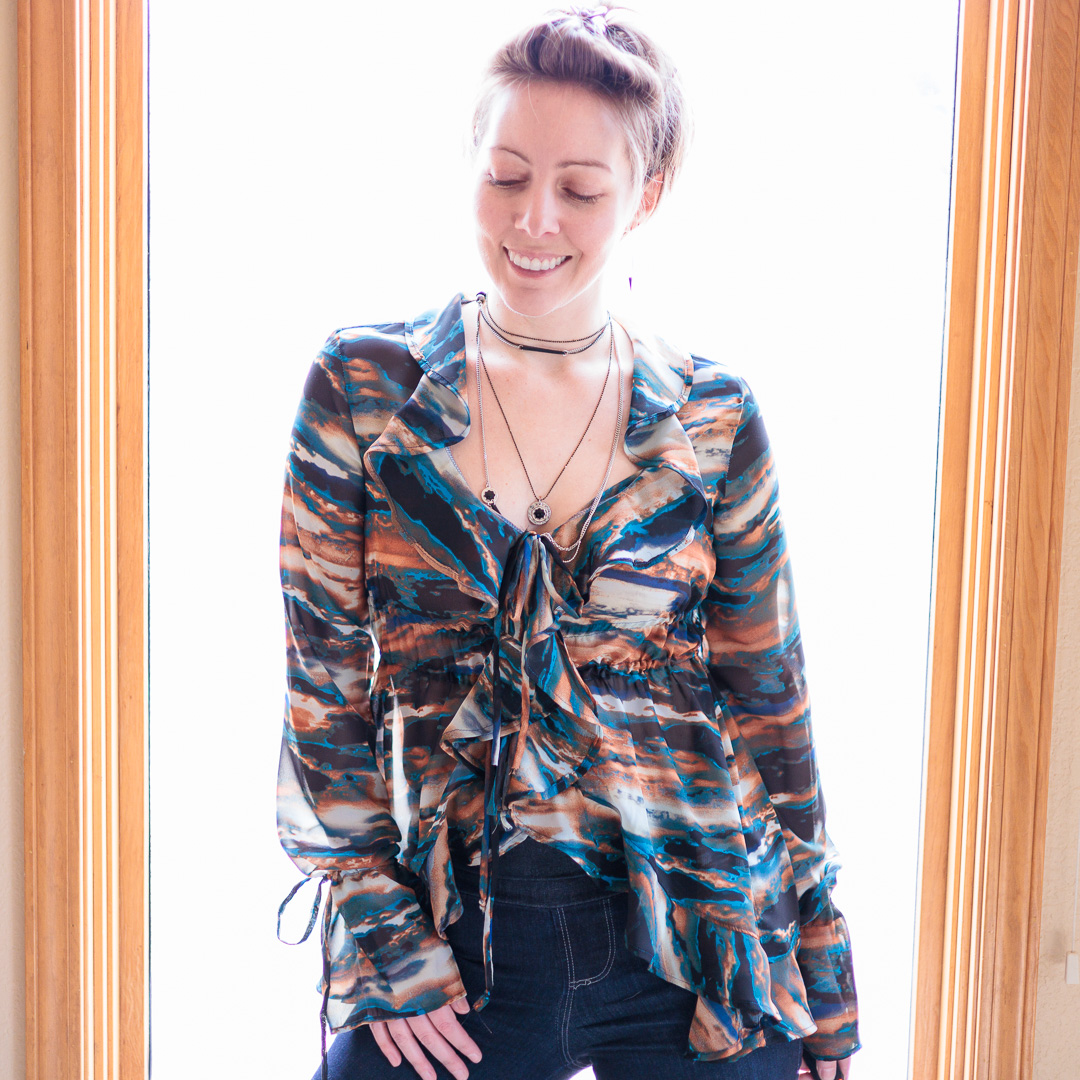
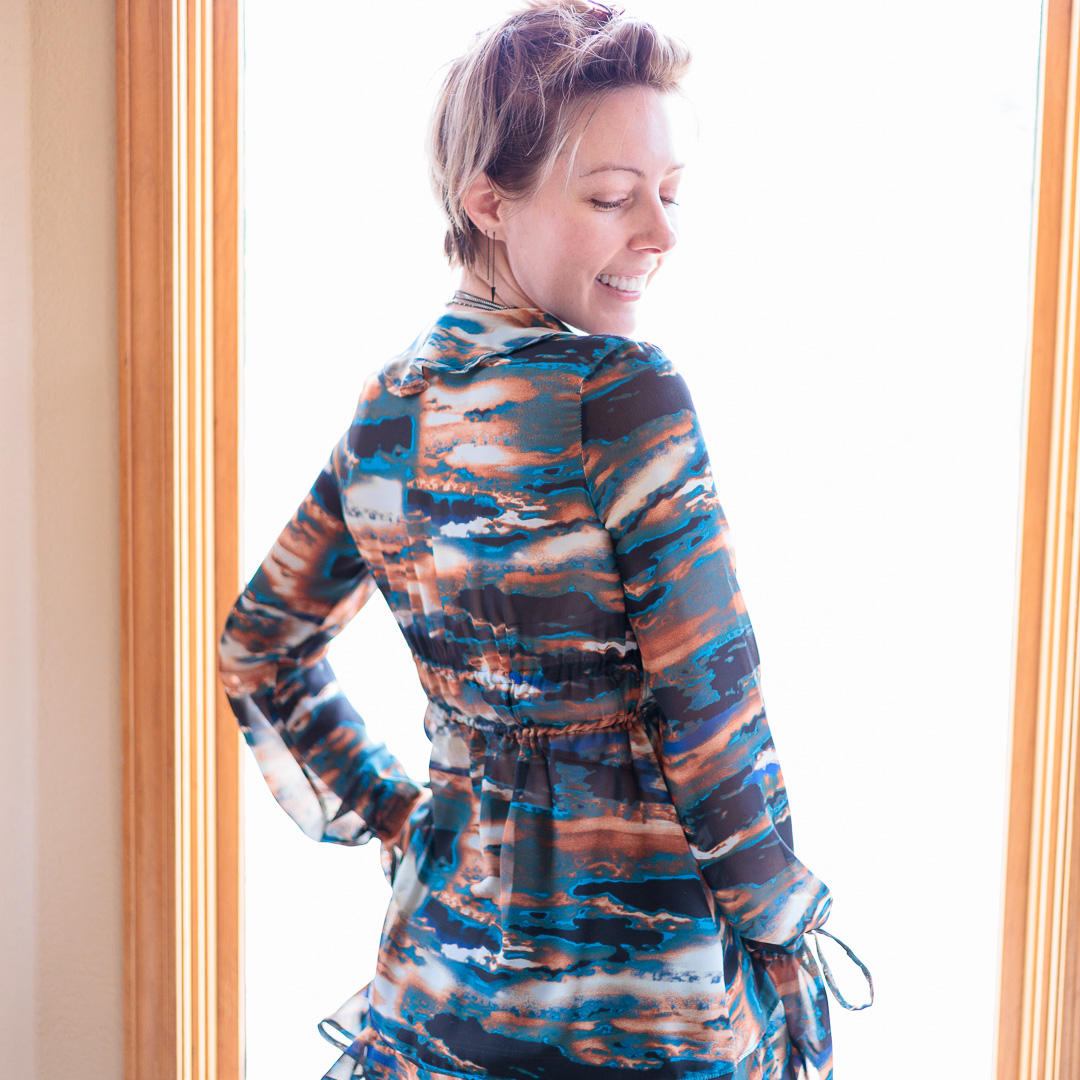
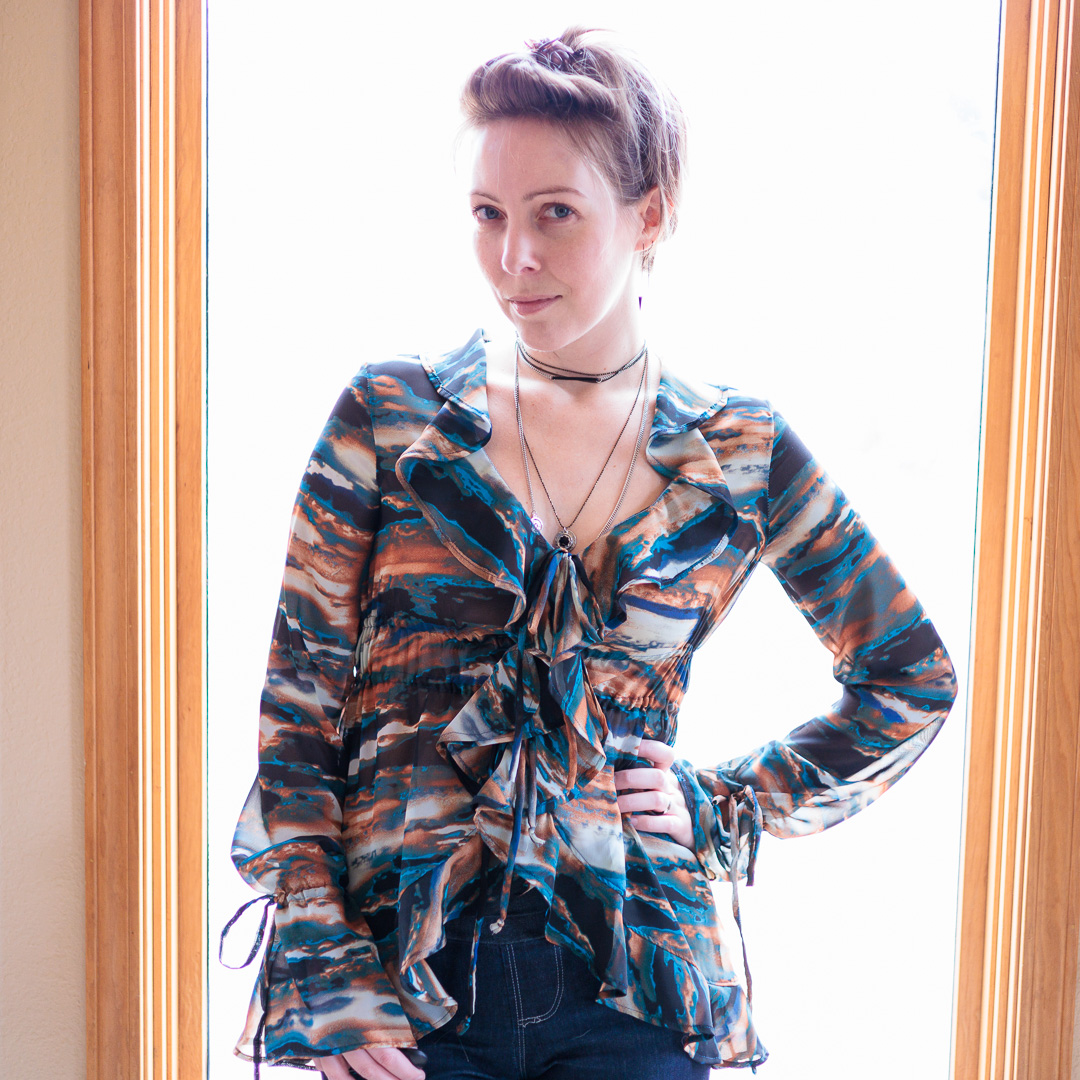
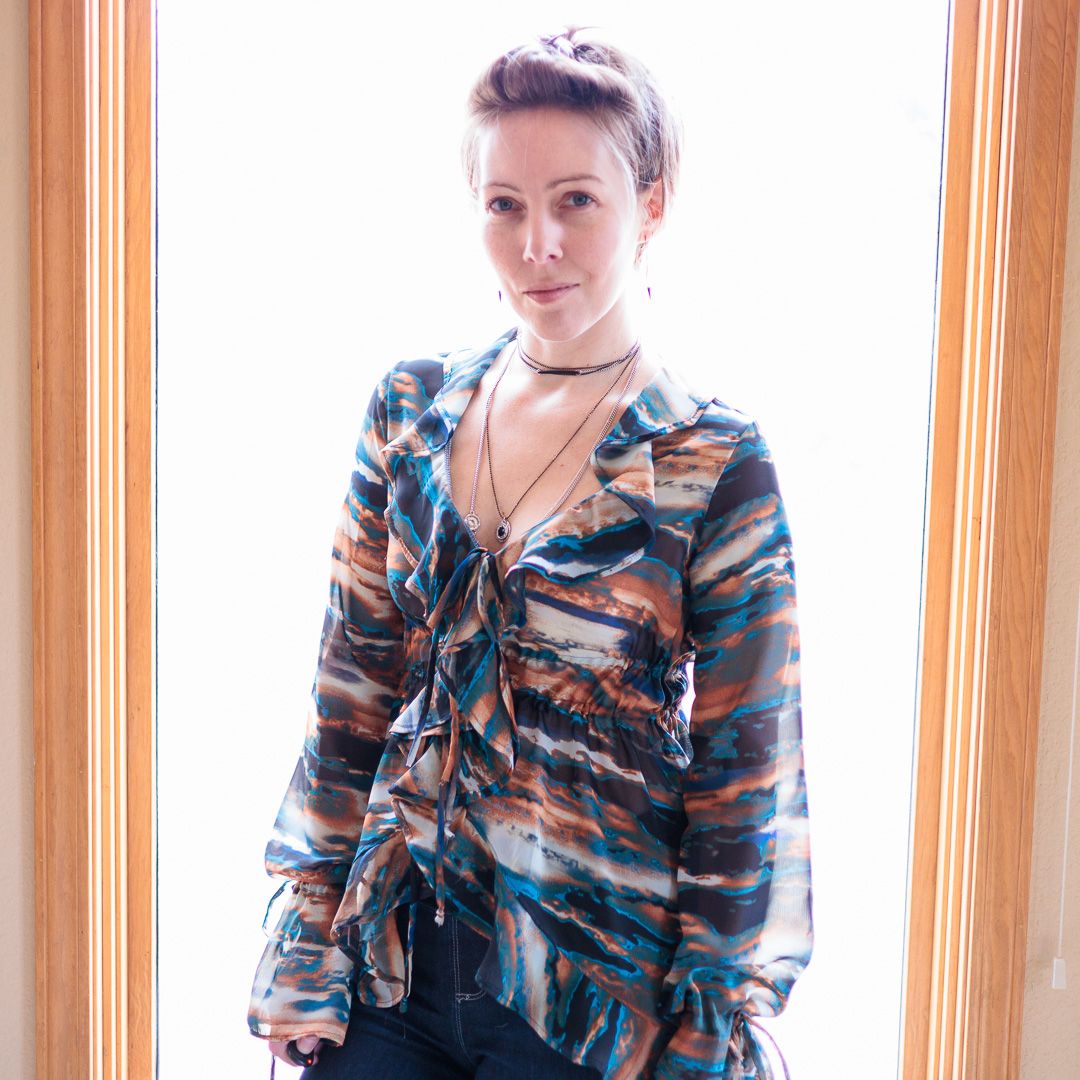
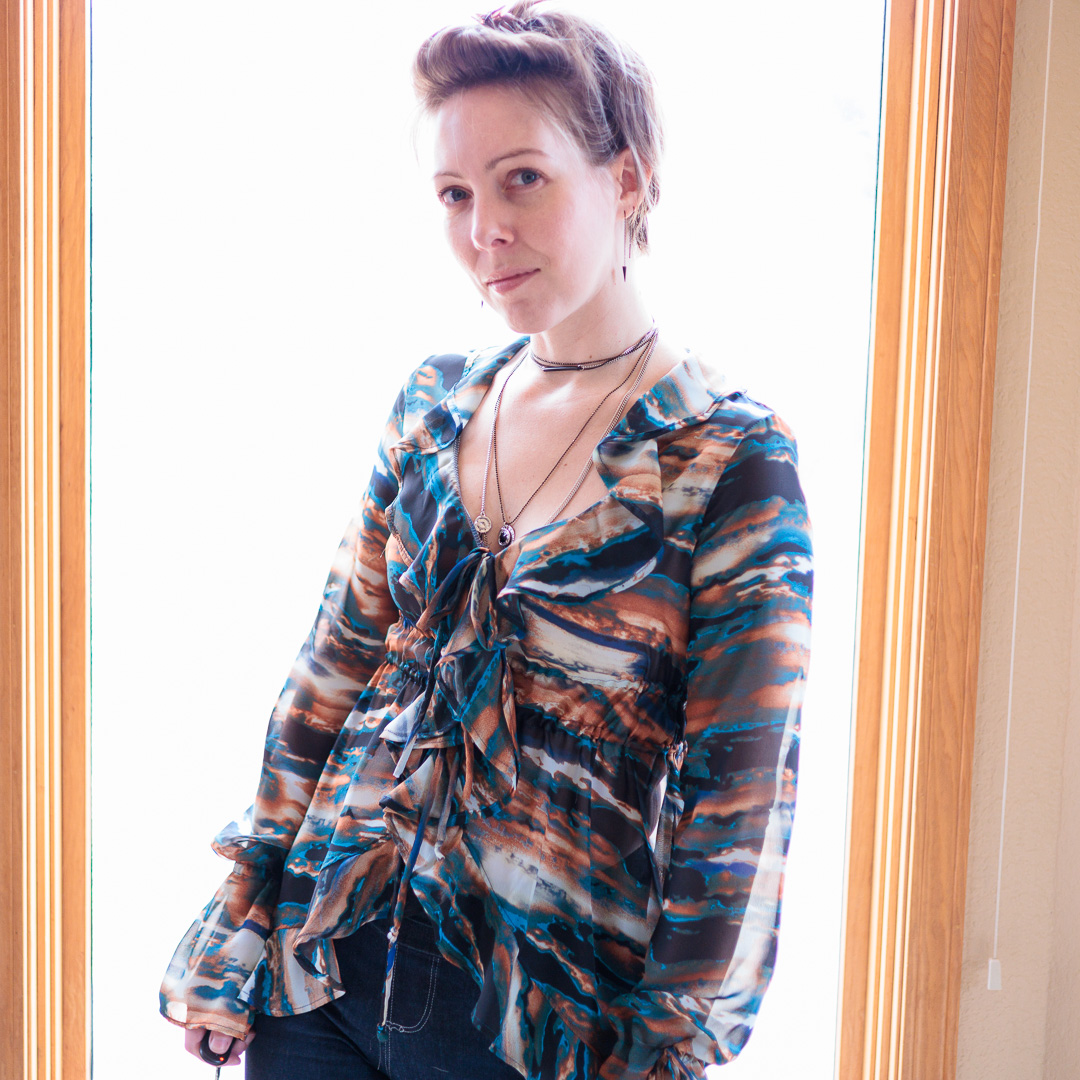
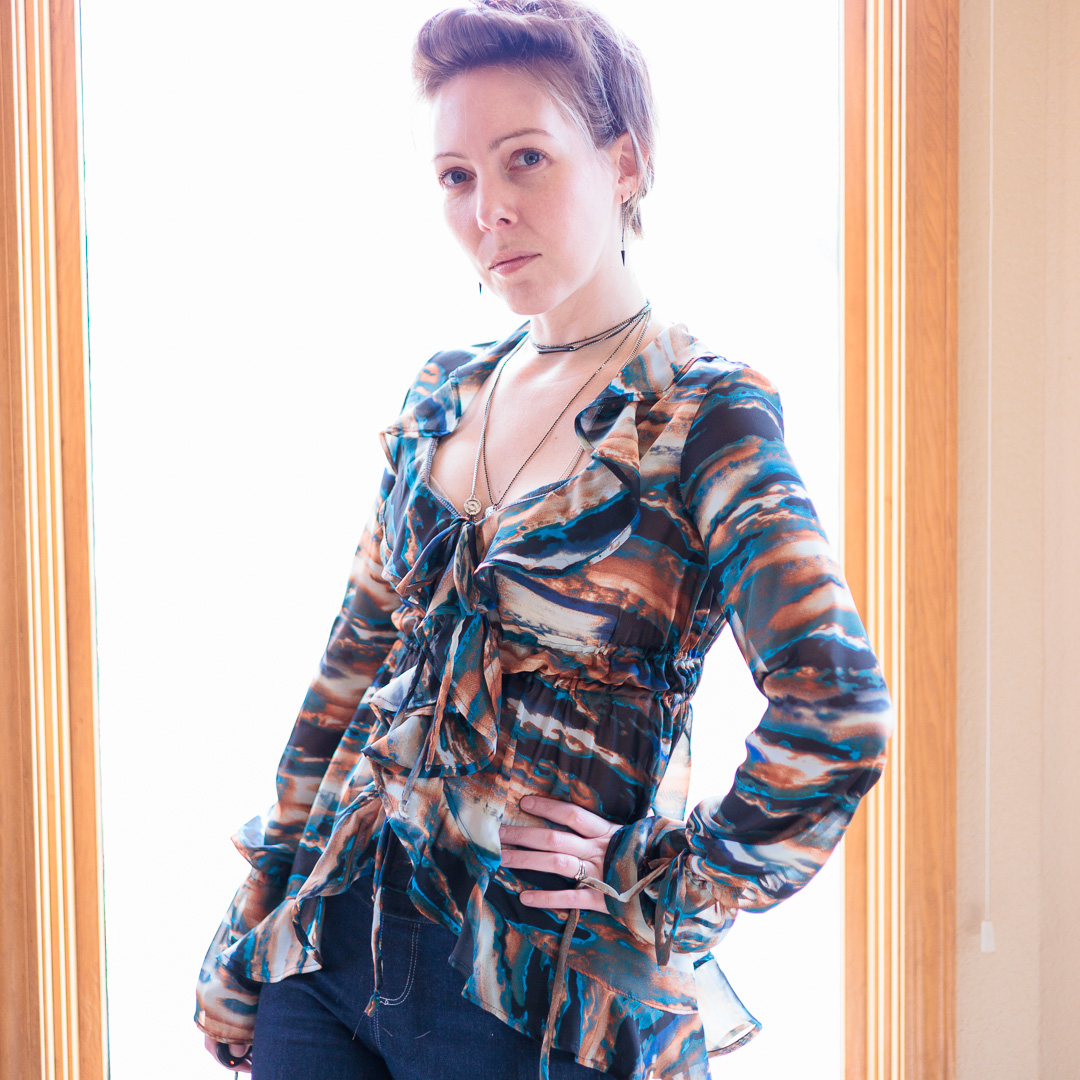
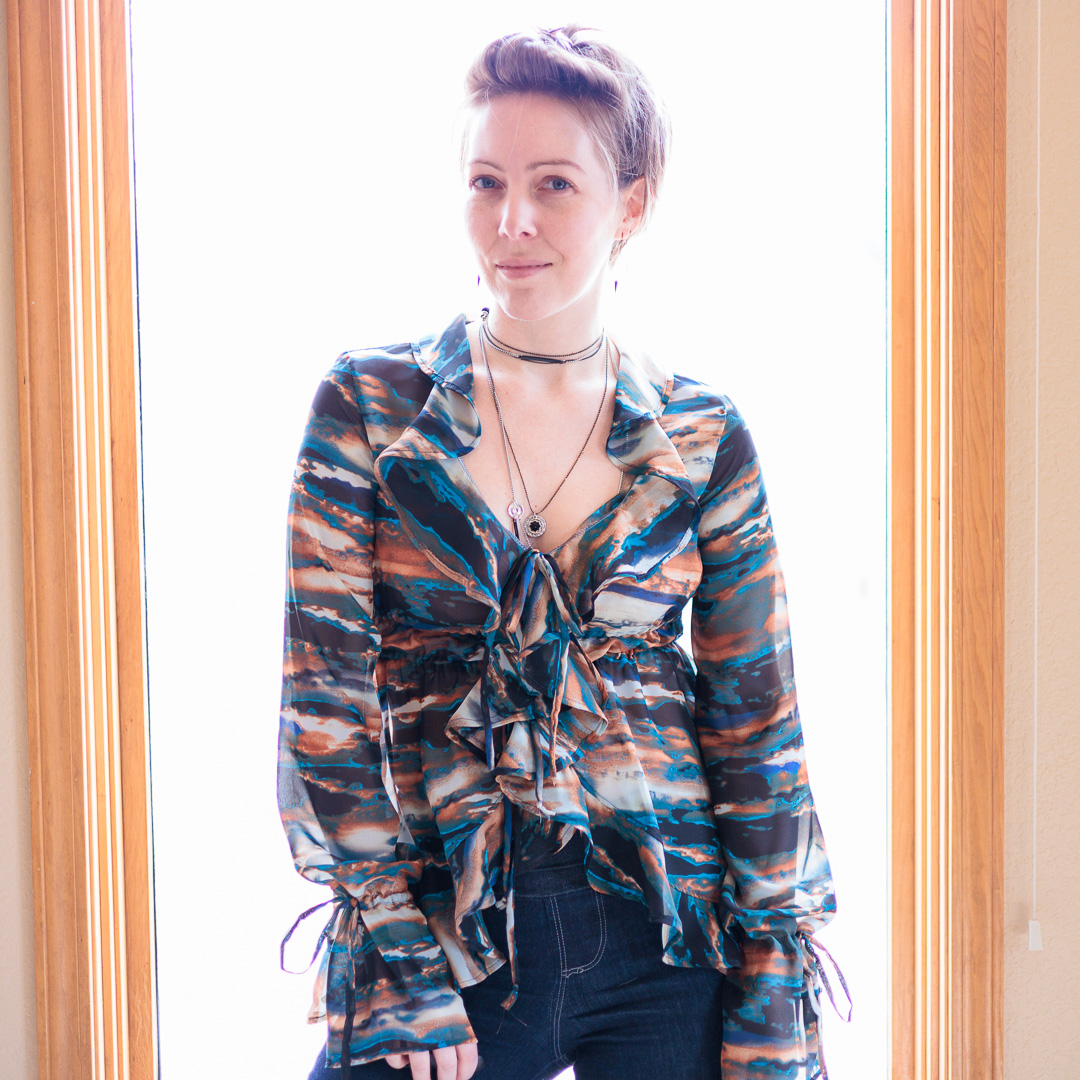
Chiffon is chiffon: it’s pretty much the worst thing to work with—and this one was doubly worse because the colors made it near impossible to create placement marks—but the garment always turns out really beautiful. It’s hard to beat that semi-sheer, floaty, airy, silky smoothness around your body. Which is why I continue to suffer through working with it every now and then. (I have another idea percolating that will use chiffon.)
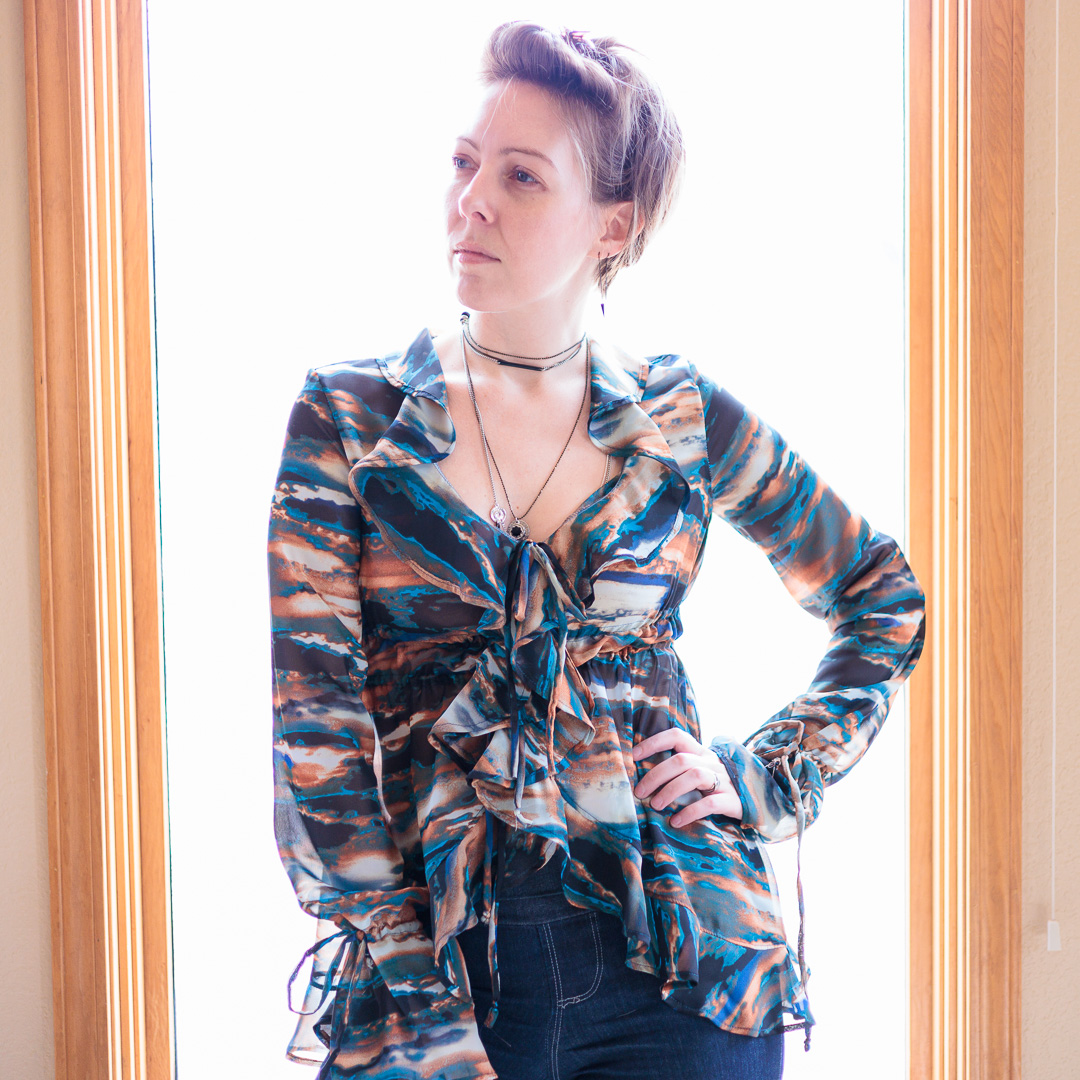
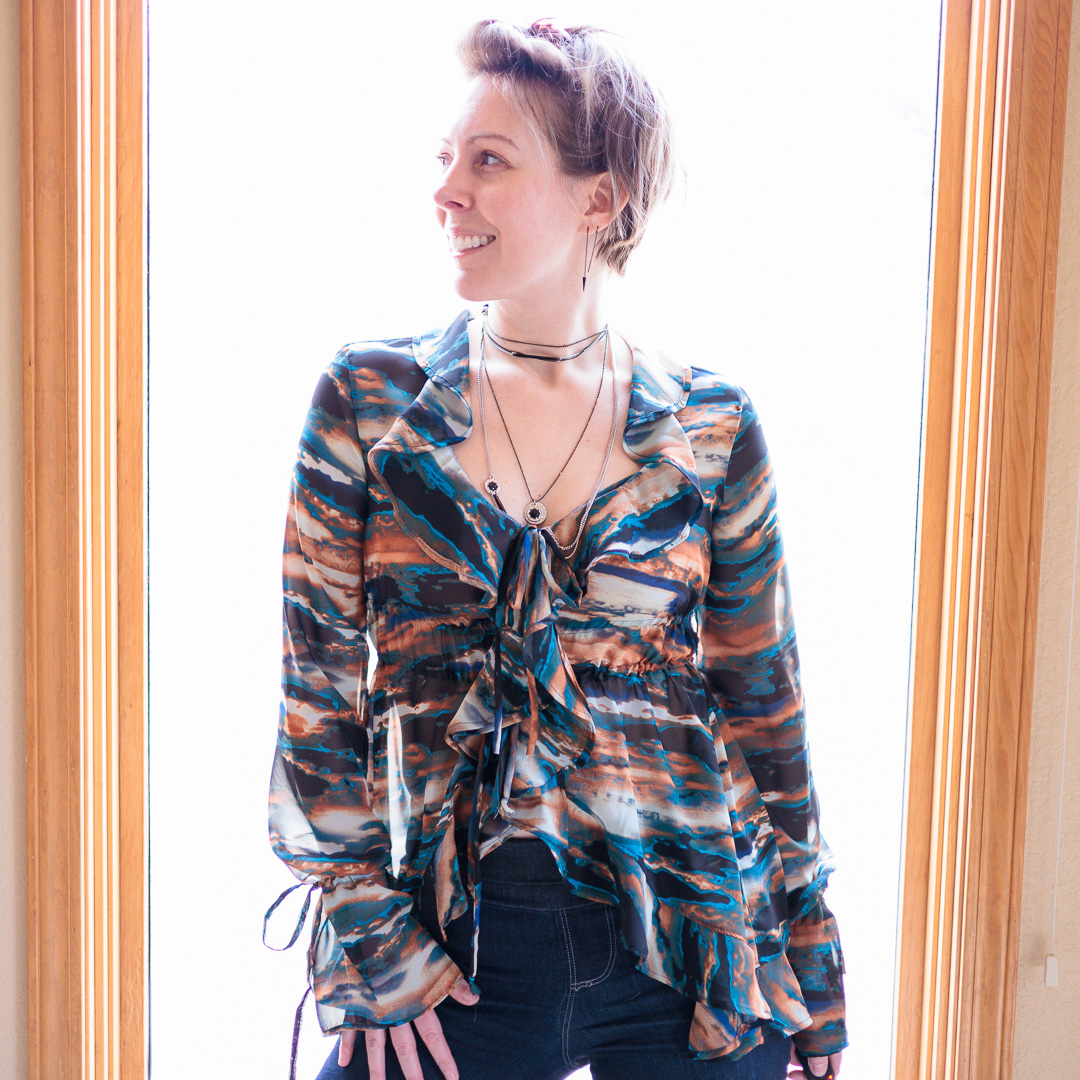
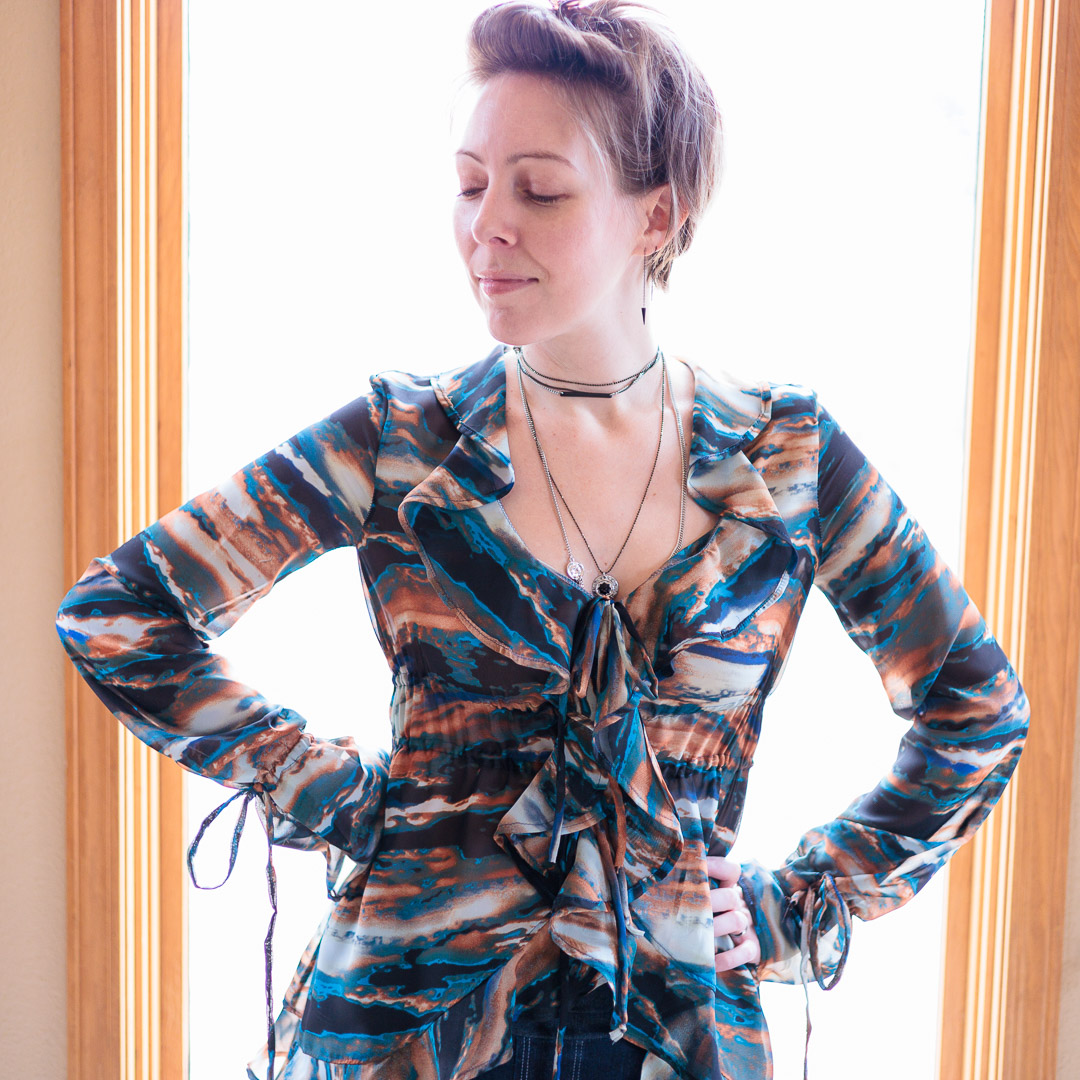
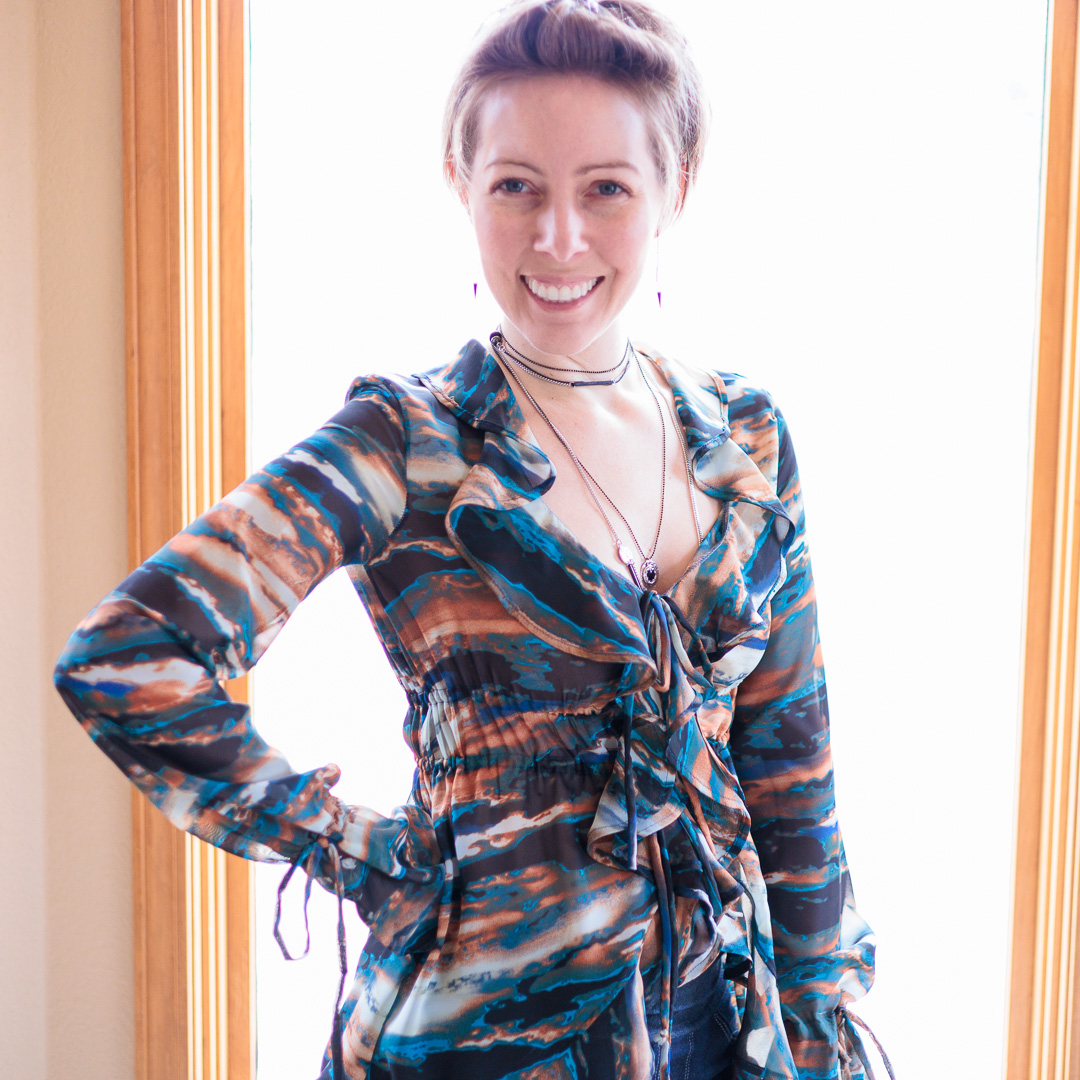
And this grunge-y print is so striking, especially with those oversaturated pops of blue. So pretty. The print on this makes it a very forgiving fabric for both hiding less-than-perfect sewing and a less-than-perfect body. So for all the headache of chiffon, it redeems itself.
About This Make
- size 36 graded to 40 at waist and below
What I Did Differently
- I completely omitted the bias binding and used my little narrow hem technique. It’s not a fun wrestle around more pronounced curves—like the front ends of the flounces—but I suspect it would have been a bigger nightmare trying to wrestle a binding around those curves.
- I cut all the ties on the grain or cross-grain as they fit on my fabric. I did not have enough fabric to cut them on the bias, and I didn’t see the point of doing that anyway.
- I combined the 4 waist tie pieces into 2 pieces. They probably had them as 4 pieces originally because they were cutting on the bias, so the full length of each waist tie probably wouldn’t fit along the bias. Combining them saved me the trouble of having to sew them together.
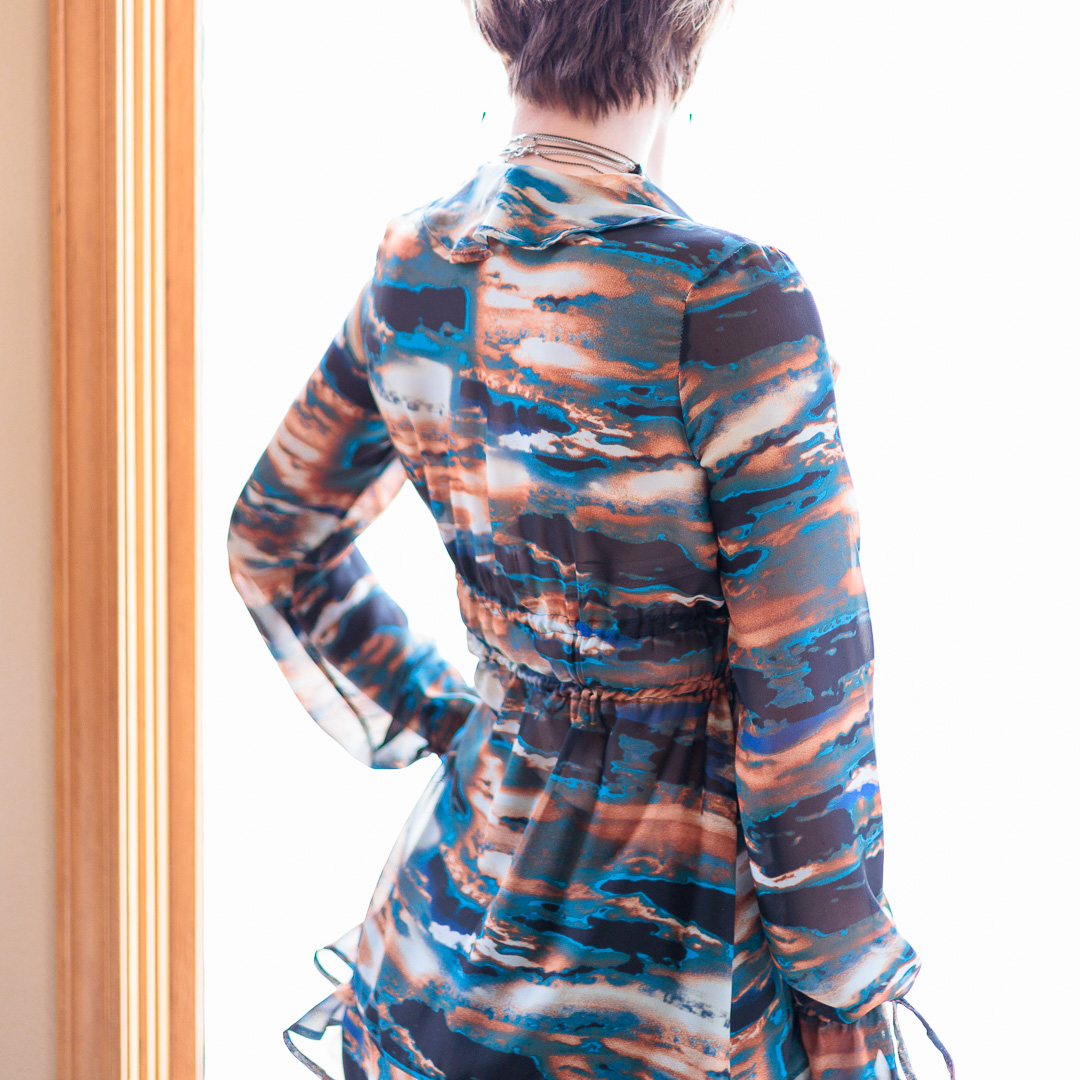
- I skipped binding the seam where the flounces attach to the bodice and just used my serger.
- I ignored their instructions for attaching the casings. I laid the right side of the casing to the wrong side of the bodice, aligning the bottom edge of the casing with the casing mark on the bodice and sewed a 1/4″ seam. Then I folded it down and pressed the wrong side of the casing against the bodice. Then, using my narrow hem trick, I folded the remaining raw edge under by about 1/4″ and sewed closed to the fold. This was so much easier than try to pre-press the casing edges under before sewing.
- Attached the sleeves using my serger instead of using French seams.
- I did not leave the sleeve edges raw. I didn’t want all that fraying around my hands, so I narrow-hemmed them.
- I did not use the webbing stuff they said to use for the buttonholes for the sleeve ties. Just used some tear-away stabilizer.
Notes for Next Time
- Narrow hem the flounces before attaching to the bodice.
- Don’t grade. Try a straight size 40, or maybe 42 since I fall between sizes. The armscyes feel too restrictive.
- Possibly lengthen the shoulder seams. They feel too short and create a tugging sensation.
So, is VikiSews Worth It?
Nope. Everything is too much of a fight; from obtaining the sizes you need to prepping the pattern to slogging through the instructions to arm-wrestling the fit. At least 99% of their patterns are not my vibe, anyway (seriously, how many shapeless, boxy, oversized shirts and pants do we need?) So, IMO, I won’t be missing much.
I do have plans to make one more version of this out of a very low-stretch sweater knit. I think that might placate the murder meter since I won’t have to hem anything, nor French seam anything, and I can make pattern markings I’ll actually be able to see, and can cut far more accurately since it’s a much more stable fabric.


Project Settings
Sewing Machine vs. Serger
| Sewing Machine | Serger |
|---|---|
|
|
Sewing Machine Settings
| Presser Foot | Stitch# | Stitch Width | Stitch Length | Needle | Top Thread Tension | Application |
|---|---|---|---|---|---|---|
| buttonhole (R) | 18 | 5 | 0.4 | 65/9 | 4 | sleeve tie openings |
| overedge (C) | 2 | 3.5 | 3.5 | 65/9 | 4 | casing attach |
| 1/4" | 2 | 3.5 | 3.5 | 65/9 | 4 | sleeve ties |
| overedge (C) | 1 | 0.5 | 3 | 65/9 | 4 | french seams step 1 |
| 1/4" | 1 | 3.5 | 3 | 65/9 | 4 | french seams step 2 |
| overedge (C) | 2 | 3.5 | 3 | 65/9 | 4 | french seams step 3 |
| 1/4" | 0 | 3.5 | 5 | 65/9 | 4 | baste |
| overedge (C) | 2 | 1 | 2.4 | 65/9 | 4 | flounce understitch |
| overedge (C) | 2 | 0 | 3.5 | 65/9 | 4 | narrow hem |
Serger Settings
| Stitch Name | 4-thread overlock |
|---|---|
| Needles | R, L |
| Finger | B |
| Threads | 4 |
| Tension Left Needle | 2.5 |
| Tension Right Needle | 2.5 |
| Tension Upper Looper | 3 |
| Tension Lower Looper | 3 |
| Cut Width | 6 |
| Stitch Length | 2.5 |
| Differential | 1.0 |
| Application | seams |
Leave a Reply