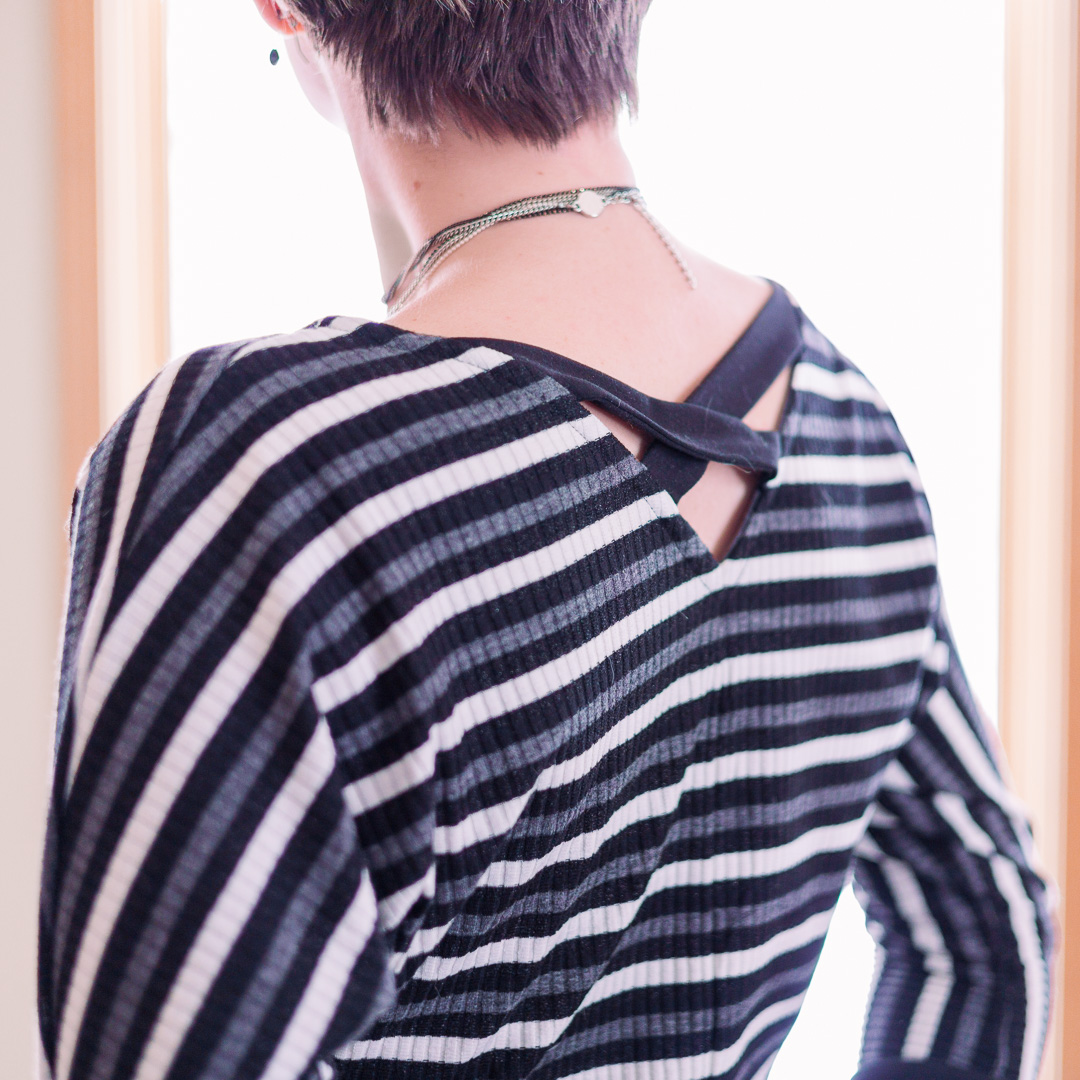
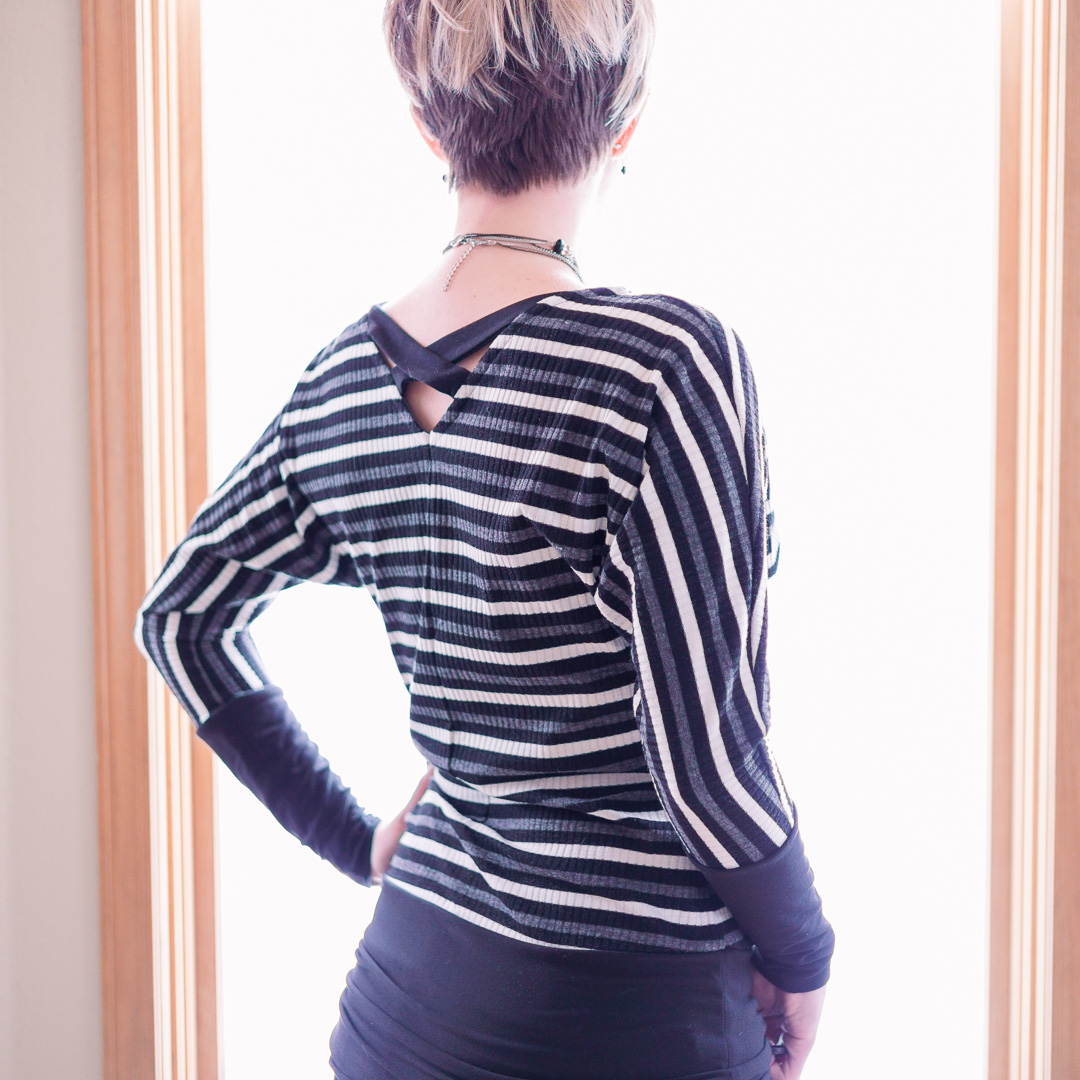
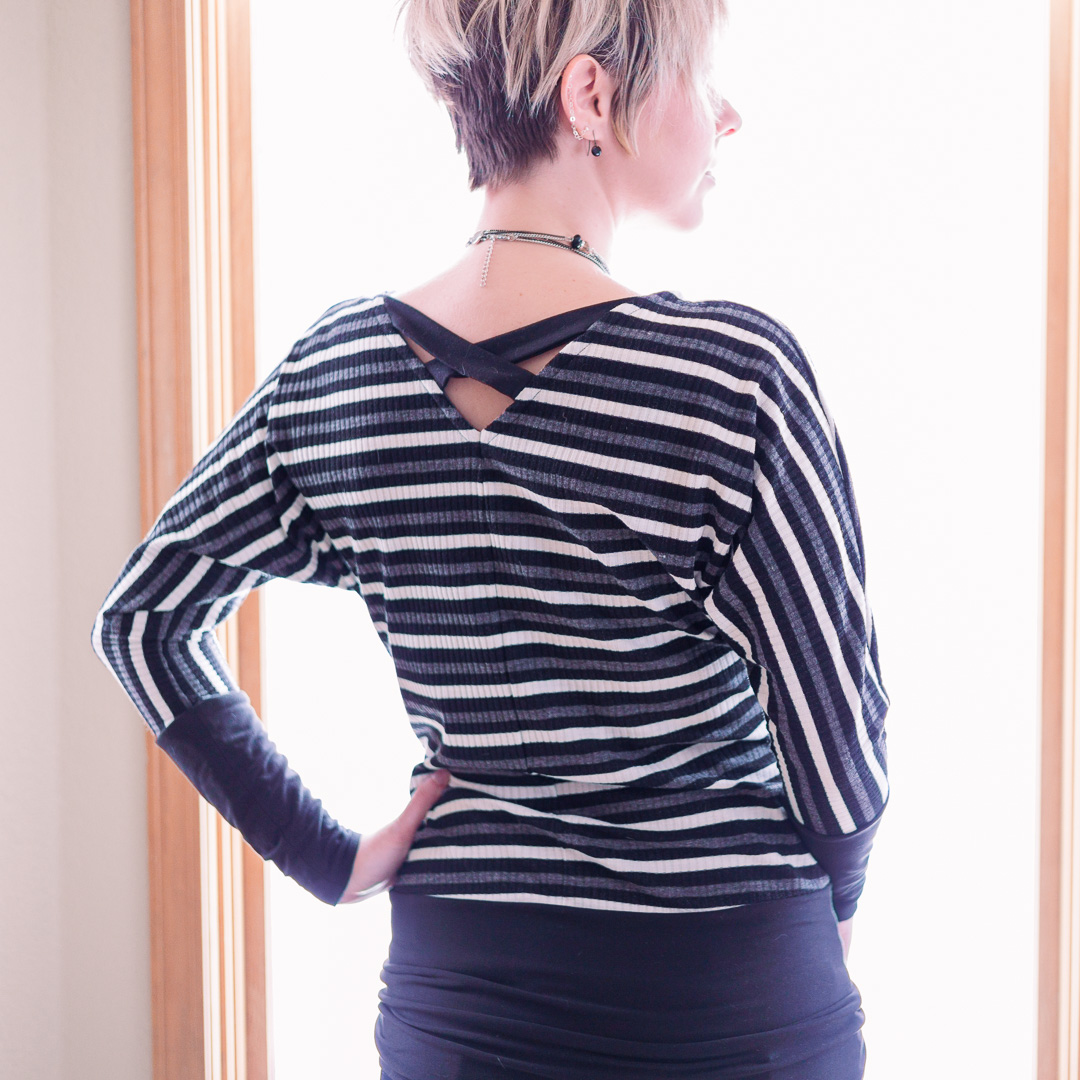
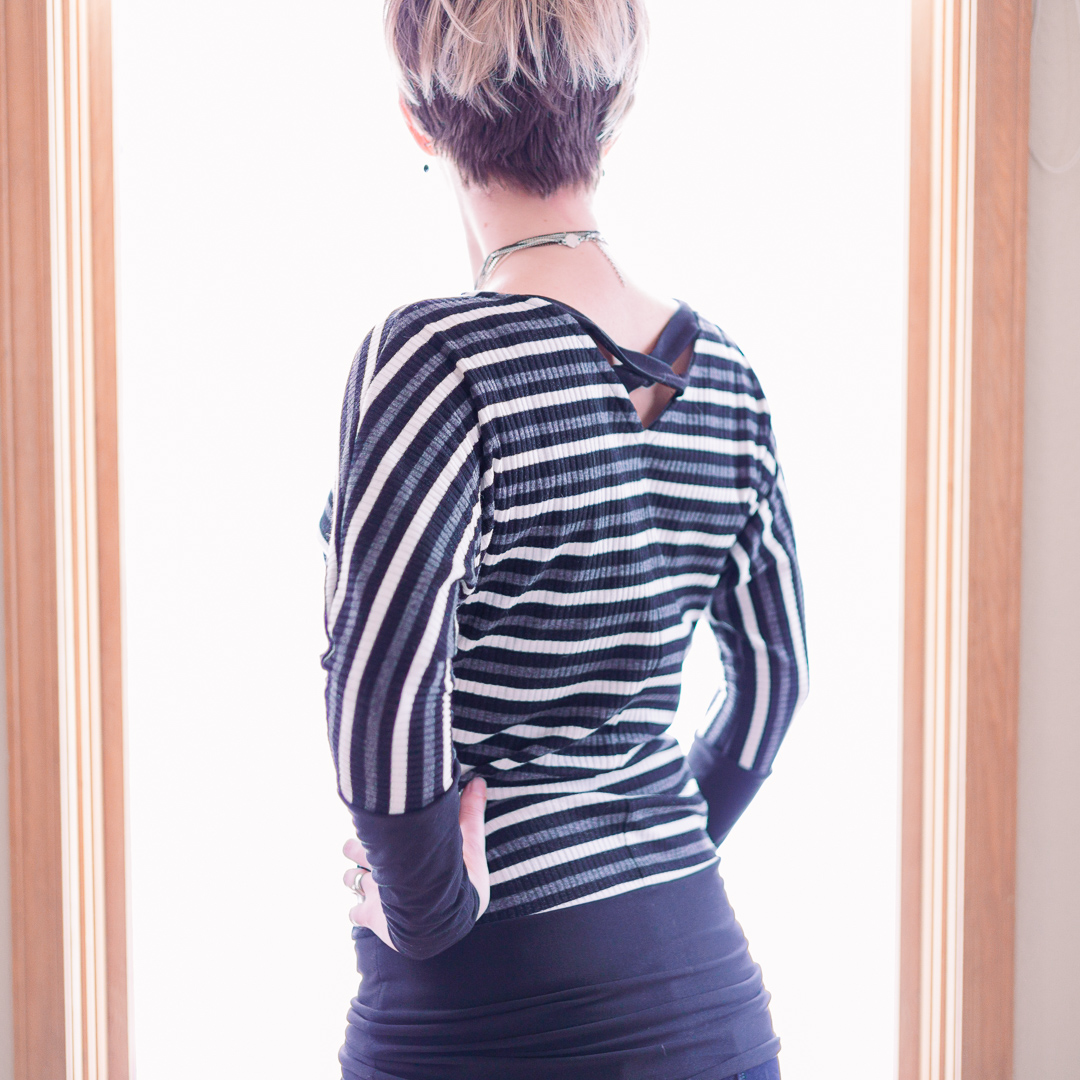
I’ve rediscovered my Danielle tops in my closet—my favorite being the one I actually messed up. So I deliberately “messed up” this one, too, and I think I’m committing to messing them up from now on. (Also, wow: I made my first version of this in 2020 and that was almost 4 years ago. 🤯)

About the Fabrics
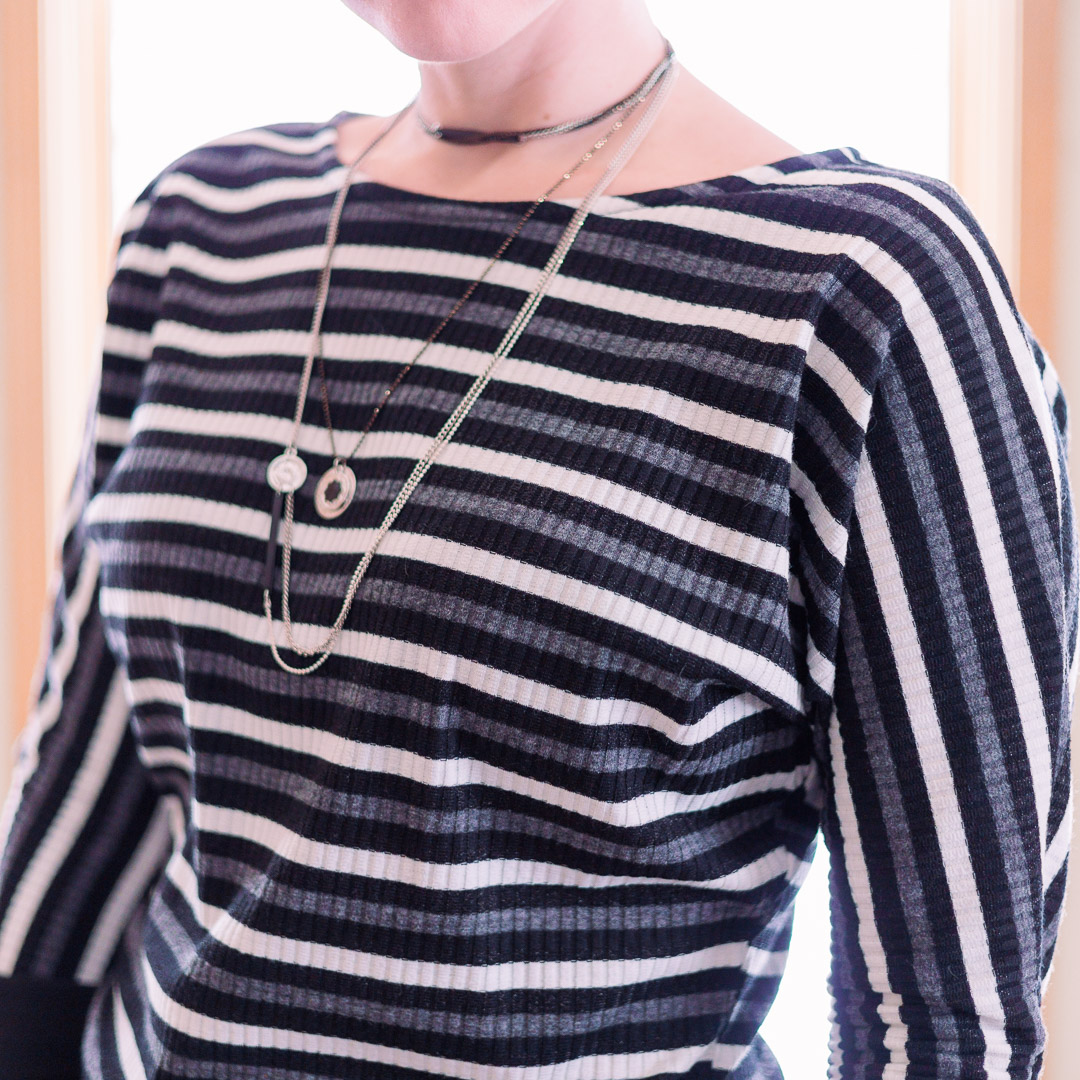
Main: 2 yards Black Shimmer, White and Grey Horizontal Stripe Midweight Ribbed Sweater Knit from Cali Fabrics
- FABRIC CONTENT: Poly/Spandex
- FABRIC WIDTH: 60″
- WEIGHT: Midweight
- STRETCH: 4-way 150% horizontal, 20% vertical
Labeled a designer deadstock, I just love the colors of this sweater knit. I do kind of question the 60″ fabric width, though. Either that was wrong, or it really shrunk when I pre-washed it. It’s less fluid than I imagined for a sweater knit, and it feels more lightweight than midweight to me; definitely not a go-to on a cold day. So it doesn’t lay as nicely as the DBP on my stone grey Danielle.
Accents: Black Double Brushed Poly Spandex Knit from Cali Fabrics
- FABRIC CONTENT: 96% Polyester/4% Lycra
- FABRIC WIDTH: 63″
- STRETCH: 4-way 150%
- WEIGHT: 5.5oz (Light Midweight)
I do declare: black DBP should be a fabric stash staple for everyone. I actually had a few remnants I used up, and then I bought another 2 yards to use on an upcoming Ginger Dress. DBP is one of the fabric rock stars in my sewing room. However, I do not like it for straps. I knew this already, but I gave it another shot here, and it only affirmed my stance. Better to use a more structured knit—even, I daresay, the awful french terry—for straps. DBP ends up looking too stretched out with all it’s lovely drapey-ness.
Binding: Dark Gray Heather Performance Knit from Nike/Under Armour via Cali Fabrics
- Polyester
- light/midweight
- 4-way 50% Horizontal, 10% Vertical
About the Pattern
I’m sure I nitpicked this the first time around, so I won’t beat a dead horse except to say something is just off about Sinclair instructions. Lots of detail, but maybe it needs editing. Like, instead of saying the thing in 30 words in a confusing order, you can rewrite it 15 and be much clearer.
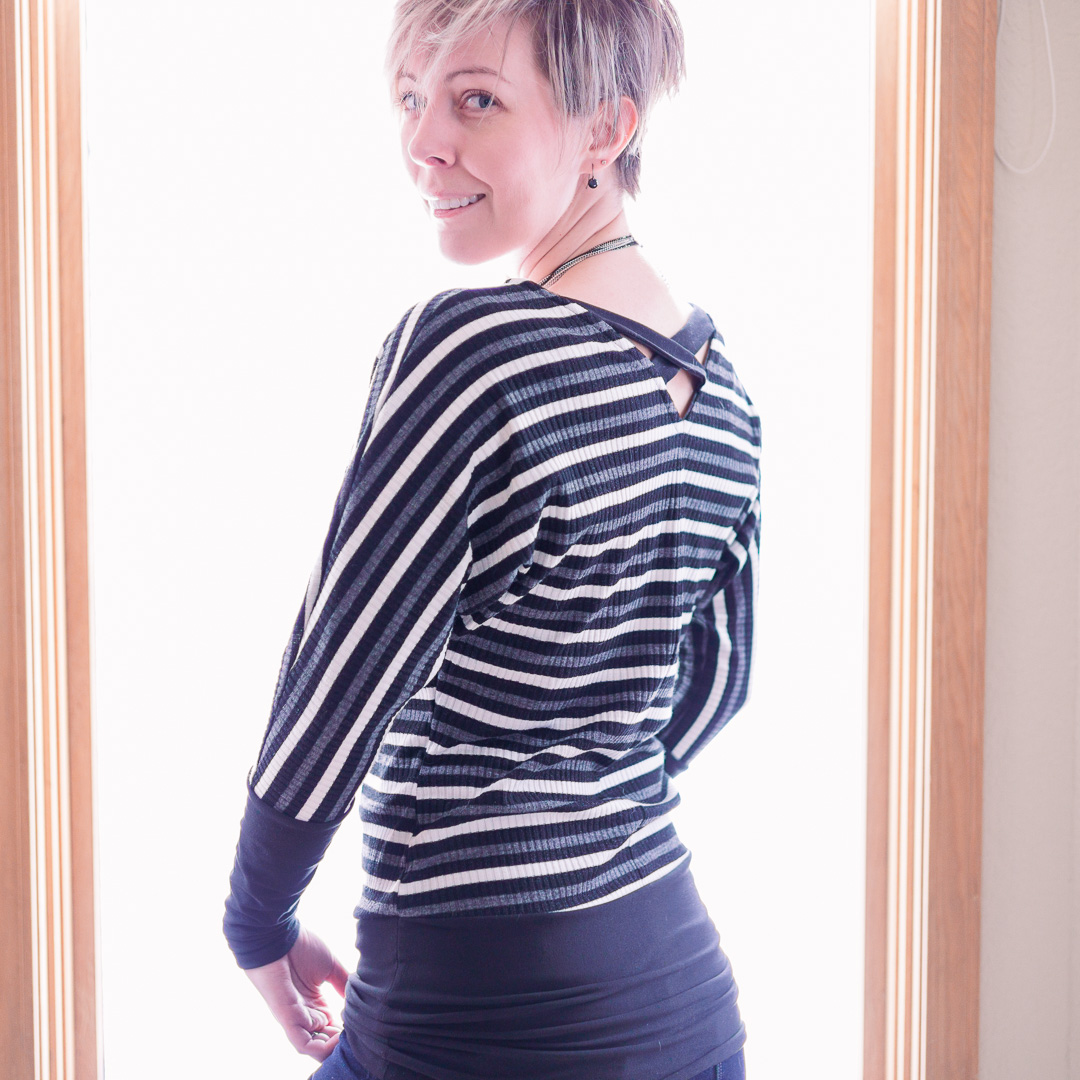
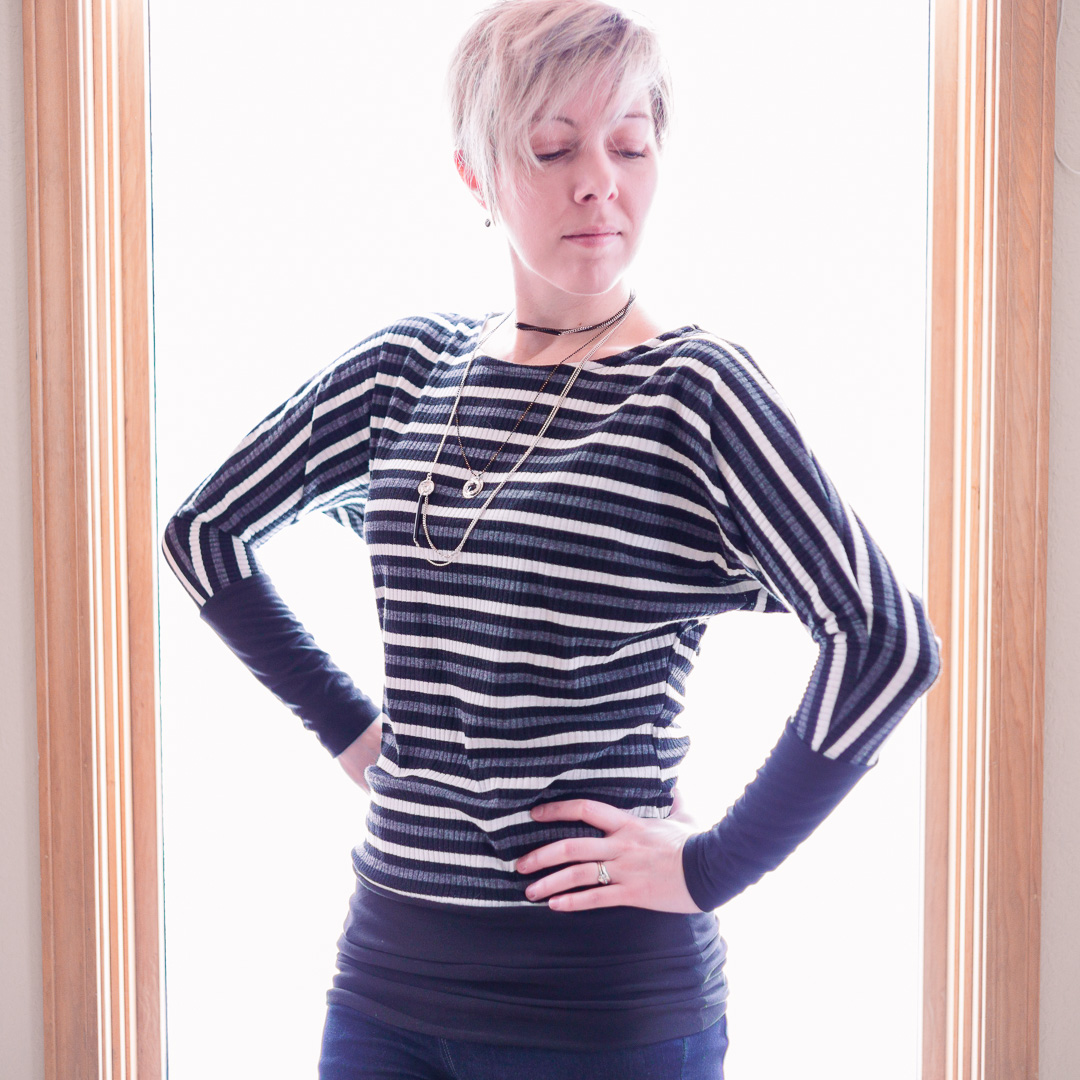
Instructions aside, the finished garment is great: lovely back detail, comfortable and flattering silhouette, nice finish with the neck binding, comfy cuffs, long hem band to play with. All yummy.
What I Did Differently
- Deliberately “messed up” the hem band and added a total of 2″ to the circumference to replicate what happened on my stone grey version.
- My sweater knit fabric was a bit tight, width-wise, so I had to move 1.5″ from the sleeves to the cuffs.
- Added some center marks to the binding and the front neckline to help line up the binding.
- Skipped unnecessary notches (top shoulder seams and side seams) and prioritized stripe-matching.
- Condensed the binding steps into
- Pin right sides together, matching raw edges, and stitch.
- Fold over to the inside so the binding is fully hidden against the back side of the fabric and encasing the seam allowance, then topstitch along the far edge of the binding.
Notes for Next Time
- Gravitate toward more fluid fabrics. This one, while striking, is not as comfortable as my other versions.
- Add interfacing to straps if using DBP or other fluid fabrics.
- Lengthen the band to wear as a dress.


Project Settings
Sewing Machine vs. Serger
| Sewing Machine | Serger |
|---|---|
|
|
Sewing Machine Settings
| Presser Foot | Stitch# | Stitch Width | Stitch Length | Needle | Top Thread Tension | Application |
|---|---|---|---|---|---|---|
| standard zig-zag (A) | 5 | 1.0 | 4 | blue tip | 4 | seams |
| overedge (C) | 2 | 3.5 | 3.5 | blue tip | 4 | seam binding topstitch |
Serger Settings
| Stitch Name | 4-thread overlock |
|---|---|
| Needles | R, L |
| Finger | B |
| Threads | 4 |
| Tension Left Needle | 4 |
| Tension Right Needle | 4 |
| Tension Upper Looper | 4 |
| Tension Lower Looper | 4 |
| Cut Width | 6 |
| Stitch Length | 2.5 |
| Differential | 1.0 |
| Application | seams |
Leave a Reply