My first serger. I’ve been sewing since 2018, so I have some general sewing experience under my belt, which I think creates a great foundation for learning how to sew with a serger. You can spend your entire sewing life never having a serger and you would be totally fine. A regular sewing machine can accomplish everything you need.
So why would you get a serger at all?
- It’s a HUGE time-saver. You sew, trim, and finish your seams all in one step. It also accomplishes several other techniques in a fraction of the time, like gathers—that includes gathering one piece of fabric and sewing it to a flat piece all in one step, attaching elastic, piping, rolled hem finishes on delicate fabrics, and so on. (Note: additional presser feet are required for some of these techniques.)
- Professional finish. A serger can really up your sewing game with the professional-looking finish it adds to your garments.
- Ideal for knits. 99% of what I sew are knits. While you can sew them just fine on a regular sewing machine, a serger really shines in this arena! The stretch stitches made by a serger are unbeatable.
- Super convenient for wovens. Being that woven fabric frays, sewing and trimming and finishing a seam all in one step is glorious. Yep. So good, I’m calling it glorious.
So, after sewing everything on a regular sewing machine since 2018, I feel ready to step into the world of sergers. (Also, my husband said he would buy me one last Christmas once I decided which one I wanted. ❤)
Off I went to decide! In the time I’ve been sewing, I kept my eye on various fabric and pattern social groups and bookmarked discussions about serger recommendations. The popular ones I made note of were:
- Brother 1043d
- Janome MOD-8933
- Juki MO-654de
- Baby Lock Vibrant
I quickly nixed the Brother 1043d even in spite of the motherload of reviews that are mostly positive. It was way too reminiscent of my first sewing machine, the Singer Heavy Duty 4423. That also had a ton of reviews and a really good overall rating. But I should have paid attention to the negative reviews, because the thing only lasted 3 months before it started seizing up and became unusable. And for the price to repair it, you could buy a completely new one. More on that story here.
The Janome MOD-8933 fell out of the running next even though I am a fan of the Janome brand thanks to my sewing machine which I adore. But I know how picky Janome is with its accessories. My sewing machine does not like universal accessories; everything from needles to presser feet need to be Janome-specific in order to work correctly. That said, with those specific accessories, the thing works like a DREAM. But I wanted something more universal-friendly with a serger.
Which left me to compare the Juki MO-654de and the Baby Lock Vibrant, both well-made machines by good brands at a reasonable price point.
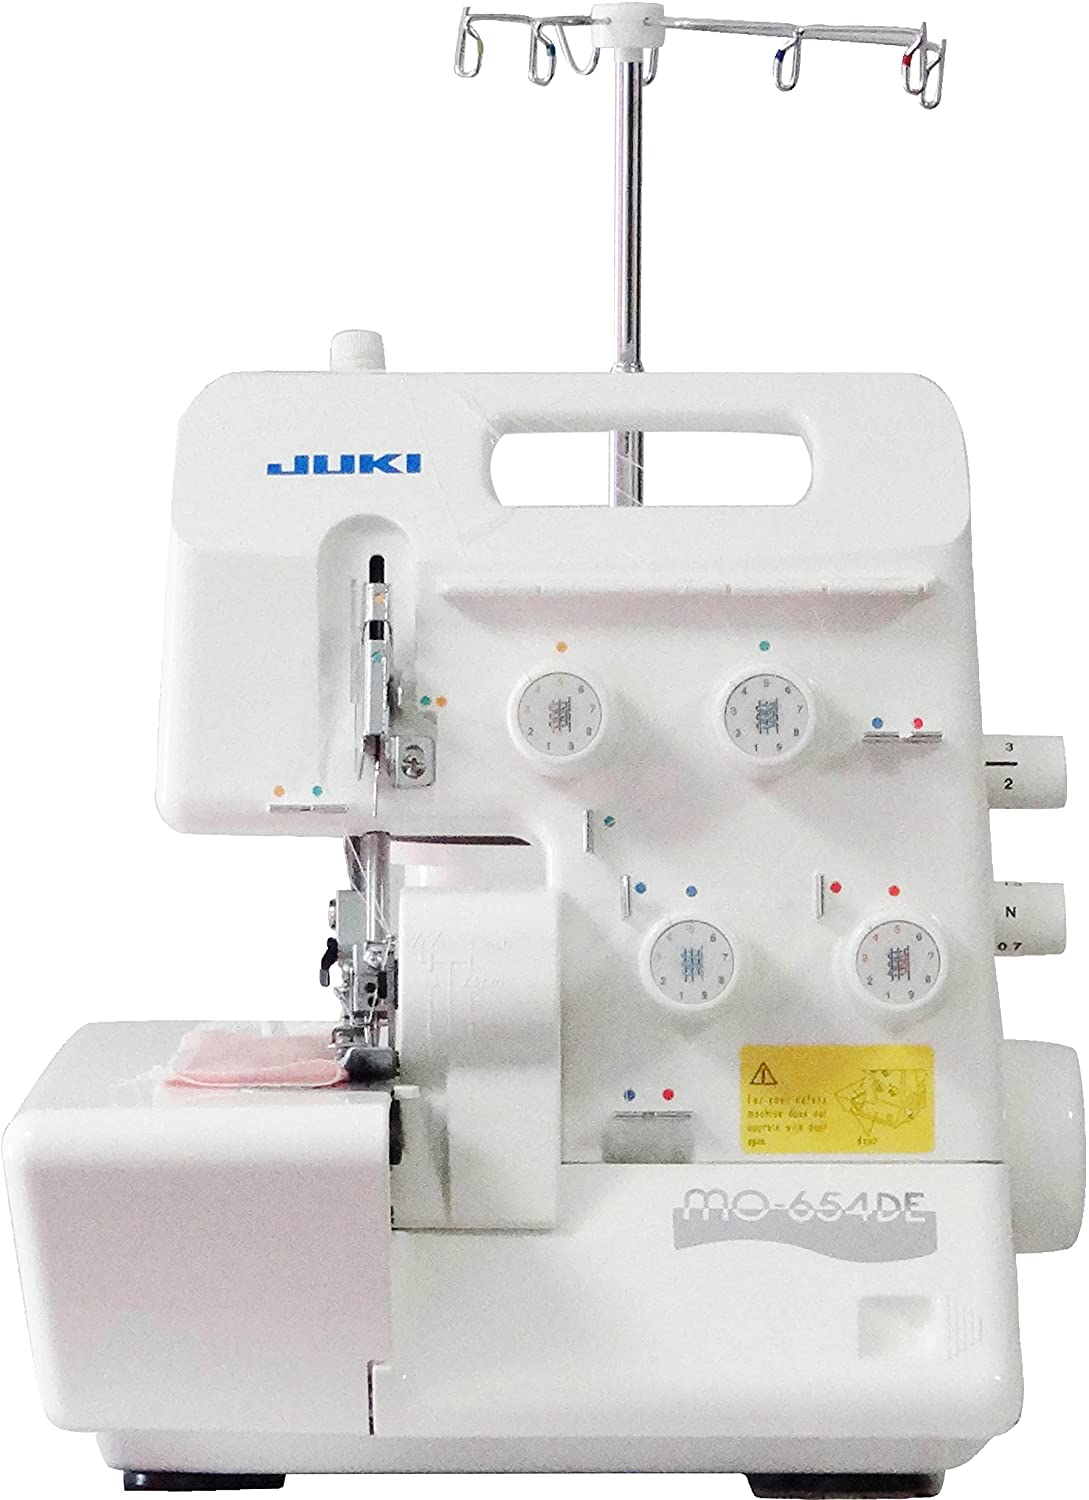
Juki MO-654de
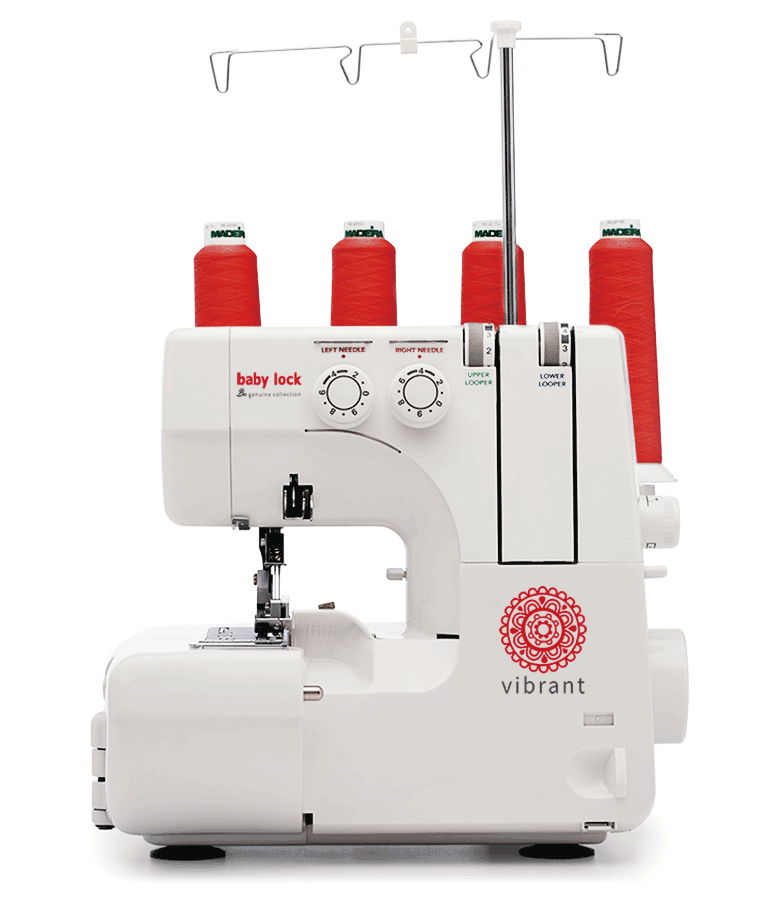
Baby Lock Vibrant
Common Tasks to Compare
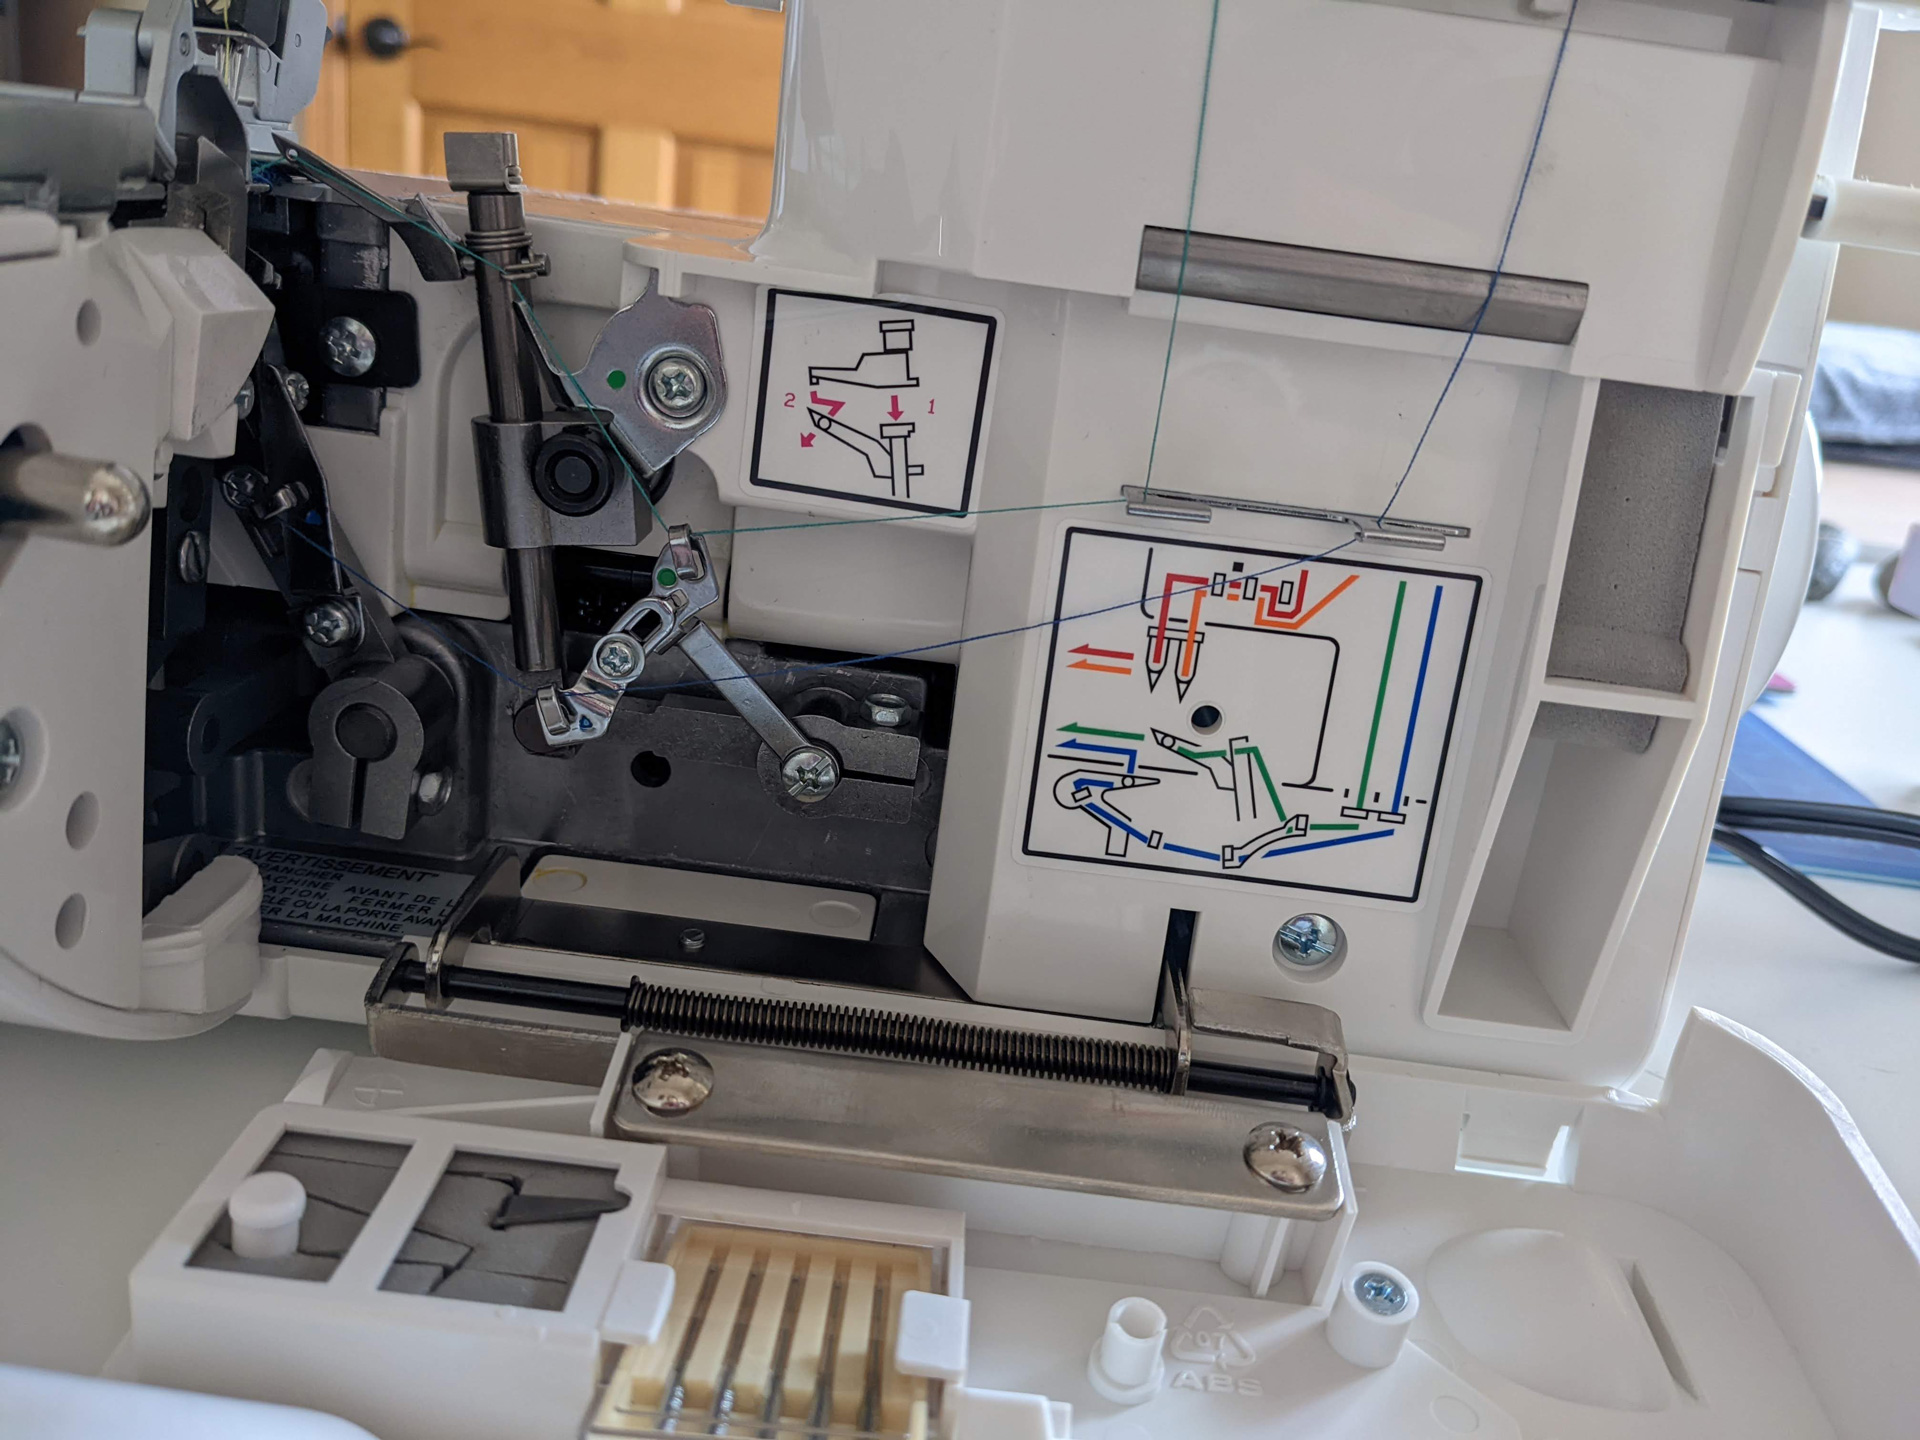
Threading diagram
Threading
Threading a serger takes practice. There’s no way around it. One serger’s claim to be “easier” than a similar serger seems like a matter of opinion as they all have their own nuances. In my research, it seems that any serger worth paying for will have clear thread guides and instructions and demonstration vidoes—official or unofficial. From there, you just need to practice. Do it enough and you won’t even need the diagrams anymore.
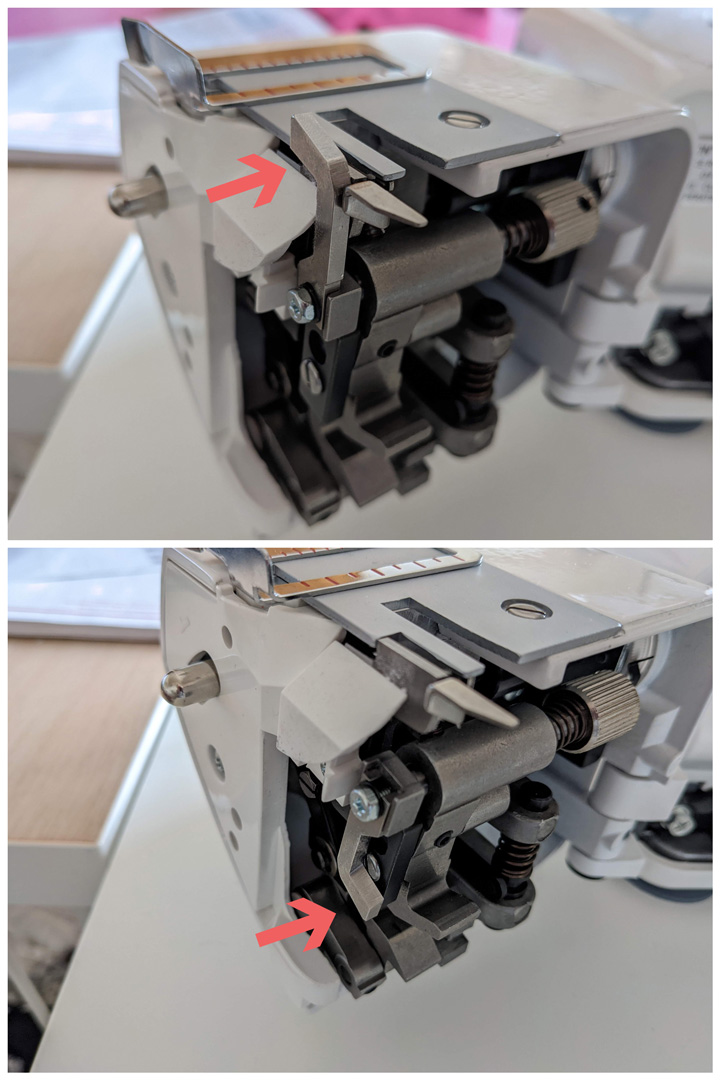
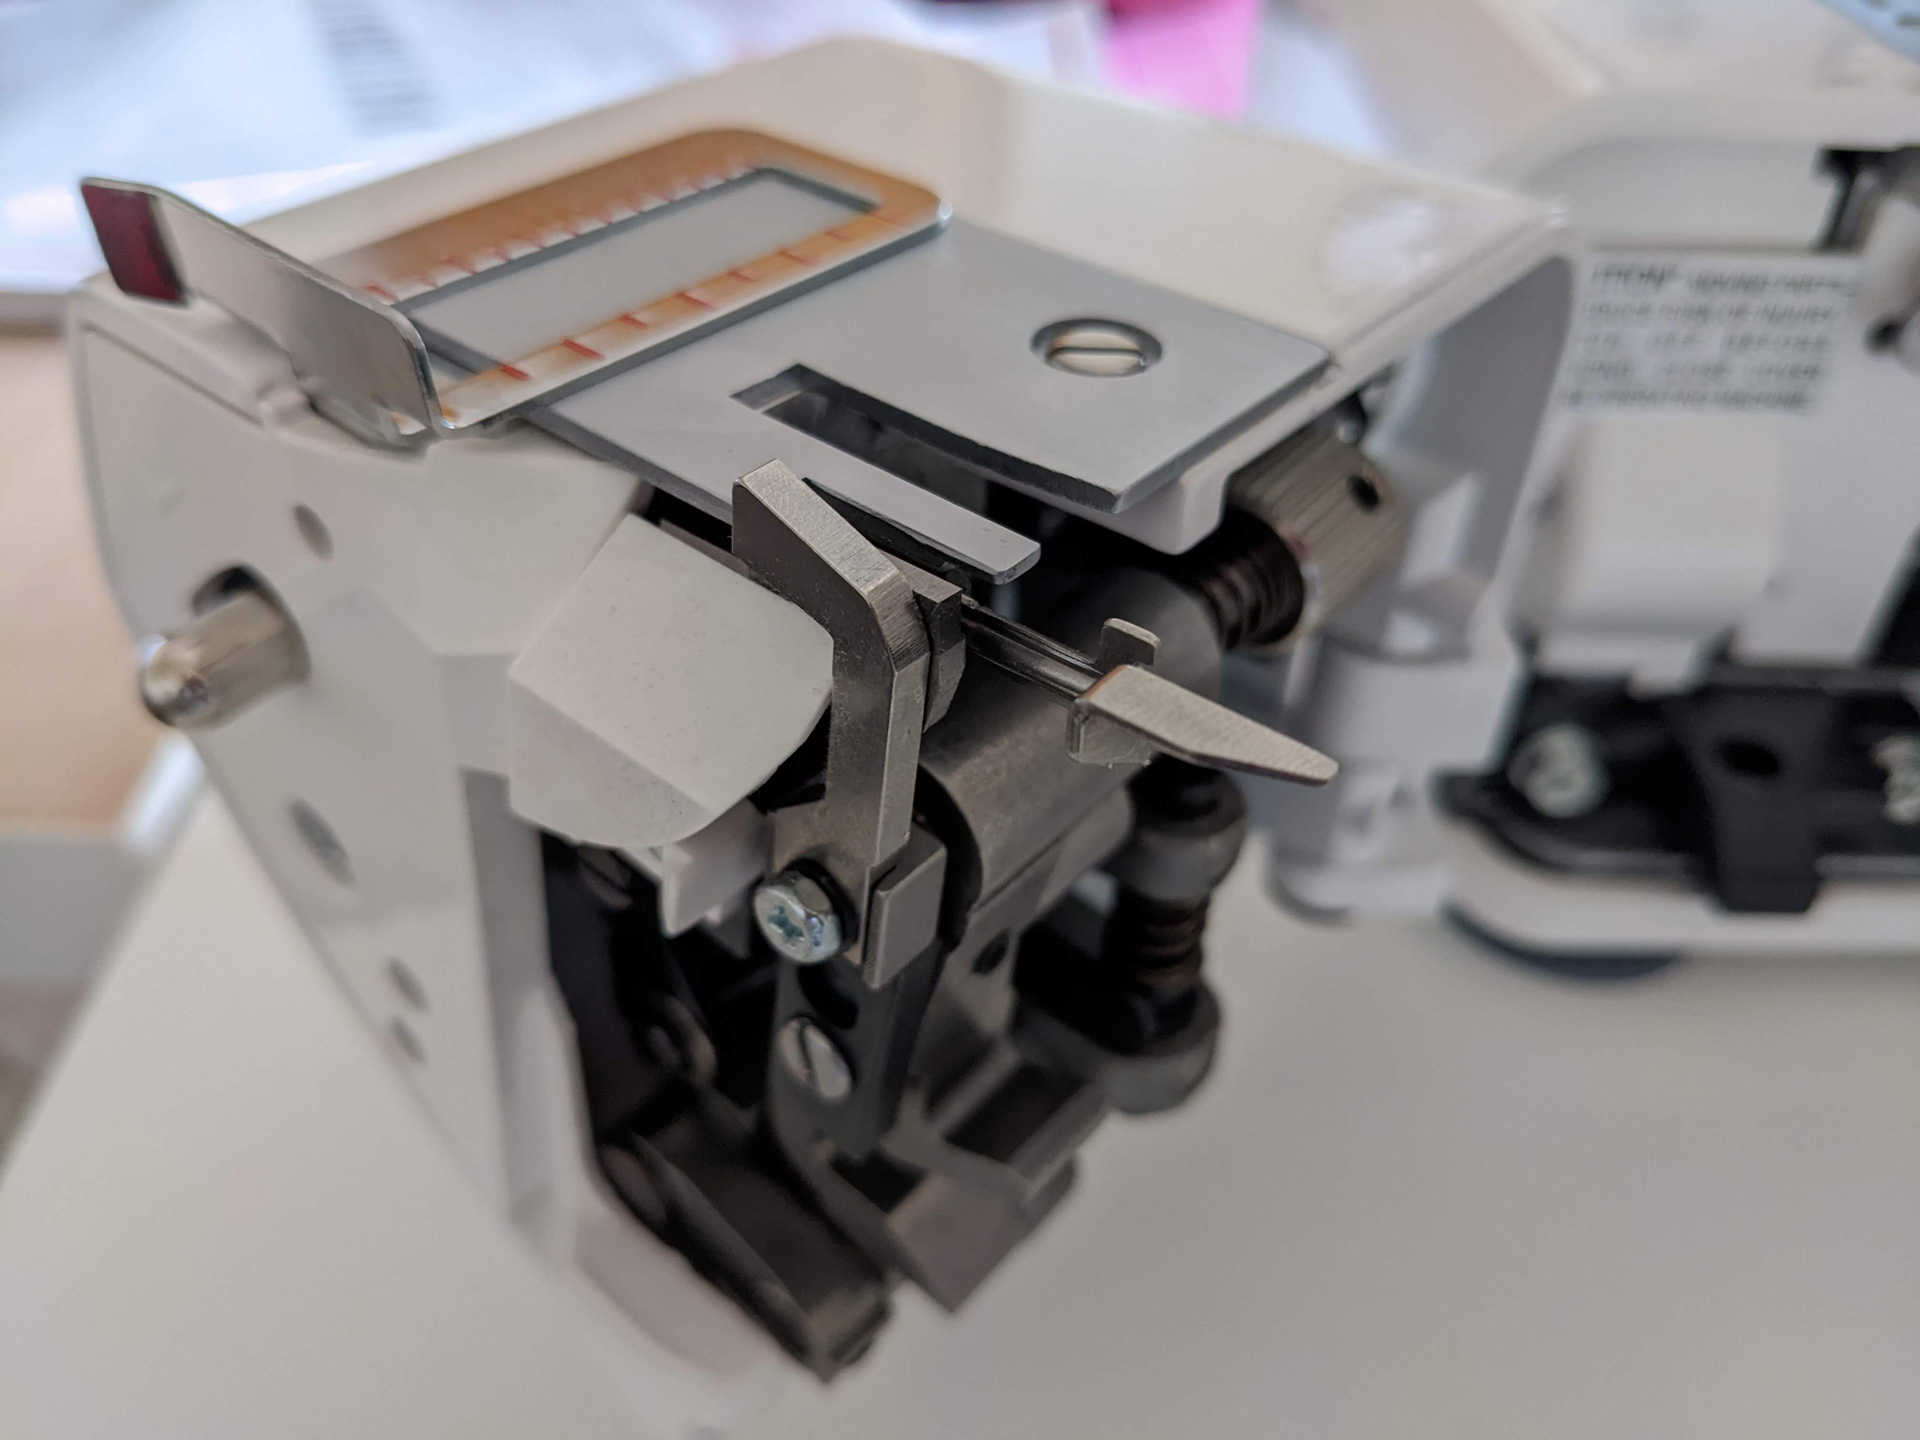
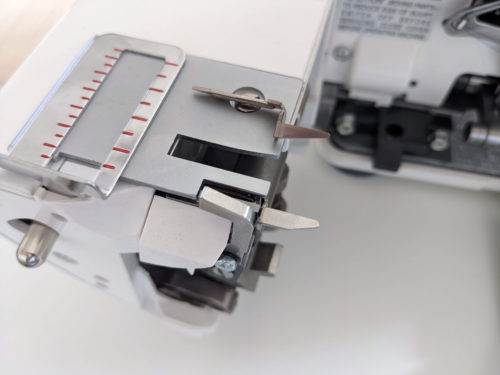
Top: Knife engaged; Bottom: Knife disengaged
Disengaging/Replacing the Knife
You really want this to be easy. Even though you may hardly ever use the serger with the knife disengaged, being able to do that easily is really important.
Equally important is how easy it is to replace the blade when needed. It’s a good idea to look up videos on each of these tasks so you can see how involved they are on the machines you’re considering.
Disengaging the knife is easier on the Juki just for the fact the knife is right in front of your face—although you still have to open up the machine to get to it. But…that means the knife is right in front of your face. For me, I’d rather have it out of the way when sewing and threading, and if I’m not disengaging it that often, then it’ll be tucked away.
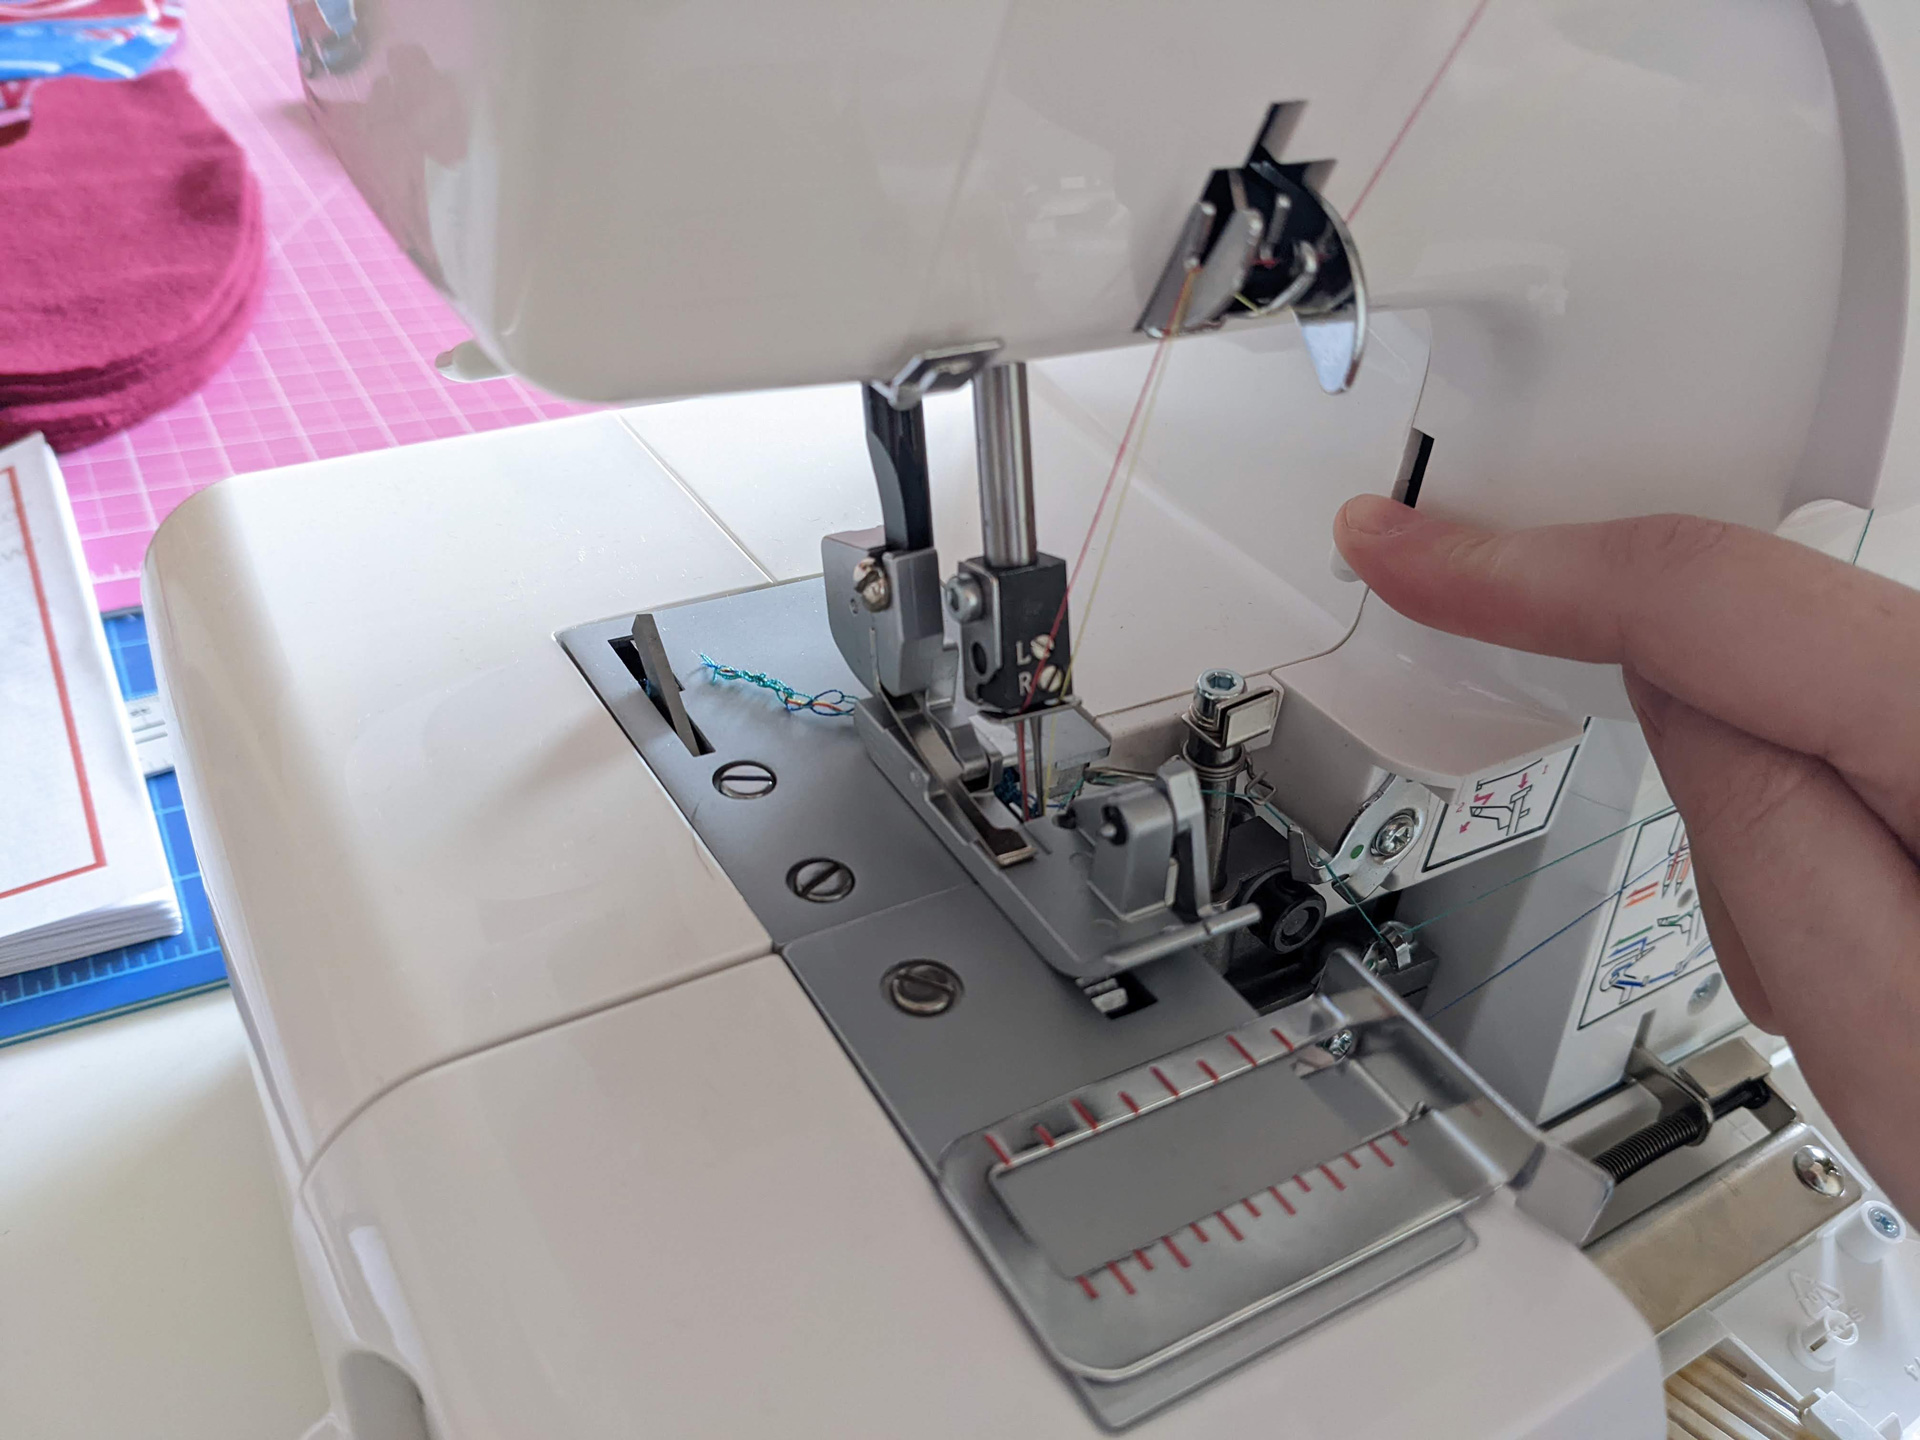
Stitch finger slides out to convert to rolled hem.
Switching to Rolled Hem
Being able to sew a rolled hem is a cool feature on a serger. Especially helpful for finishing edges, it rolls the raw edge of your fabric and stitches all at the same time. However, switching from your normal overlocking stitches to a rolled hem can be more involved on some sergers than others.
For both: You will have to remove one of the needles.
On the Baby Lock: You have to open both doors of the machine and slide out the stitch finger. You can leave your machine threaded while doing this. After that, it’s just a matter of adjusting your stitch and tension dials according to the chart they provide.
On the Juki: There’s a lever in front of the presser foot that you slide, and that’s it. No stitch fingers.
Again, this is a matter of preference. It doesn’t look like a big deal to me to open up the Baby Lock and slide out the stitch finger. I actually like the idea of having stitch finger options. It gives me more to play around with if I need to fine-tune my settings for a perfect stitch. Someone else may not care about that, though, and may rather flip a lever to switch to a rolled hem. To each her own!
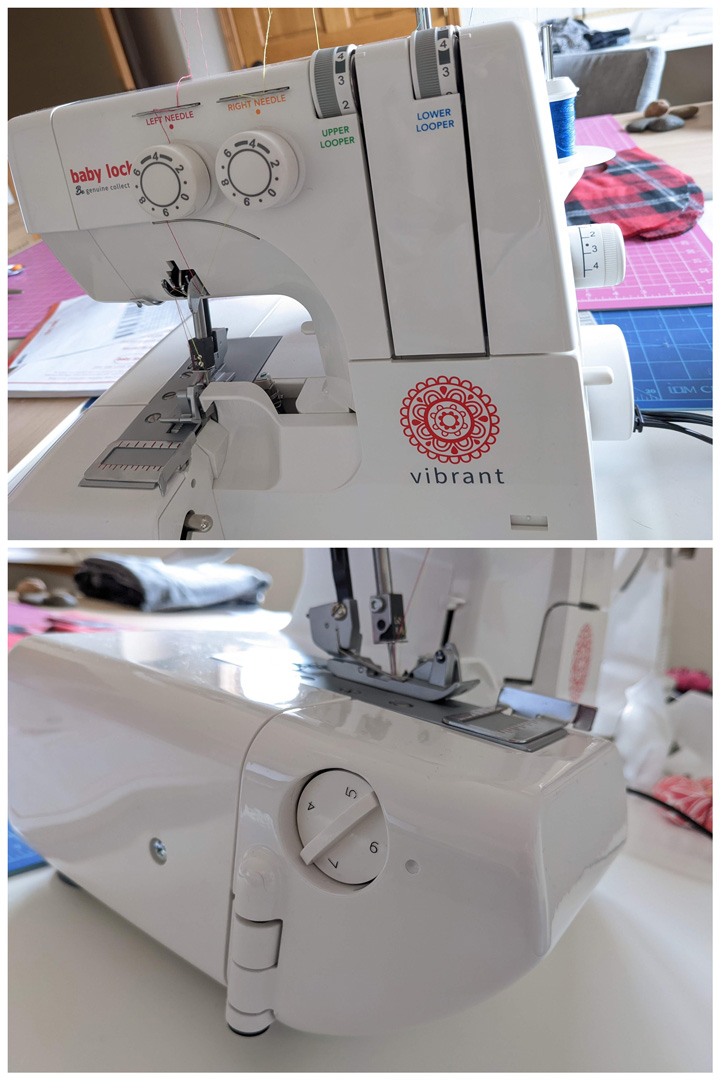
Top: Needle and looper tension dials, stitch length dial, and differential feed lever. Bottom: cut width dial
Tension, Stitch, and Differential Feed Adjustments
There are a lot of knobs and dials on a serger, including a tension dial for each thread, a stitch length dial, a stitch width dial, a differential feed dial, a presser foot pressure dial, and a cutting width dial. Not all sergers will have all of these, but whatever dials are included should be easily accessible. For example, the Juki’s cutting width dial is inside the housing. So you have to open up the machine in order to adjust the cutting width of your knife. That sounds annoying to me. The Baby Lock has a dial on the outside left of the machine. Super convenient. All the other dials for both are easily accessible.

Lay-in looper tension
Lay-In Tension vs. Knob Tension
Most claim there isn’t really a difference in performance between lay-in tension and knobs. Whatever commentary I could find on the difference seemed to favor lay-in, and manufacturers peddle lay-in as a modern and desirable feature. I did find mention of the tension knobs being finicky on the Juki.
Comparing Features
- Knob Placement: As I mentioned, I prefer all the setting knobs to be easily accessible. All the knobs on the Baby Lock are located on the outside of the machine. For the Juki, the cutting width dial is located inside the machine.
-
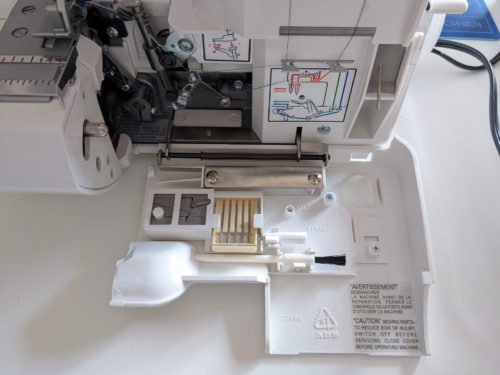
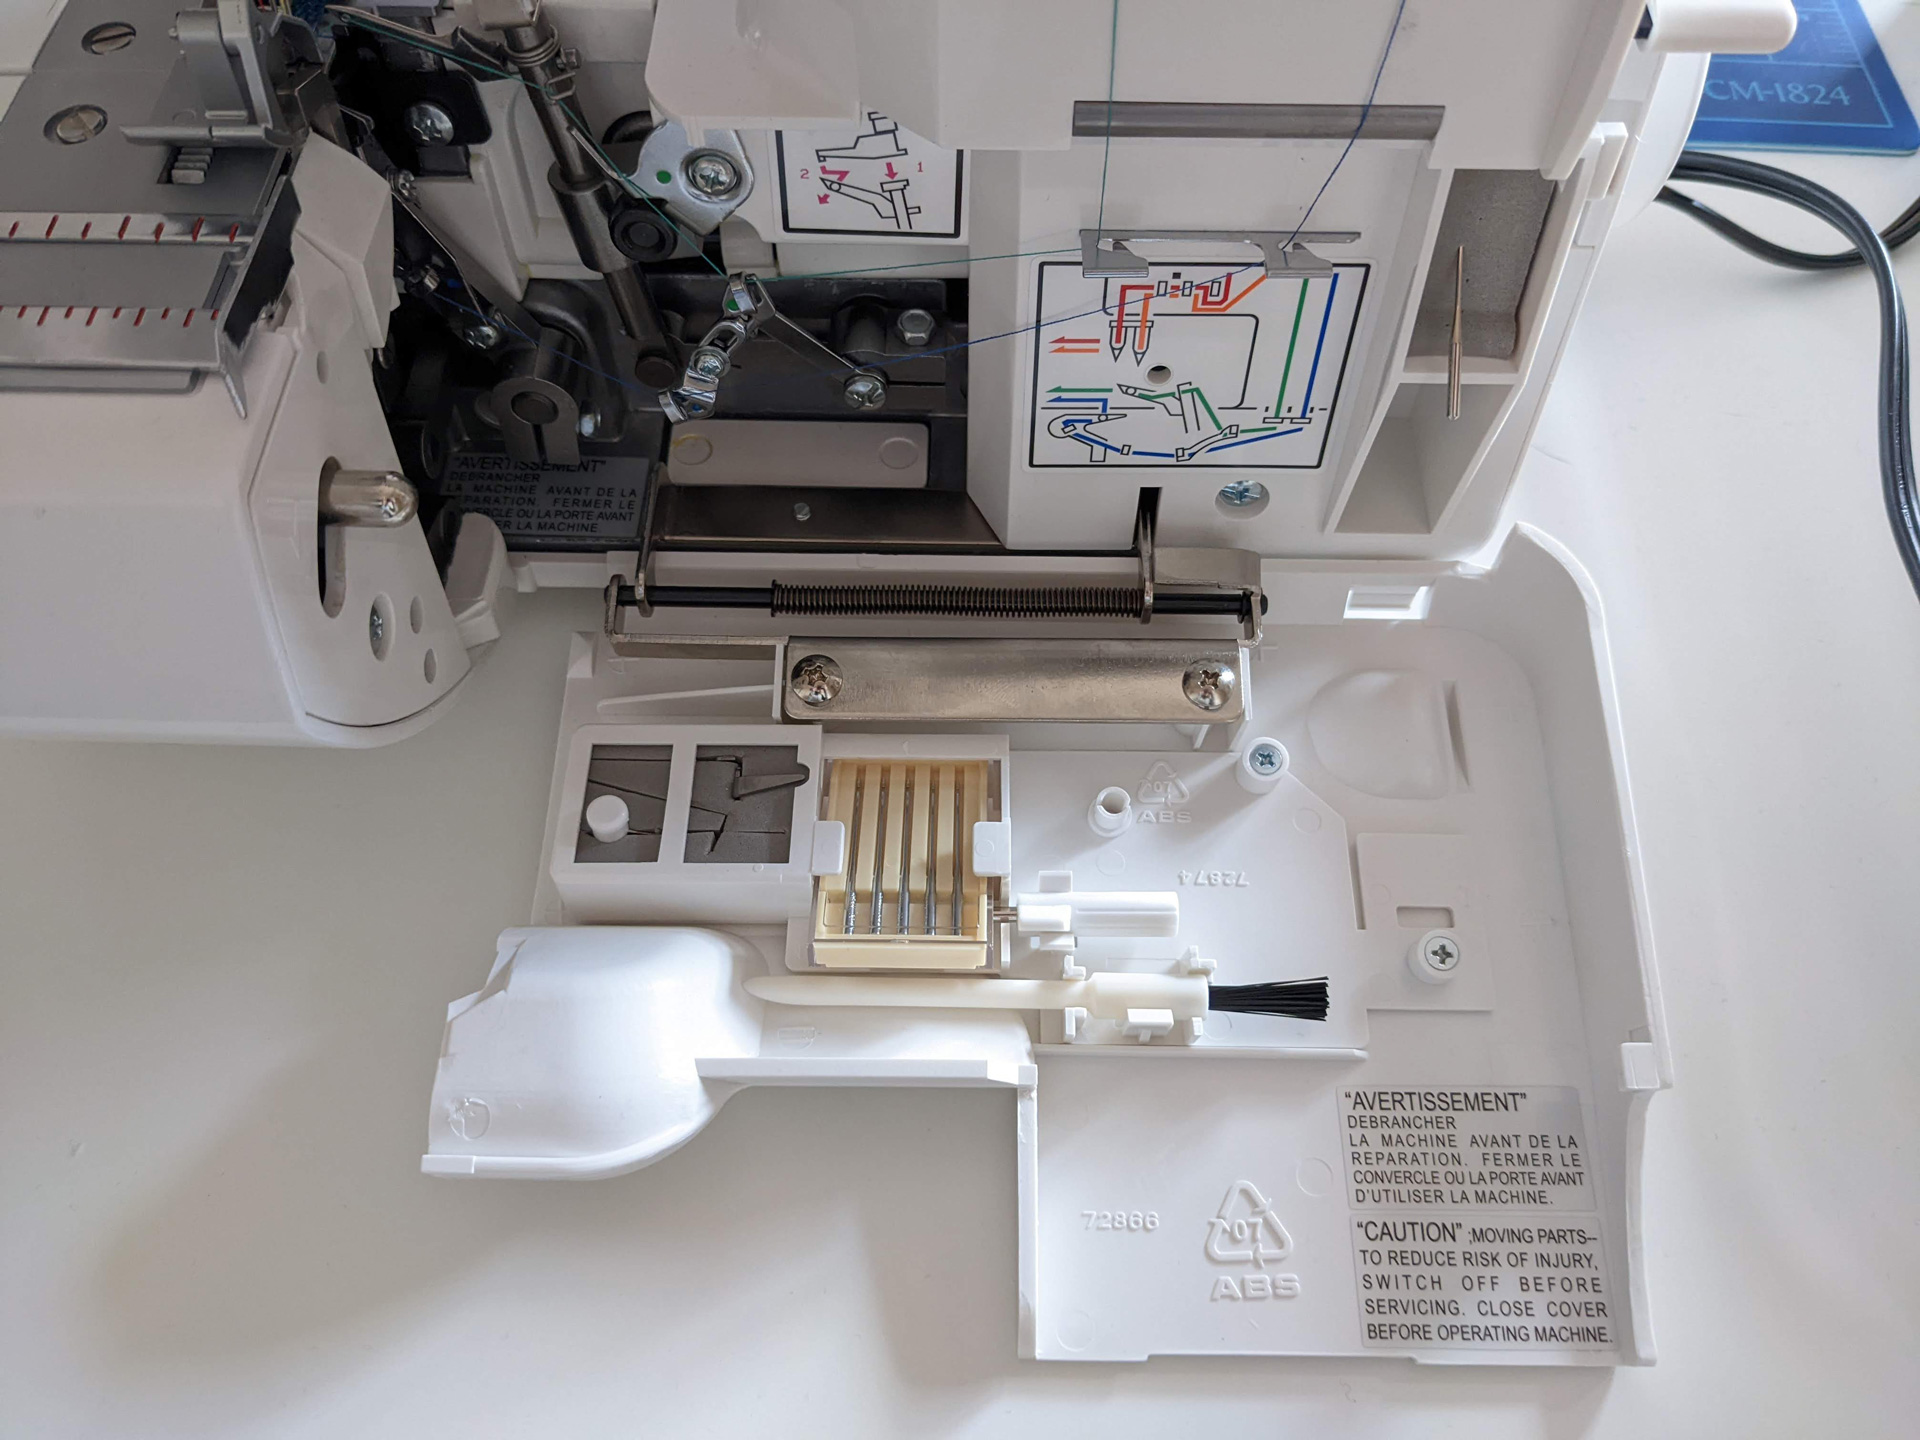
Storage compartment
Storage: Who doesn’t love some storage? The Baby Lock has this super handy compartment that holds spare needles, stitch fingers, a screw driver, lint brush, and even a plush pad for sticking machine needles whenever you convert from 2 needles down to 1.
- Knife Placement: As I pointed out above, I do not like the placement of the blade on the Juki. Baby Lock’s blade is neatly tucked away and super easy to disengage if needed, and easy to replace. The bottom blade is made of a special alloy and shouldn’t need to be replaced.
-
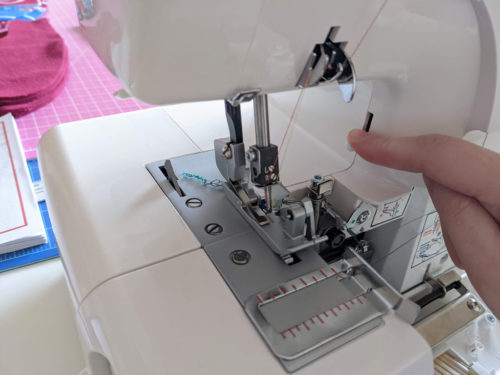
Thread cutter lever engaged
Thread Cutter: The thread cutter on the Baby Lock pops up from the plate when you depress a lever to the right of the presser foot. I am wondering if this will bother me when I’m so used to my thread cutter on my machine being fixed in position where I just lift the threads into the blade and instantly cut them. I think Juki’s thread cutter is in a fixed position like that. Answer: the pop-up thread cutter does NOT bother me. I’m so used to it I don’t even consciously register using that lever anymore.
-
Carry handle (+ the presser foot pressure dial on the top right)
Carry Handle: Juki’s is clearly defined at the top of the machine. Baby Lock also has one, but it’s a recessed groove along the back that I didn’t even know existed until my husband pointed it out.
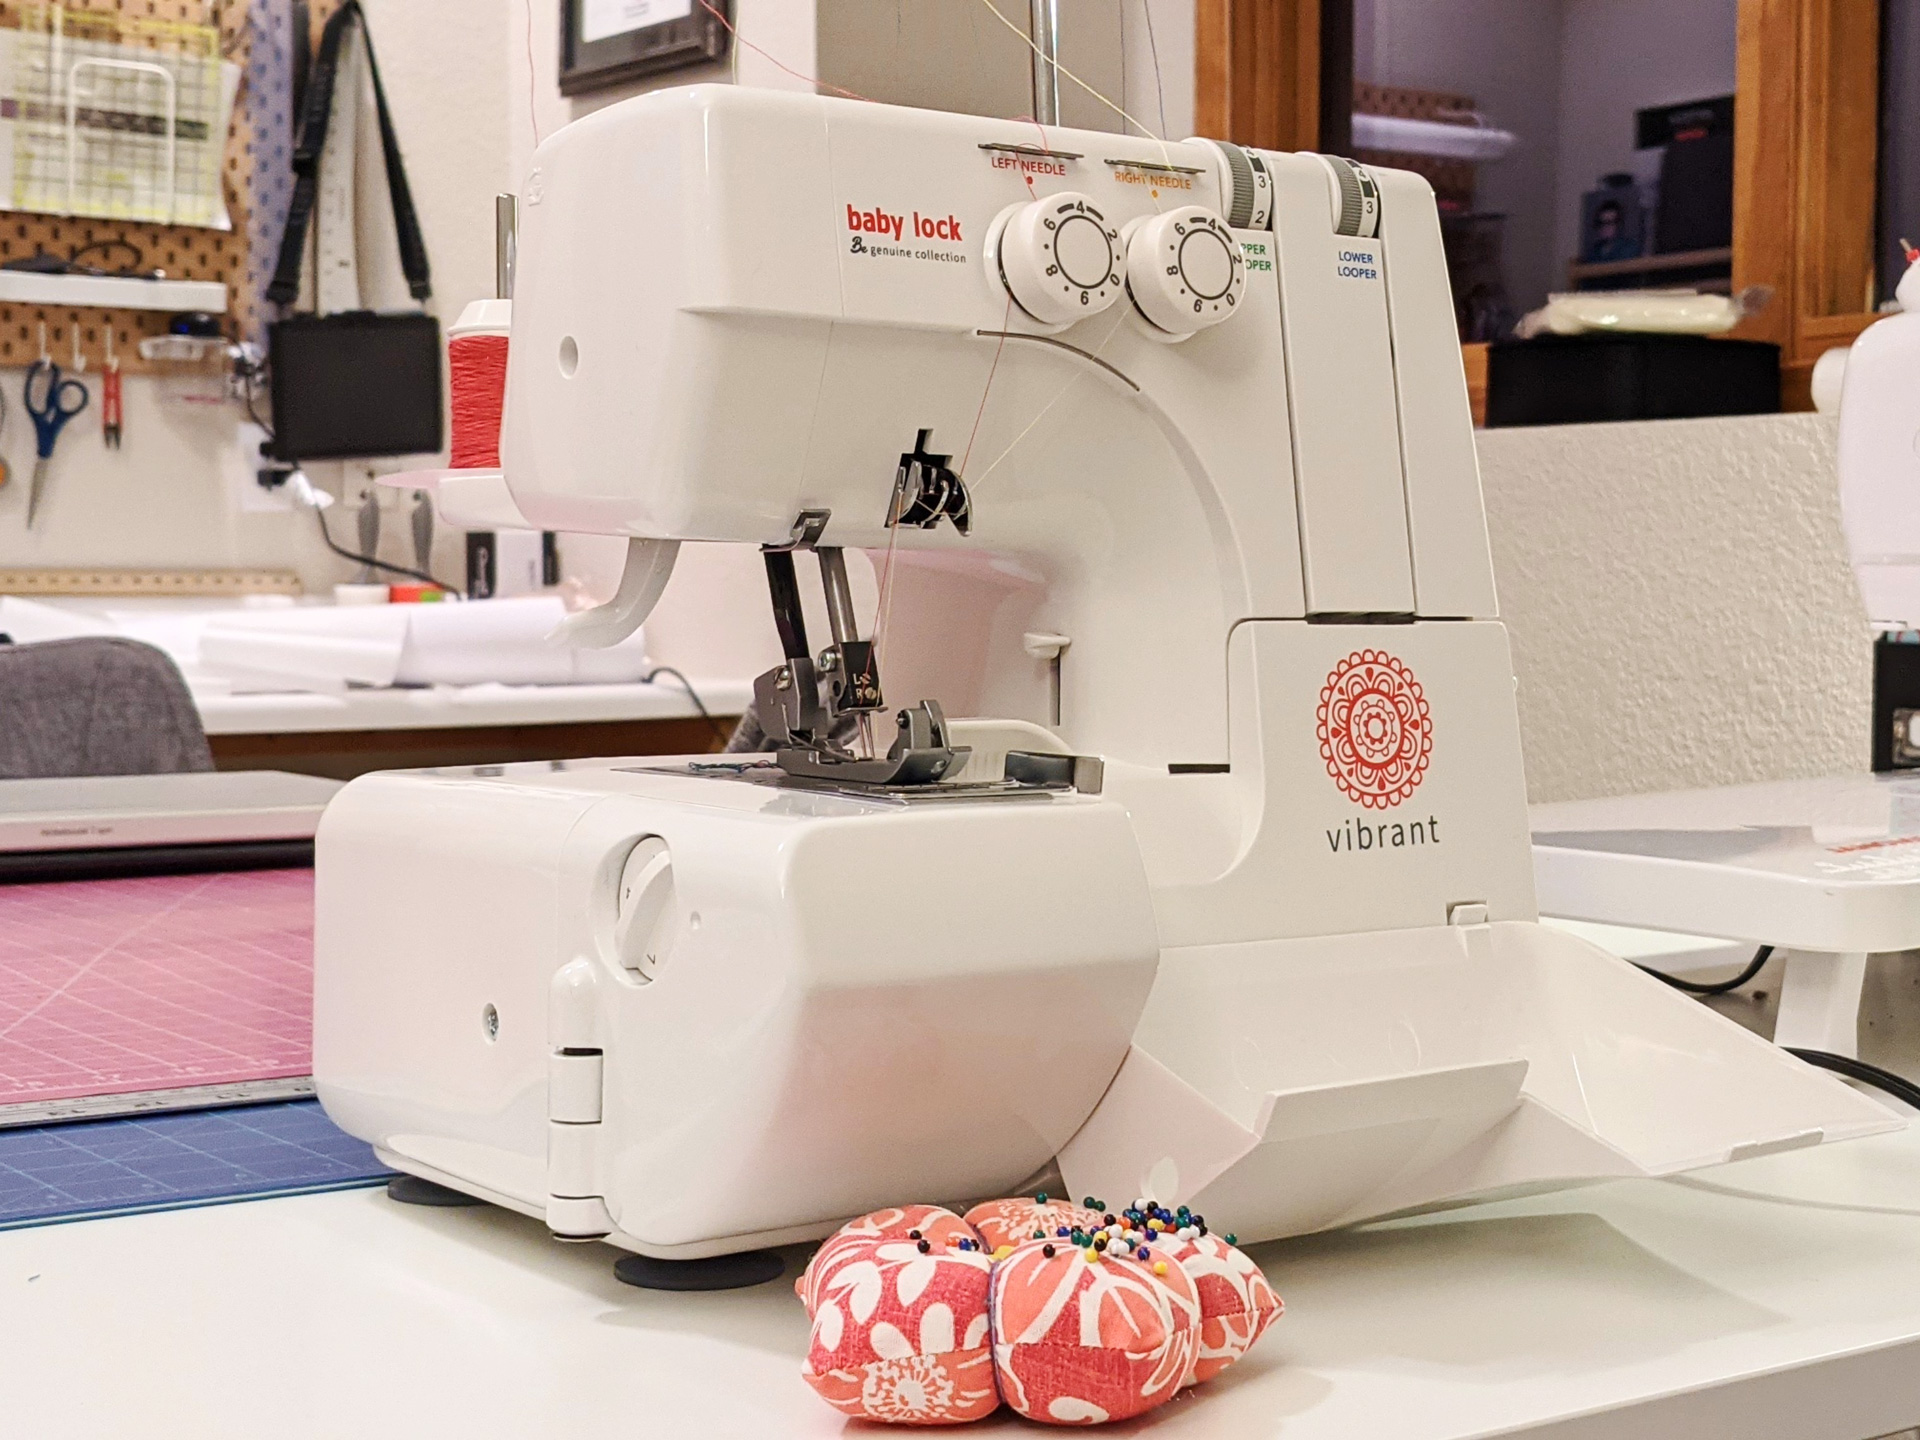
- Overall Design: I think the Baby Lock boasts a more attractive design overall. It feels less cluttered and more sleek and refined to me. Now that I have it in my possession, I’m impressed with how hefty the little thing is. It feels incredibly solid; the casing for the work table (where the blade is housed) is actually made of metal. The lay-in looper threads keep it looking clean. The work area is more open compared to the Juki. On the Juki, I don’t like that solid “wall” on the right side of the presser foot, nor how the knife looks to get in the way of threading on the videos I watched.
-
Two different stitch fingers
Stitch Fingers: Baby Lock has stitch fingers, which I like because it’s another detail I can play around with that gives me more control. Juki has no stitch fingers.


Videos that helped me decide.
Watching these gave me an idea of what to expect with each machine, and gave me an in-depth look at the design and inside of each.
- A woman named Cindy threads and demonstrates a bunch of different sewing techniques on the Baby Lock Vibrant, including gathering, attaching elastic, attaching cording/piping, and more.
- Baby Lock has an amazing variety of YouTube videos. They have a whole playlist of 37 videos on the Vibrant alone.
- A woman in a sewing shop reviews, threads, and demos the Juki MO-654DE.
- Juki put together this torturous video on preparing, threading, and adjustments on the Juki MO-654DE. The narration is robotic and it’s super dry—and it also randomly cuts off at the end in the middle of a super useful bit showing you how to secure seams. But, it still gives you a great look at the design and inside.
The Factors in My Final Decision
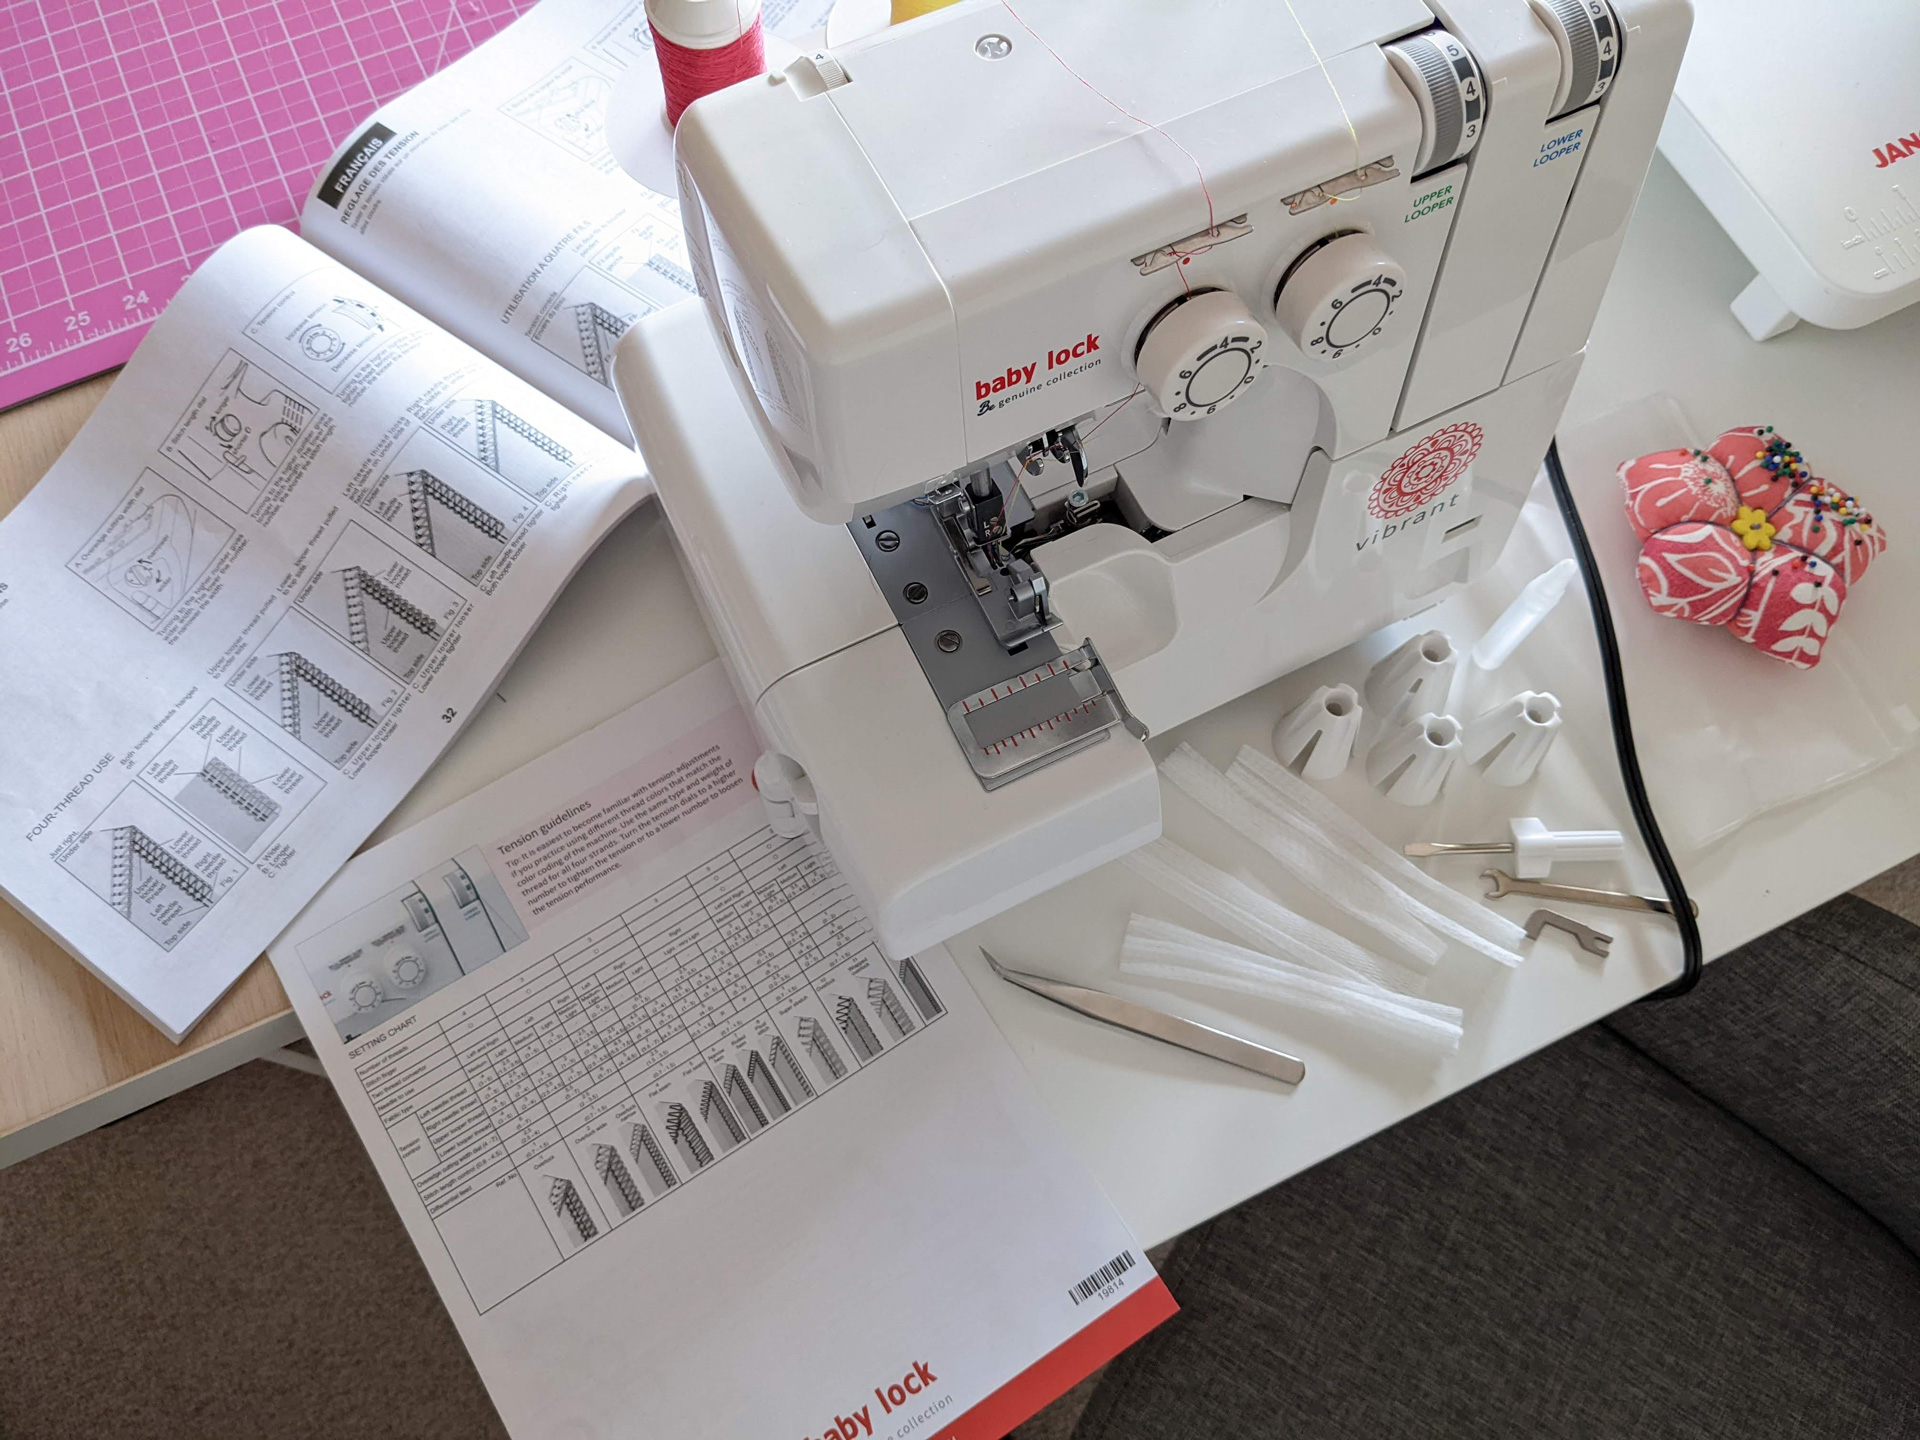
Baby Lock Vibrant with accessories and documentation.
For me, the Baby Lock Vibrant is the winner. Honestly, I don’t think there is a wrong choice between the two; it all comes down to personal preference. It is the more expensive of the two, but not by very much. I probably would be just as satisfied with the Juki as my first machine. The details that make the Baby Lock win out for me:
- Design
- Reviews – Everything I found on the Baby Lock was positive. The only negatives I came across were mentions of it not being “as much of a workhorse” as Juki, and some reference to trouble with thicker fabrics. Digging more on that topic, other Baby Lock owners rebutted that saying they had no issues with multiple layers of denim, fleece, 4 layers of brocade…etc. Edit: Now that I’ve been using this machine for 4 years, I can tell you it has had no issues with anything I’ve thrown at it.
- Support Documentation – YouTube videos are plentiful and well-done for the Baby Lock. The user manual is well-written and helpful, including an incredible reference chart with settings and diagrams for all sorts of stitches. In comparison, the Juki manual was clearly translated from some other language and it’s far less polished. It also lacks that amazing quick reference chart you get with Baby Lock.
- Intuitive threading order: start at the far right and work your way left. Juki’s threading order is mixed.
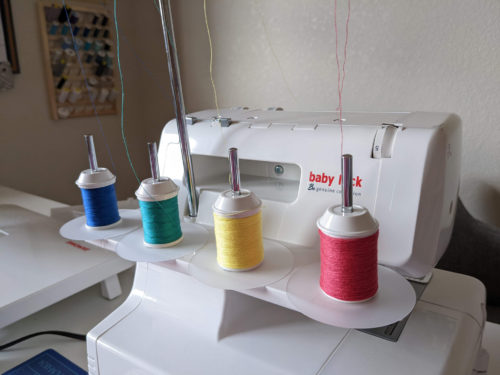
And here she is!
Very thorough and helpful review. Thank you.
How did the prices compare? Was one much more expensive than the other? I’m currently looking at a Baby Lock Vibrant for $399.
Hi Sue! From what I remember, it wasn’t a huge difference—I think around $50. But that of course depends on where you shop and prices are subject to change. I know my husband couldn’t find any discounts for the Baby Lock, but he was able to get one that came with a nice bonus of several different colored spools of wooly nylon thread.