I’ve had this make in my head for apparently a solid year, and it felt like it took way longer than one week to knock it out. It was just so involved! Part of that was my fault, but it was only exacerbated by everything this pattern is.
- My fault: I envisioned bishop sleeves so I had to draft those, plus I always lengthen my sleeves.
- My fault: I originally cut size XS because looking at the finished measurements looked like an overabundance of ease. Turns out, you kinda need that with woven fabric. So I had to re-cut size M, which meant redrafting the sleeves again. 🙄
- Pattern’s fault: I got halfway through constructing the sleeve placket and realized it would probably interfere with the drape of the fabric since the placket had interfacing. Also, it seemed like a lot of unnecessary work when I could just sew a slit into the seam like I did with the bodice. So I edited the sleeve pattern and re-cut the sleeves.
- Pattern’s fault: Most of this was best done on the sewing machine instead of my serger, which slows things down.
- Pattern’s fault: A seemingly endless litany of things to do. You can tell by my ridiculously long list of sewing machine settings at the end of this post. Back pleat, back yoke with lining, side seam slits, fusing interfacing, collar with lining, gather sleeve caps, seam slits on sleeves, gather sleeves at the cuff, construct the cuff, attach the sleeves and go over them again with the serger to clean them up, make the drawstring, make the casing, line up the casing and attach it, still gotta hem, still gotta sew 8 buttonholes and attach 8 buttons, then 4 more buttonholes for the cuffs and attach 4 more buttons. Not to mention all the seam finishes with the sewing machine and topstitching. /wallheadsmash
I mean, it is nice to spend the bulk of the project time on sewing vs. editing the pattern and fitting, but I have this weird issue where I’m always over-anxious to finish what I’m working on. I had to stop a lot so I wouldn’t get overly annoyed by this endless list of Things.
About the Fabric
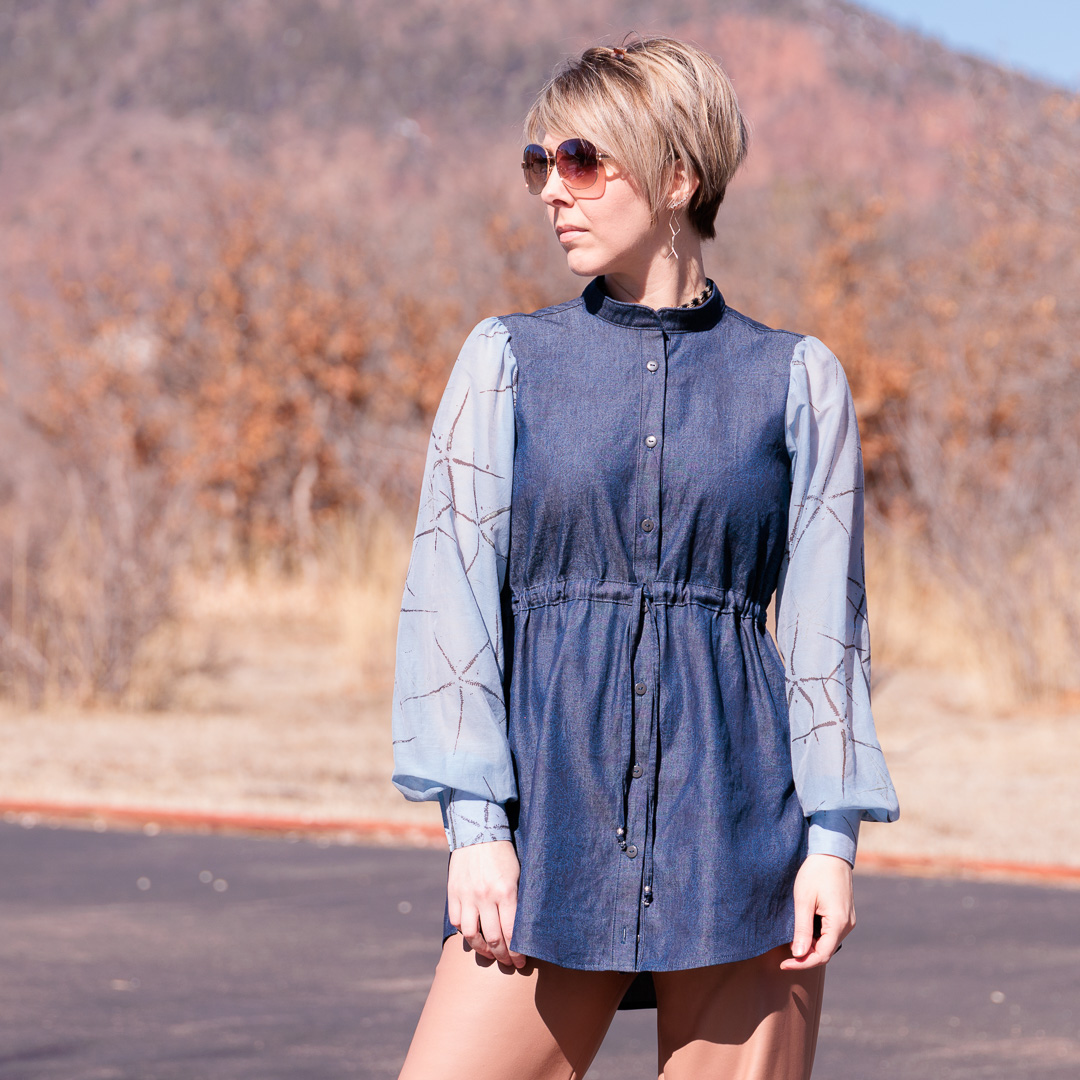
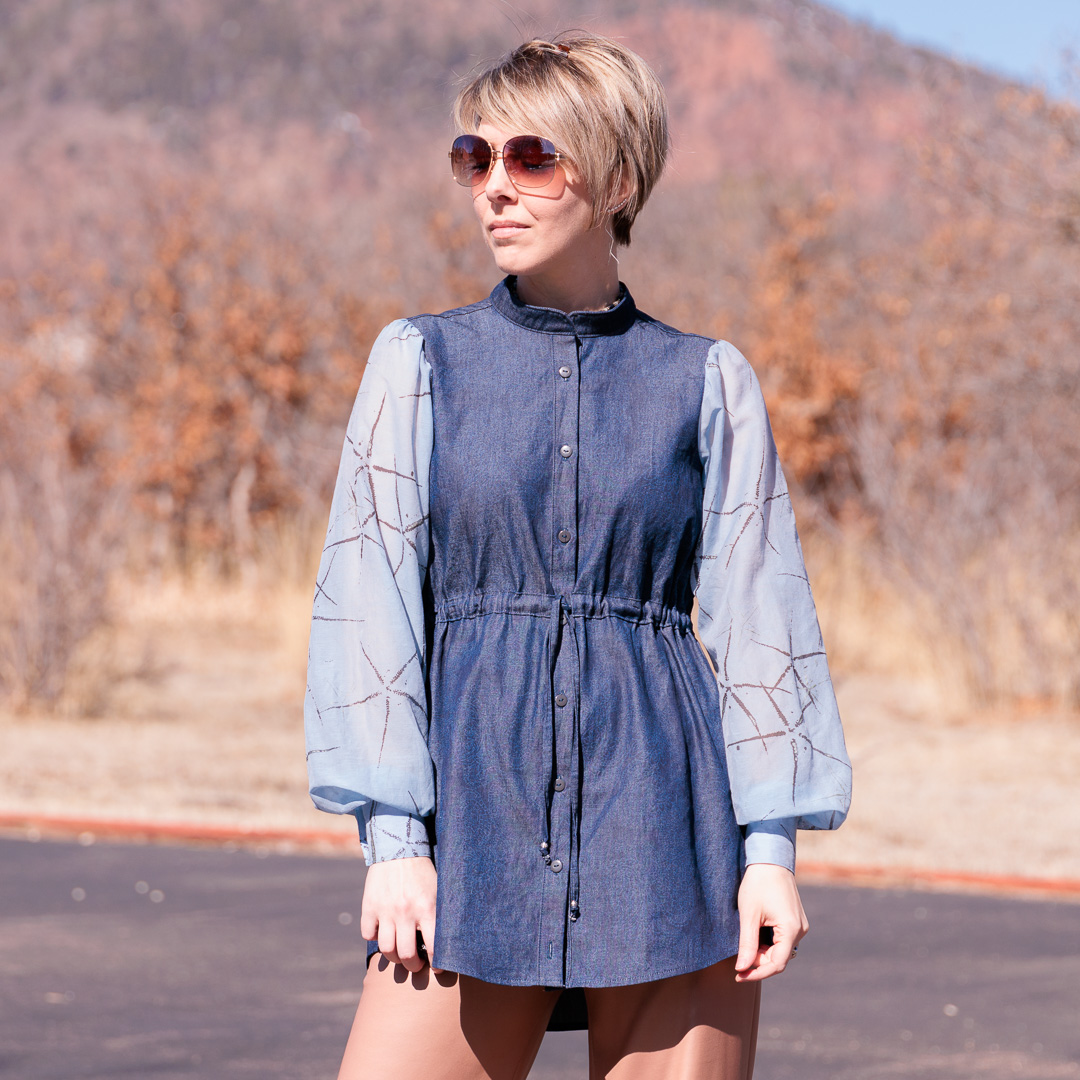
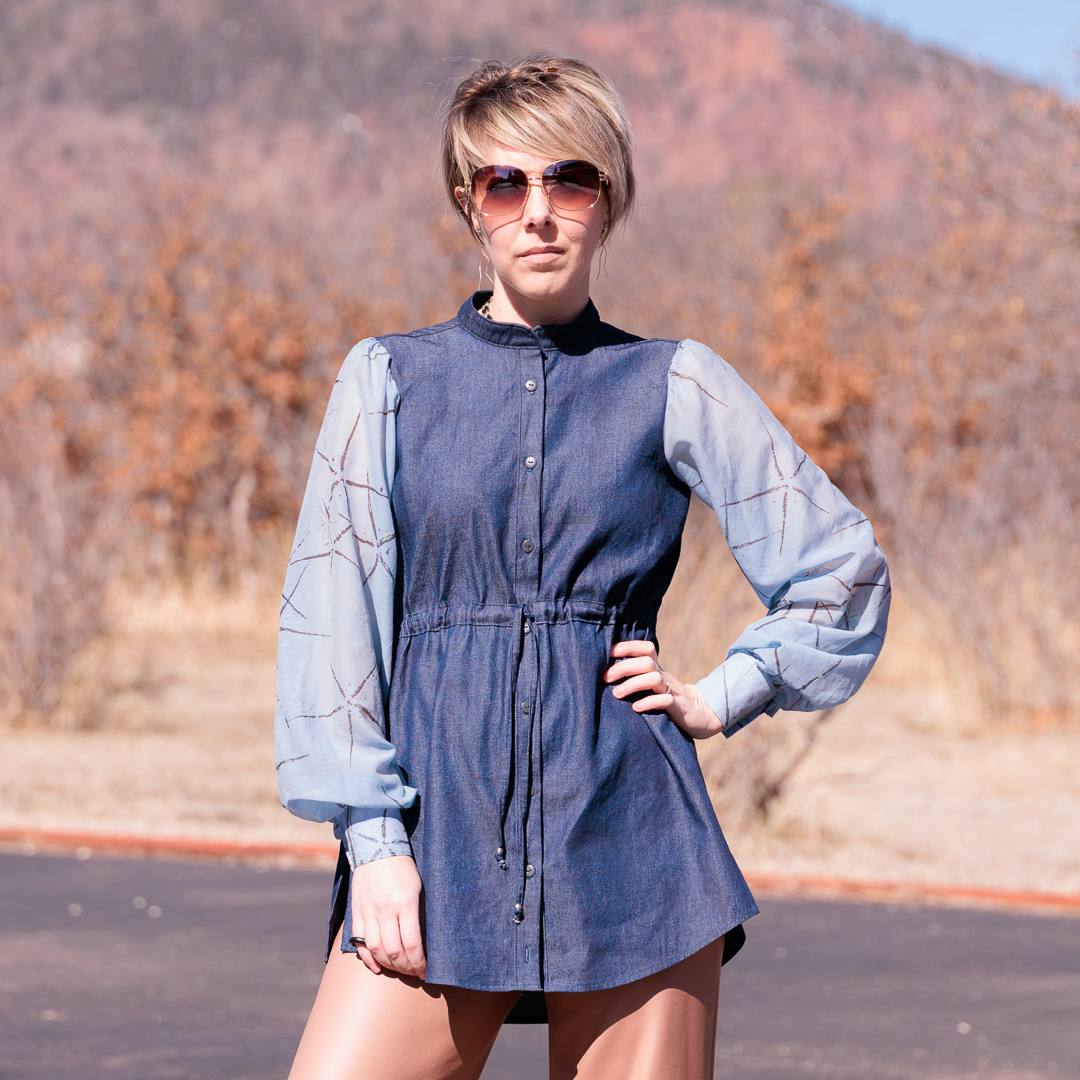
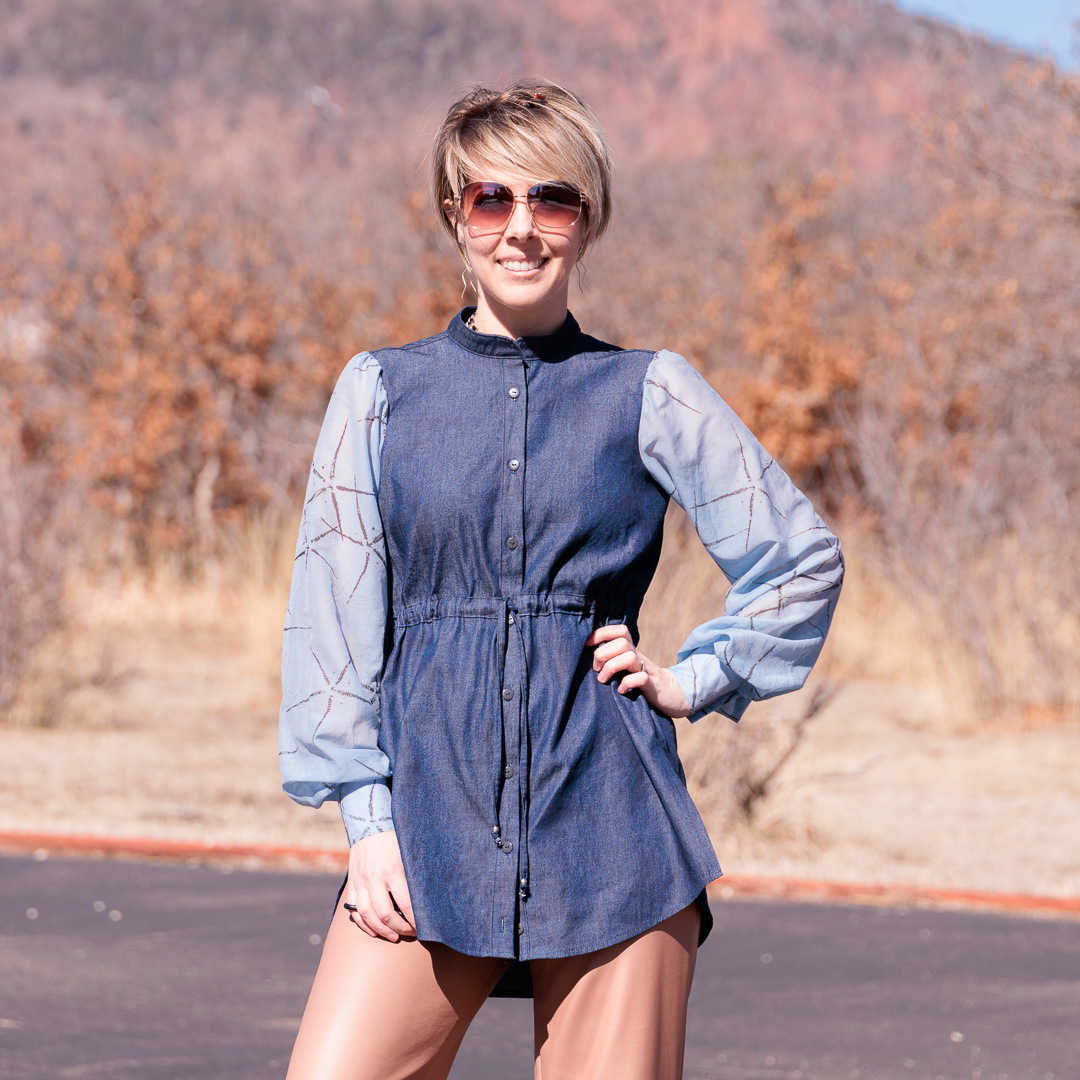
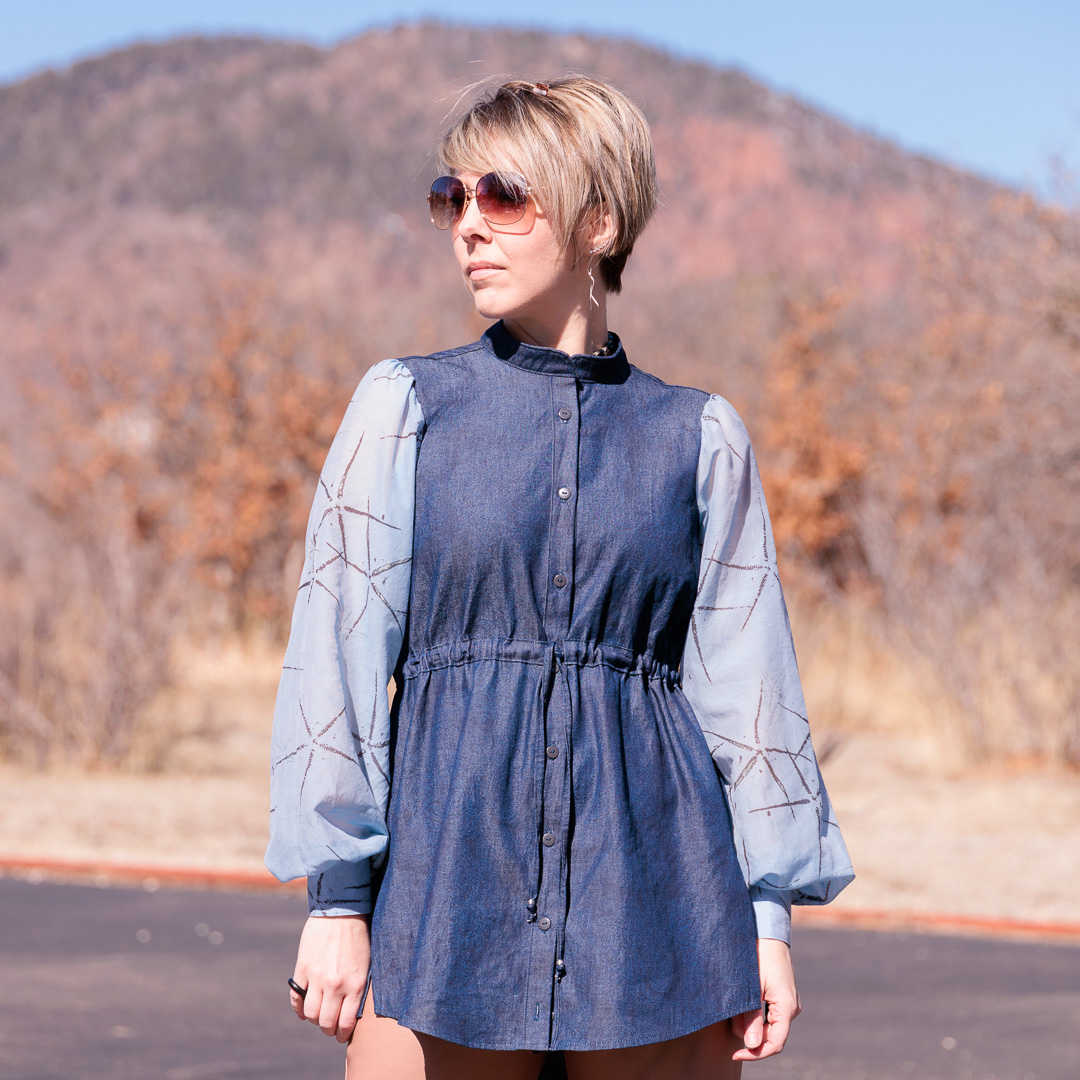
Sleeves: 4 yards Abstract Metallic Starfish on Dusty Blue. Cotton Voile from Boho Fabrics
- Weight: 1.5 oz
- Stretch: none
- Contents: 100% Cotton
I snagged this on sale for $3.50/yd many moons ago. I thought it was so beautiful even though I didn’t know what I wanted to make out of it. I’ve had it for so long that the sun faded parts of it that were exposed on my shelf of fabric. (Maybe I ought to move that shelf.)
It’s a very lightweight and sheer fabric, which makes it a little shifty to work with, but far less shifty than chiffon.
Bodice: Shadow Paisley on Indigo Designer Cotton Chambray from Cali Fabrics
- FABRIC CONTENT: 100% Cotton
- WEIGHT: Light Midweight
- STRETCH: None
I loved the subtle paisley print and oh-so-slight color variation all over this fabric. Cotton chambray is a win in my book. I haven’t used it a ton yet, but I quite like it! I have some more earmarked for another M7950 maxi dress.

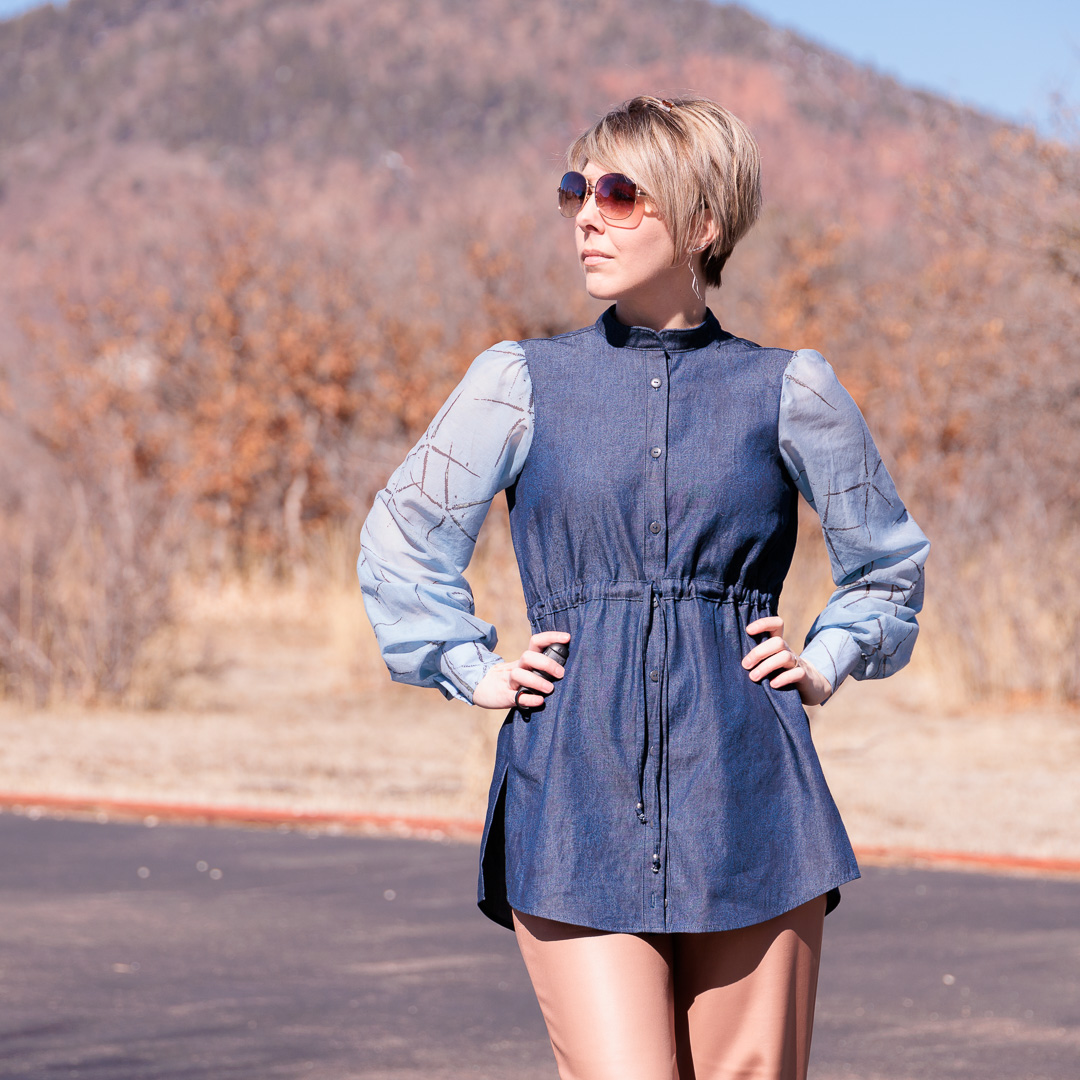
About This Make
- size M
- sleeves +2″, slashed and spreaded for bishop sleeves (Spreaded is so not a word.)
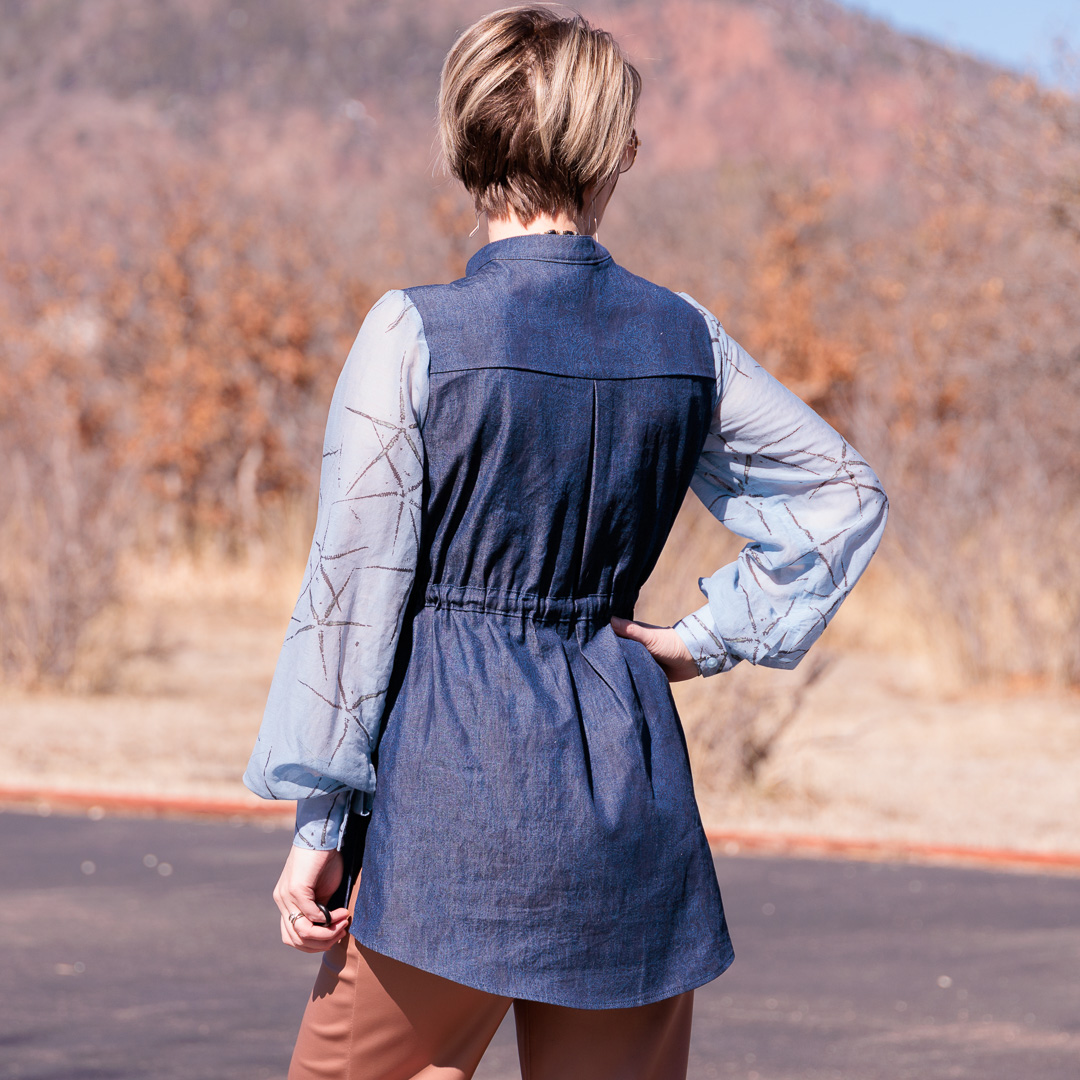
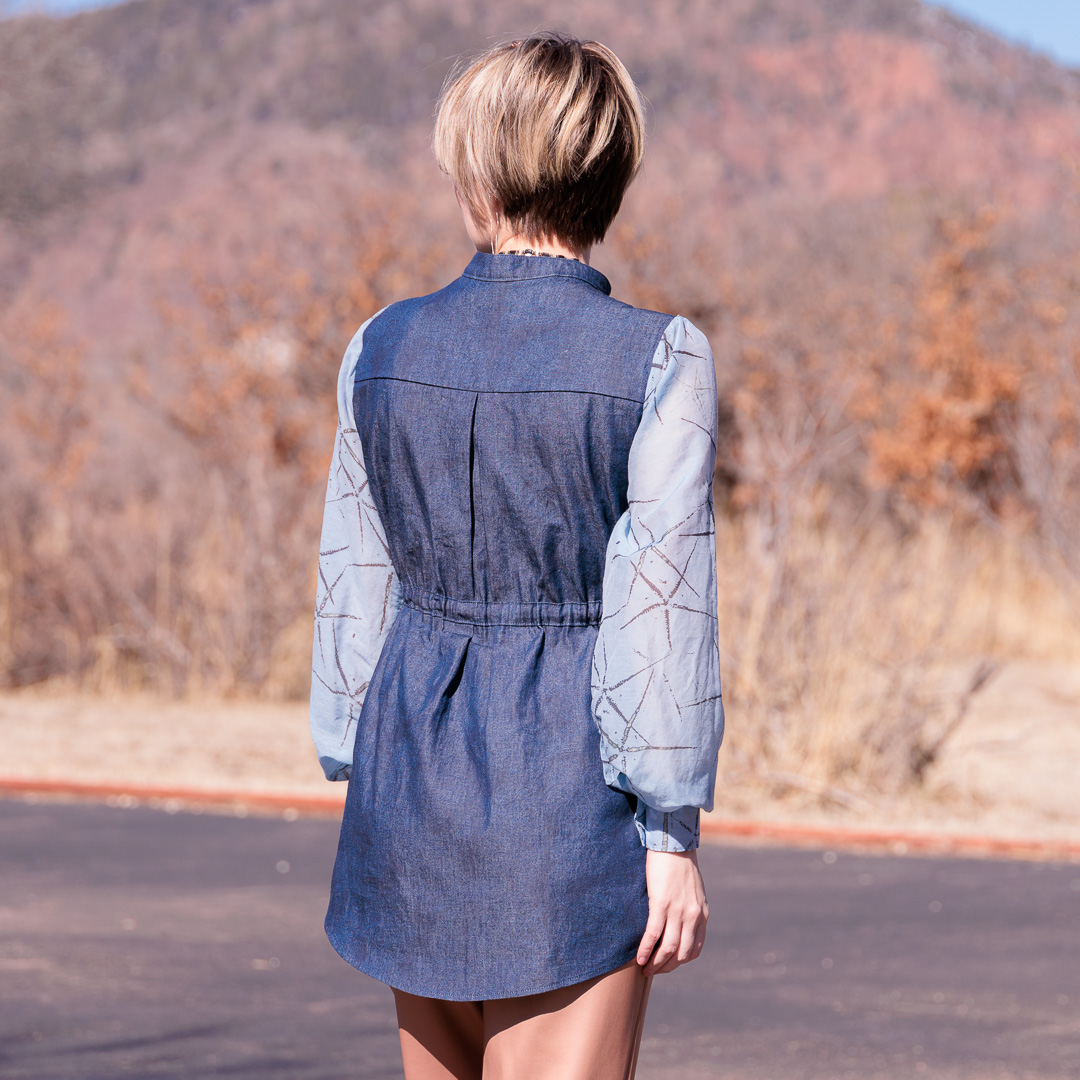
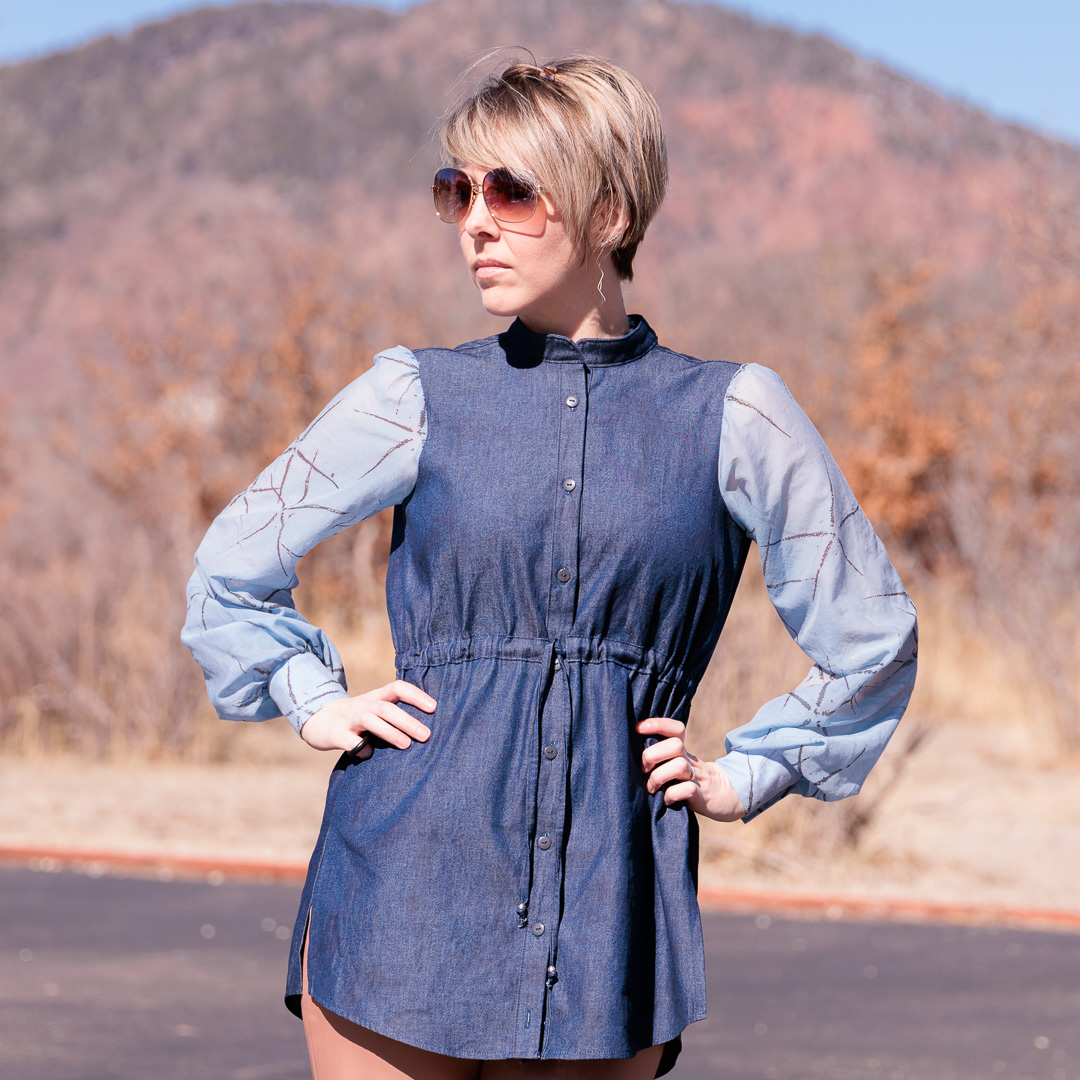
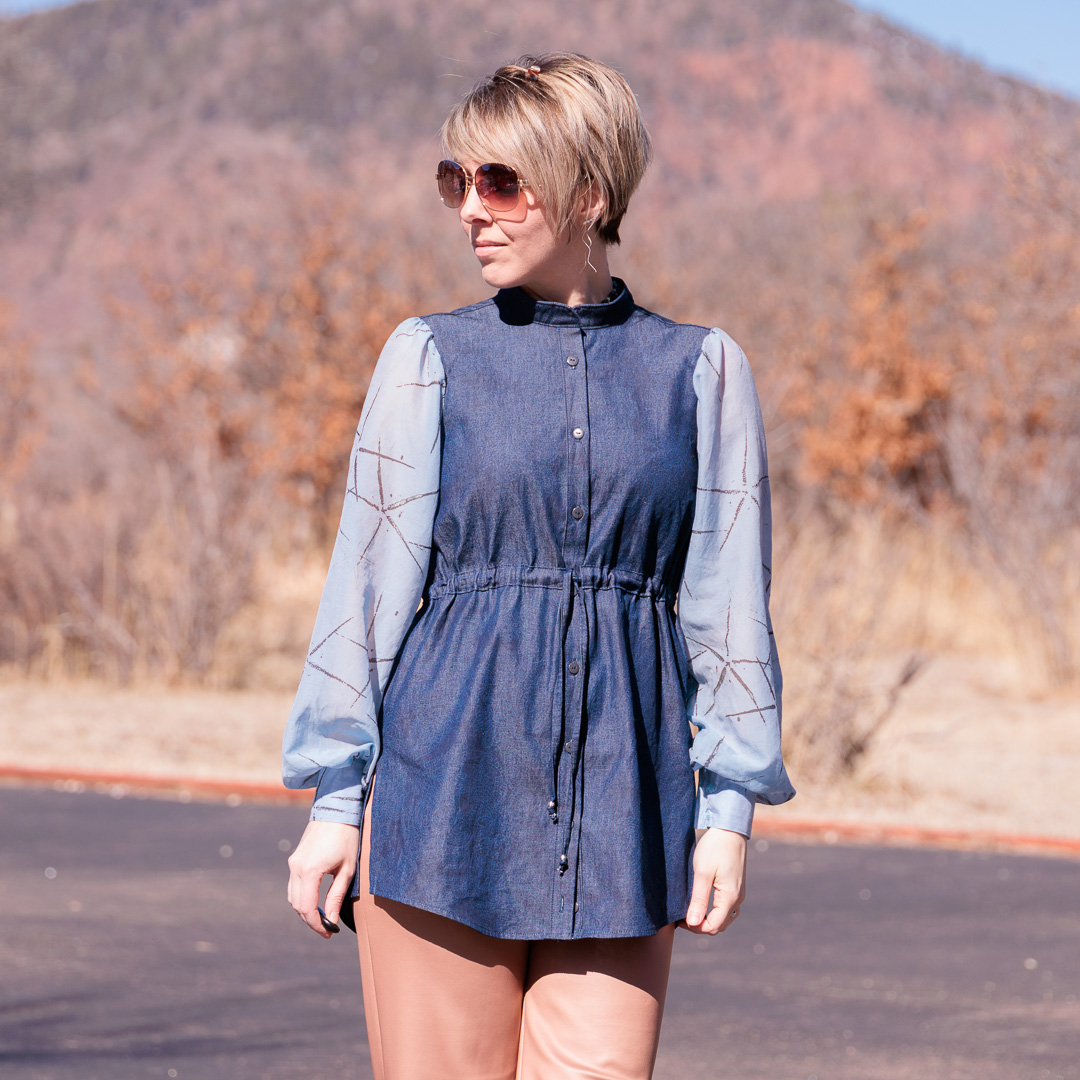
- tunic length with side slits
- long sleeves
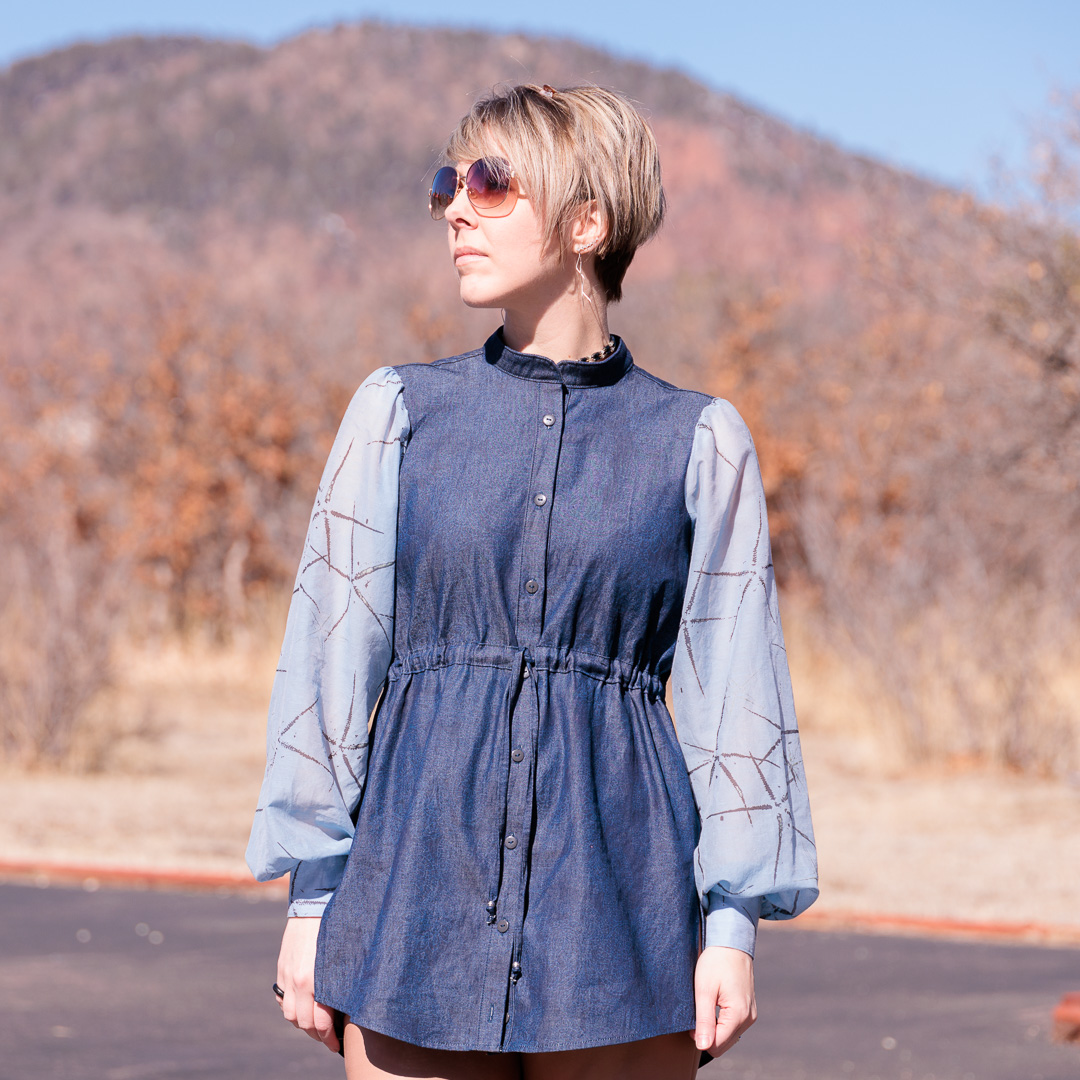
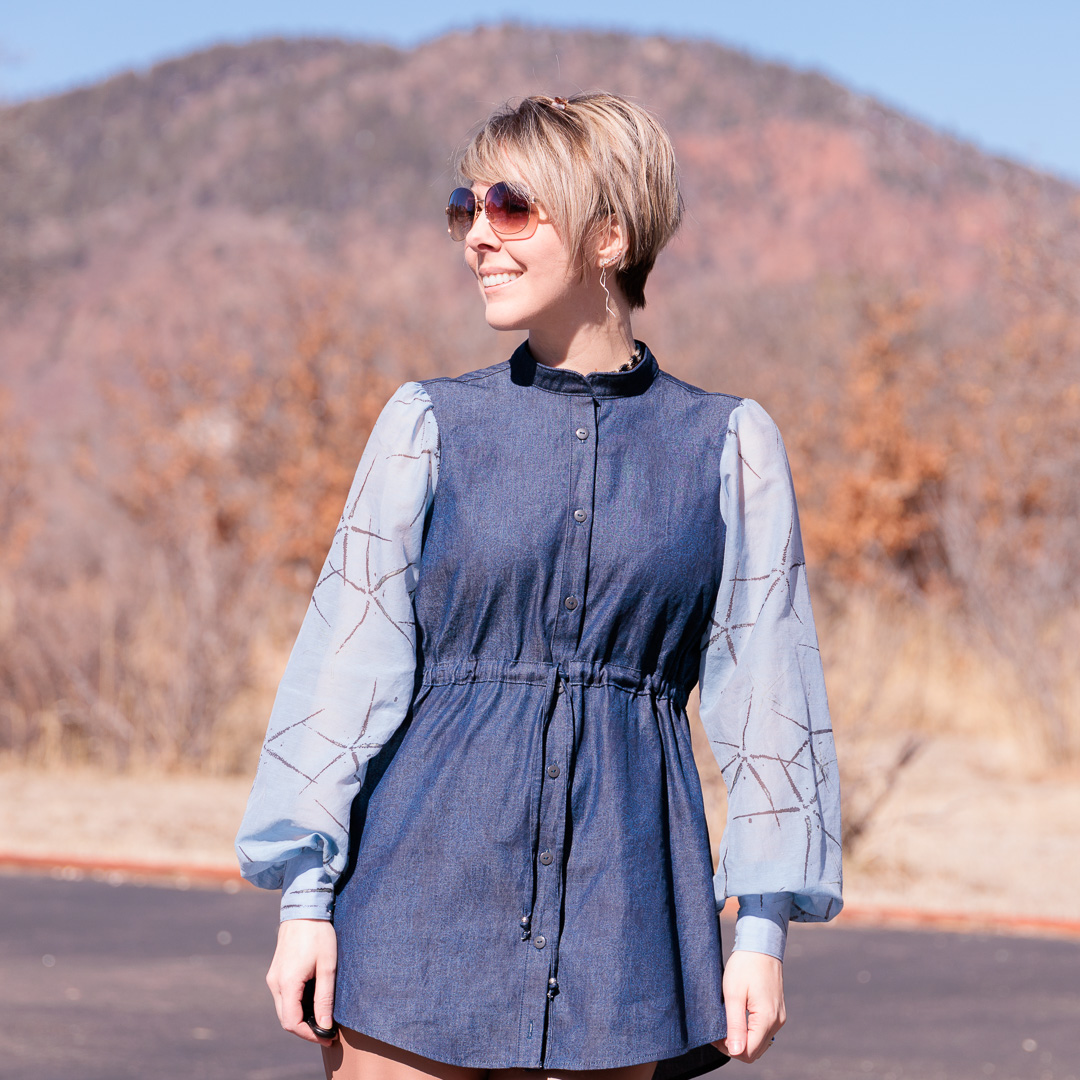
- banded collar
- waist definition (casing + drawstring)
About the Pattern
Aria Button Down // Love Notions
This is only my second Love Notions pattern and the instructions on this one really annoyed me. A beginner could easily get confused thanks to missing detail—such as failing to note things like “right sides together.” The whole casing for the drawstring was like an afterthought; no markings on the pattern for it, lackluster instructions. The numbered steps for the long sleeves go from 11, 12, 13, to 3 (an obvious cut/paste from the short sleeve instructions that weren’t edited at all.)
Plus, if you’re making the sleeves as is, good luck discerning which slit/pleat lines you’re supposed to mark for your size. Why are they all the same color??? 👇
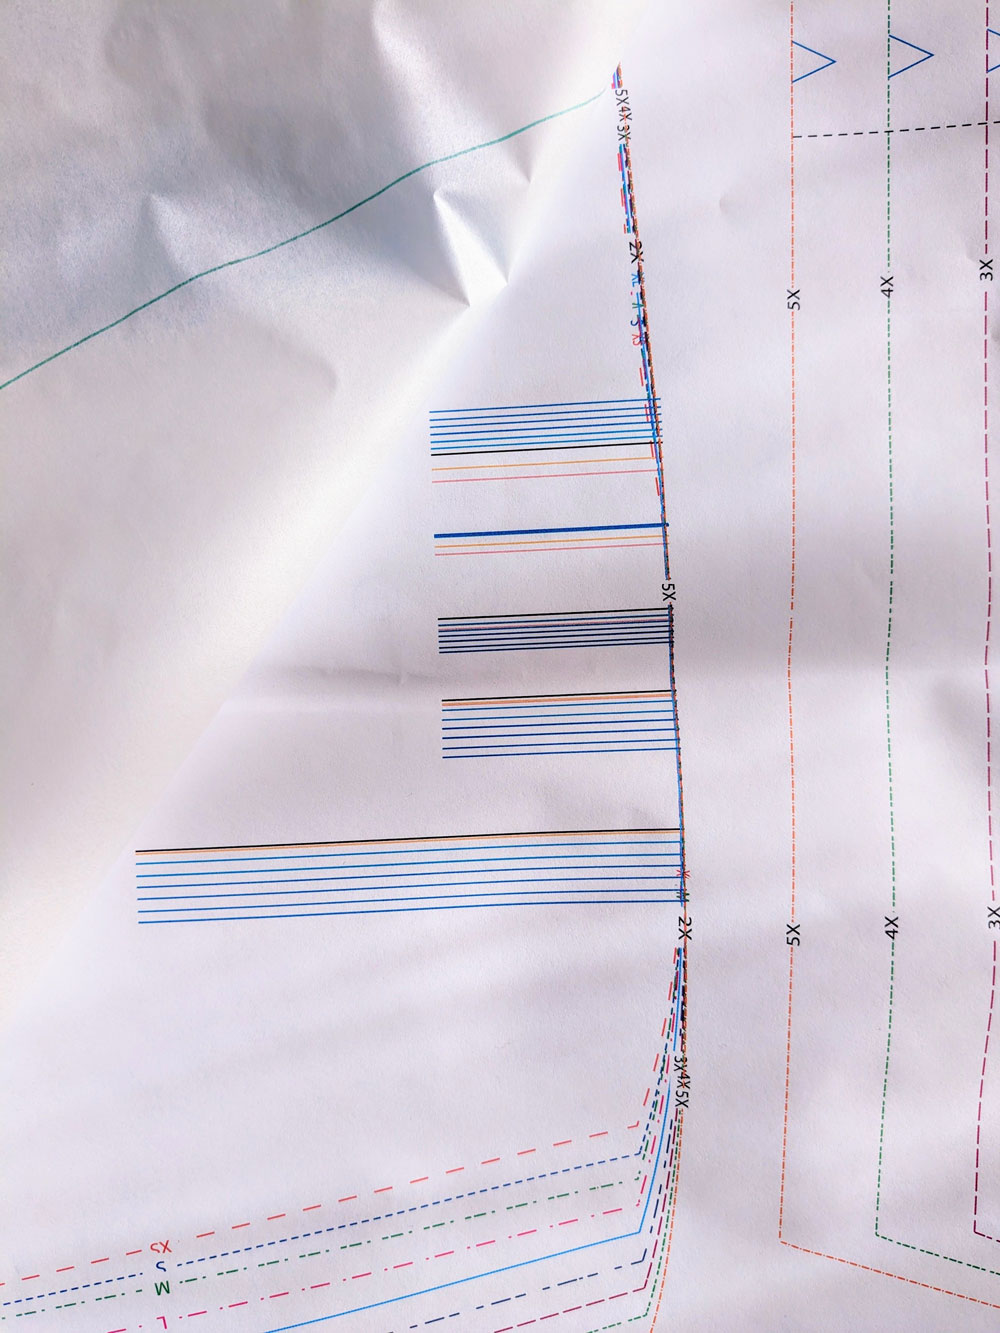
Seriously, what is that? Is it the slit? Is it the pleats? Both? Does it matter since it’s basically an ocean of blue and less-blue lines? Nope; doesn’t matter. Thankfully I could ignore this since I did my own thing with the sleeves.
This pattern did throw a lot of new stuff at me, including
- sleeve cuffs
- sleeve plackets (even though I ultimately omitted them. I always opt for the easier technique that accomplishes the same thing, cuz duh.)
- bishop sleeves
- side slits
I also discovered the usefulness of a basting stitch for accurately folding a hem or fabric edge. It was especially handy for the drawstring casing. Instead of using my iron and ruler to fold 116″ inches of fabric over 1/4″, I used my 1/4″ foot and a basting stitch. Then ironing that 1/4″ under was a breeze. It was also quite helpful on the curved hem. Gonna tuck that one into my arsenal of tricks.
What I Did Differently
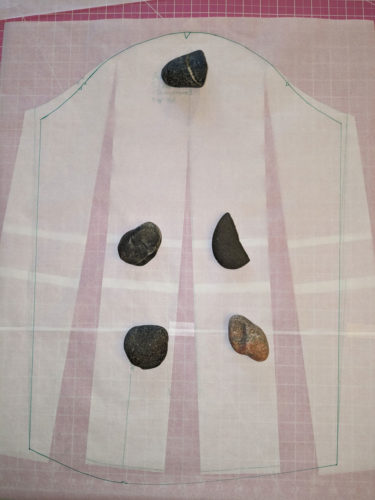
- Modified pattern for bishop sleeves using this walk-through. Modified vs. slashed original shown below (this is before I modified it to include the side extensions for the slit. Also note: I didn’t fully cut out the bottom pattern piece so there’s extra paper on the sides that might make you think that’s the sleeve width after slashing. Tisn’t. There are lines you can see beneath the final green trued ones.) I spread 2″ at each slash. That walk-through didn’t talk about keeping the original armscye shape, but maybe it should have? I always respect the original armscye shapes cuz thems look like crazy curves to start messing with.
- Ditched the sleeve placket, as I said, and applied the side-slit technique on the bodice to the sleeve seam. So much simpler and helps preserve the lightness/drape of the voile.
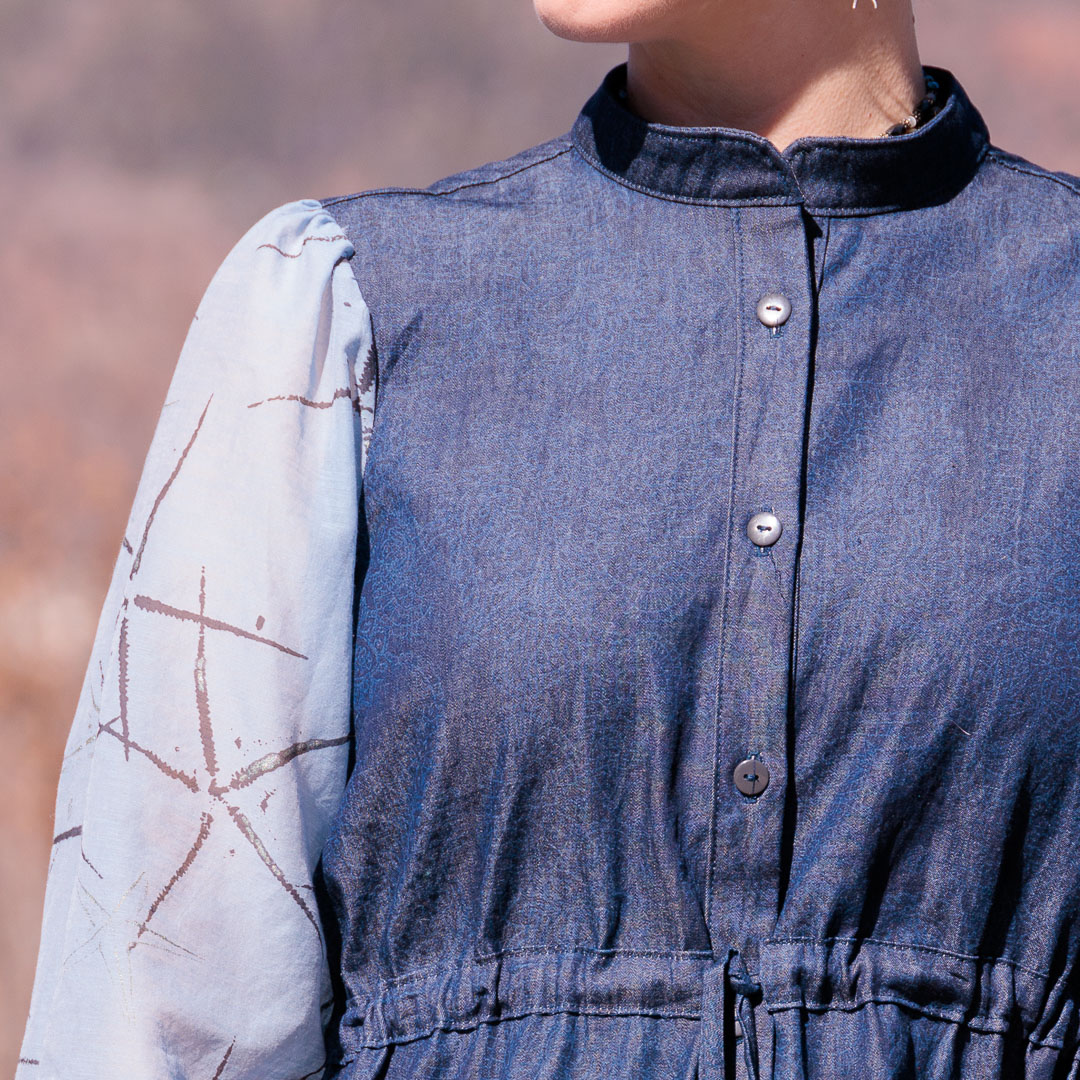
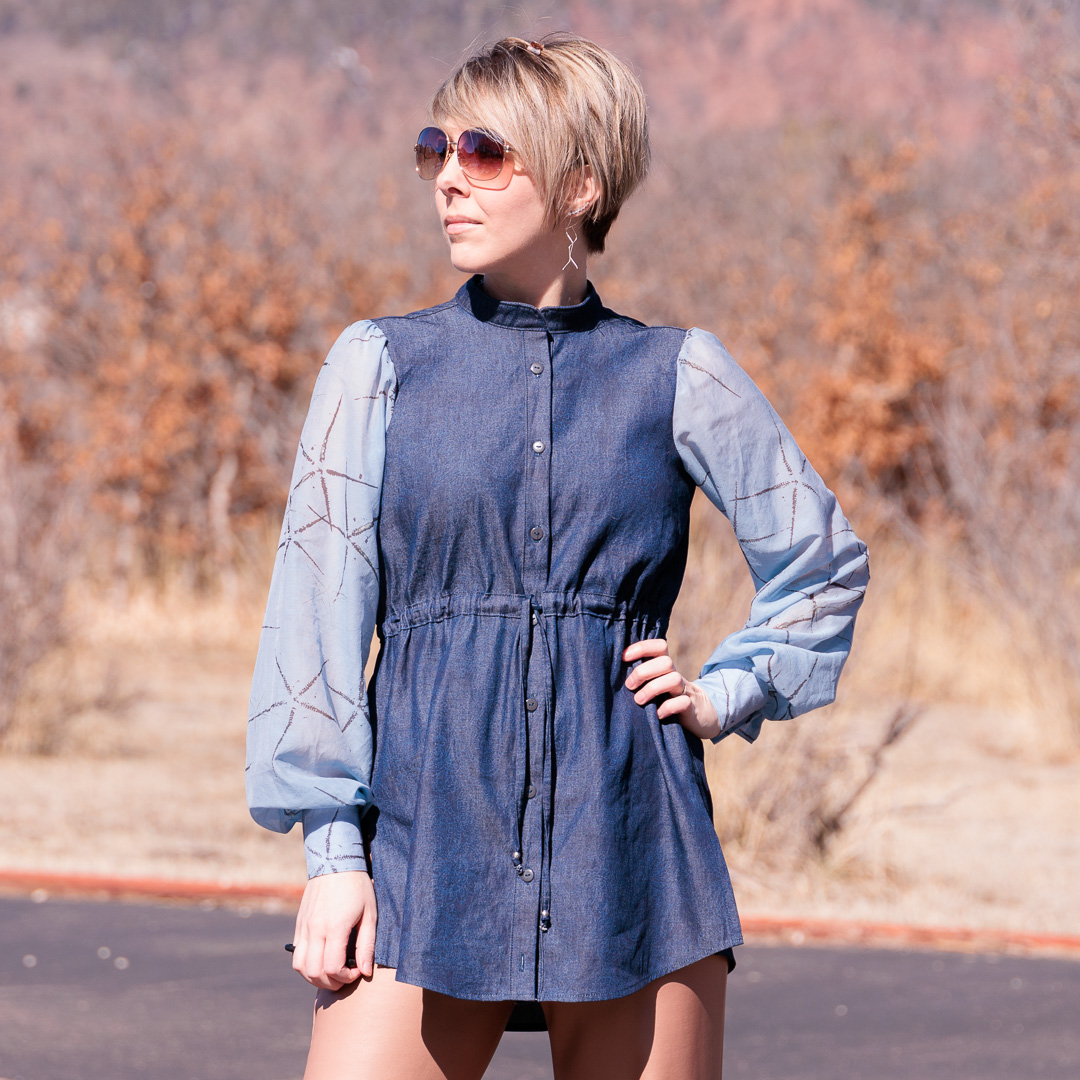
- Used two buttons per cuff instead of one.
- Included some beads on the drawstring ends to weigh them down.

Notes for Next Time
I resolve there will not be a next time for this one. But in case I go bananas and torture myself with this again…
- Could narrow the cuff by like an inch. Then I’d probably only need one button.
- Don’t have to press the collar lining under until it’s attached to the collar main. I say this because the 1/4″ pre-press wasn’t enough to ensure it would be caught in the topstitching. So I ended up refolding it so it aligned with the seam where the collar main attached to the bodice. Ended up being larger than 1/4″.
- For gathering the sleeve caps, seems like you only need to run the basting stitches between the back notches and shoulder notch. Didn’t gather much if anything between the shoulder notch and front notches.
Can’t think of anything else. This one turned out pretty flawless, in my opinion, and garnered a fair amount of compliments. Only one drawback: that cotton chambray wrinkles real easily.
Project Settings
Sewing Machine vs. Serger
| Sewing Machine | Serger |
|---|---|
|
|
Sewing Machine Settings
| Presser Foot | Stitch# | Stitch Width | Stitch Length | Needle | Top Thread Tension | Application |
|---|---|---|---|---|---|---|
| standard zig-zag (A) | 0 | 3.5 | 5 | 90/14 | 4 | baste |
| standard zig-zag (A) | 1 | 3.5 | 3.5 | 90/14 | 4 | seams |
| standard zig-zag (A) | 1 | 3.5 | 3.5 | 65/9 | 4 | seams (chiffon) |
| overedge (C) | 2 | 3 | 3.5 | 65/9 | 4 | chiffon slit topstitch |
| overedge (C) | 1 | 3 | 3.5 | 90/14 | 4 | side slit topstitch |
| overedge (C) | 6 | 5.5 | 2.5 | 65/9 | 4 | edge finish (chiffon) |
| overedge (C) | 6 | 6 | 3 | 65/9 | 4 | cuff attach edge finish |
| overedge (C) | 1 | 3 | 3.5 | 65/9 | 4 | cuff topstitch |
| overedge (C) | 0 | 3 | 3.5 | 90/14 | 4 | collar topstitch |
| adjustable edge (SE#9) | 0 | 1.5 | 3.5 | 90/14 | 4 | hem |
| buttonhole (R) | 18 | 5 | 0.4 | 90/14 | 4 | buttonholes |
| button foot (T) | 6 | 4.5 | drop feed | 90/14 | 4 | shirt buttons |
| button foot (T) | 6 | 4 | drop feed | 90/14 | 4 | sleeve buttons |
Serger Settings
| Stitch Name | 4-thread overlock |
|---|---|
| Needles | R, L |
| Finger | B |
| Threads | 4 |
| Tension Left Needle | 4 |
| Tension Right Needle | 4 |
| Tension Upper Looper | 4 |
| Tension Lower Looper | 4 |
| Cut Width | 6 |
| Stitch Length | 2.5 |
| Differential | 1.0 |
| Application | seams & armscye finish |
Leave a Reply