My favorite jacket is taking a nosedive. The faux leather accents have decided to become no leather accents and I’m not happy about it. (Can you even find Hurley jackets anymore? Their website looks pretty dismal and USD isn’t even an option. How rude.)
No need to wallow in sorrow, though, because it turns out, I can sew. /toothy grin
About the Pattern
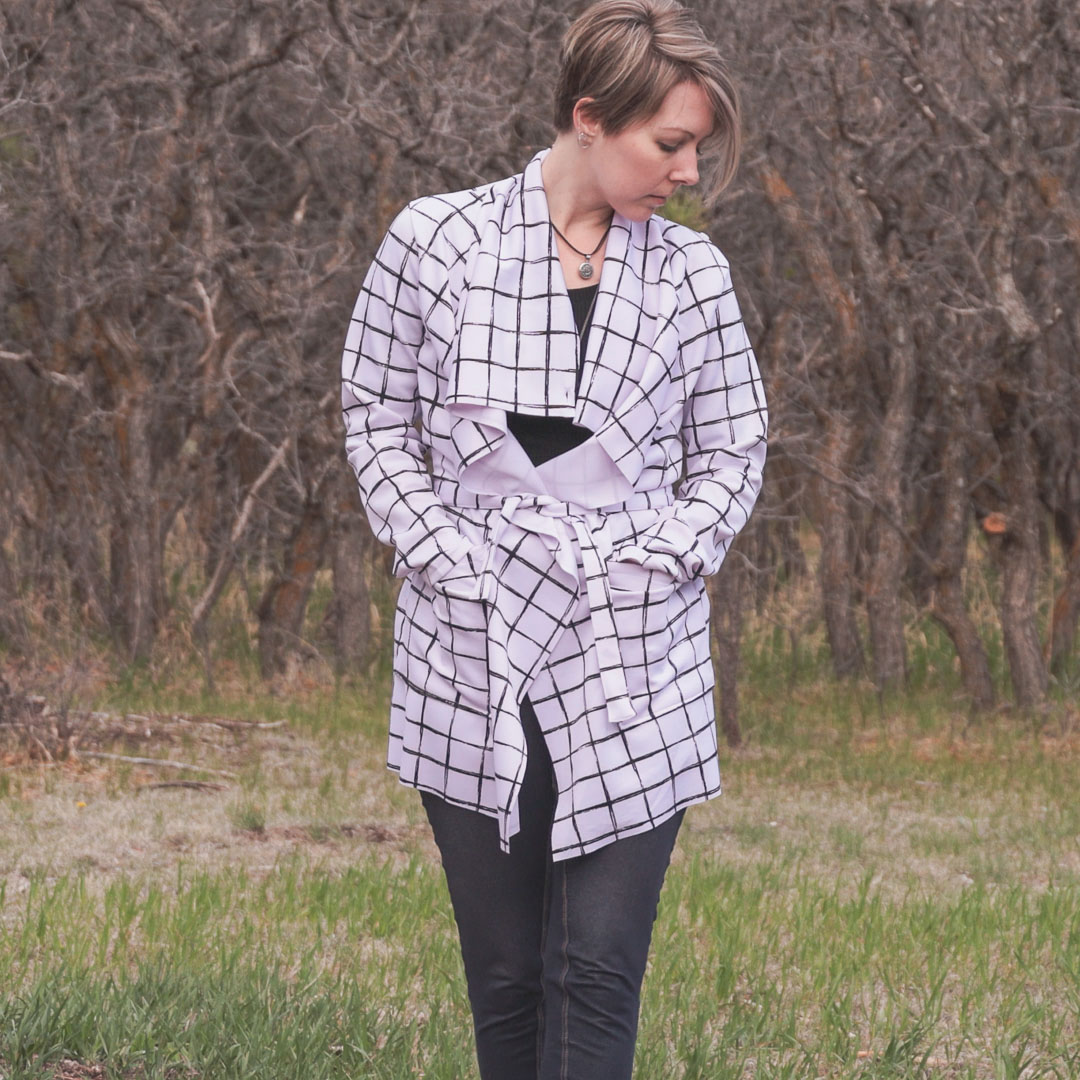
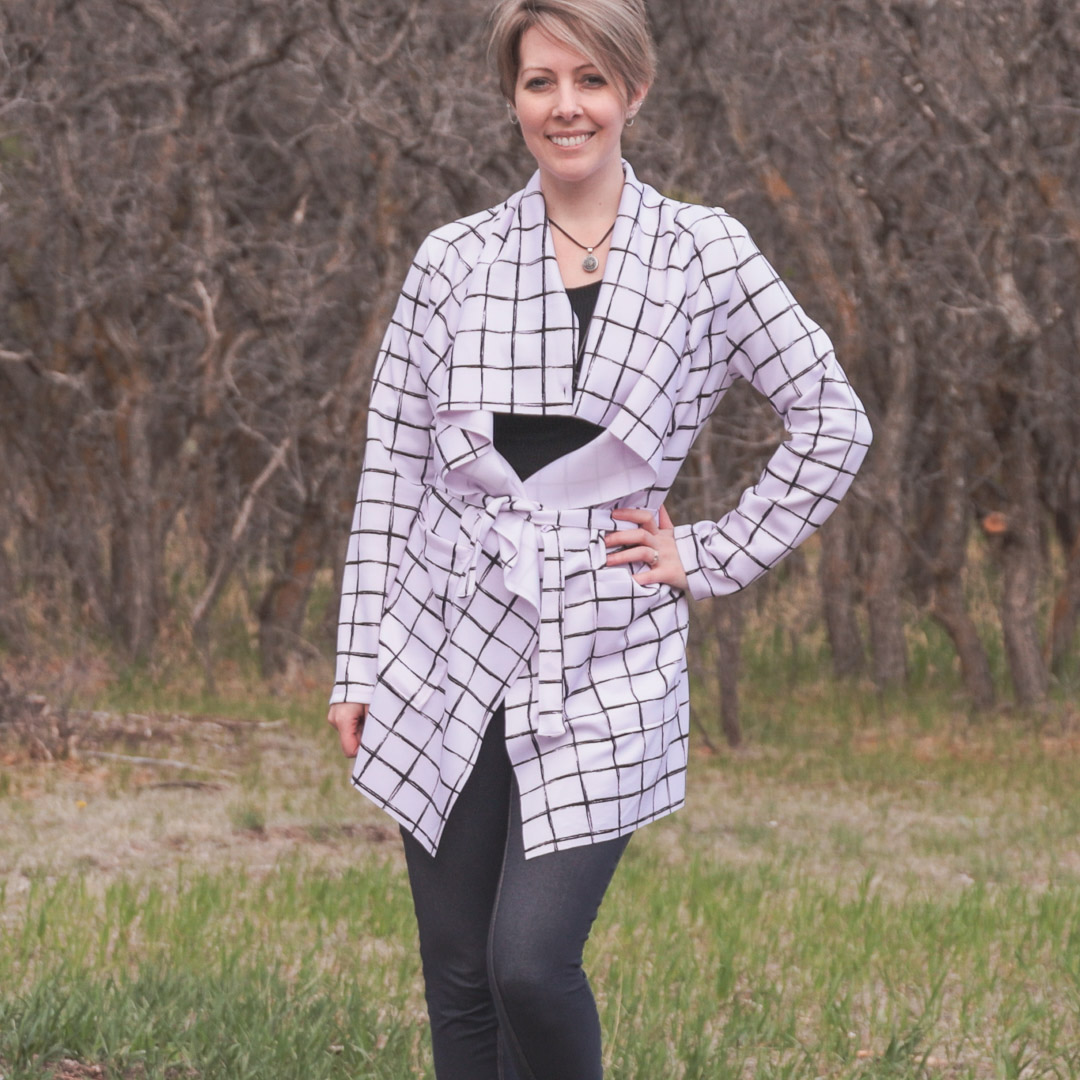
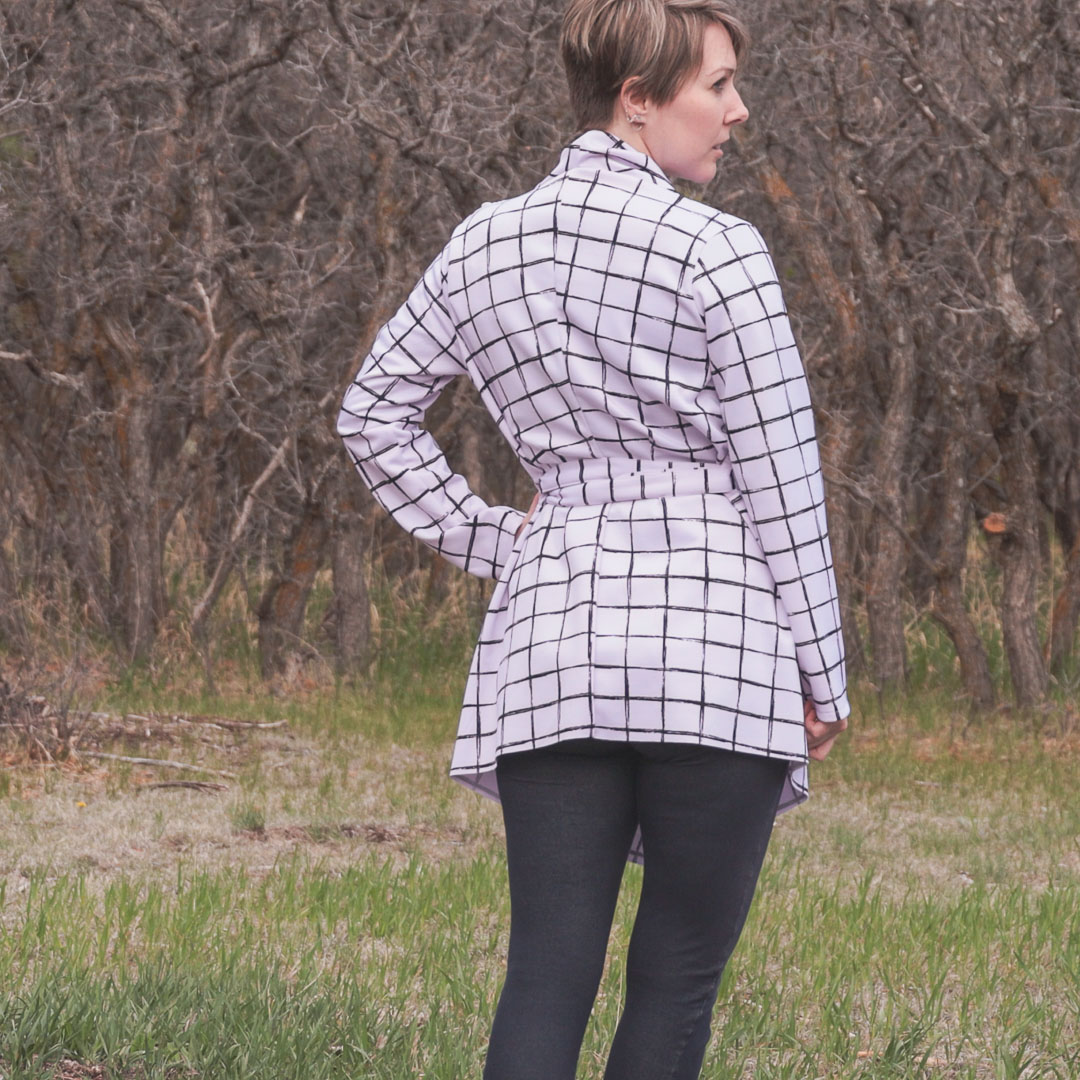
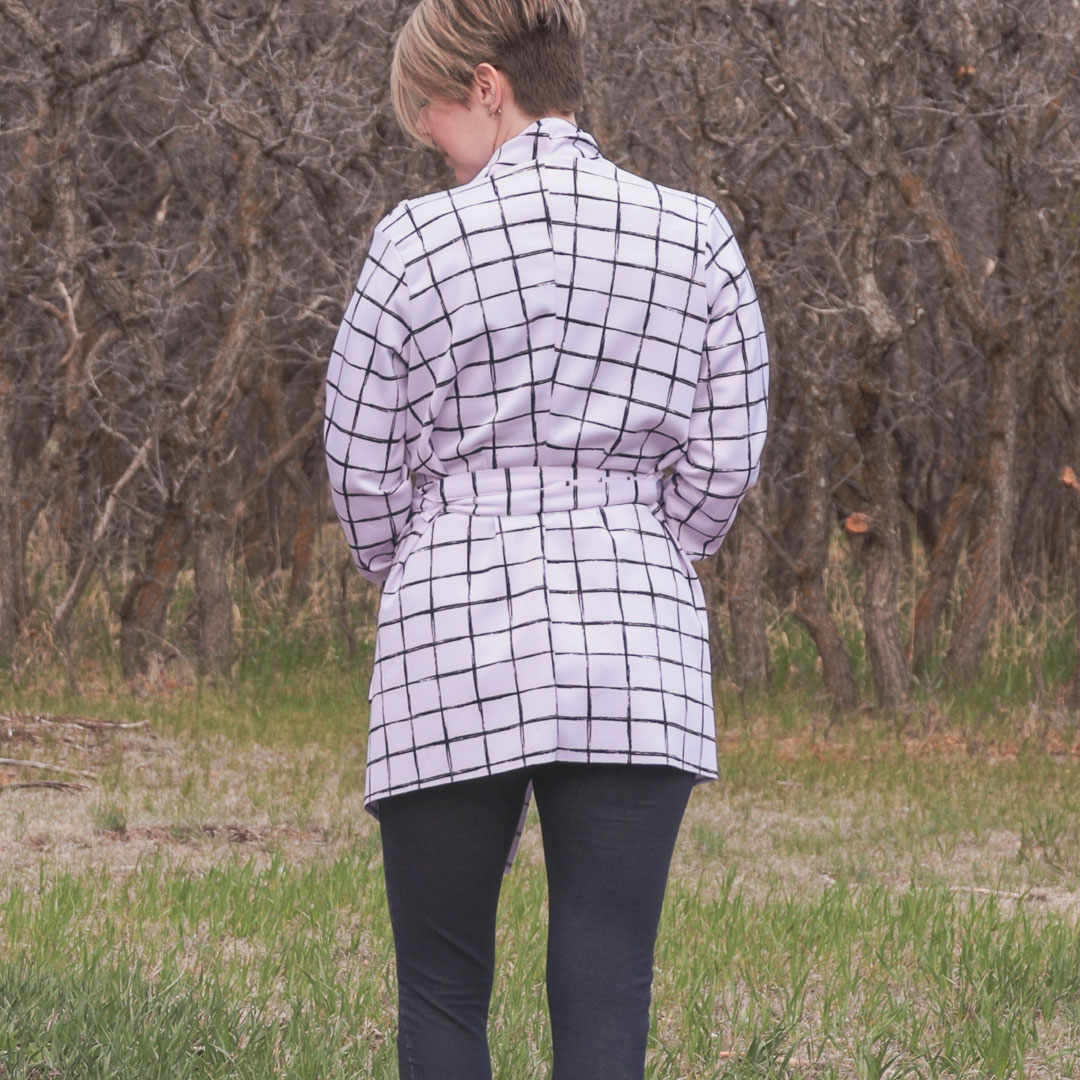
This is my first Rebecca Page pattern I’ve made and it’s called the Carli Coatigan. Aside from one very funky neck/shoulder seam that shot me back to the days when my brother would put the heads of my barbie dolls on his action figures — that doesn’t seem to go together… — it was a great pattern. Super thorough instructions with nice aesthetics, a one-page cheat-sheet for those of us who don’t want all the extra, and fitting guides.
I don’t even remember how I found this pattern. Was I looking for it or did I just trip over it in Internetville? No idea. But however I came across it, it was a short leap to “Hey, that could be my lightweight spring jacket!”
So it be’d.

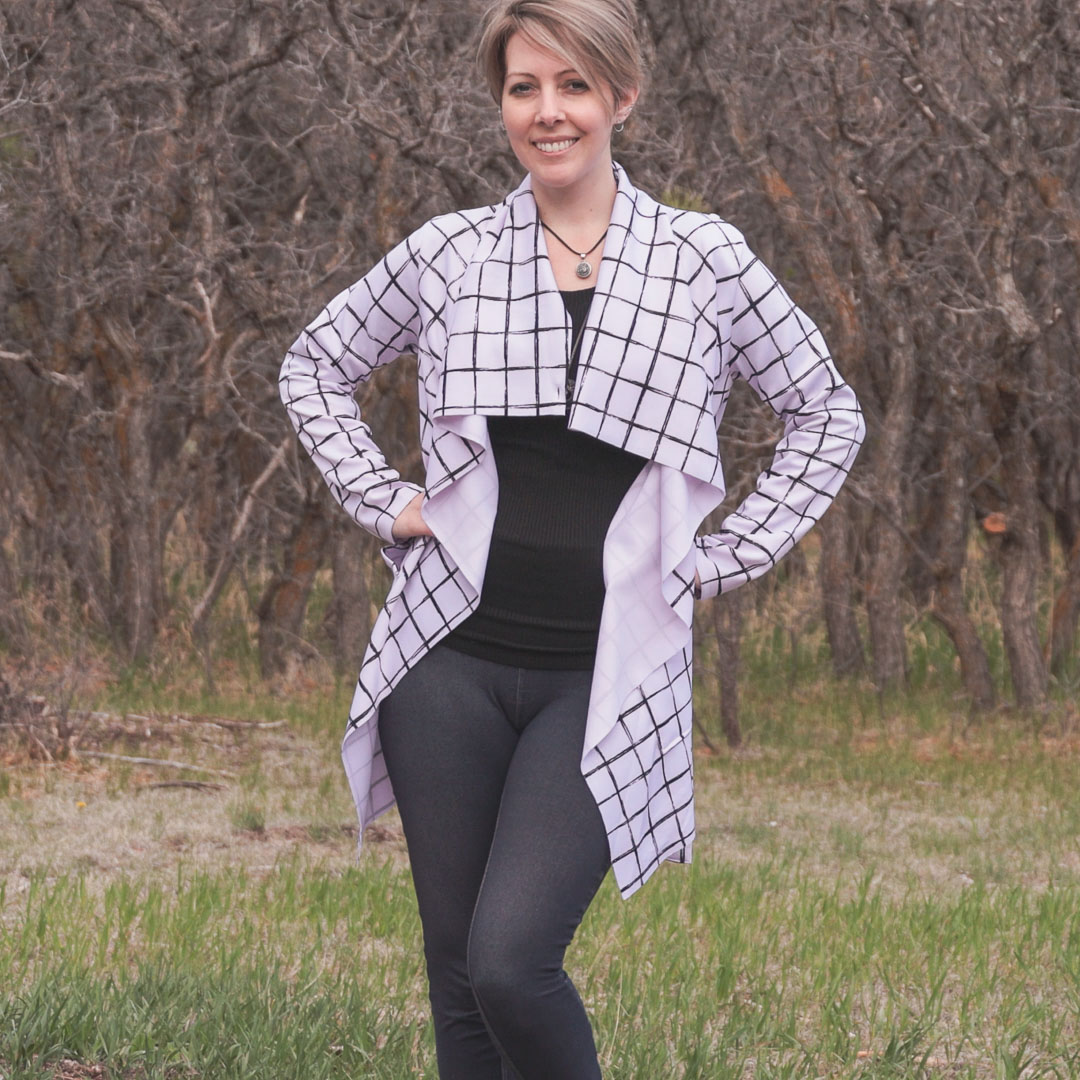
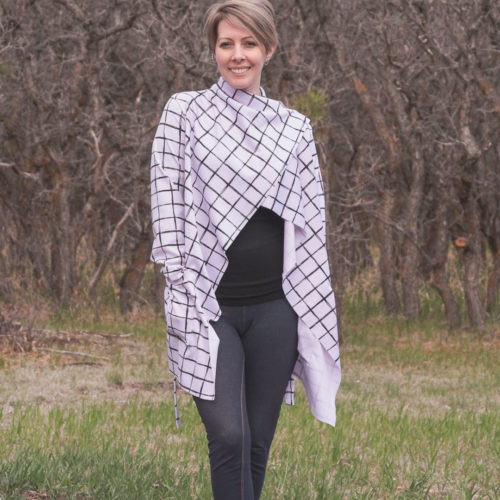
About This Make
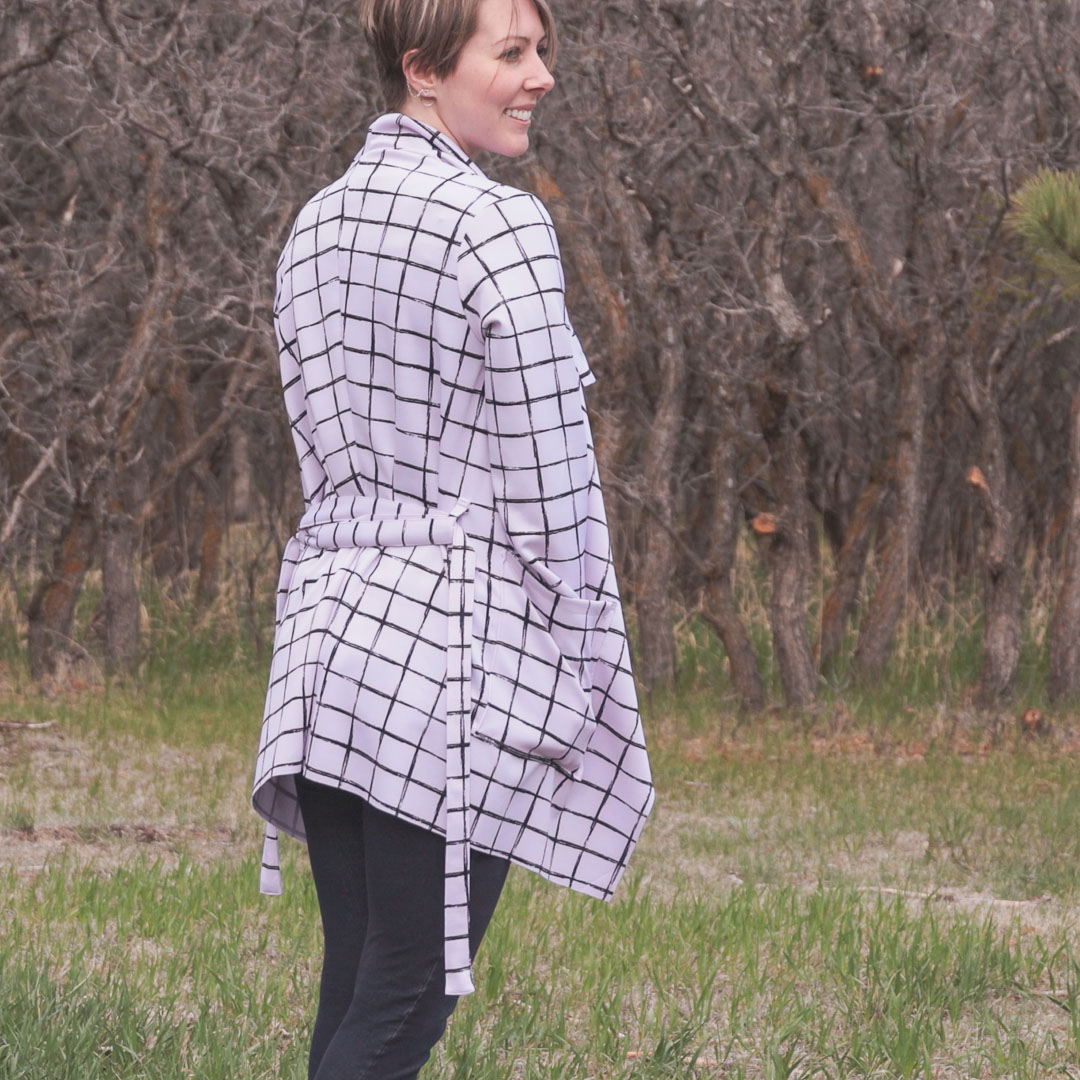
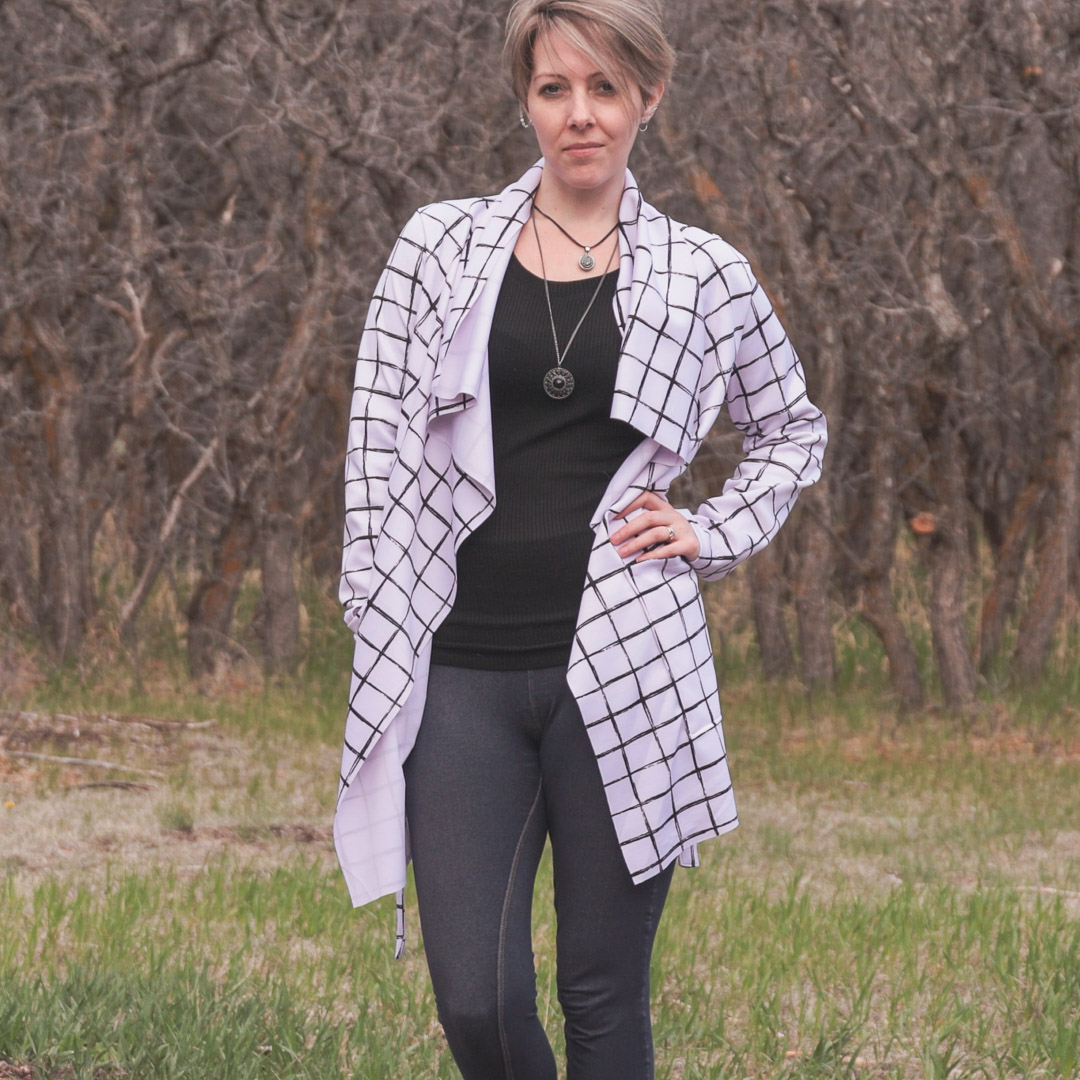
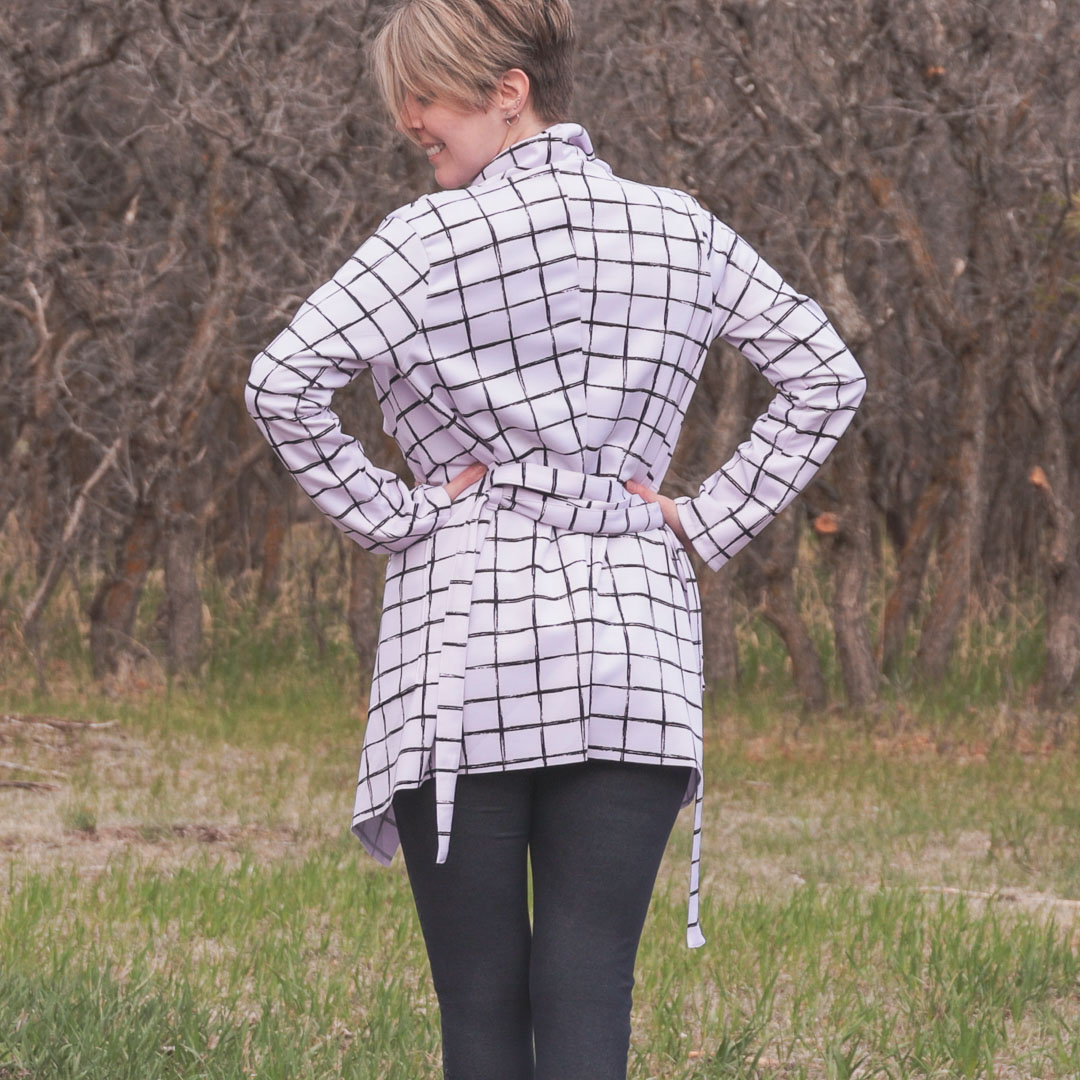
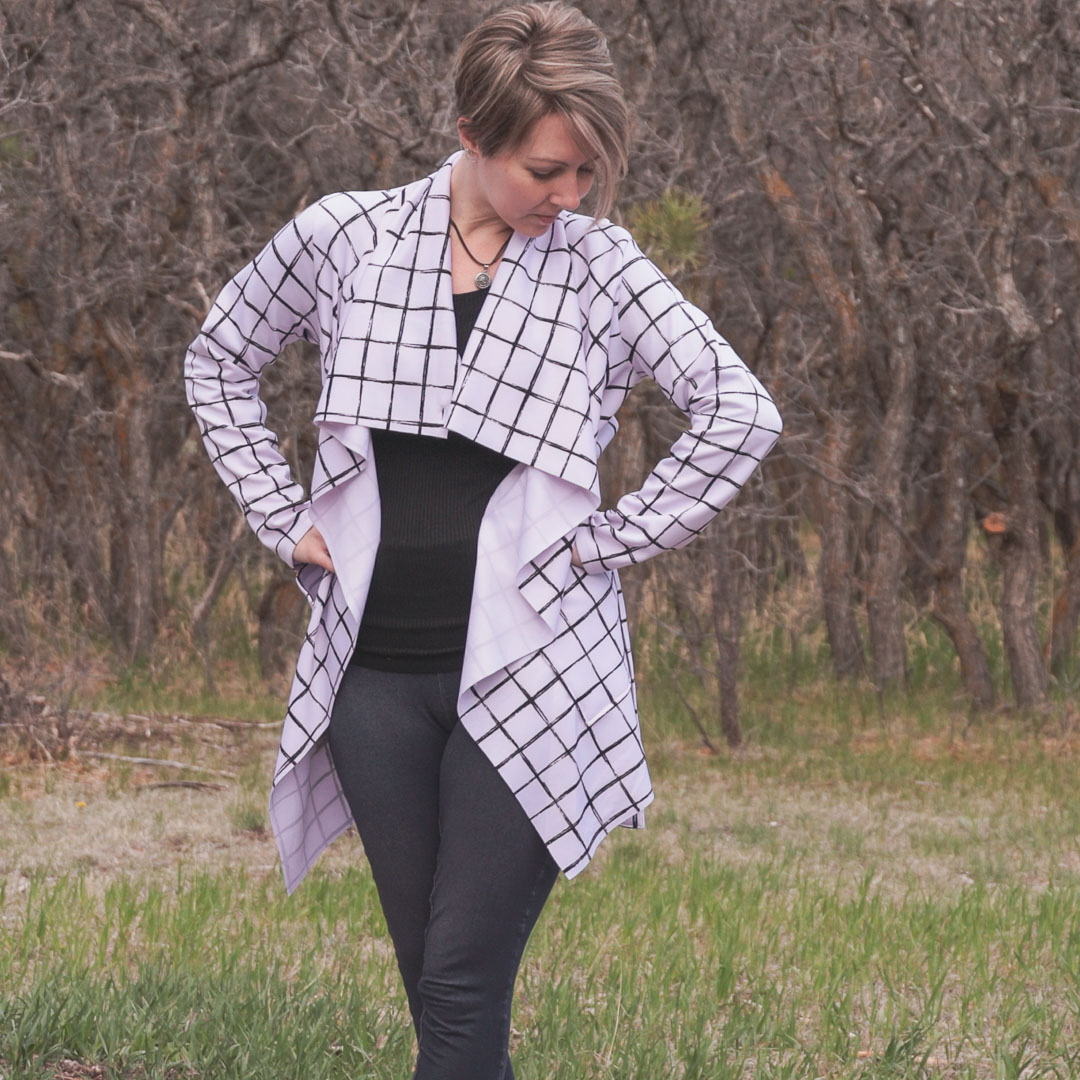
- size S
- thigh length
- +pockets
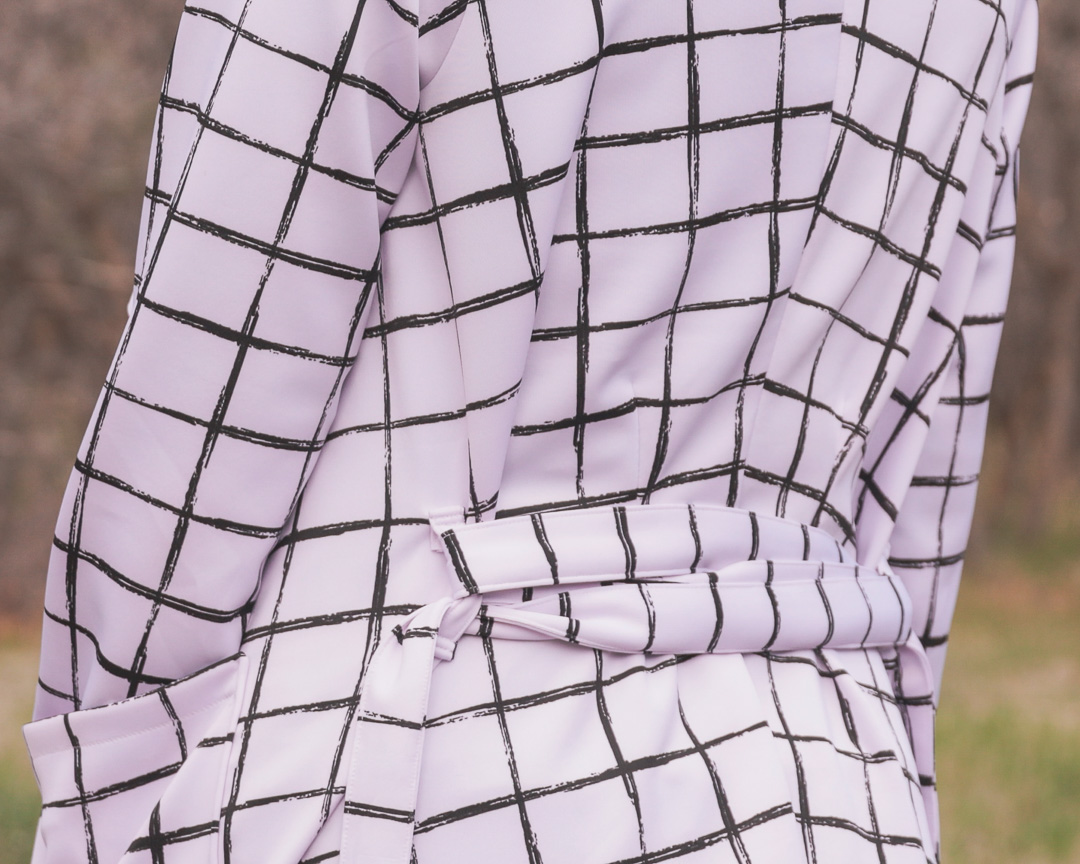
- +belt
I fell in between XS and S for the bust, but knowing I would be layering this over various things as a jacket, I opted for the larger size instead of grading.
About the Fabric
Square Sketch. Printed Scuba Knit from Boho Fabrics (I am always this close to typing Hobo Fabrics every time and it slays me.)
- Horizontal Stretch: 75%
- Vertical Stretch: 30%
- Fabric Width: 61″
- Weight: 13 oz.
- Content: 95% Poly, 5% Spandex
I originally bought this fabric for my second version of the Duchess Jacket that I swore I’d never make again. But it’s a stretch fabric, and that pattern calls for woven. I was going to go ahead with it anyway until I found some wool on Boho Fabrics and decided to use that instead. Which turned my lightweight Duchess Jacket plan into a heavyweight Duchess Jacket with satin lining (versus the minky lining I used in my first version.)
Ah, the pitfalls of sewing.
This fabric is really gorgeous. 13 oz. is a pretty substantial weight, but it still drapes really well. It has a smooth, cool texture and it was well-behaved while sewing. It’s quite perfect for a transitional layer in spring. And that sketchy plaid print is right up my alley. (My alley is apparently lined with plaid.)
What I Did Differently
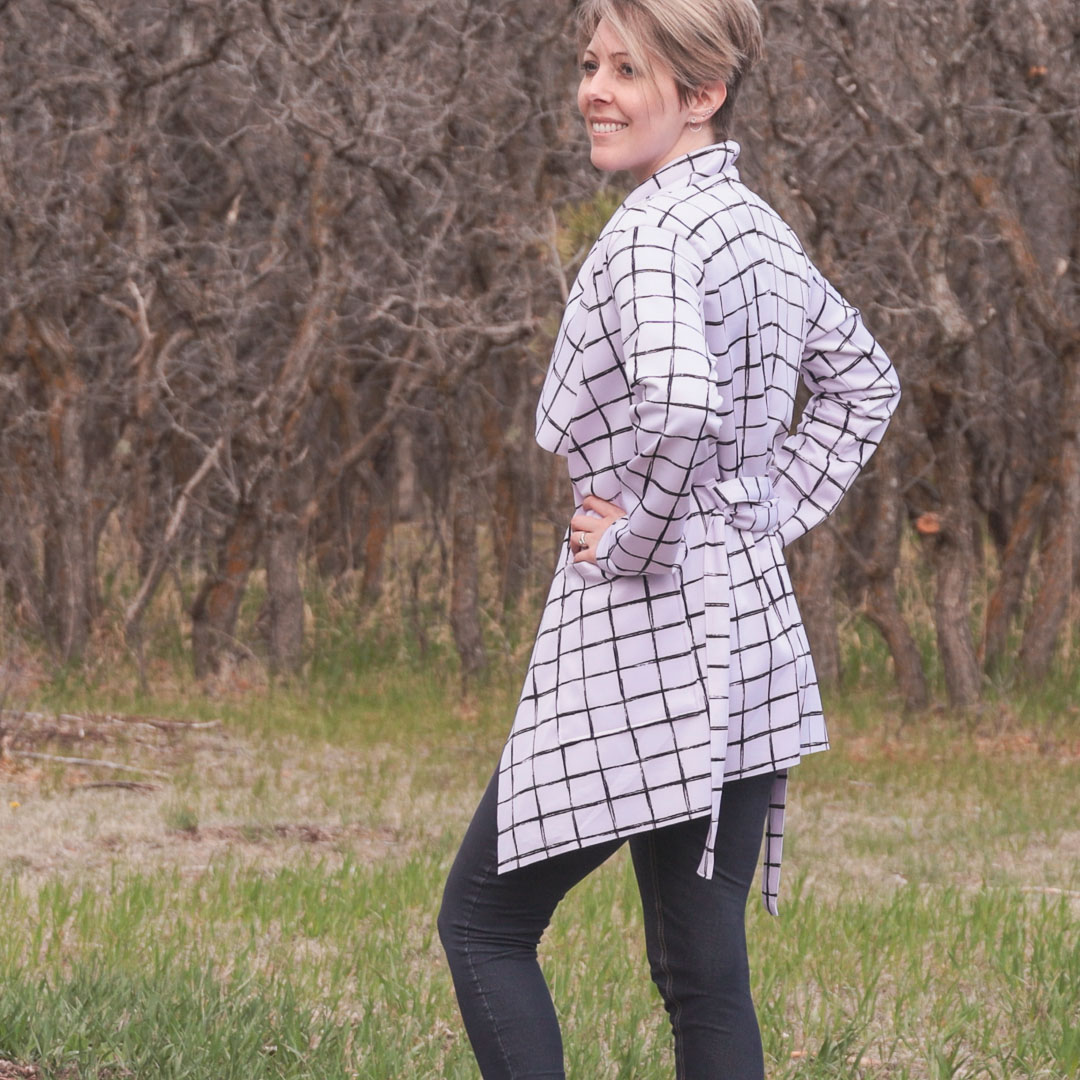
- Button! I added a little button on the left shoulder and a button hole on the right floppy neckline (unofficial term) so I could fasten the neckline closed.
- Belt. I constructed it like a long tube (vs. leaving a gap for turning as the instructions say), then tucked in the open short ends and topstitched all around.
- I was planning on making cuffs instead of hemming the sleeves, but when I tried it on pre-hem and pre-cuff, I was okay with the sleeves as is. I can always pivot on this later. It’s super easy to add sleeve cuffs.
- I left the bottom and collar edges unhemmed.

Notes for Next Time
- I serged one sleeve to the bodice and used my sewing machine for the other. Recommend the sewing machine.
- I also recommend the sewing machine over serger for the shoulder/neck seam. It’s just such a funky mash of seamlines that would run so much better through a sewing machine. I’m shocked I didn’t completely destroy it in my serger.
- Maybe try tapered sleeve cuffs. Or lengthen the sleeves by 1″.

Project Settings
Sewing Machine vs. Serger
| Sewing Machine | Serger |
|---|---|
|
|
Sewing Machine Settings
| Presser Foot | Stitch# | Stitch Width | Stitch Length | Needle | Top Thread Tension | Application |
|---|---|---|---|---|---|---|
| standard zig-zag (A) | 5 | 1.0 | 4 | blue tip | 4 | seams |
| overedge (C) | 2 | 3 | 3 | blue tip | 4 | belt loop construction |
| standard zig-zag (A) | 2 | 3.5 | 3.5 | blue tip | 4 | darts, hem |
| overedge (C) | 6 | 5.5 | 3 | blue tip | 4 | edge finish |
| 1/4" | 0 | 3.5 | 3.5 | blue tip | 4 | pocket attach |
| applique (F) | 0 | 3.5 | 3 | blue tip | 4 | belt loop attach |
| buttonhole foot (R) | 18 | 5 | 0.4 | blue tip | 4 | button hole |
| button (T) | 6 | 4.5 | drop feed | blue tip | 4 | button |
Serger Settings
| Stitch Name | 4-thread overlock |
|---|---|
| Needles | R, L |
| Finger | B |
| Threads | 4 |
| Tension Left Needle | 4 |
| Tension Right Needle | 4 |
| Tension Upper Looper | 4 |
| Tension Lower Looper | 4 |
| Cut Width | 6 |
| Stitch Length | 2.5 |
| Differential | 1.0 |
| Application | seams |
Leave a Reply