Last year, I upcycled a shirt my dad used to wear all the time. I cried as I carefully picked at the seams to deconstruct it, detaching piece after piece, button after button, until finally it was time to cut. I used two of the buttons on that make, and the rest have been waiting in a zip-top bag for the right moment. As I was sifting through my bag of 100 random buttons, looking for the right ones to compliment this fabric, I pulled out four little buttons from that zip-top bag. Suddenly, this project became more than just another top to sew. With those four little buttons, it became another memory to hold, just one week shy of the six-year anniversary of my father’s passing.
About the Pattern
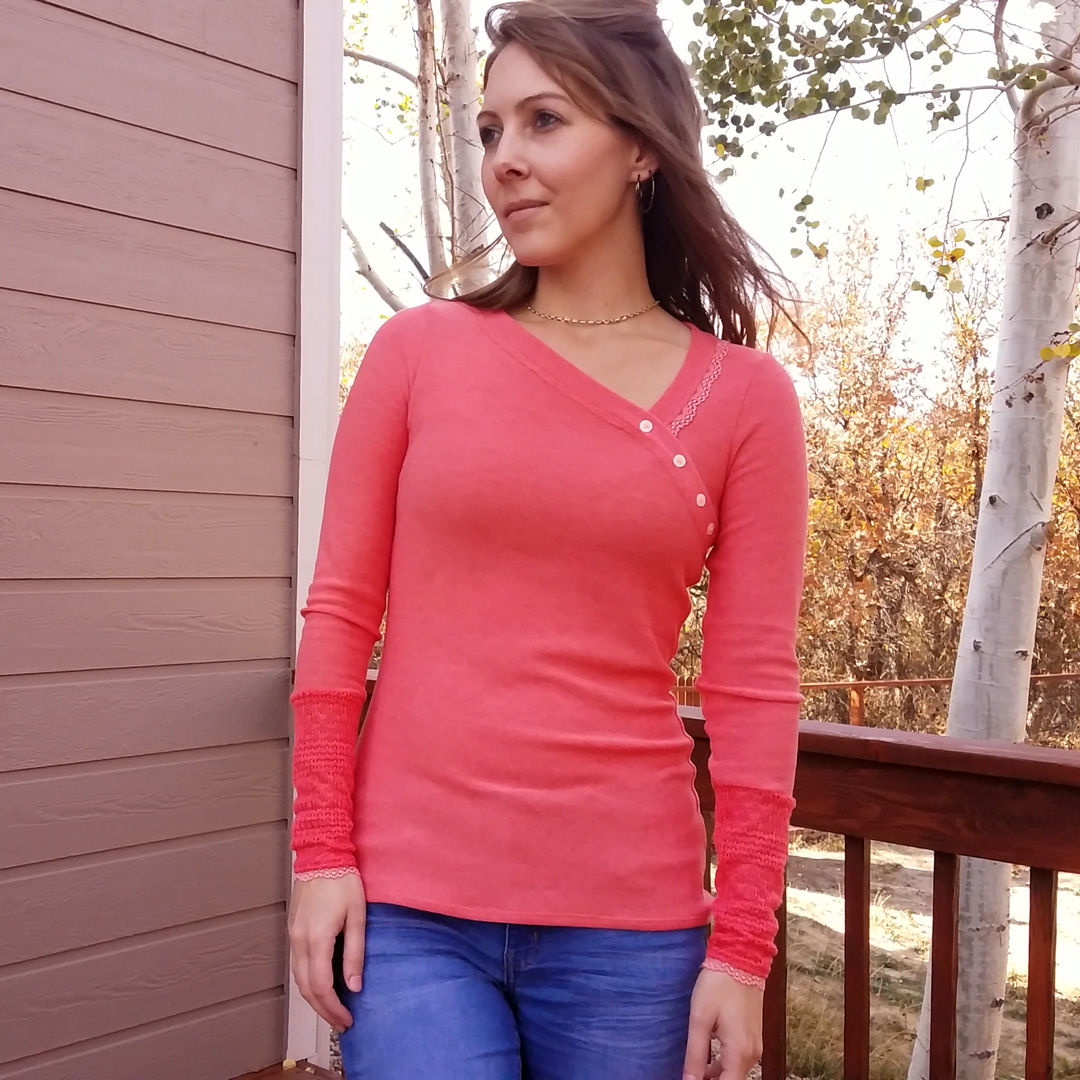
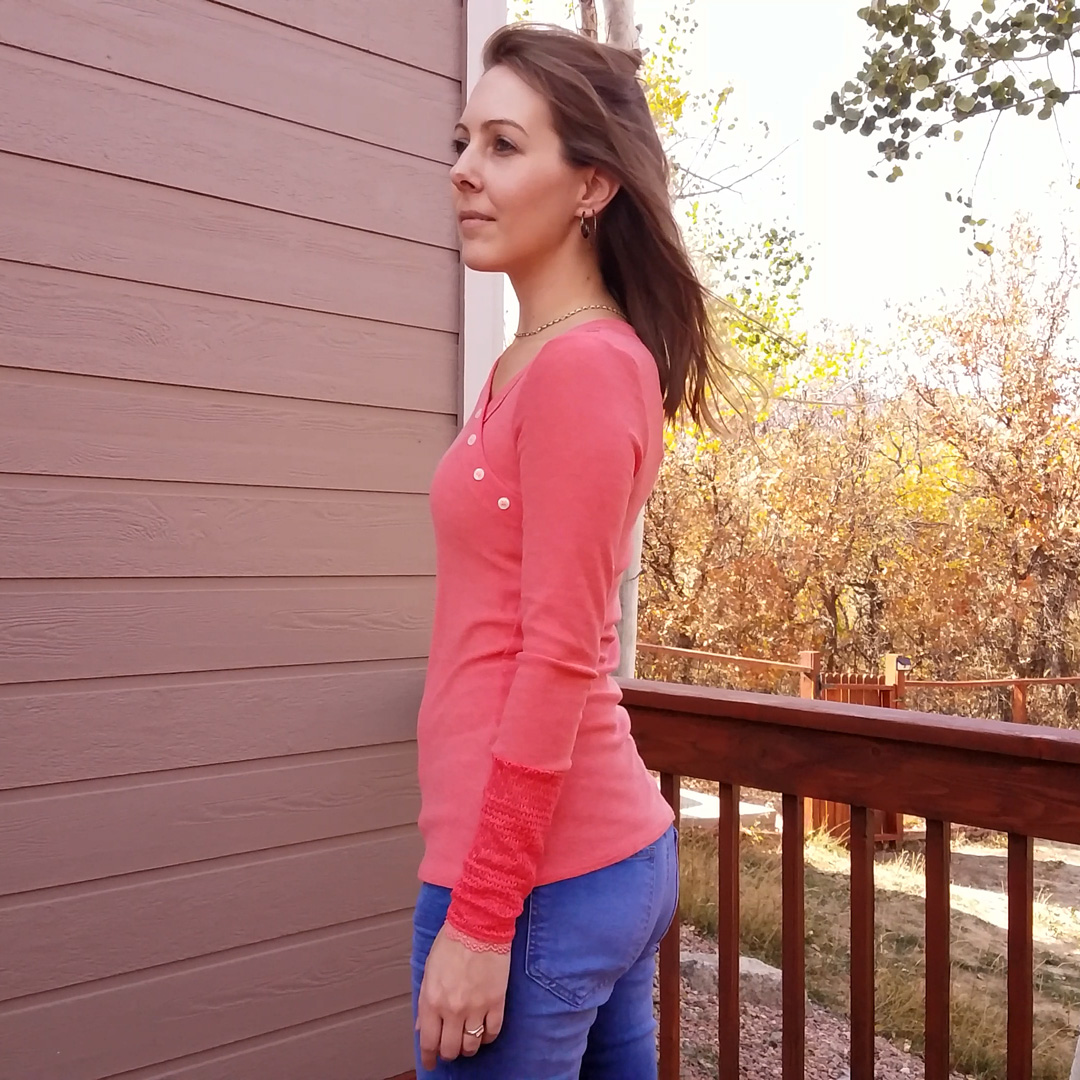
My favorite pattern designer just released a free pattern—the 40K Sway Top—to celebrate 40,000 members in the Facebook group, and it’s a fabulous pattern. I knew almost immediately I wanted to use up what was left of my coral brushed triblend from Boho Fabrics. I made a Teen Spirit Top out of it already, and used some to colorblock a Skylar Hoodie. It’s such a cozy fabric and it’s time to ramp up the cozy as fall wears on—even though it’s still managing to be in the 70s. Weird.
Pattern Features
- functional or decorative placket
- long or short cuffs
- customization potential: anything from color blocking to simple hacks to lengthen/shorten the bodice or sleeves
Instructions
As always, George and Ginger patterns are very easy to follow. Concise with helpful illustrations. However, there were a few points in this one that I skipped and changed.
- I did not baste the neckband. I found it totally unnecessary for a few reasons:
- It’s essentially like attaching a waistband. I never baste a waistband before quartering and attaching.
- Basting stitches have no stretch, and in the very next step you’re supposed to distribute the stretch.
- Considering the first 2 reasons, I really didn’t want to pick out a bunch of basting stitches.
- You increase the risk of distorting the fabric when you baste. No thanks.
- I did not finish the curved edge of the shoulder piece. Again, I found that unnecessary considering the next step has that edge sewn to the seam allowance of the neckband. Which I would then edge finish the entire neckband seam allowance, including that edge I was told to finish previously.
- I did the cuffs totally different. Detailed below.
About the Fabric(s)
Brushed Triblend Sweater Knit // Boho Fabrics Buttery soft, good 4-way stretch, a somewhat looser recovery, and wonderful drape. The brushed inside feels amazing! It’s a lighter weight sweater knit, so wind does cut through it easily. Also develops some pilling on the right side as time wears on.
Tropic Time Open Sweater Knit // JoAnn Fabrics Soft, two-way stretch knit with good drape and great recovery. Cut edges do shed and unravel, so finishing is important. Has a slightly heavier weight than the triblend above, but an open weave obviously offers no barrier for wind. I love open weaves for days where it can’t seem to decide if it’s hot or cold.
Stretch Lace Trim I want to say this came from Boho Fabrics as a free gift, which they include with every order. Very often they send appliques, but they send trims as well. I have some purple, glittery elastic, and also had this yard of lace which coordinated perfectly with my coral fabric scheme. Oh, serendipity.
What I Did Differently
Embellishments
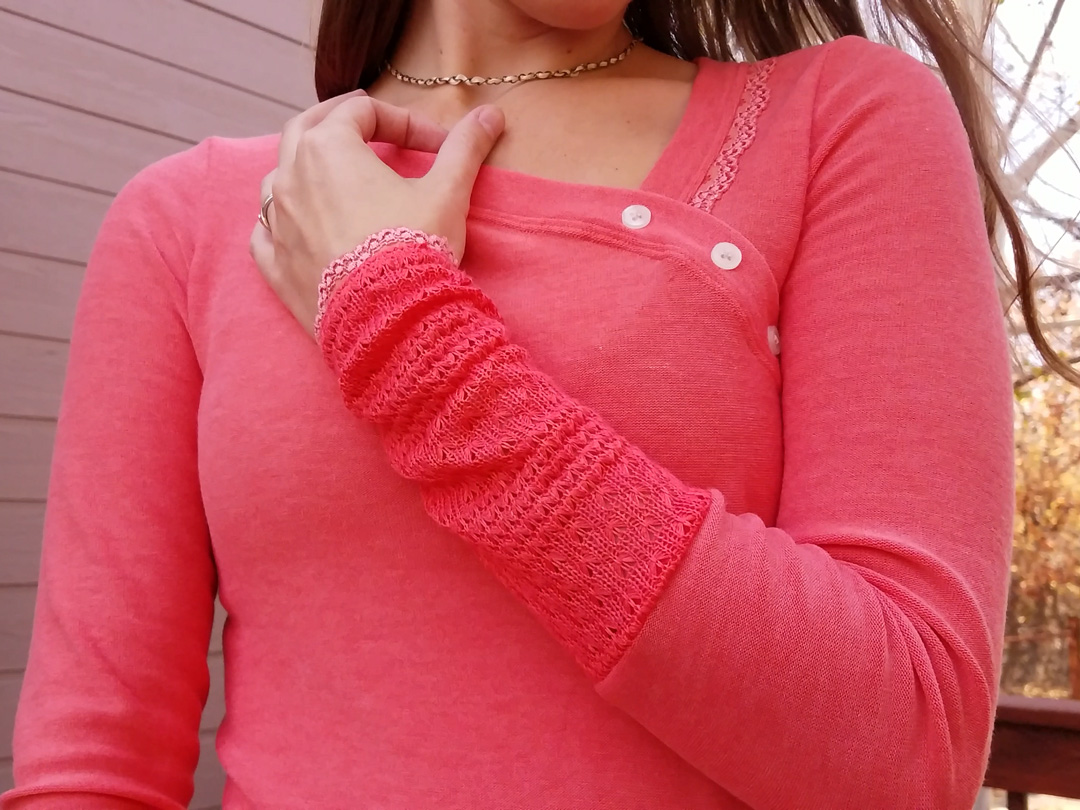
The pattern is a little on the vanilla side except for that asymmetric neckline and placket/button detail. Nothing wrong with that at all! It actually creates the perfect opportunity to add your own twists, as I did with the lace details around the wrists, and along the neckband/shoulder. I’m so thrilled how the shoulder detail turned out. It runs just along that shoulder piece. It would’ve been way too overdone to run it along the entire neckband.
Adding the lace was the very first step. I lined up the raw edges of the fabric with the straight edge of the lace, right sides together. Then I shifted the lace just slightly away from the raw edge so I wouldn’t catch too much of it in the seam allowance. Then I sewed a 1/4″ seam to attach it.
Pattern Adjustments
I like extra long sleeves. Kind of an understatement—I’m obsessed with extra long sleeves. So I lengthened the cuffs by 1″. It was a fairly easy adjustment to make. I added the length to the end of the cuff, so the point where they taper to the center on the pattern piece. As I was tracing, I traced just one half of the cuff. Then I marked an extra inch where my tracing stopped, moved my tracing paper to line up my one-inch line with the center of the cuff, then traced the other half. Using a ruler, I extended both the angled lines until they intersected again. Probably not the correct way to do it technically speaking, but the results turned out just fine.
I decided to attach the cuffs before sewing the side seams for a few reasons:
- it’s easier to attach a cuff on the flat. No quartering or stretching or wrangling around the presser foot/needle.
- …especially when that cuff is made of an open weave fabric
I know why the instructions tell you to attach the cuff the way they do: because it creates a neater seam along your wrist. But with the fact I only used half the cuff piece vs. a folded-over cuff, plus the lace detail around the wrist, it wasn’t necessary to worry about that. The seam would look the same regardless of how I attached it to the sleeve, so I chose the simpler route.
Construction
I topstitched the neckband. To help my shoulder lace lay flat and keep the neckband from turning out, I topstitched the seam allowance using my twin needle. The weird part of this is the section along the lace had to be topstitched to the neckband, while the rest of the neckband seam allowance had to be topstitched to the bodice. I cut one little snip in the seam allowance along the left shoulder seam in order to accomplish this as neatly as possible.
I also made sure to place my buttons in a way where one of them was centered over the neckband overlap. That also really helps the neckband to lay flat and not gap.
I also topstitched the seam allowance around the wrists to help the lace lay flat.
And there we have it! One of my favorite makes to date!
Project Settings
Presser Foot |
Stitch# |
Width |
Length |
Needle |
Top Thread Tension |
Application |
|---|---|---|---|---|---|---|
standard zig-zag (A) |
5 |
1.0 |
4 |
blue tip |
4 |
seams, sleeve lace topstitch |
overedge (C) |
6 |
5.5 |
3.0 |
blue tip |
4 |
edge finish |
standard zig-zag (A) |
2 |
3.5 |
3.5 |
double stretch |
4 |
neckline topstitch, hem |
Leave a Reply