Sewing the Skylar Hoodie by Sinclair Patterns isn’t overly difficult–once you can anticipate the awkward instructions. This wasn’t my first Sinclair pattern so I had a pretty good idea of what to expect: a lot of re-reading to make sense of odd phrasing, missing details, and extra detail where it’s not needed, and hunting for the appropriate photo to go with the appropriate step. It was the same with my other makes from this pattern designer: love the finished product, despise the instructions.
This time, I went so far as to start re-writing everything on sticky notes to refer to if/when I make another of these. I did that up to about step 6, and then I just looked at the photos to get the jist of what came next, and then constructed things how I wanted:
Okay, time to attach the sleeves. I’ve done raglan sleeves before, so I’ll do it the way I know.
Okay, topstitching the hood so the lining doesn’t roll; I’ll sew it the way I want.
Okay, make a casing. I’ll measure it myself and do what makes sense and ignore the measurement the pattern gives.
And so forth. It was much more enjoyable once I started doing that.
Features
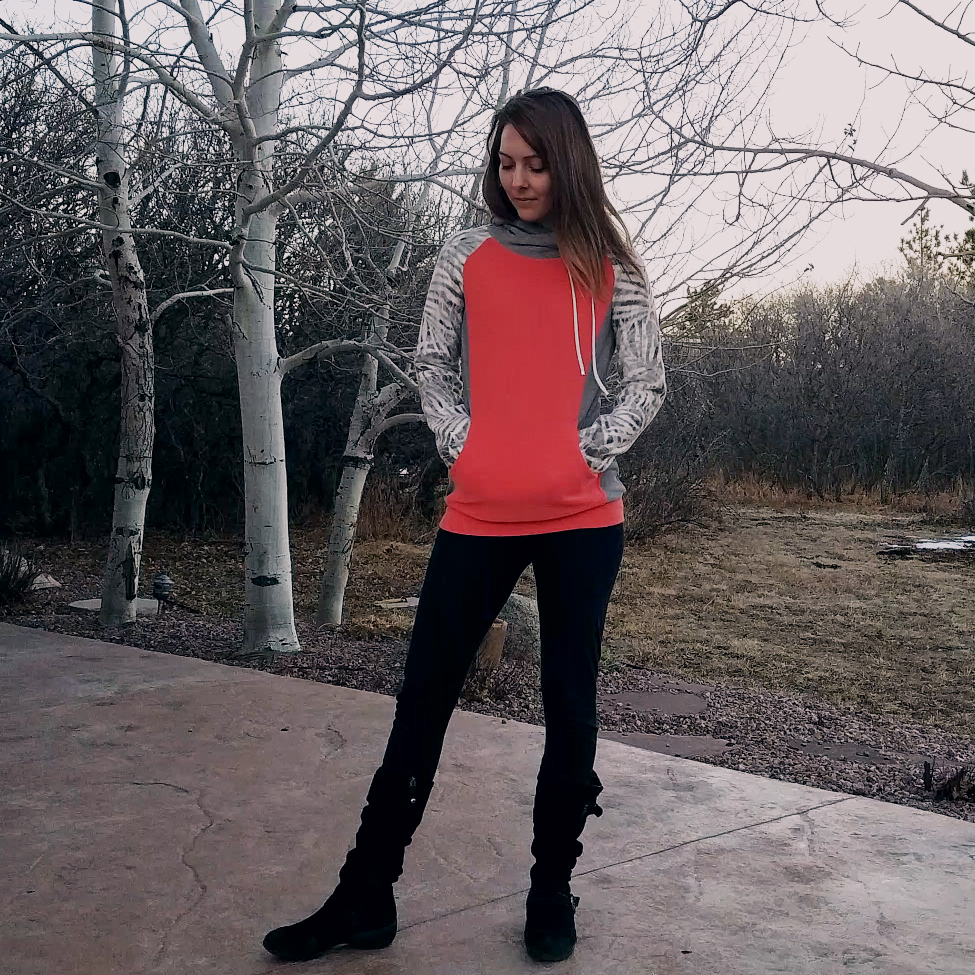
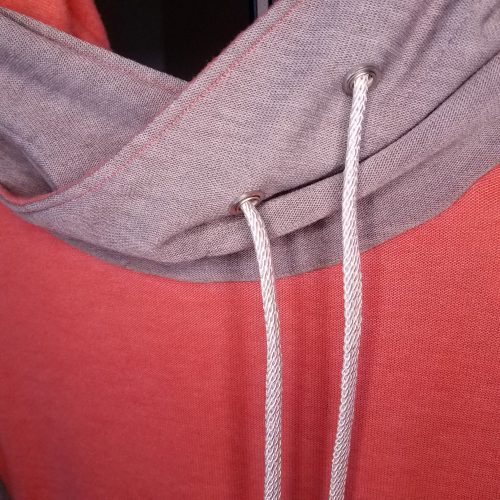
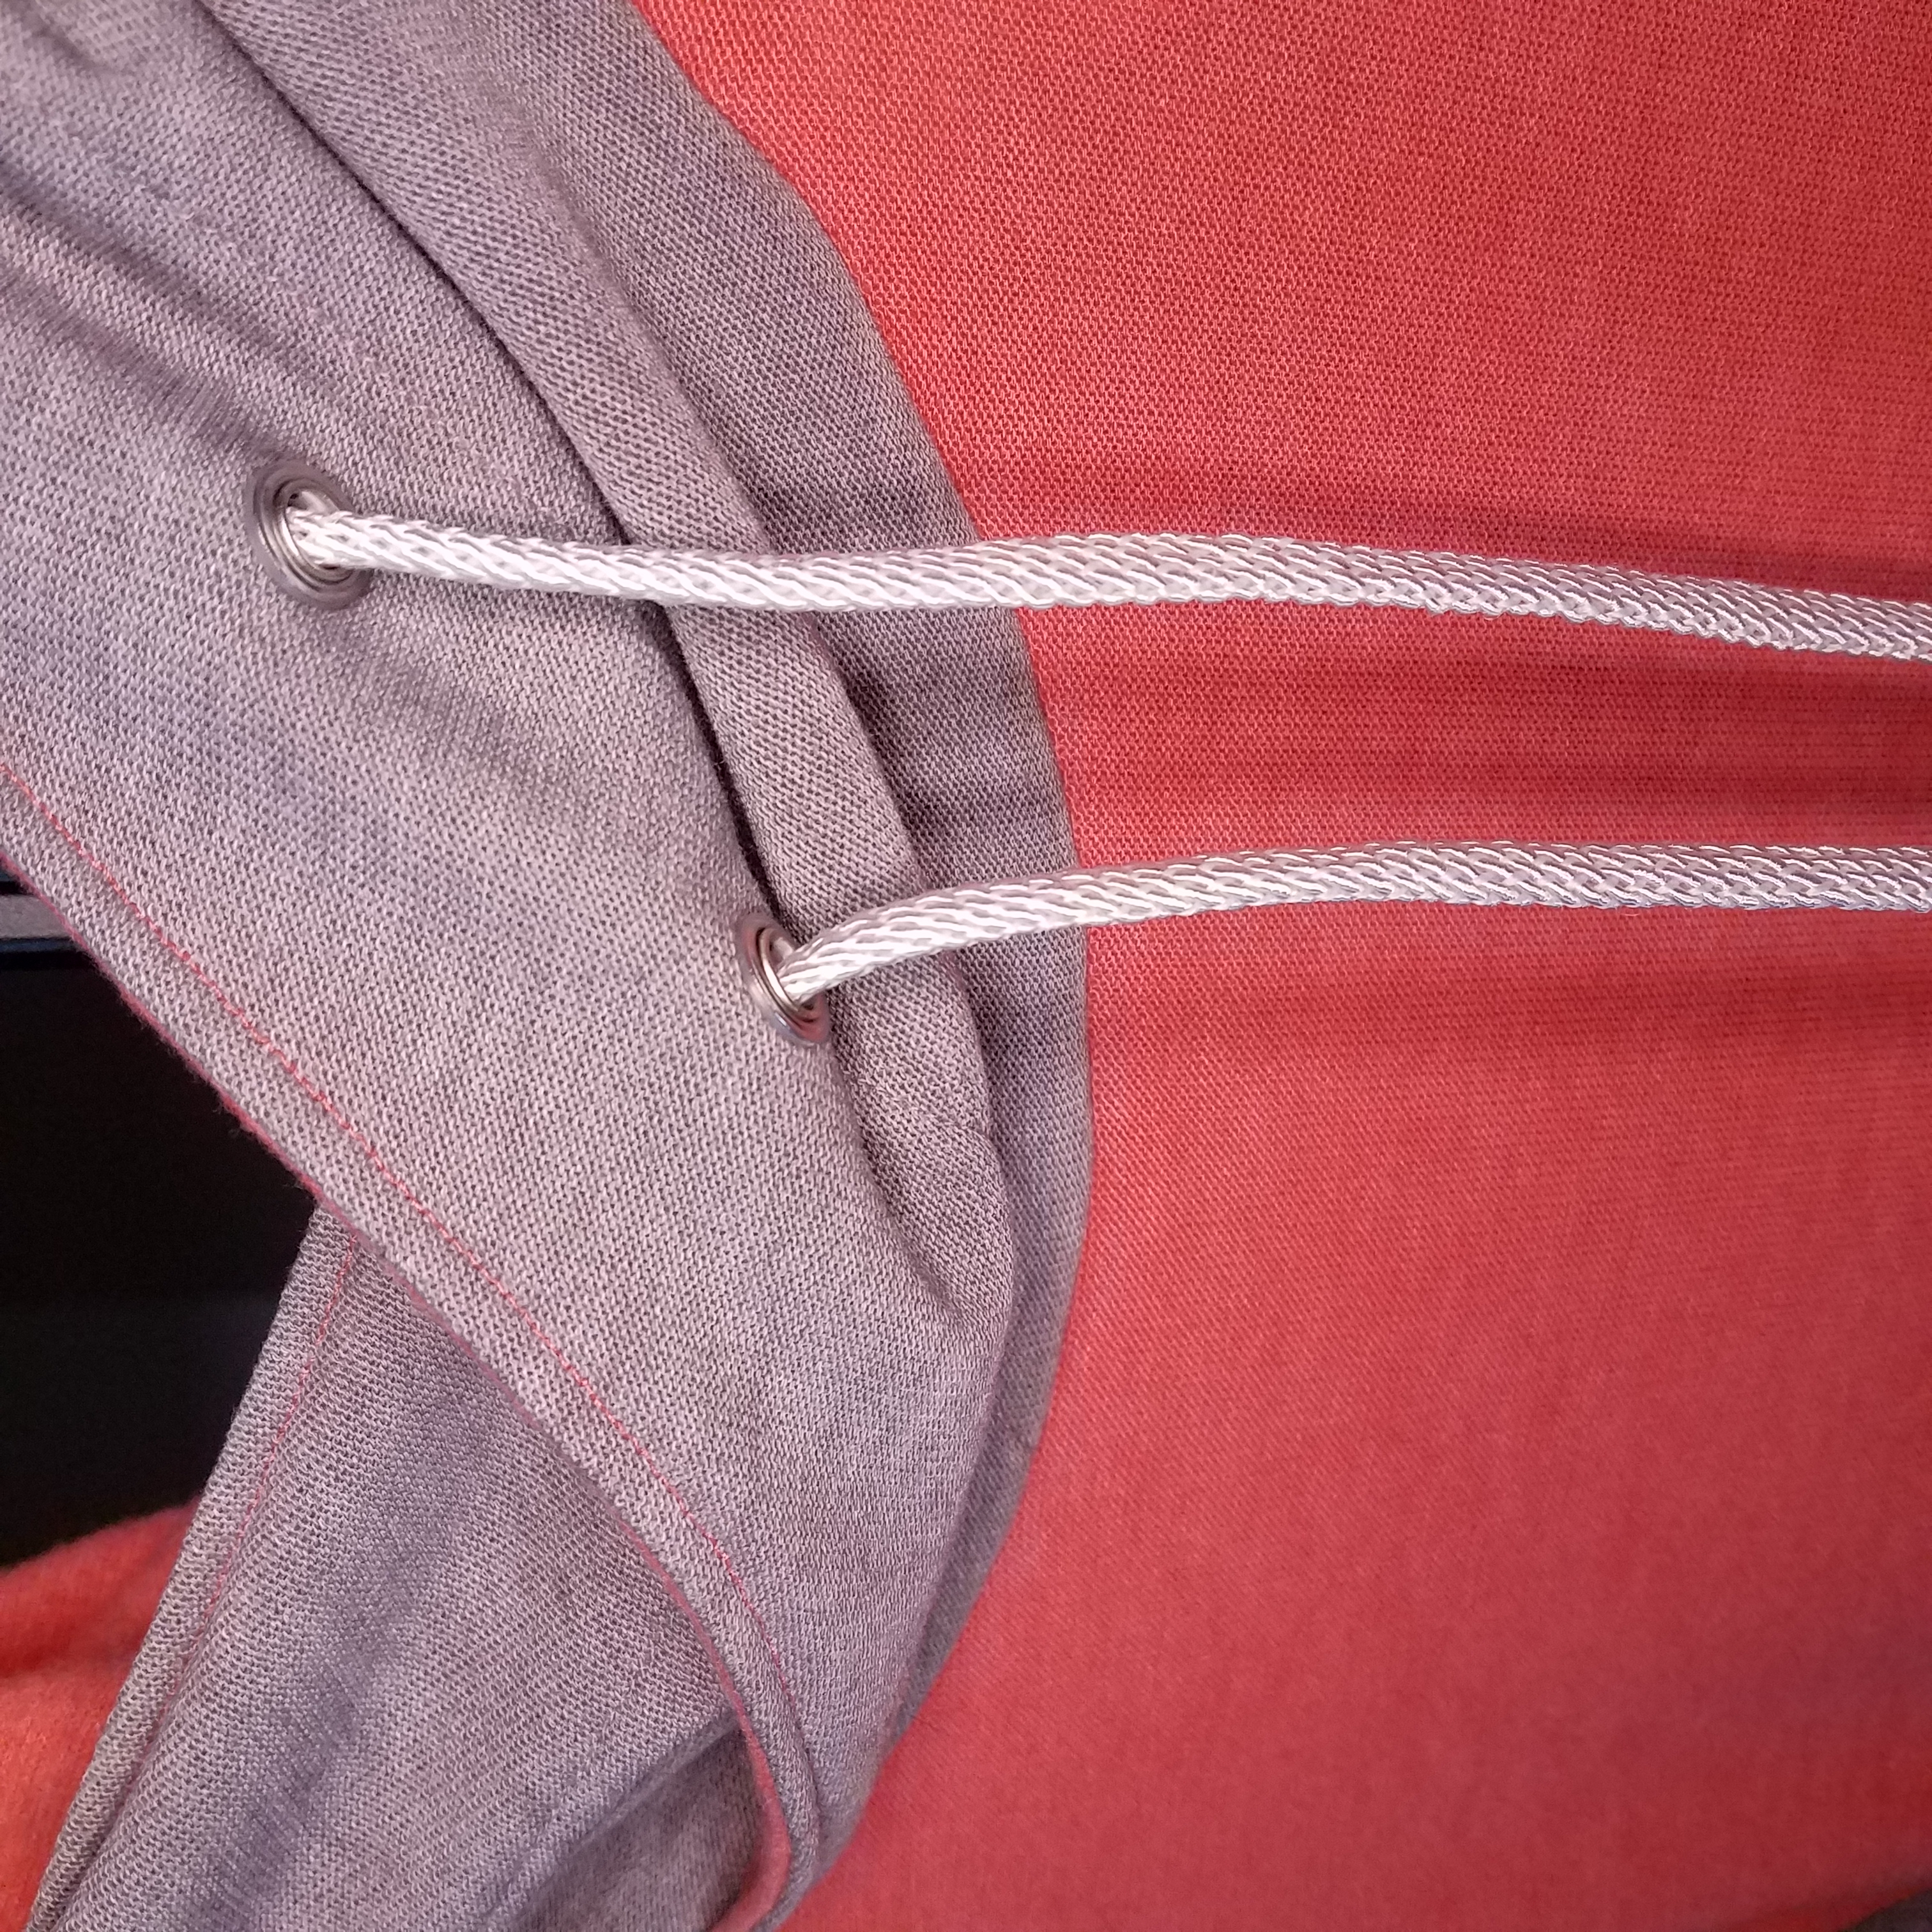
- Backward grommets. That’s right; I hammered my grommets on backwards. I accepted it and decided to call it a style choice. I’m really the only one who is going to know anyway.
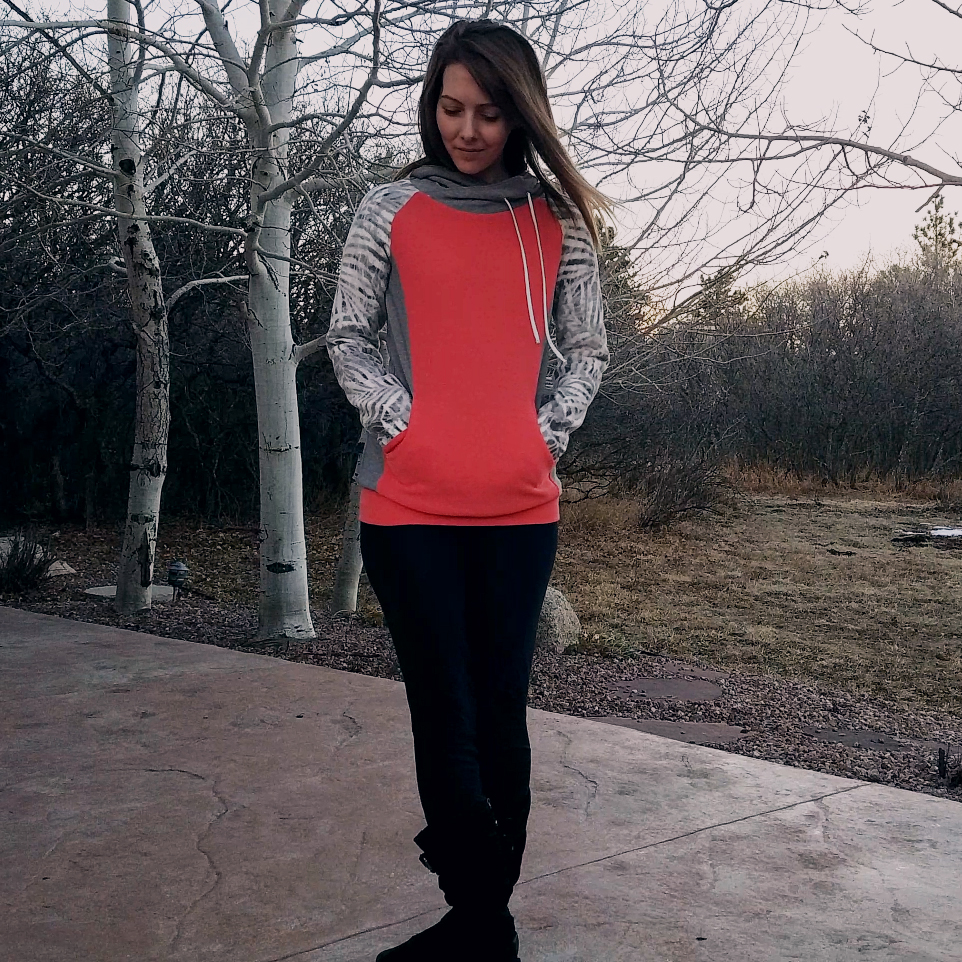
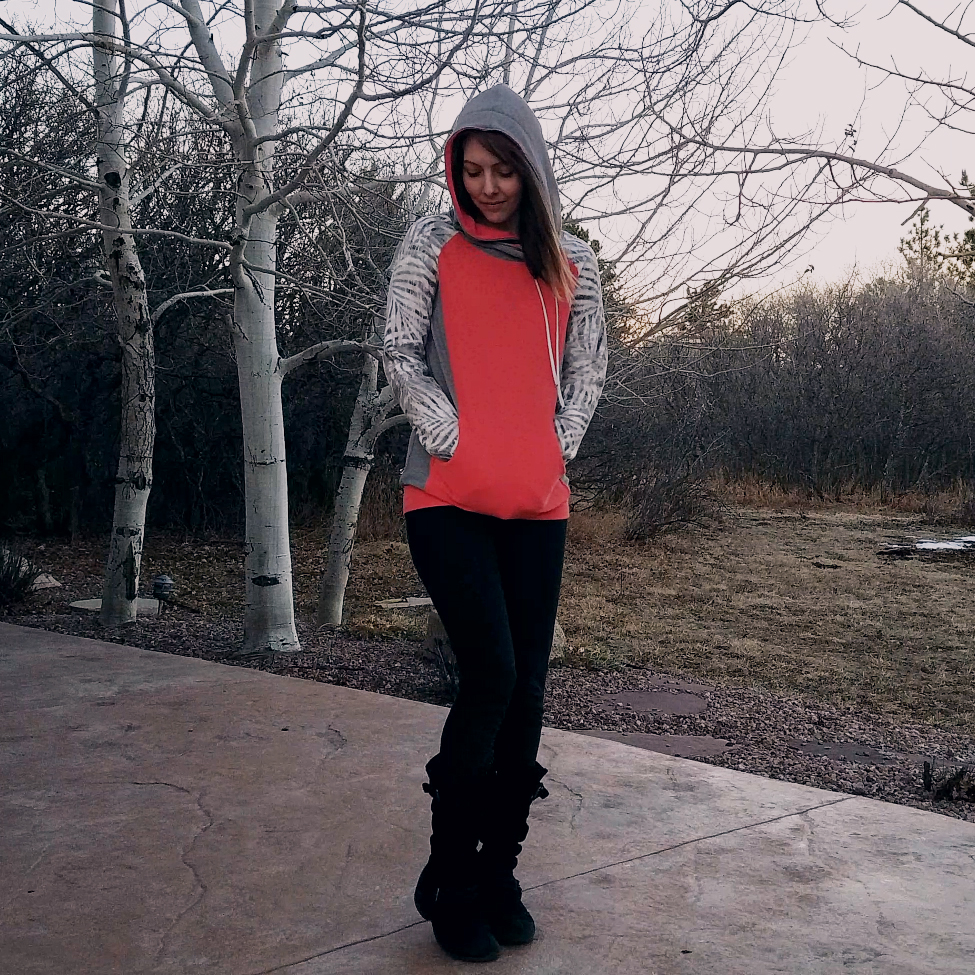
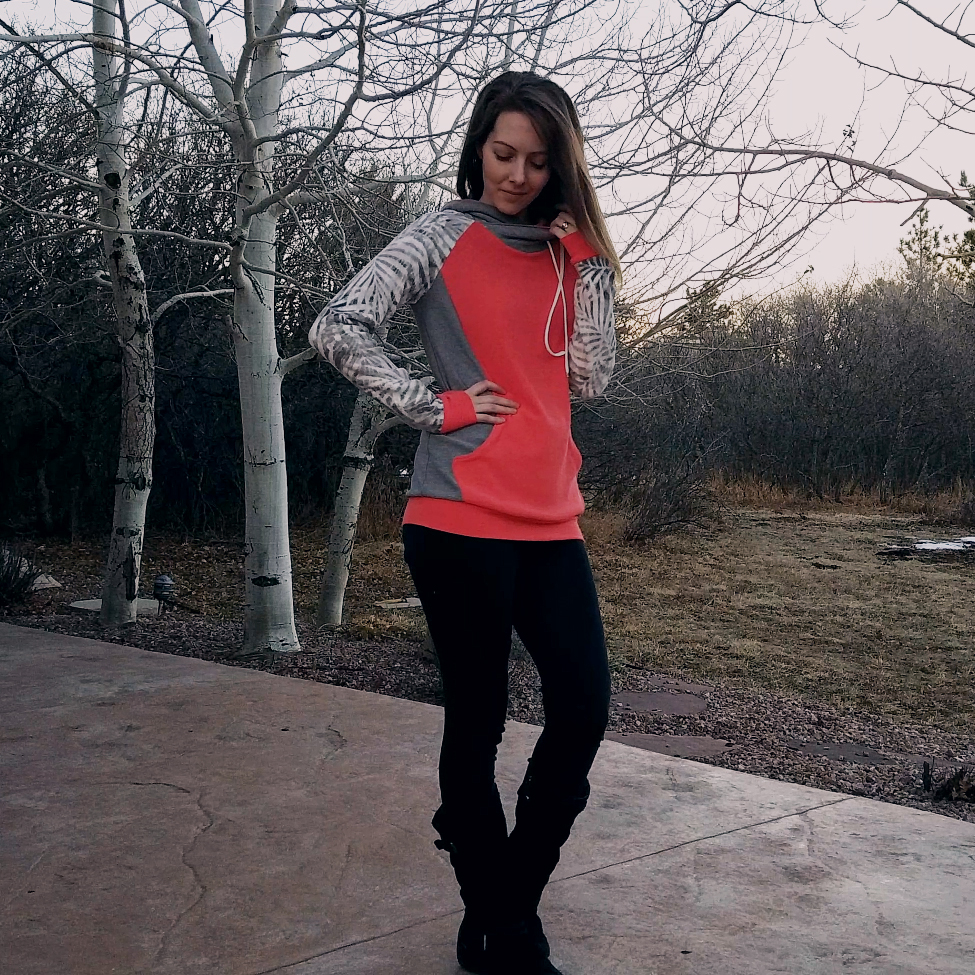
- Brushed tri-blend and hacci sweater knits. The coral and gray are a lot lighter than I anticipated; even mildly see-through. That gives them a wonderful drape and less structure than I imagined when I ordered them. The brushed back on each of them is incredibly soft against the skin. They have a generous amount of stretch. I had to trim about 3″ off the waistband for how loose it was feeling before I attached it.
- Plush anti-pill fleece. The sleeves really elevate the warm and cozy factor. I added 2 inches, distributed with 1″ at the upper arm and 1″ at the forearm. Re-drew the lines using my french curve and it was perfect. Wise choice. With the added cuffs, they hit just where I like my sleeves to hit at the base of my thumb, no yanking involved.
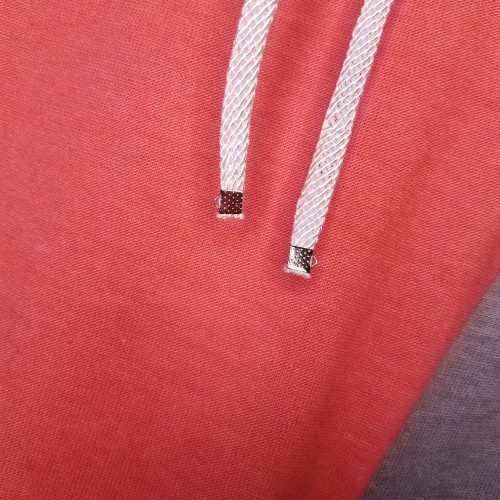
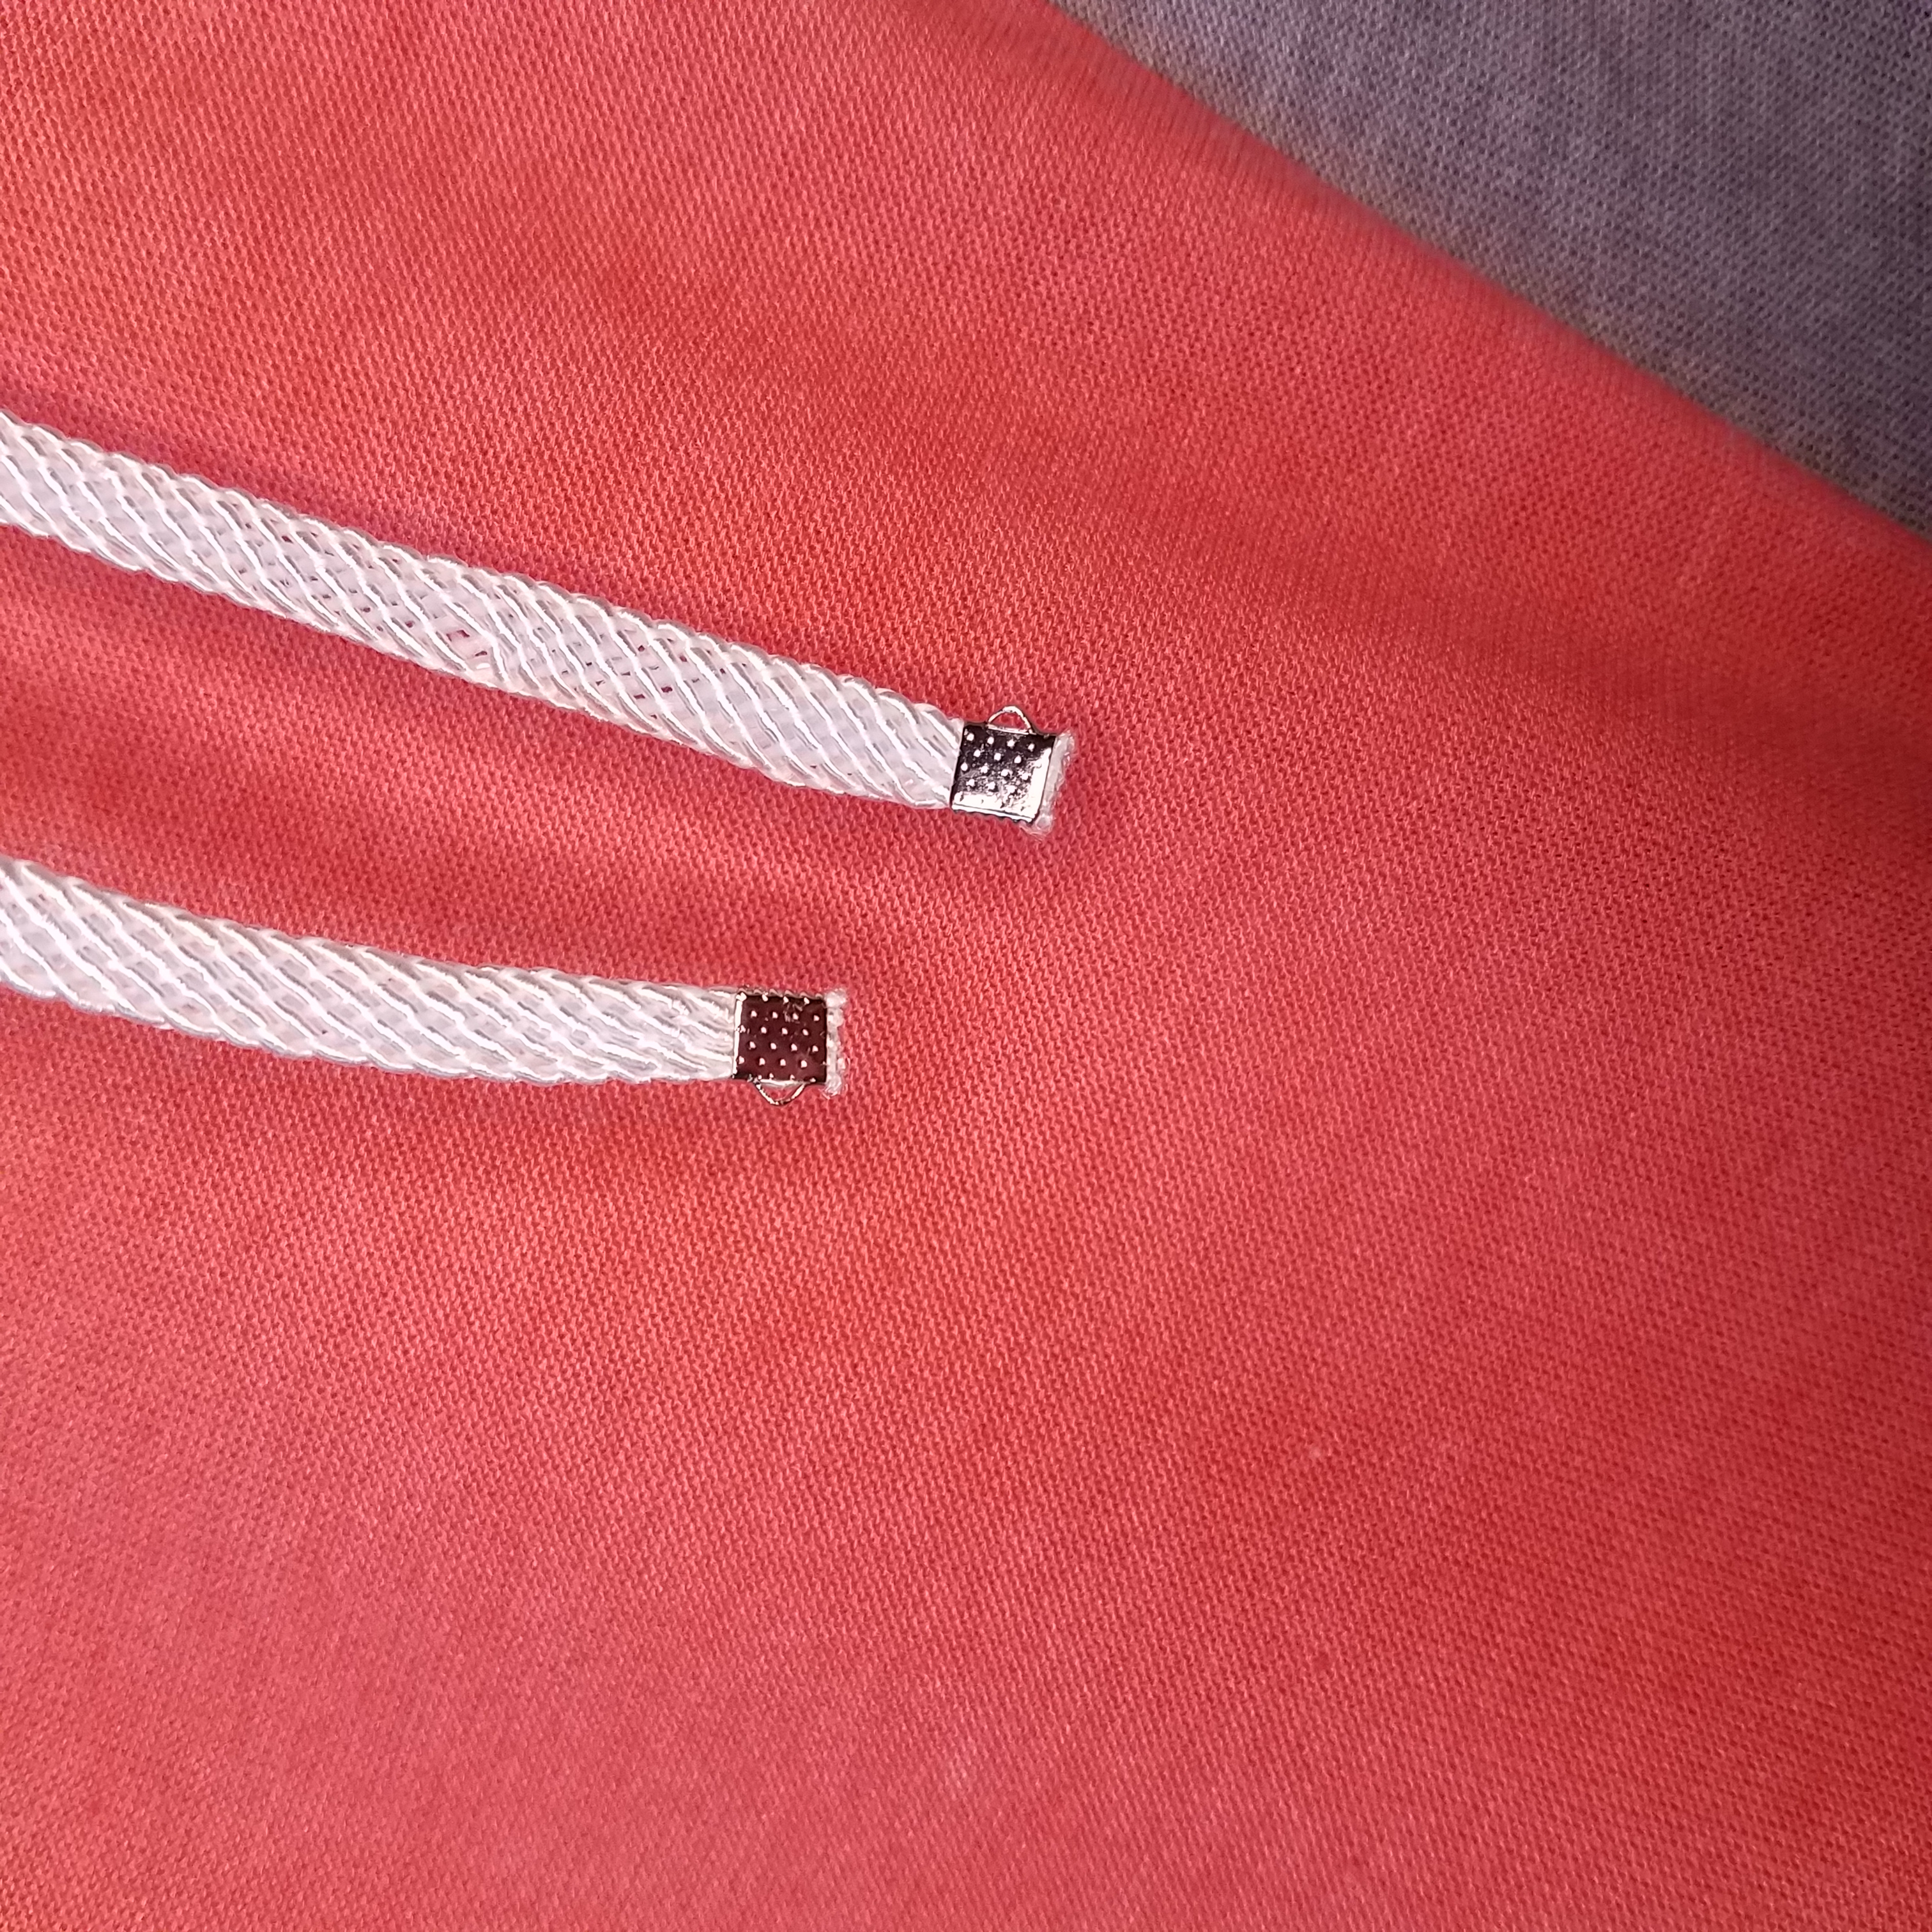
- “Home decor trim” drawstrings and jewelry crimp ends. Found this home dec trim at Joann’s and liked the look of it for drawstrings, so I rolled with it. It frays and unravels badly when cut, so I scrounged up these crimp findings and clamped them on the ends after feeding the cord through the casing.
For Next Time
- For the pocket lining, if the “wrong” side is brushed, use it as though it’s the “right” side in the instructions.
- Possibly size up a bit so I can use a larger seam allowance. I don’t know the reason behind this designer’s love affair with a 1/4″ seam allowance, but it leaves next to NO room for error. And when you start sewing 5-ish layers of fabric together–with a lightning stitch that’s aligned left on your particular machine so you’re actually feeding at the 1/8″ mark–it’s just stupid.

Project Settings
Presser Foot |
Stitch# |
Width |
Length |
Needle |
Top Thread Tension |
Application |
|---|---|---|---|---|---|---|
standard zig-zag (A) |
5 |
1.0 |
3.5 |
blue tip |
4 |
seams |
overedge (C) |
6 |
5.5 |
3 |
blue tip |
6 |
overcasting |
overedge (C) |
5 |
0.5 |
3.5 |
blue tip |
4 |
topstitching |
applique (F) |
5 |
1.0 |
3.5 |
blue tip |
4 |
pocket sides |
standard zig-zag (A) |
6 |
4 |
1 |
blue tip |
4 |
bar tacks |
applique (F) |
1 |
3.5 |
3 |
blue tip |
5 |
casing |
applique (F) |
6 |
4 |
0.8 |
blue tip |
5 |
drawstring anchors |
Leave a Reply