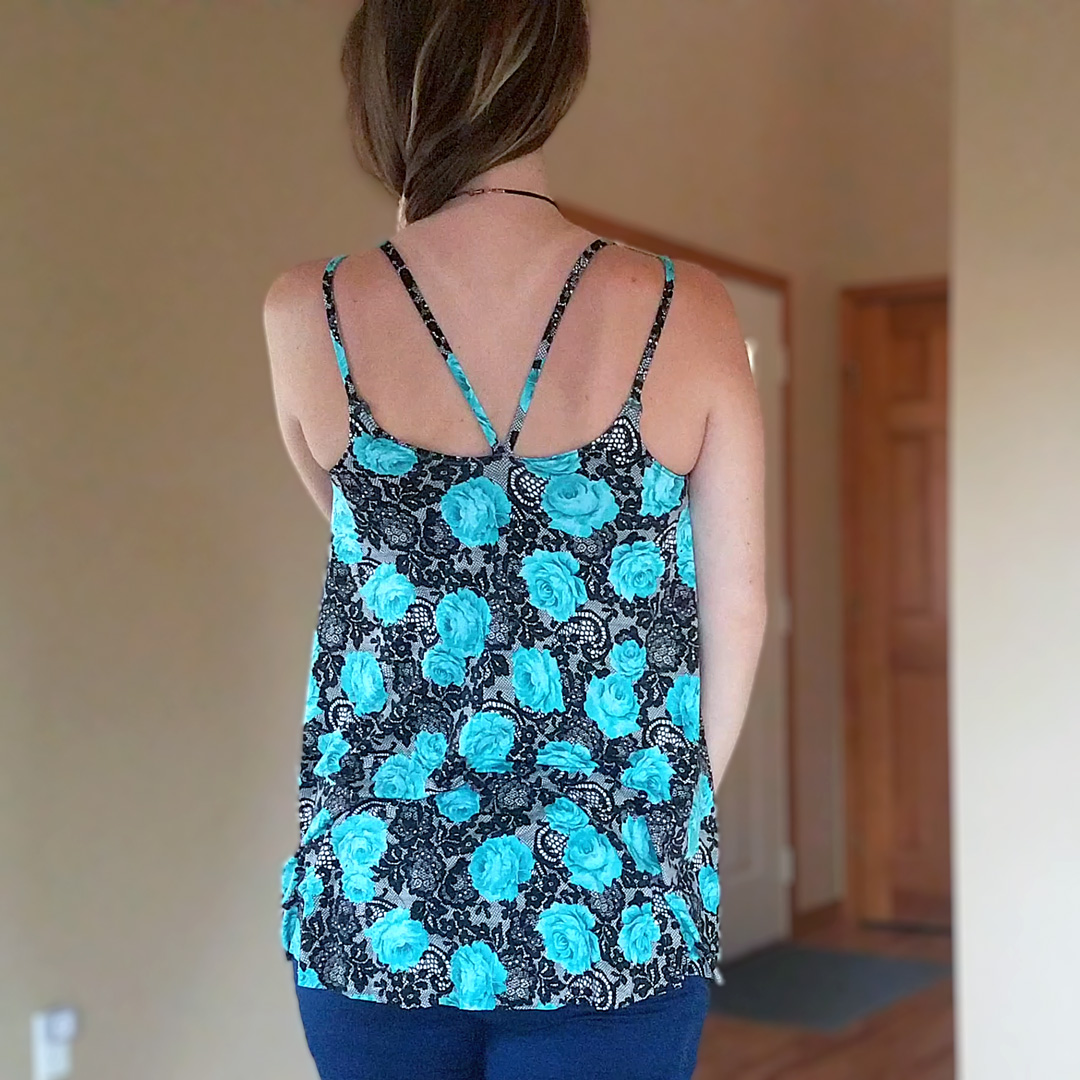
I snagged the Catalina Tank by So Sew English for free as a part of a fabric promo they ran about a week ago. I’ve been wondering what to make out of the one yard of modal spandex I ordered from them back in July. Even though I typically avoid floral prints, the colors on this fabric are stunning, and the floral vibe is balanced with a black lace-looking backdrop. I couldn’t visualize what it wanted to be until I saw the Catalina.
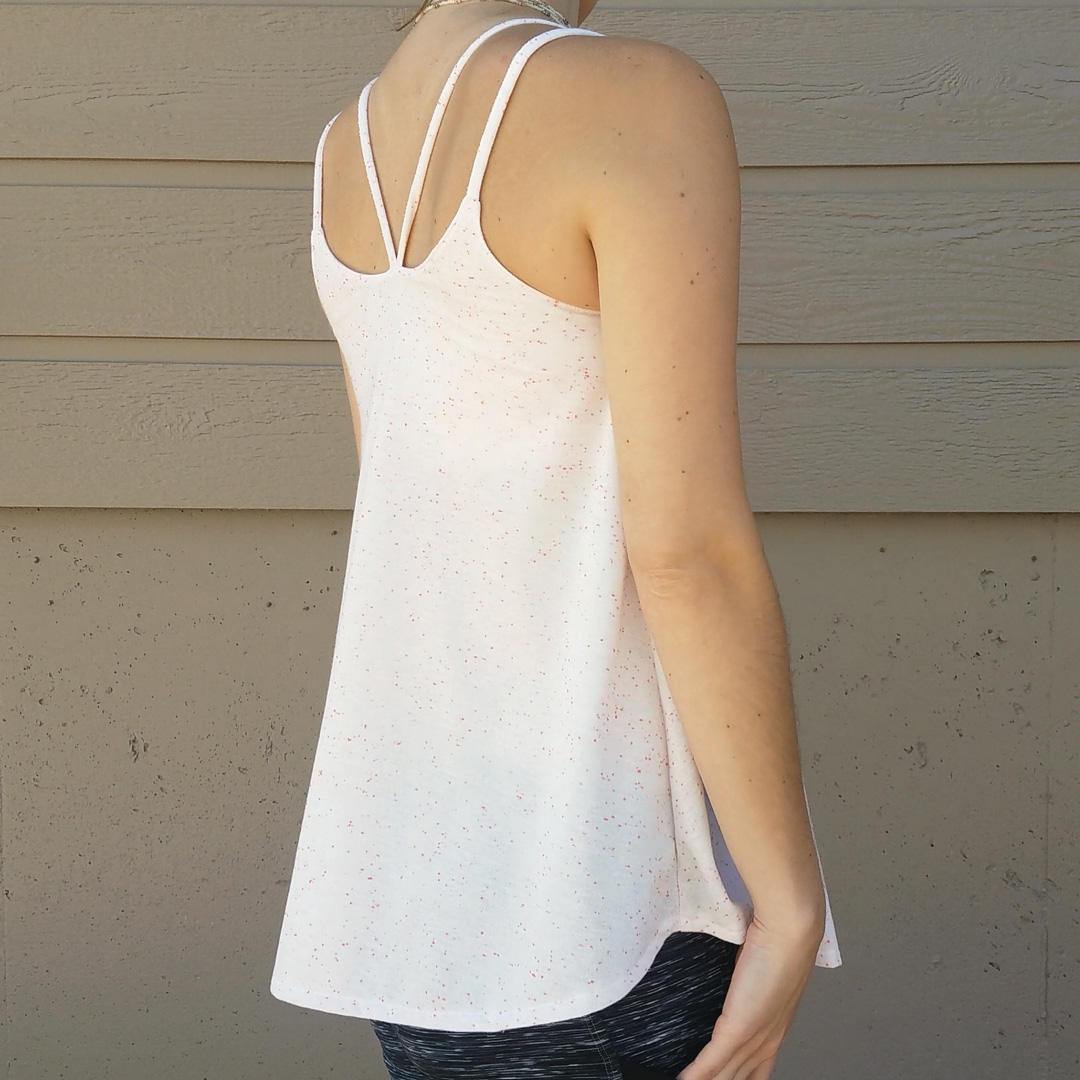
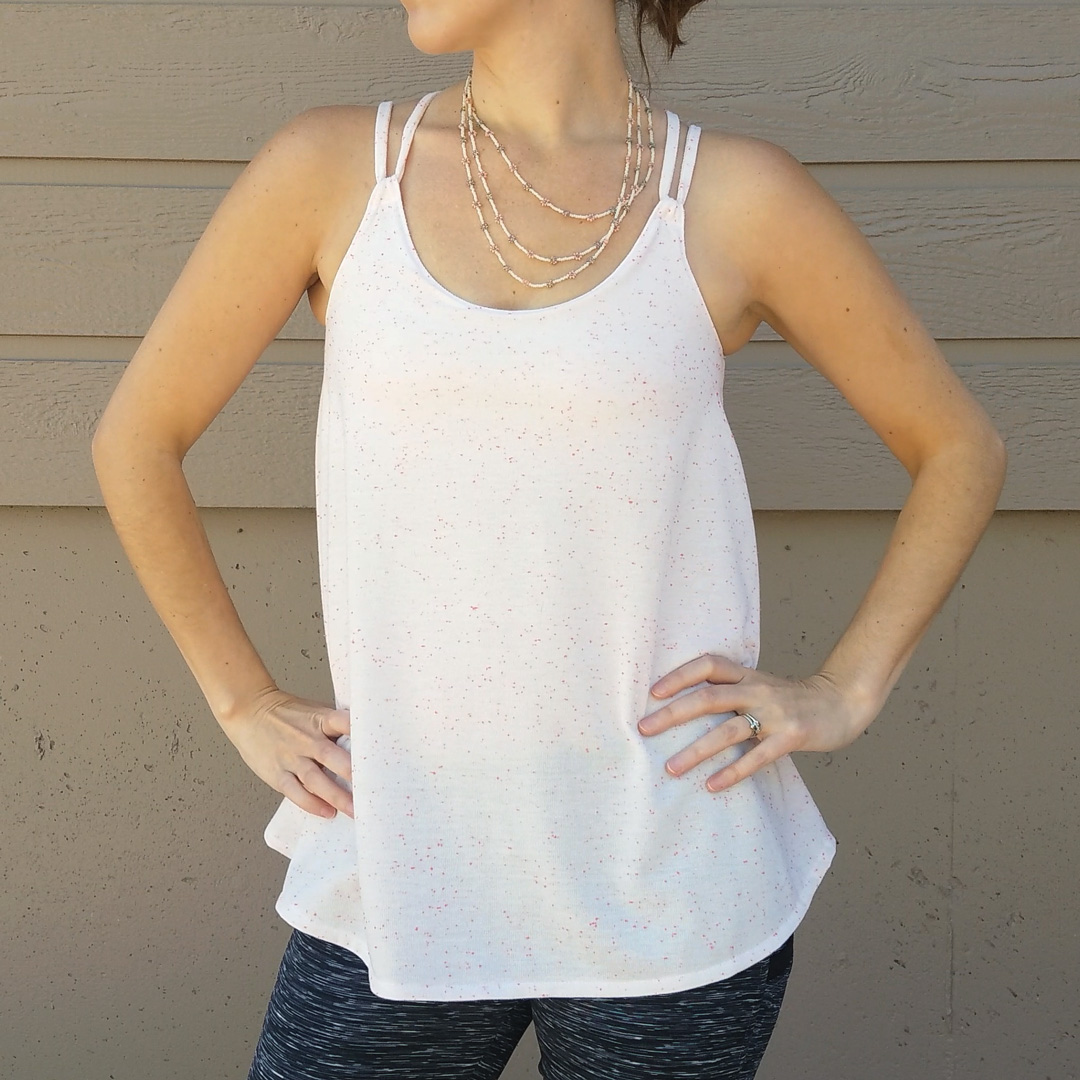
I’ve also had some poly linen french terry in coral speckle on white and charcoal speckle on teal from Made of Love that I thought I would use for leggings. But two-way stretch is flat out unsuitable for bottoms. You need four-way stretch for bottoms. So I gave it a try on a second Catalina with mixed results.
About the Pattern
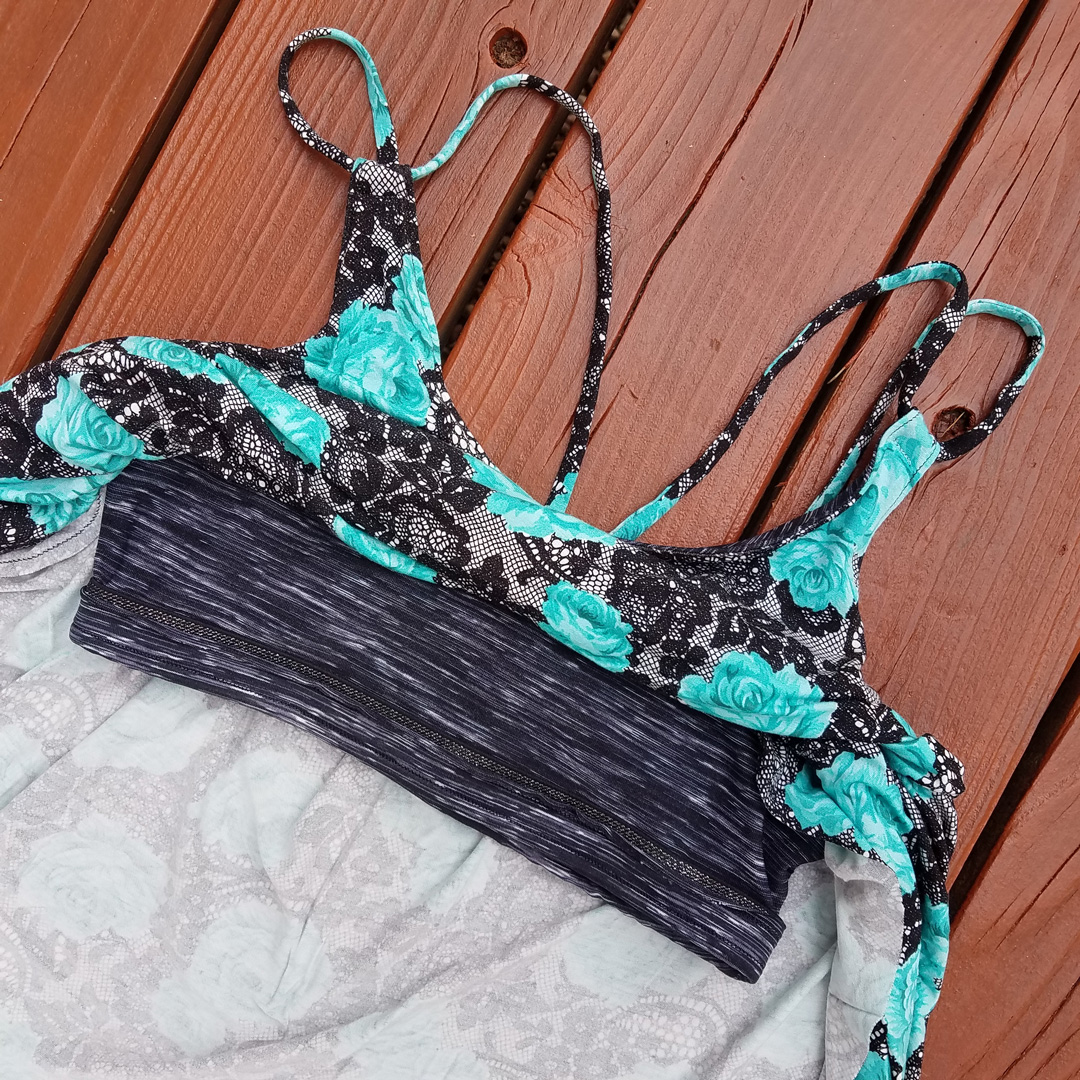
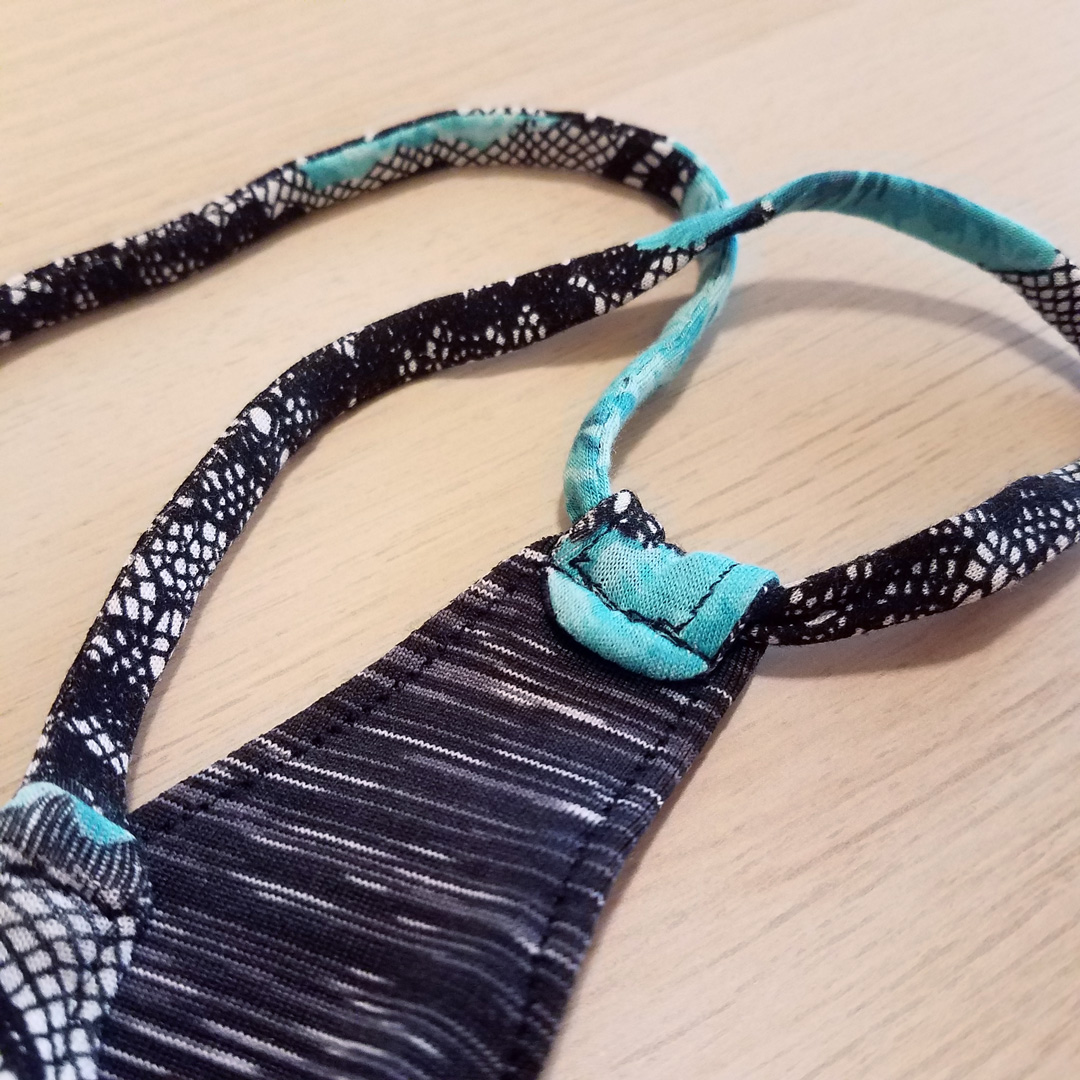
It’s all about those straps with this pattern. I haven’t seen straps done like this before and I am all about unique twists on a garment. They look amazing. Add in the included shelf bra and we wind up with a comfortable balance between fitted and relaxed and no extra bra straps to deal with.
About the Fabric
As I mentioned, I used modal spandex for my first version, and poly linen french terry for version two.
Modal Spandex
Very light with a cool, fluid hand, excellent drape, and good recovery, the modal spandex was perfect for a flowy, summery shirt. Not the easiest fabric to work with, but it also wasn’t the worst. I think a large part of the challenge had to do with the pattern itself, which I’ll get into in a second. For the shelf bra, I put to work the super-stretch of the athletic nylon spandex I had from Made of Love, and it was a great choice.
Poly Linen French Terry
I seem to be falling prey to inadequate stretch lately. (I’ll write up the recent blunders involving leggings, deceptive jegging fabric, and my brain that didn’t register the deception until I couldn’t get into a perfectly sewn, lovely pair of Peg Leg capris. I’m still upset about that one.) This poly linen french terry (heretofore known as PLFT) wasn’t as big a disaster, but once again, my brain failed to note the lesser stretch and just pressed on with the same sizing as version 1.
This gave me a just-barely-wearable overly-snug shelf bra and bust area. I really like the fabric though so I wear it anyway. If I use my teal PLFT for a third tank, I will definitely need to size up the top. At least by one size. Probably two. I can sew a quick shelf bra to gauge the fit at that size before cutting/constructing the rest of the shirt.
About the Instructions
Let’s forget how much I love the end result for a second and talk about the pattern. I’m actually pretty dismayed at the quality of a paid pattern (at least I got it for free with the purchase of fabric. BTW, where is that fabric I ordered? 10-14 business day processing time and it’s day 14 now.)
Marked for a beginner skill level, I would not expect a beginner to have a good experience with this pattern at all. The only reason I muddled through it is because I’ve been sewing for about two years now and I have a solid understanding of how garments are constructed. There are several steps that will easily confuse a beginner, even without the typos and errors:
- “…left side out…” That’s a new one. It’s supposed to say wrong side out…if it’s to match the photo anyway. Matching the photo messes up the next part…
- “…insert the shelf bra inside the tank, right sides together…” Doing that will make your shelf bra inside out when you finish. The right side of the bra should be against the wrong side of the tank.
- “…the thin straps will be in between the two straps…” Plus crummy photo to not illustrate that at all. This whole step in the instructions will totally derail a beginner. And that’s if they get past the assumption that everyone knows what quartering is. Yeah, quartering is easy, but I was a beginner not long ago, and a beginner has no idea what that means or how to do it.
I guess proof-reading is optional when you want to be an independent pattern designer? Stuff like this drives me bonkers.
Construction Notes
- Even though I always harp on how much I hate elastic, I actually incorporated it into version 1 as instructed. I had this shimmery 1″ elastic sitting around so I figured why not. Turns out I’m not a fan of it. (Are we surprised?) It flips up and it’s just stupid.
- On version 2, I ditched the elastic and did my faithful fabric band, measured at 85% the circumference of the bottom of the bra. It turned out about the same size as the bra, so I chopped an extra 2″ (including seam allowance) off of it. Much happier with that even though it is too small.
- On both versions, I used Wonder Tape along the entire length of the spaghetti straps to resounding cheers. The straps are flawless.
- On version 2, I used Wonder Tape to anchor the spaghetti straps before basting in place. Highly recommended!
- Version 1 is unhemmed, and I’m not sure I’m going to do that. Raw hems don’t bother me, and I’d hate to ruin that beautiful drape.
- I went with tunic length because the pattern was drafted for a height of 5’5″. That’s 2″ shorter than I am and I have a long torso to begin with. I’m happy with where the tunic hits around my hips.
- The sizing on both versions was graded from XS>S>S and the shelf bra was XS.
Notes for Next Time
- If using PLFT or anything with a similar stretch, size up the bra and top by 2 sizes.
- If using modal spandex again or anything with a similar stretch, could probably size down or shorten the straps a bit. Version 1 creeps a little low on the front throughout the day.

Project Settings
Presser Foot |
Stitch# |
Width |
Length |
Needle |
Top Thread Tension |
Application |
|---|---|---|---|---|---|---|
standard zig-zag (A) |
5 |
1.0 |
4 |
blue tip |
4 |
bra, top seam, straps |
1/4″ |
0 |
3.5 |
3.5 |
blue tip |
4 |
strap finish |
overedge (C) |
6 |
5.0 |
3.0 |
blue tip |
4 |
edge finish |
standard zig-zag (A) |
0 |
3.5 |
3.5 |
blue tip |
4 |
elastic close + melt edges |
standard zig-zag (A) |
5 |
1 |
3.5 |
blue tip |
4 |
elastic attach |
standard zig-zag (A) |
0 |
3.5 |
3 |
blue tip |
4 |
strap baste |
adjustable edge (SE) |
5 |
1 |
4 |
blue tip |
4 |
topstitch |
standard zig-zag (A) |
1 |
1 |
3.5 |
blue tip |
4 |
hem (version 2) |
Leave a Reply