What the heck is quartering when sewing?
Good question. I was several months into my sewing journey before I encountered this technique, and the way it was ‘splained to me in a book was highly overcomplicated and involved measuring and mathing and a lot of unnecessary stupidity. So, toss aside your ruler and calculator because I have good news: quartering is easy.
What is it? And WHY?
Quartering is a method of distributing stretch evenly on things like neckbands, waistbands, armbands… Pretty much any situation where you’re attaching a smaller piece of fabric to a larger piece of fabric. You want to distribute that difference in length evenly, otherwise you end up with fabric bunched up in awkward areas or puckers around your neckband and all kinds of ugly.
How to Quarter (Easily!)
Have some photos.
1 All you need as your starting point is ONE SEAM. For instance, the single seam you get when you construct a band. We’ll call it Point #1.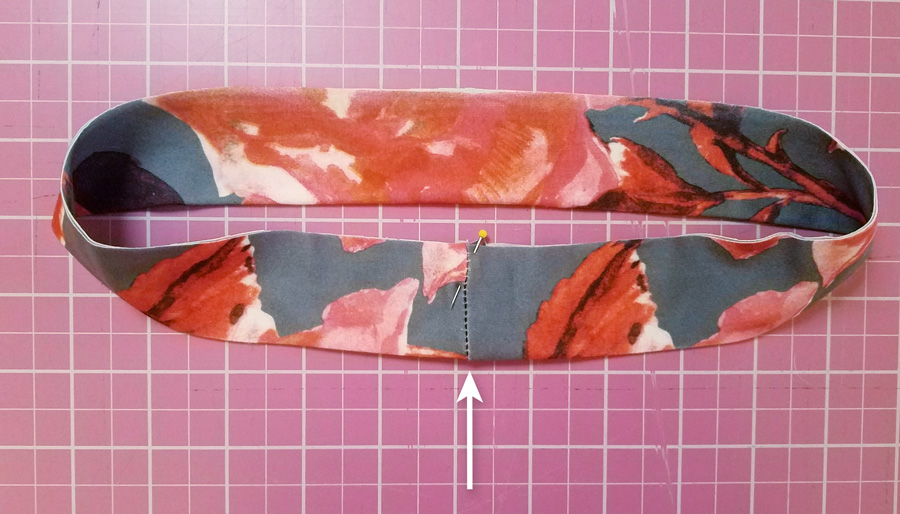
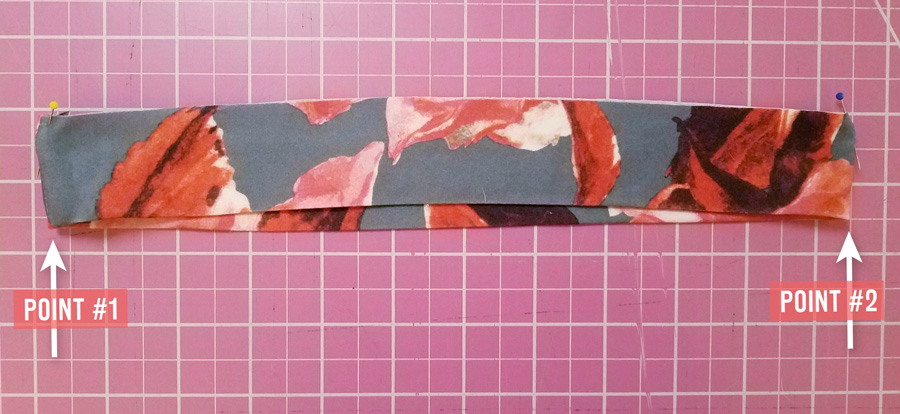
2Fold the band in half with Point #1 at the side. Now look at the opposite side. That’s Point #2. Mark it. (Stick a pin in it, put a clip there, snip it with scissors, mark it with chalk or a disappearing marker… Whatever you want.) Congrats, you successfully divided the band into two even halves.
 3Refold the band in half, but this time, line up Point #1 and Point #2.
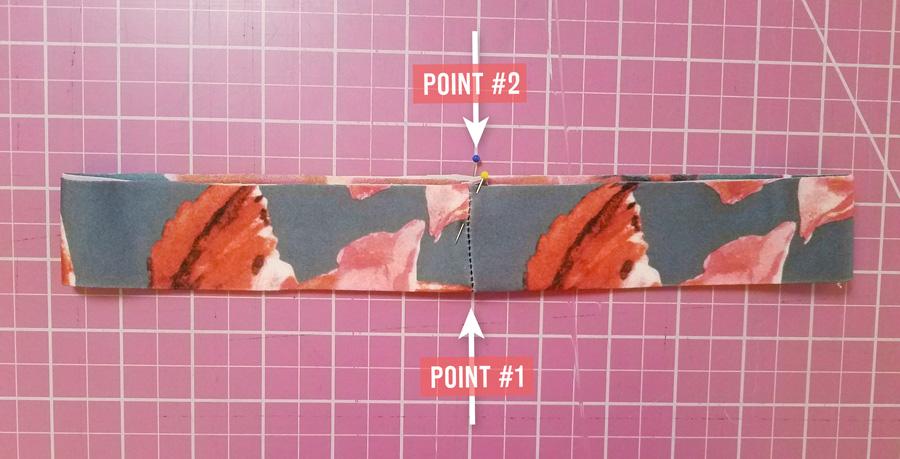 4Now check out the folds you just created on each side. These are Points #3 and #4. Mark them.
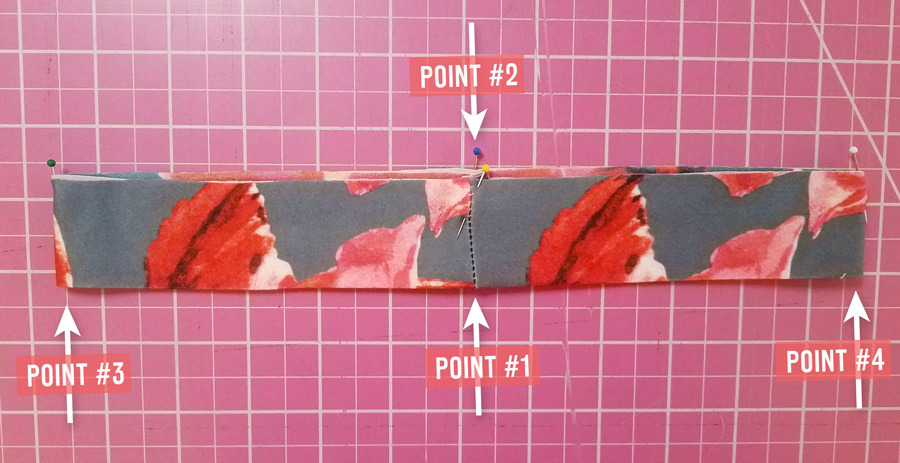 5That’s it. You just divided your band into 4 equal quarters.
The thing you’re attaching your band to typically has–at minimum–two side seams. It could also have a front and back seam. But do not be fooled. In many cases, these seams may not actually mark four even quarters, so it’s best to repeat the process on this piece too.
6I like to start with the back seam if there is one. If there isn’t one, then fold your side seams together and mark the center fold to get your starting point, Point #1.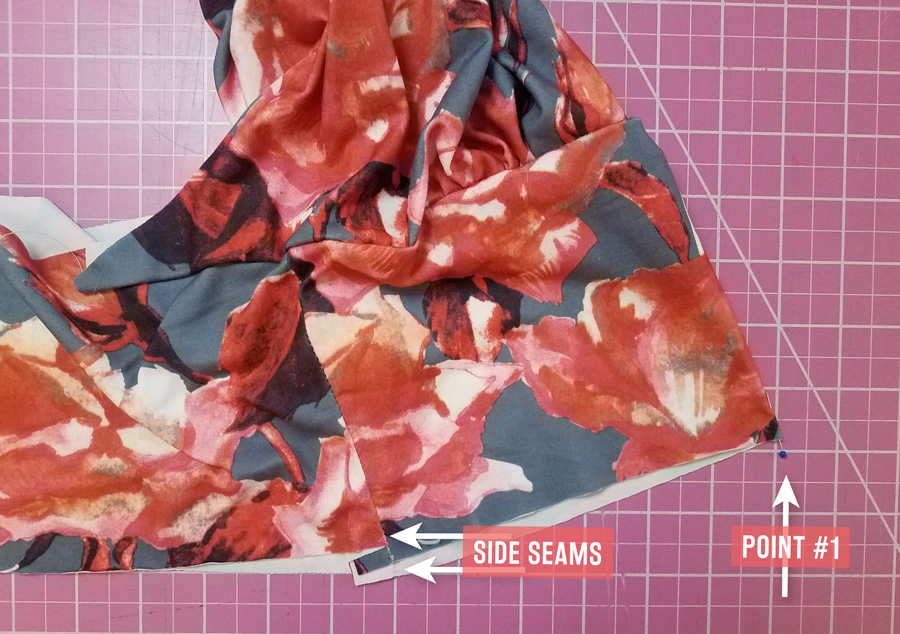 7To mark the opposite center point (Point #2), fold your side seams together and mark the center fold opposite of Point #1.
 8Now repeat steps 3 through 5 above, keeping in mind your side seams may or may not actually be your quarter marks, as you can see on my example below.
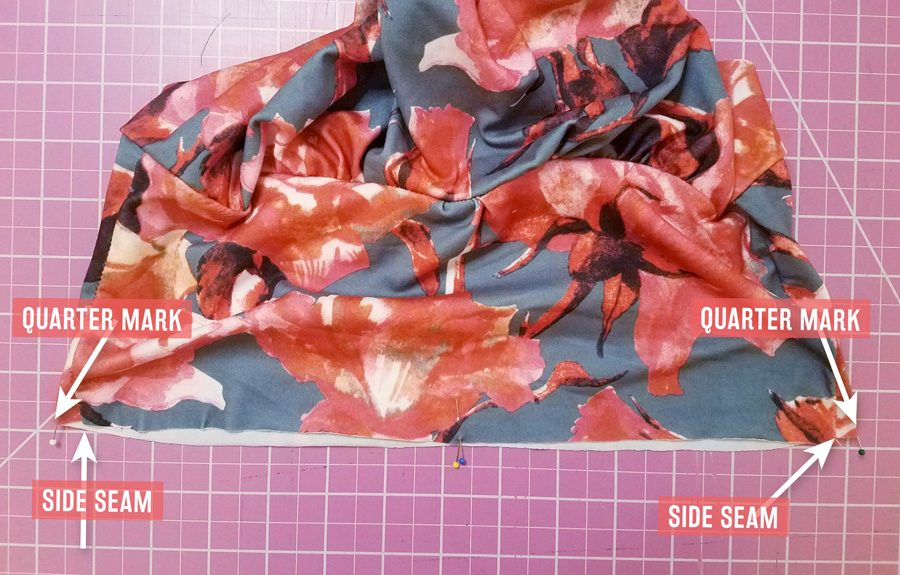
It’s literally that easy.
Now you have quarter marks on each piece. Match those up: back to back, front to front, side to side, and side to side. Now you can stretch the fabric between each of these marks so it lays flat, add one or two pins to each section, and have near-perfect distribution of stretch ready for your sewing machine. Check out the 1-minute demonstration below.
Leave a Reply