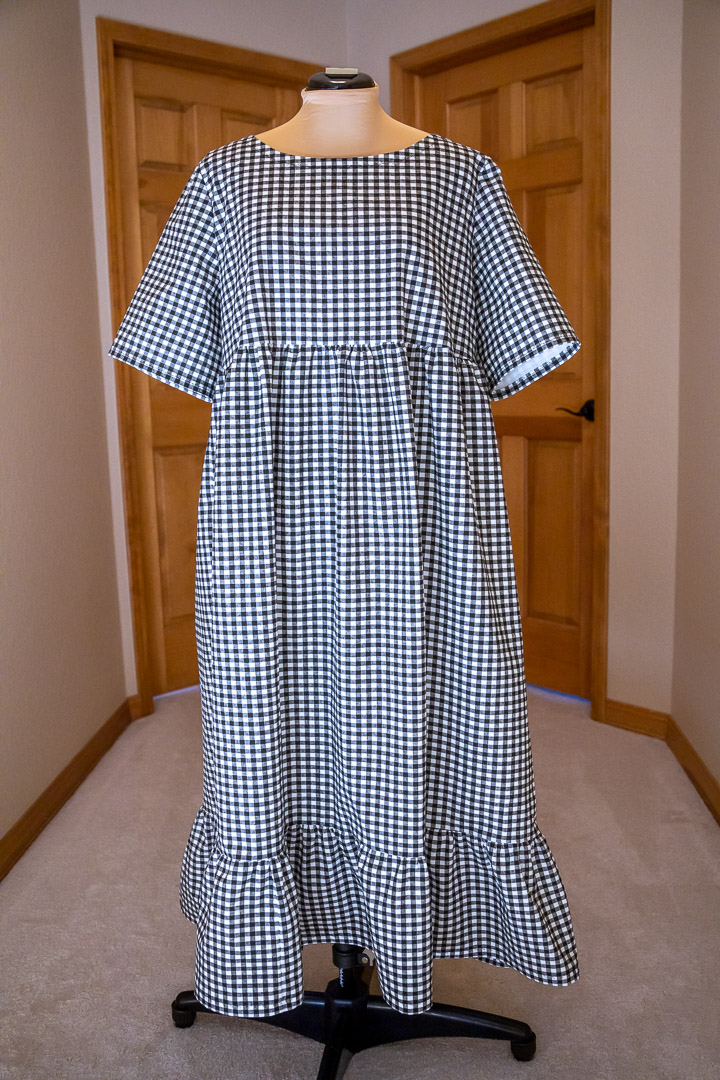
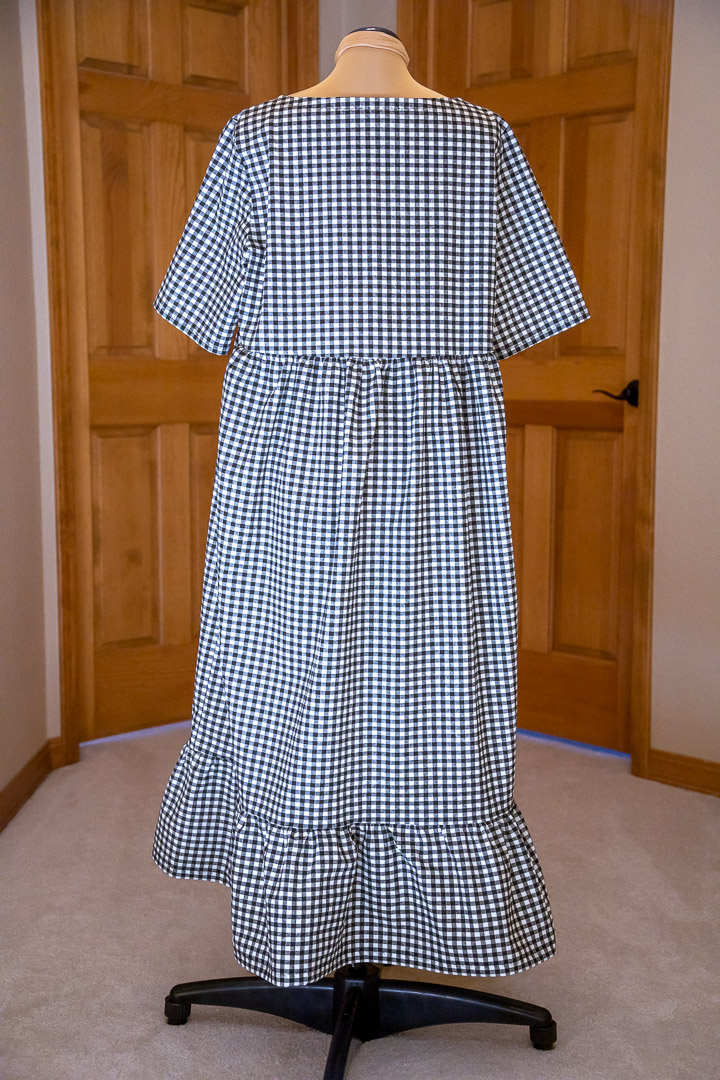
I was asked to sew a thing. A girl I work with had her eye on a certain style of dress. She owns a ready-to-wear dress in this style, but it’s sleeveless and she wanted a sleeved version so she could wear sleeved version to work. And she found a pattern. Which is half the reason I said yes. The other half was I really should get some experience in fitting other people. And she’s super cool so I knew she would be a gracious guinea pig for this learning experience. Also, the fact she already had a pattern picked out and the silhouette of the style is very forgiving made me feel good about saying yes.

About the Pattern
Overall, it’s a good pattern. The one thing that drove me up the wall was the sleeve notches. They were inconsistent with industry standards: double notches indicate the back. She used a single notch for back and double for front and it kept messing me up. And those notches didn’t even come close to lining up when I eased the sleeve into the armscye. Maybe my between-sizes pattern had something to do with it, but it shouldn’t have. I marked them in between the notches for sizes 18 and 20.
And inconsistent grainline markings: some pieces have it and others don’t. It’s obvious to me at this point where the grainline runs, but a pattern designer shouldn’t assume everyone knows.
 About the Fabric
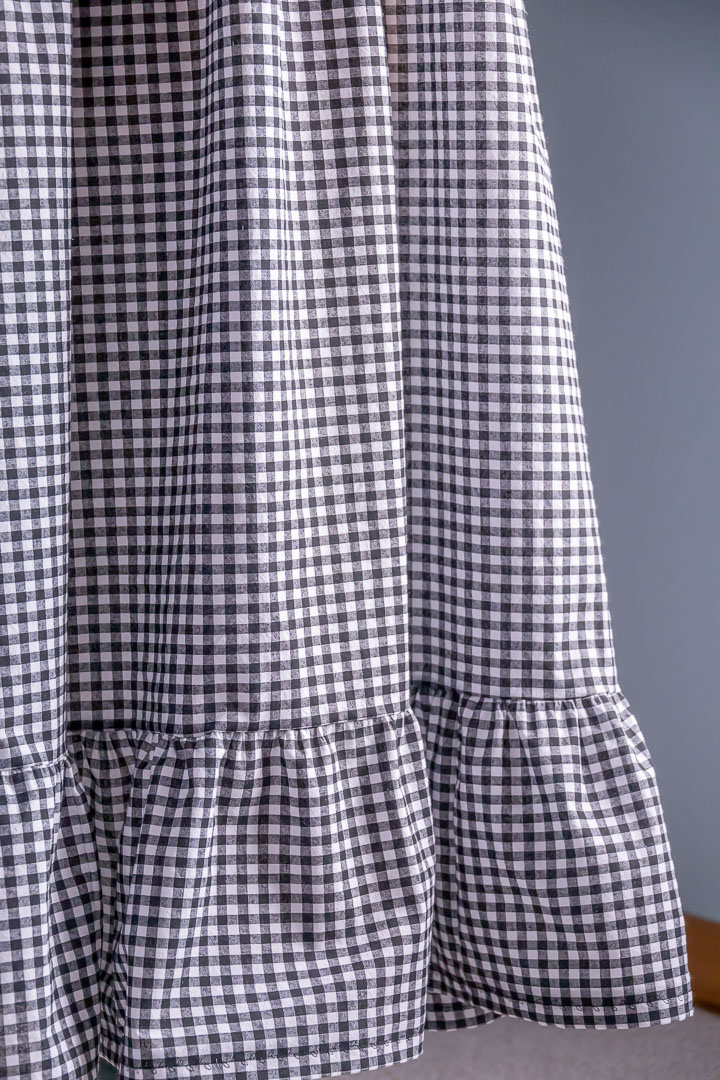
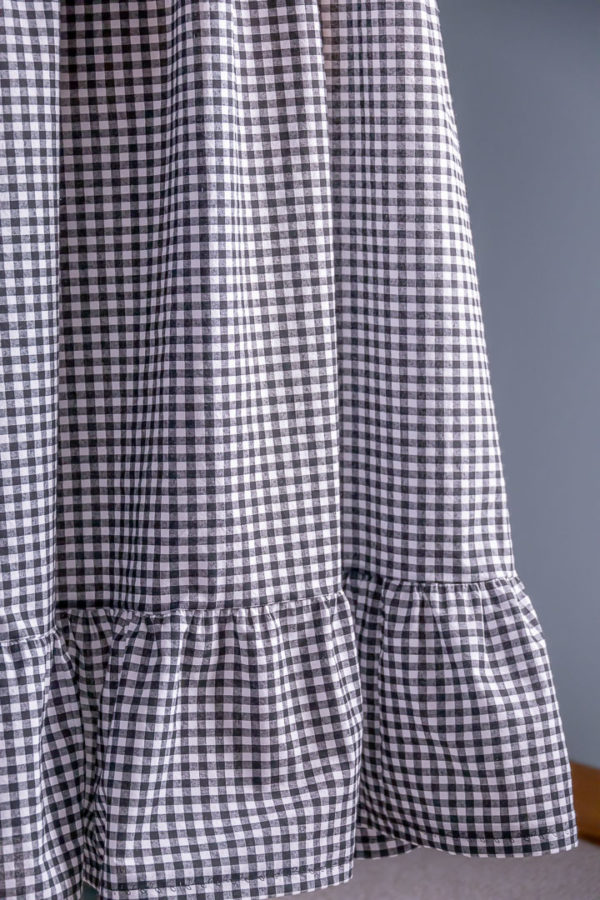
The fabric is really nothing to write home about other than the $5/yd pricetag. Just a standard cotton fabric from Joann’s. Stable fabric with a structured drape, opaque, and heavier than cotton voiles and shirtings. Stupid easy to work with: pressed well and cut well enough. The print seemed to skew a bit at the selvages but I made it work.
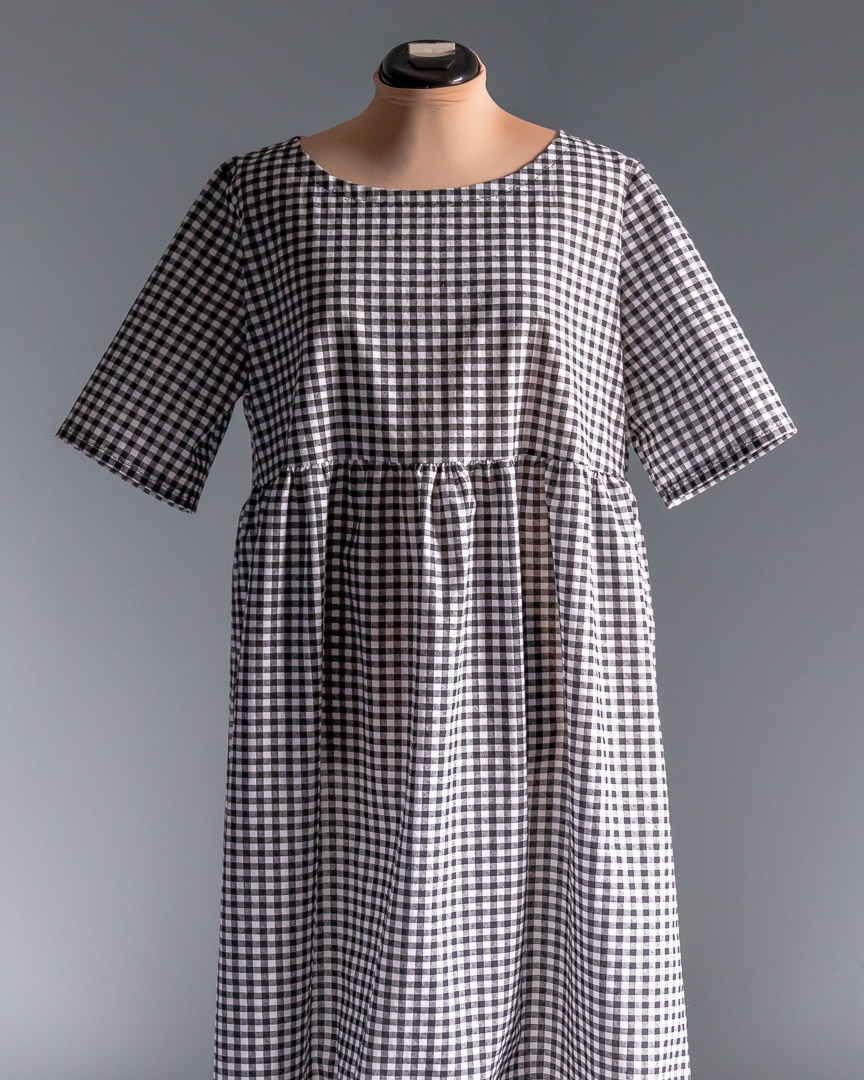
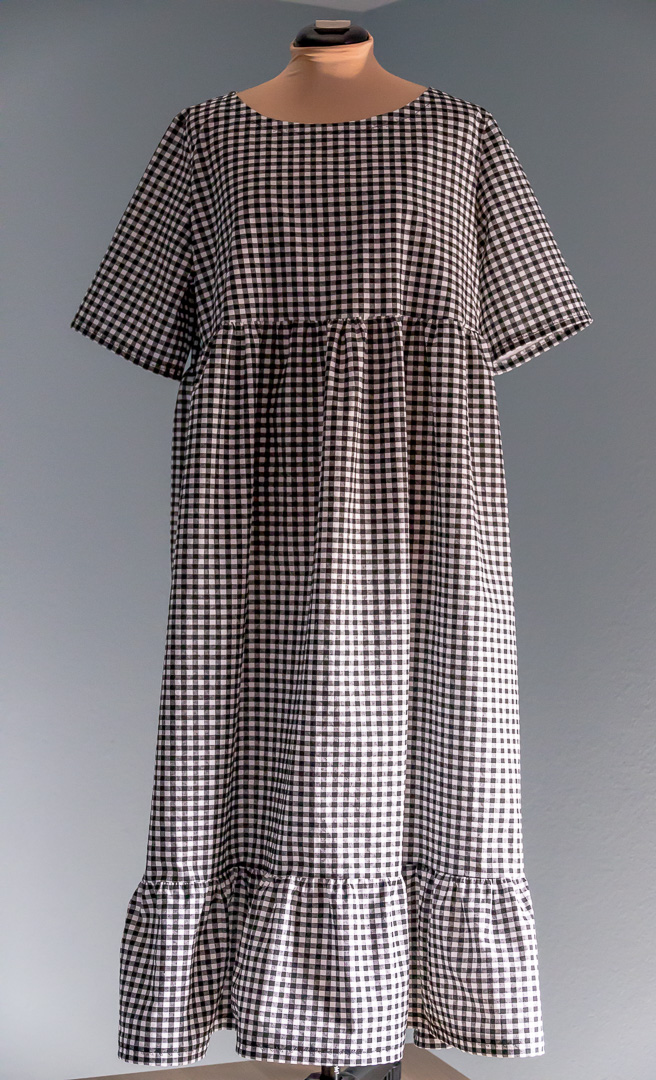
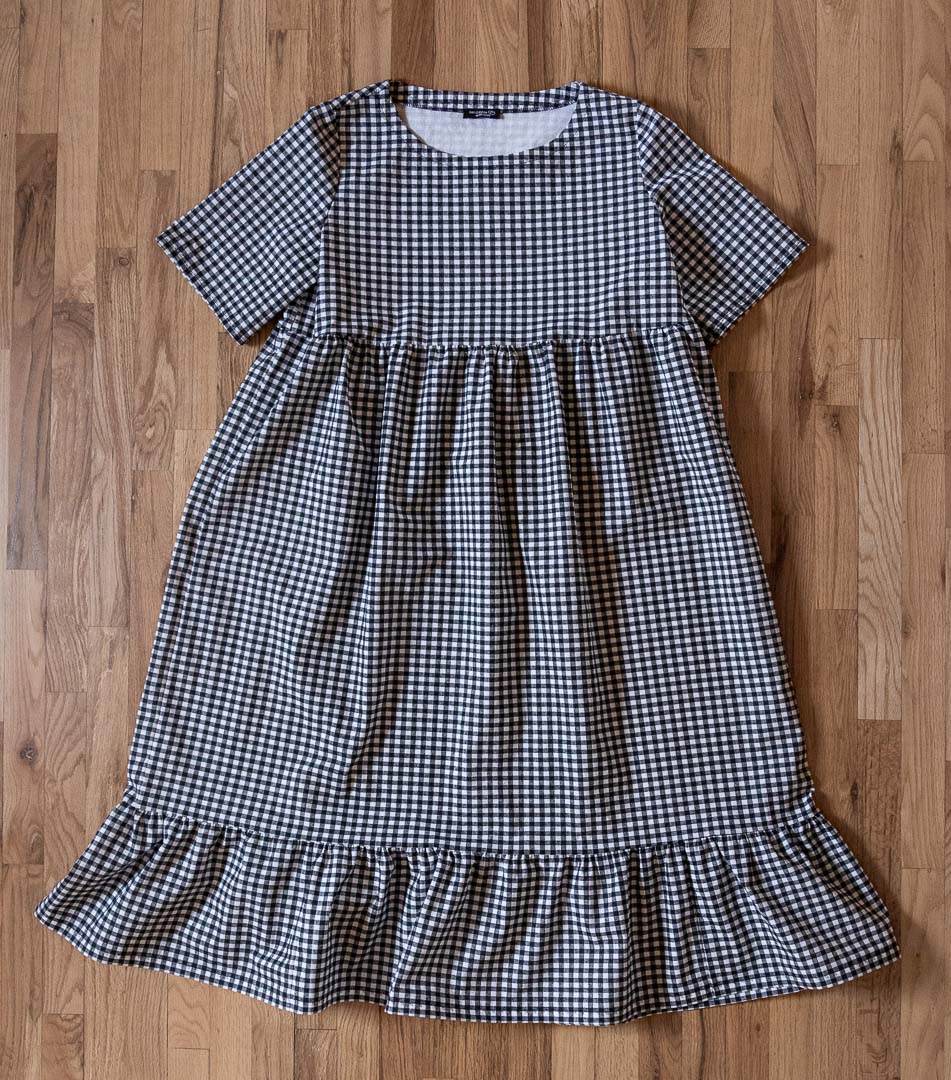
About This Make
Since I made this for someone else, I was a responsible sewist and made a muslin first for her to try on. She fell in between sizes so I had to draw in a custom size. We ended up dropping the gathered waistline 1″ and removing that inch from the skirt.
Then my recklessness kicked in and I went straight to the final fabric with those mods. (Maybe I should just call it confidence.) Yeah; I was totally confident and not at all reckless so I went straight to the final fabric with those mods.
At a glance, it seems like an easy sew, but there are some time-intensive things involved. I also had the added detail work of matching the gingham print between seams and making sure the horizontal lines of the dress paralleled the print. Normally that wouldn’t be too much extra, but the 44″ width of this fabric was too short to cut the bottom ruffle as two pieces (pattern calls for 60″.). So I had to cut it as four and work that matchy magic.
As satisfying as I find gathering to be, it’s always a time-suck, especially on long cuts of fabric. Distributing the gathers evenly and matching the length of the piece you’re joining the gathered piece to is almost an artform. The following really helped me manage that whole process:
- Used a bright pink thread for the bobbin, and a bright blue thread for the needle. That makes it super obvious which threads to pull to create the gathers, and super easy to remove the basting stitches when finished.
- Sew one set of basting stitches along HALF the fabric, and a separate set along the other half. Leave long, loose thread tails at both ends. This makes it nice and easy to create gathers at each end, then slide them along to the midpoint of the garment. Way better than a single long set of basting stitches to wrestle with.
- The spacing between each row of basting stitches was nice. It meant I could serge the final seam in between those stitches, which cuts off one row and only leaves one left to unpick and remove. (All hail the serger for wovens. It is awesomesauce.)
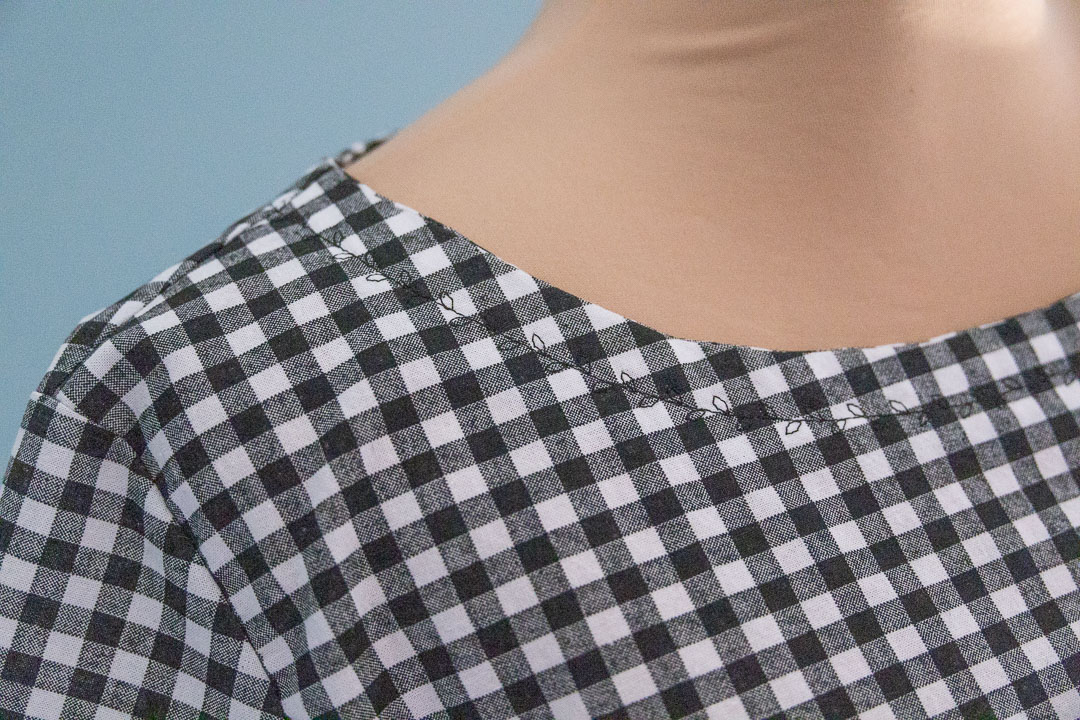
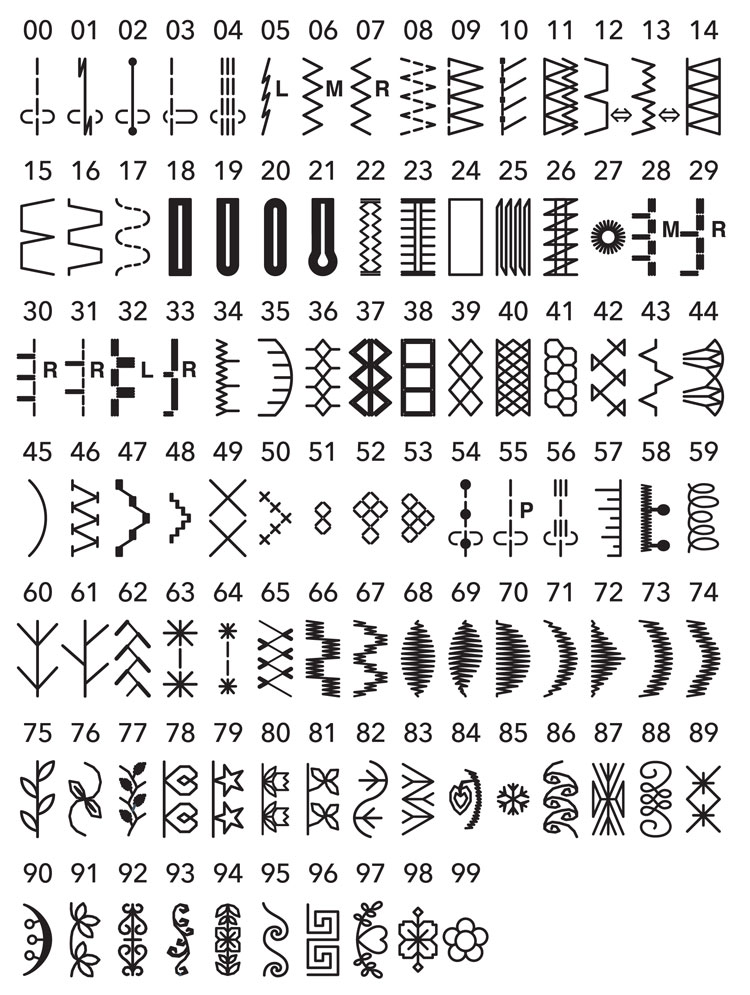
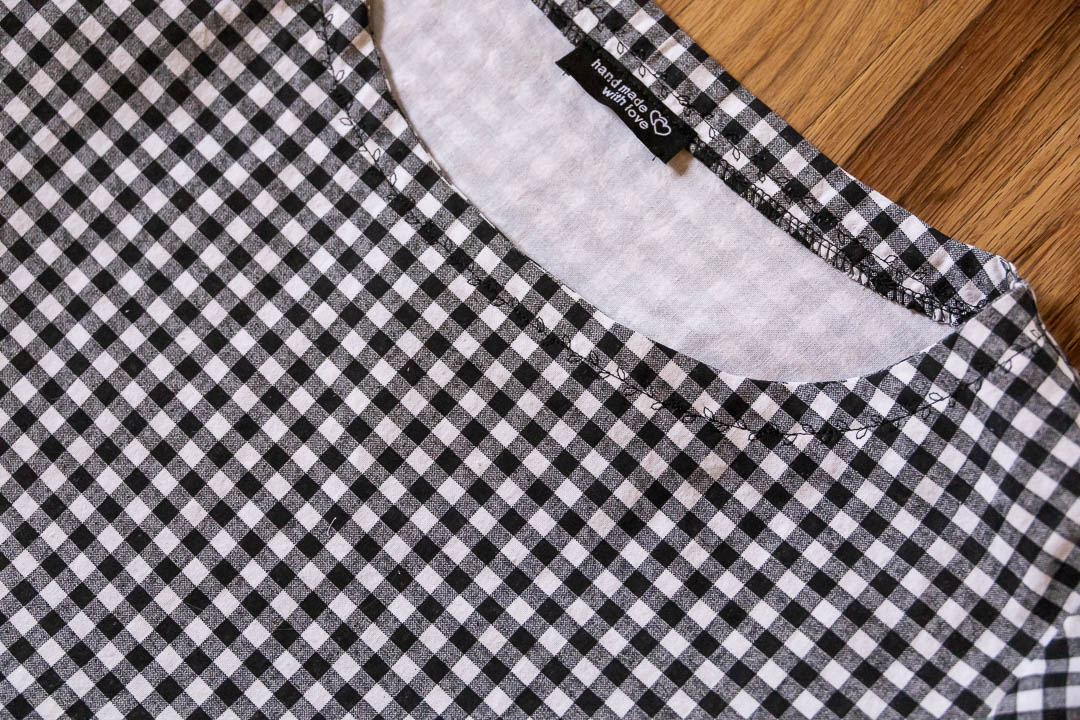
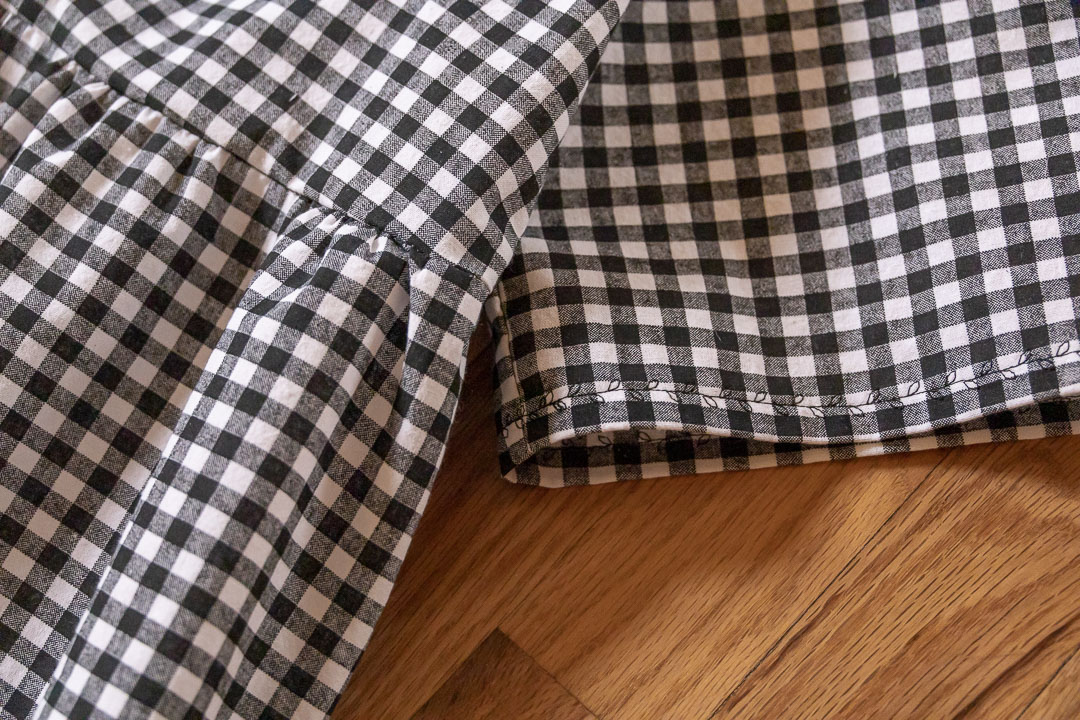
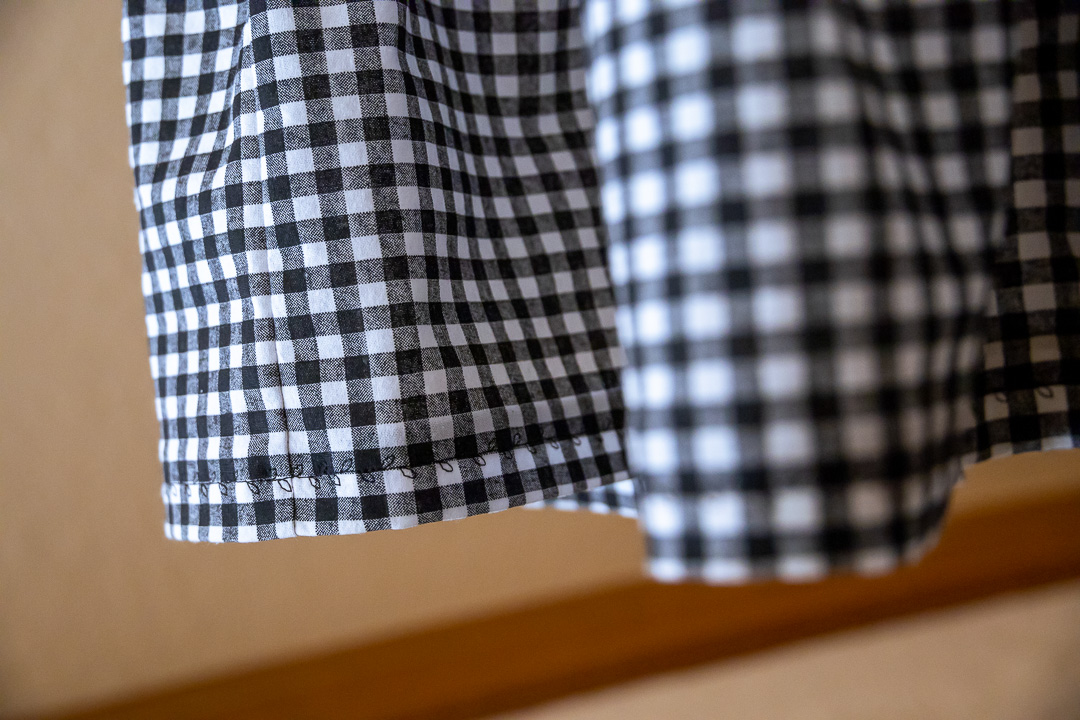
I used a decorative stitch for the first time evarrrr! I saw an opportunity what with the stable woven cotton—which I don’t really use when making garments for myself—and thought it would be a cute something extra instead of a boring straight stitch. I used it to topstitch the collar facing and hem the sleeves and skirt. (And she loved this little easter egg. Huzzah!) I tested a handful of my decorative stitches to see which one worked best, and I went with #75. I also tried 40, 51, 52, 64, 91, and 98. None of the others really turned out the way I imagined they would based on the diagram.
I created memory hems on the sleeves before sewing their side seams, and on the skirt ruffle before gathering. And then I actually hemmed all those pieces before attaching to the final skirt. The less fabric I have to wrestle around my sewing machine while hemming, the better.
Notes for Next Time
There’s nothing I would do differently on this than I described above. If I stick with these tips, any future versions will come together easily:
- Sew separate sections of basting stitches: one set on the front piece and one set on the back piece.
- Leave long, loose thread tails at the beginning and end of basting stitches.
- Create gathers from the ends and work them in toward the middle.
- Use obnoxious colored thread for basting and use different colors for the needle and bobbin.
- Memory hem the sleeves and ruffle.
Project Settings
Sewing Machine vs. Serger
| Sewing Machine | Serger |
|---|---|
|
|
Sewing Machine Settings
| Presser Foot | Stitch# | Stitch Width | Stitch Length | Needle | Top Thread Tension | Application |
|---|---|---|---|---|---|---|
| standard zig-zag (A) | 1 | 3.5 | 3.5 | 90/14 | 4 | seams |
| overedge (C) | 6 | 5.5 | 3 | 90/14 | 4 | edge finish |
| standard zig-zag (A) | 0 | 3.5 | 5 | 90/14 | 4 | baste |
| applique (F) | 75 | 7 | 2.5 | 90/14 | 4 | decorative topstitch |
Serger Settings
| Stitch Name | 4-thread overlock |
|---|---|
| Needles | R, L |
| Finger | B |
| Threads | 4 |
| Tension Left Needle | 4 |
| Tension Right Needle | 4 |
| Tension Upper Looper | 4 |
| Tension Lower Looper | 4 |
| Cut Width | 6 |
| Stitch Length | 3 |
| Differential | 1.0 |
| Application | seams |
Leave a Reply