What you’ll need:
- The ability to sew.
- The basic trappings that come along with the ability to sew (sewing machine, thread, fabric, scissors.)
- A little cuff know-how.
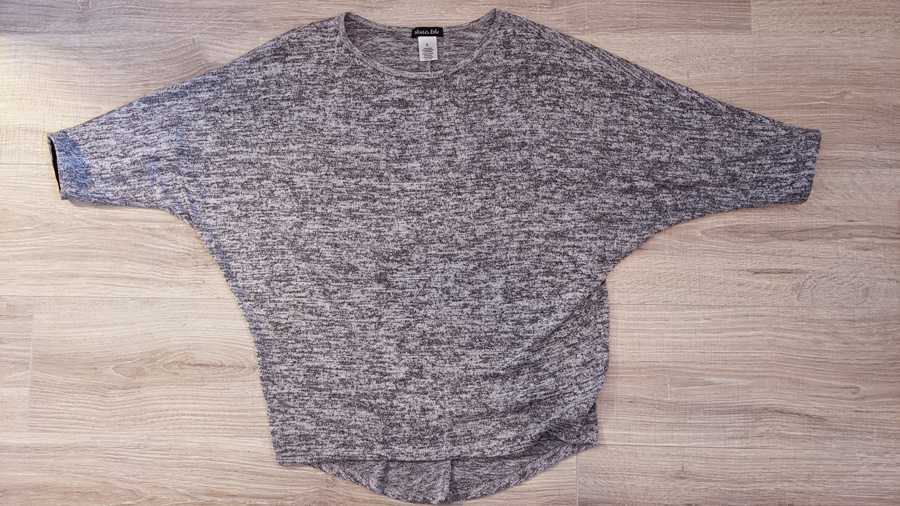
My Lackluster Off-the-Rack Sleeves
One thing I loathe is a sleeve that’s too short. That’s why you won’t find any 3/4-length sleeves in my closet. They’re the worst. It’s like the flip-flopping politician of sleeves. Do I want to be a sleeve? Do I want to keep my human warm? Maybe not TOO warm. They can always wear a sweater. So then I can be this awkward and annoying pseudo-sleeve underneath a long sleeve… Forget it.
I finally pulled out the two shirts in my closet that were flirting with this awkward 3/4-length sleeve idea that needs to die and put a little cuff know-how to use.

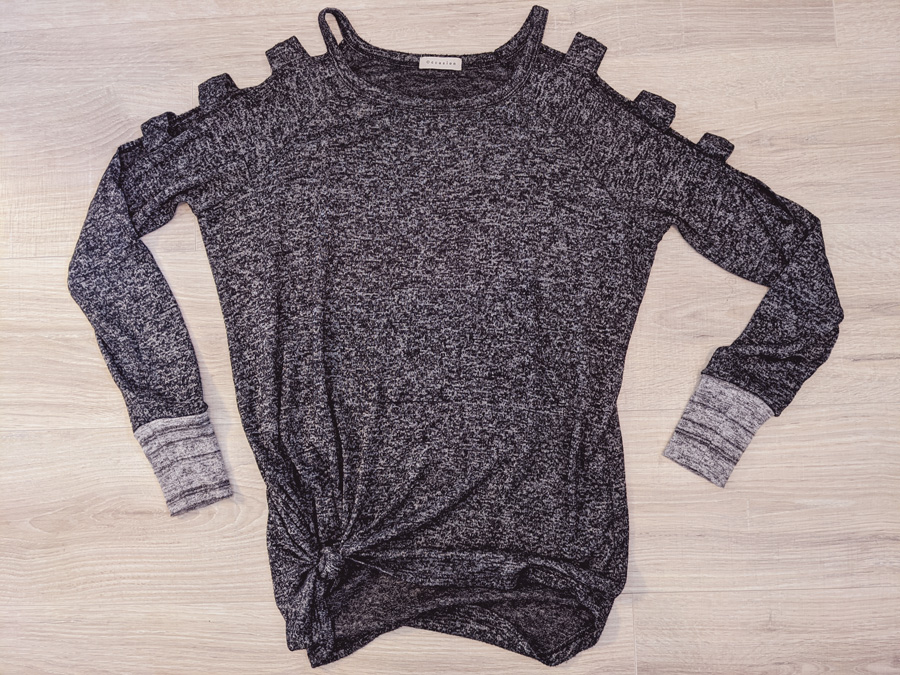
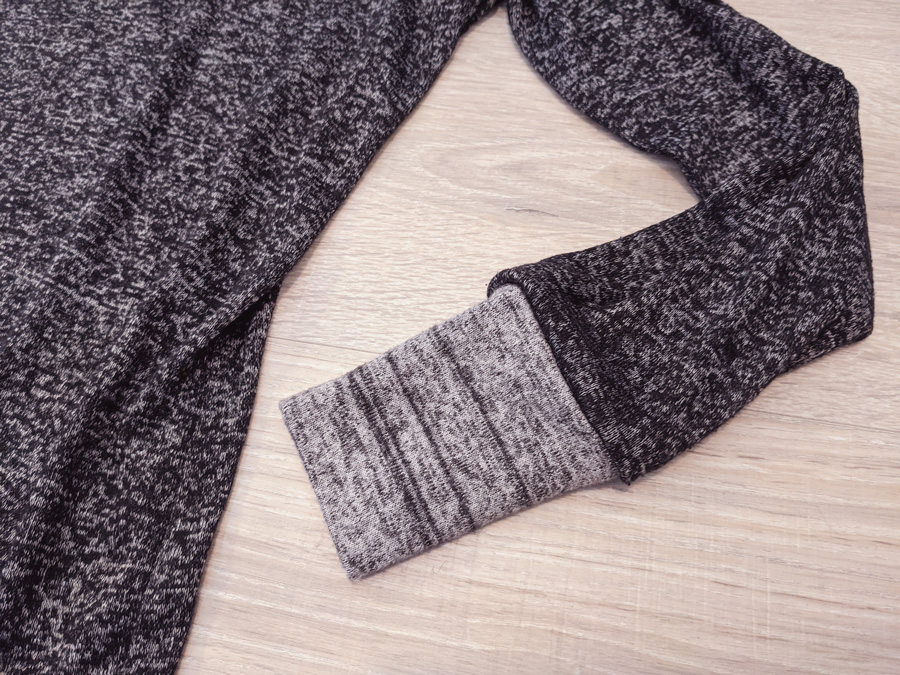
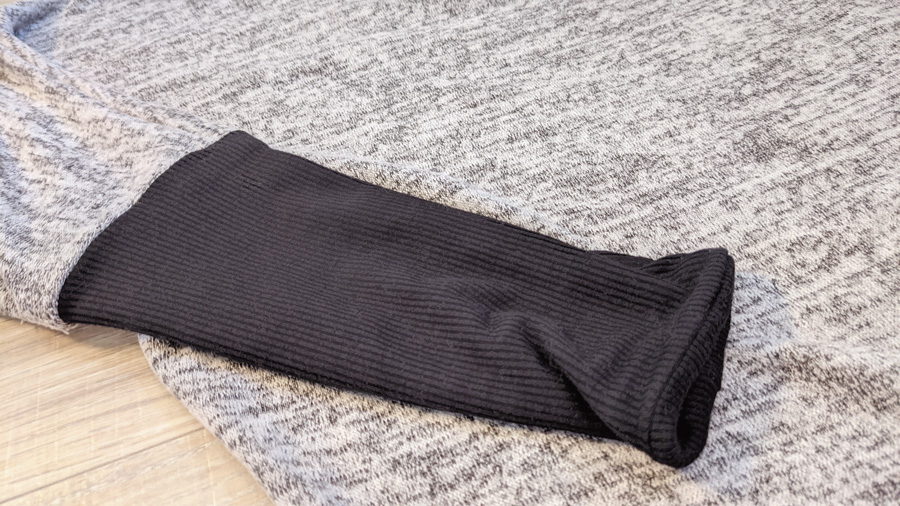
Cold Shoulder – before cuff addition
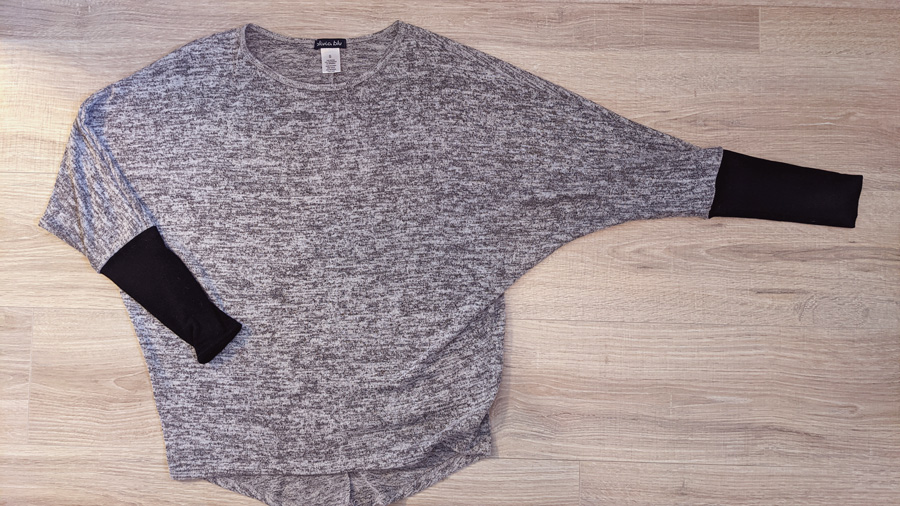
Dolman – before cuff addition
How to Draft A Cuff
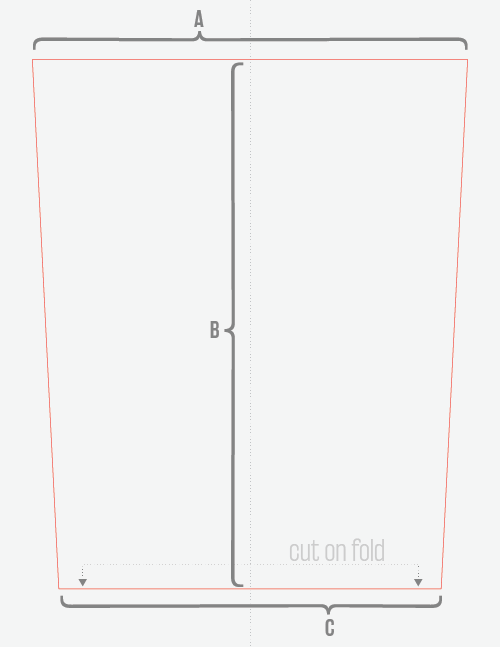
Cuff Pattern Shapes
*Note: I’m working with knit (stretchy) fabric here, so these instructions don’t apply to wovens (no stretch).
First, let’s understand the basic shapes of sleeve cuffs: rectangle, and what I’m calling an hourglass shape.
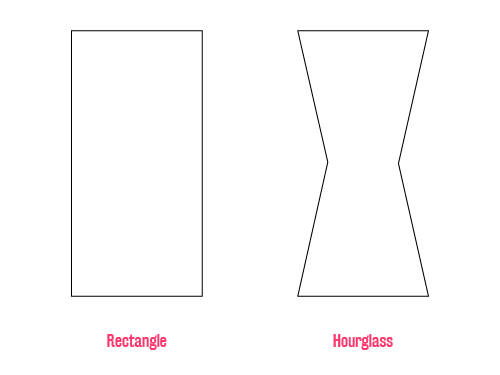
The rectangle is more suited for shorter cuffs or relaxed fit silhouettes that don’t have to contour to the shape of the arm so much. You could also get away with this shape on a longer cuff if your fabric has a ton of stretch.
The hourglass is best suited for longer cuffs. The longer the cuff is, the greater change in circumference you’ll encounter as you move from your wrist up your forearm.
For my lackluster OTR sleeves, I used an hourglass shape for both.
Drafting the Cuff
Measure
The measurements I used for my Dolman shirt will be in coral below.
- Measure the circumference of your sleeve opening.
8.5″ - Calculate 80% of the sleeve opening.
80% x 8.5″ = 6.8″ - Add in your seam allowance. I chose a 1/2″ seam allowance.
6.8″ + (0.5 x 2) = 7.8″
You can choose to round up or down slightly to the nearest workable measurement. For example, 7.75 is easier to measure out than 7.8 since inches aren’t divided into tenths. - Measure how long you want your finished cuff to be—ideally while you’re wearing the shirt.
8″ - Add your seam allowance to the length.
8″ + (0.5 x 2) = 9″ - If using an hourglass shape for your cuff, measure the circumference of your wrist.
Me: 6.5″
You now have the measurements for the size at which you need to cut your cuff. You’re ready to start drafting!
Drafting
Things to note:
- You only have to draft half the cuff since you can cut the fabric on the fold.
- I’ve assigned the following variables for reference on the images below:
A = 7.8 (calculated in step 3 above)
B = 9 (calculated in step 5 above)
C = 6.5 (measured in step 6 above)
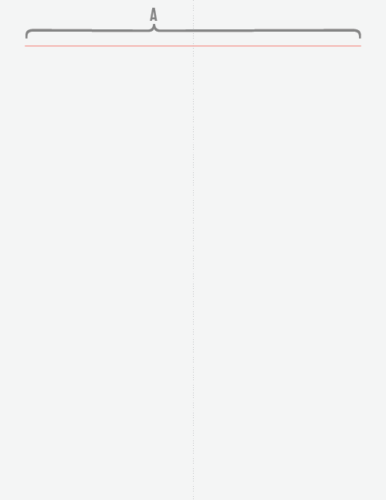
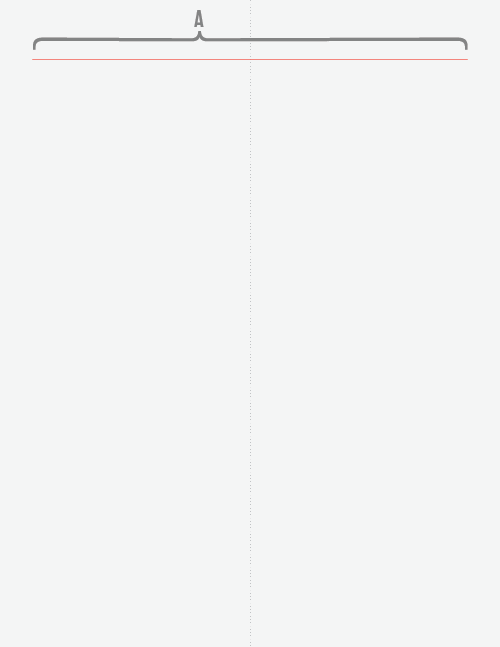
- On an unlined sheet of paper or tracing paper, draw a vertical line. This will be the center of your pattern piece.

- Draw a perpendicular line (A) near the top and centered over the centerline.
- Measure your total length (B) down the centerline and mark. Draw another perpendicular line (C) at this mark and centered over the centerline.
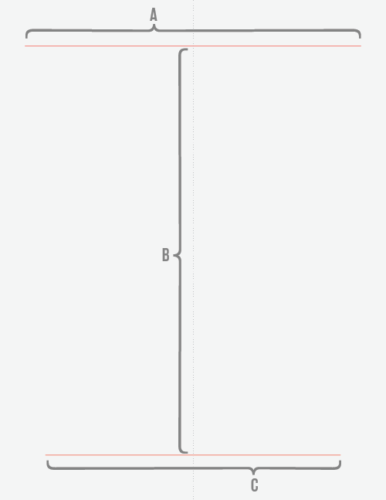
- Connect the ends of (A) and (C).
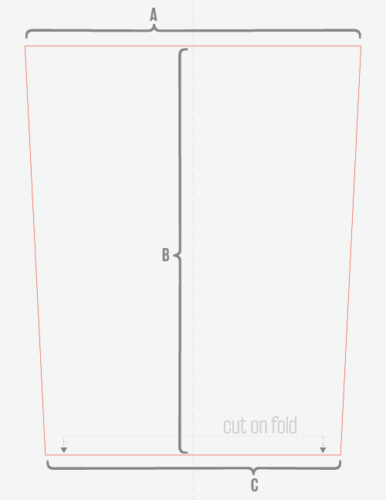
- Mark your fold line and then cut out your pattern piece.

Sewing the Cuff
Both shapes follow the same basic steps:
- Fold your cuff right sides together along the longest side.
- Sew along the longest raw edge at your defined seam allowance.
- Fold the cuff in half over itself (as if you’re turning it right side out, but don’t turn it all the way right side out.) You should end up with a fold at one end of the tube, and the other end of the tube should have all your raw fabric edges.
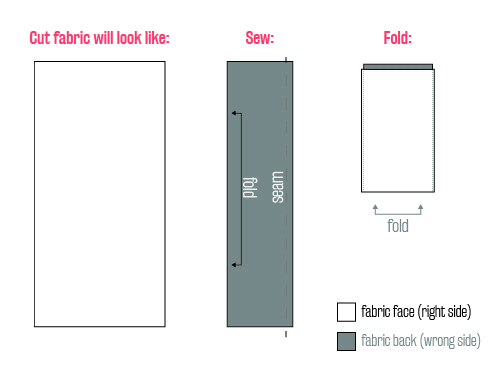
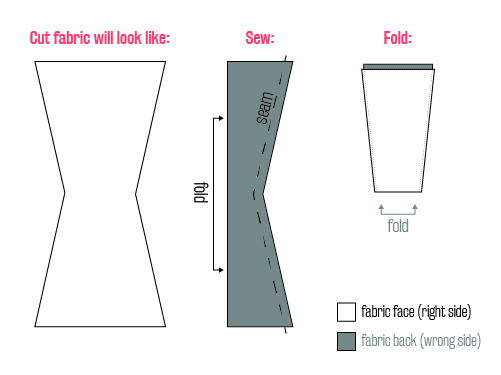
- With your shirt right side out, slide the cuff over the sleeve with the folded edge of the cuff aimed toward the shirt. The raw edges of your cuff should line up with the edge of your sleeve opening.
- Quarter and sew at your defined seam allowance.
You may notice a seam around the wrist here. That’s because I was using up scraps of fabric and had to divide and piece together my pattern to make it fit.
Leave a Reply