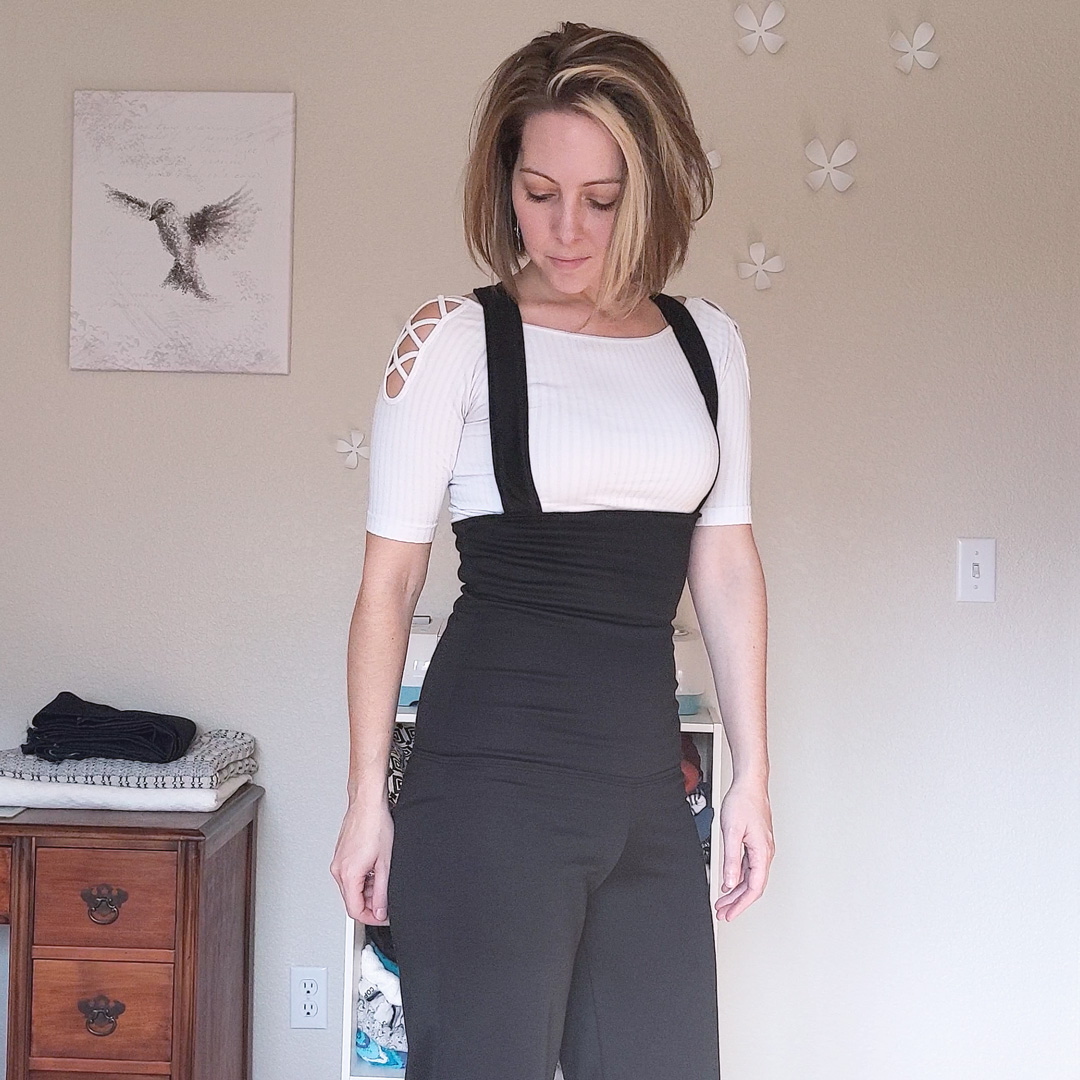
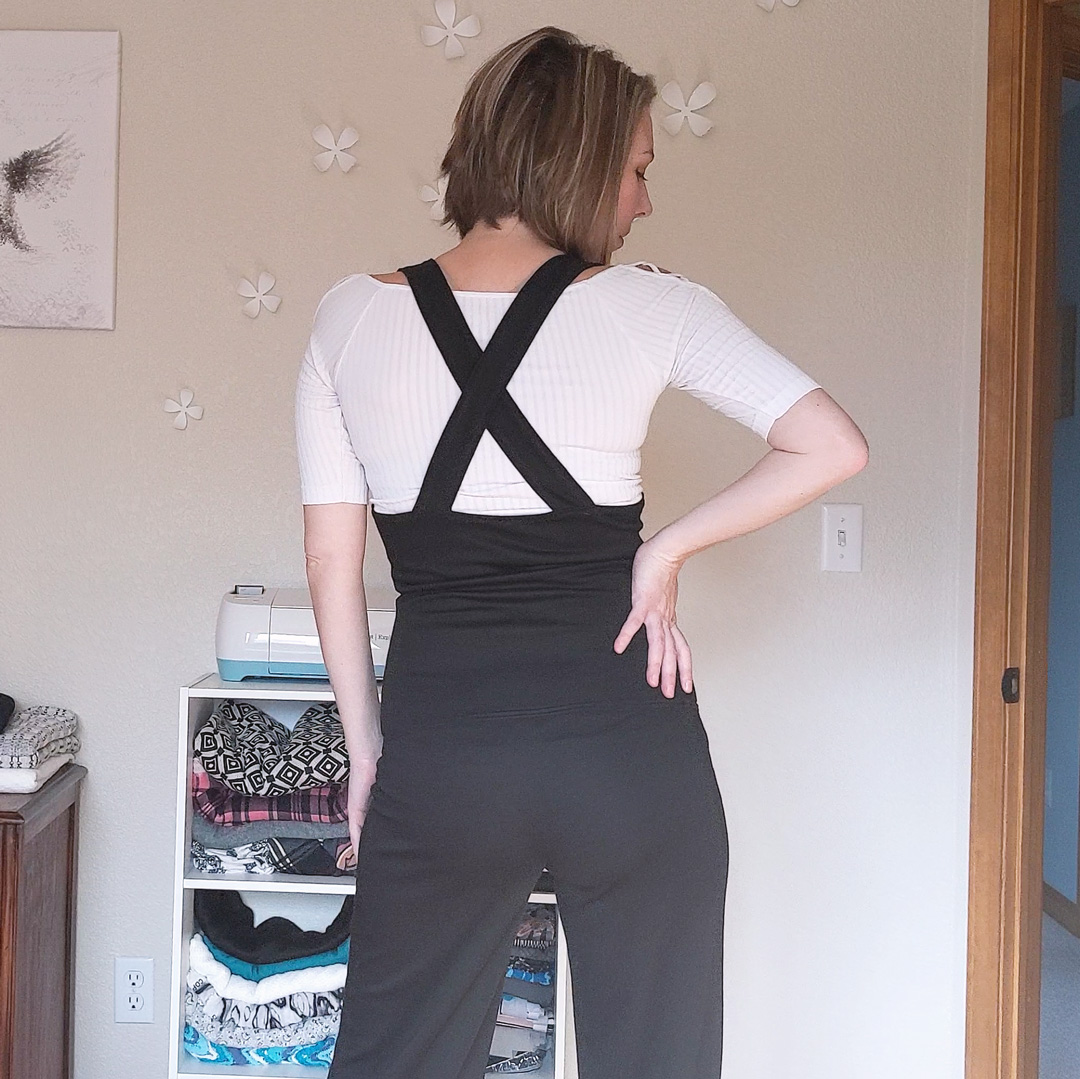
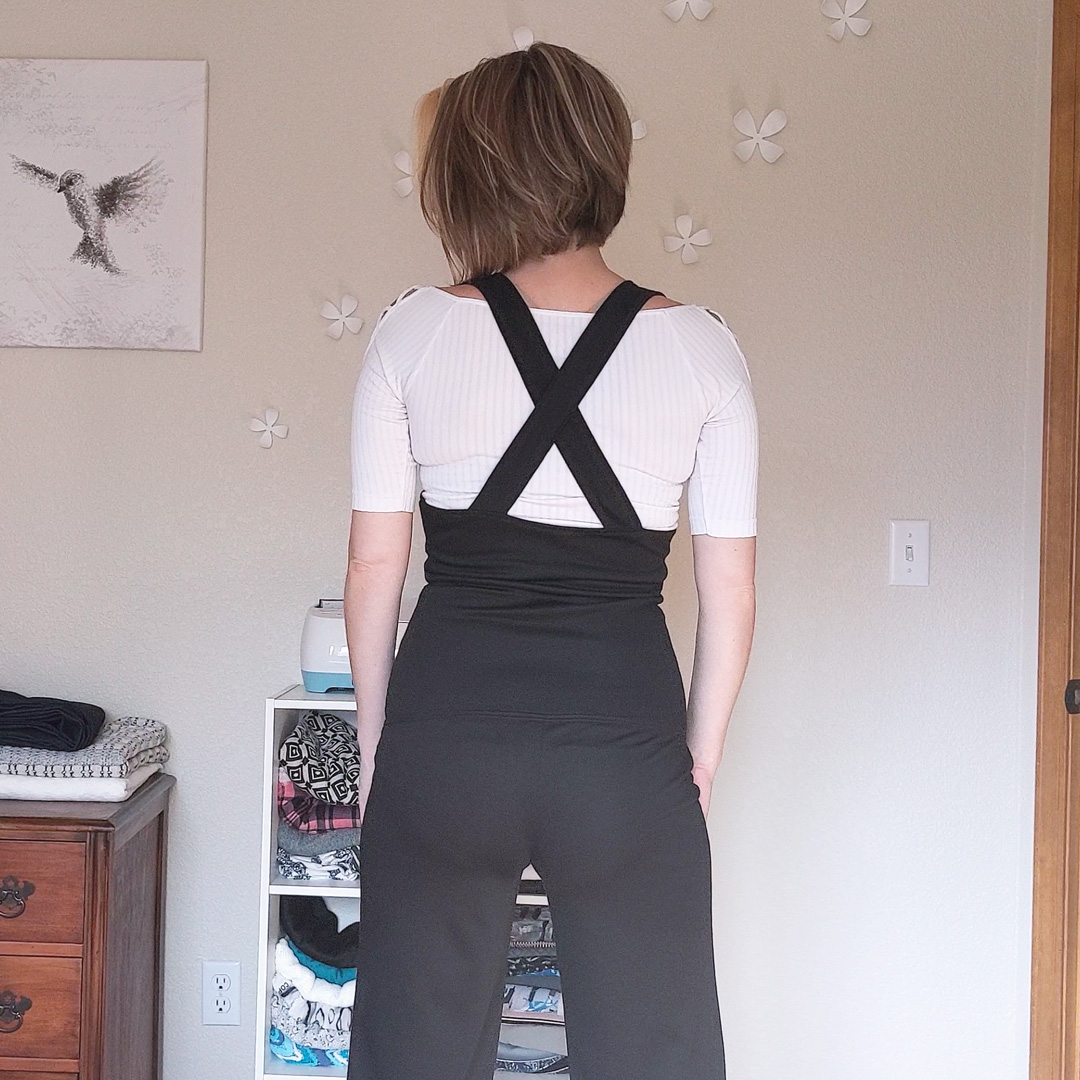
I have wanted these high-waisted, pinafore pants for months and months now. I had a vision of them in my head and it just never went away. So I finally worked up the courage to just dive in and mash some patterns together.
It Began With a Toile
I’ve had some speckled french terry laying around for eons, thinking I would use it for bottoms but shelving it after a failed attempt at a skort. Lucky me; it turned out to have a similar stretch to the black midweight ponte I had earmarked for my final version, and I had a fair amount of it.
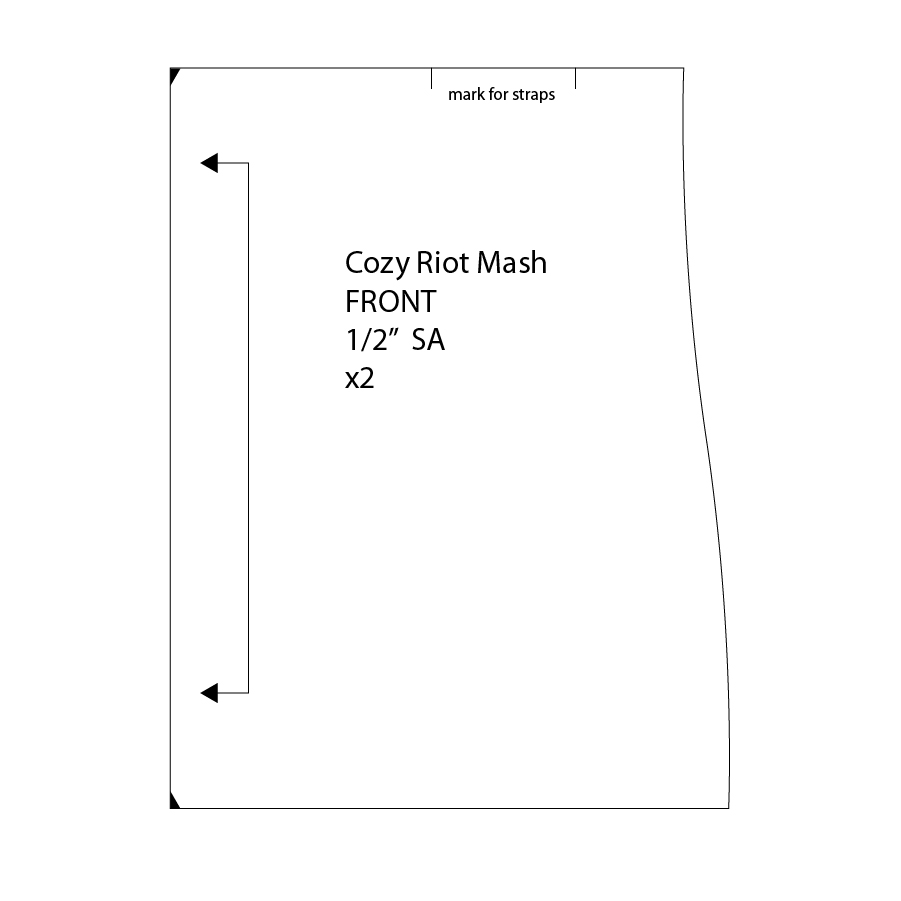
- I traced out the low rise shorts from the Cozy Pants (Patterns for Pirates) pattern.
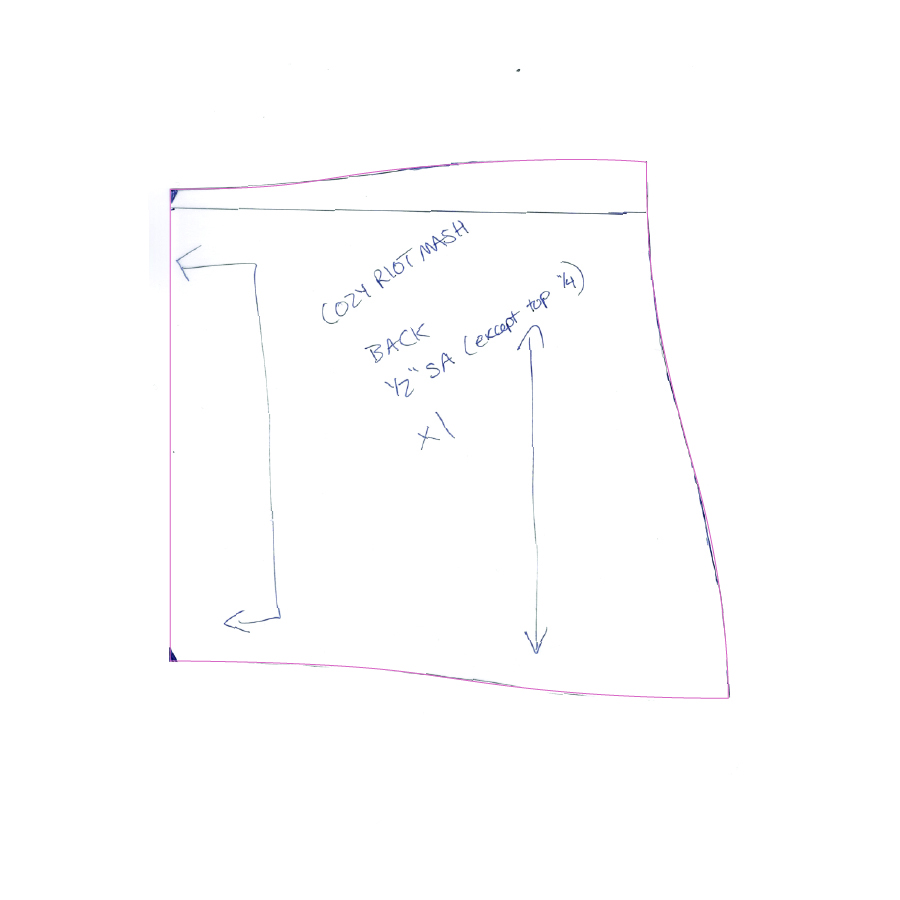
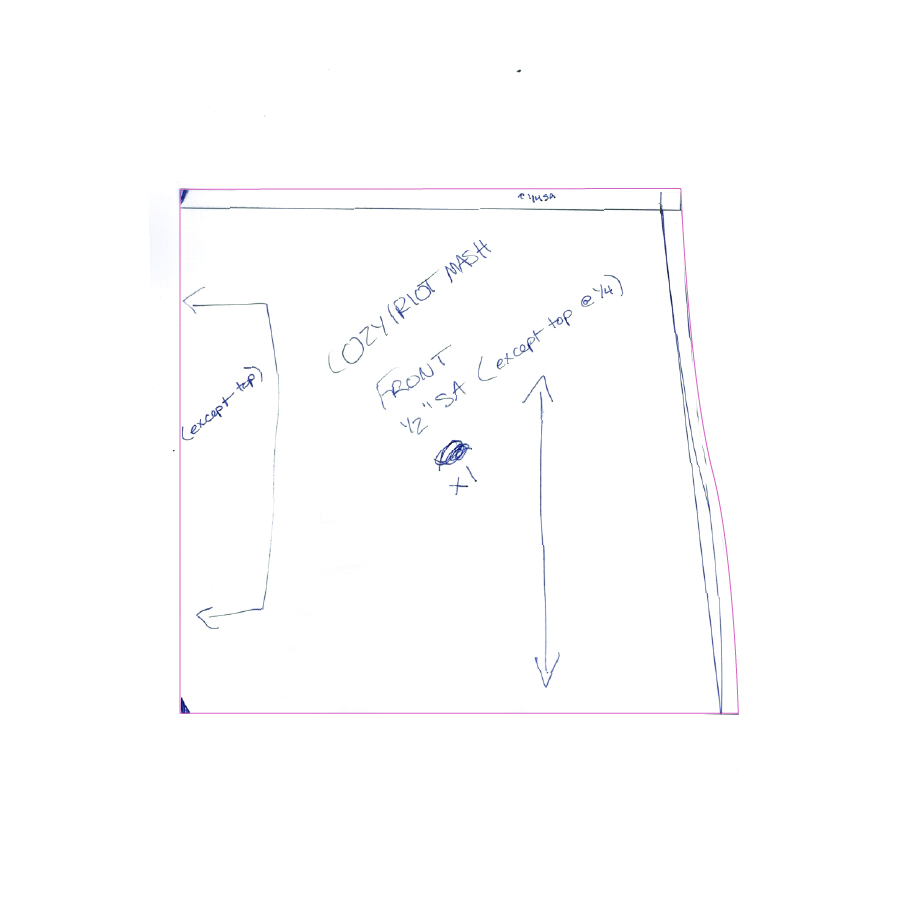
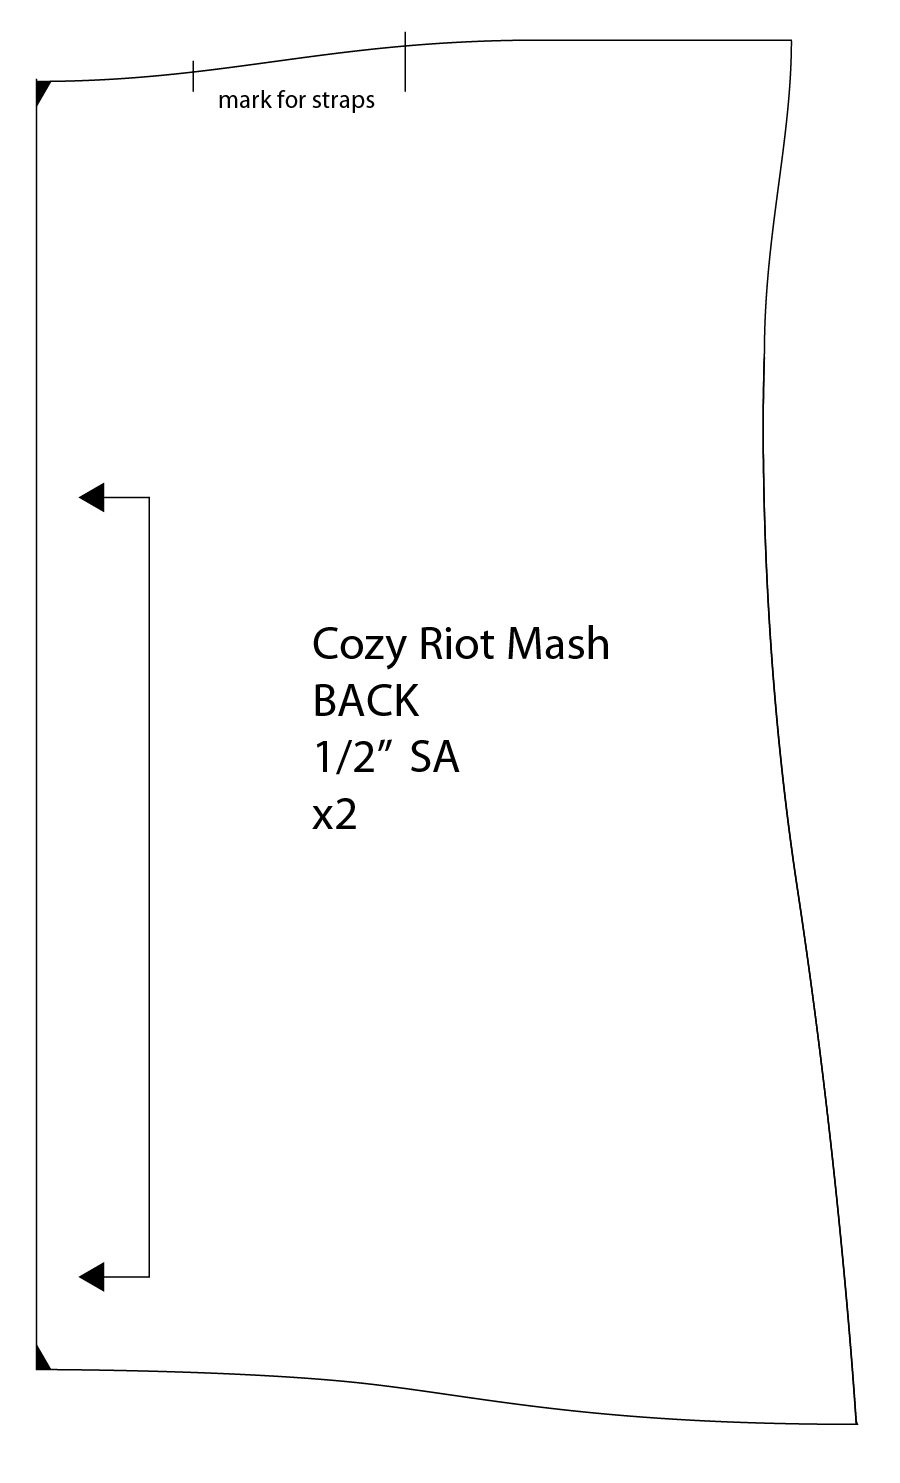
- I dug out my Riot Skirt (George & Ginger) pattern pieces and measured and sketched and landed on a pattern piece to connect the shorts to the Riot overlapped waistband.
By some miracle, everything came together pretty well. I was a little skeptical about being able to slip into the thing once it was ready to try on, but I managed, and it definitely had fit issues.
- The front was a tad longer than the back at the side seams
- The height of my self-drafted waist was too short…
- …which caused the straps to feel too short…
- …and tug the shorts up in crotchy areas you don’t want shorts to be tugged up into.
- I like the overlap waist on the Riot Skirt, but decided it would be easier to get on and quicker to sew if I merged that piece into my self-drafted piece.
- The waist needed to be wider; it was a bit snug around the body.
Adjustments, and Toile #2
To save some time, I chopped the shorts and straps off my first toile to re-use on my second one. No seam-picking; I just cut along the seam allowance and didn’t care about the extra layer of fabric it left. This was all for testing the fit anyway; I had no intention of wearing this garment.
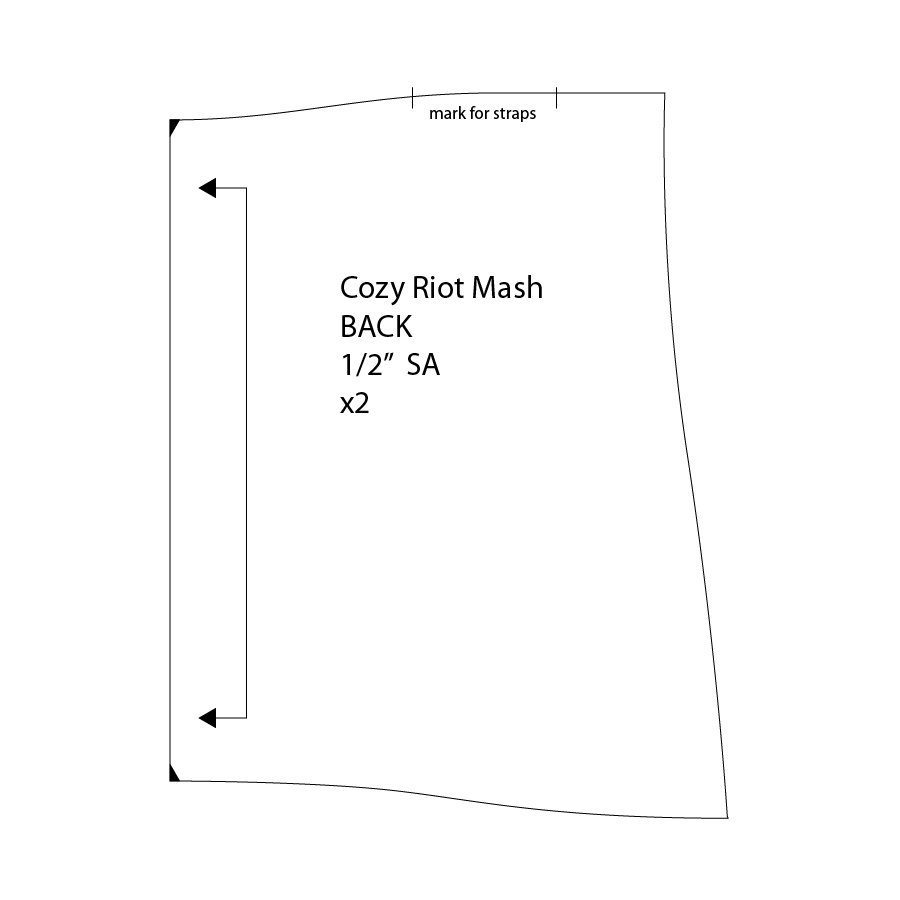
I also scanned my original pattern pieces and brought them into Illustrator to make quicker and more accurate adjustments, and smoother curves.
I only got to the point of cutting out the fabric and pinning the side seams. I could already tell it was going to be way too short. So I hopped back into Illustrator to land on my third version.
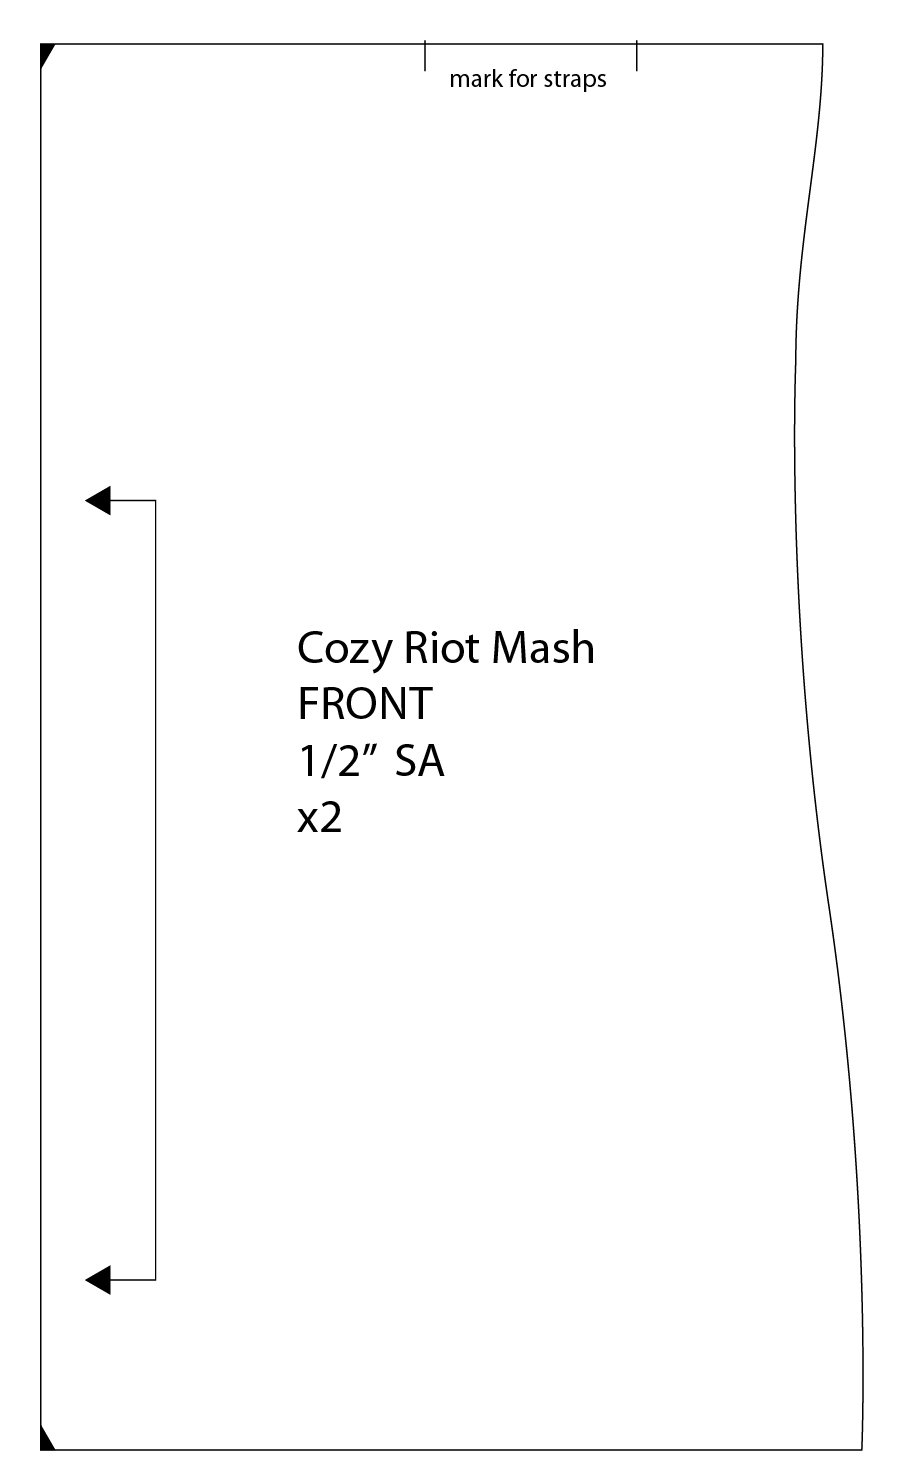
I cut these new waist pieces out of my test fabric, sewed everything together, and tried it on to surprising success. I decided I would change the waist seam allowance to 1/4″ for the final version to add a bit more room, and that was it. I felt confident enough to cut into my midweight ponte next.
About the Fabric
Black Midweight Stretch Ponte De Roma from Cali Fabrics
- FABRIC CONTENT: Poly/Rayon/Lycra
- STRETCH: 2-way
- WEIGHT: Midweight
Can’t beat $5.99 yard. The fabric cost for these pants was less than $20.
The Final Verdict
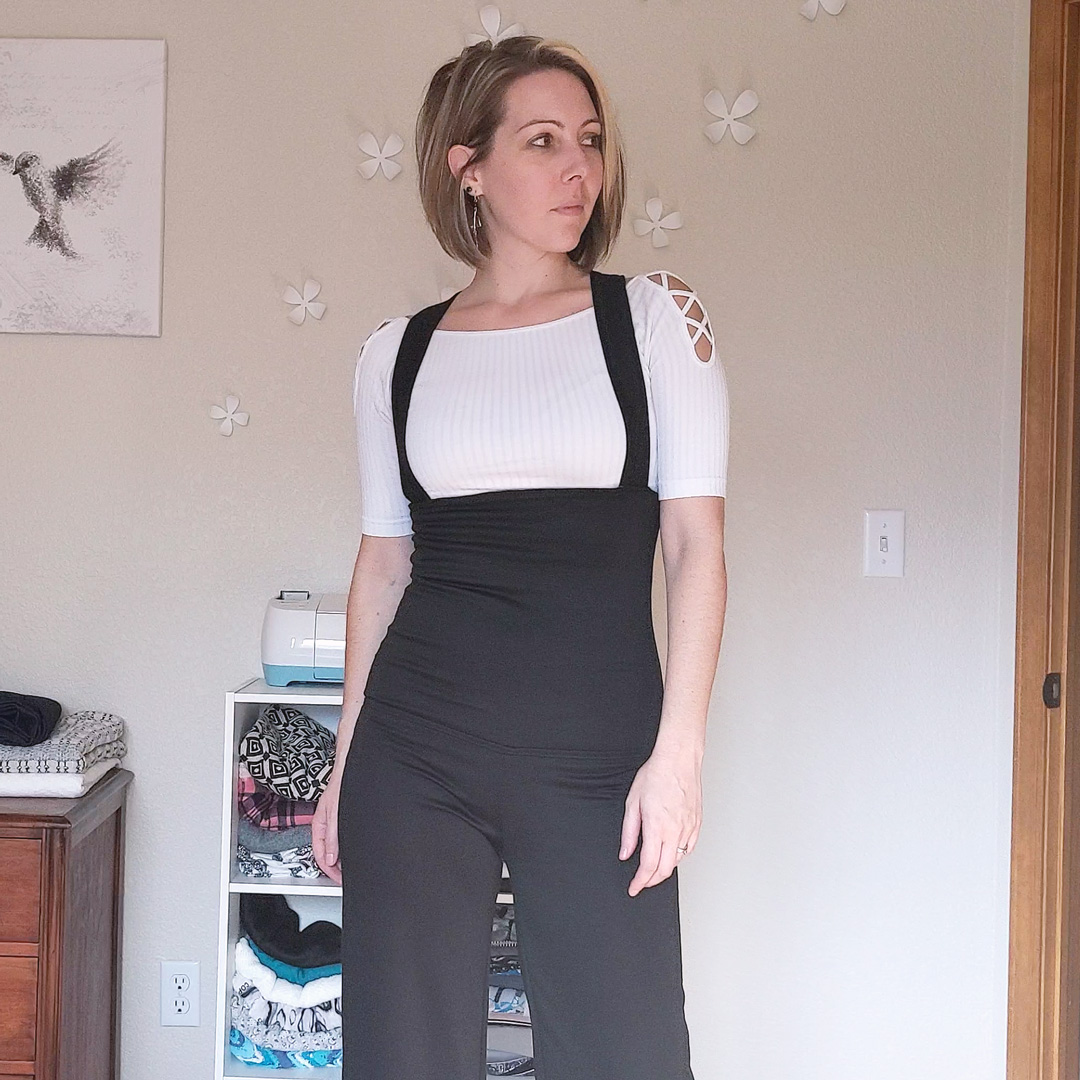
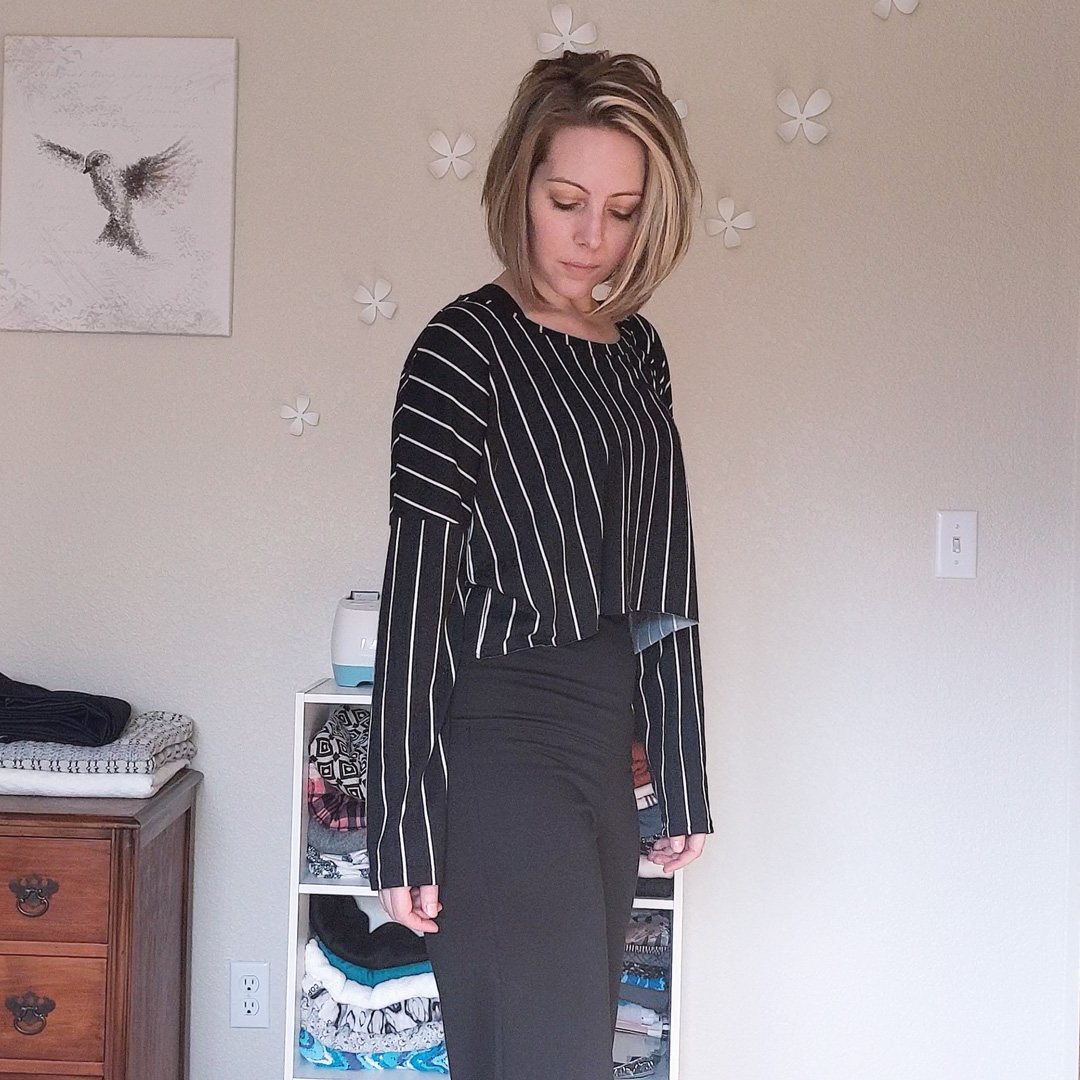
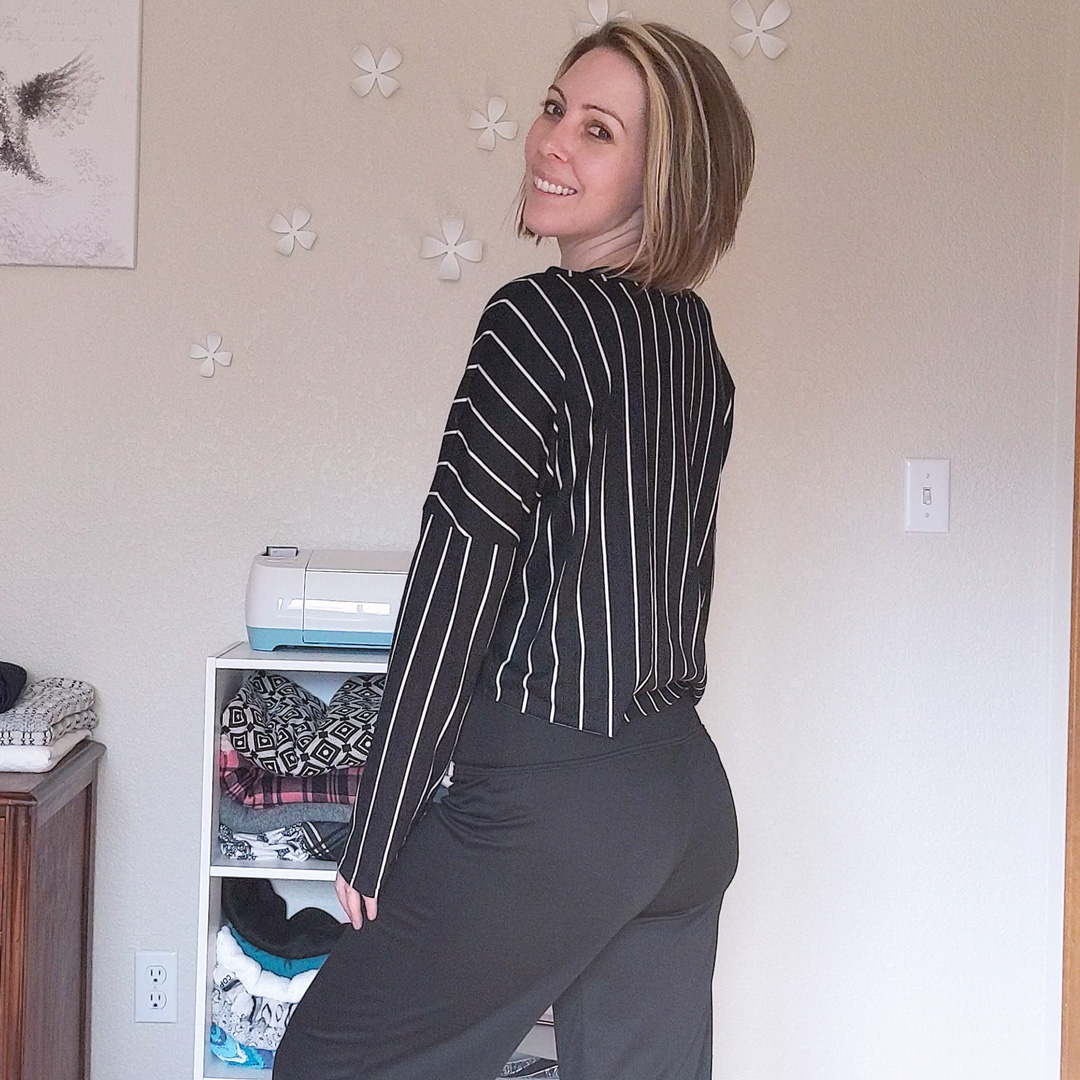
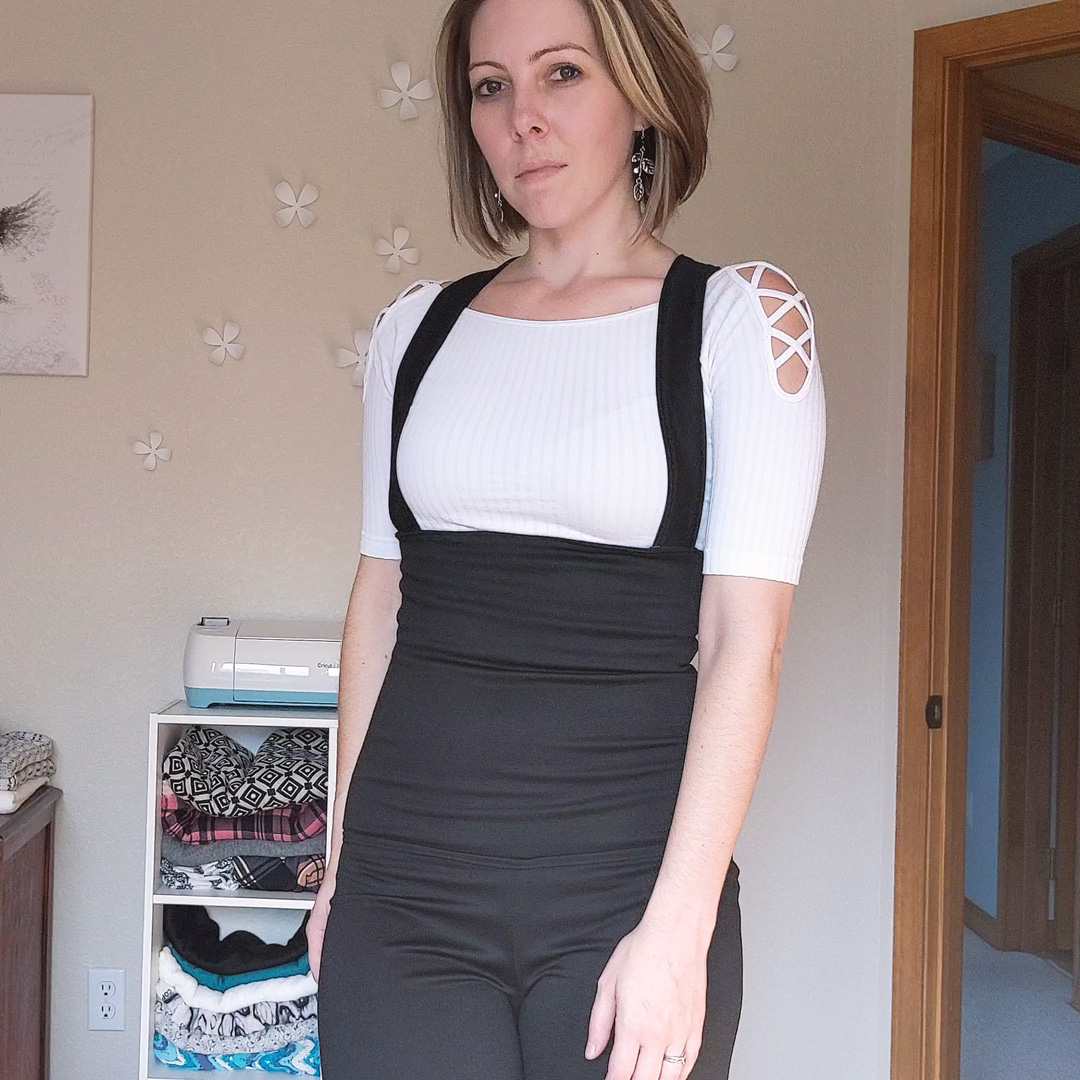
So. Thrilled. Just being able to bring something out of my head into real life is satisfying enough, but I love how they turned out. I added an inch to the pants so they’re long and loose and flattering and look great with a pair of heels.
Wearing this overtop some (yet-to-be-made) rash guards—I’m thinking of digging out my Mix It Up (George & Ginger) pattern to create a whole bunch of fun options—or some fun long-line bras using the Switch It Up pattern (George & Ginger), or layering some high-low tops over it for a pop-over look… So many possibilities!
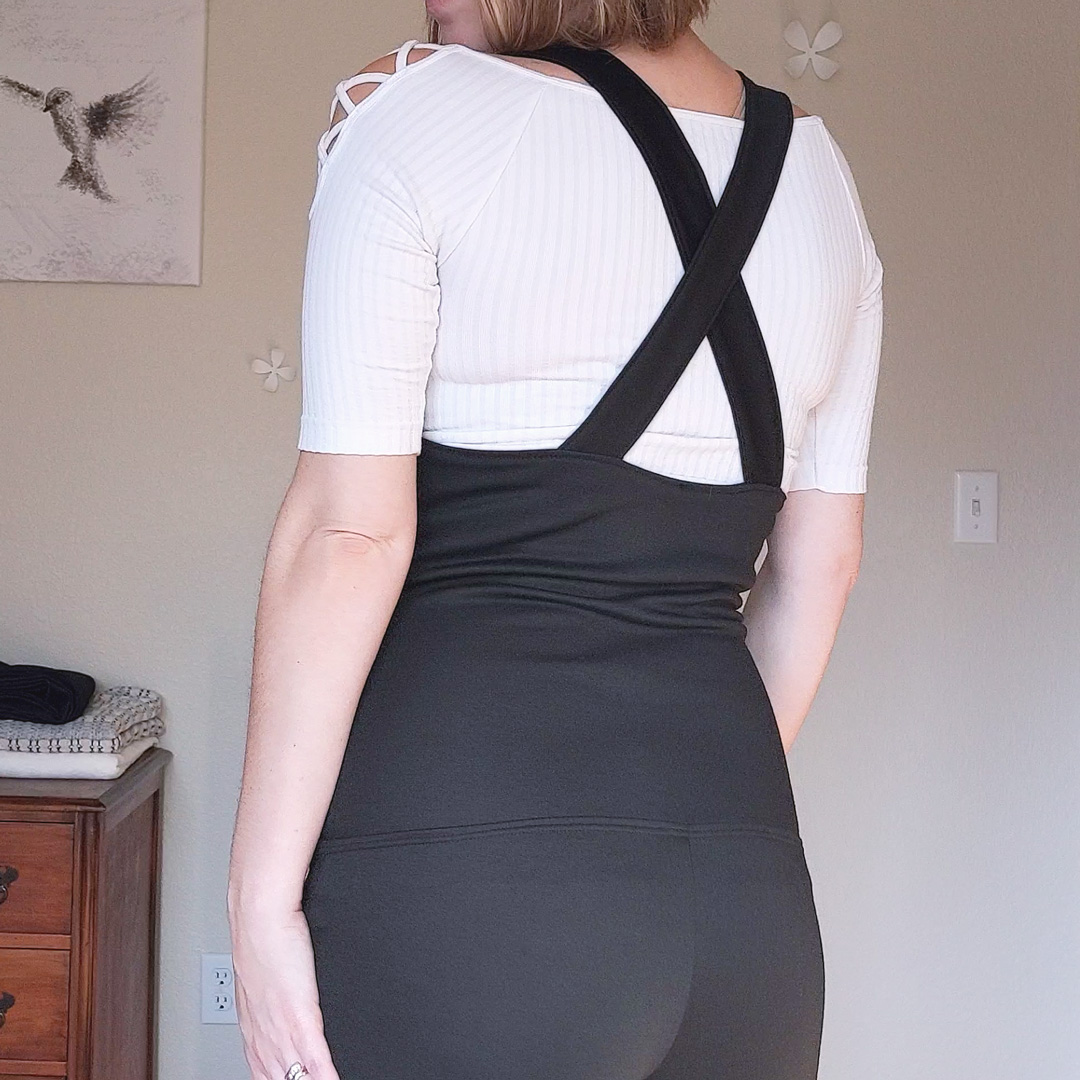
It’s also incredibly comfortable to wear. The two layers of ponte around the waist serve as a bit of a control top without turning you into sausage filling. And there’s the added bonus of your pants staying in place all day no matter how you bend or move.
Notes for Next Time
- Try redrafting the side curves along the bottom of the waist to float out more around the hip. This might involve adjusting the fit of the pants as well. I’m envisioning a silhouette that’s fitted around the waist and loose around the hips and bum to cascade into the wide legs.
- My straps ended up too long and I had to slice them at the front and reattach. Make sure to trim them down to 25.5″ before attaching.
- Alternately, instead of the looser silhouette, redraft the pants for mid-rise at the sides and back. I’ll also have to adjust the waist pattern piece to accommodate that.
But here they are! From dream to reality! Sewing is awesome.
Step By Step
- Optional: press memory hem on pant legs.
- Sew outer leg seams at 1/2″ seam allowance. Finish.
- Sew inner leg seams at 1/2″ seam allowance. Finish.
- Sew crotch seam at 1/2″ seam allowance. Finish.
- Sew waist side seams on self, 1/4″ seam allowance. Press.
- Sew waist side seams on lining, 1/4″ seam allowance. Press.
- Sew straps at 1/4″ seam allowance. Turn RSO. Press.
- Topstitch straps. Trim to 25.5″ from angled point to straight end.
- Attach straps to waist at 1/4″ seam allowance. Press.
- Topstitch waist around top.
- Attach waist to legs at 1/2″ seam allowance. Finish. Topstitch.
- Hem.
Project Settings
Presser Foot |
Stitch# |
Width |
Length |
Needle |
Top Thread Tension |
Application |
|---|---|---|---|---|---|---|
standard zig-zag (A) |
5 |
1.0 |
4 |
blue tip |
4 |
seams |
overedge (C) |
6 |
5.5 |
3.5 |
blue tip |
4 |
edge finish |
standard zig-zag (A) |
2 |
3.5 |
3.5 |
twin stretch (wide) |
4 |
hip topstitch |
adjustable edge (SE)#6 |
5 |
1.0 |
4 |
blue tip |
4 |
strap and waist topstitch |
standard zig-zag (A) |
1 |
3.5 |
3.5 |
twin stretch (wide) |
4 |
hem |
Leave a Reply