Bought some sweatshirt fleece but I didn’t want to make your run-of-the-mill sweatshirt hoodie or any variation of your run-of-the-mill sweatshirt hoodie. Those are a dime a dozen and borrrrinnnng.
So I did this instead:
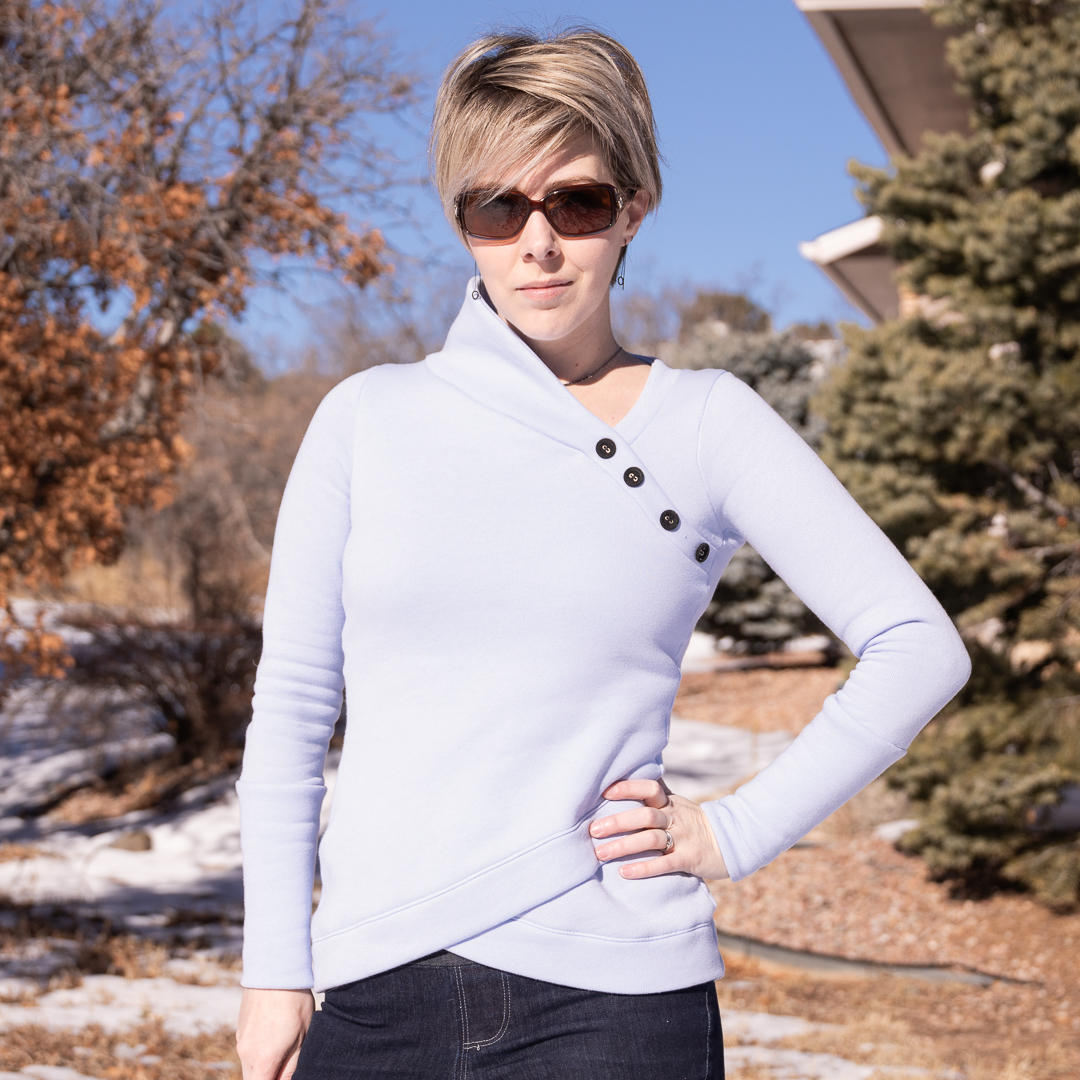
About the Pattern
George and Ginger 40K Sway Top (It’s FREE!)
George and Ginger patterns are so hackable, it’s amazing. They’re such a good base to start from. Having made a few variations of the 40K Sway Top already, I started with this pattern because it had the silhouette I was looking for: that nice taper in at the waist and back out at the hip without being too snug.
As I was wandering around Pinterest for sweatshirt ideas, I was inspired by this top:
I loved the tulip front with the wide bands, the fitted silhouette, the length, everything. And I knew sweatshirt fleece would play perfectly with this.
About the Fabric
2 yards Light Baby Blue, Sweatshirt Fleece from Boho Fabrics
- Contents: 50% Cotton, 50% Poly
- Weight: 14 oz
- Width of Fabric: 70″
- Horizontal Stretch: 50%
- Vertical Stretch: 25%
Snagged this for 25% off around Thanksgiving and it is everything a cozy sweater should be. Forget French Terry, ya’ll. Sweatshirt fleece is where it’s at. And that extra width at 70″? Nice!
The cut edges roll a little bit, but it’s not level like cotton lycra; it’s still very workable. It’s a nice, lofty fabric, so it bulks up quickly when you start adding layers on top of each other. However, my serger and sewing machine had no issues running through all of it, including the areas where there were 4 or 5 layers to sew through.
Very well-behaved fabric overall; at no point did I want to strangle anyone with it. (That’s how I tell if a fabric is nice to work with or not. You might call it the ‘murder meter.’)
About This Make
- size 6 graded to 8 at the hip
- Did I lengthen this eons ago when I first made it?
- Did I modify the cuffs myself or did they come this long?
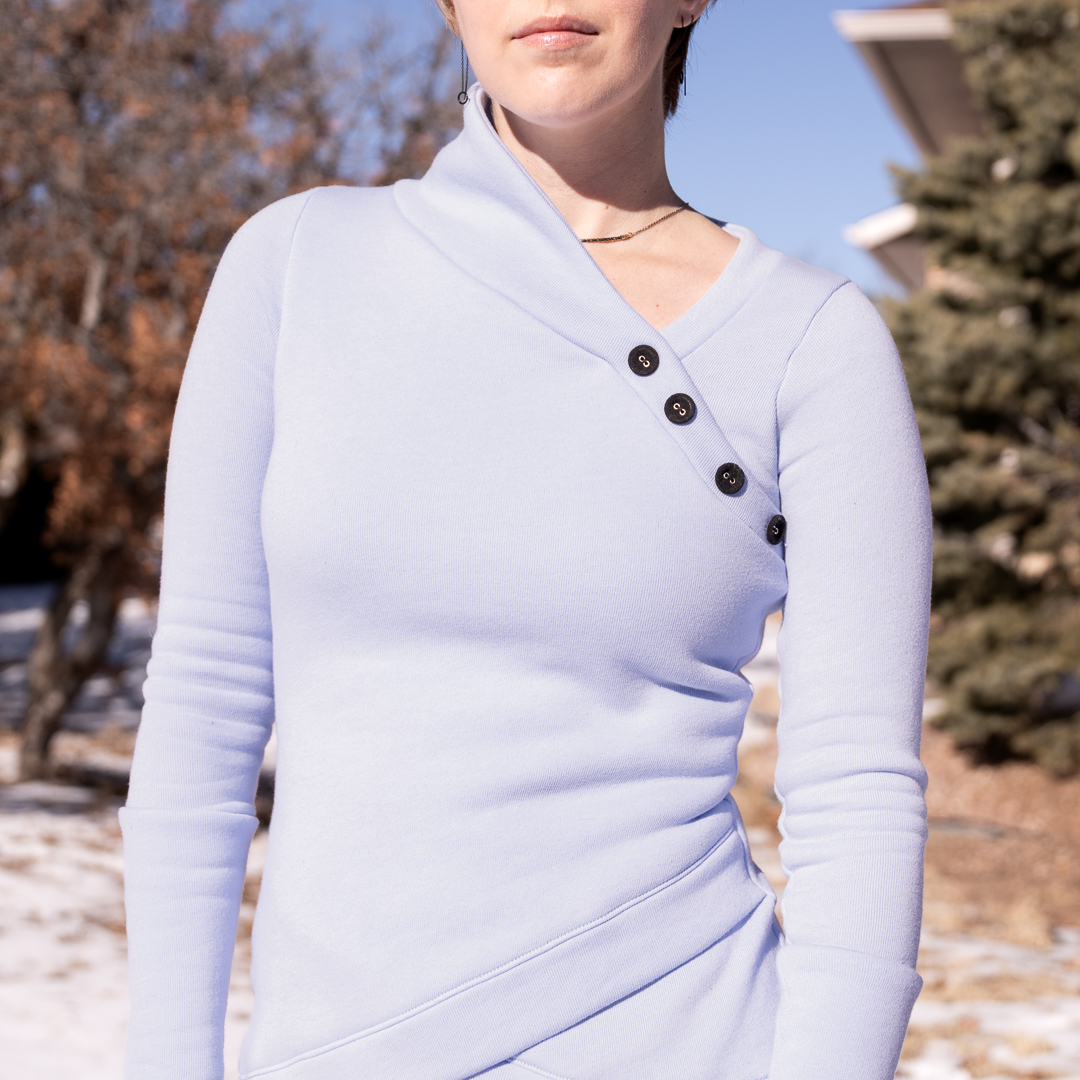
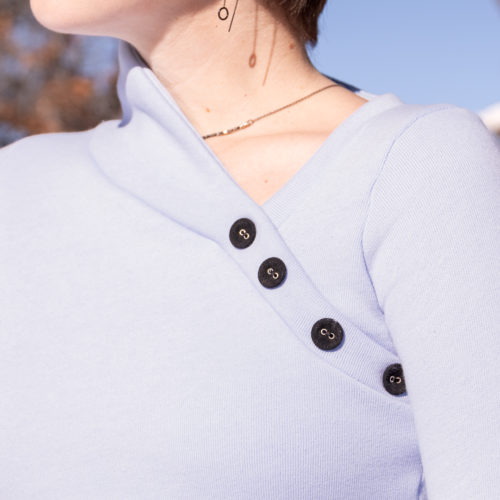
- Buttons were a freebie that came with a Boho fabric order, I think.
What I Did Differently
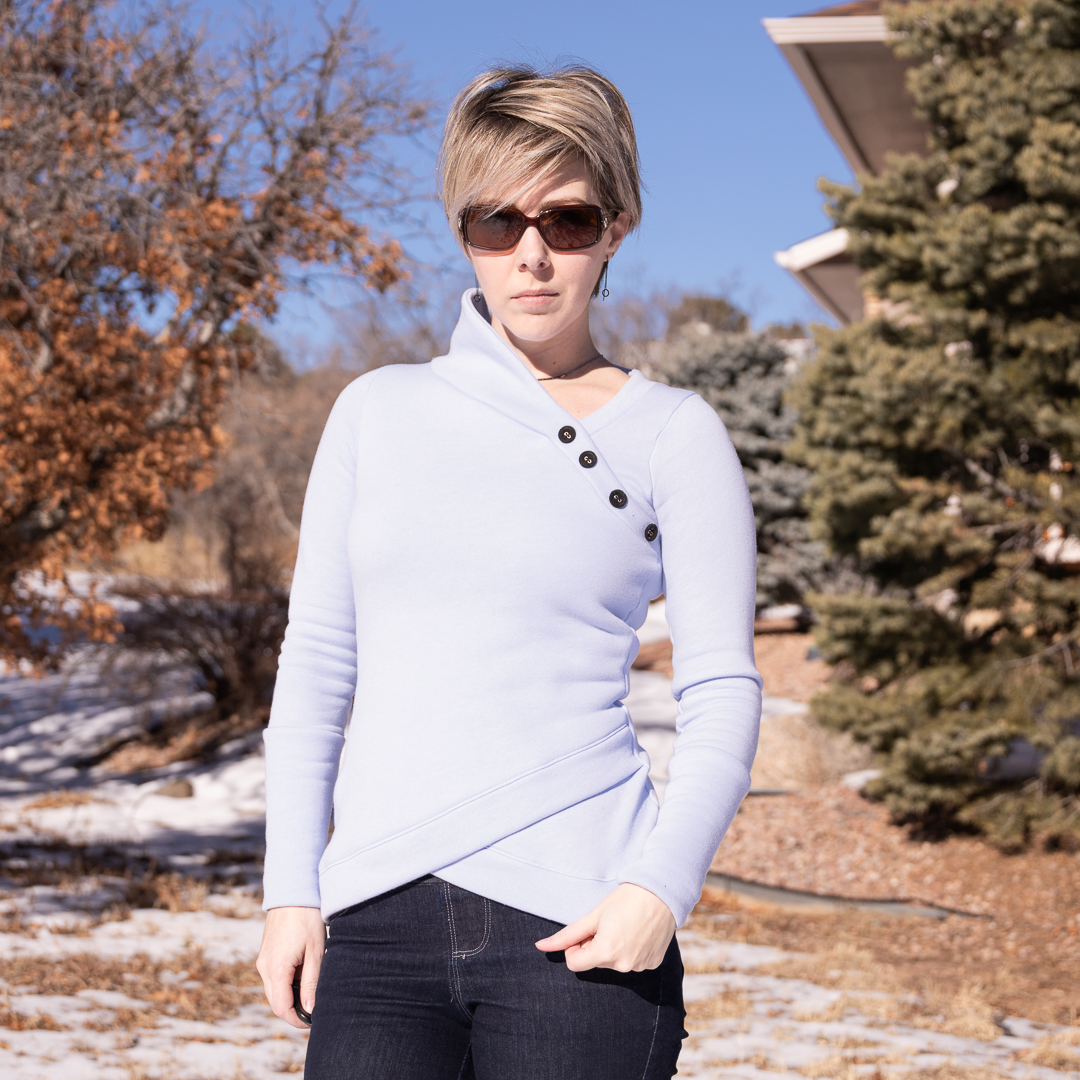
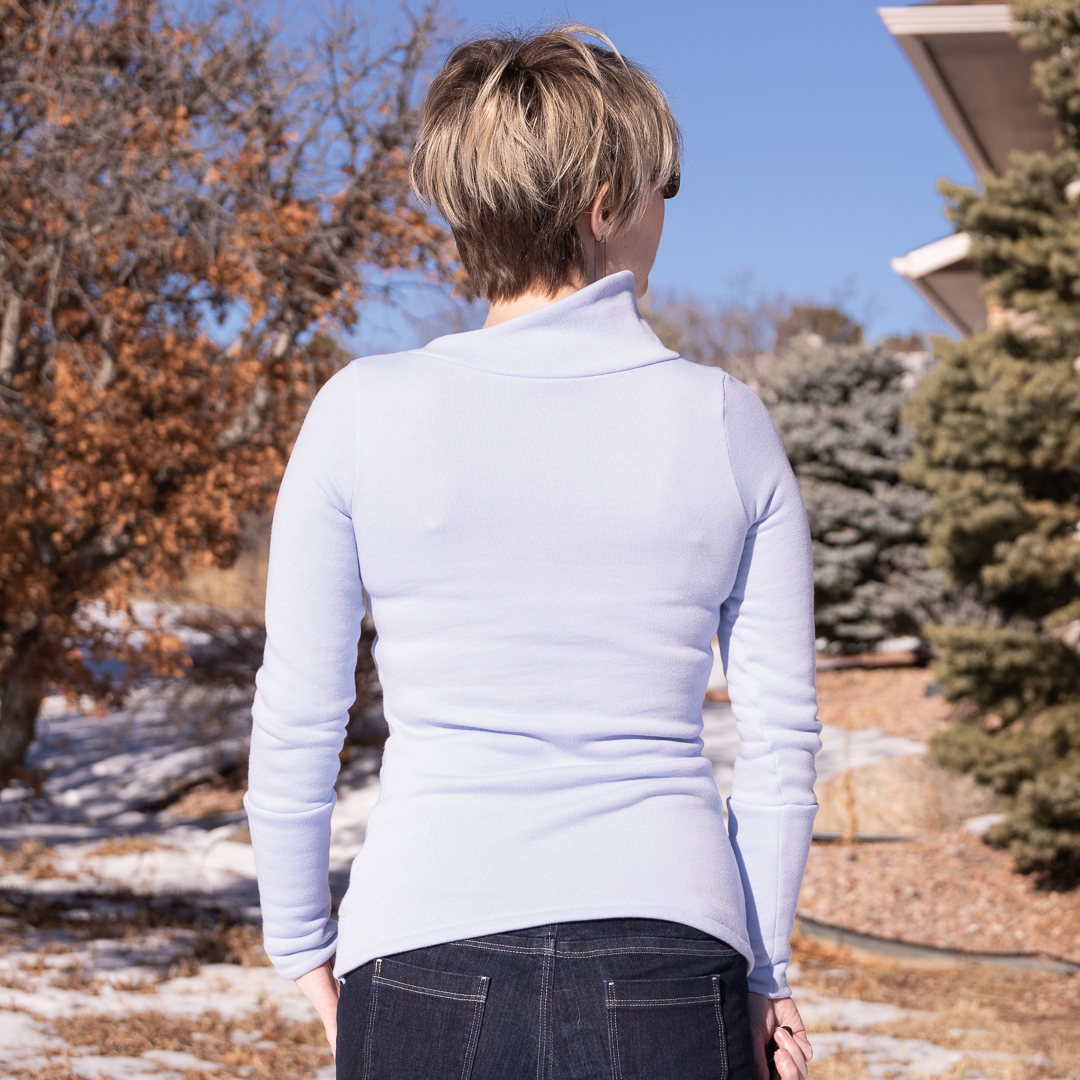
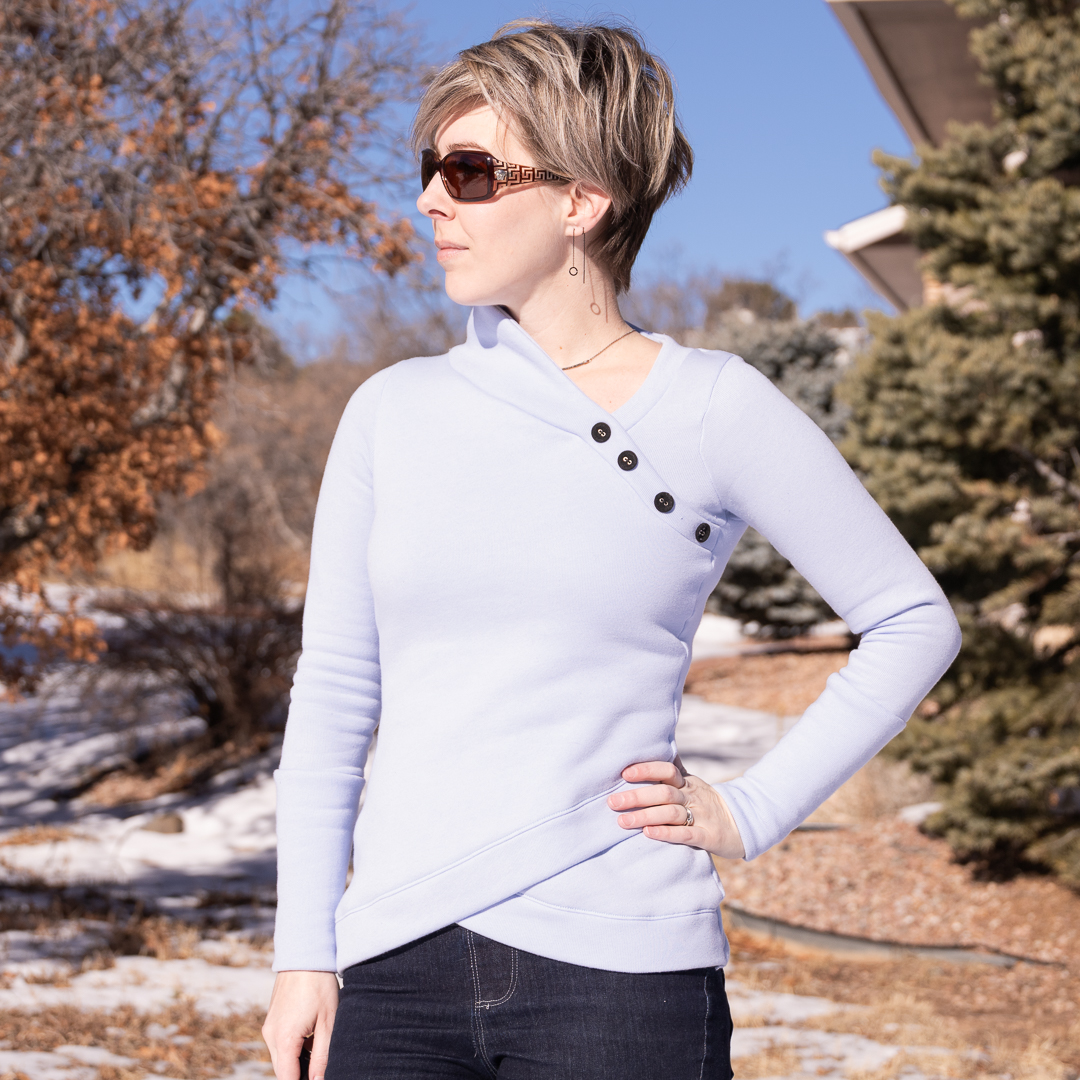
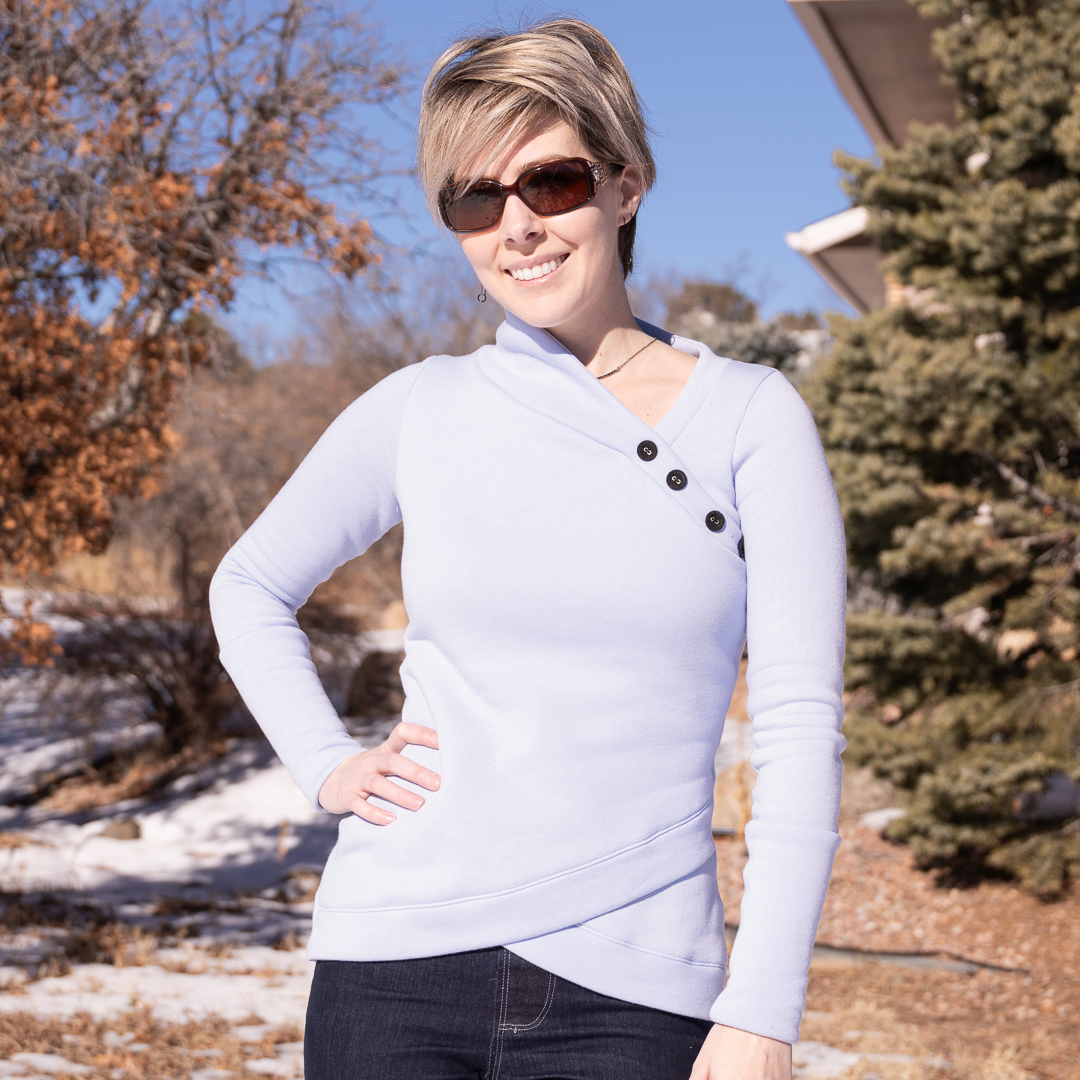
- The neckband. My original 40K uses the out-of-the-box neckband. This time around, I wanted a little more substance to it, something that would add more warmth and coverage for winter. I thought about widening the neckband all the way around by about an inch. As I kept thinking and visualizing, my Erica top came to mind: the asymmetry and the extra fabric on one side that you can play with. So that’s what I aimed for, knowing sweatshirt fleece would be more structured than the rib knit I used on Erica and so it had the potential to create a really interesting shape.
- I divided the original neckband in half lengthwise because I would be contouring it and you can’t fold anything in half lengthwise and wind up with contours.
- I added 0.5″ to the width.
- I contoured the center of the neckband up 2″.
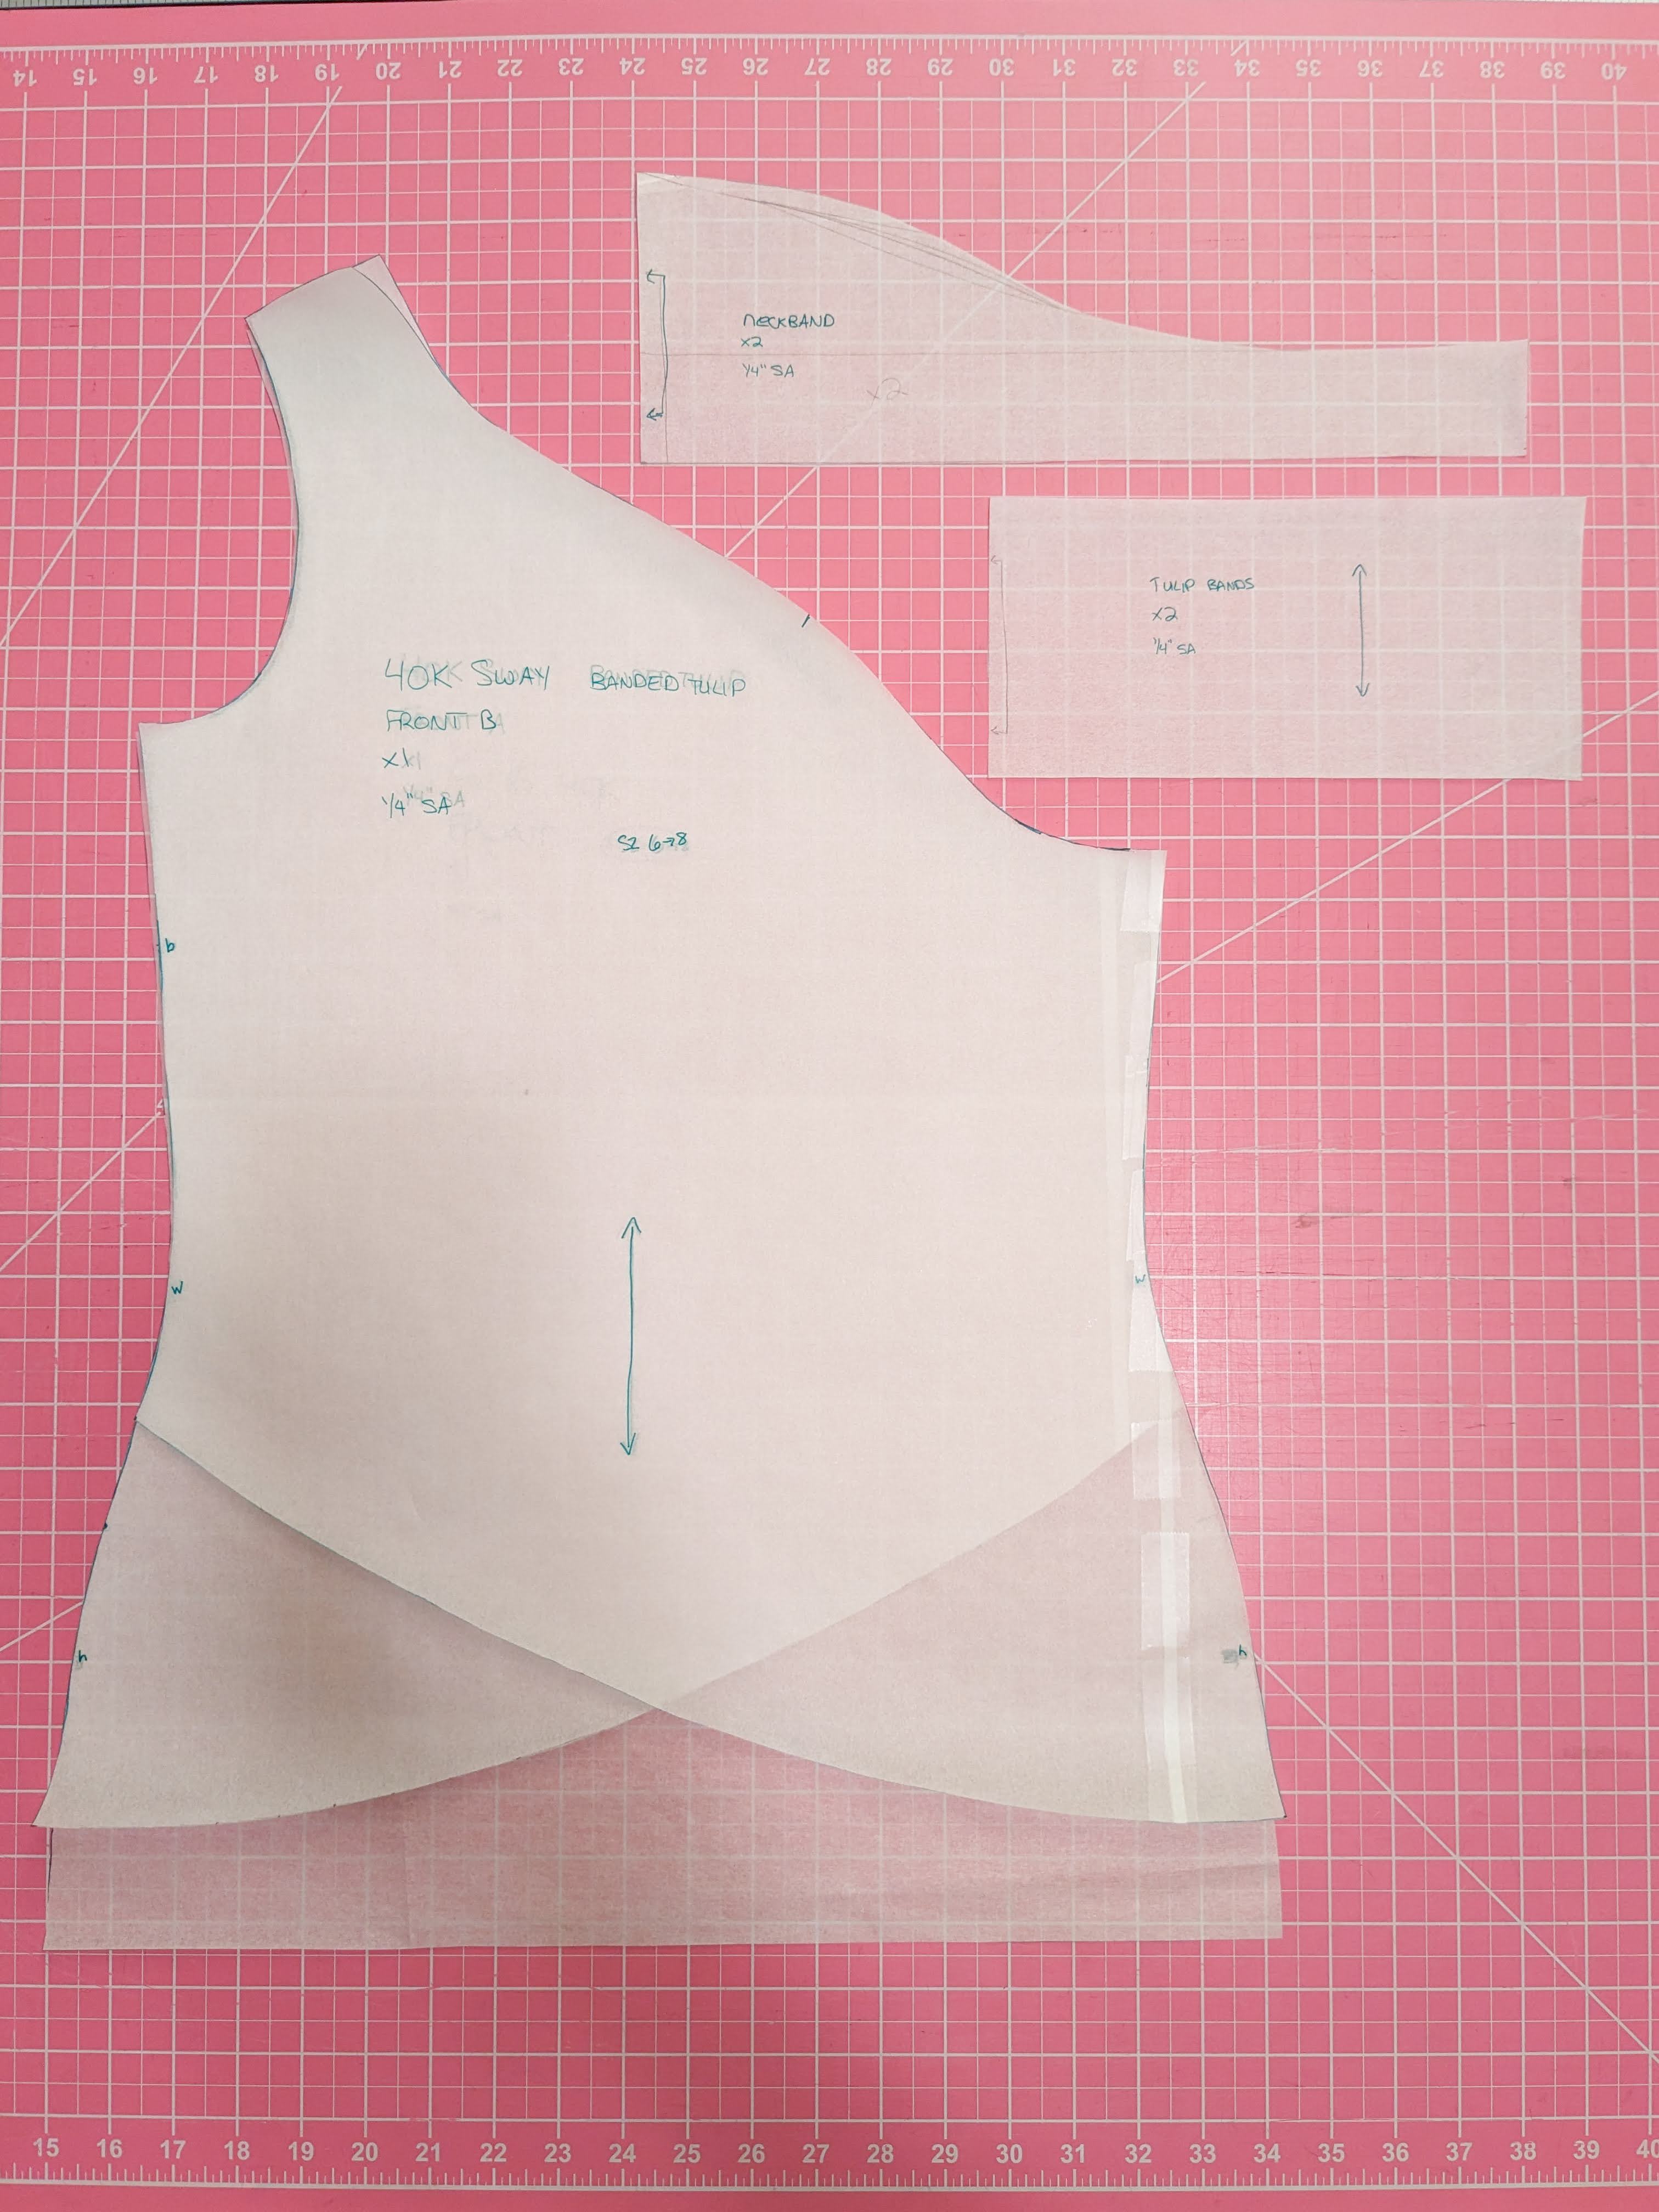
- Tulip’d the front. I have a few patterns that employ the tulip petal front (Orono and Petal Top come to mind), so this wasn’t a new concept for me. I based the start and end points for each petal on the inspiration photo and ended up locating the high point for each side about 6.5″ up from the original hemline. I subtracted another 2″ to compensate for the bands I planned to add at the bottom.
- A tulip front requires two pattern pieces, so I drafted one, and then used that one to trace over for the second pattern piece with the hemline going the opposite direction. That way, the curve is the same but mirrored for both pieces.

- A tulip front requires two pattern pieces, so I drafted one, and then used that one to trace over for the second pattern piece with the hemline going the opposite direction. That way, the curve is the same but mirrored for both pieces.
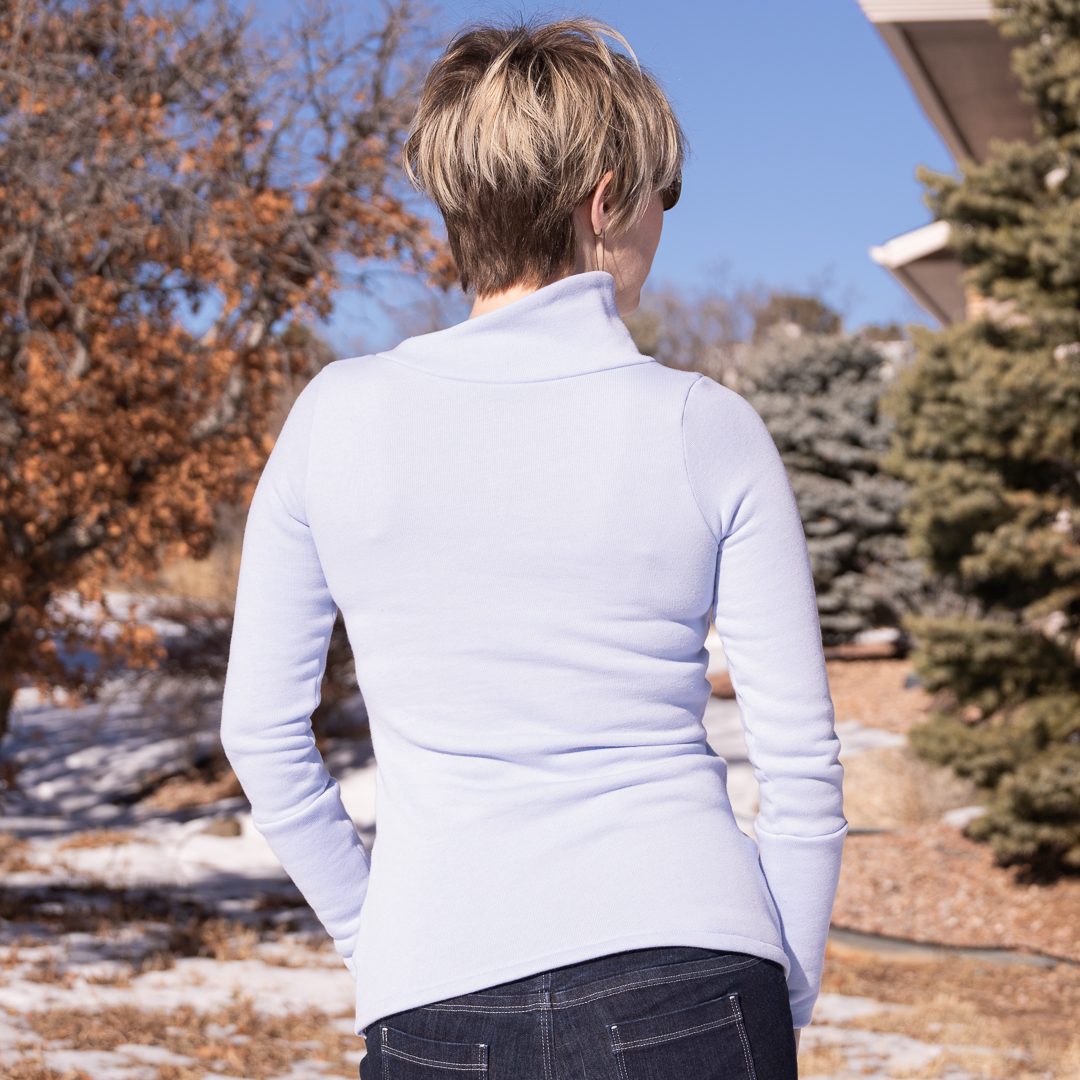
- Drafted hem bands. This was simple. Once I’d drafted the bottom curve, I measured it, and then drafted a band piece at the same length that would be 2″ wide when folded in half lengthwise. While attaching it, I stretched it slightly so I ended up with 0.5″ to 1″ extra to trim off.


And then I dove in! No test garment; I put a whole lot of faith in my eyeballs. And it paid off. This came out exactly as I envisioned and I adore it. It’s making want to buy all the sweatshirt fleece and make a bunch more.
For anyone who prefers visuals, here are the modified/extra pattern pieces. I layered the original front piece on the bottom of the two tulip versions for comparison.
Notes for Next Time
I wouldn’t change a thing. I’m curious about sizing up for a bit more ease, maybe adding a smidge to the length, and do wider hem bands—maybe 3″.
Project Settings
Sewing Machine vs. Serger
| Sewing Machine | Serger |
|---|---|
|
|
Sewing Machine Settings
| Presser Foot | Stitch# | Stitch Width | Stitch Length | Needle | Top Thread Tension | Application |
|---|---|---|---|---|---|---|
| standard zig-zag (A) | 5 | 1.0 | 4 | blue tip | 4 | seams |
| overedge (C) | 6 | 5.5 | 3 | blue tip | 4 | edge finish |
| adjustable (SE#4) | 5 | 1.0 | 4 | blue tip | 4 | hem band topstitch |
| button foot (T) | 6 | 4.5 | n/a | blue tip | 4 | buttons |
Serger Settings
| Stitch Name | 4-thread overlock |
|---|---|
| Needles | R, L |
| Finger | B |
| Threads | 4 |
| Tension Left Needle | 4 |
| Tension Right Needle | 4 |
| Tension Upper Looper | 4 |
| Tension Lower Looper | 4 |
| Cut Width | 6 |
| Stitch Length | 2.5 |
| Differential | 1.0 |
| Application | seams |
Leave a Reply