I’ll sum it up right off the bat here: love the garment design aesthetic; working with the pattern sucks. All the reasons to follow.
About the Pattern
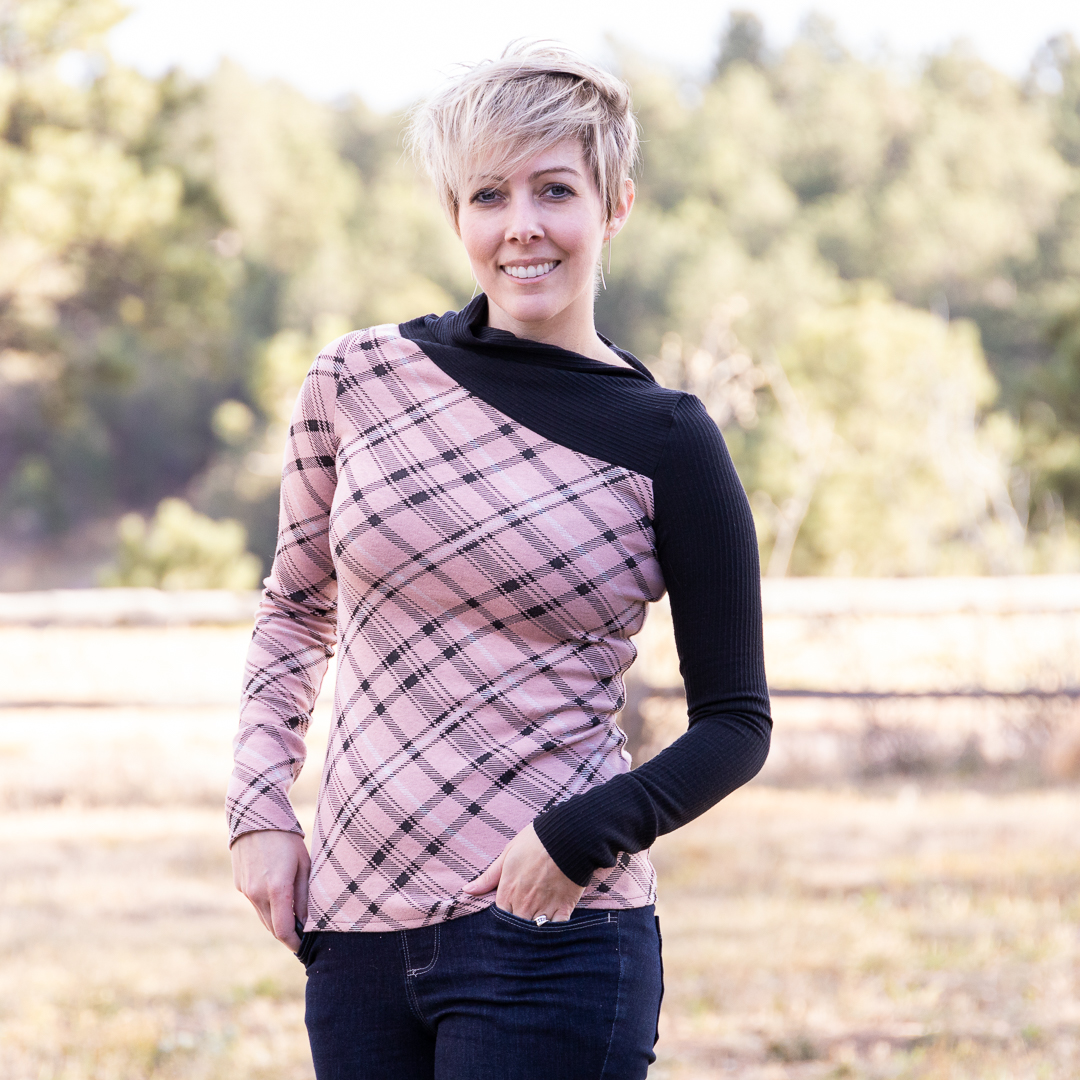
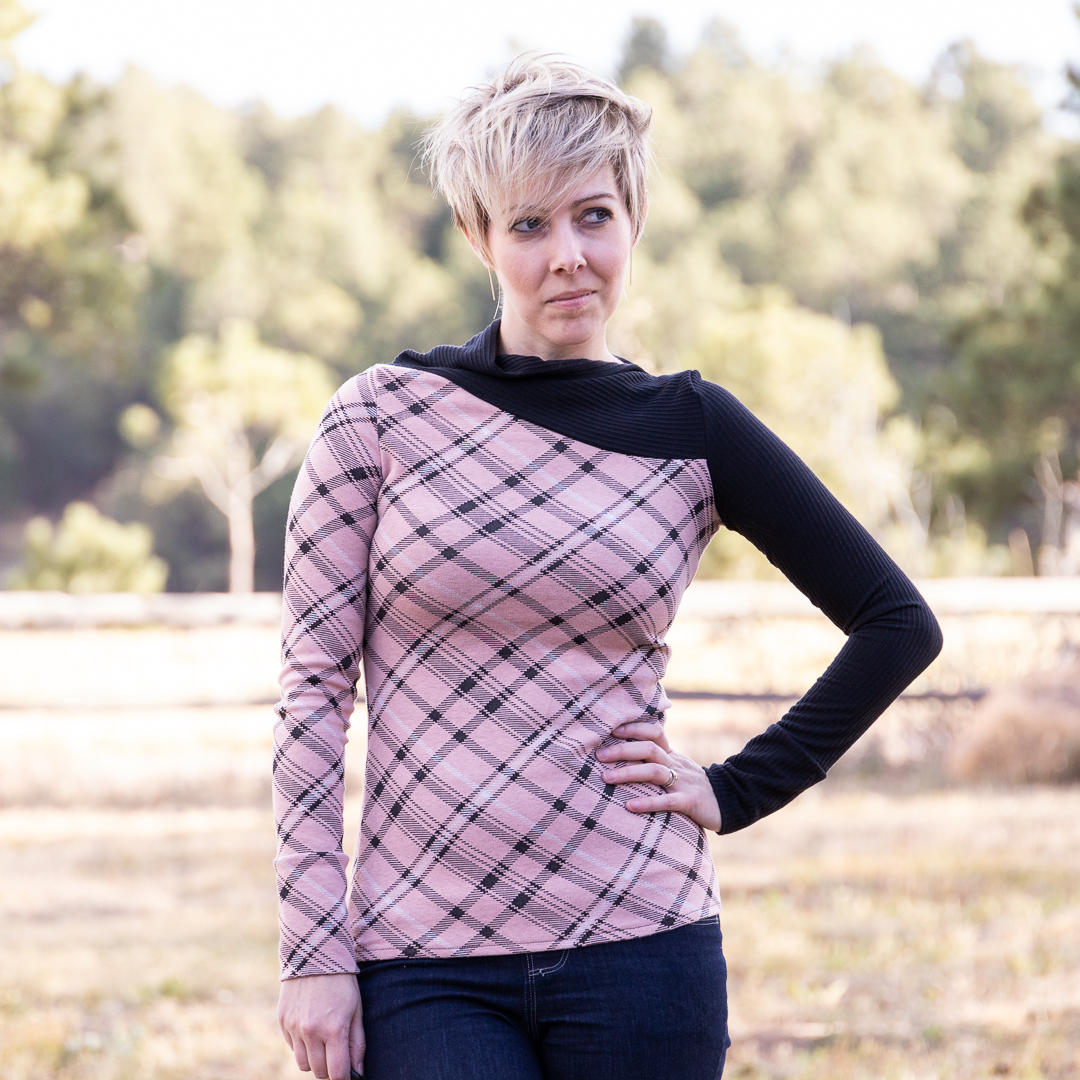
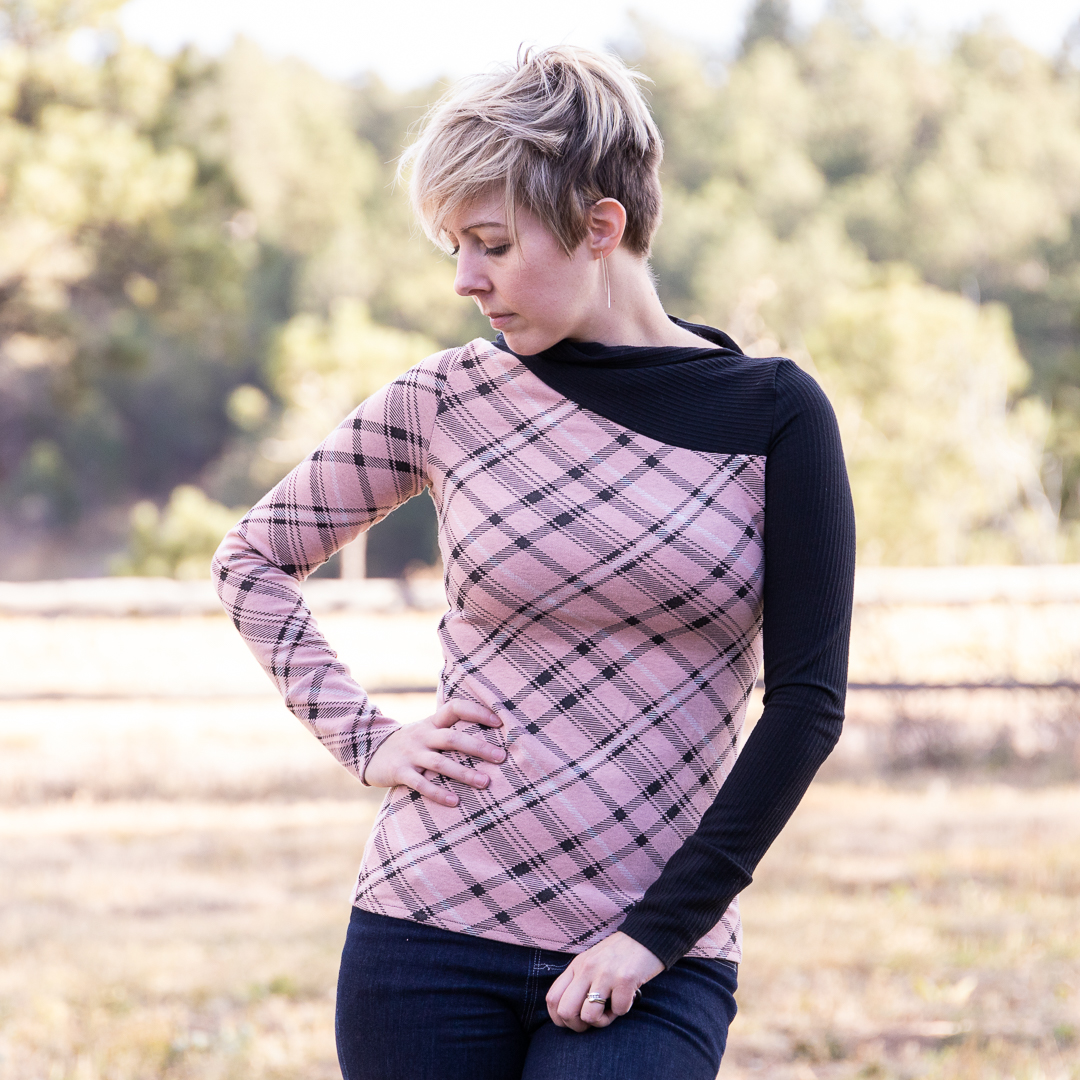
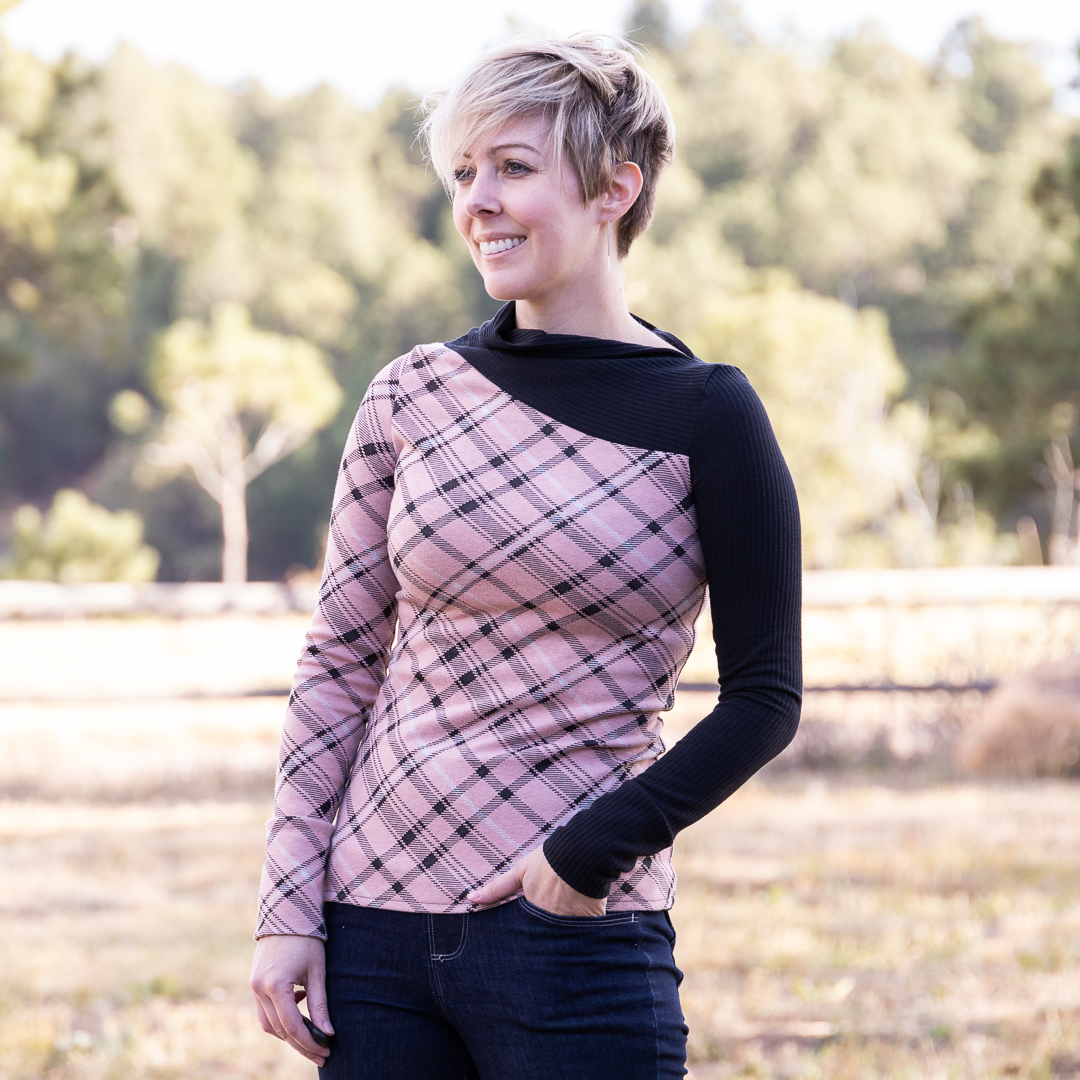
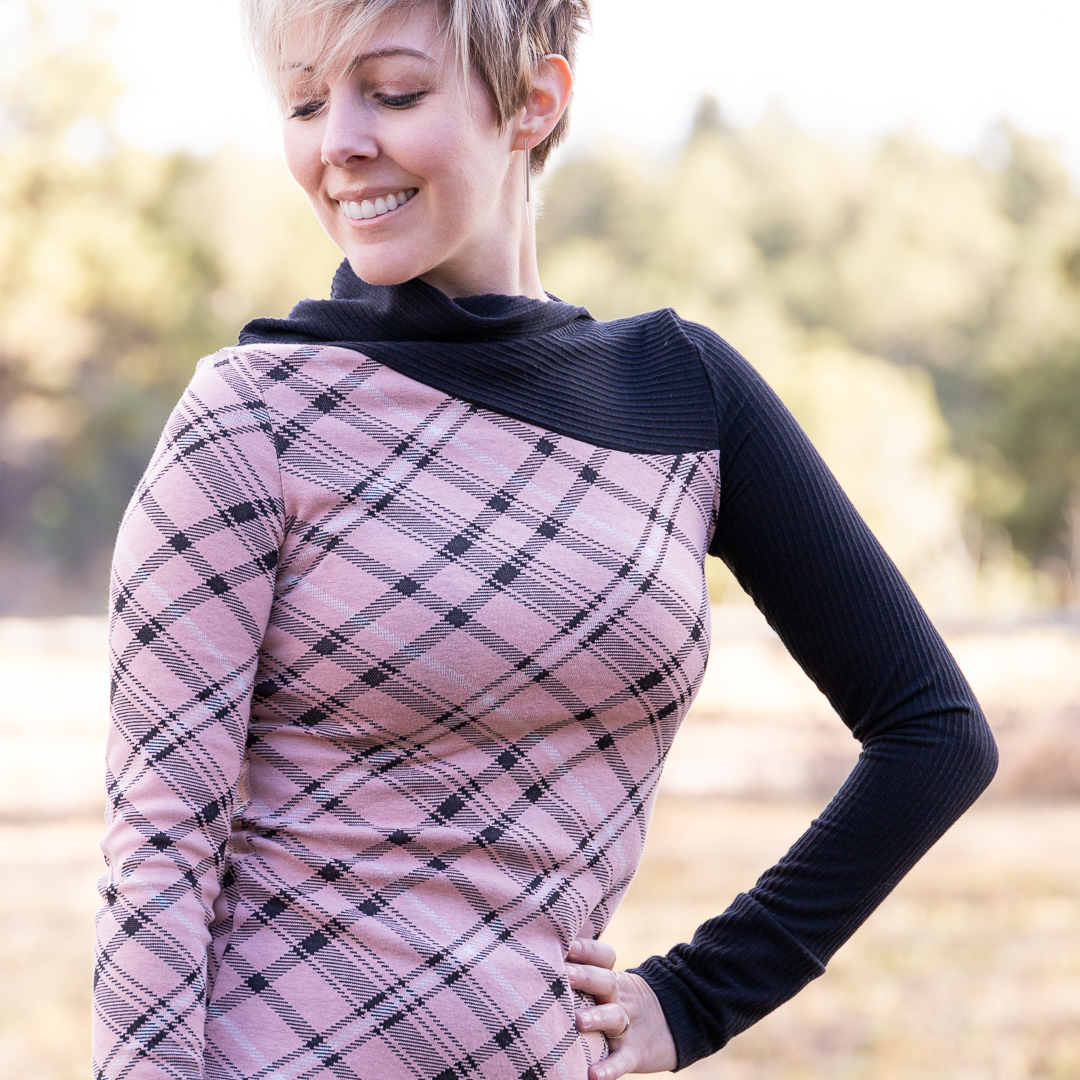
Erica Long Sleeve Top // Viki Sews
This is my first time making a Viki Sews pattern and it has given me full-on Big Four vibes. Littered with extra. Staystitch this, press that, sew this separate, finish this, blahblahblah. While conveniently not mentioning vital details like “make sure to serge this without cutting off a seam allowance here” or “[insert helpful words about how to arrange that folded yoke properly for attachment].”
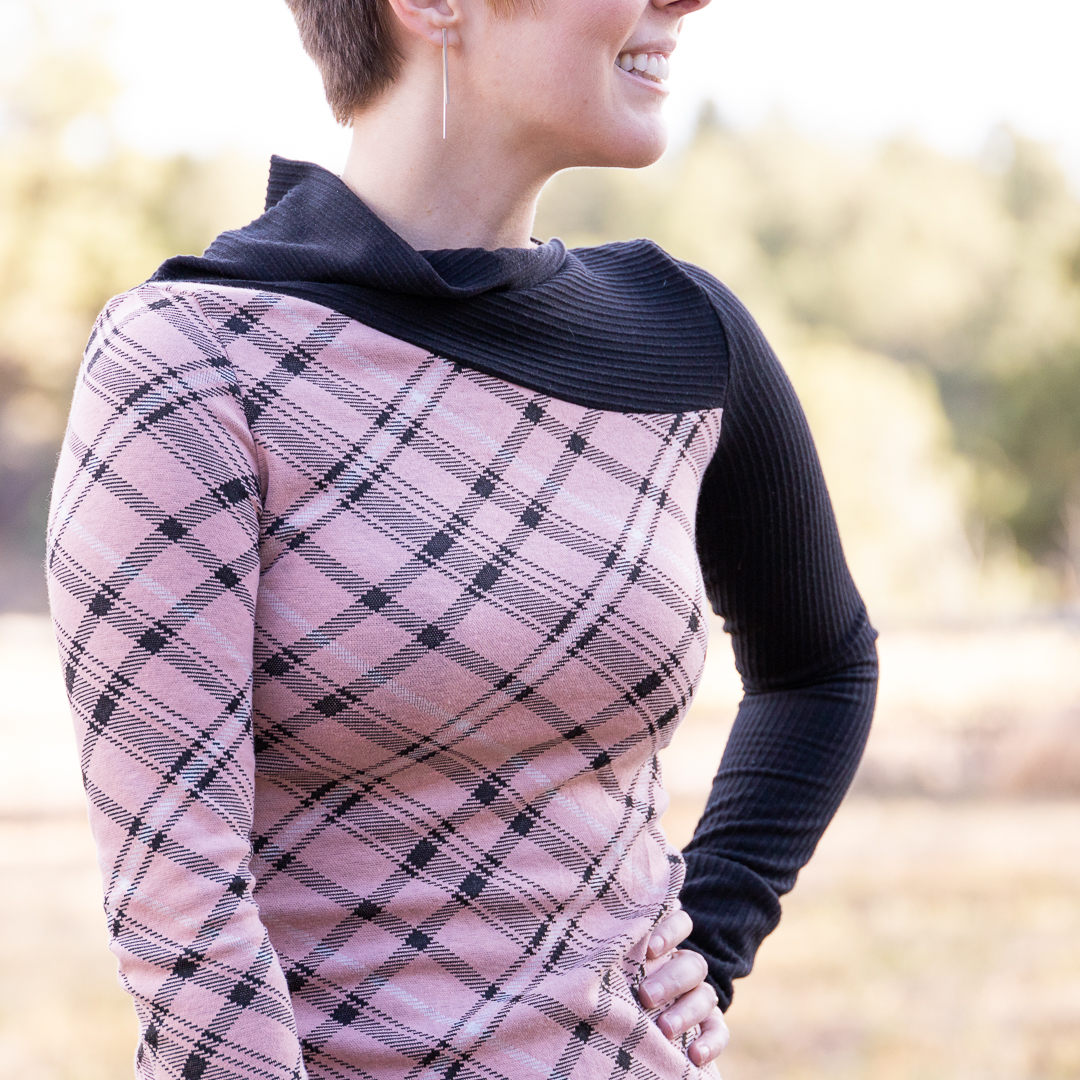
The instructions also feature photos that you can’t make heads or tails out of. My personal preference is well-drafted line-art (a la George and Ginger.) It’s so much clearer than trying to find that seam they’re talking about in the photo that has thread which perfectly matches the fabric, or fabric with busy patterns, or fabric with no difference between the face and back. Uhg. It took some serious making-origami-in-the-dark to figure out how to attach the yoke to the bodice. Photos were completely useless.
There was a video I didn’t watch, so maybe that would have been less painful, but I forgot about it in the middle of my sewing.
The stitch marks for the shoulder seam on the yoke didn’t line up when everything was folded. So that was stupid.
I also really do not like that you only get one size when you purchase a pattern. Not even any neighboring sizes for grading; Big Four patterns at least do that (even though I usually fall into a size that borders two ranges. Glorious.) Not so with Viki Sews: you get one size. That’s. It. So if you want to grade between sizes or make various versions with different garment ease…well, hopefully you have a degree in patternmaking or you’d like to shell out at least three times the cost of the pattern to get neighboring sizes. Huge con, this. H U G E. It makes me not want to bother with any more patterns from this designer. And there’s no recourse: “* change of size is only possible if pattern has not been previously downloaded.” Erm, excuse me genius. How will I know I need a change of size if I haven’t made and tried the size I already bought???
They recently announced they’re selling print versions of their patterns which come with multiple sizes, but that doesn’t help me right now because 1) I already bought the size indicated by my measurements, 2) Erica isn’t available in print, and 3) uhg, can’t you just do digital PDFs with multiple sizes? Look at their instagram post; that’s literally what everyone is asking for. They could get super smart about it and have a “select your sizes” and allow the user to pick like 3 sizes to include in a single PDF.
Overall, not a great experience with the pattern instructions.
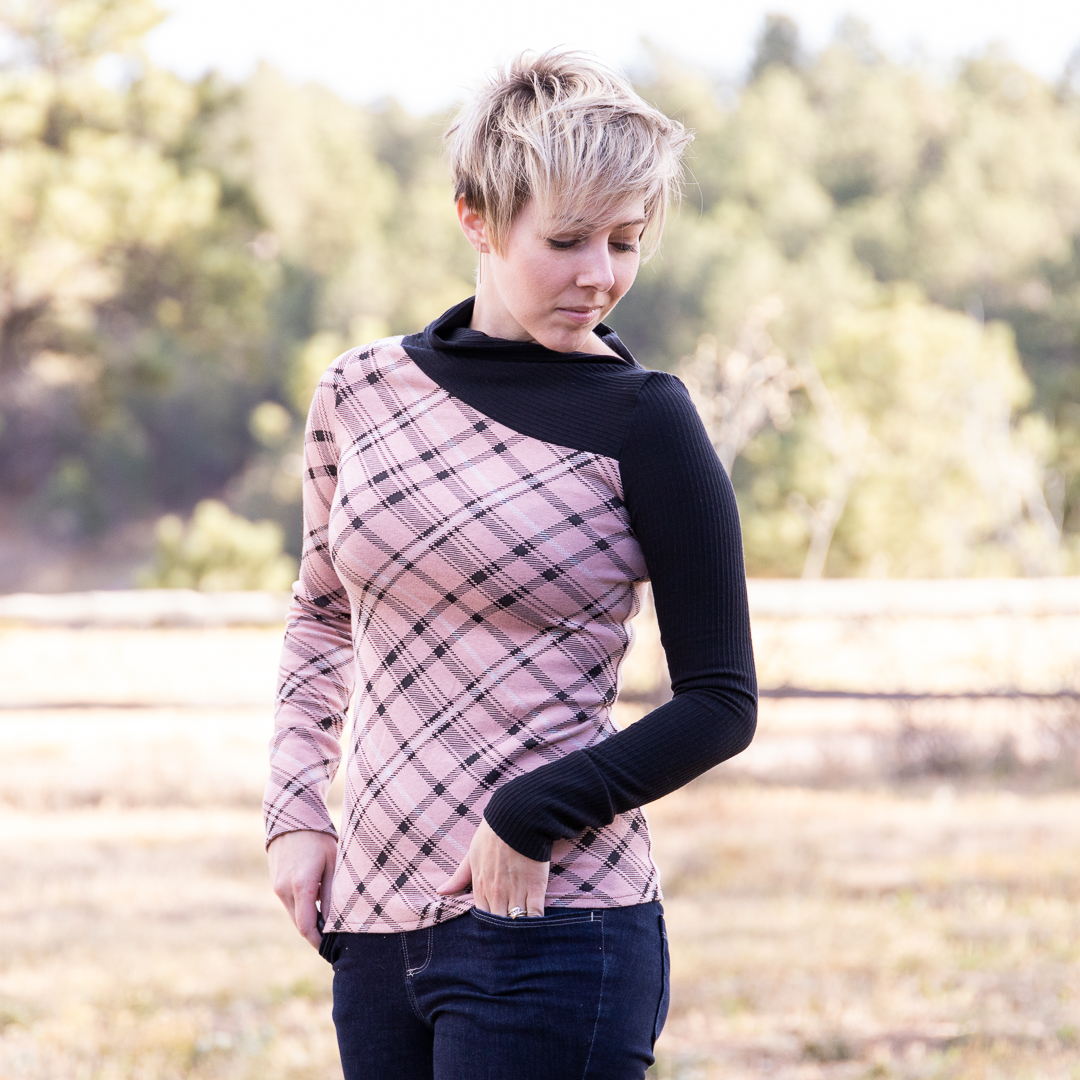
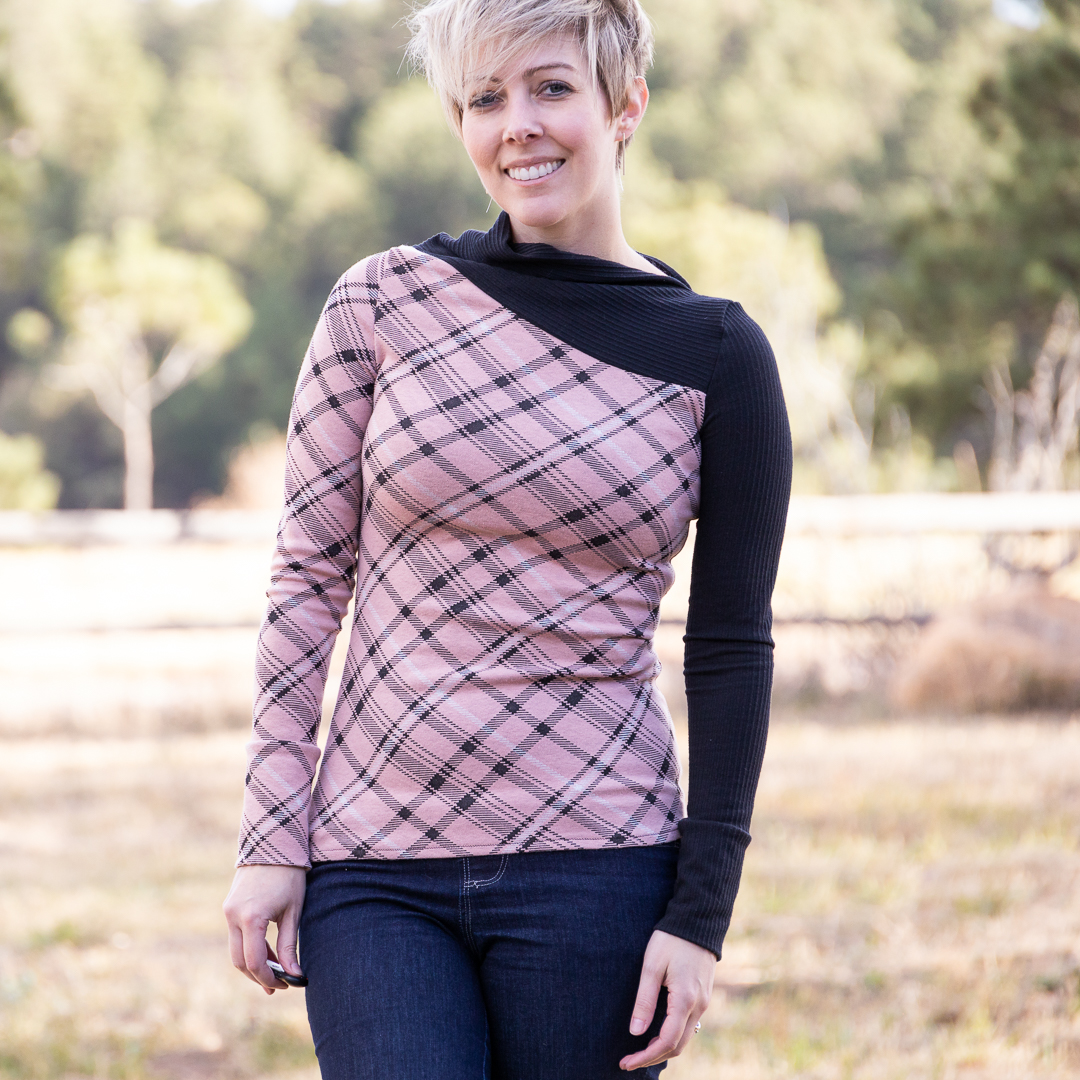
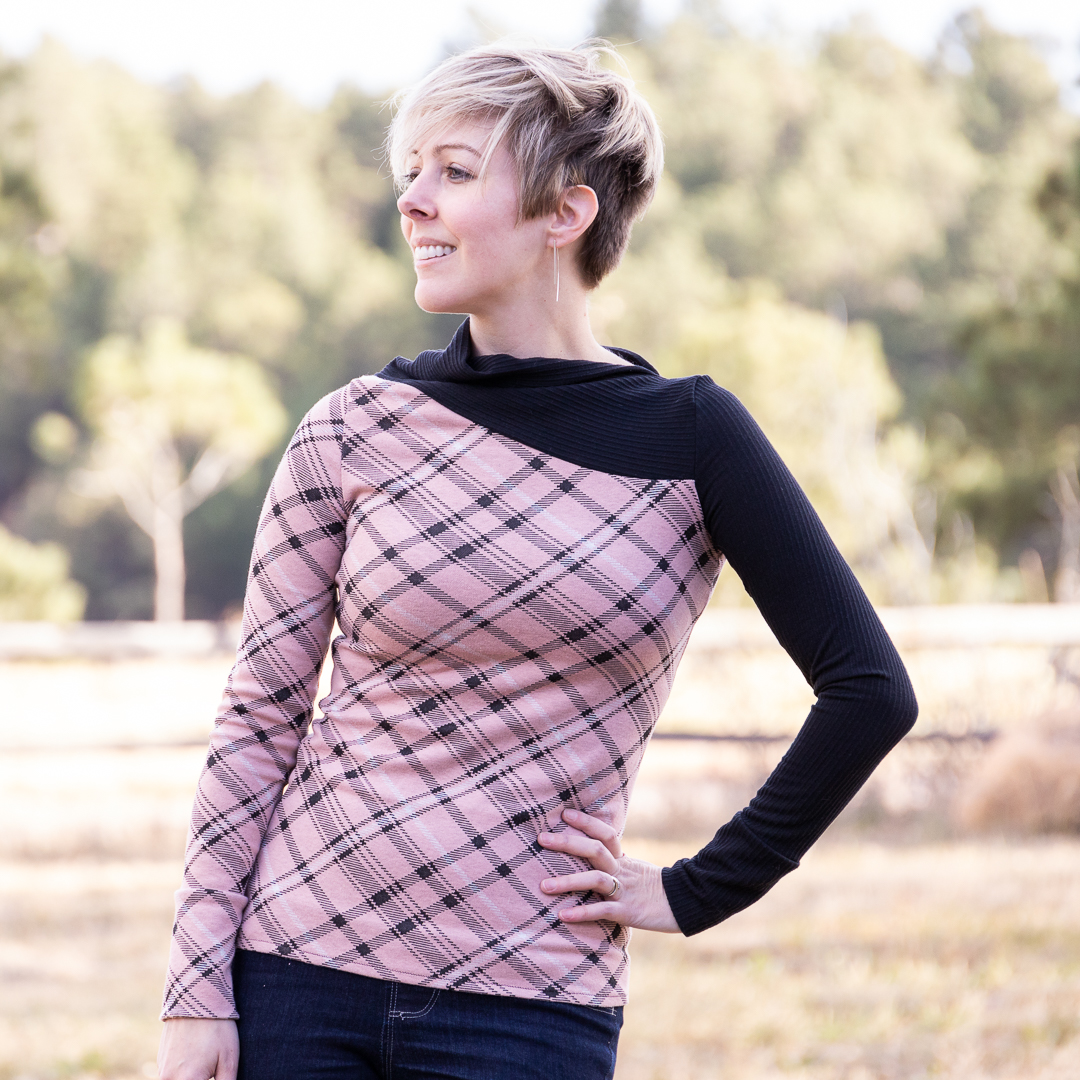
I will say, after I scrubbed all the extra out of it and made sense out of that yoke, this particular pattern is actually a very quick sew: front, back, yoke, two sleeves (+ cuffs if you’re me), and a hem. And that yoke is everything; transforms it from boring top to double-take, especially with some color blocking.
About the Fabrics
Blush Diagonal Plaid – Poly Rayon Ponte from Made of Love (IDK what happened to their website. You can find them on Facebook, but that seems like a pretty dumb move to hitch your ecommerce wagon exclusively to a social media website. Whatevs.) Anyhoo, I had quite a bit of this plaid leftover from my second Ginger Dress.
- Fiber Content: 55% Polyester, 40% Rayon, 5% Spandex
- Weight and Thickness: Heavyweight
- Stretch: 100% horizontal, 10% vertical
Oh gosh, which black rib knit did I use? I think it’s leftover from my Dandelion turtlenecks.
Black Ruffle, Rib Knit from Boho Fabrics
- Contents: 83% Polyester, 14% Rayon, 3% Spandex
- Weight: 12 oz
- Horizontal Stretch: 75%
- Vertical Stretch: 50%

About This Make
- Size 38
- height 3
- +2″ to bodice
- modified sleeves for 5″ cuffs
It’s not what I was hoping. Much too snug. I want more ease for a nice cozy sweater that doesn’t fit like a second skin. So, howww to do that without re-purchasing the pattern?
- print at like 110%? Not exactly feasible with tiled printing.
- Outline my existing pattern with the ease I want? I suspect that oversimplification would be problematic with the armscye, which is extra complicated because half of the one armscye is part of the yoke. I’d just leave it, but the armscyes feel too tight, too. Megaeyerollbatman.
- Buy another version? But what size? I understand this is from a professional pattern designer, but my word, can we not simplify this at all? (Seriously, I am this close to never messing with another Viki Sews pattern again.)
I guess I’m leaning towards option 2 and just see what happens. I manage to wring success out of my unprofessional techniques more often than not. So I guess I’ll just go for it. Cuz I really want this top in a fuzzy sweater material I’ve had sitting around and earmarked for the G+G Tryout Tracksuit zip-up hoodie.
Orrrrr…maybe because G+G is such a better experience/fit, I’ll just stick to my original plan with that fabric and give Erica one more try with something else from my stash. Yeah, let’s do that.
What I Did Differently
- Staystitched nothing. Turned out fine.
- Ignored the entire rigamarole for the first shoulder seam and simply sewed one seam on my sewing machine and included some seam binding to reinforce it.
- Skipped all the fitting. What’s the point when I have no other sizes to grade between? Especially on this one where I can’t make pieces I already cut any larger.
- I finished no edges except the yoke edge. It’s knit fabric; it doesn’t fray.
- I only tuck in serger tail ends on seams that don’t get sewn into other seams (necklines, cuffs.) Ol’ Erica here tells you to tuck them all in. Which is pointless when, for example, you’re going to serge over the top of the side seams when you attach the sleeves. Work smarter, not harder.
- I didn’t trace baste the yoke fold. Know what works just as well and is infinitely faster? Chalk. (See all the extra I’m talking about here?)
- I didn’t hand baste the hem. Give me a break. Fold it, press it, sew it.
- I didn’t hand baste the sleeves. Just freaking attach them.
So all that crap I skipped is probably the difference between a “professional finish,” and what I end up with. But seriously, for all the time it adds to end up with the same shirt that still looks well-made? I will stay outside the snobby, “professional finish” bubble, thank you.
Project Settings
Sewing Machine vs. Serger
| Sewing Machine | Serger |
|---|---|
|
|
Sewing Machine Settings
| Presser Foot | Stitch# | Stitch Width | Stitch Length | Needle | Top Thread Tension | Application |
|---|---|---|---|---|---|---|
| standard zig-zag (A) | 5 | 1.0 | 4 | blue tip | 4 | seams |
Serger Settings
| Stitch Name | 4-thread overlock | 4-thread overlock |
|---|---|---|
| Needles | R, L | R, L |
| Finger | B | B |
| Threads | 4 | 4 |
| Tension Left Needle | 2.5 | 4 |
| Tension Right Needle | 2.5 | 4 |
| Tension Upper Looper | 3 | 4 |
| Tension Lower Looper | 3 | 4 |
| Cut Width | 6 | 6 |
| Stitch Length | 2.5 | 2.5 |
| Differential | 1.0 | 1.0 |
| Application | rib knit | ponte |
Leave a Reply