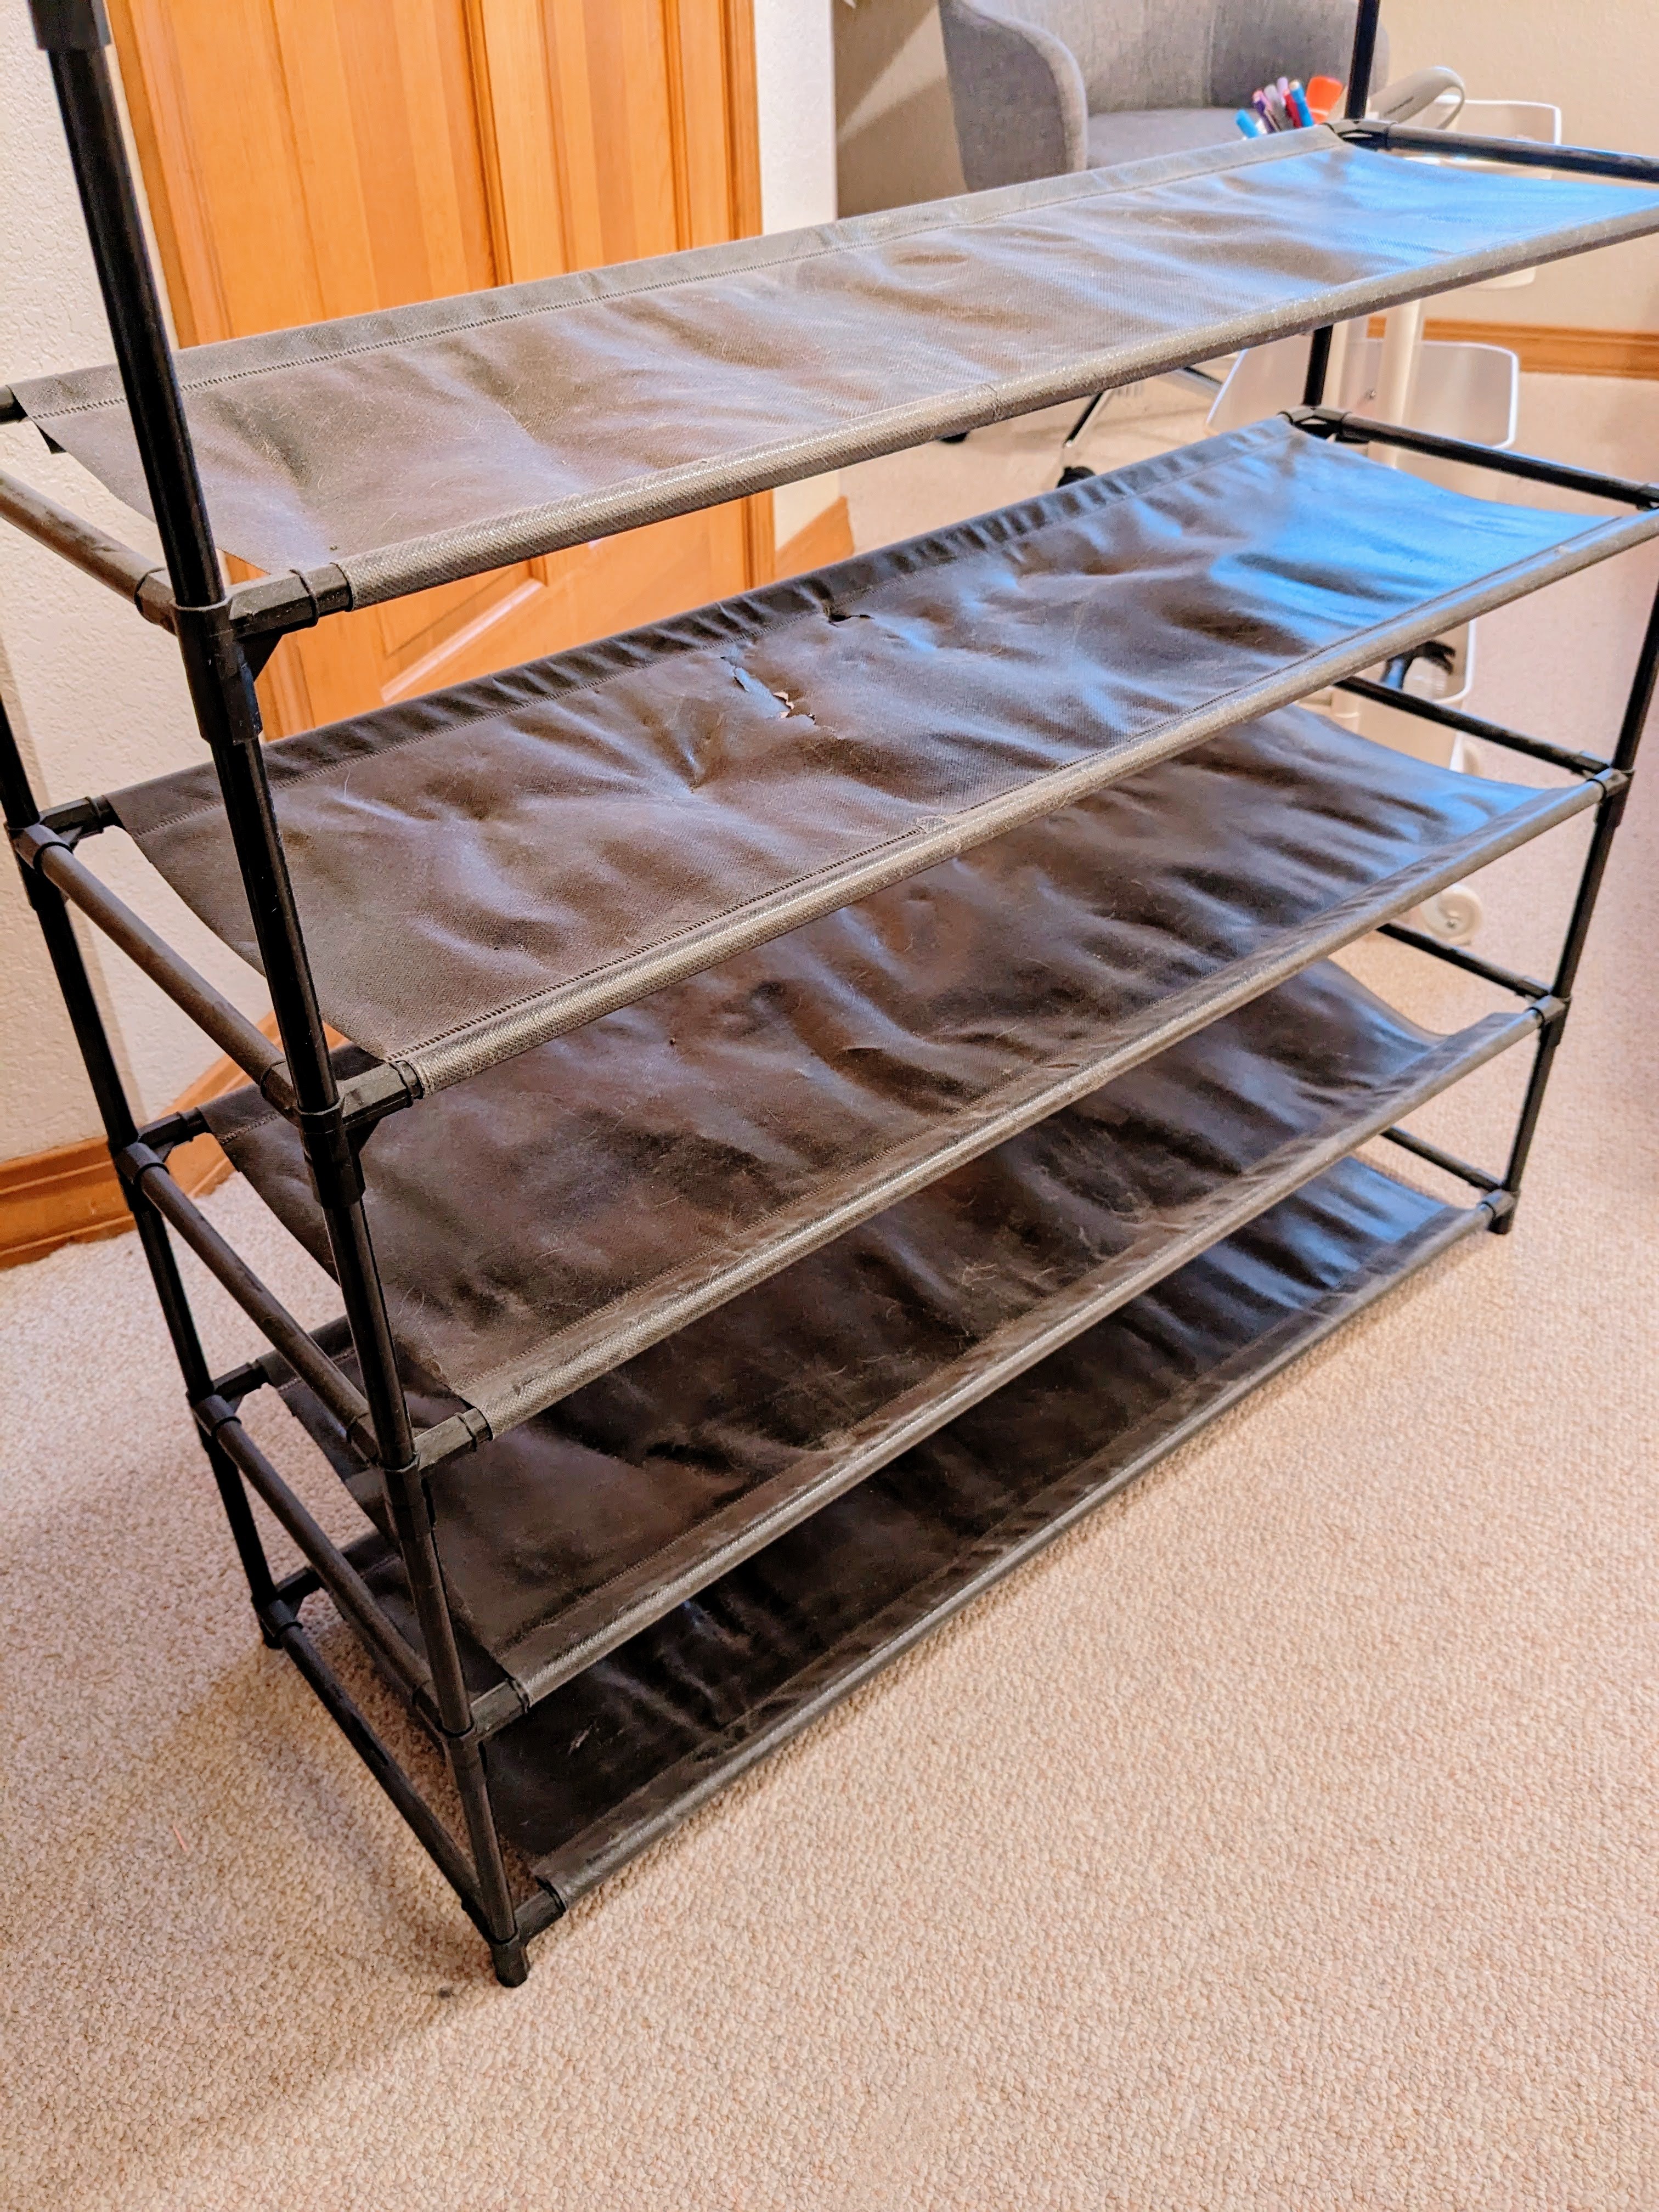
I bought this shoe rack years ago when we were living in Florida. It was dirt cheap, and you could tell by the material the “shelves” were made out of. Not fabric; more like weird plastic sheets. Honestly, it’s pretty impressive it held up this long. Alas, it began to rip and disintegrate and my shoes with heels were stabbing right through.
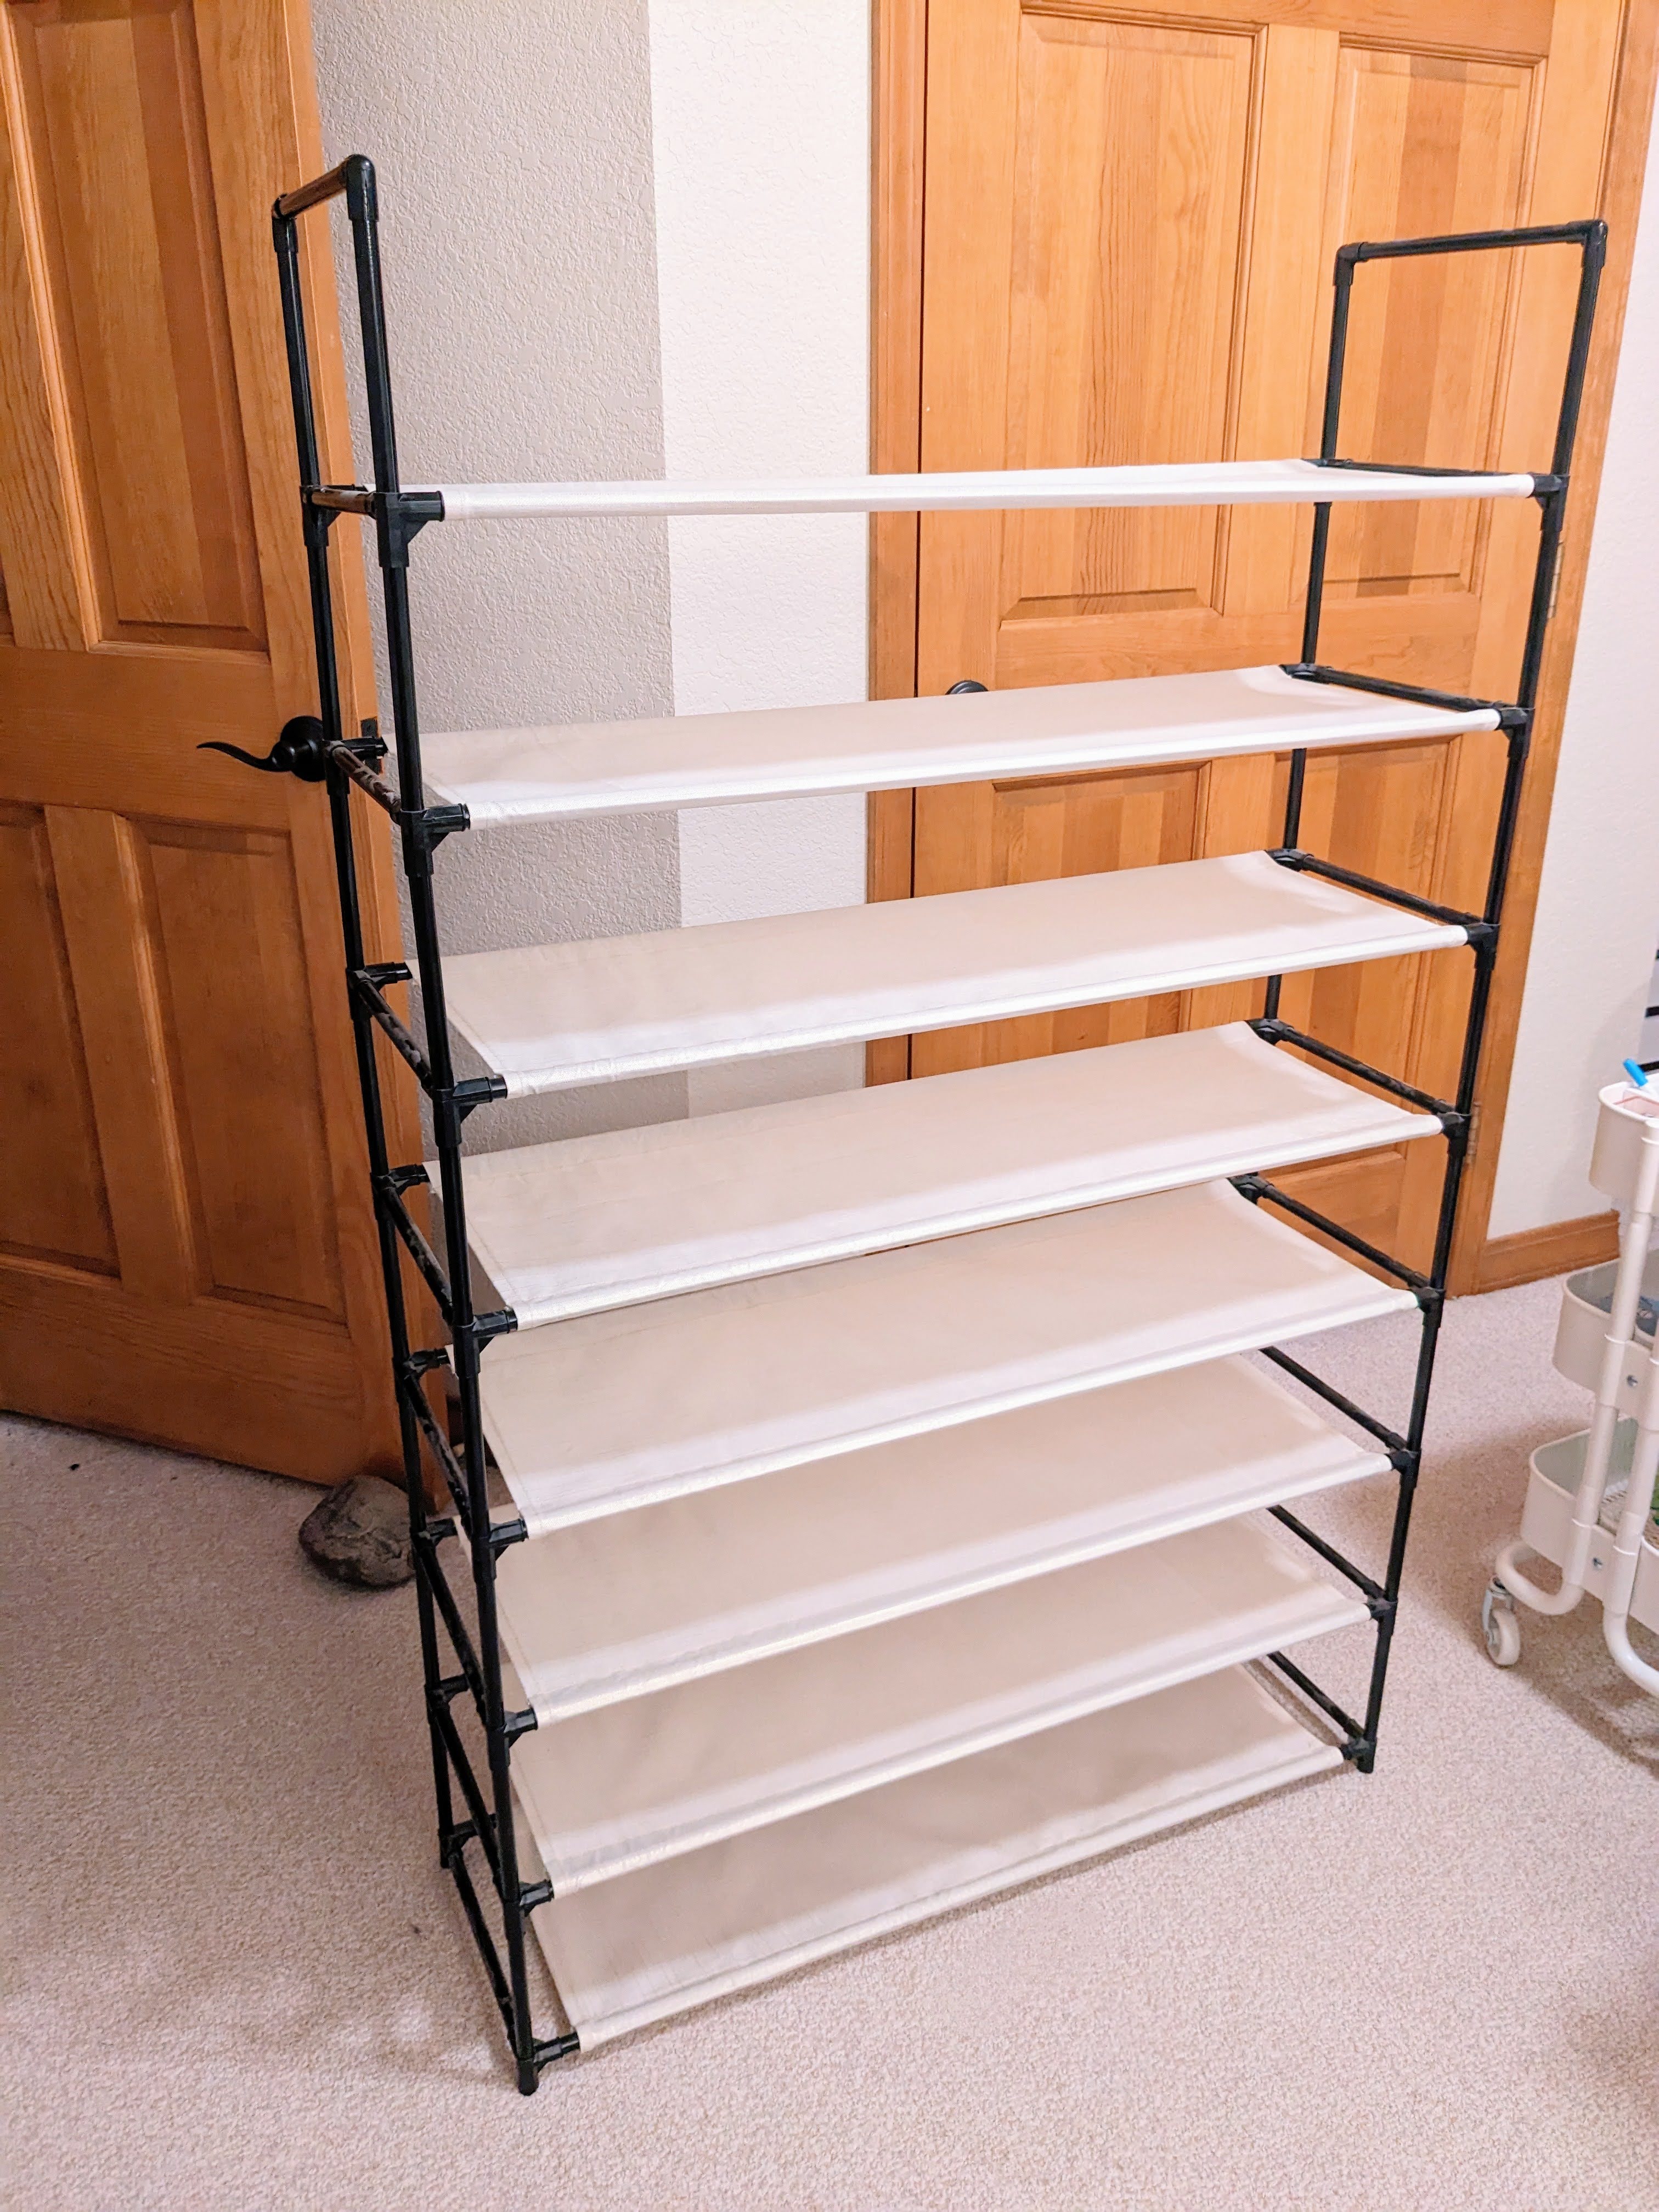
Time for a fabric upgrade: an easy project when you know how to sew, and timely to get the sewjo going again. I’ve been much more interested in motorcycling than sewing the last few months.
About the Fabric
Some kind of home deco fabric I bought to make a cushion topper for a chest. I have yet to make said cushion, and I may have changed my mind on the look of the fabric I want to use. I don’t know what that is, but I know it’s not this ivory/metallic. It’s been so long, I don’t remember where it came from or exactly what it is other than “home decor” fabric.
Construction Deets
I measured the existing shelves and whipped up a plan to sew the replacements using those measurements:
- Each shelf piece was cut at 15″ wide by 32.5″ long.
- Includes 3.25″ at each long edge to fold over for casings: 0.25″ first fold and 1.5″ second fold.
- Includes 1″ at each short edge to fold over 0.5″ twice to hem.
Super simple!
Project Settings
Sewing Machine Settings
| Presser Foot | Stitch# | Stitch Width | Stitch Length | Needle | Top Thread Tension | Application |
|---|---|---|---|---|---|---|
| standard zig-zag (A) | 0 | 0.5 | 3.5 | 90/14 | 4 | long edge casings |
| adjustable edge (SE#10) | 1 | 0 | 3.5 | 90/14 | 4 | short end fold |
Leave a Reply