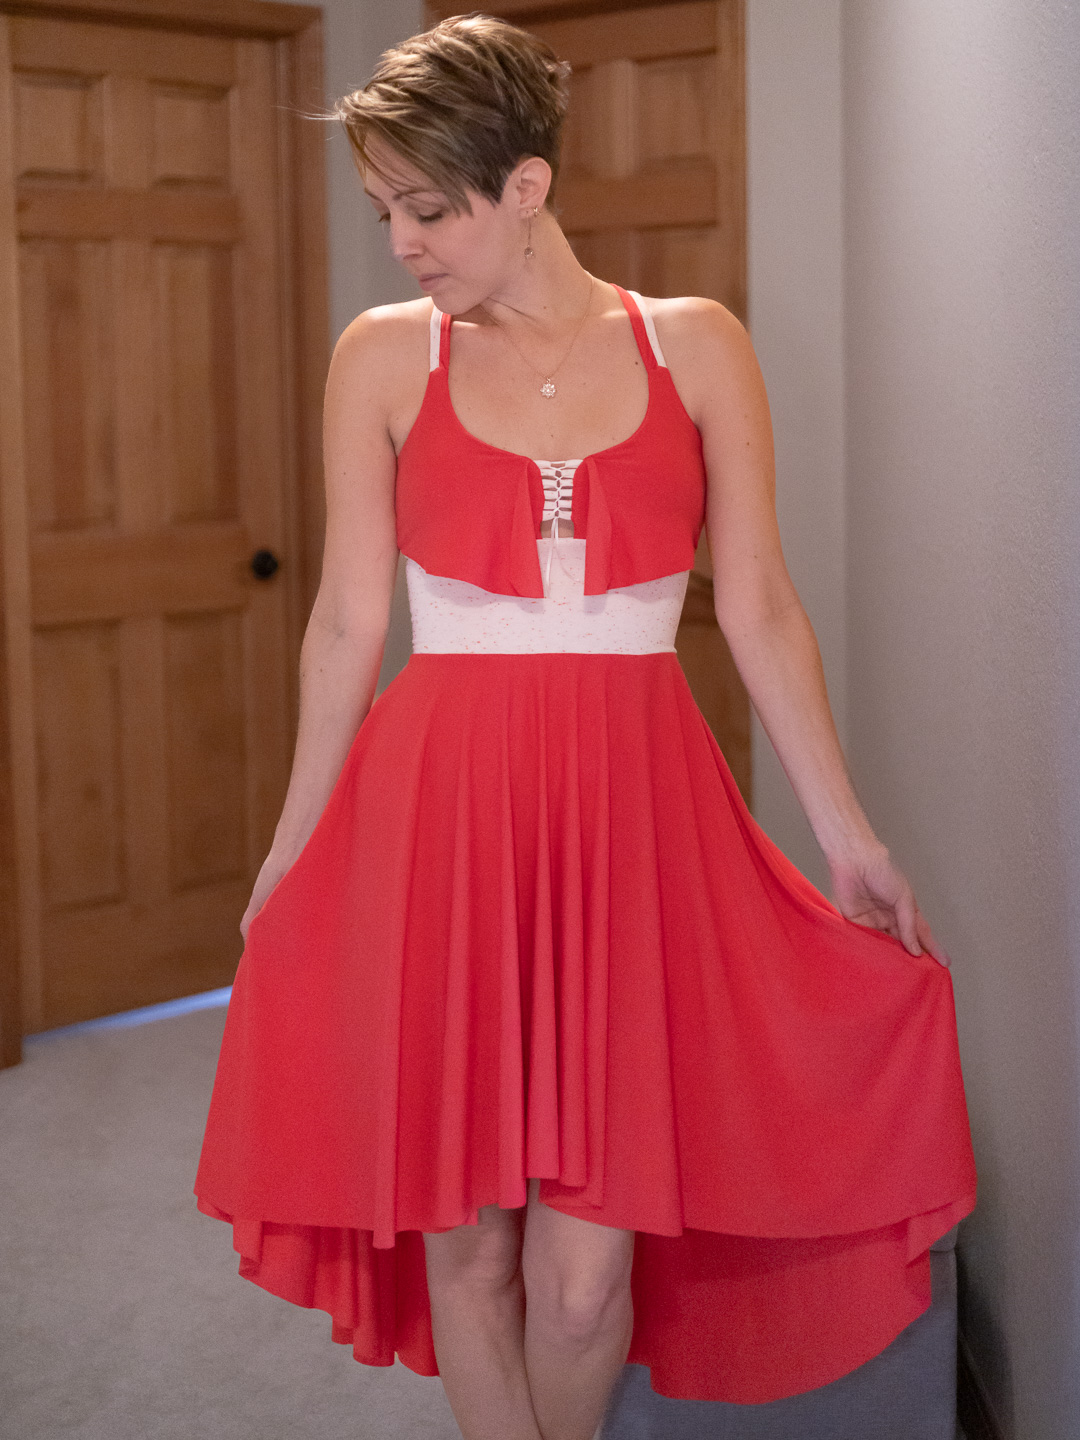
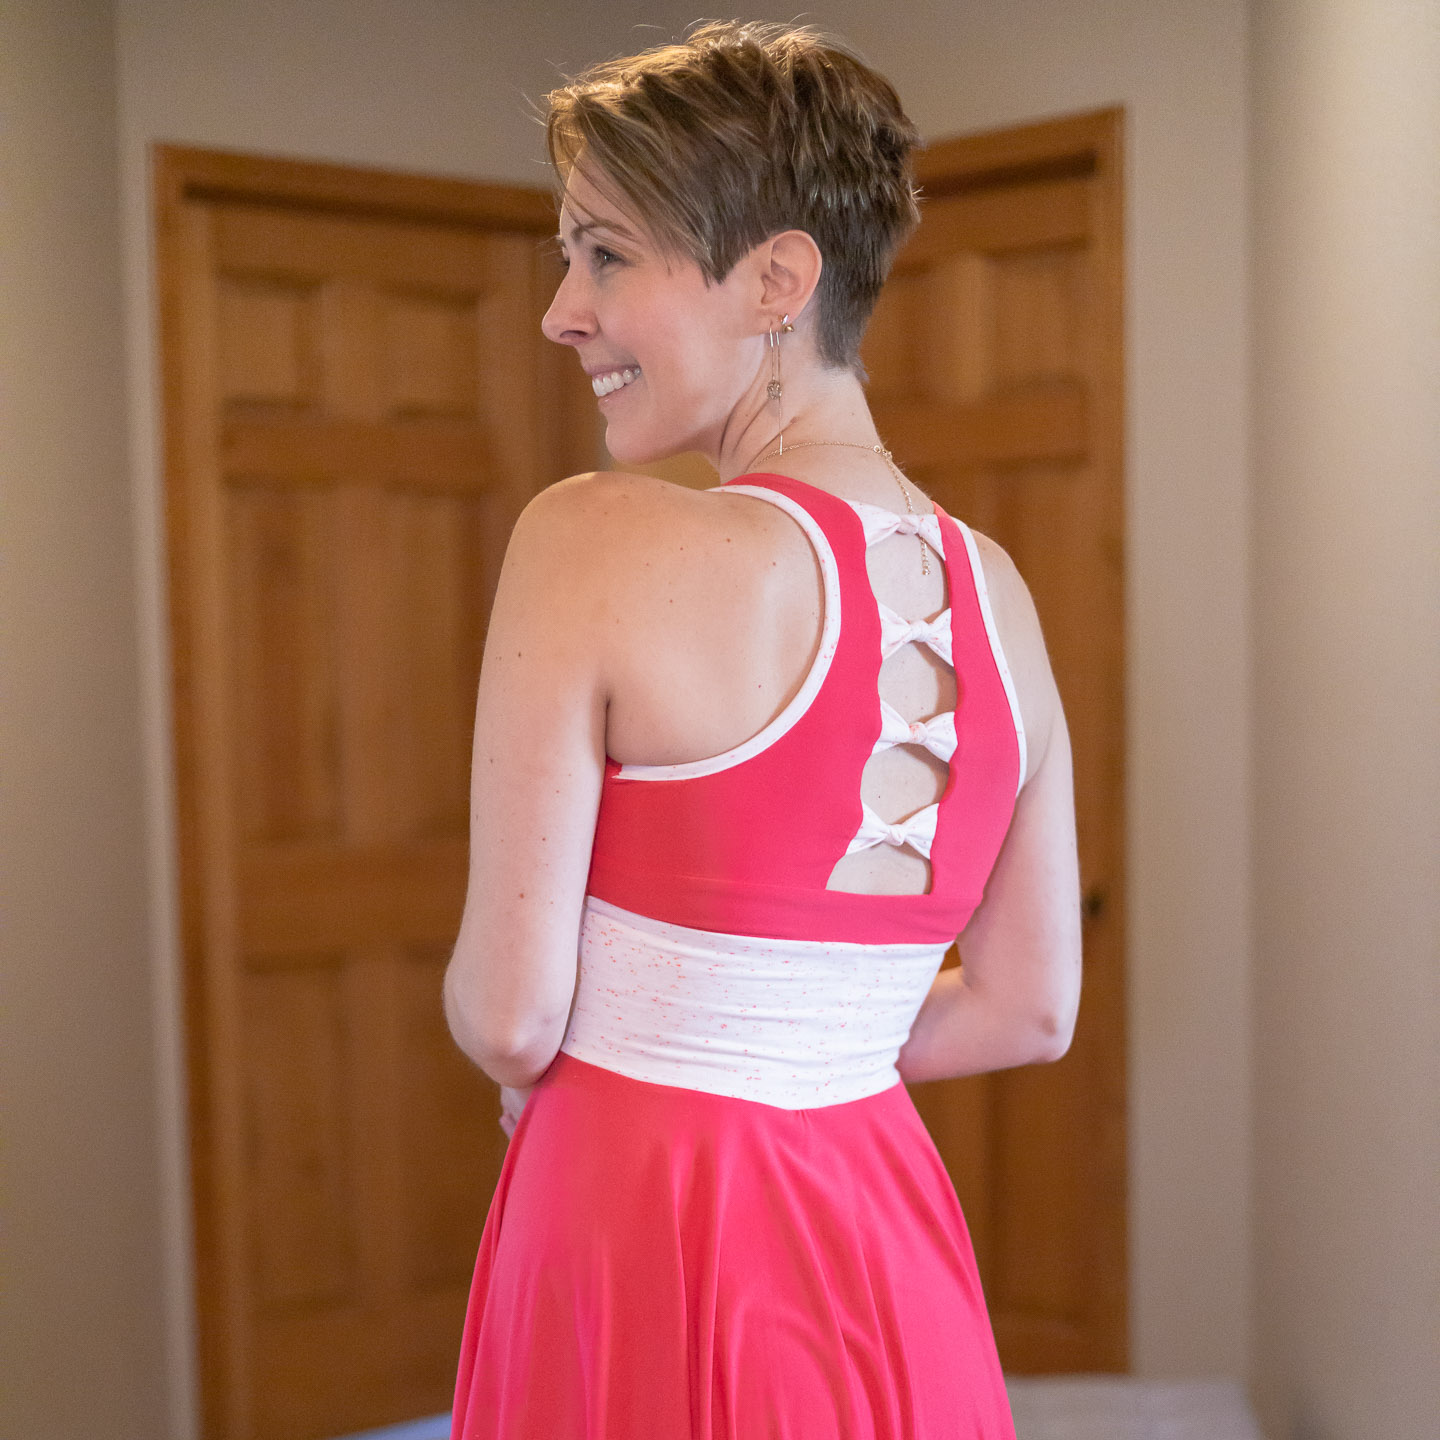
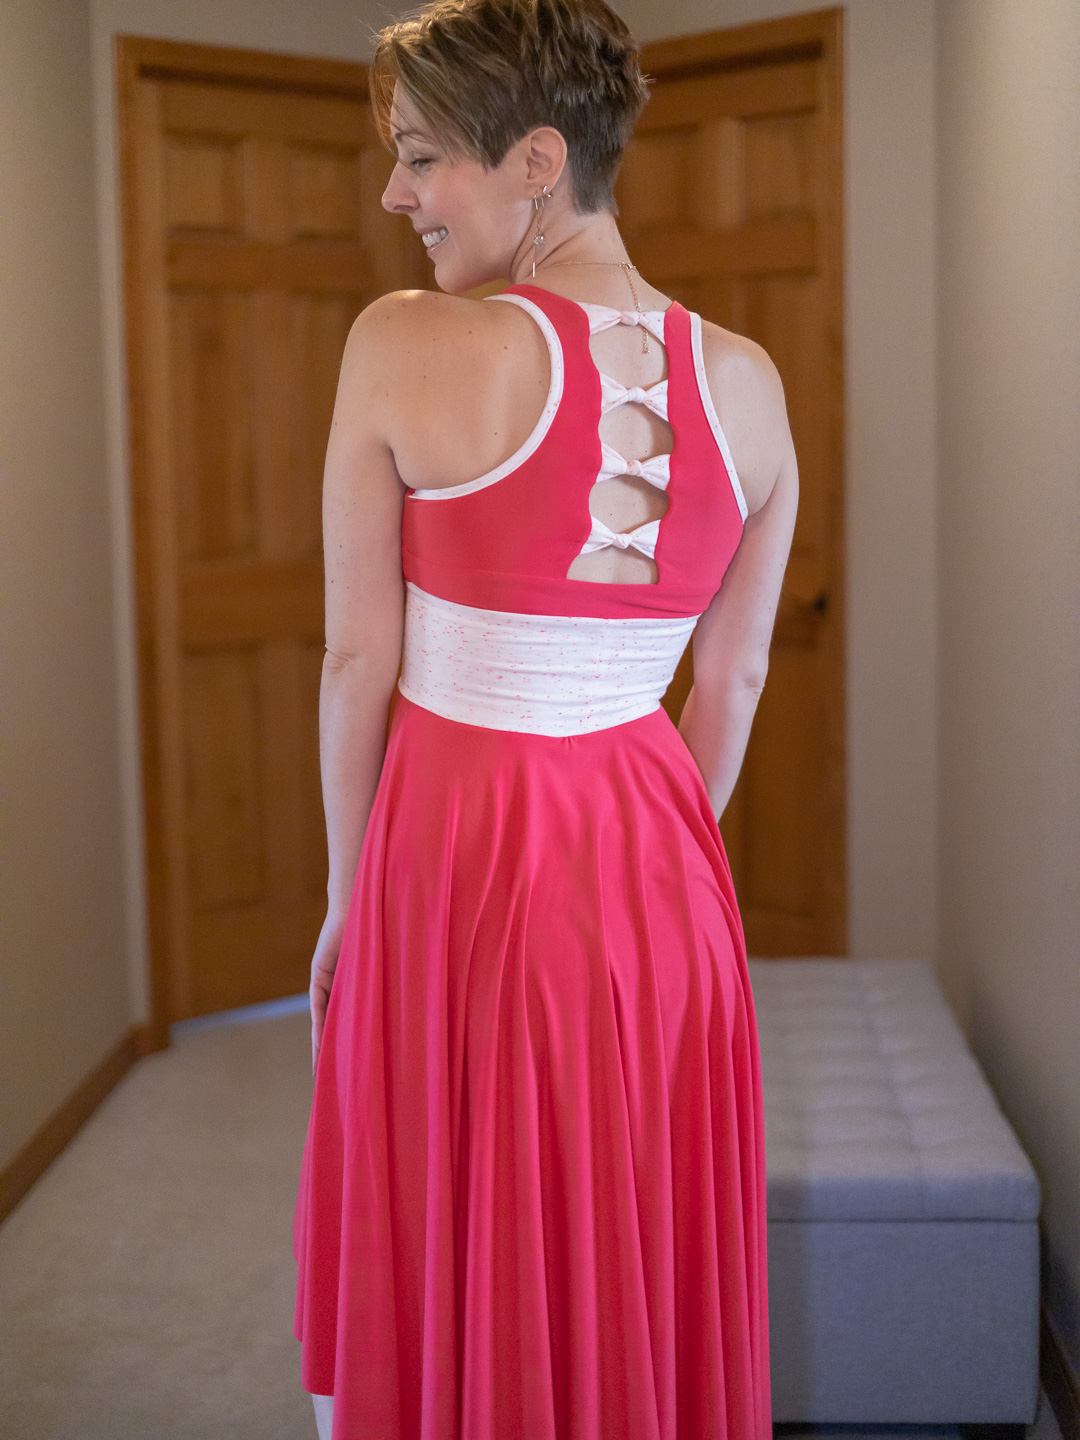
Well, I listened to myself and made almost every adjustment I suggested after my first polka-dot version of this dress. The only thing I didn’t do was use DBP for the waistband. I used French Terry. Yes, even in spite of my loathing for French Terry. And yes, I still loathe it even though I love this dress.
About the Fabric
Main: 3 yards Bright Coral Double Brushed Poly from Cali Fabrics
- FABRIC CONTENT: 96% Polyester/4% Lycra
- STRETCH: 4-way 150%
- WEIGHT: 5.5oz (Light Midweight)
You cannot go wrong with DBP, especially for a dress. I expect I’ll have a lot of trouble straying away from it when it comes to making dresses, but I doubt I’ll regret it. It comes in a plethora of prints, it’s easy to work with, ridiculously comfortable, and that drape is gorgeous.
Accents: Coral Speckle on Offwhite – Poly Linen French Terry from Made of Love Fabrics
- 2-way stretch
Oh, the consistently disappointing French Terry. Putting aside the fact the colors work perfectly in this project, everything else about this fabric is just blarg. That’s right, blarg, I say. From the shedding loops to the lackluster stretch (which I should have remembered from the Catalina tank I made out of it that’s borderline too snug) that caused me to have to unpick and re-do the waistband because it was unbearably small, to the rolling edges and the dish-towel-esque vibe French Terry always has. But, I had these scraps laying around and it went so well with the coral DBP and I really want to start using up scraps. So I did. The end result is quite nice—but it’s still French Terry. Blarg.
Notions: Semi-circle bra pad inserts
About This Make
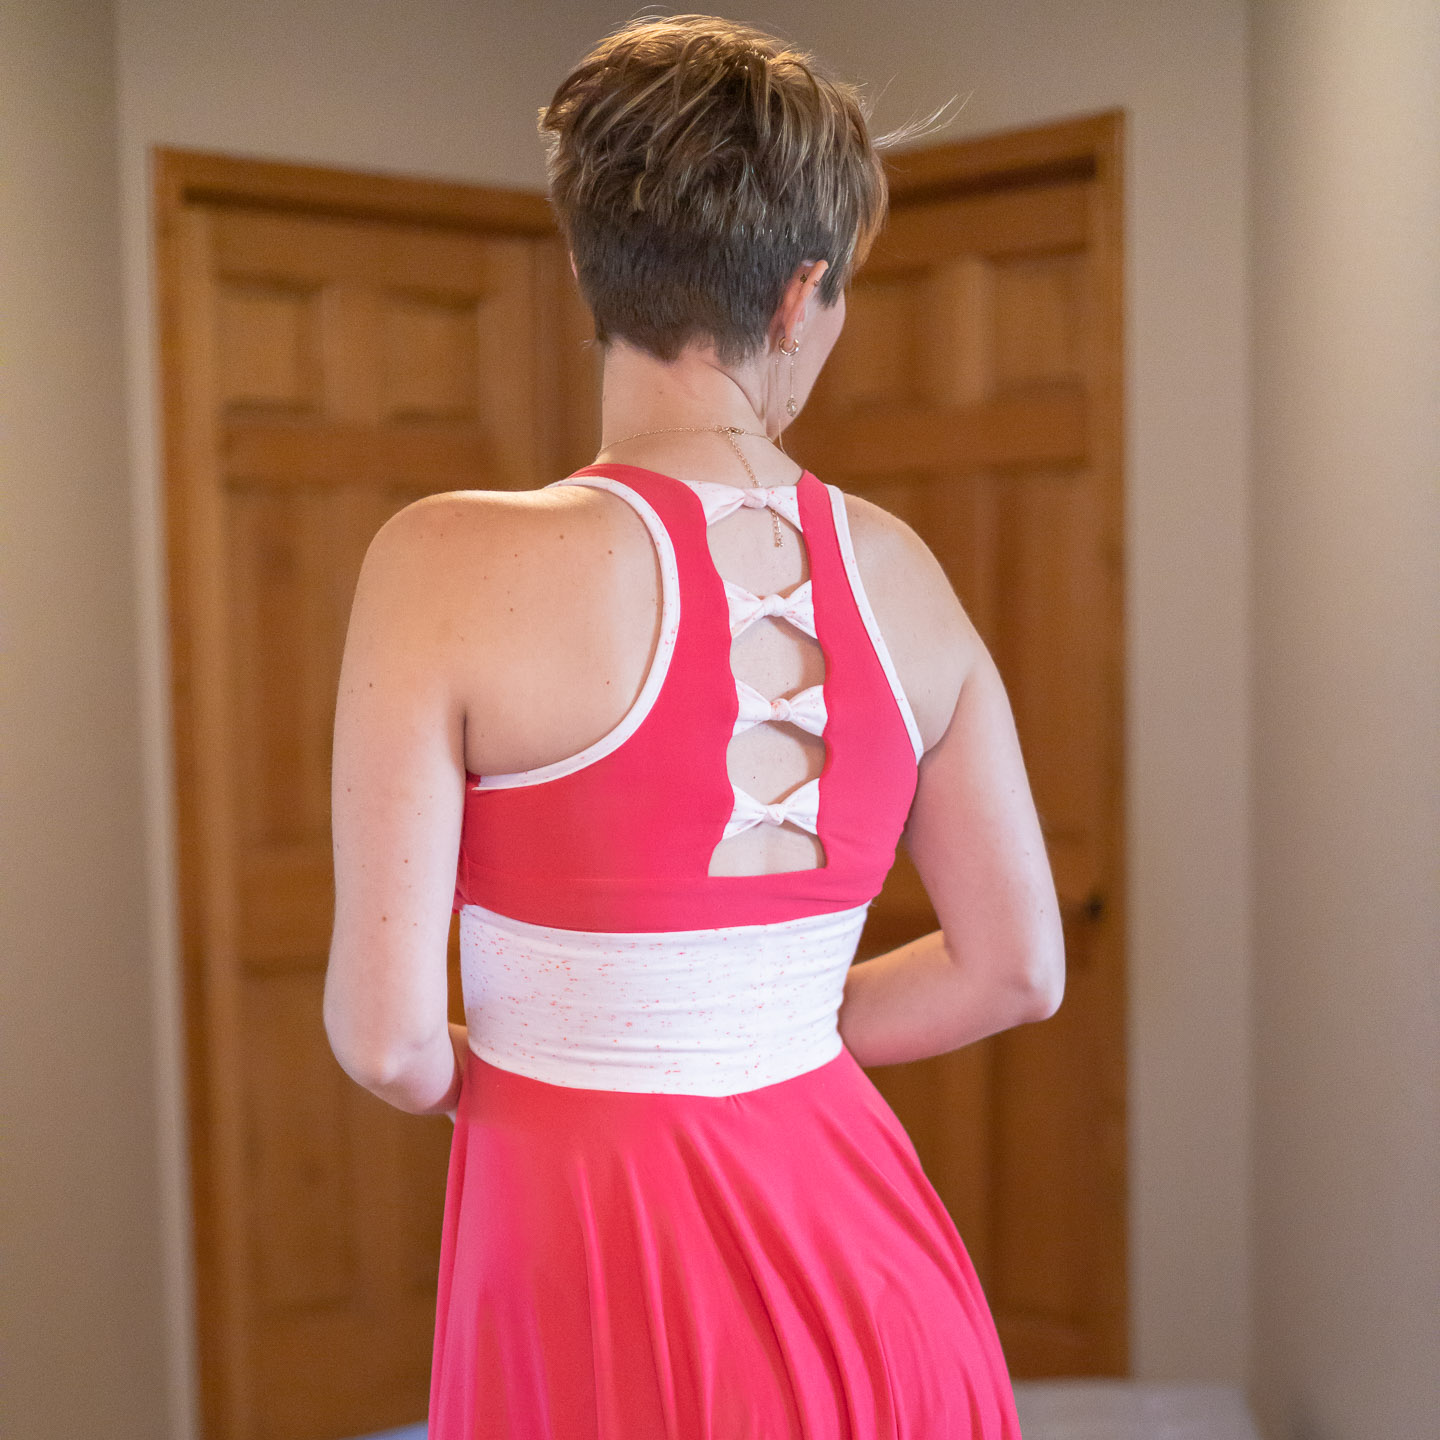
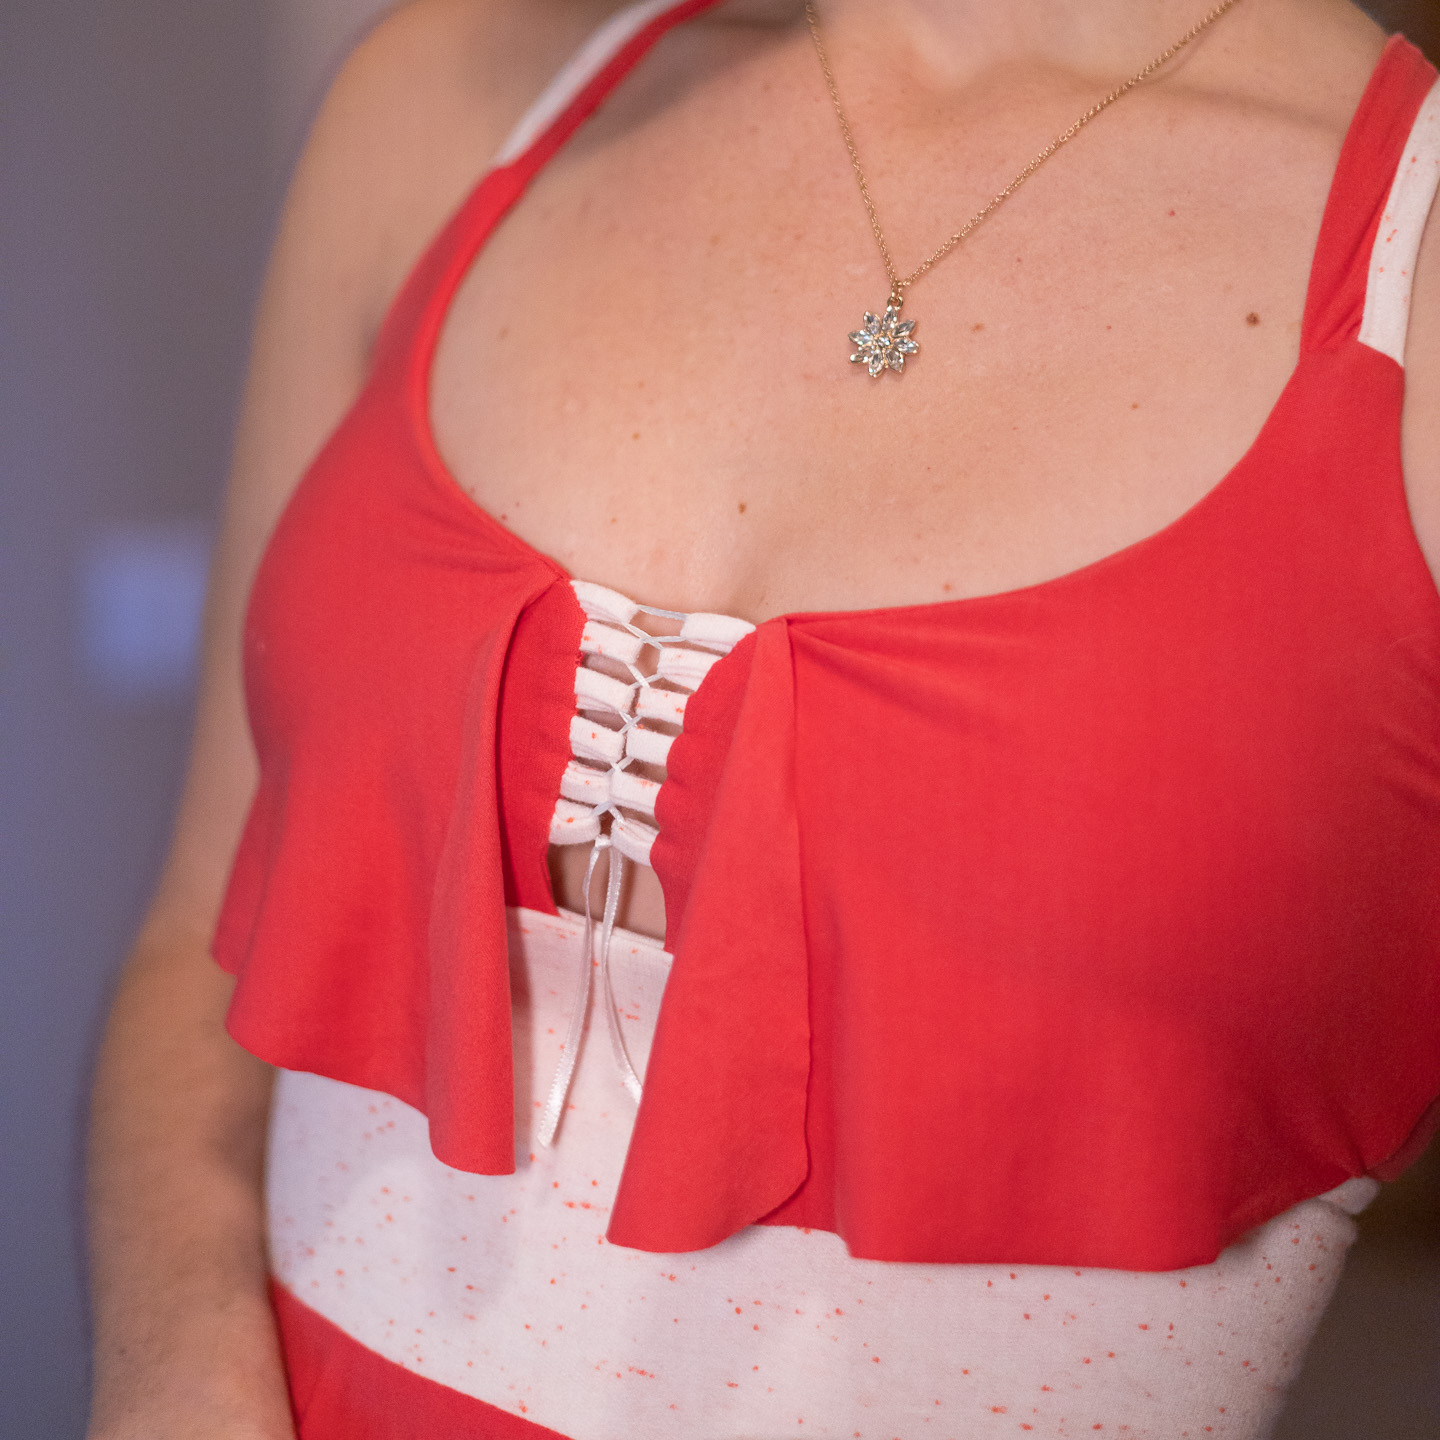
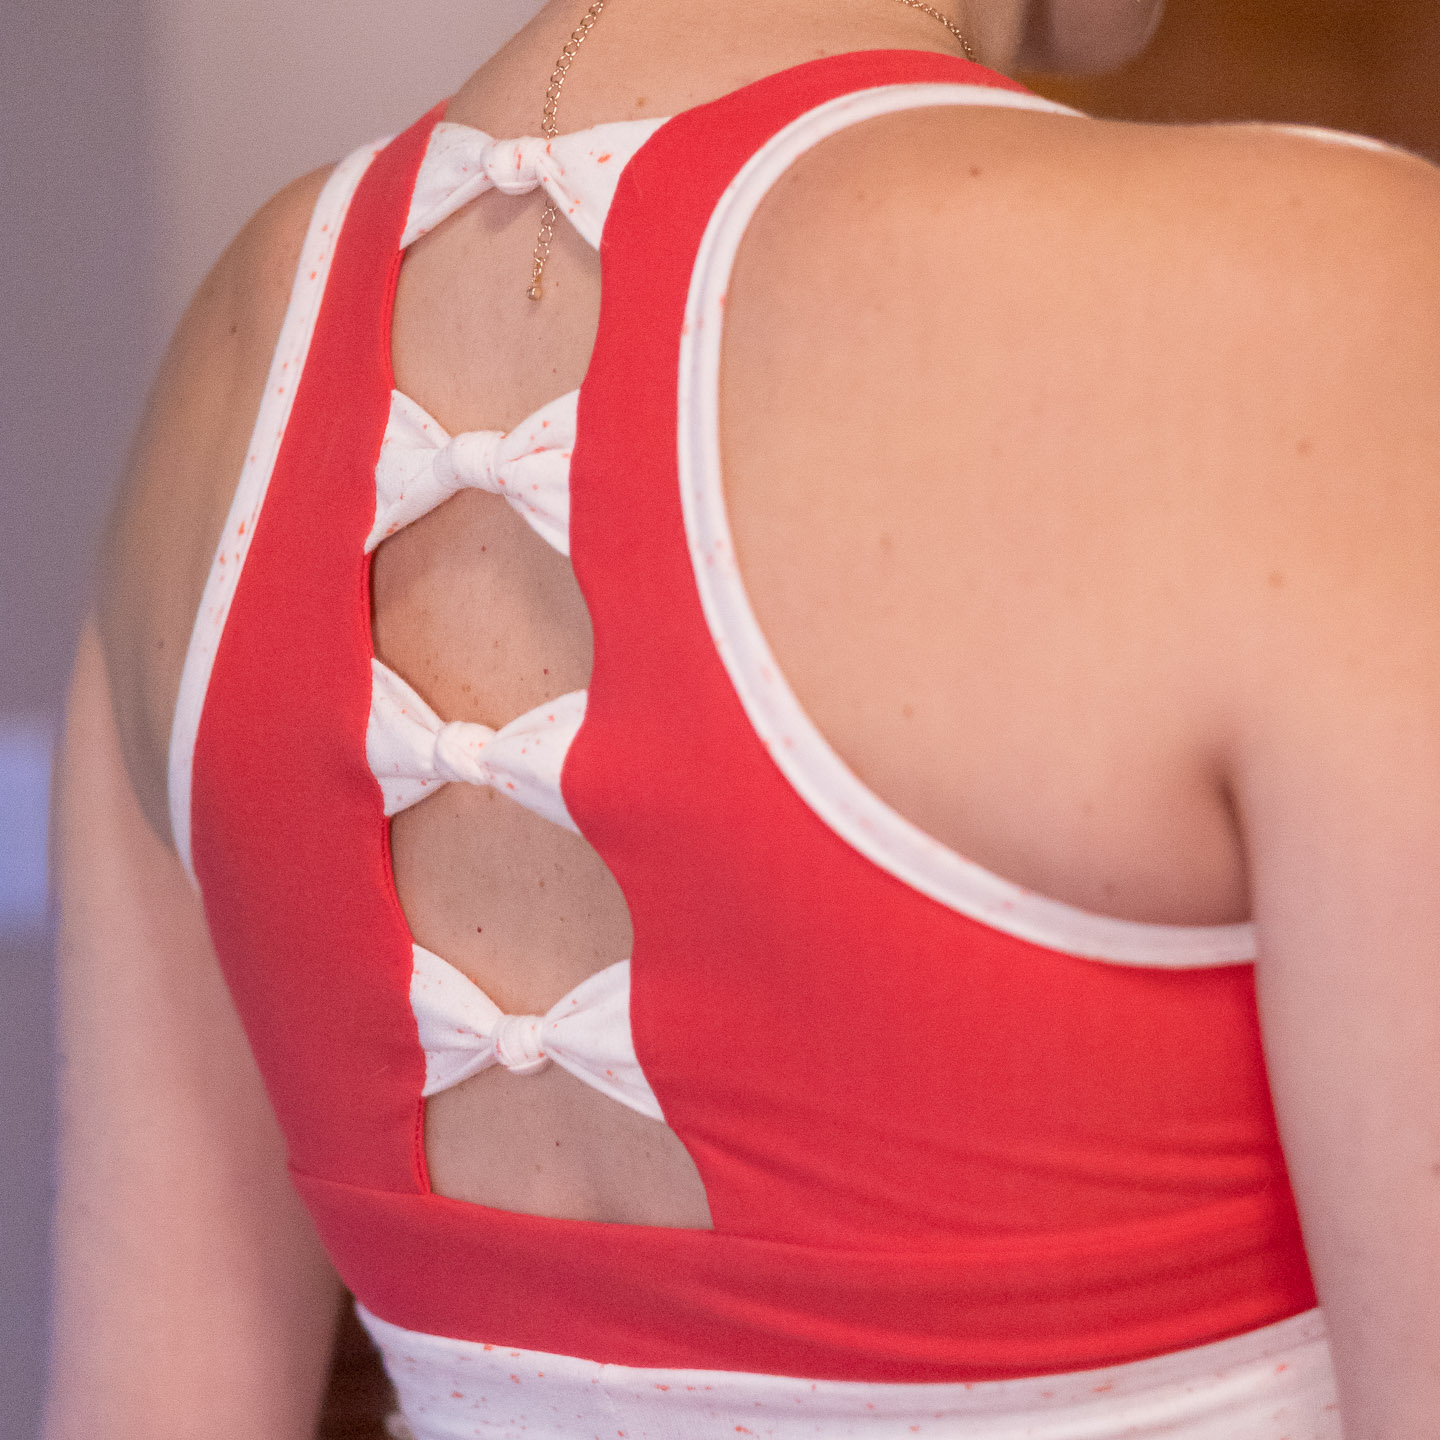
Changes from version 1 are highlighted in coral. (See what I did there? Ha!)
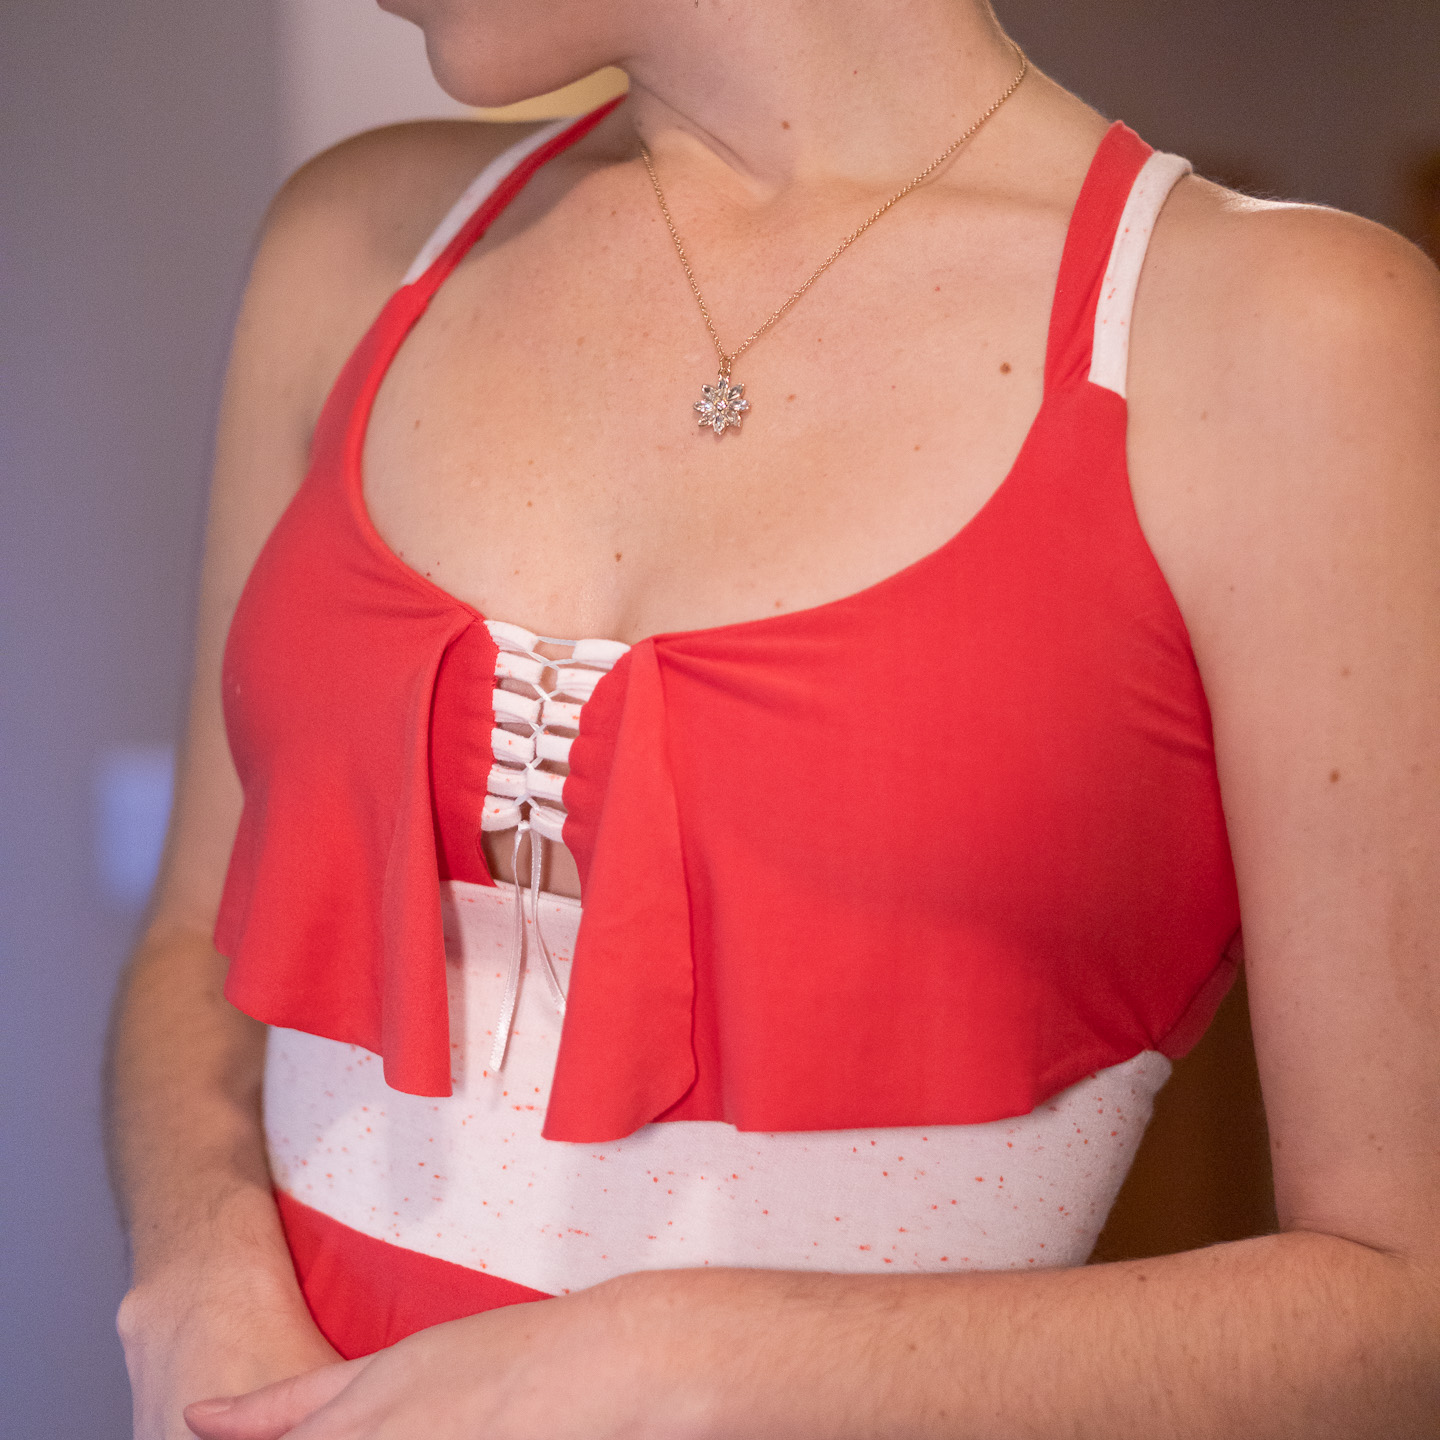
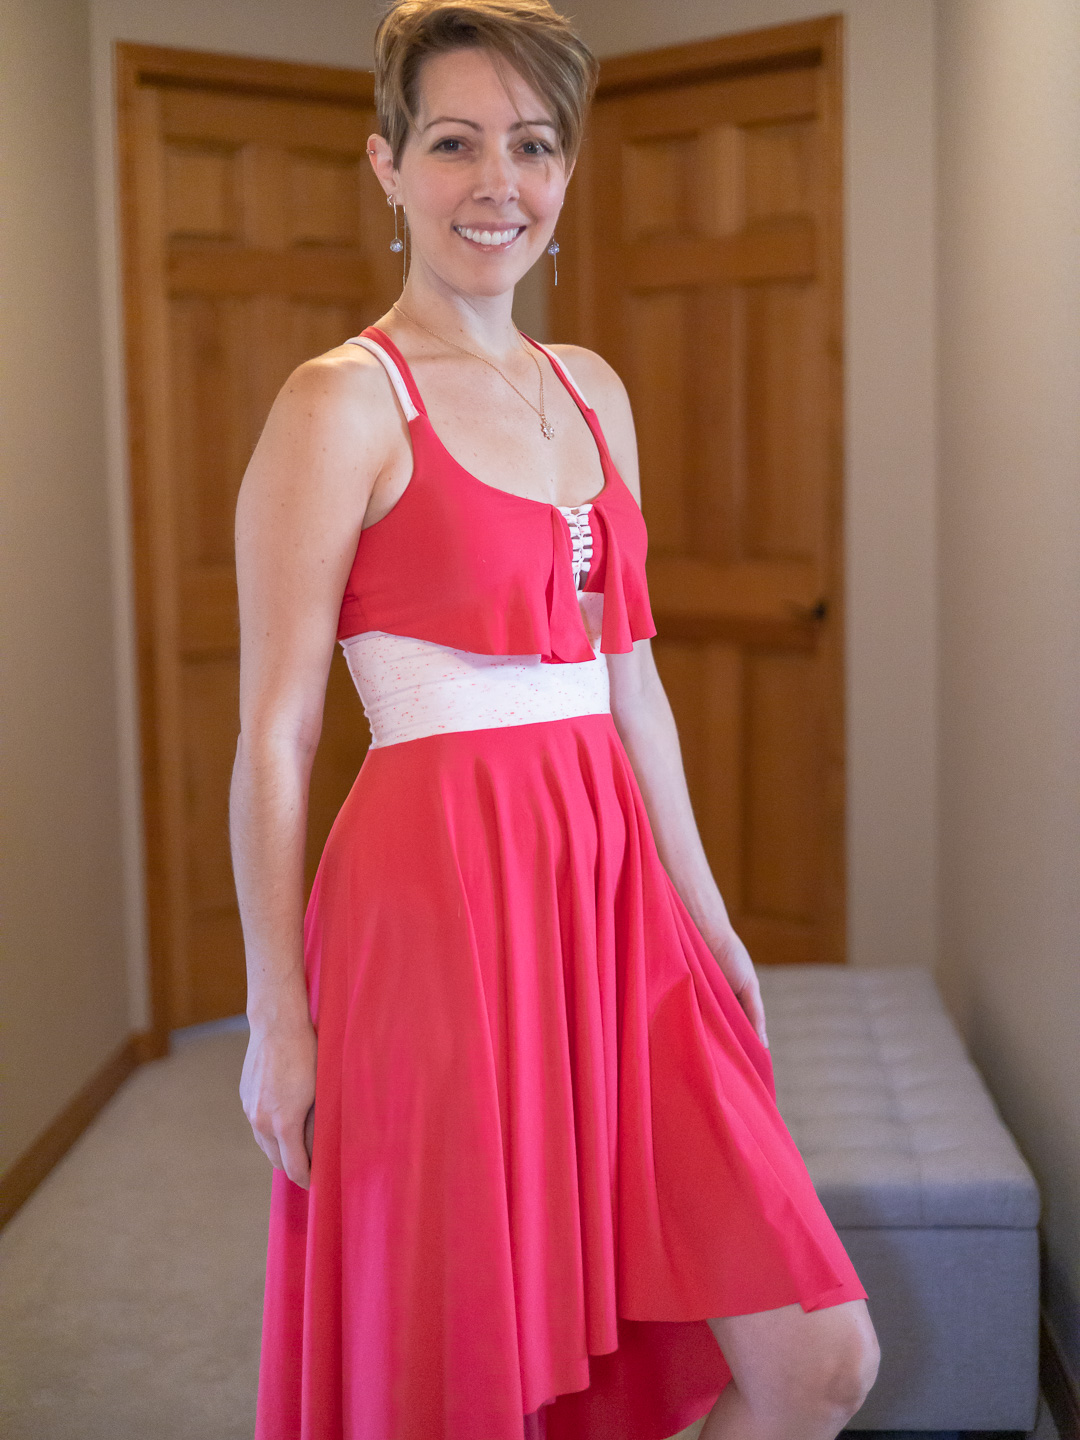
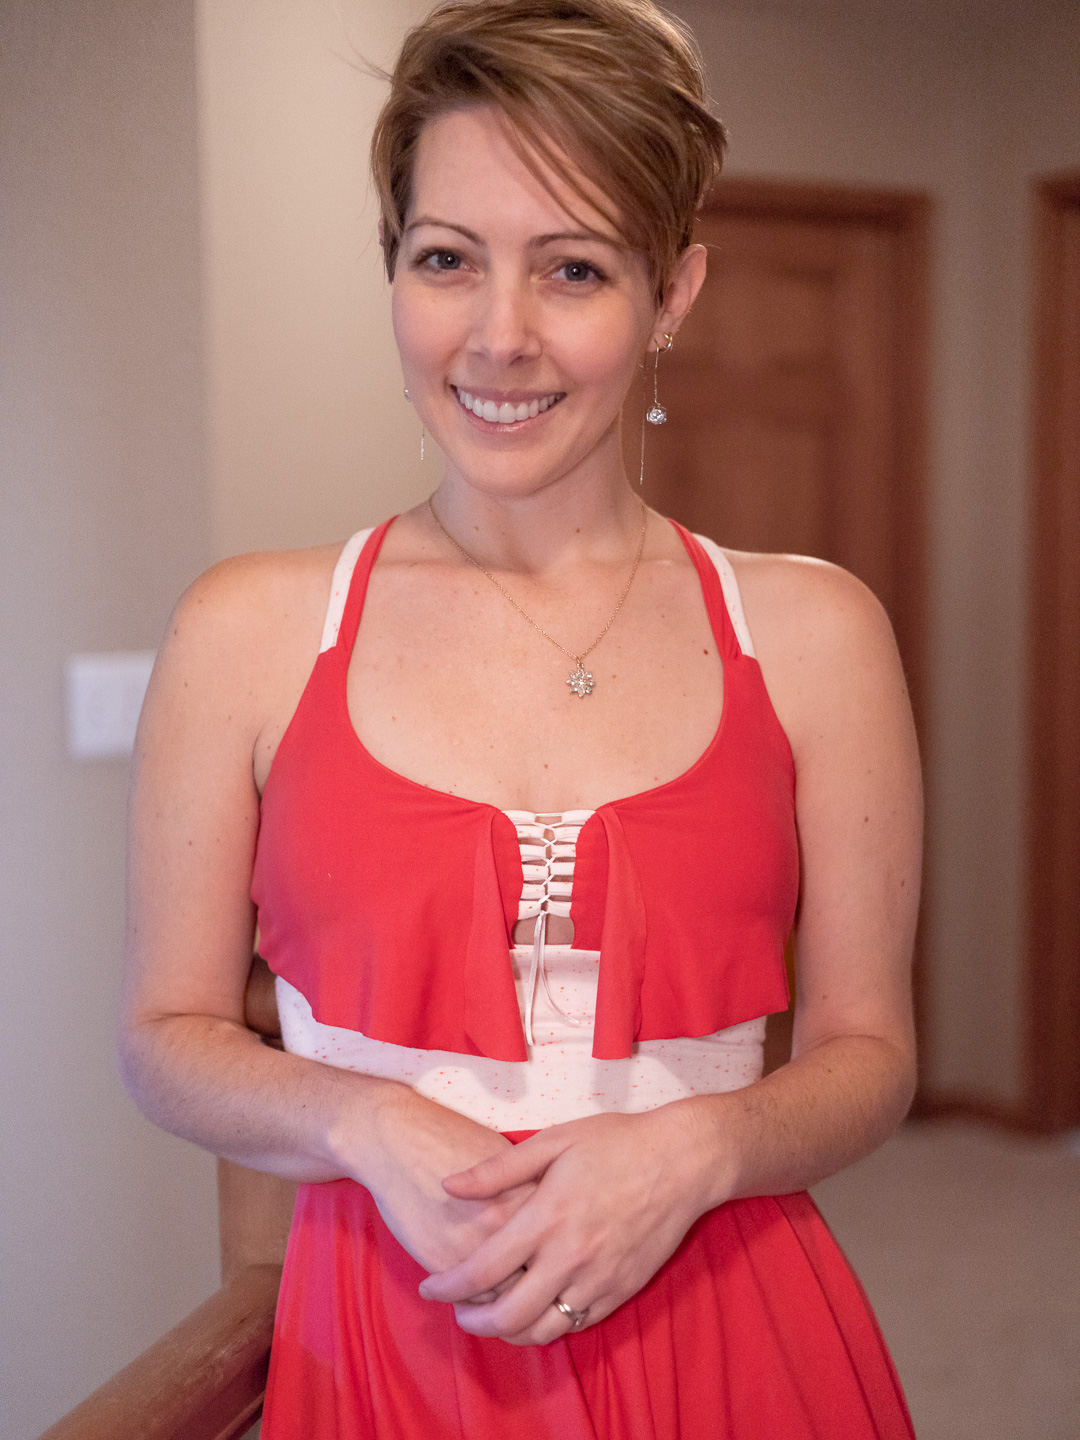
FRONT: Switch It Up Bra
- View J
- Size 6
- Pieces:
- full waistband (lengthened +2″)
- front (0.5″ added to bottom)
- loops and tie
- self-drafted flounce
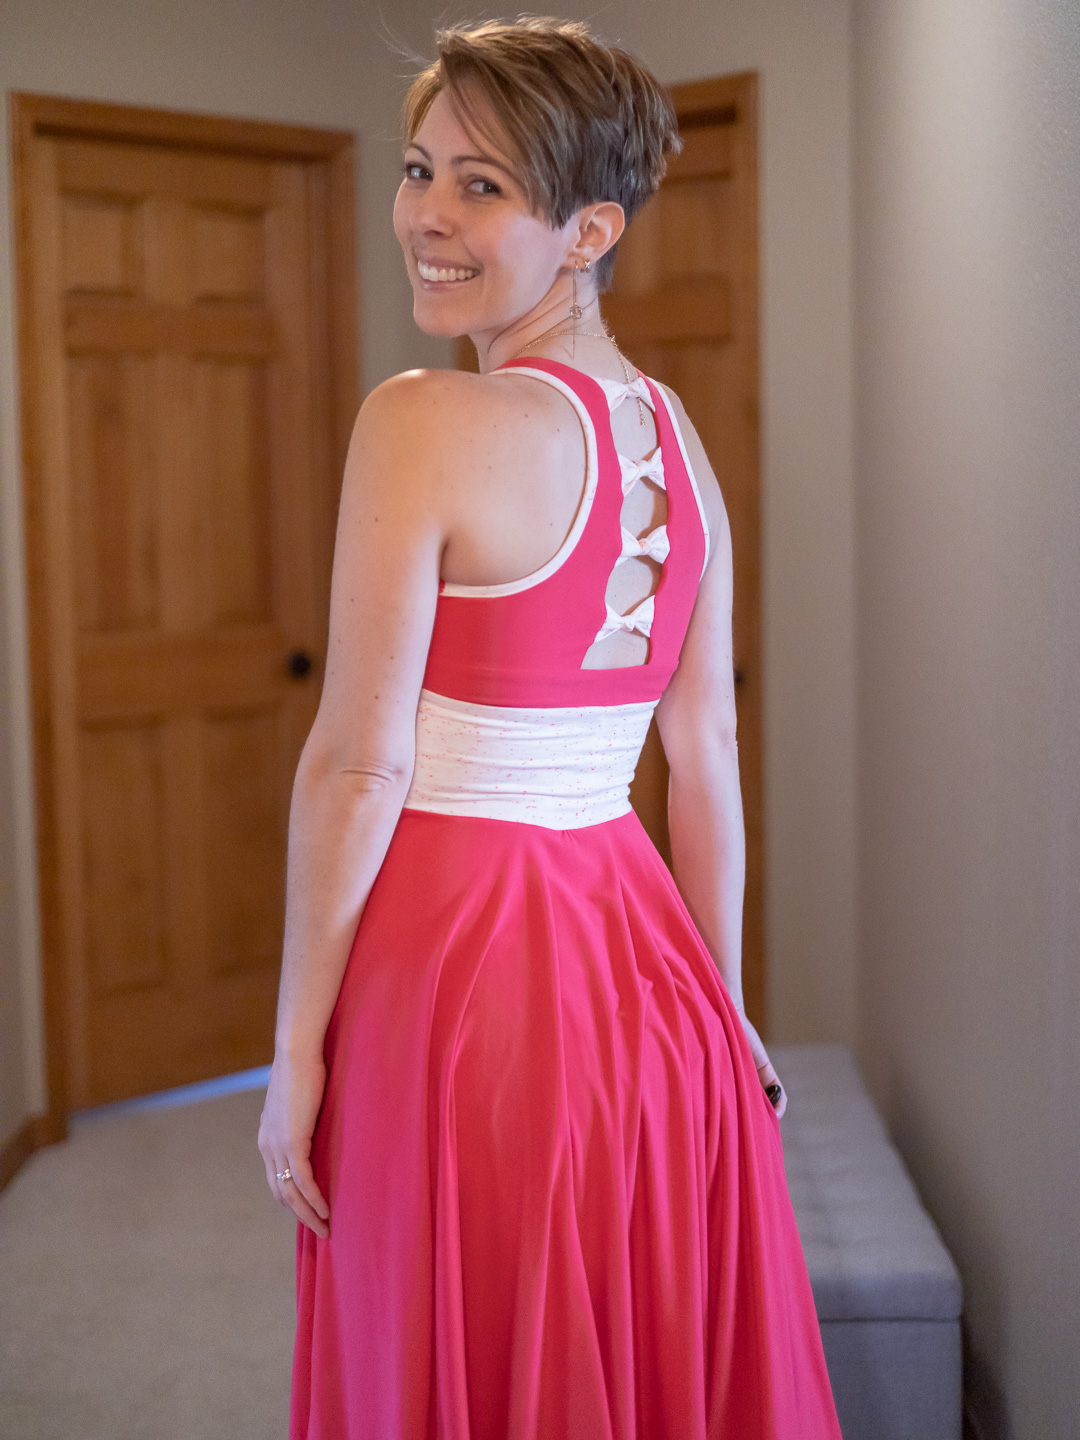
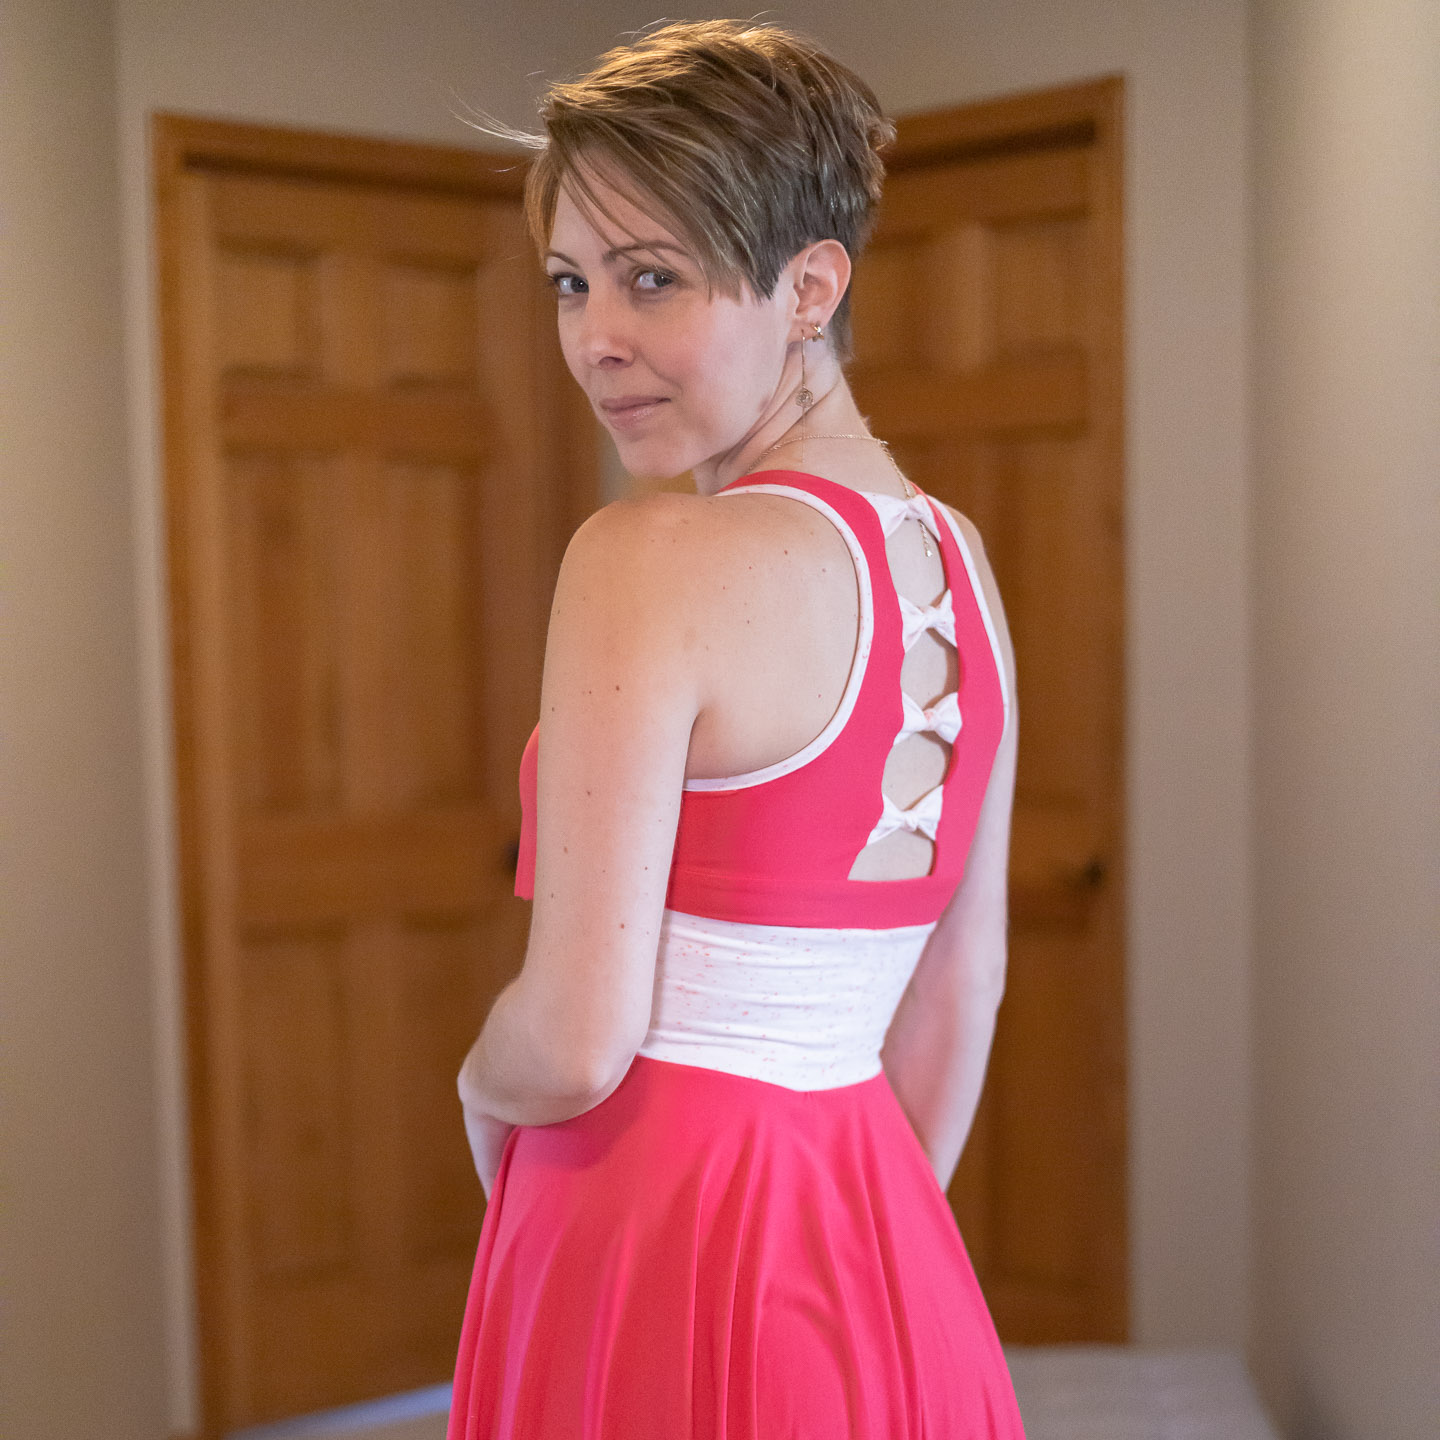
BACK: Sum It Up Bra
- View #12
- Size: range 8
- Pieces:
- back merged with Switch it Up front strap (total back strap extension: 5.5″)
- back bottom (lengthened +0.5″)
- armscye binding
- bow
CONSTRUCTION
- Construct bows
- Construct back as instructed (omit or remove all basting stitches to preserve stretch)
- Anchor loops on front (I used Wonder Tape)
- Pin flounces to front self with wrong(back) side of flounce facing the right(face) side of front.
- Sandwich completed back between flounce and front lining with main fabrics facing each other and linings facing each other.
- Sew outer sides, armscyes, straps, and neckline, making sure to catch only appropriate layers in each section:
- outer side: all layers (front lining/flounce/self and back lining/self)
- armscyes: front lining, flounce, and front self (no back layers)
- straps: all layers (front lining/flounce/self and back strap)
- neckline: front lining, flounce, and front self (no back layers)
- Un-sandwich and sew center seams (loop and tie edges) of front with RST (right sides together). Do not include the center of the flounce in this seam.
- Turn RSO and press
- If desired, topstitch center of flounce partway down along the loops and ties. (I left it free on this version.)
- Insert cups between main and lining. Optionally baste along bottom.
- Attach waistband to bodice.
- Attach skirt to waistband.
- Hem if you want but I never do.

What I Did Differently
- Sized up the front to 6
- Sized up the back to range 8
- Lengthened the waistband by 2″
- Added and kept the extra 0.5″ on the front
- Avoided most basting stitches. I think the only place I basted was to anchor the bows while constructing the back.
- Lengthened the back straps for a total of 5.5″ from the original line and anchored them a little further into the front to better blend that bulky seam.


Project Settings
Sewing Machine vs. Serger
| Sewing Machine | Serger |
|---|---|
|
|
Sewing Machine Settings
| Presser Foot | Stitch# | Stitch Width | Stitch Length | Needle | Top Thread Tension | Application |
|---|---|---|---|---|---|---|
| standard zig-zag (A) | 5 | 1.0 | 4 | blue tip | 4 | seams |
| standard zig-zag (A) | 0 | 3.5 | 5 | blue tip | 4 | baste |
| overedge (C) | 6 | 5.5 | 3.5 | blue tip | 4 | edge finish |
Serger Settings
| Stitch Name | superstretch |
|---|---|
| Needles | R, L |
| Finger | B |
| Threads | 3 |
| Tension Left Needle | 3 |
| Tension Right Needle | 3 |
| Tension Upper Looper | — |
| Tension Lower Looper | 0.5 |
| Cut Width | 6 |
| Stitch Length | 3 |
| Differential | 1.0 |
| Application | seams |
Leave a Reply