My last two makes using the Sum It Up Bra reminded me of this inspiration pic I pinned forever ago:
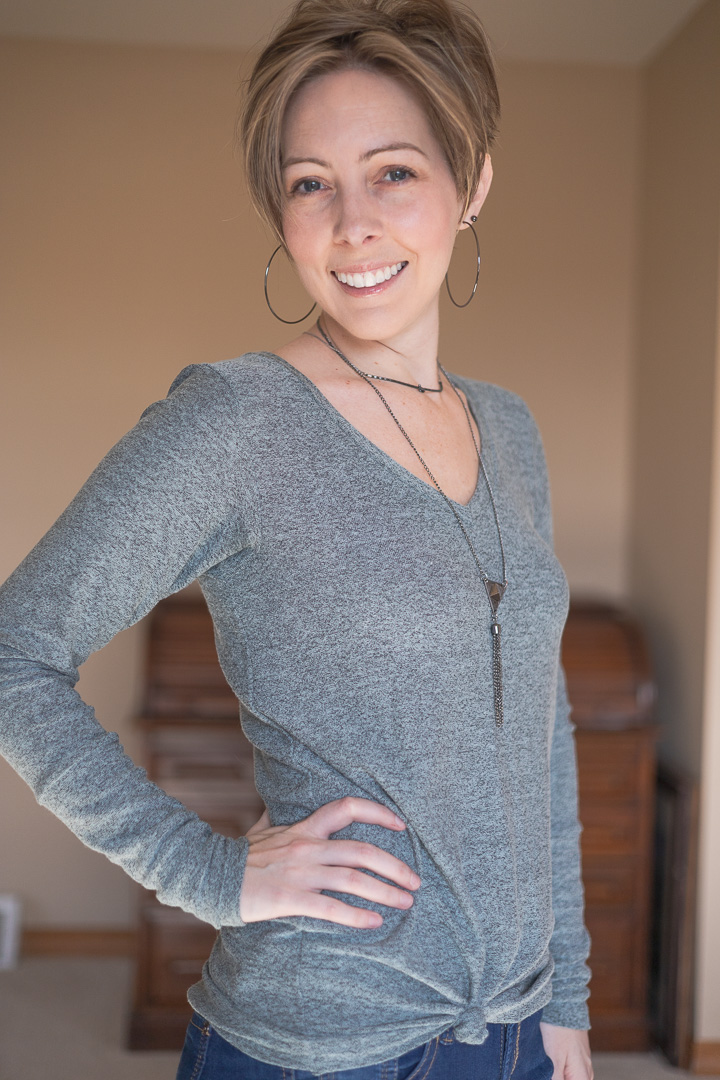
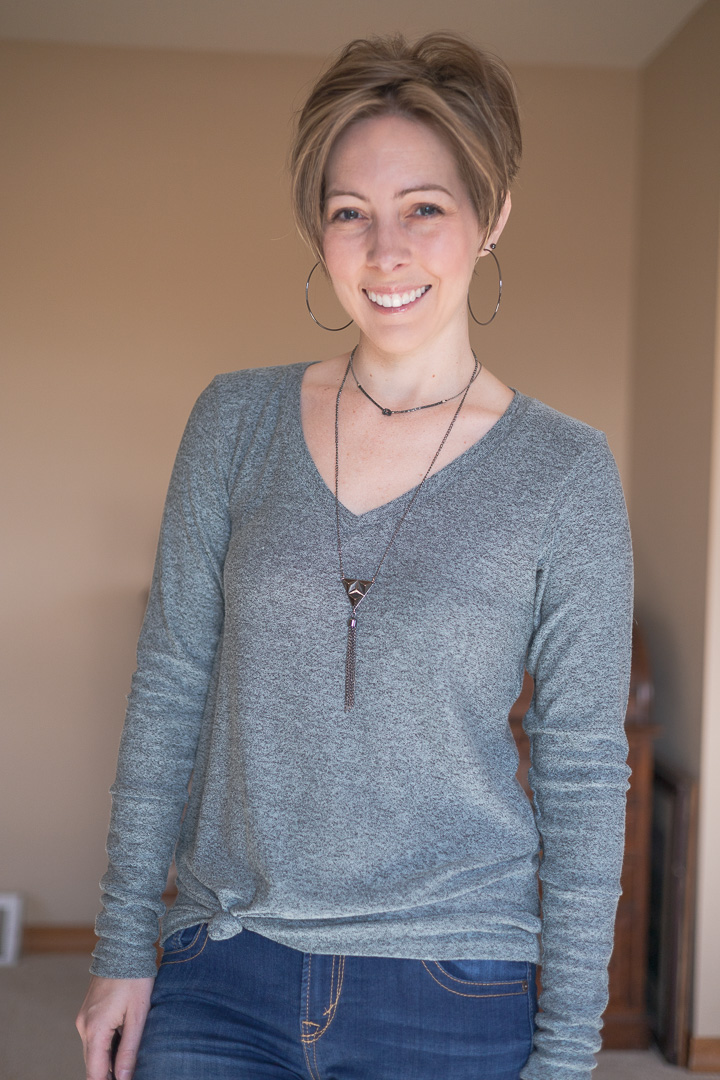
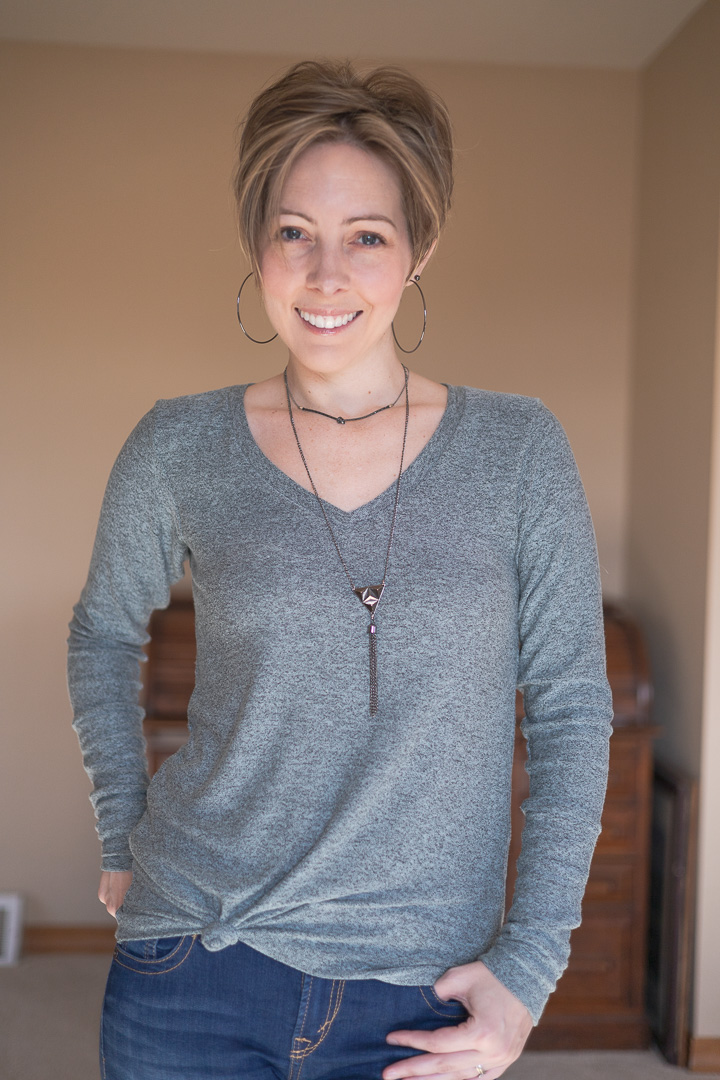
And so I tackled a version of my own. I knew I wanted a v-neck instead of the round neck shown on the inspiration photo, so that’s where I started.

About the Fabric
Main: Teal Grey Heather Brushed Stretch Sweater Knit from Cali Fabrics
- 200% horizontal stretch, 50% vertical stretch
- polyester / rayon / spandex
- light midweight
I love this sweater knit. I had quite a bit left over from my last North Pole Poncho. It’s the perfect transitional sweater knit: fairly lightweight with a brushed back and gorgeous drape. It keeps me warm without going overboard.
Bows: Offwhite Double Brushed Poly Spandex Knit from Cali Fabrics
- FABRIC CONTENT: 96% Polyester/4% Lycra
- STRETCH: 4-way 150%
- WEIGHT: 5.5oz (Light Midweight)
Patterns Used
- GGVneck (modified)
- Sum It Up Bra (bows)
About This Make
I’ve modified the original GGVneck pattern quite a bit to suit my tastes, and so my base for the pattern is moderately different than the original:
- size: graded from 4 at the arms/bust to 10 at the hips. (Bows: range 8)
- narrowed neckline
- modified sleeves (mashed the sleeves from the 40K Sway Top [free pattern!] into the GGVneck armscye) with long cuffs
- +1″ to bodice
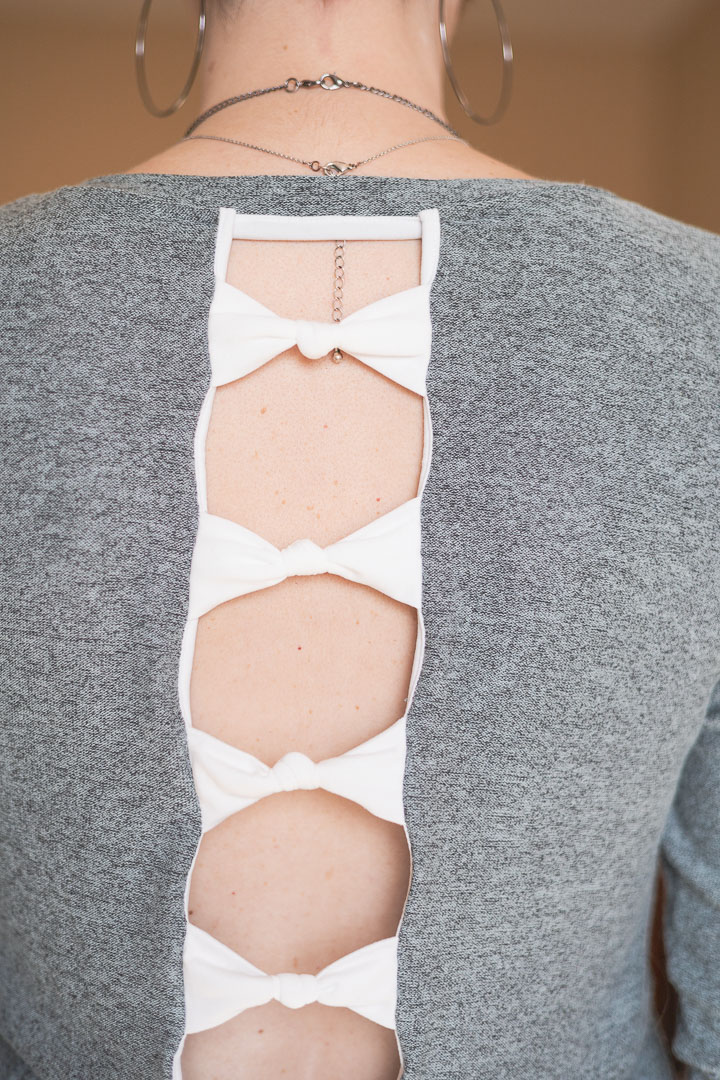
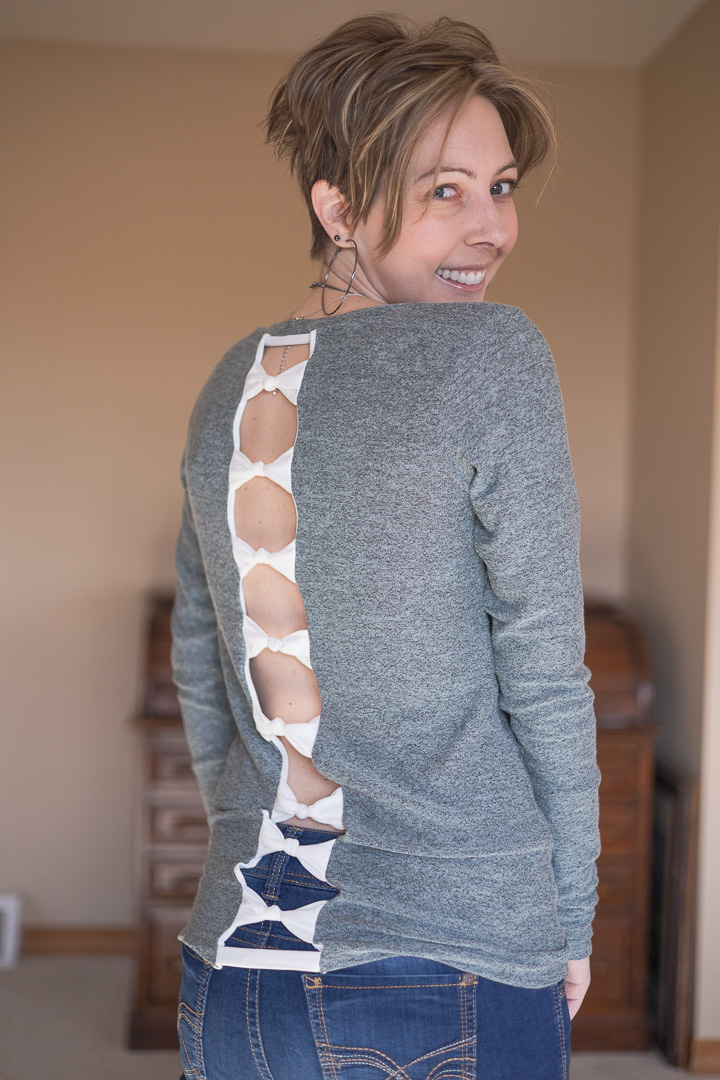
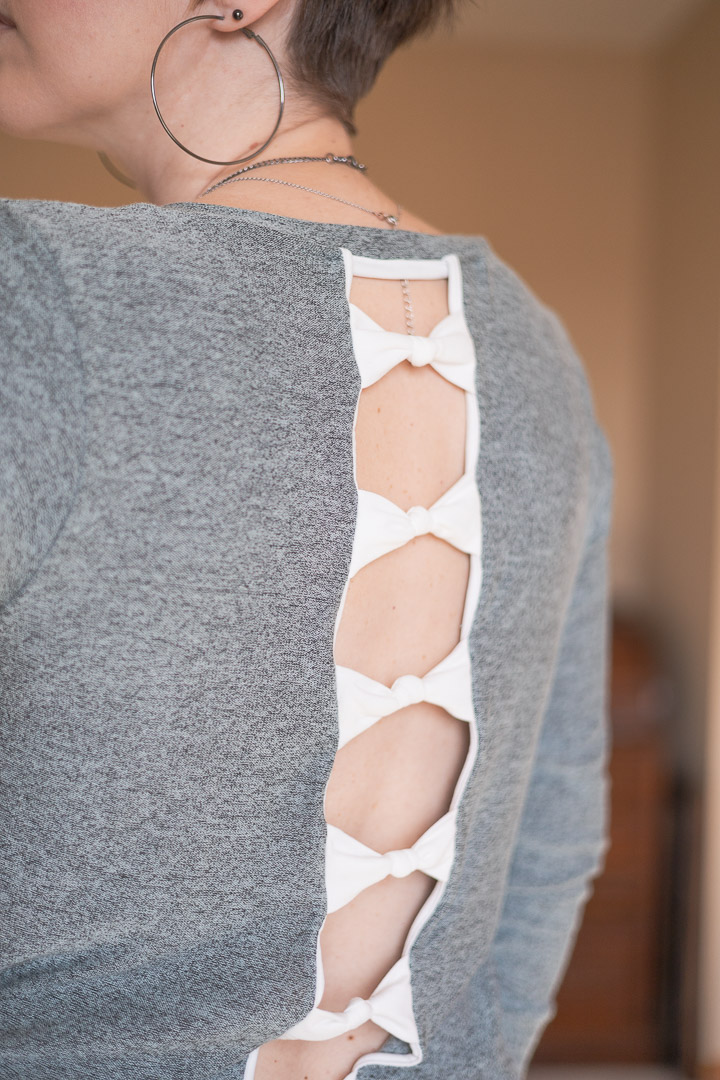
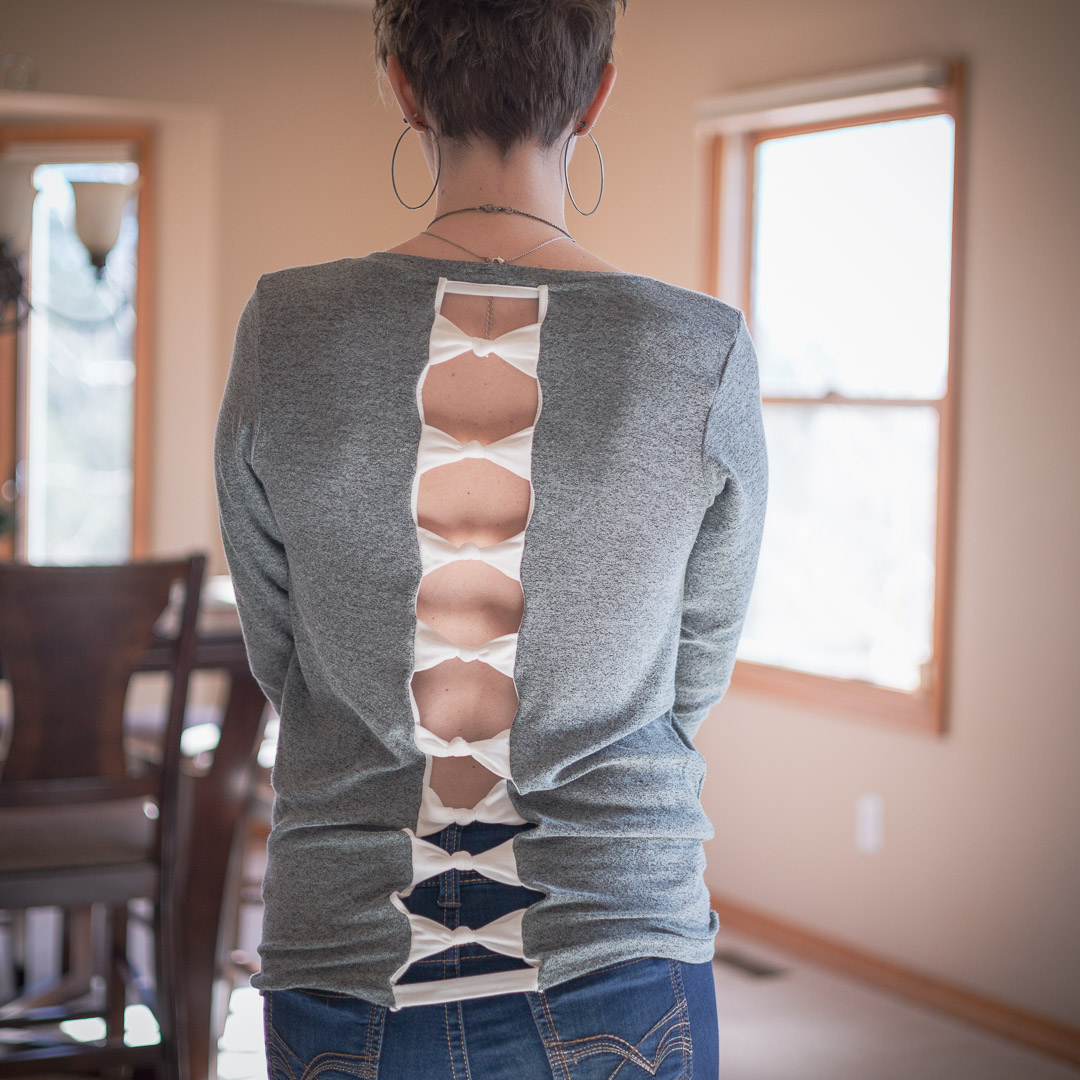
And how I bow-i-fied the back…
- Subtract 1.25″ from each half of the back pattern piece.
- Cut three binding strips: one for the back neckband, and two for each side of the back opening along the bows.
- Cut a strip at 2.5″ x 2″ for the bottom back strap. Fold in half lengthwise twice for a final strap width of 0.5″
- Hem the front and back pieces of the shirt.
- Construct the bows. (I made 8 total spaced along the back with 1.5″ in between each bow.)
- Attach the bows and bottom back strap.
- Bind the seam allowance along each side of the back along the bows.
- Sew front and back bodice together at shoulder seams.
- Attach sleeves.
- Sew side seams.
- Attach sleeve cuffs.
- Attach neckband.
- Bind the visible seam allowance of the neckband.
Notes for Next Time
- Rather than knotting the bows, try a narrow strip of fabric to bundle them at the center. This is mostly for more comfort when sitting back against the bows; the knots are pretty knotty.
- Omit the straight straps at the top and bottom and re-work the spacing of the bows.
- Possibly shorten the shirt.
- Instead of binding the seam allowance, maybe try facing and topstitch. This could save a ton of time.
- Modify for a dolman sleeve.
- I could also do a version with my cold shoulder sleeve and somehow carry over the bow effect to the cold shoulder strap.
Project Settings
Sewing Machine vs. Serger
| Sewing Machine | Serger |
|---|---|
|
|
Sewing Machine Settings
| Presser Foot | Stitch# | Stitch Width | Stitch Length | Needle | Top Thread Tension | Application |
|---|---|---|---|---|---|---|
| standard zig-zag (A) | 5 | 1.0 | 4 | blue tip | 4 | seams |
| overedge (C) | 6 | 5.5 | 3.5 | blue tip | 4 | edge finish |
Serger Settings
| Stitch Name | 4-thread overlock |
|---|---|
| Needles | R, L |
| Finger | B |
| Threads | 4 |
| Tension Left Needle | 4 |
| Tension Right Needle | 4 |
| Tension Upper Looper | 4 |
| Tension Lower Looper | 4 |
| Cut Width | 6 |
| Stitch Length | 2.5 |
| Differential | 1.0 |
| Application | seams |
Leave a Reply