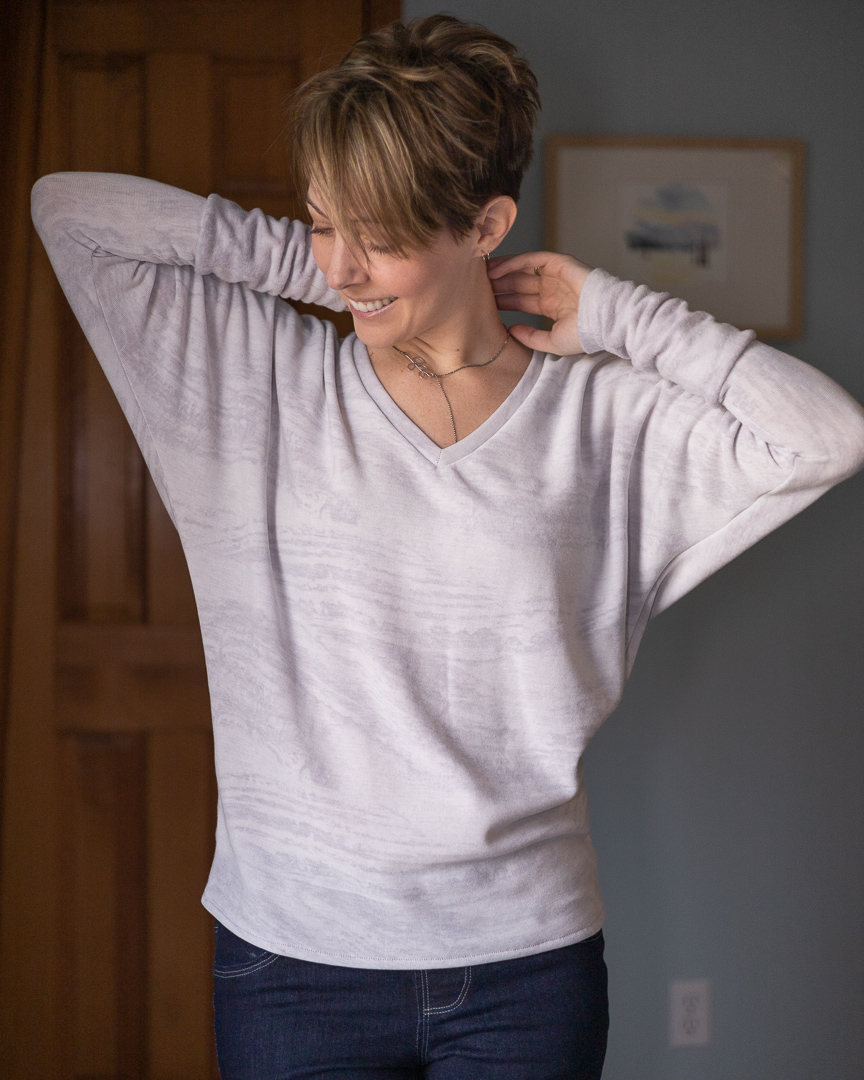
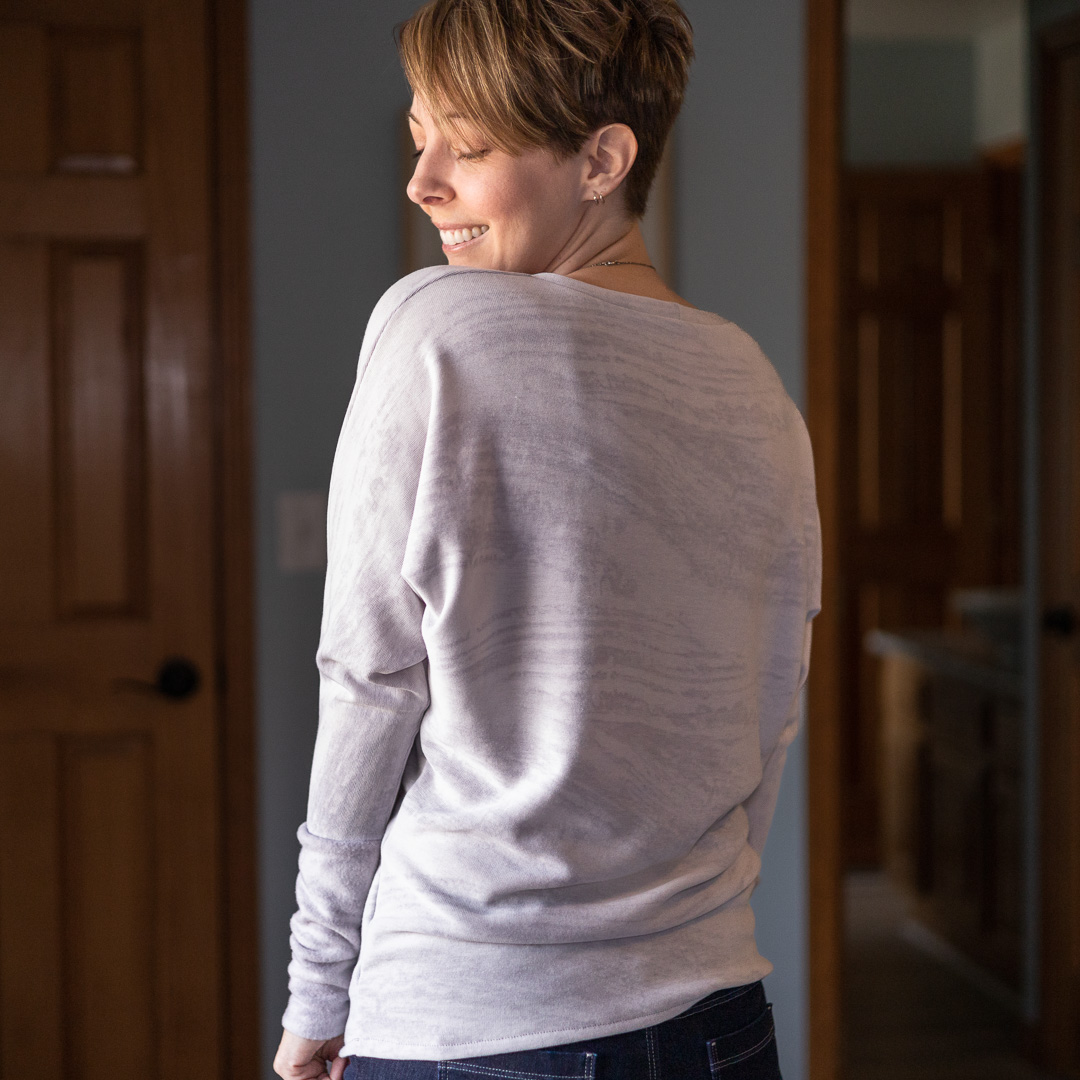
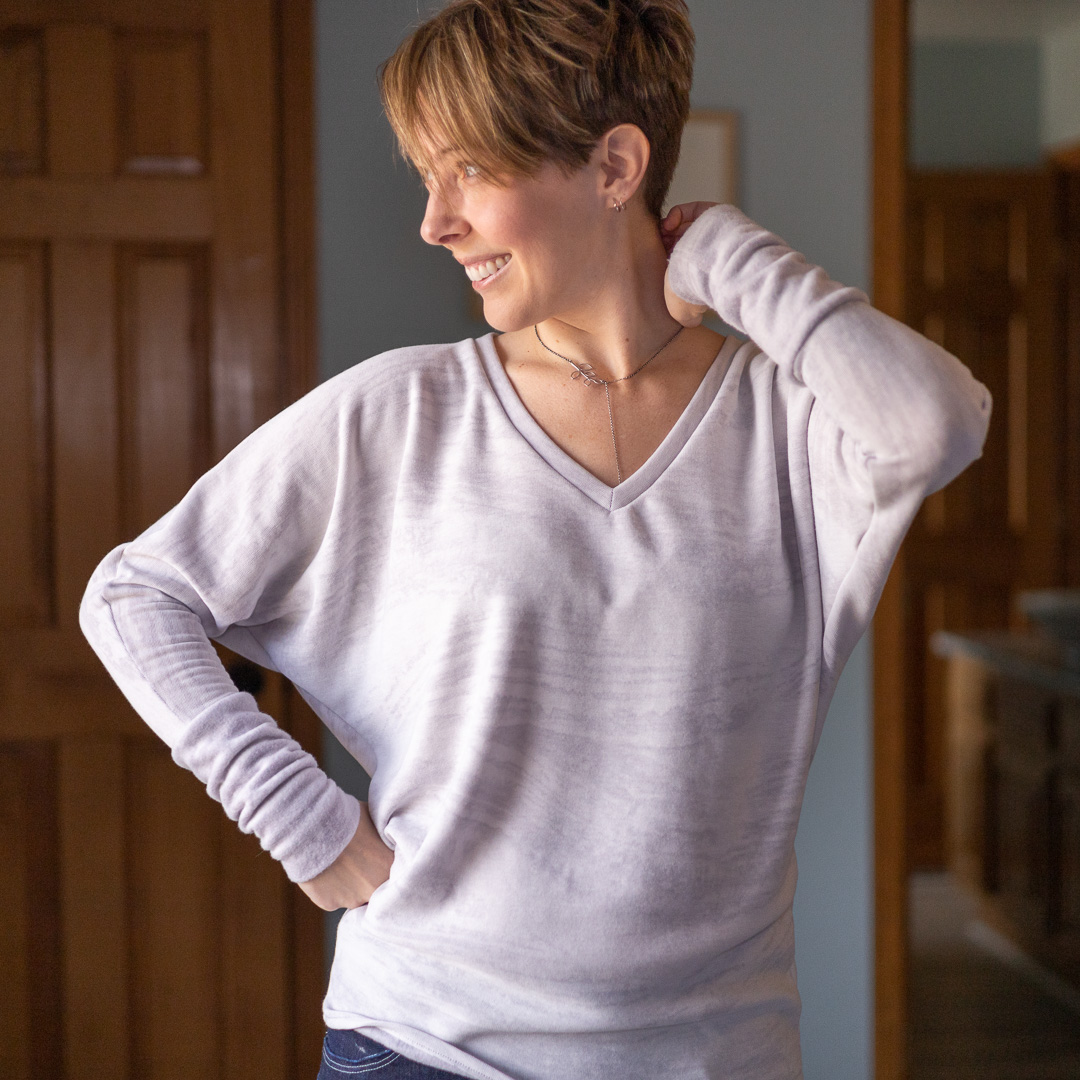
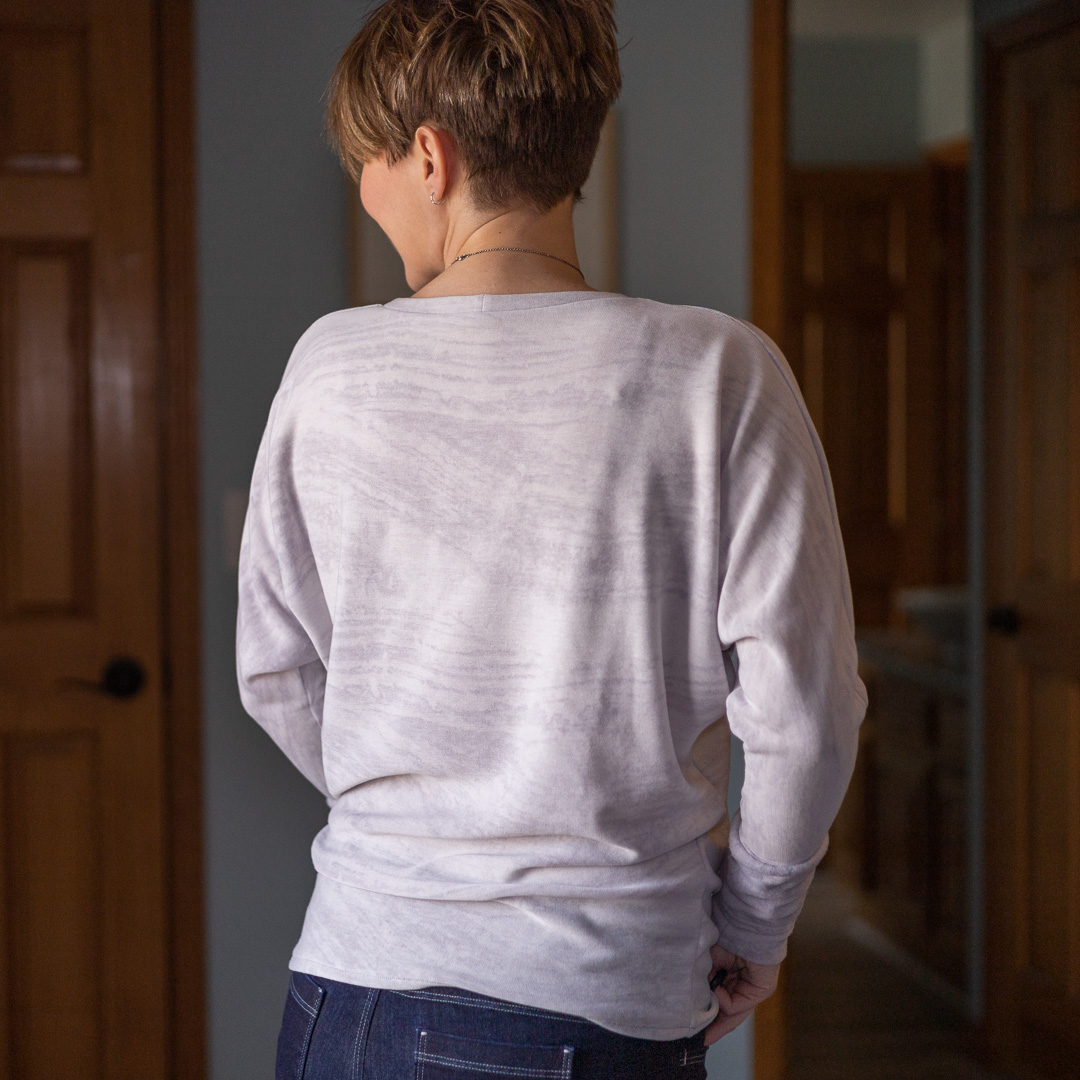
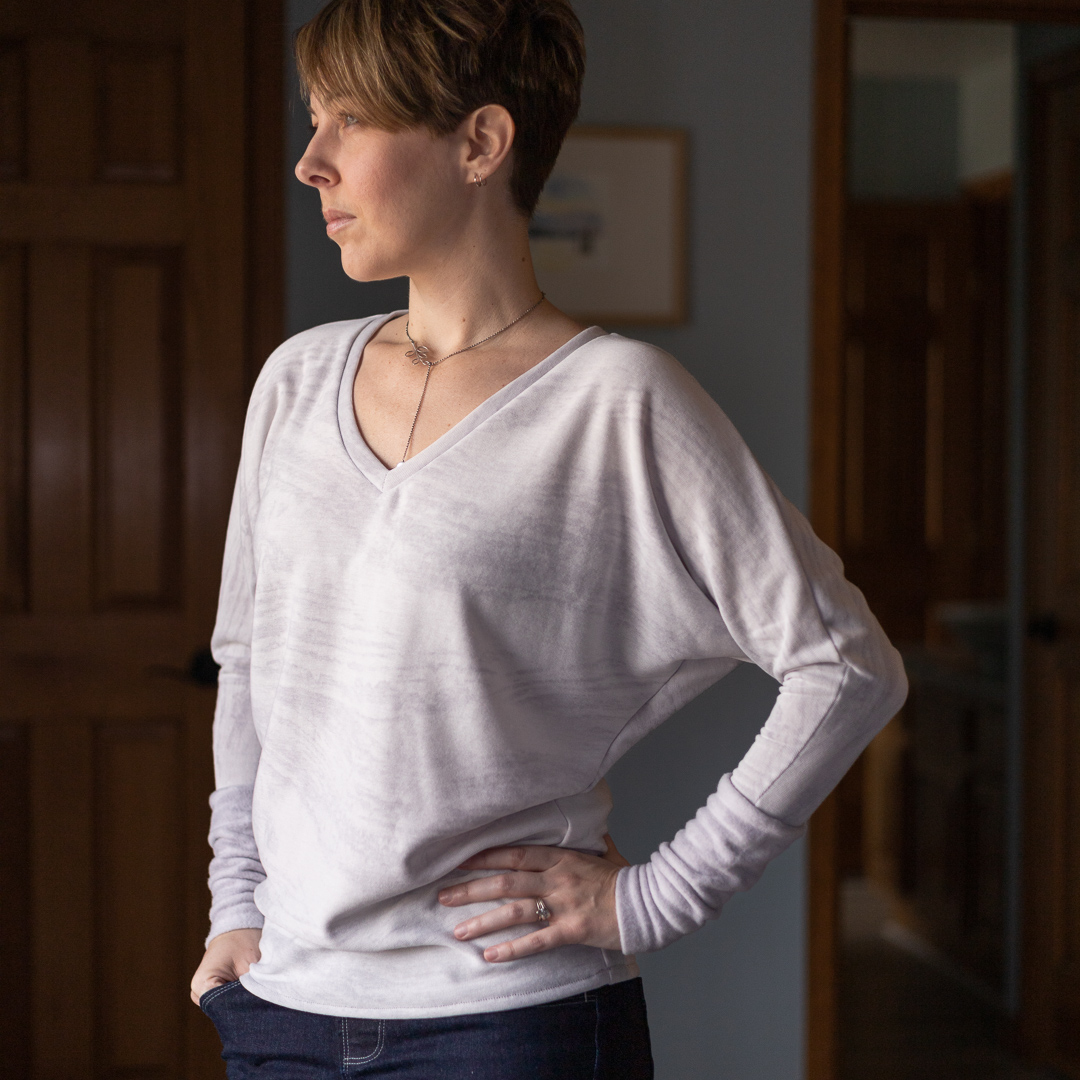
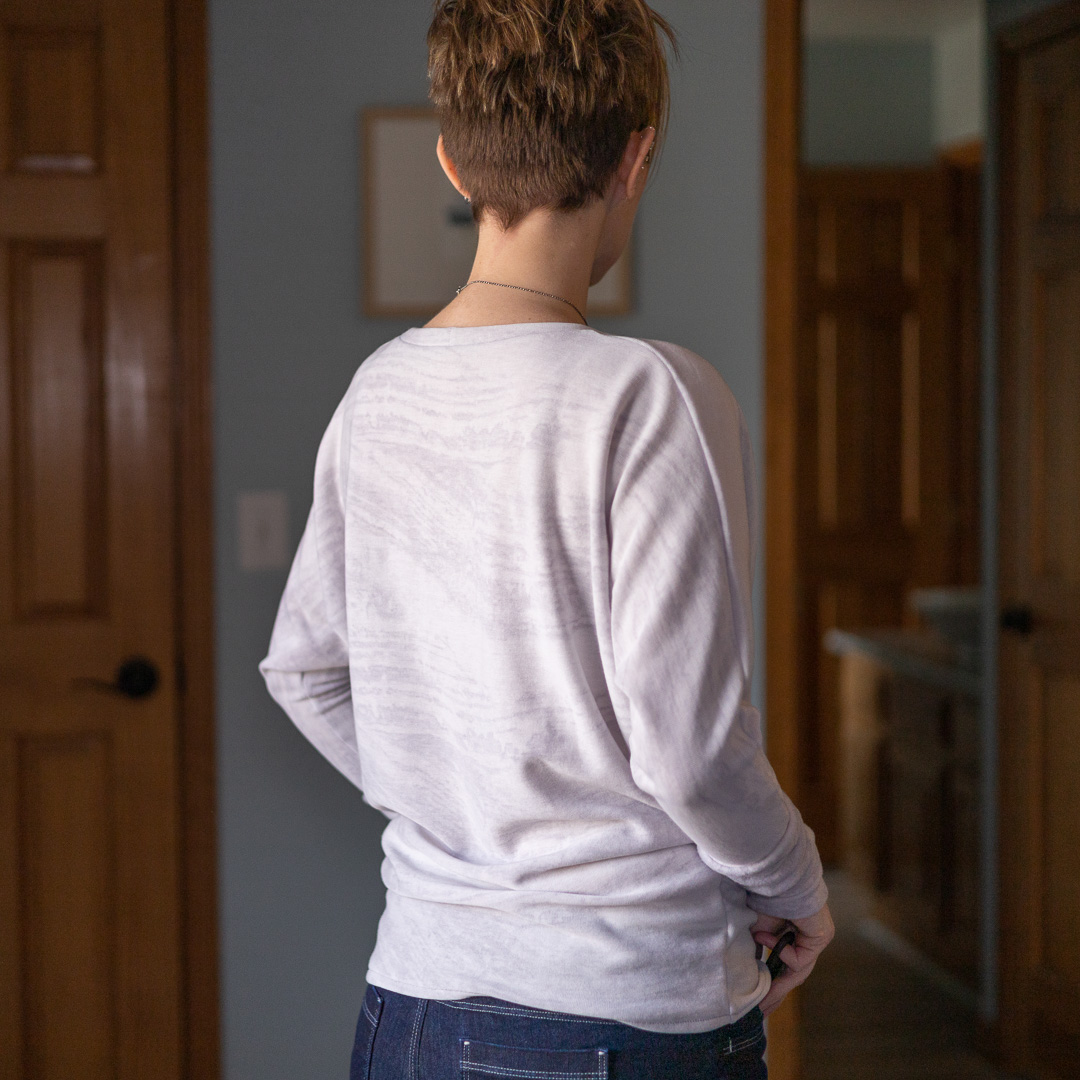
I love me a good dolman sleeve. I started to wonder: how difficult is it to convert a pattern to a dolman sleeve? Turns out, not difficult at all. Huzzah! Because I bought this sweater knit that immediately declared, “I want to be a dolman sleeve v-neck.”
What is a dolman sleeve?
It’s a type of sleeve that is essentially an extension of the shirt. Other types of sleeves are raglan, and set-in. A dolman sleeve is the easiest sleeve to construct.
About the Fabric
2 yards Silver Tie Dye alpaca sweater knit from Sly Fox Fabrics
- Content: 69% Polyester, 28% Rayon, 3% Spandex
- Weight: 190 grams per square meter (GSM)
- Stretch: 50% Horizontal / 5% Vertical
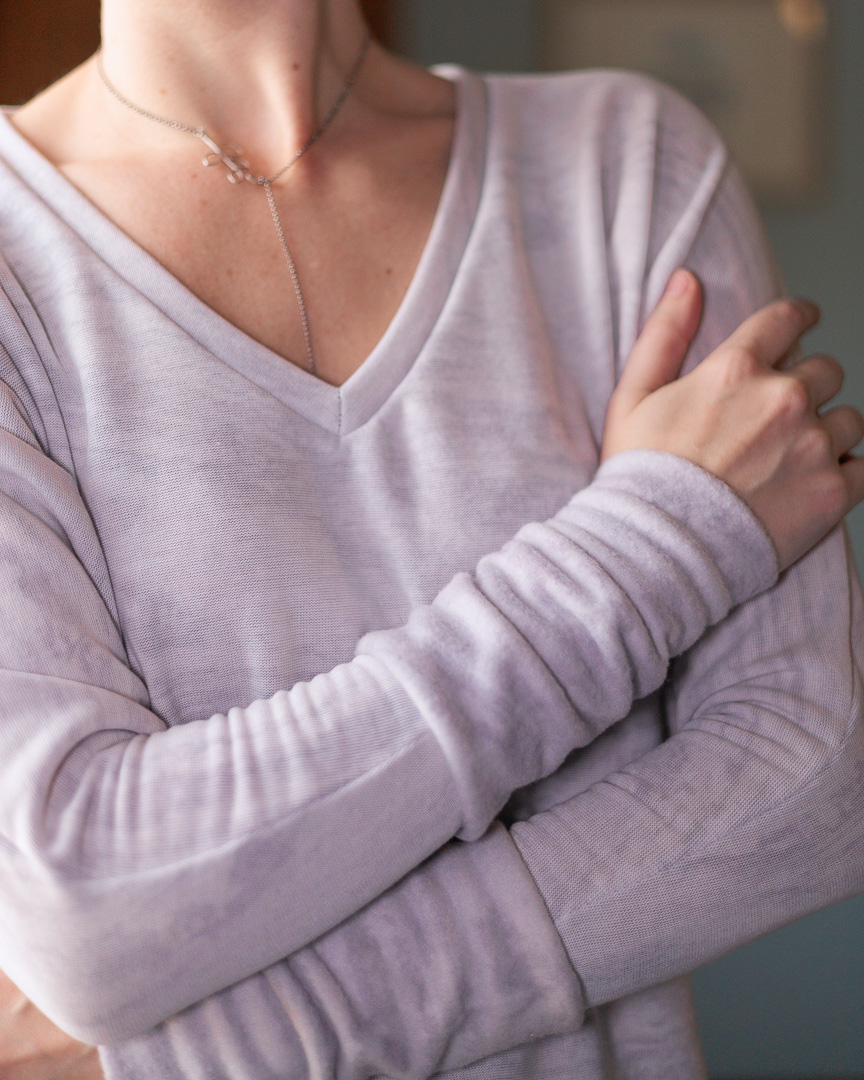
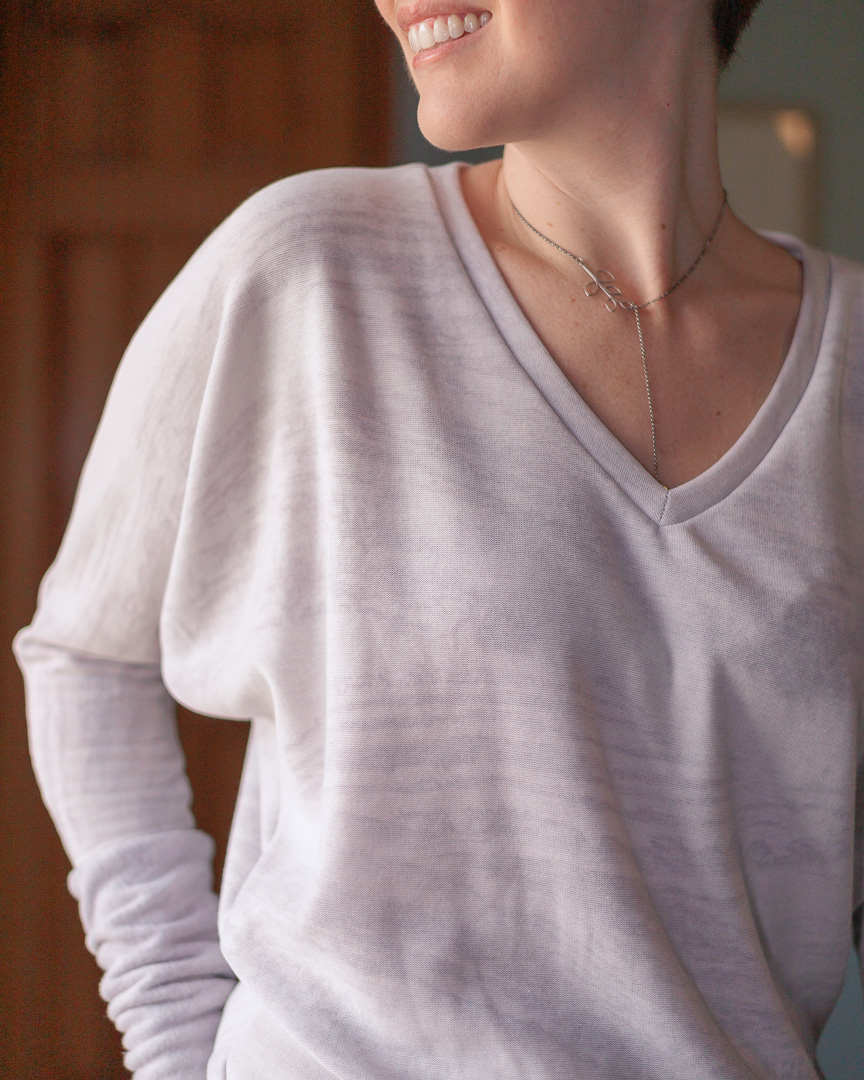
This fabric is so yummy. It’s pretty evident the face of the fabric is brushed, which is only a minor bummer because the back still looked good enough to me to use as the outside of the garment. I needed that soft, brushed side against my skin. This sweater knit has more substance to it than most—I’d call it a plushy quality, yet it’s still light with wonderful drape. Very well-behaved and easy to work with.
About This Make
GGV-neck, modified
- size 4 graded to 10 at waist
- mashed with 40K Sway sleeves/cuffs
- narrowed neckline
- lengthened bodice +1″
This pattern is turning into my favorite thing to hack for everyday wear.
How to Convert to a Dolman Sleeve
- Lay your original bodice and sleeve pattern pieces together as show below. (I began with the front bodice, but you could use the back if you want.) Line up the sleeve cap mark with the shoulder of the bodice, and angle the sleeve so the front armscye meets the bottom of the armscye on your bodice. They may not line up exactly at this point, but that’s ok. (If using the back bodice, then angle the sleeve so the back armscye meets the bottom of the armscye on the bodice. It might not make much difference, but better to do this just in case.)
- Overlay some tracing paper. Mark the midpoint of the sleeve end and draw a straight line from the shoulder/neckline point to the bottom of the sleeve.
- Measure your desired amount up from the bottom of the sleeve and from the bodice hemline (I did 3″ for both of these.) Then draw a smooth curve connecting these two points. The further away from the original armscye, the more “batwing” effect you’ll get. For a more subtle dolman, draw the curve to rise closer to the armscye.
- Add a seam allowance to the new combined shoulder/sleeve line.
- For your remaining bodice piece, trace out the neckline, centerline, hemline, and sideline. Then trace over your newly drafted dolman sleeve so the front and back pieces have an identical sleeve.
- Original pattern pieces are show in black below. Redrawn dolman is shown in coral.
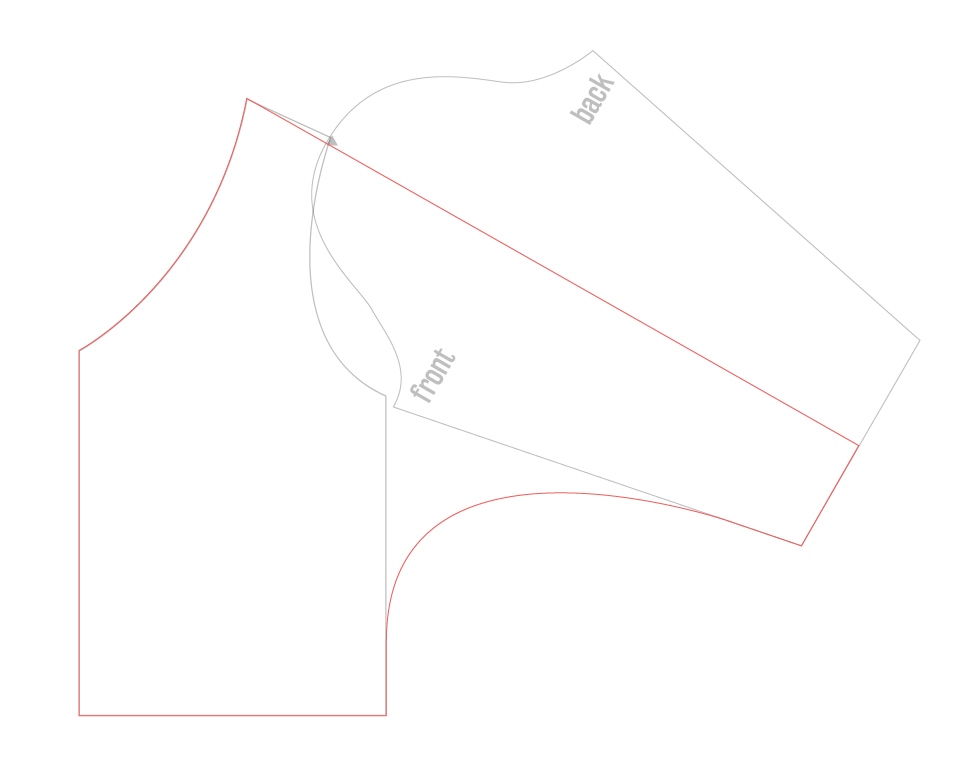
It’s that simple.


Project Settings
Sewing Machine vs. Serger
| Sewing Machine | Serger |
|---|---|
|
|
Sewing Machine Settings
| Presser Foot | Stitch# | Stitch Width | Stitch Length | Needle | Top Thread Tension | Application |
|---|---|---|---|---|---|---|
| standard zig-zag (A) | 5 | 1.0 | 4 | blue tip | 4 | seams |
| overedge (C) | 6 | 5.5 | 3.5 | blue tip | 4 | edge finish |
Serger Settings
| Stitch Name | superstretch |
|---|---|
| Needles | R, L |
| Finger | B |
| Threads | 3 |
| Tension Left Needle | 3 |
| Tension Right Needle | 3 |
| Tension Upper Looper | — |
| Tension Lower Looper | 0.5 |
| Cut Width | 6 |
| Stitch Length | 3 |
| Differential | 1.0 |
| Application | seams |
Thank you for sharing! Your explanation and machine settings are so helpful!