I love v-necks. Let’s face it, though: they’re more challenging to sew than crew or scoop necks. But fear not! I have a few v-neck sewing tips that might help you master this neckline.
The Annoying, Obligatory Prelude
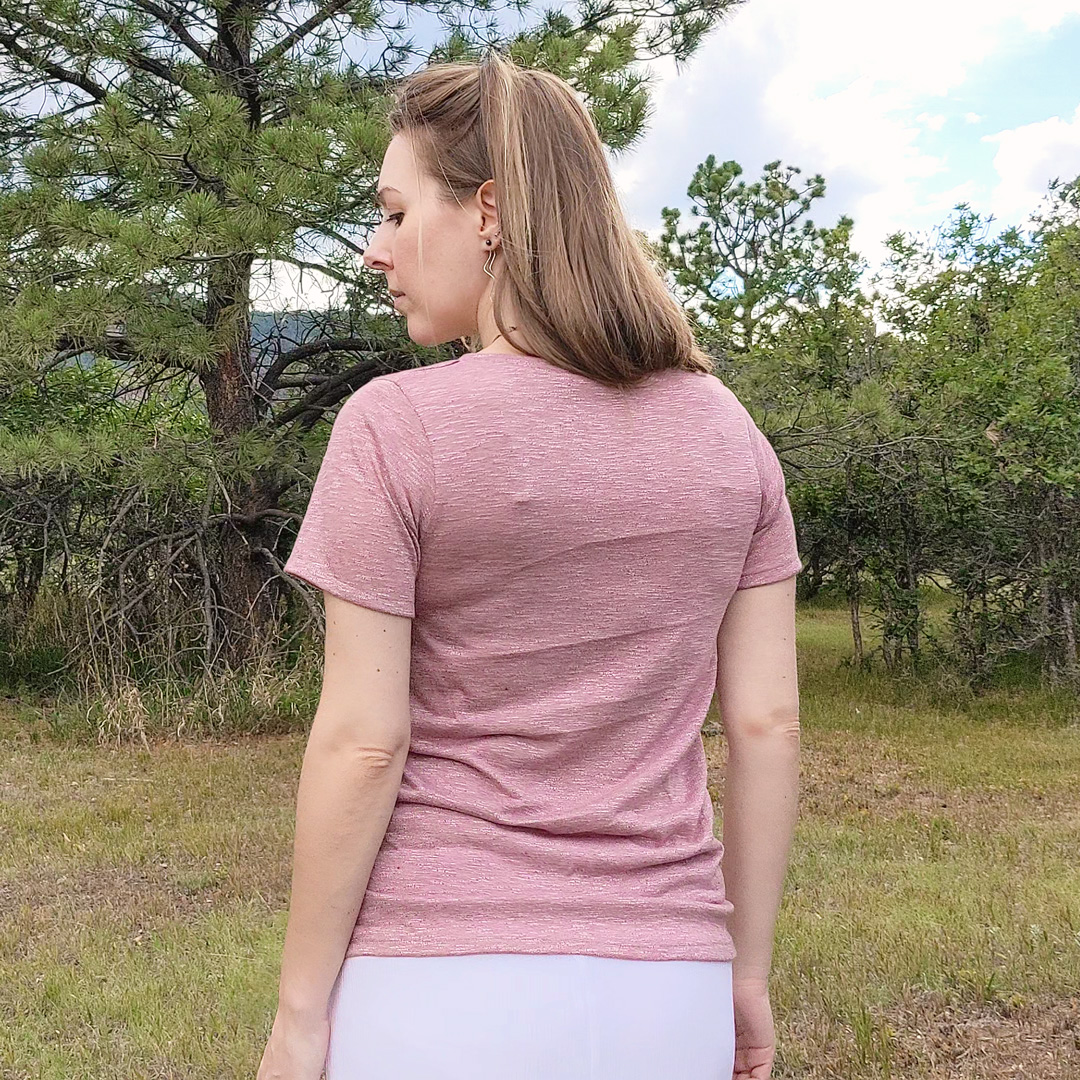
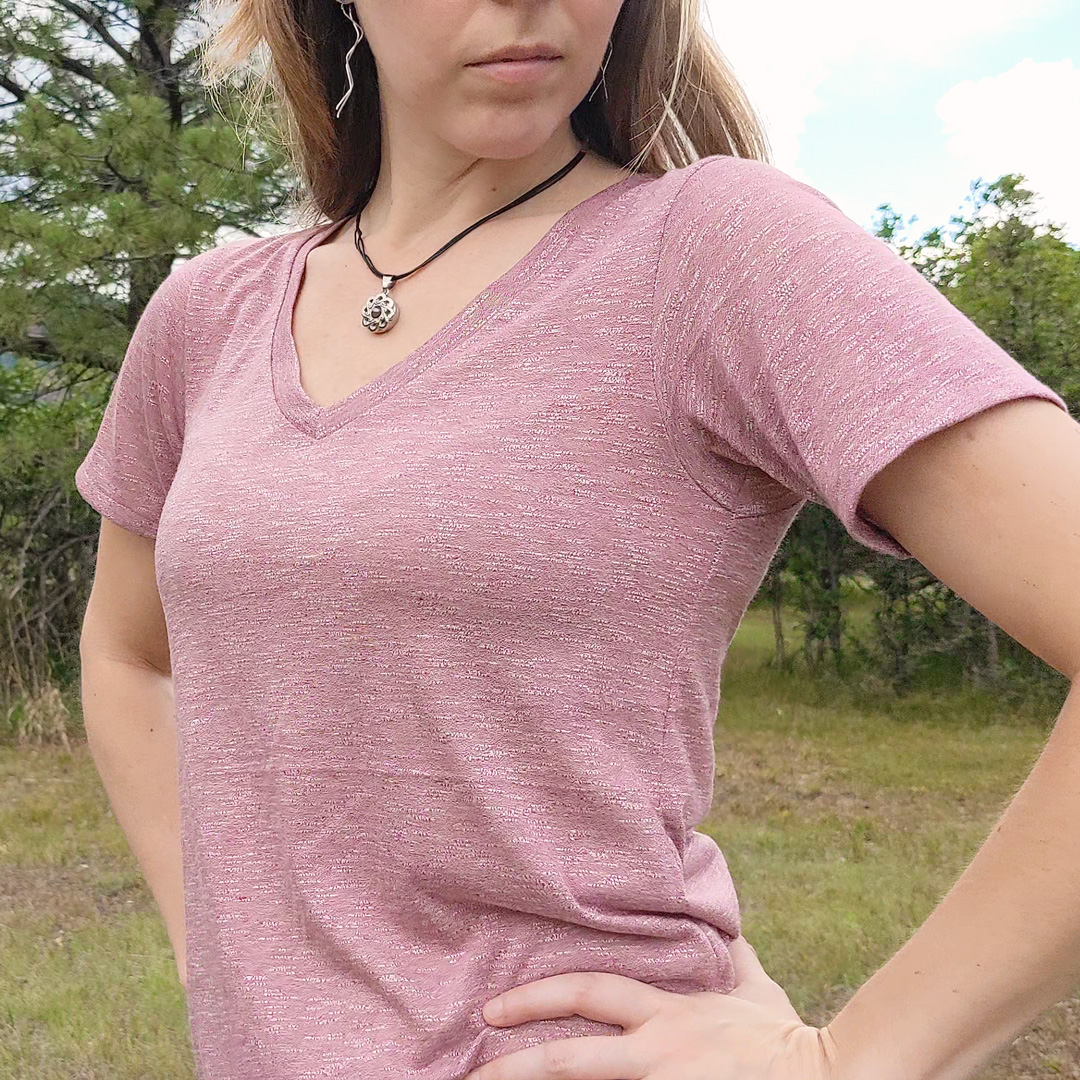
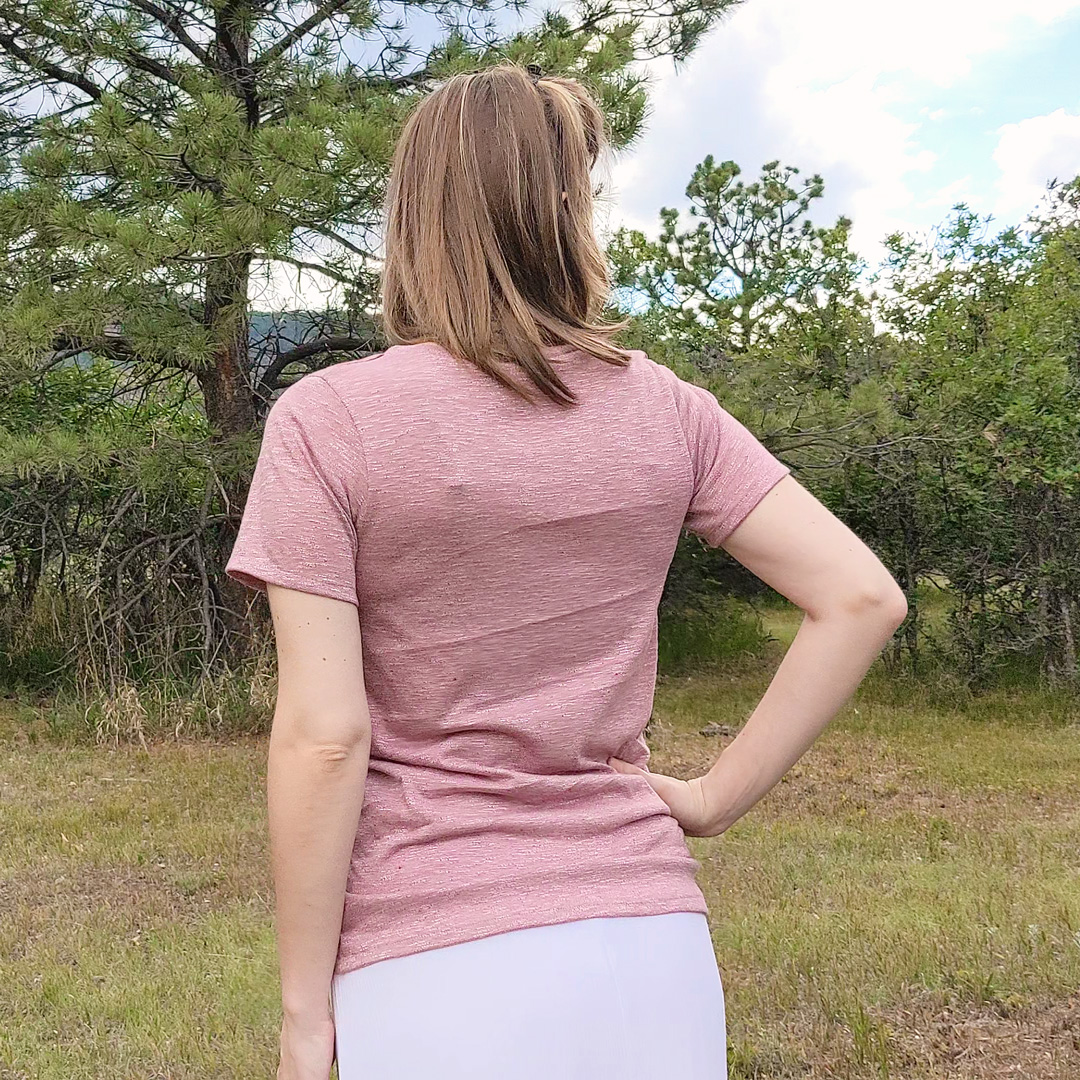
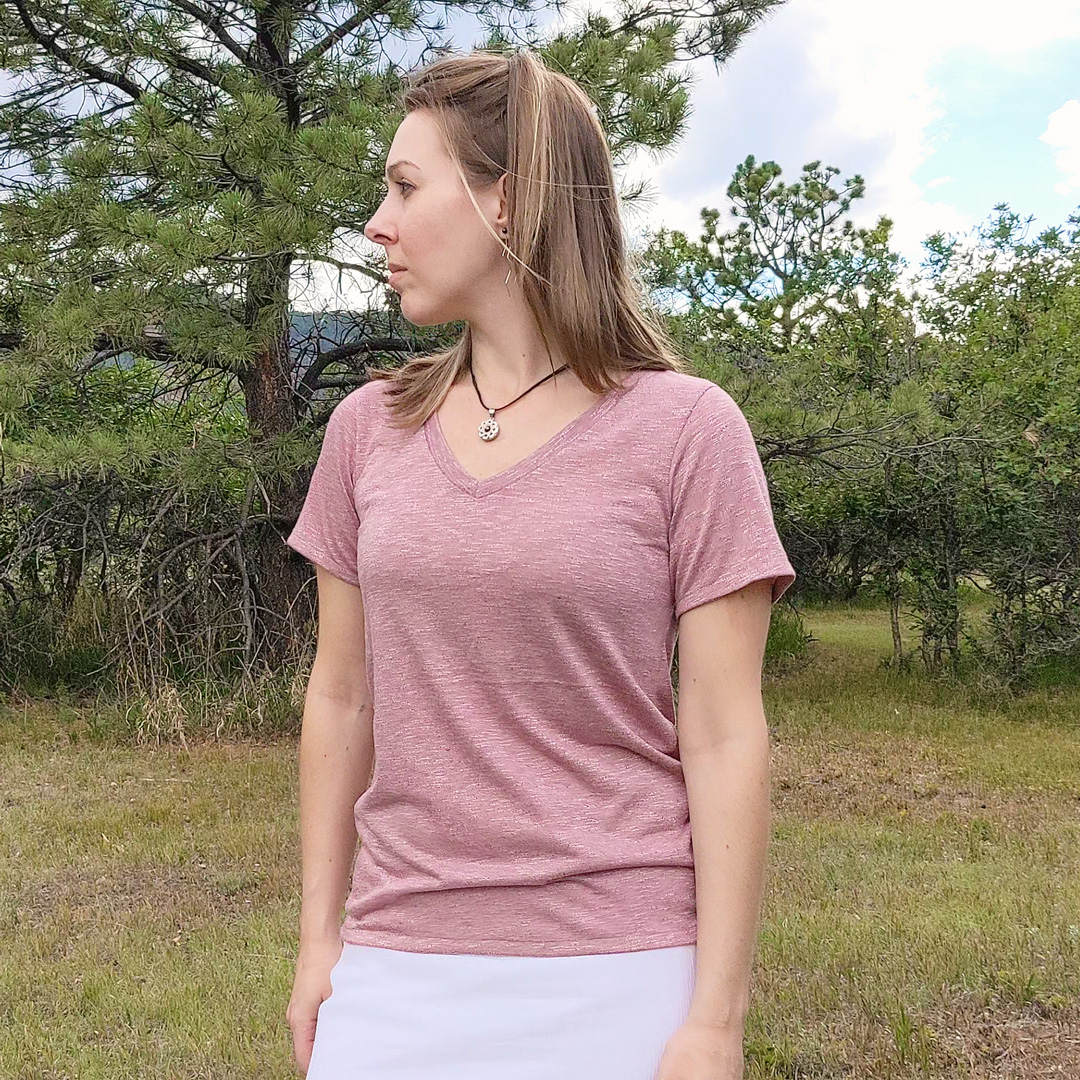
I’m destined to hang out in a field for a few days in Tennessee this summer, which means heat and humidity are almost definitely in my future. But I won’t be able to wear what I might usually wear in that situation—spaghetti straps, halter tops, backless, sleeveless, and so forth. No, I have to be work appropriate, and so I dusted off my George + Ginger V-Neck pattern and introduced it to some Copenhagen Melange Twist Jersey from Surge Fabric Shop.

About the Fabric
1 yard Copenhagen Melange Twist Jersey
- Fabric Content: 50%Poly/50%Rayon
- Weight: 140gsm
- Stretch: 100% horizontal/ 20% vertical
This lightweight fabric boasts a cool hand, beautiful drape and a 2 color thread twist that creates a unique texture and added interest! Suitable for tops, cardigans and so much more! —Surge Fabric Shop
I ordered 1 yard each in three colors: tapestry red, pewter, and mustard seed—though I should have thought that one through more; it’s not a great color for my complexion. I was trying to coordinate with the three colors of shirts my work company is selling at festivals this summer so I could at least attempt to be cohesive with my team, and one of the colors is a beige color (or “strange flesh”, as my teammates have dubbed it.) So yeah, I officially have my own strange flesh shirt.
It’s a really beautiful fabric. The thread twist creates a bit of a shimmer in the light. It’s lightweight, a little sheer, and very comfortable to wear.
It was not my favorite fabric to work with, though. Cut edges roll and shed a little bit, and I hate working with fabrics that roll.
About the Pattern
I already landed the fit of this top when I made my long-sleeved v-neck out of some lovely, drapey sweater knit. I wear that top a lot as it’s one of my favorites, but I’ve decided the neck is just a tad too large. I don’t need to be advertising my bra straps, so I made some adjustments.
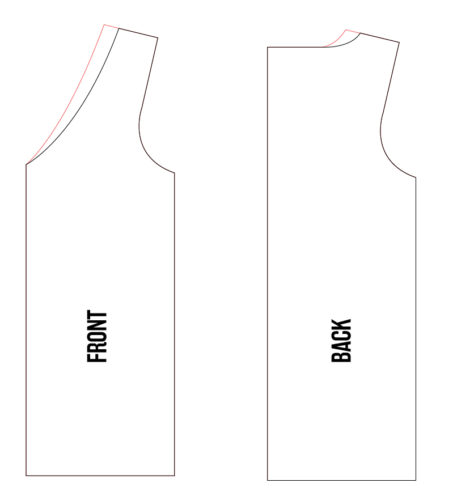
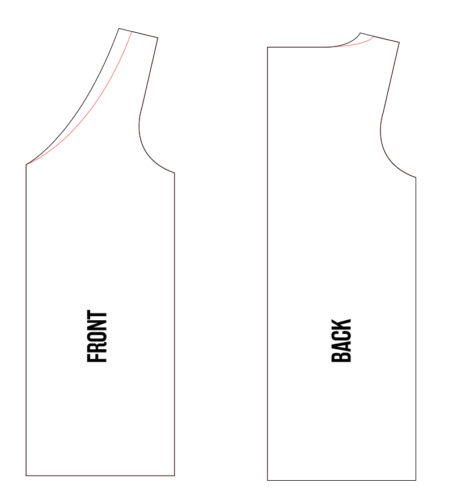
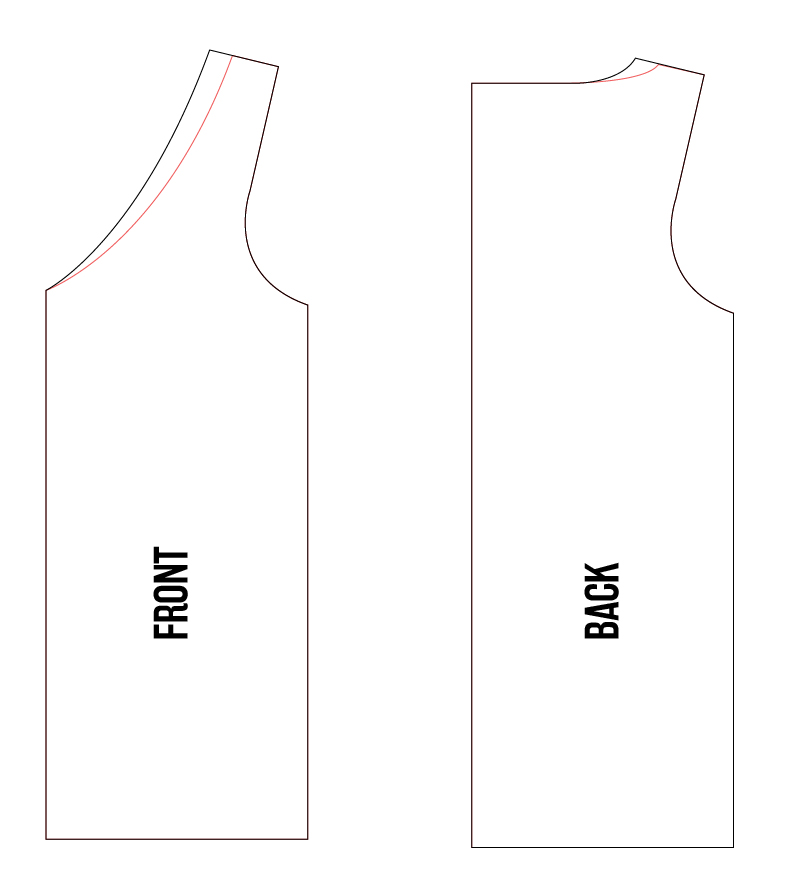
Adjusting the Neckline of a V-neck Sewing Pattern
Not much pops up when you google this—at least, not much that pertains to editing a pattern. So I wung it. (Yeah, wung. Past tense of wing.) To save any random peeps from the wunging, here’s how to edit a sewing pattern to narrow (or widen) a v-neck.
NARROWING
- Determine how much you want to bring the v-neck in. For me, I wanted to narrow it by about 1.5″ at the shoulders.
- Trace over your original pattern and extend the shoulder seams into the neckline by the amount of your choice. You will do this on both the front and back pattern piece.
- True the line of the vneck from the new end of your shoulder seam down to the original point of the vneck. A French Curve comes in handy here. (For the back, just make sure the neckline maintains a 90-degree angle with the vertical center.)
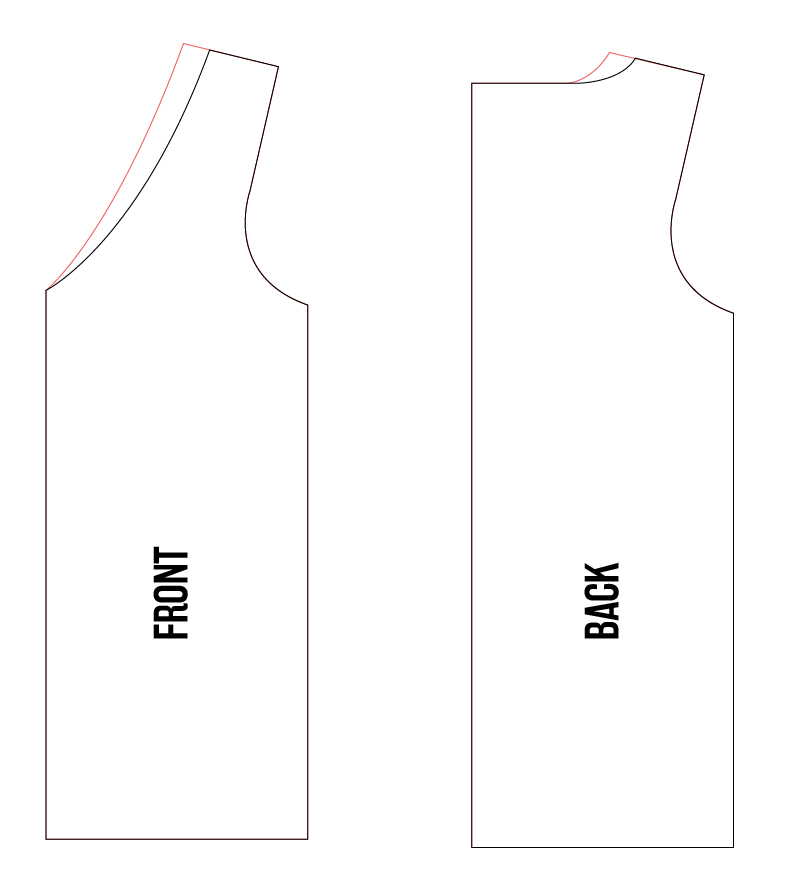
WIDENING
- Determine how much you want to widen the v-neck.
- Trace over your original pattern and shorten the shoulder seams toward the armscye by the amount of your choice. You will do this on both the front and back pattern piece.
- True the line of the vneck from the new end of your shoulder seam down to the original point of the vneck. A French Curve comes in handy here. (For the back, just make sure the neckline maintains a 90-degree angle with the vertical center.)
NECKBAND ADJUSTMENT
By changing the shape of the neckline, we ended up changing the length, which affects the neckband. Here’s what I did to figure out the new length of the neckband:
- I measured the original length of the neckline using my tailor’s tape (30.25″) and the original length of the neckband (28.25″). That gave me a difference of 2″.
- I measured the new length of the neckline I drew (26″), and then subtracted the difference from step 1 to find out what the new length of my neckband should be. (26″–2″=24″)
- That’s it. Easy.
About the Makes
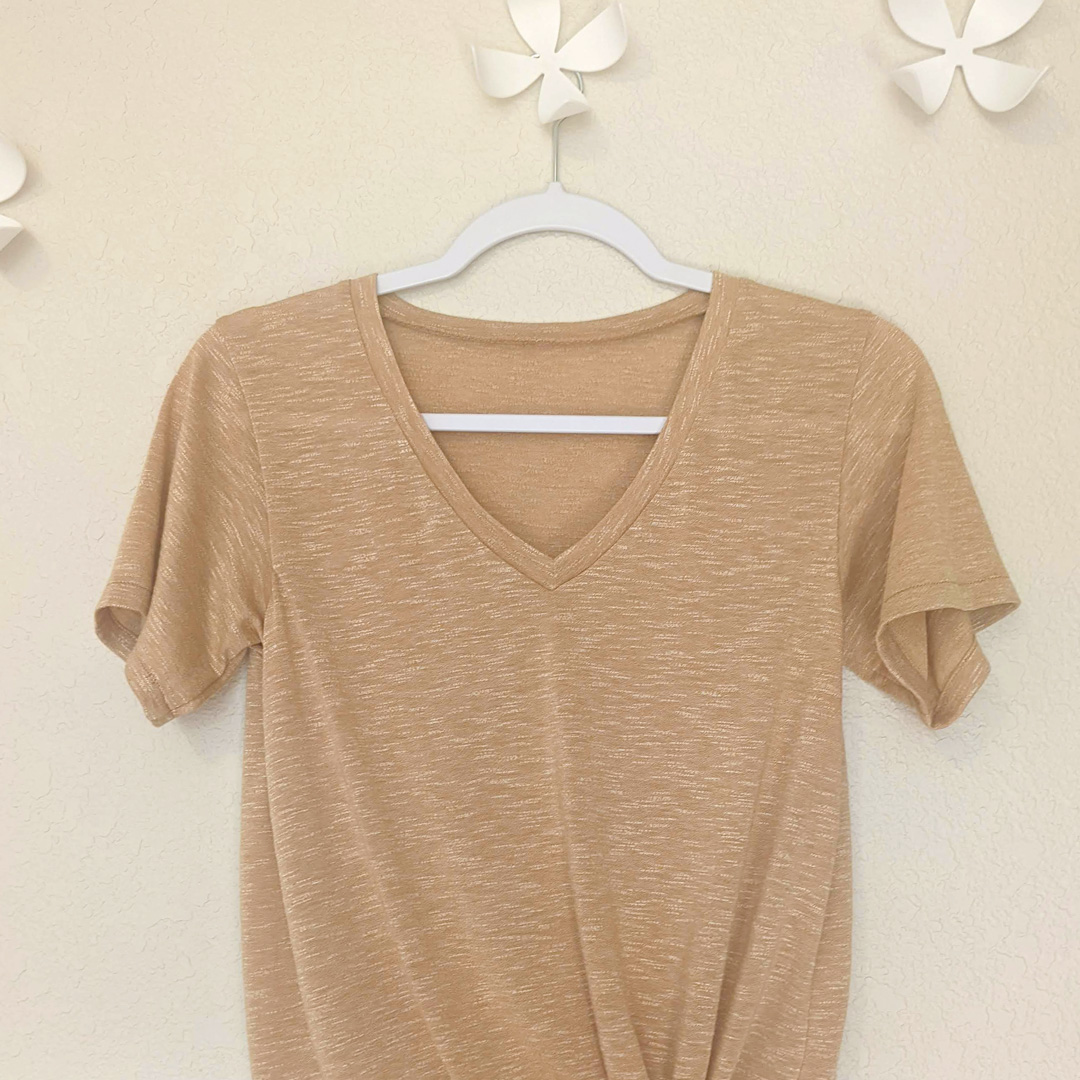
Version 1: Mustard Seed
- Size 4 graded to 10 at waist
- Short sleeve (using G+G pattern piece and NOT the 40K Sway sleeves from my previous v-neck)
- +1″ to bodice
- Narrowed neck by 1.5″
The neckline was narrowed just a little more than I wanted, so…
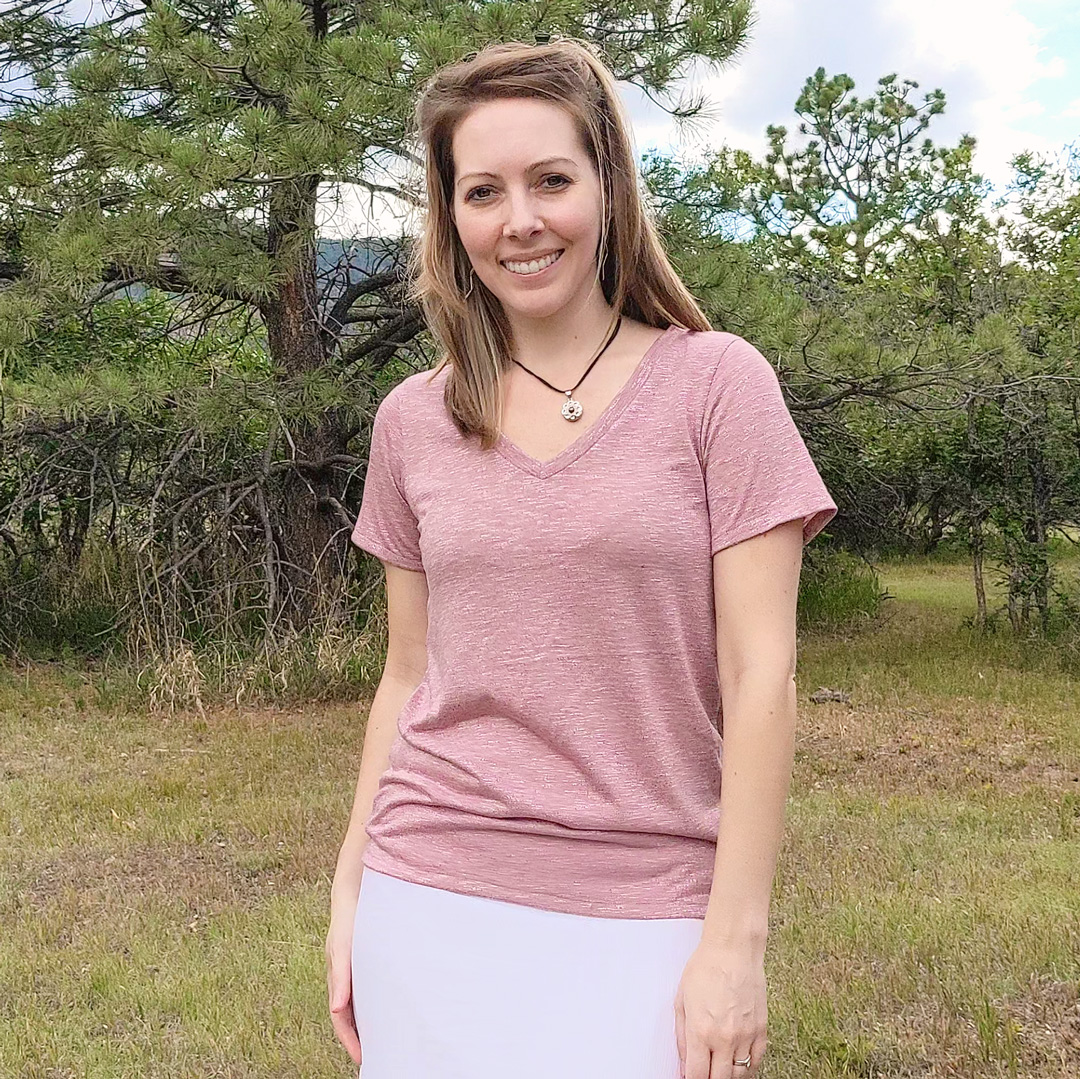
Version 2: Tapestry Red
- Same options as Mustard Seed, except…
- Widened neck by 0.5″ for a total narrowed adjustment of 1″
Tips for Sewing a Flawless V-Neck
- Practice! If you’ve never sewn a v-neck before, make a messy test version to practice on using cheap fabric you don’t care about. It will help you understand what’s going on spatially in ways illustrations and photos won’t.
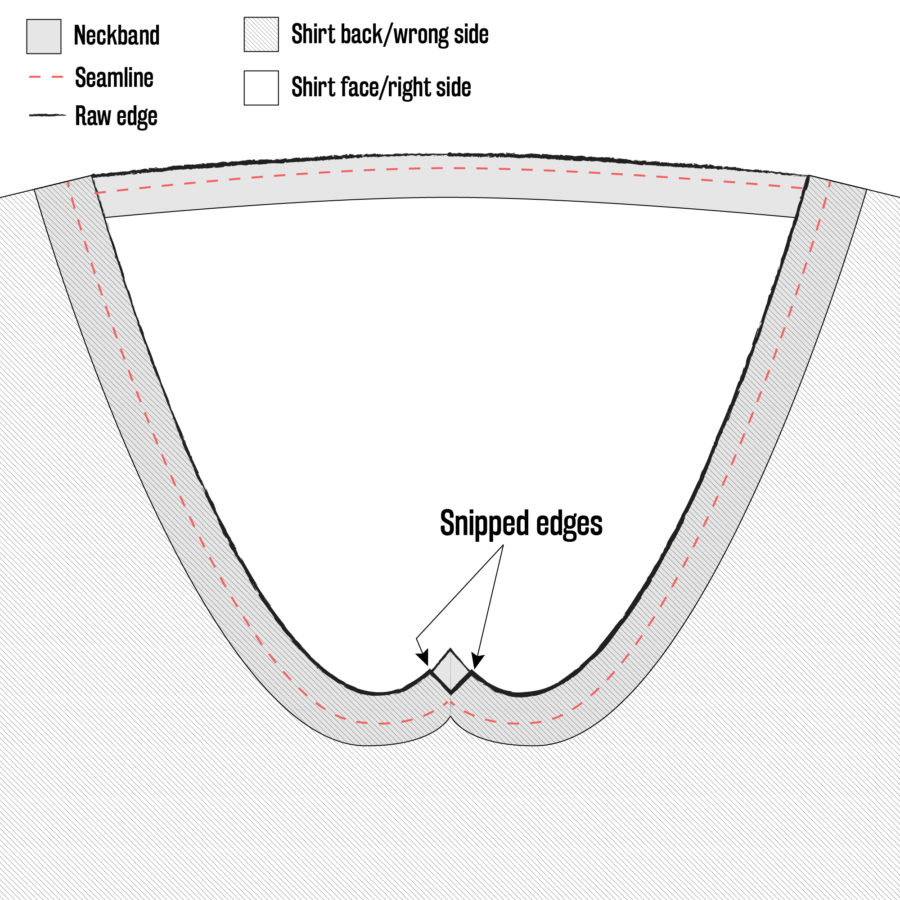
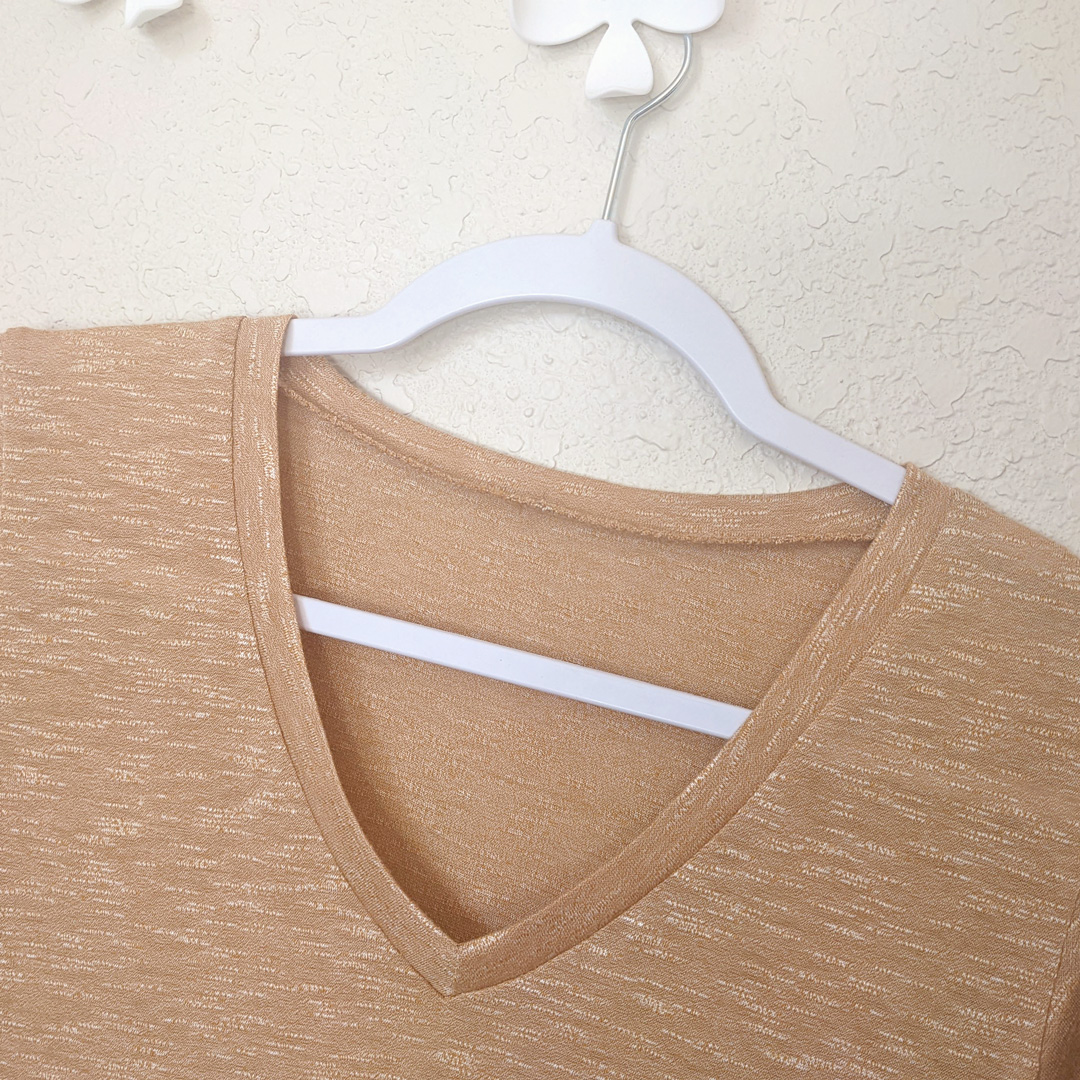
- Sew the neckband to the shirt with the shirt inside out (band should be attached to the right side of the fabric.) This makes it easier to pivot at the front v-point to make sure the shirt catches in the seam around the snip mentioned next.
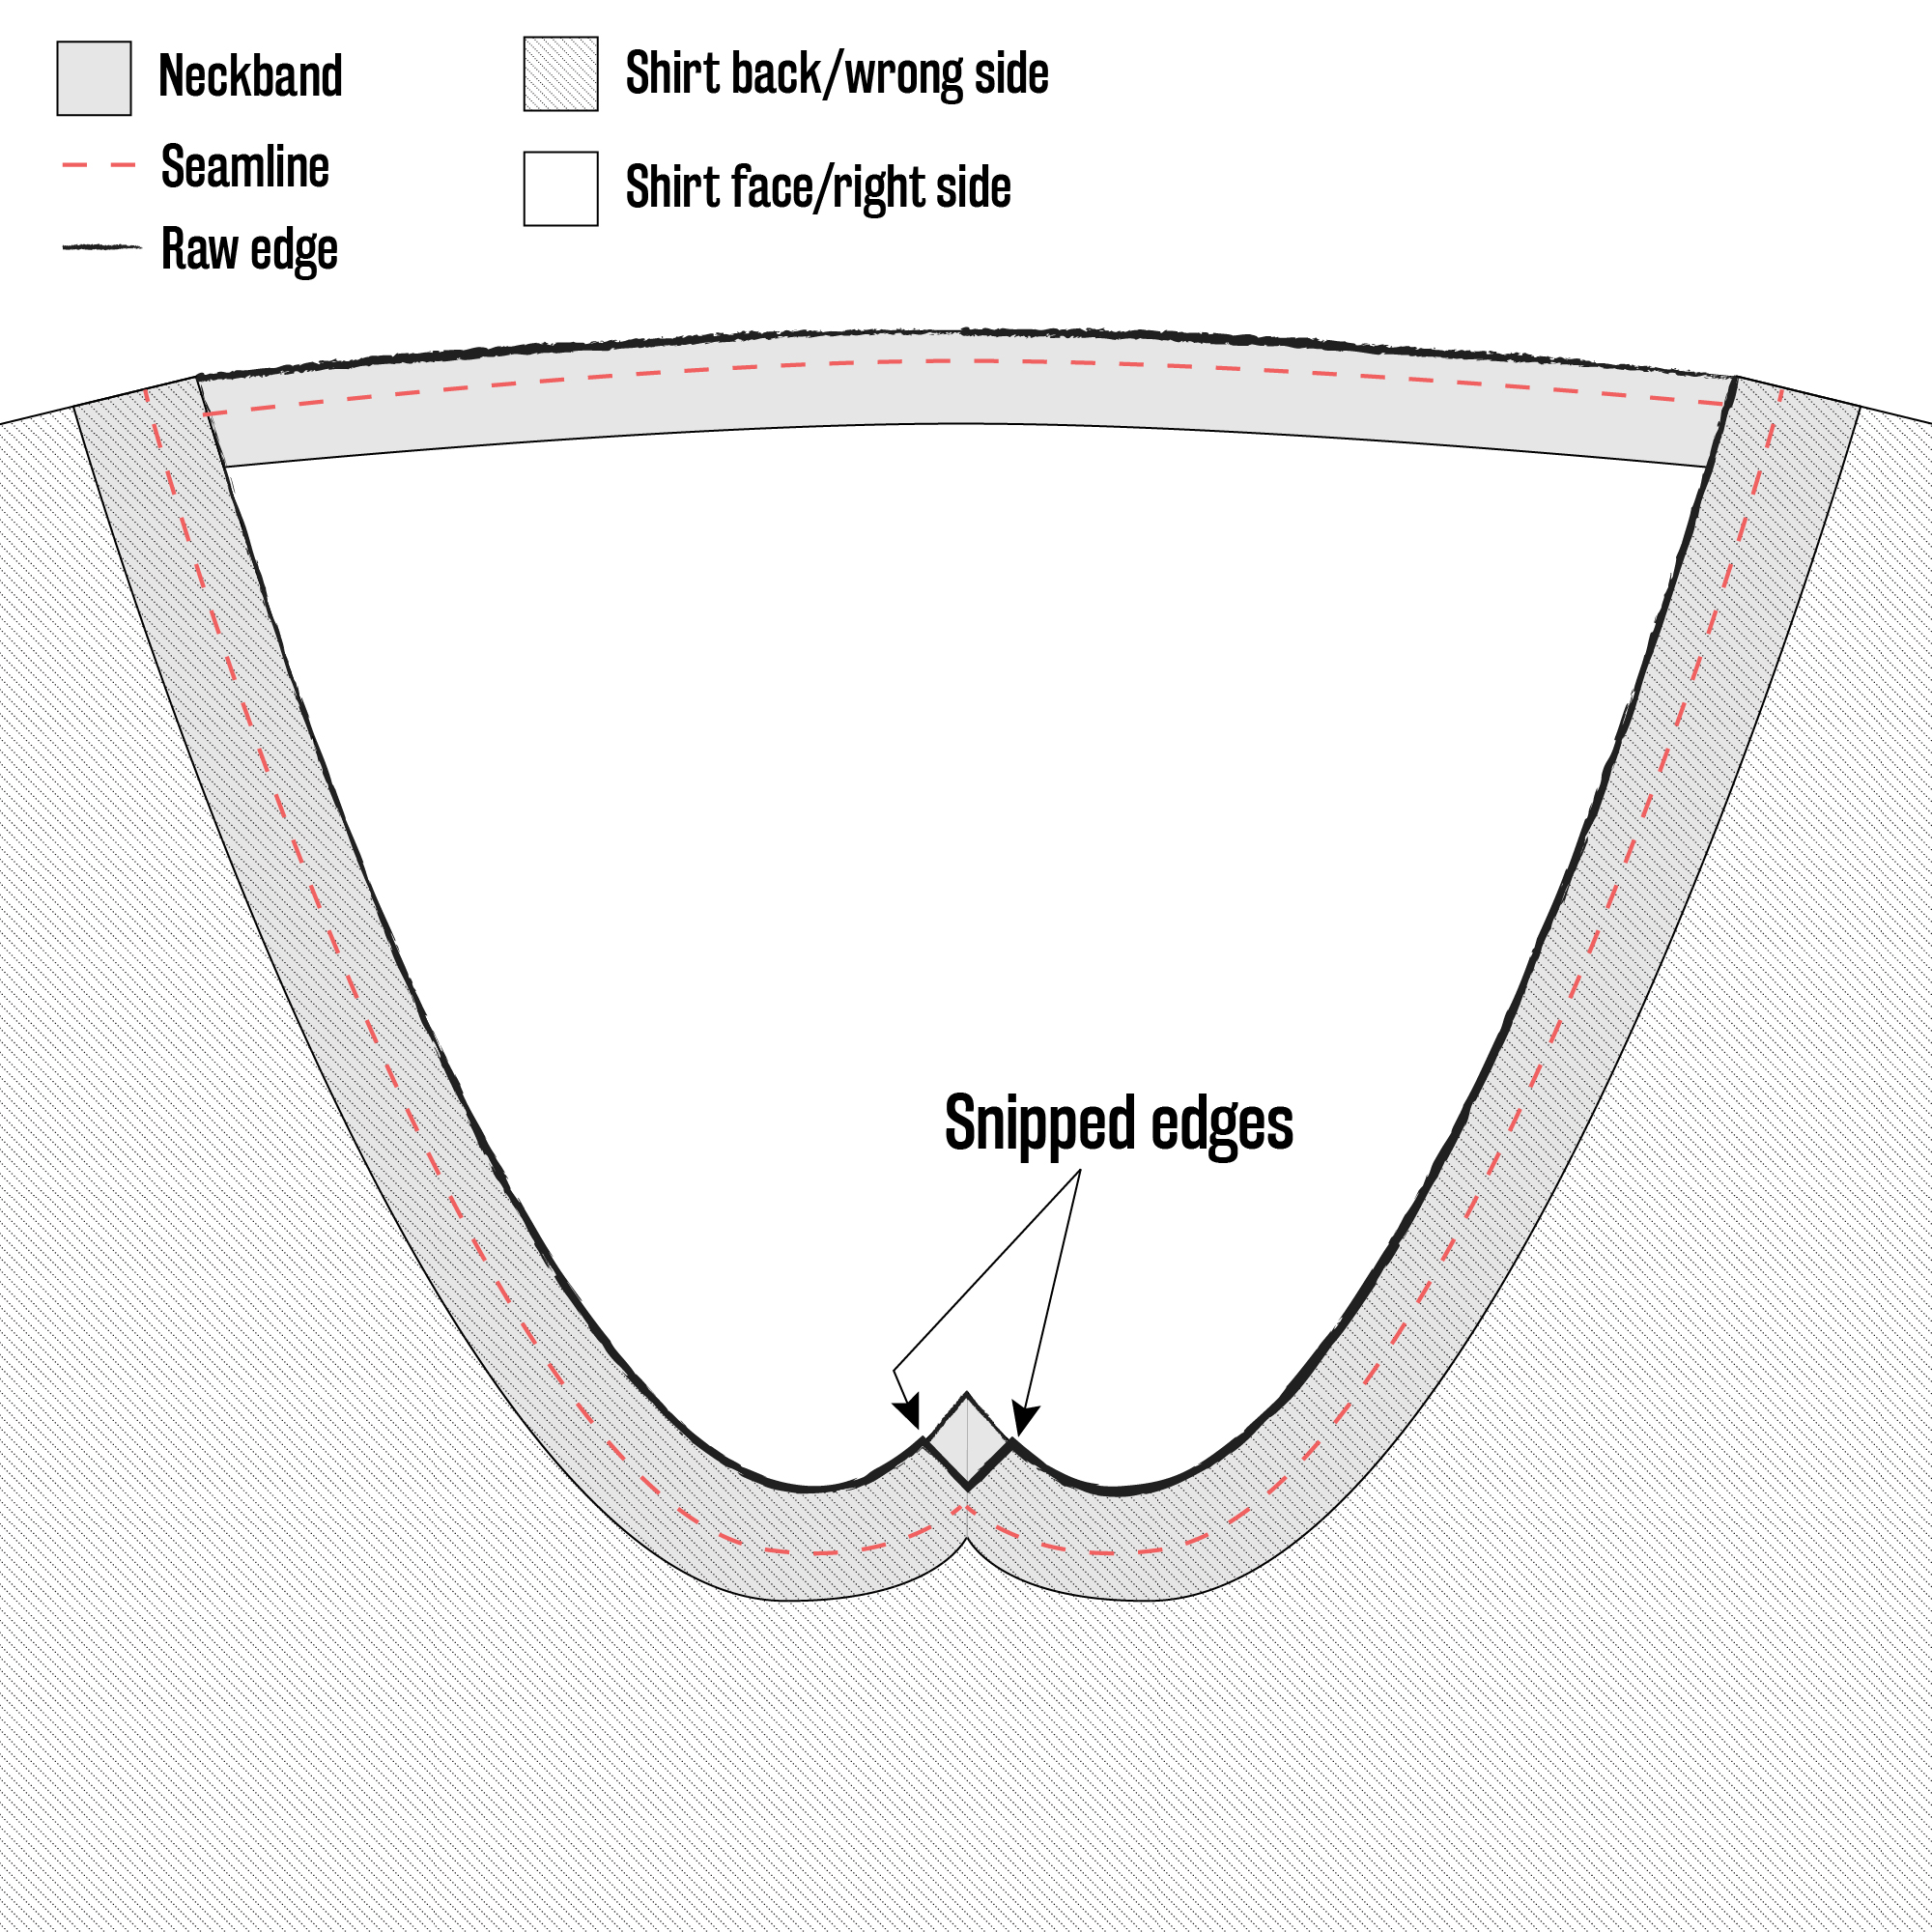
- Make a 1/8″ snip in the shirt at the point of the v-neck to help with pivoting. I illustrated how to orient the snipped edges in relation to the neckband. I’m fully aware this is difficult to wrap you’re head around, especially because the V looks upside-down here. But this is how it looks when viewed inside out with the neckband turned inward to lay against the face/front of the shirt. Note that I’ve made the shirt in the illustration below “transparent” in order to view the neckband underneath.
- Take your time. There are some dangers that are just inherent to the v-neck: puckering, and not catching the shirt in the seam around the V. It happens to the best of us; I’ve been there, too. There is no substitute for slowing down and taking the time to adjust your fabric as much as you need to get it right. Yes, it’s annoying when you just want to finish the shirt or you want to make a bunch of them and it sucks up so much more time than a crew or scoop neck. But it’s worth it, and you will get better at it!
- Don’t give up. This is true with everything when it comes to sewing. Don’t throw in the towel on this neckline if it doesn’t turn out well at first. Keep experimenting, try different fabrics (some fabrics behave better than others), and don’t be married to a single technique—including what I described above. If you find some other way that works better for you, embrace it!
Project Settings
Sewing Machine vs. Serger
| Sewing Machine | Serger |
|---|---|
|
|
Sewing Machine Settings
| Presser Foot | Stitch# | Stitch Width | Stitch Length | Needle | Top Thread Tension | Application |
|---|---|---|---|---|---|---|
| standard zig-zag (A) | 5 | 1.0 | 4 | blue tip | 4 | hems |
| overedge (C) | 6 | 5.5 | 3.5 | blue tip | 4 | neckband finish |
| applique (F) | 5 | 1.0 | 4 | blue tip | 4 | neckband attach |
Serger Settings
| Stitch Name | superstretch |
|---|---|
| Needles | R, L |
| Finger | A |
| Threads | 3 |
| Tension Left Needle | 2 |
| Tension Right Needle | 2 |
| Tension Upper Looper | — |
| Tension Lower Looper | 1.5 |
| Cut Width | 6 |
| Stitch Length | 2.5 |
| Differential | 1.0 |
| Application | seams |
Leave a Reply