I love it when a test comes together.
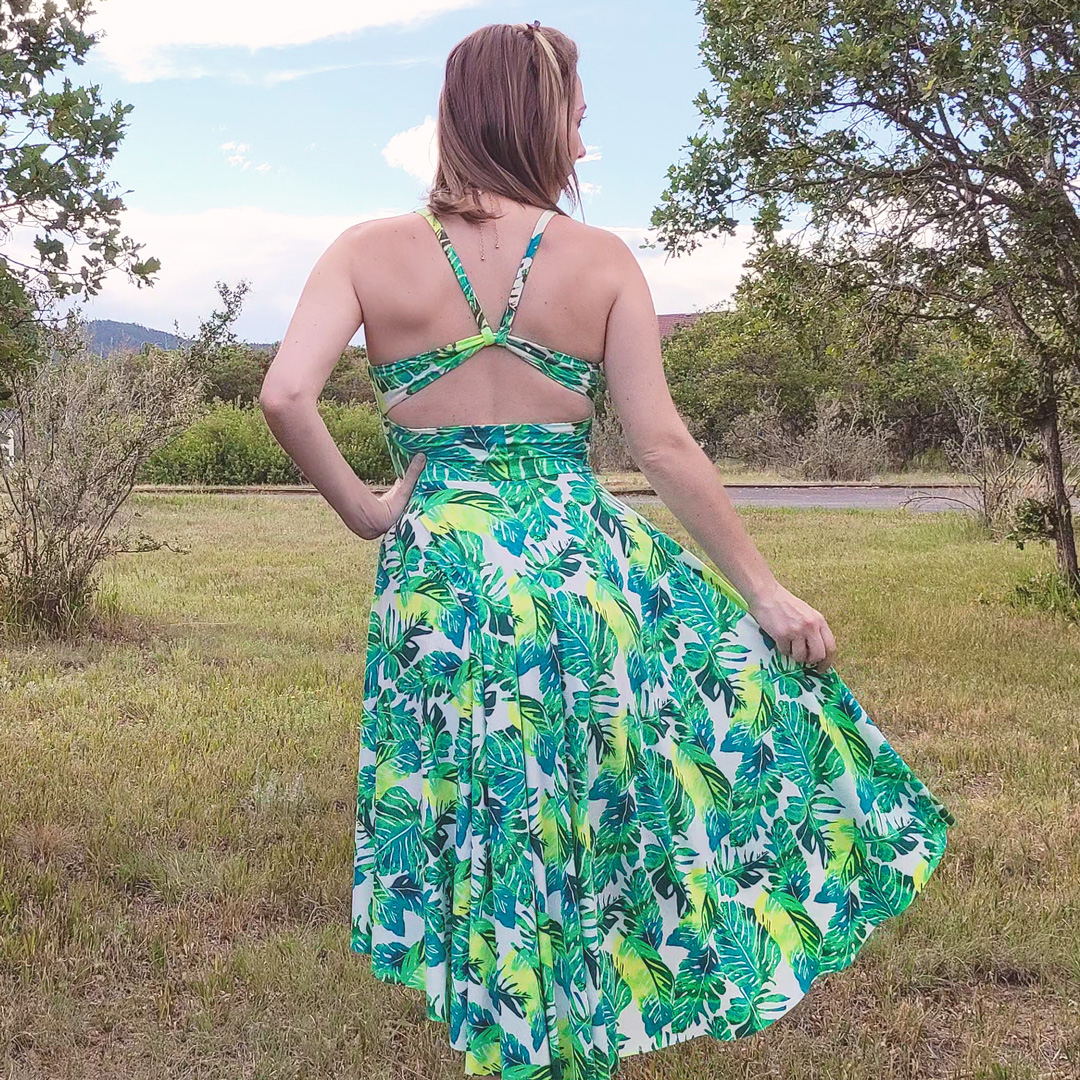
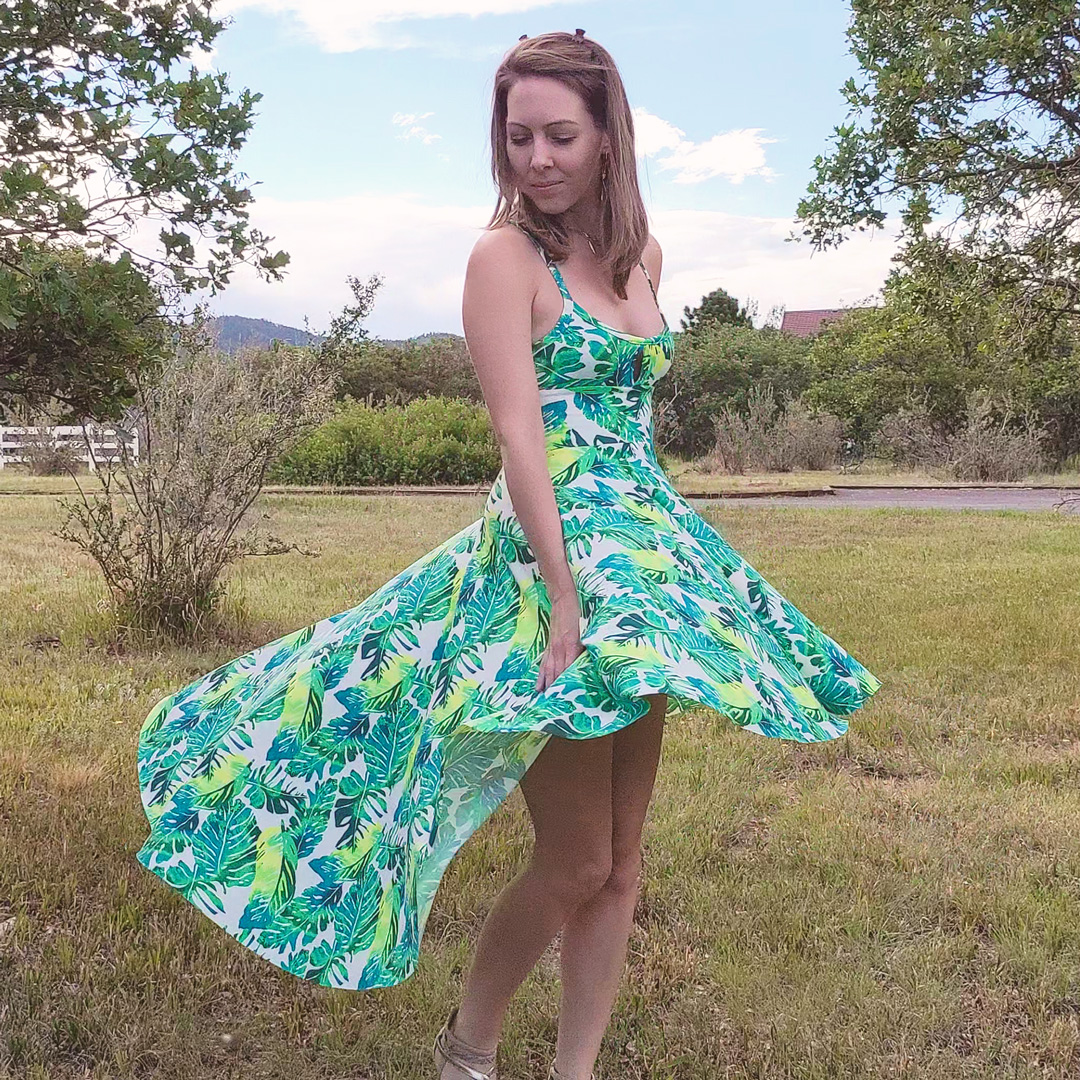
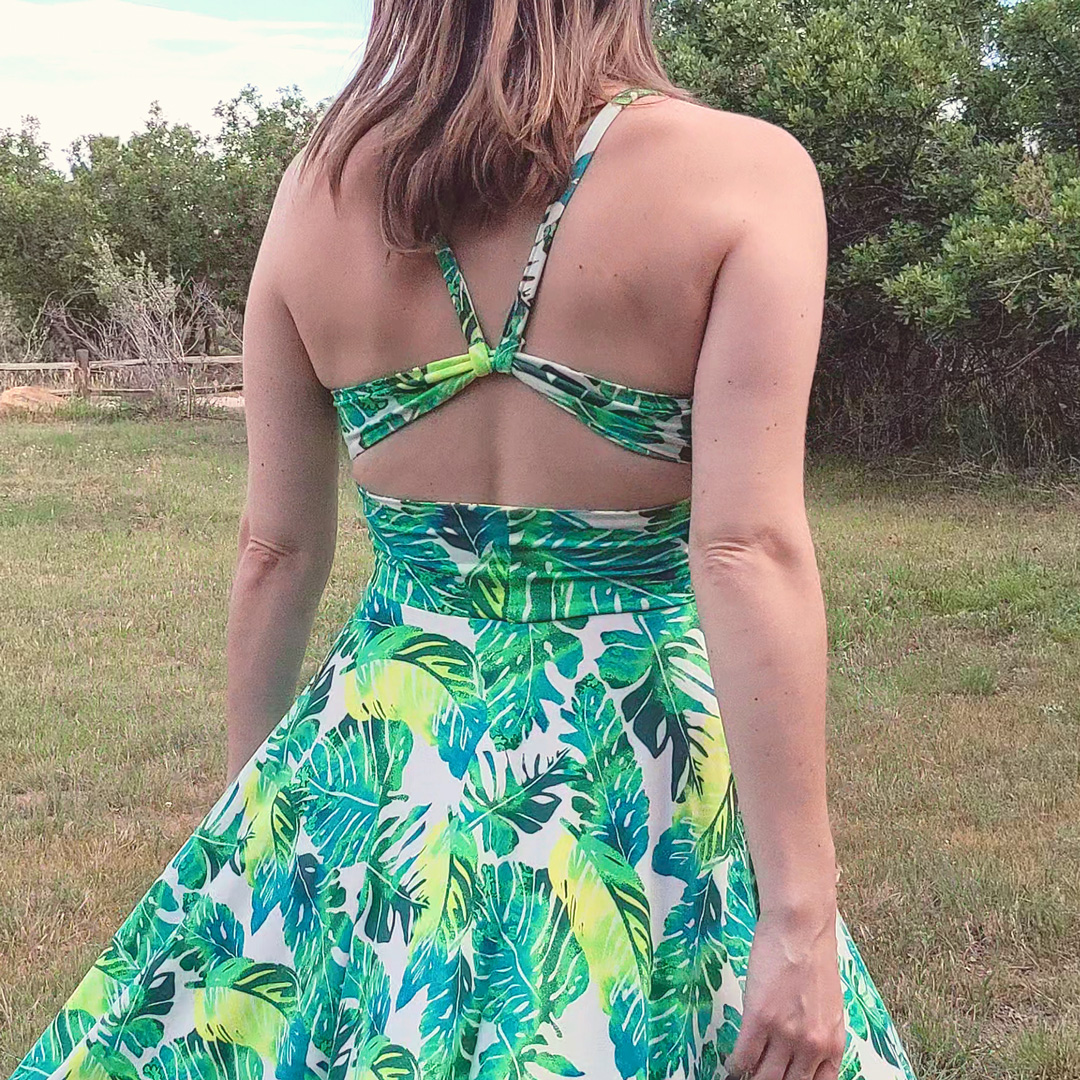
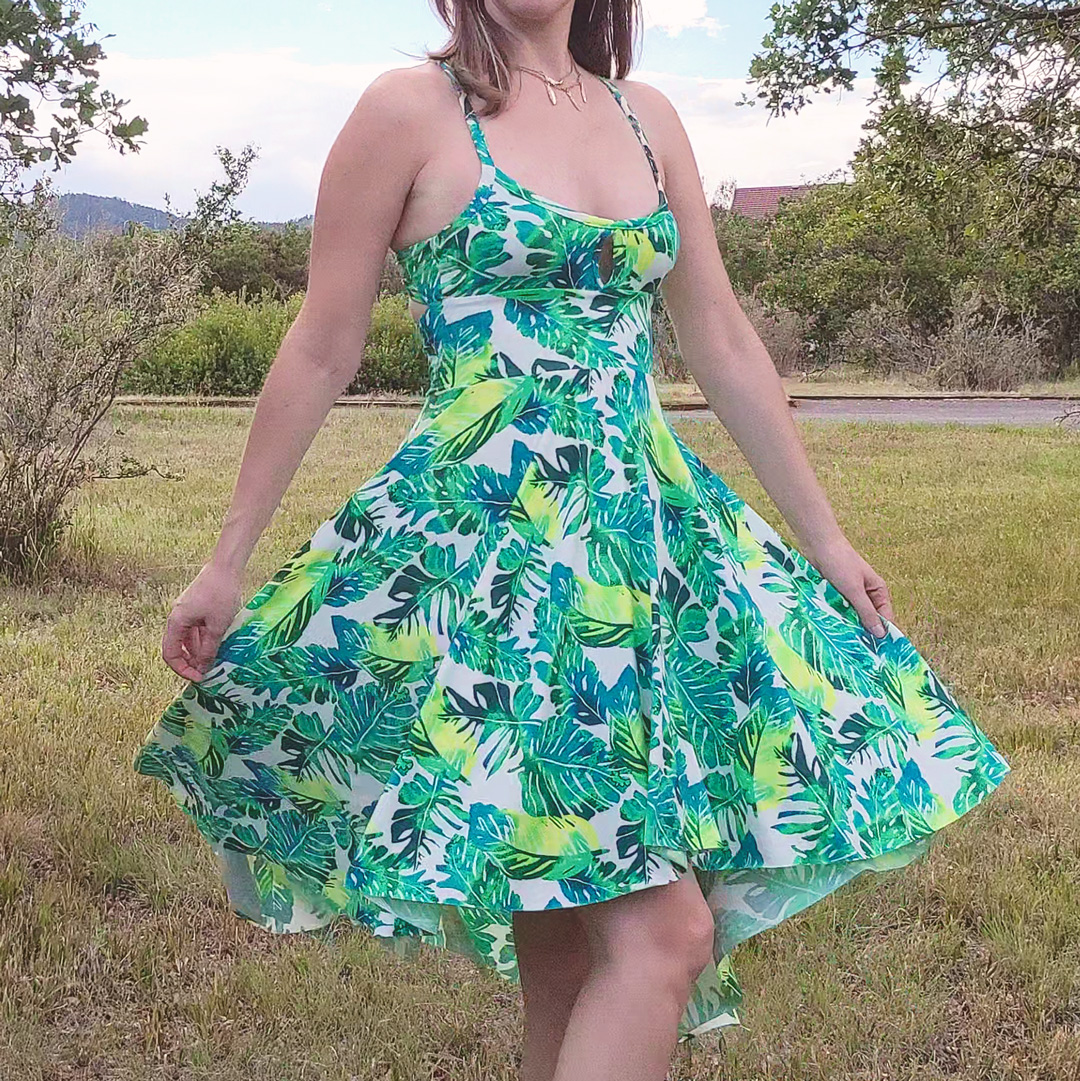
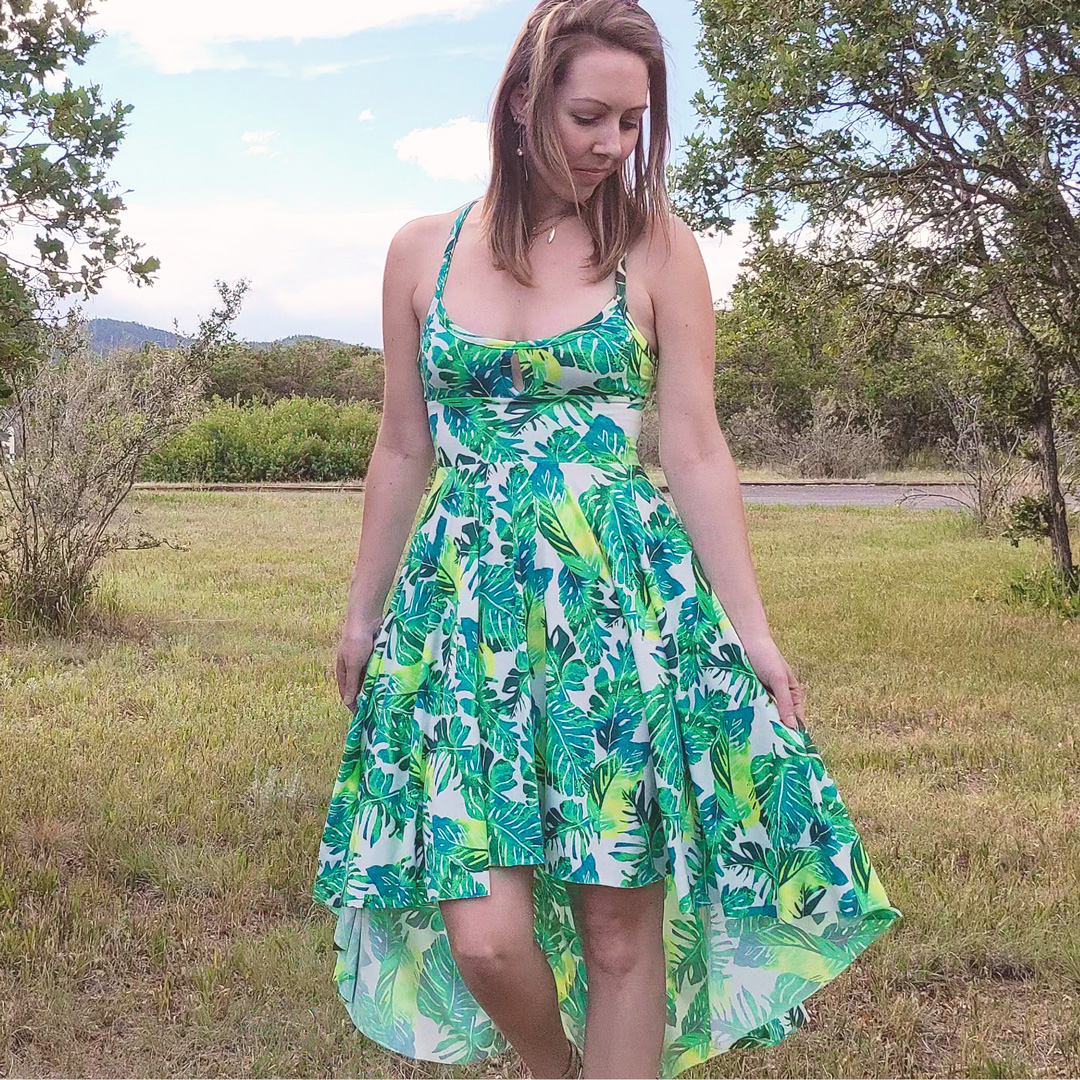
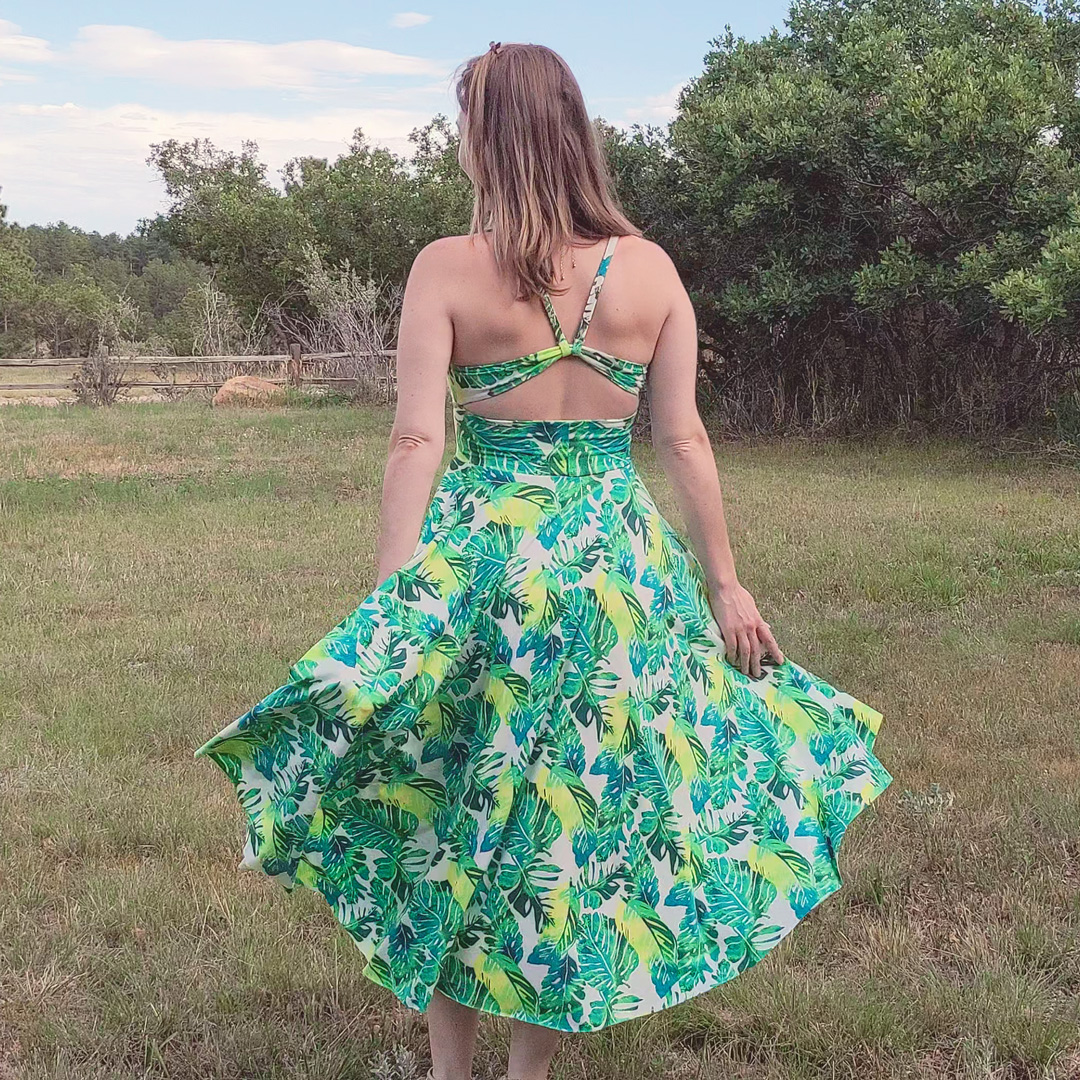
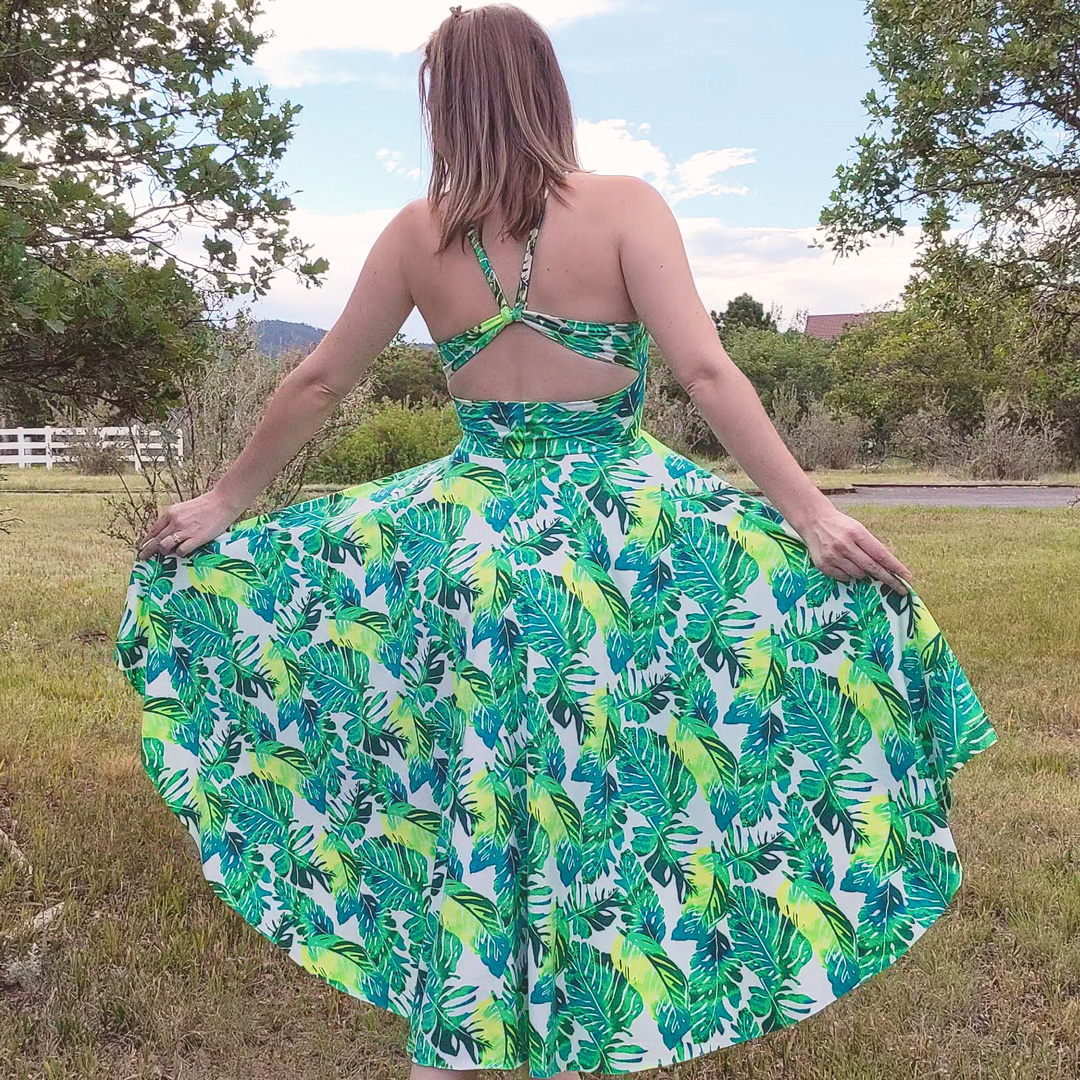
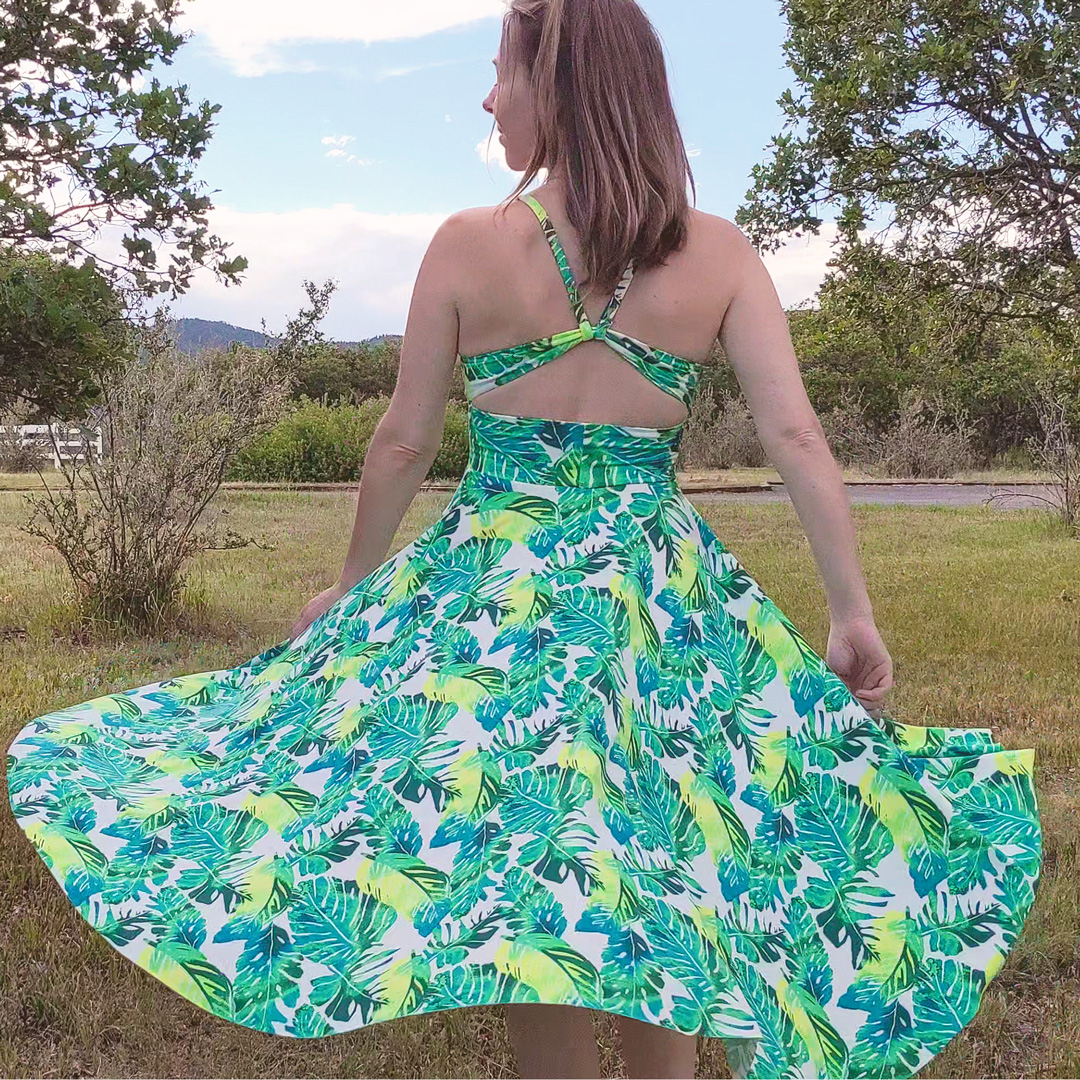
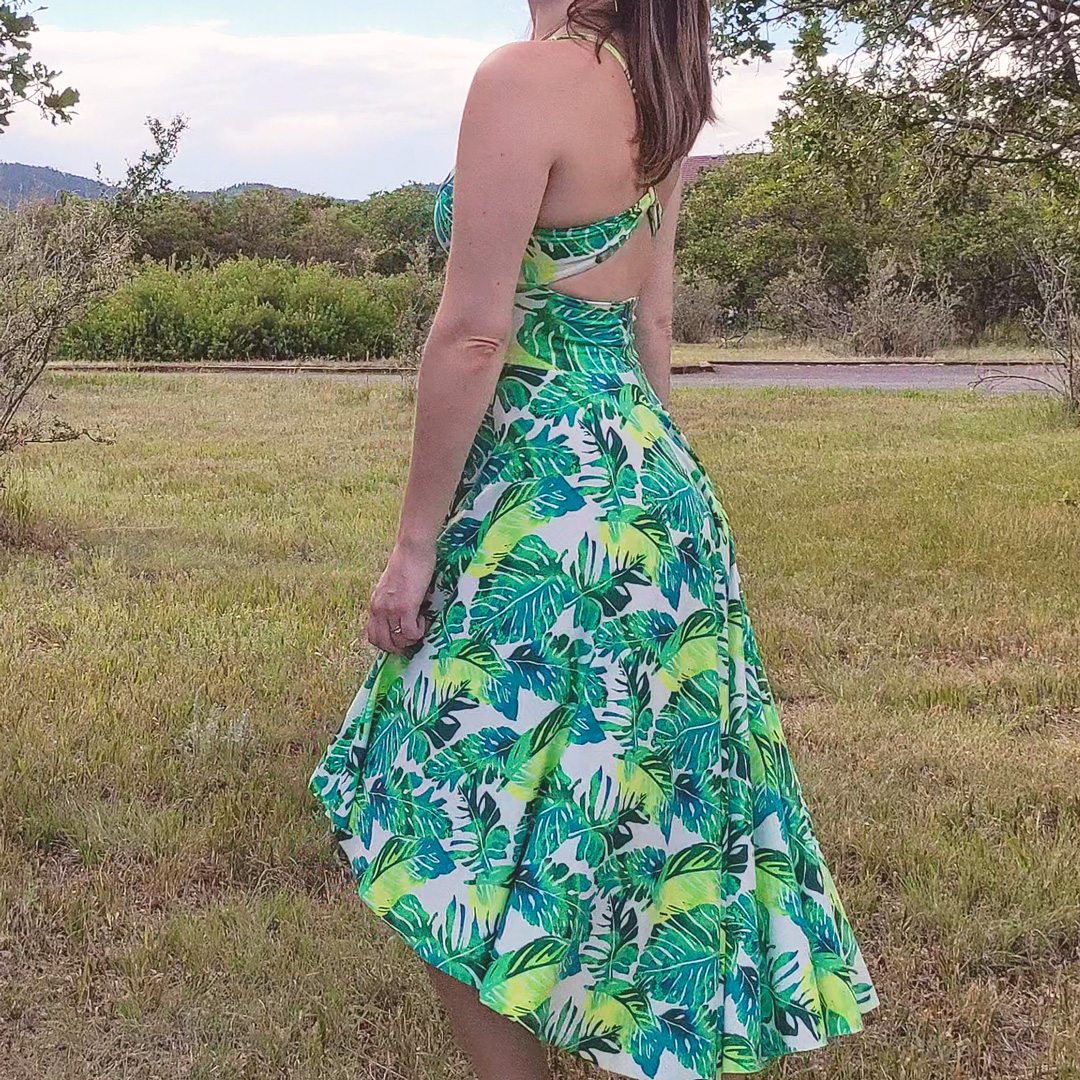
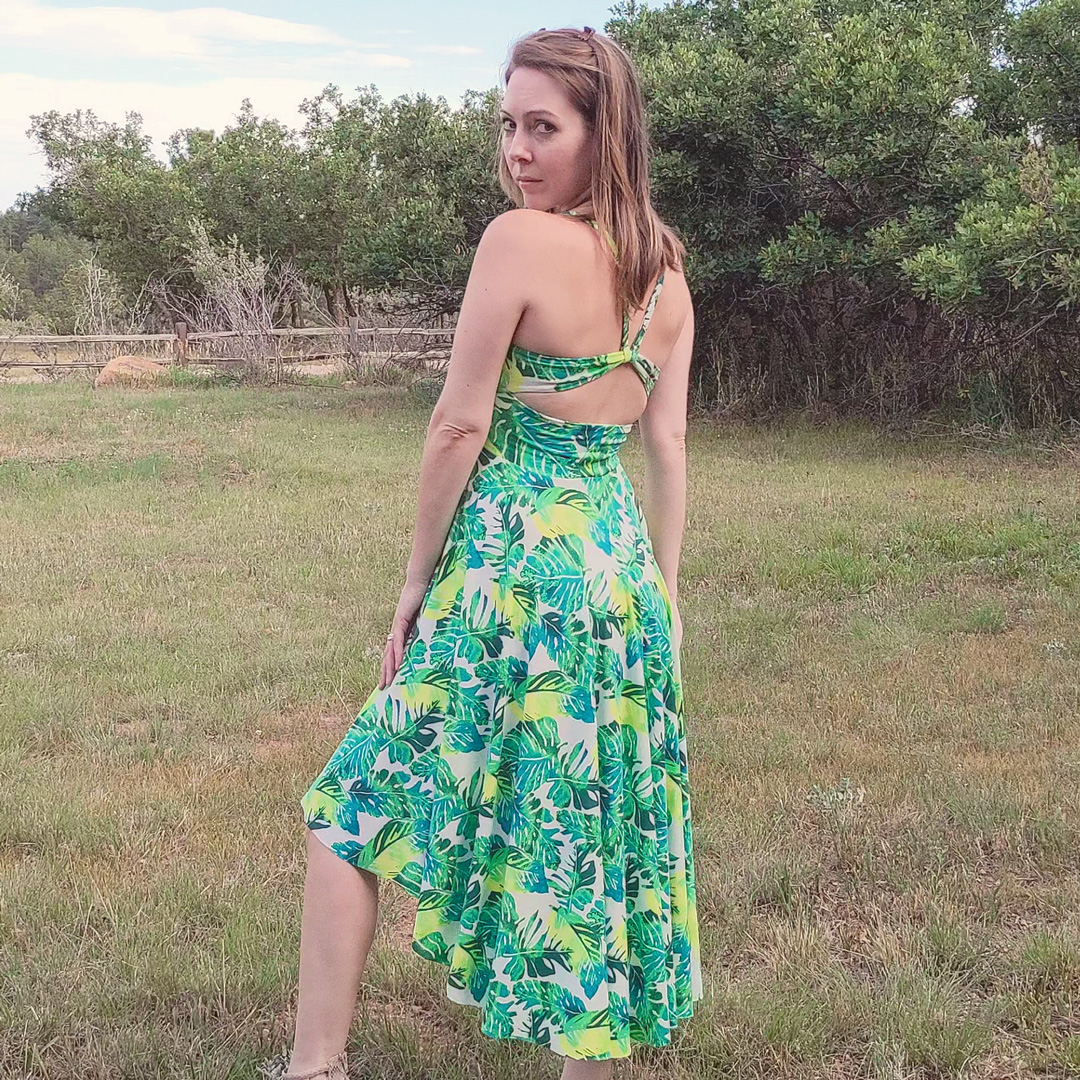
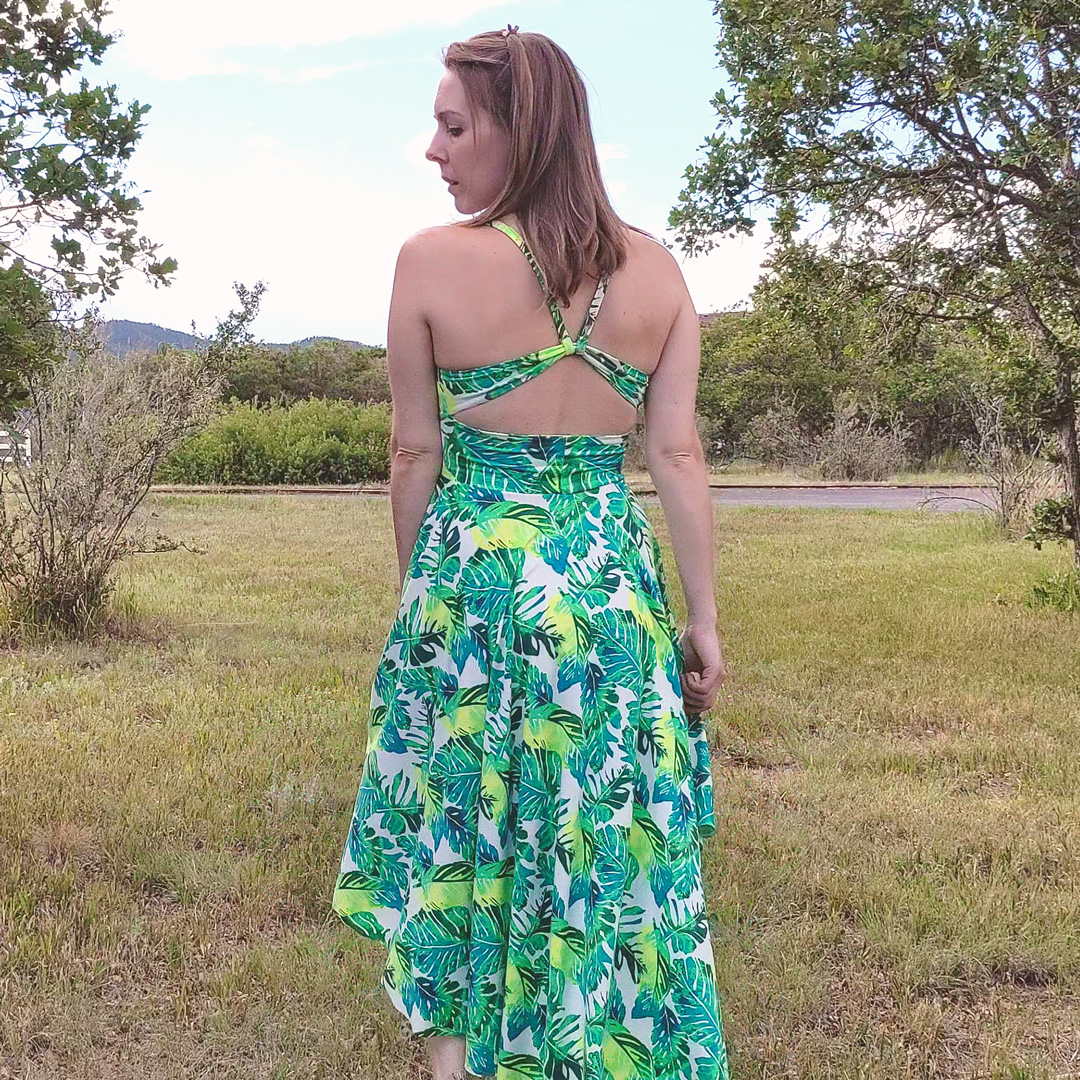
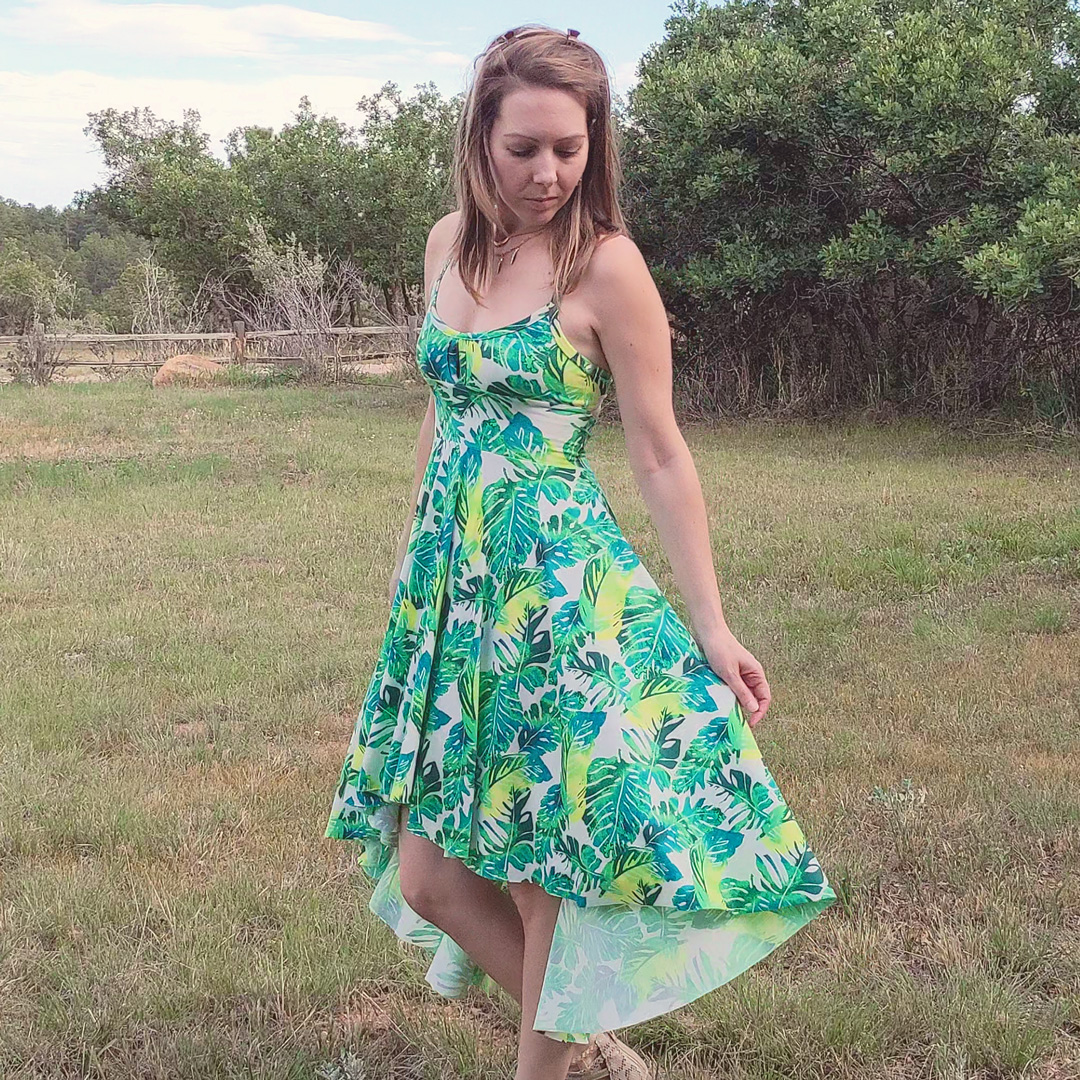
I’ve been drooling over the Switch It Up Bra from George and Ginger, especially the back views, and most especially view S with that back cut-out. What an awesome feature for a summer dress! Check out how I made this fun summer dress below.
About the Fabric
3 yards Weekend Paradise double brushed poly from Sly Fox Fabrics
- Content: 96% Polyester, 4% Spandex
- Weight: 180 grams per square meter (GSM)
- Width: 58/60”
- Stretch: 125% Horizontal / 50% Vertical
I didn’t order this fabric. 😄 I ordered this stunning DBP but they shipped this to me instead. Major bummer, and not a great start to shopping with them since this was my first purchase from them. But they made it right: they told me to keep this fabric and then re-did my original order at no charge.
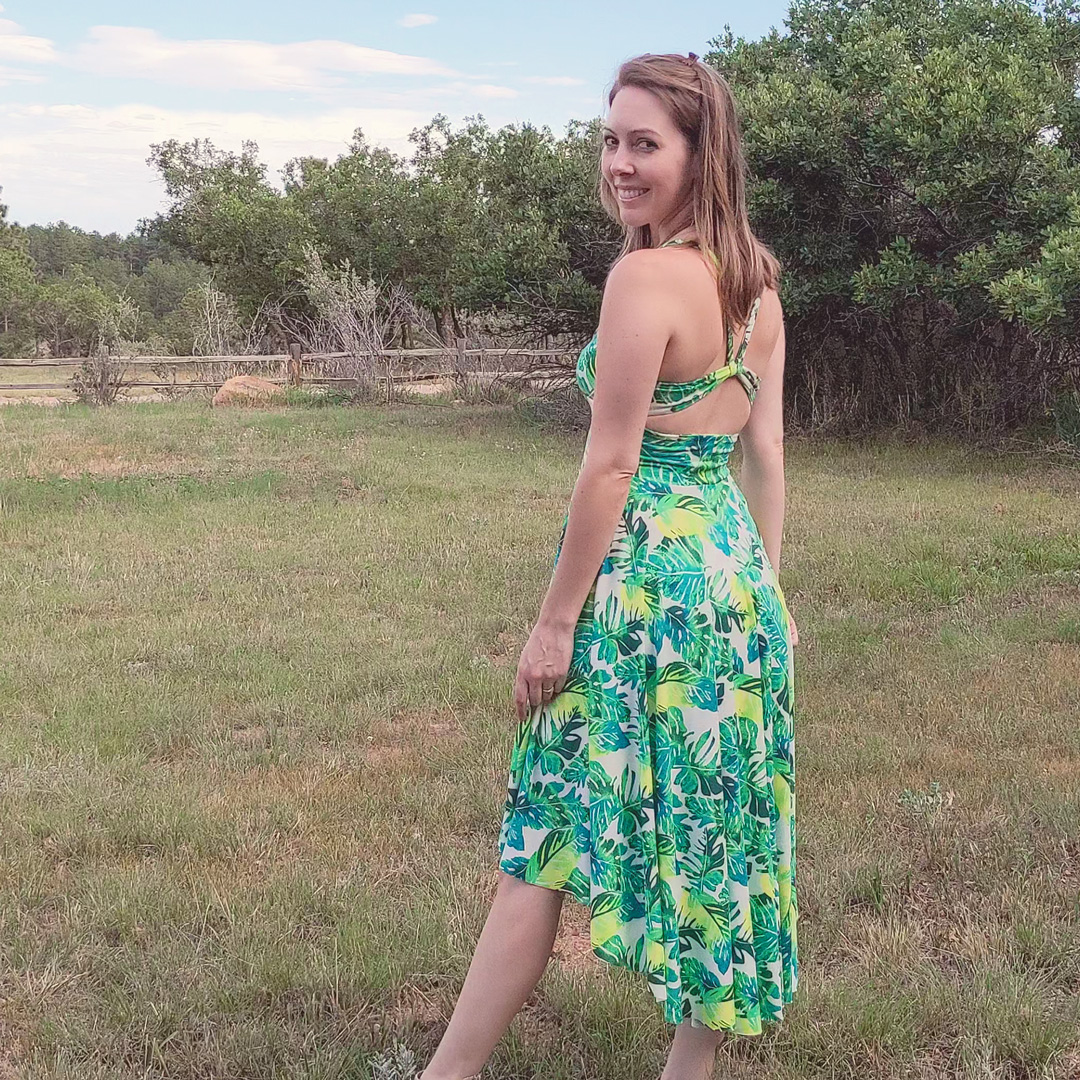
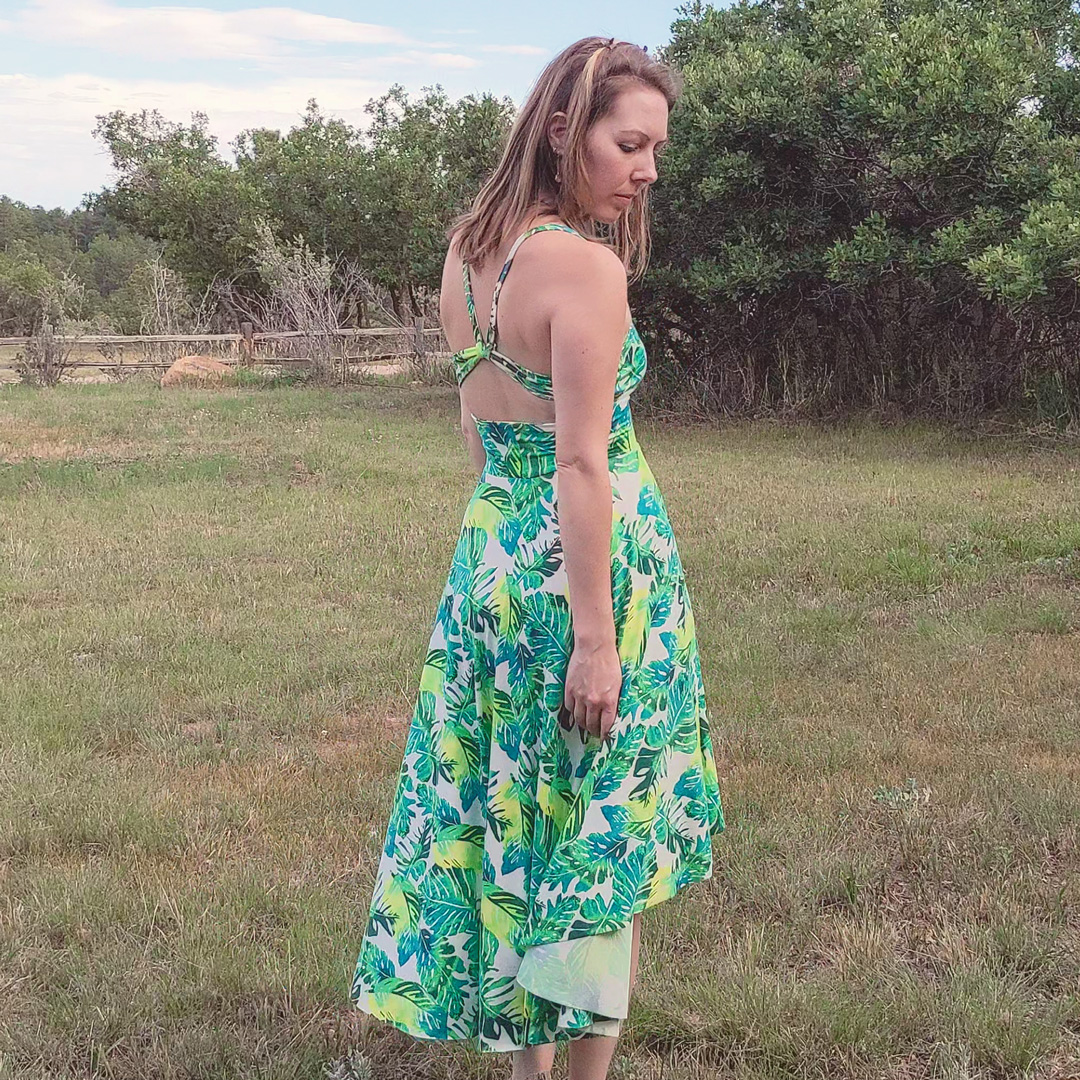
So even though this isn’t a fabric I would’ve chosen for myself—primarily because of the color scheme—it turned out great for testing this idea I had for a summer dress. It’s so beautifully soft with a fabulous drape. And though I don’t really wear green, it does scream “tropics!” Or “summer!” Or “beach vibes!” (It screams a lot of things.)
About the Make
Brace yourself; this took a bit of doing!
Patterns Used
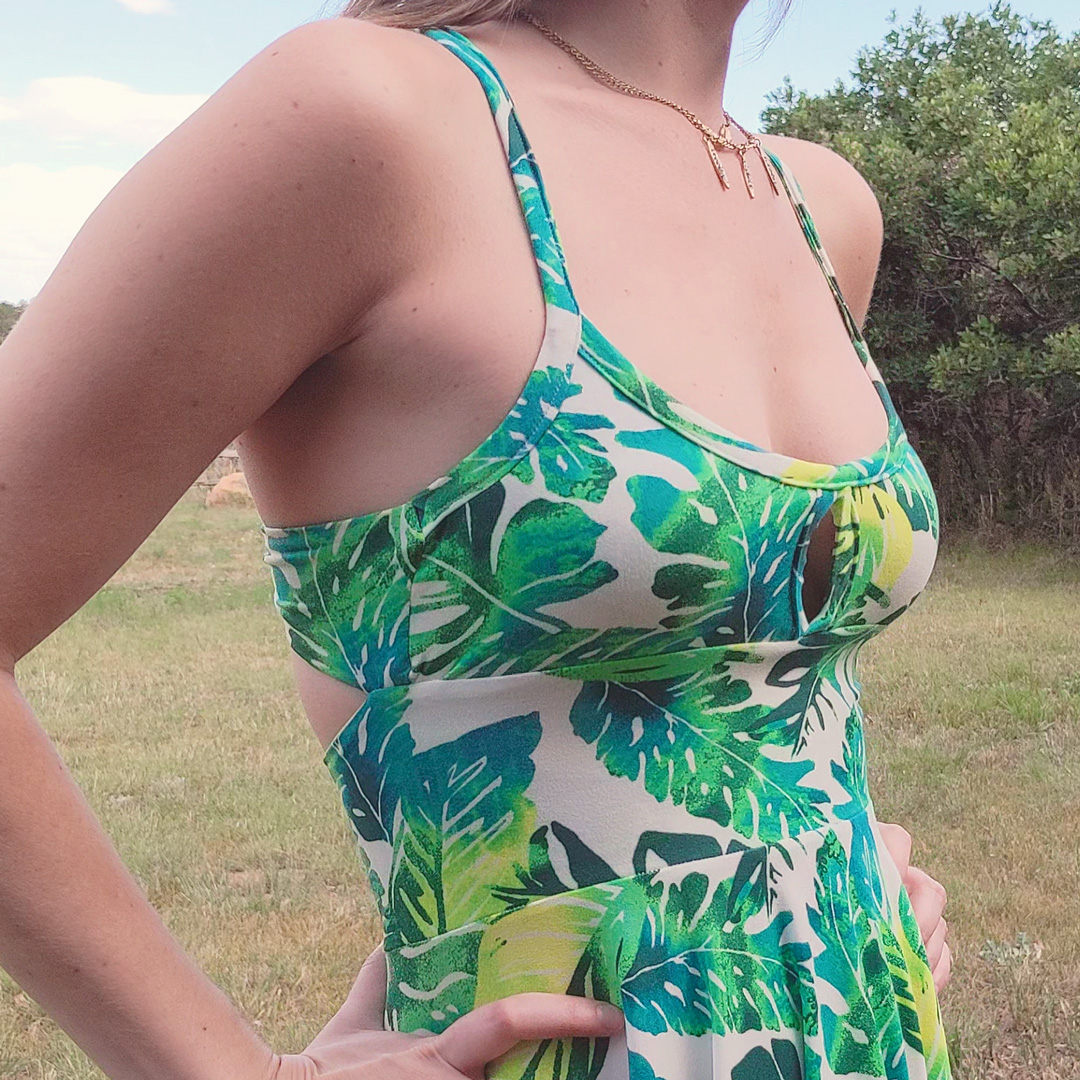
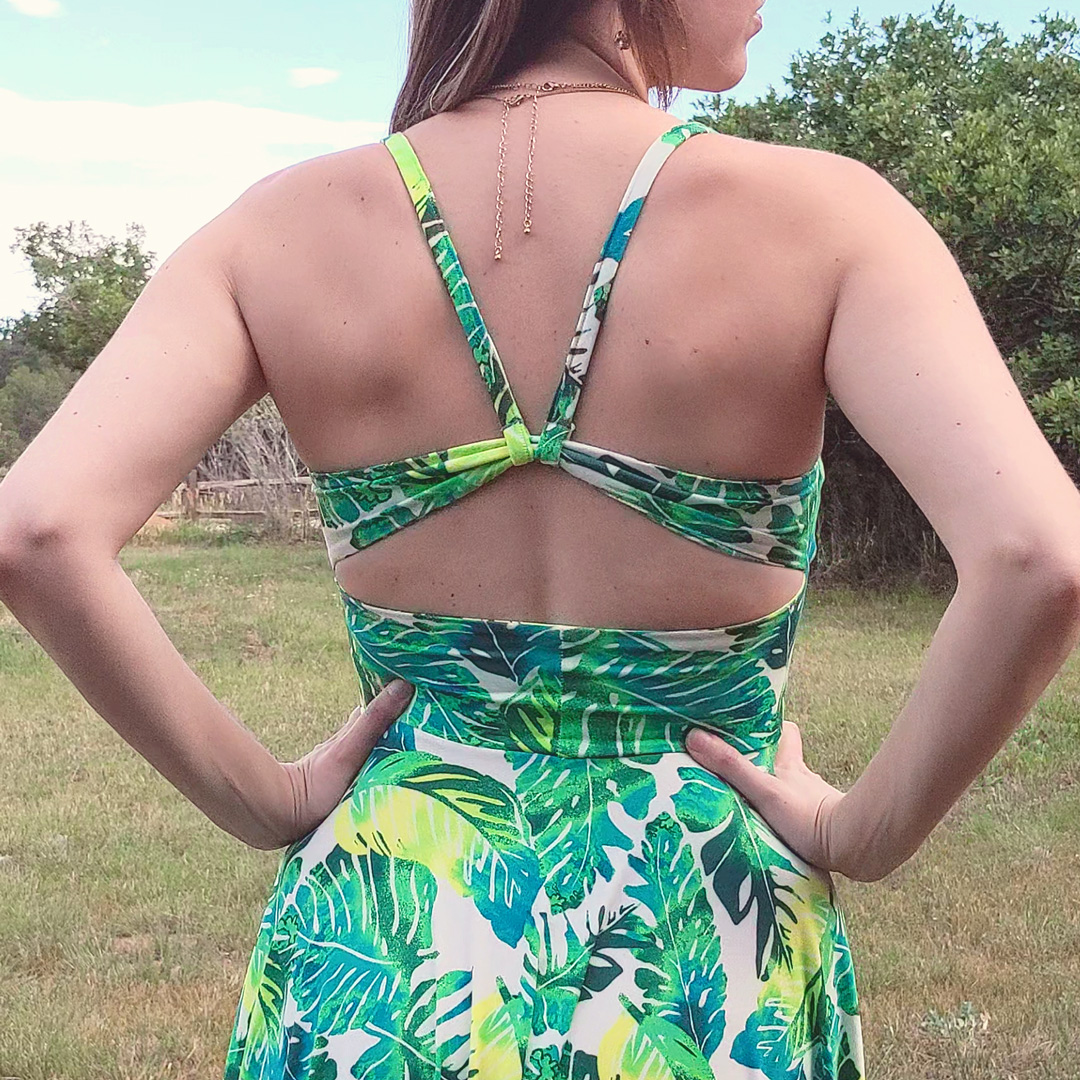
Front Bodice Switch It Up [Back Edition] – View E (modified)
- View E features a pretty standard bra front with an overlay and cut-out in the center. I wanted the center cut-out to be hollow with no underlying fabric. To do that, I omitted the “front” pattern piece and cut a main and lining out of the overlay pattern piece.
Back Bodice Switch It Up [Front Edition] – View S
- In order to combine the front and back bodice with the modifications I was making, I had to play a little pattern tetris to narrow down the pattern pieces I would actually need.
- Pattern Pieces for Back (S)Pattern Pieces for Front (E)
- band
- straps
- back
- cutout
- neck binding
- overlay binding
- armscye strap
- front overlay
- I also wanted to combine the straps between the front and back so it would just be one continuous piece from the front bodice to the back bodice. I laid the strap piece from the back end-to-end with the armscye strap from the front and traced out a combined pattern piece. It ended up being too short when I was testing it, so I added 5″ to the pattern piece. The final length of the straps when I finished was about 19.5″.
Skirt – Mix It Up
- The width of my fabric wasn’t enough to accommodate the full circle with the 11 added inches, so I had to reshape it. In the end, 11 inches was added to the back, and 8 inches was added to the front and sides.
- I did not hem the skirt. I like the fluidity of the raw hem on DBP, and I also hate hemming.
How I Constructed the Thing
With all my modifications, the included pattern instructions could only take me so far. I actually had to pause overnight after cutting out the fabric to mull over the correct way of putting it all together the way I wanted without wonky seams. Here’s the write-up!
- Lay 1 main overlay wrong sides together with 1 lining overlay and pin. Repeat with the other main/lining pieces. Bind the center cut-out. Marking lining sides.
- Baste the center cut-out together at top only, slightly overlapping the binding.
- Bind the neckline.
- Add 3/8″ elastic to straps. (I tried clear elastic on my first test but it was too difficult to stretch. I recommend knit elastic.)
- Bind the armscyes with the straps.
- Sandwich front bra between back pieces, with main fabric of bra and back facing each other and lining fabrics facing each other. Pin short sides. Then stuff the bra in between the back pieces, making sure everything is out of the way so you can pin around the long sides of the back. Leave a gap along the top or bottom for turning. Sew the back pieces together, making sure to catch the front of the bra only along the sides.
- Clip corners
- Pull out bra through gap and press.
- Slip stitch or topstitch gap closed.
- Secure straps at back according to pattern instructions. (My final length was around 19.5″.)
- Insert boning in cutout and baste bottom, slightly overlapping
- If adding bra cups, insert now. Baste bottom of bra to enclose cups (this is important since I don’t have much fabric to work with around the base of the bra cups.)
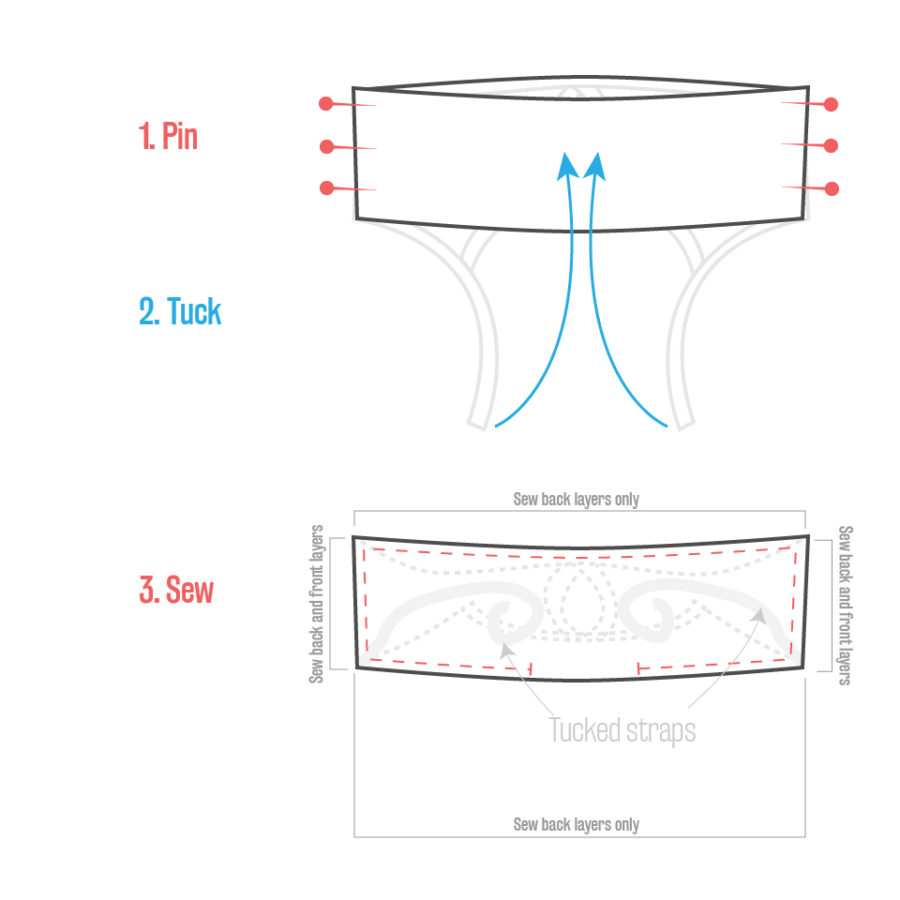
- Sew short ends of waistband. Repeat with waistband lining. Quarter waistband.
- Sandwich bra between waistband main and lining, making sure lining orientation is correct and leaving back of bra free from seams. Align side marks of waistband with side seams of bra. Pin bottom of bra to top of waistband.
- Sew waistband to bra. Sew through all layers around the front, and only the waistband around the back. Edge finish to reinforce. Turn right side out and press.
- Attach skirt to waistband.

Specs
- Switch It Up front, size 4
- Switch It Up back, size 4
- Mix It Up high-low long tunic +8″ (front/sides)/+11″ (back), size 4
- 19.5″ straps
Notes for Next Time
- Raise the neckline. The front has the tendency to creep down and pull the back upward, so raising the neckline will help keep the girls covered.
- Sew in some bra cups.
- I used some 1/4″ clear plastic boning to give some structure to the front cut-out. Structure is a great idea, but I need to explore some other options for boning. I’d like something semi-flexible that I could bend into shape that’s also round. I’m wondering about silicone tubing with rubber caps. Maybe bendable craft wire with rubber caps.

Project Settings
Sewing Machine vs. Serger
| Sewing Machine | Serger |
|---|---|
|
|
Sewing Machine Settings
| Presser Foot | Stitch# | Stitch Width | Stitch Length | Needle | Top Thread Tension | Application |
|---|---|---|---|---|---|---|
| standard zig-zag (A) | 5 | 1.0 | 4 | blue tip | 4 | seams/binding |
| standard zig-zag (A) | 6 | 5 | 3.5 | blue tip | 4 | elastic attach |
| applique (F) | 1 | 3.5 | 3.5 | blue tip | 4 | strap secure |
Serger Settings
| Stitch Name | superstretch |
|---|---|
| Needles | R, L |
| Finger | A |
| Threads | 3 |
| Tension Left Needle | 2.5 |
| Tension Right Needle | 2.5 |
| Tension Upper Looper | — |
| Tension Lower Looper | 0.5 |
| Cut Width | 6 |
| Stitch Length | 2.5 |
| Differential | 1.0 |
| Application | seams |
Leave a Reply