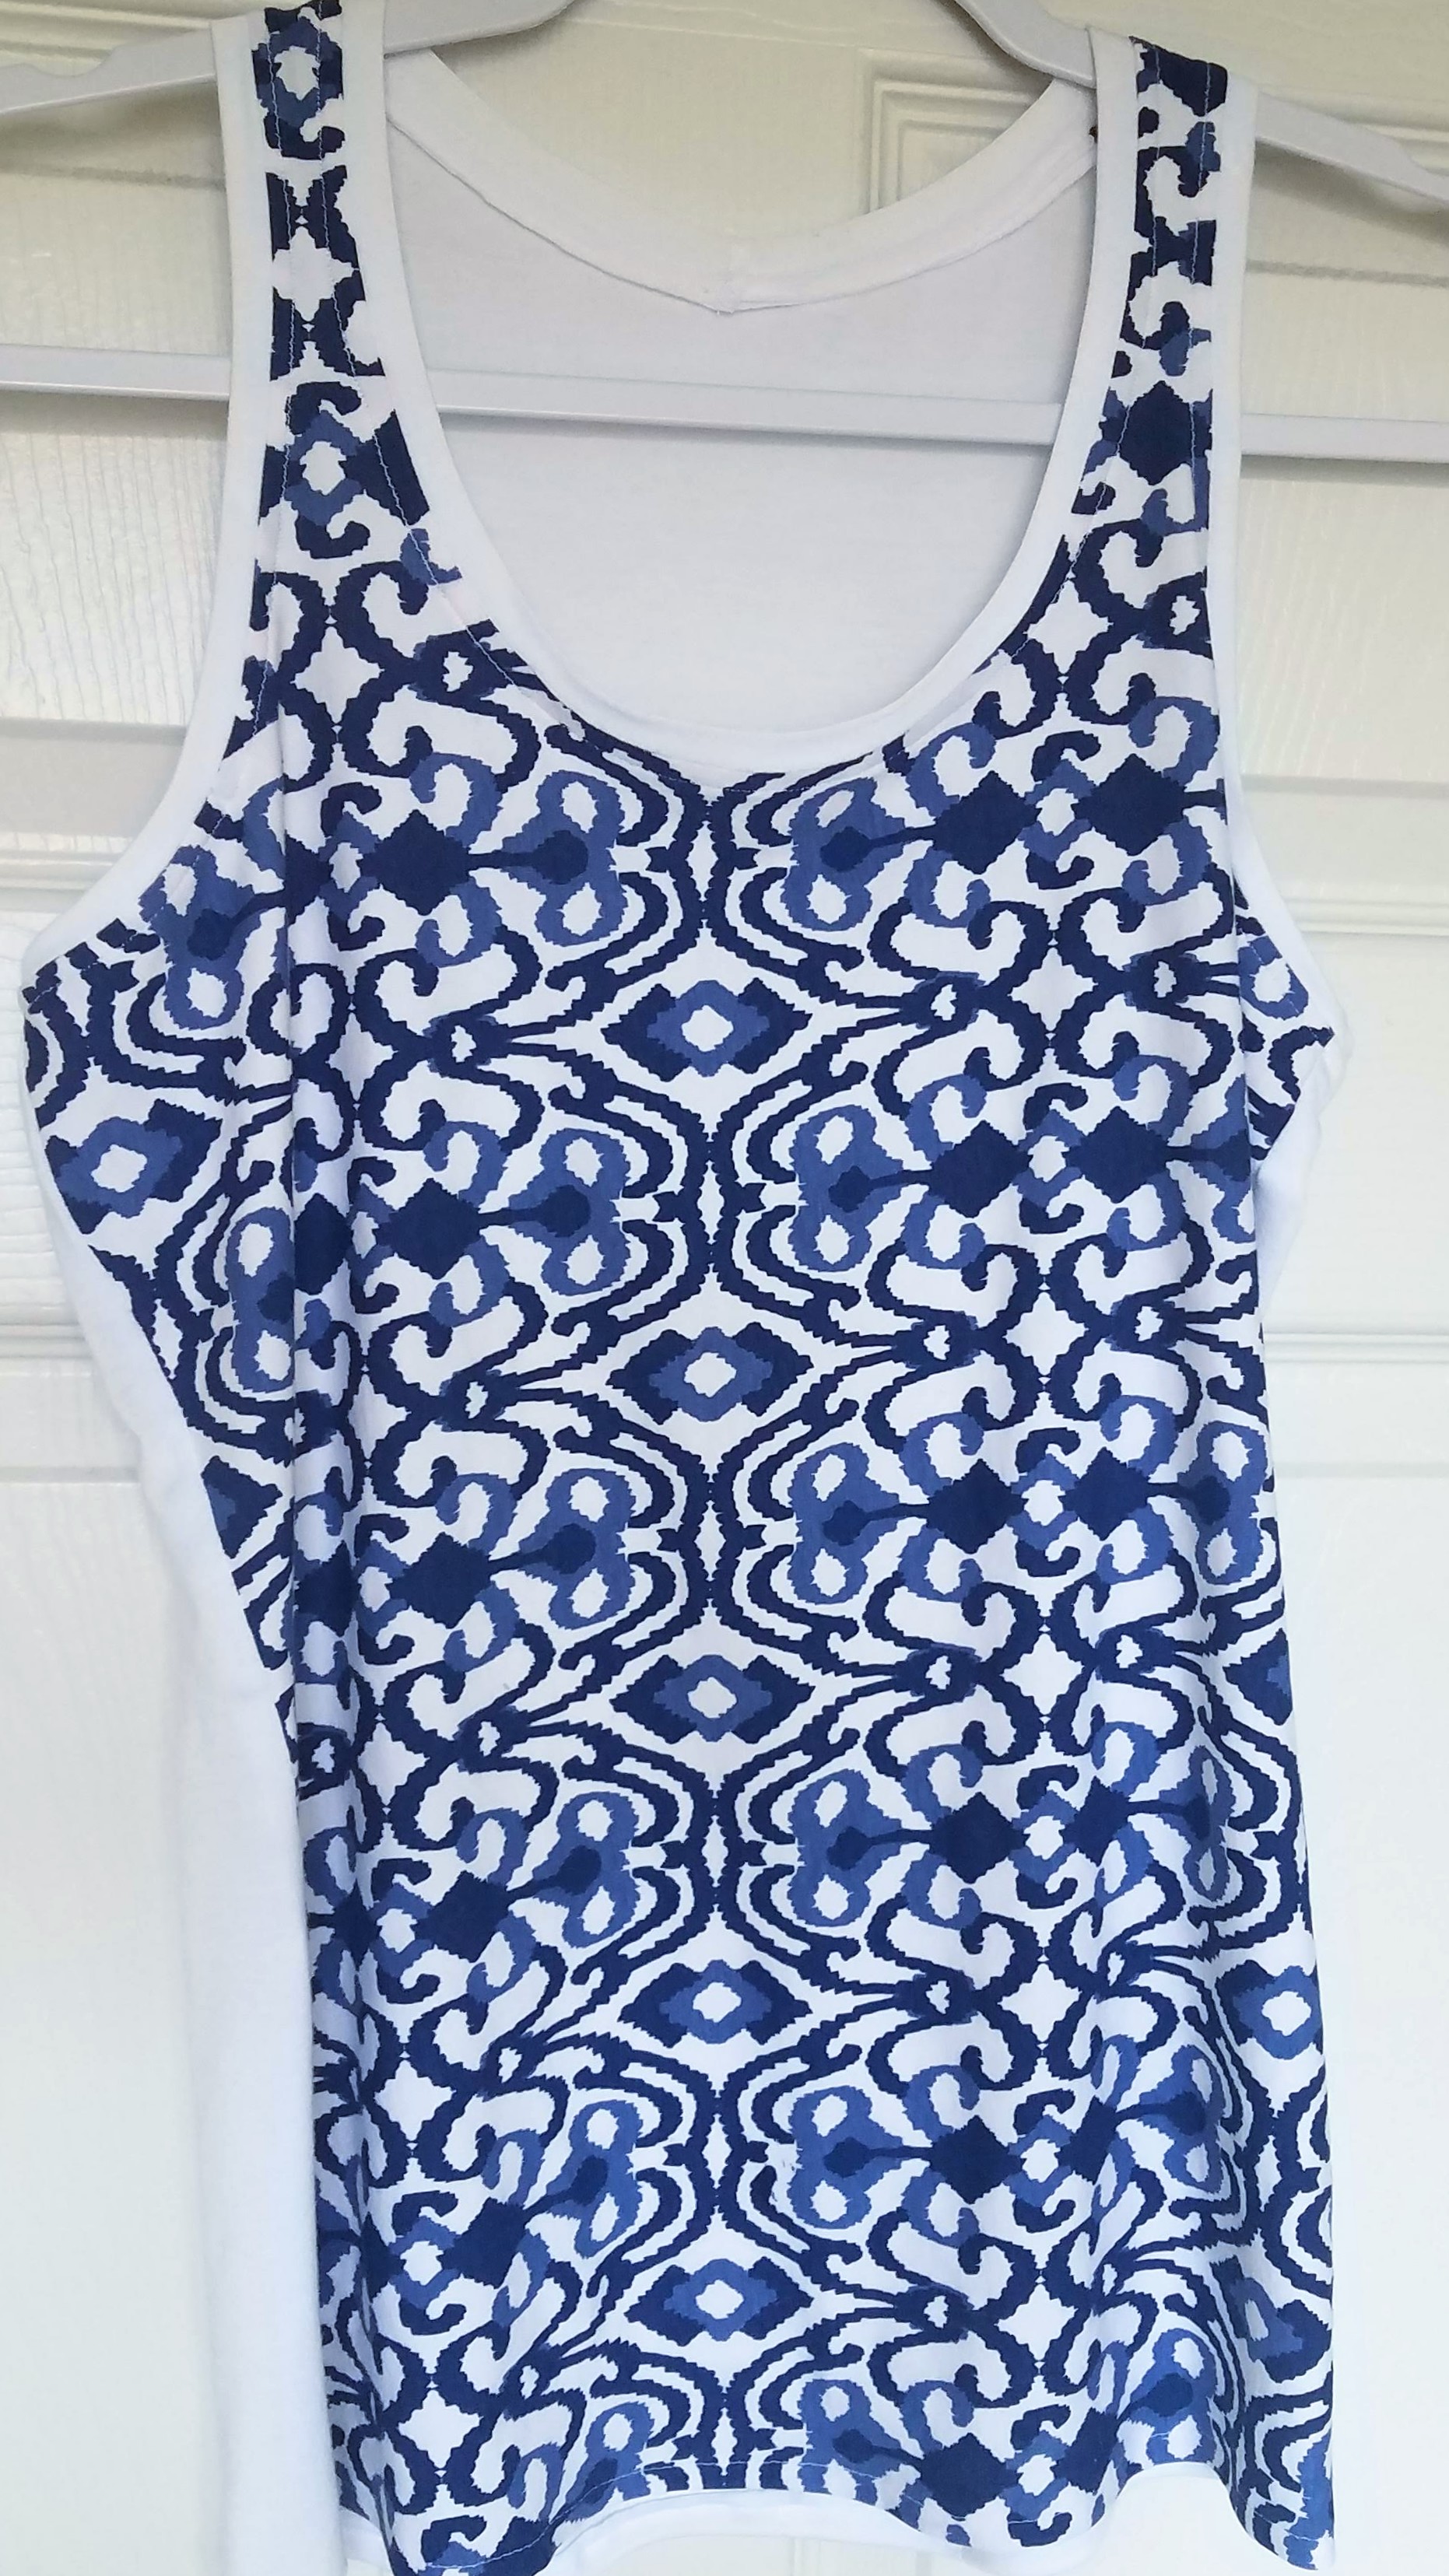
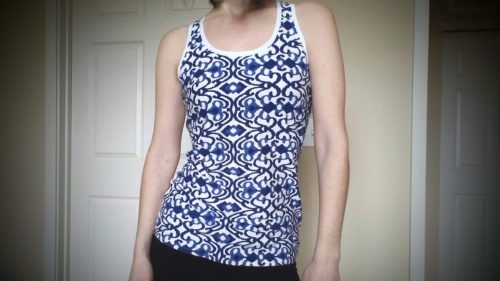
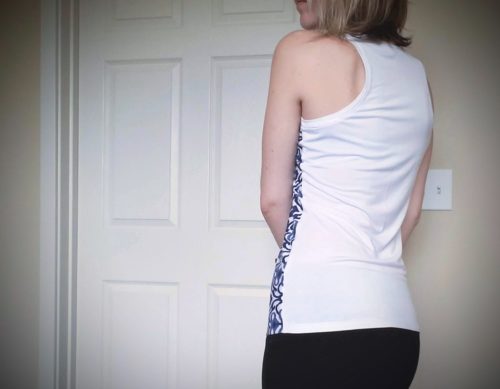
Well this took longer than I expected. Not because it was difficult; actually, if you can sew a collar in a stretchy shirt reasonably well, this pattern is really easy. It’s essentially just 3 collars, 2 side seams, and a hem. The instructions are pretty thorough and put together very well. It was also very easy to blend 3 sizes between the bust, waist, and hips to make this shirt fit me just right.
What took so long, Deb?
Nothing overly dramatic. There was the running out of fabric and having to hit the store for something else to cut out the back, neck and arm bands; then there was a busy weekend; and then there was just stupid mistakes that involved unpicking seams because the bottom layer around the arm holes crept away from the needle.
How to Conquer the Single Knit Jersey
- Wash it before you sew. Seriously. It’s annoying, but do it. Get that shrinkage out of the way.
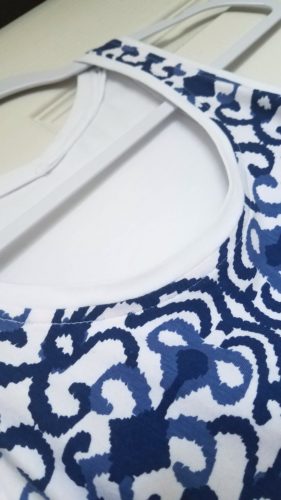
- I cannot rave enough about my hack when stretching/pinning/clipping neckbands and armbands to the main part of the shirt. Go to your kitchen, grab a bowl or a pot or cup or glass dish — whatever size fits the hole in your project, and stretch your pieces over it so you can pin/clip them together evenly. And don’t skimp on the pins/clips. That will help you avoid the creeping fabric issue I had.
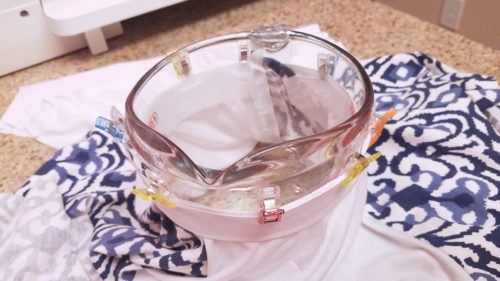
Kitchen hack: stretch the bodice opening and the neck/arm band over some kitchen bowl/cup/pot to achieve an evenly distributed stretch around the band.
- They say to not stretch knit fabric while sewing because, logically, if you sew over stretched fabric it’ll stay stretched out. However, that’s not really a rule to always follow. Sometimes you’re going to want to stretch it, especially in the case of sewing neck or armbands to your garment. I’m finding that’s actually the key to sewing it successfully: stretch the band so it lays flat against the bodice as you sew between each clip (or pin if you’re using pins.) Be careful to NOT stretch the bodice fabric though. Also double-check that you’re catching all the layers of fabric in the seam. That was my major downfall on this project.
- For this particular pattern, the seam allowance is only 3/8″, which is quite a bit smaller than your standard 5/8″. As such, the notches marked on the pattern don’t need to be cut nearly as deep as they’re marked.
- Feeding single knit jersey through the machine can be a challenge in itself. It takes some time of just working with it to learn how it behaves and how to control it. If you’re not sewing any neckbands or armbands, then do your best to let the machine do the work of pulling the fabric. All you should have to do is steer. Because it’s so stretchy, it might look like you’re steering crooked when you’re not. Do your best to not let the fabric hang over the front of the machine as it’s going. Lift it gently and let the machine slide it through your hand. You can also steer the fabric that’s laying off to the side. Nudge it along to keep it feeding evenly along with the seam that’s being sewn. This will probably involve a lot of stopping to adjust, and that’s perfectly fine. No rush.

Walking Foot Woes
I need to look into why these things are happening to me, but I have 2 very distinct issues.
- The first is not exclusive to the walking foot: when I reach a bulkier section of fabric, such as where seams are overlapping, the fabric stops feeding, which means I’m just sewing in the same spot over and over again. I’m thinking this is more a machine issue than a foot issue. I have to take the pointy end of my little plastic cleaning brush, slow my machine all the way down, and push against the bulkier section of fabric as the machine is sewing in order to get it to feed through.
- The second issue is when that bulkier fabric passes through to the back of the walking foot, it gets hung up there too and will create this traffic jam of fabric. Sometimes this even happens when there is no bulk. Something just gets hung up on the back part of the walking foot. Maybe it’s a presser foot pressure thing, but I don’t see any way to adjust that on my machine. Or maybe it’s something else. I am using my Singer walking foot; the foot that came with my Janome sews all kinds of crooked. It looks like it was constructed a little lopsided to the left so fabric gets viciously skewed when it feeds through.
Regardless, I ended up with a pretty sweet tank. Just in time for a foot of snow on Wednesday. Ah, spring in Colorado.


Project Settings
Presser Foot |
Stitch# |
Width |
Length |
Needle |
Top Thread Tension |
Application |
|---|---|---|---|---|---|---|
walking |
6 |
0.5 |
2.5 |
blue tip |
~6 |
all seams |
Leave a Reply