I’m pretty terrible at adhering to traditions, as evidenced by the fact I finished this self-imposed challenge with a whole one day left in May. It’s also only my second May since I started sewing, so it’s way too early for me to call this a tradition. But it would be cool if it became one. That is, choosing a project that intimidates me and involves new things I’ve never done before.
Last year, it was the Ava Sundress.
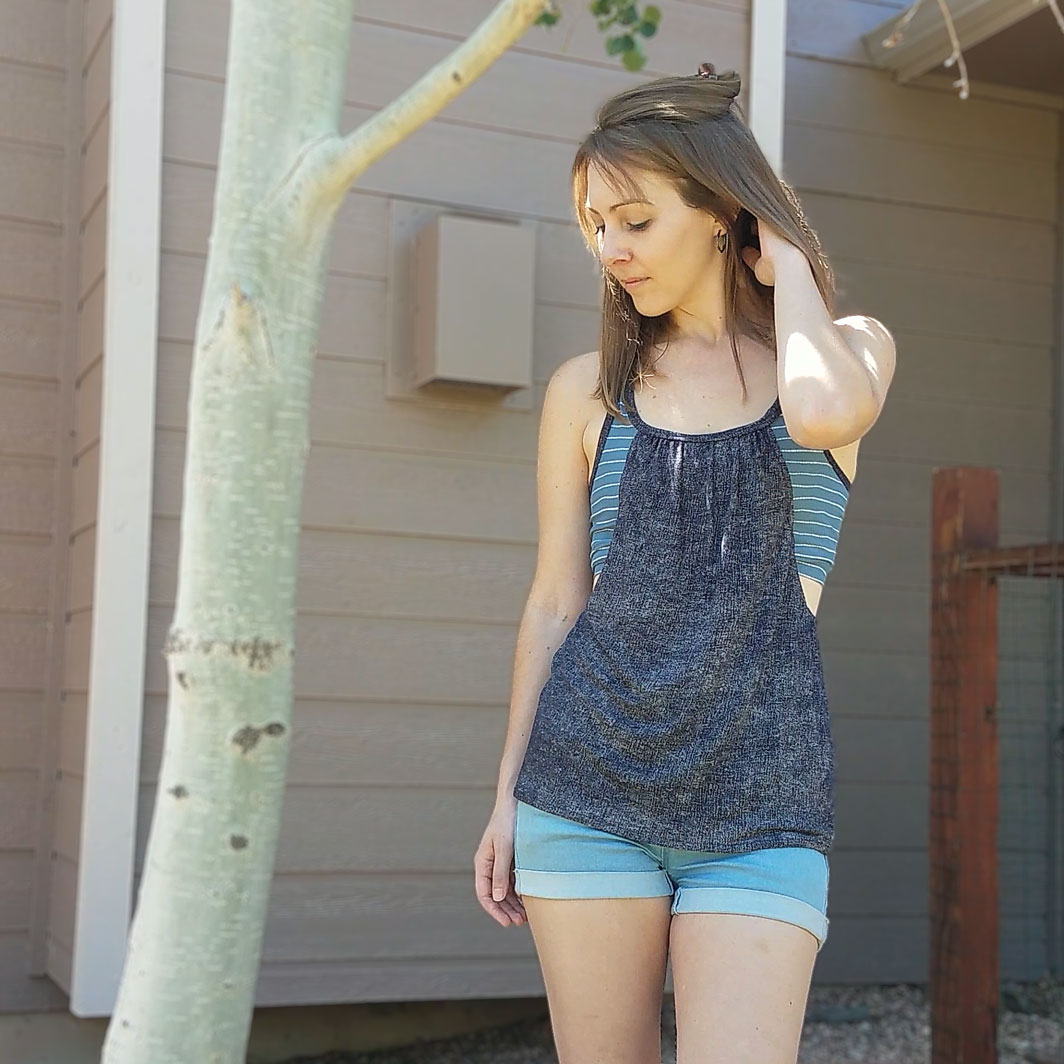
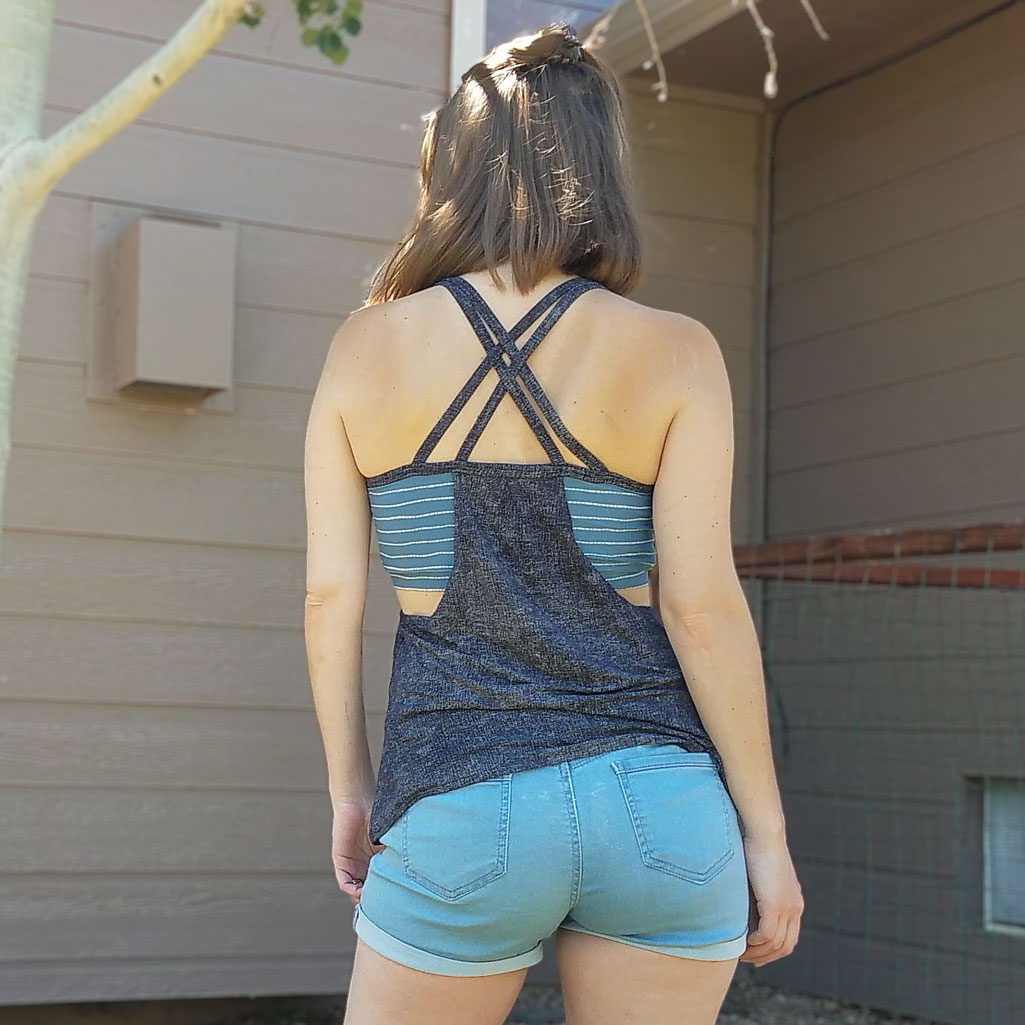
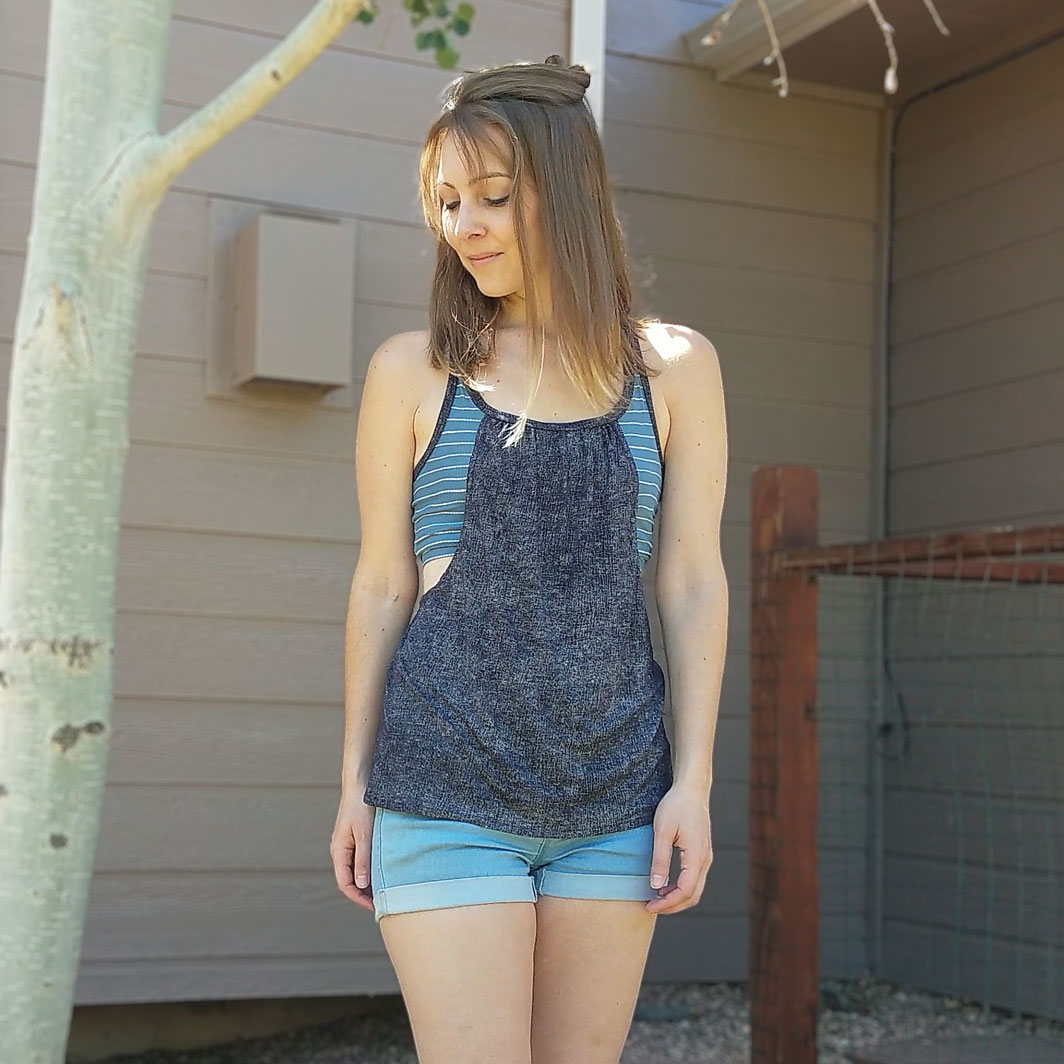
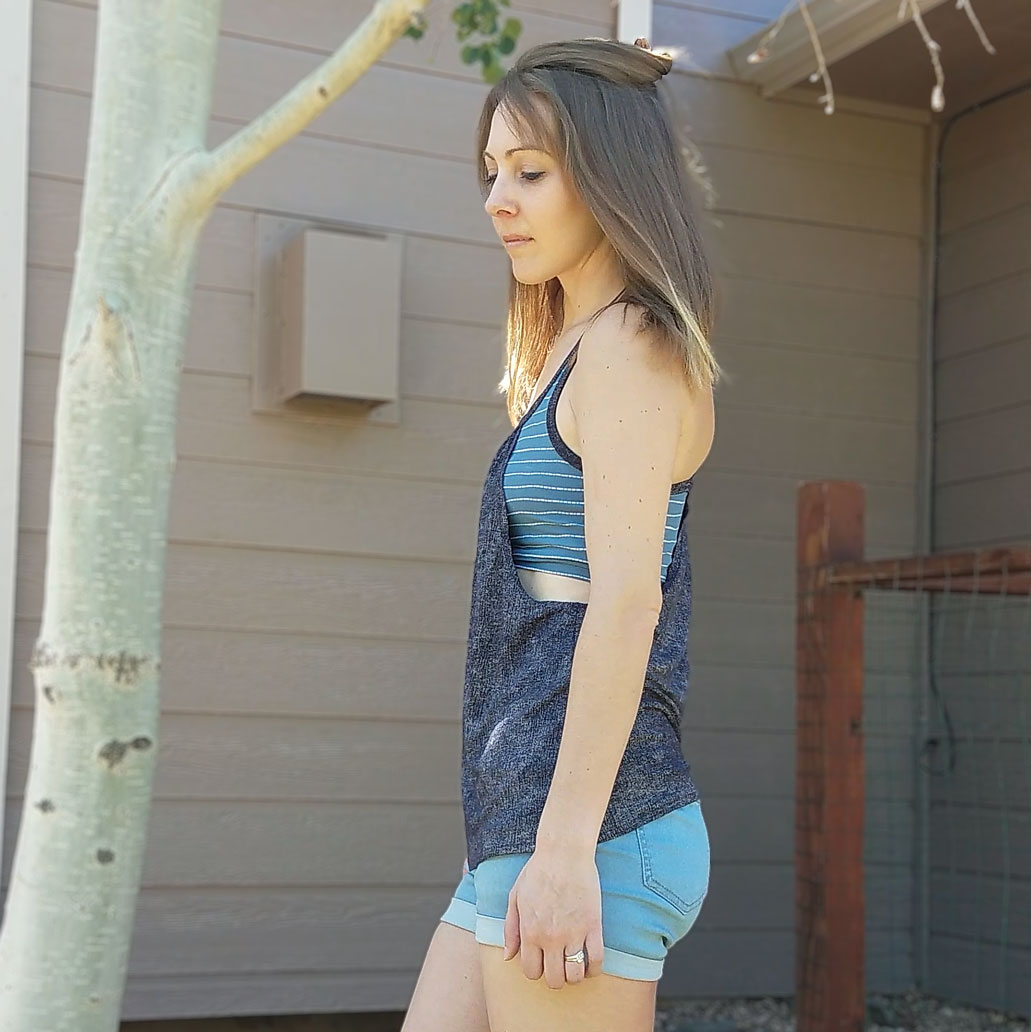
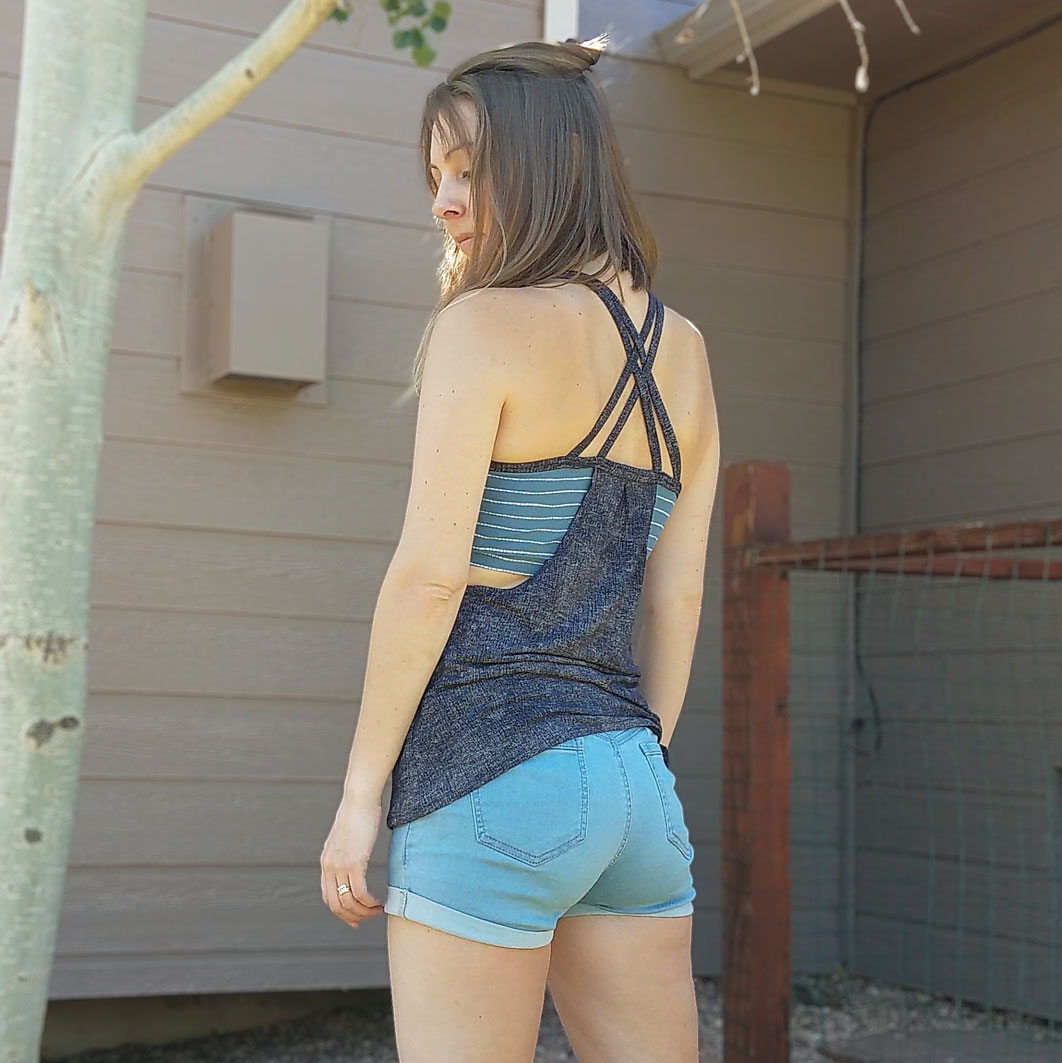
This year, I chose the Agility Tank.
Why I Chose the Agility Tank
- It looks freakin’ awesome.
- It’s May, which means summer is on the doorstep. (Just ignore that snow we got on the 25th.)
- Optionssssss. I love options. Strappy-back, t-back, banded shirt, hemmed shirt, dress, show or no-show some extra skin. Yerse please.
- The challenges:
- Never worked with swim before (athletic nylon spandex)
- Never worked with bra cups
- Never made a bra or anything resembling one
- Pretty involved set of instructions, so it was definitely not going to be a quick sew
Reviewing the Pattern
It was better than most. As per usual though, the graphic designer in me saw room to improve it. I found myself flipping back and forth all over the place, checking and double-checking that I was on the right step for what I was doing. Better design hierarchy would’ve fixed most of that issue.
Content-wise, it was well-explained and complete and the illustrations were helpful.
The Fabrics/Notions
Everything I used is from Boho Fabrics. 1 yard of each fabric gave me plenty to work with.
- Athletic nylon spandex (swim)
- Jersey knit
- some mystery knit mesh from a clearance box
- 3/8″ Picot Plush Back Elastic
- Nude Foam Lining Cups
The Options I Chose
- strappy-back bra
- shirt length
- hemmed shirt
- low-cut underarms
- sewn-in bra cups
What I Did Differently
- Ditched the bottom elastic band on the bra and cut out a 2.75 x 24.5 strip of swim to attach as a band. I loathe elastic, and my modest endowment lets me get away with a fabric band instead.
- Graded the overlay pieces from XS to S.
- I did ~0.5″ hem on the shirt instead of 0.75″.
- I trimmed ~0.25″ off the bottom of the bra, mostly to even up the raw edges of the main, lining, and mesh for attaching the band.
Notes for Next Time
- When in doubt, definitely utilize wash-away wondertape. I used it to hem the underarms and that was a very good idea.
- I did NOT use wondertape on the straps though; I didn’t feel it was necessary so long as I went slowly and carefully trying to catch all the layers as I was binding.
- For the middle bra layer (mesh), probably go with a 4-way stretch fabric versus a 2-way.
- I might make the bottom bra band wider.
Project Settings
Presser Foot |
Stitch# |
Width |
Length |
Needle |
Top Thread Tension |
Application |
|---|---|---|---|---|---|---|
standard zig-zag (A) |
5 |
1.0 |
4 |
blue tip |
4 |
seams |
edge guide (SE) |
5 |
1.0 |
4 |
blue tip |
4 |
strap binding coverstitch |
standard zig-zag (A) |
6 |
3.0 |
1.5 |
blue tip |
4 |
sew-in bra cups |
Leave a Reply