Mashing up sewing patterns is perhaps the next evolution in customizing patterns after you’ve mastered grading/lengthening/shortening for your own unique shape. It also opens a door to a whole new world of creativity: What if I took the top of that dress and mashed it with the bottom of a different dress? What if I made this dress into a t-shirt? What if I made this t-shirt into a dress? What if I used the sleeves from this pattern, the bodice from that other pattern, and neck from another pattern? The options are endless, and what a way to advance your skills with patterns. Plus, you wind up with a completely unique garment that no one else has.

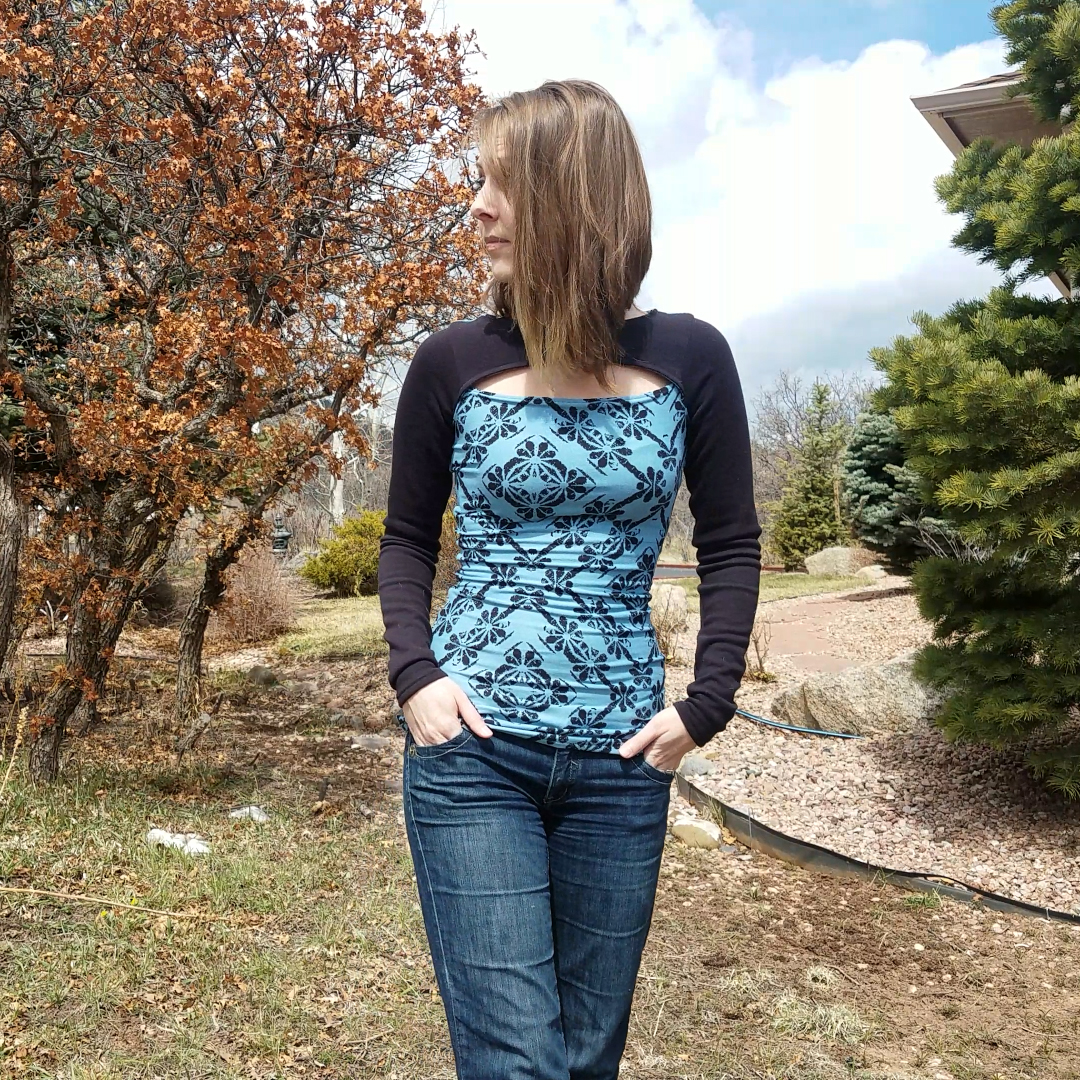
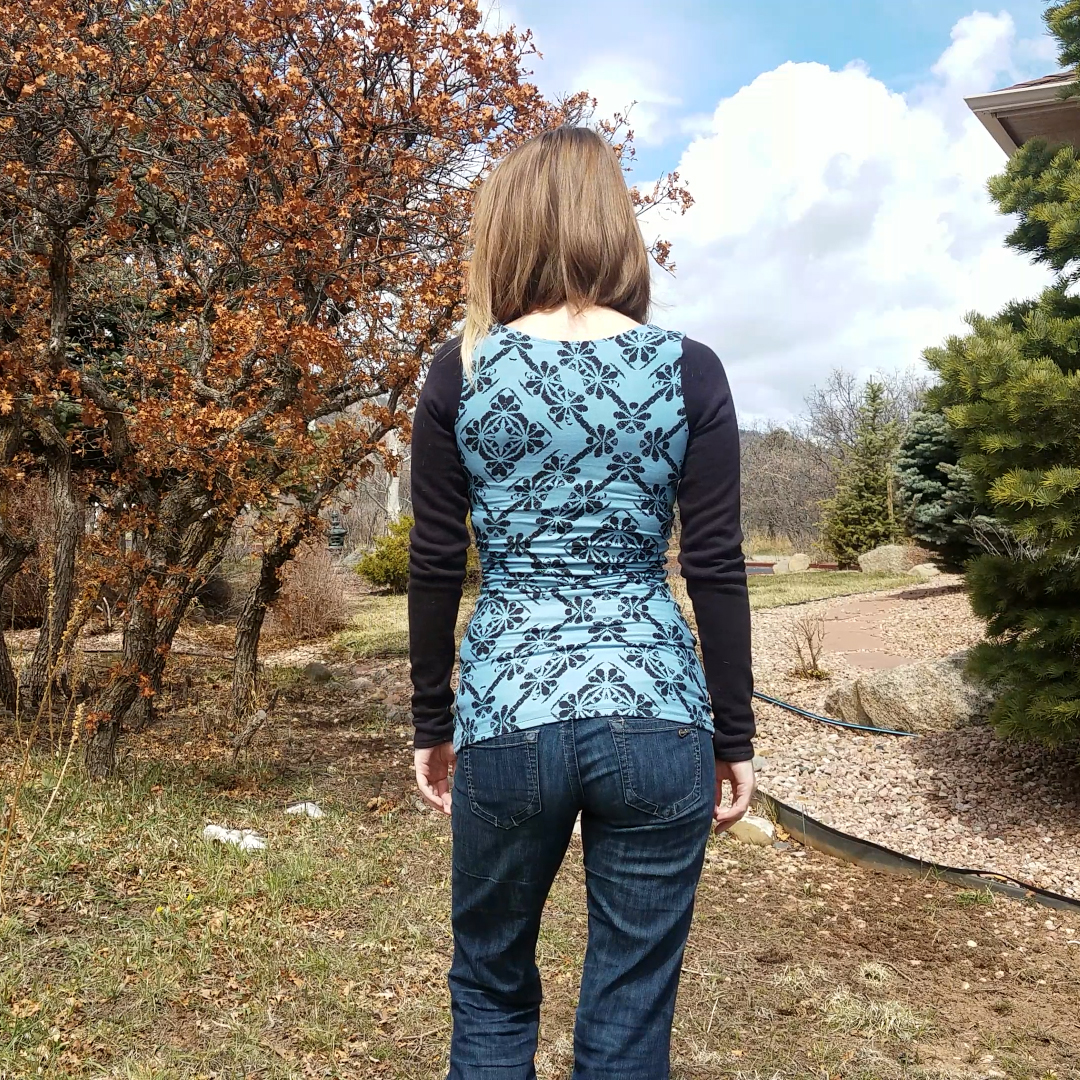
How I Mashed Up the Mix it Up Dress & Dandelion Tee
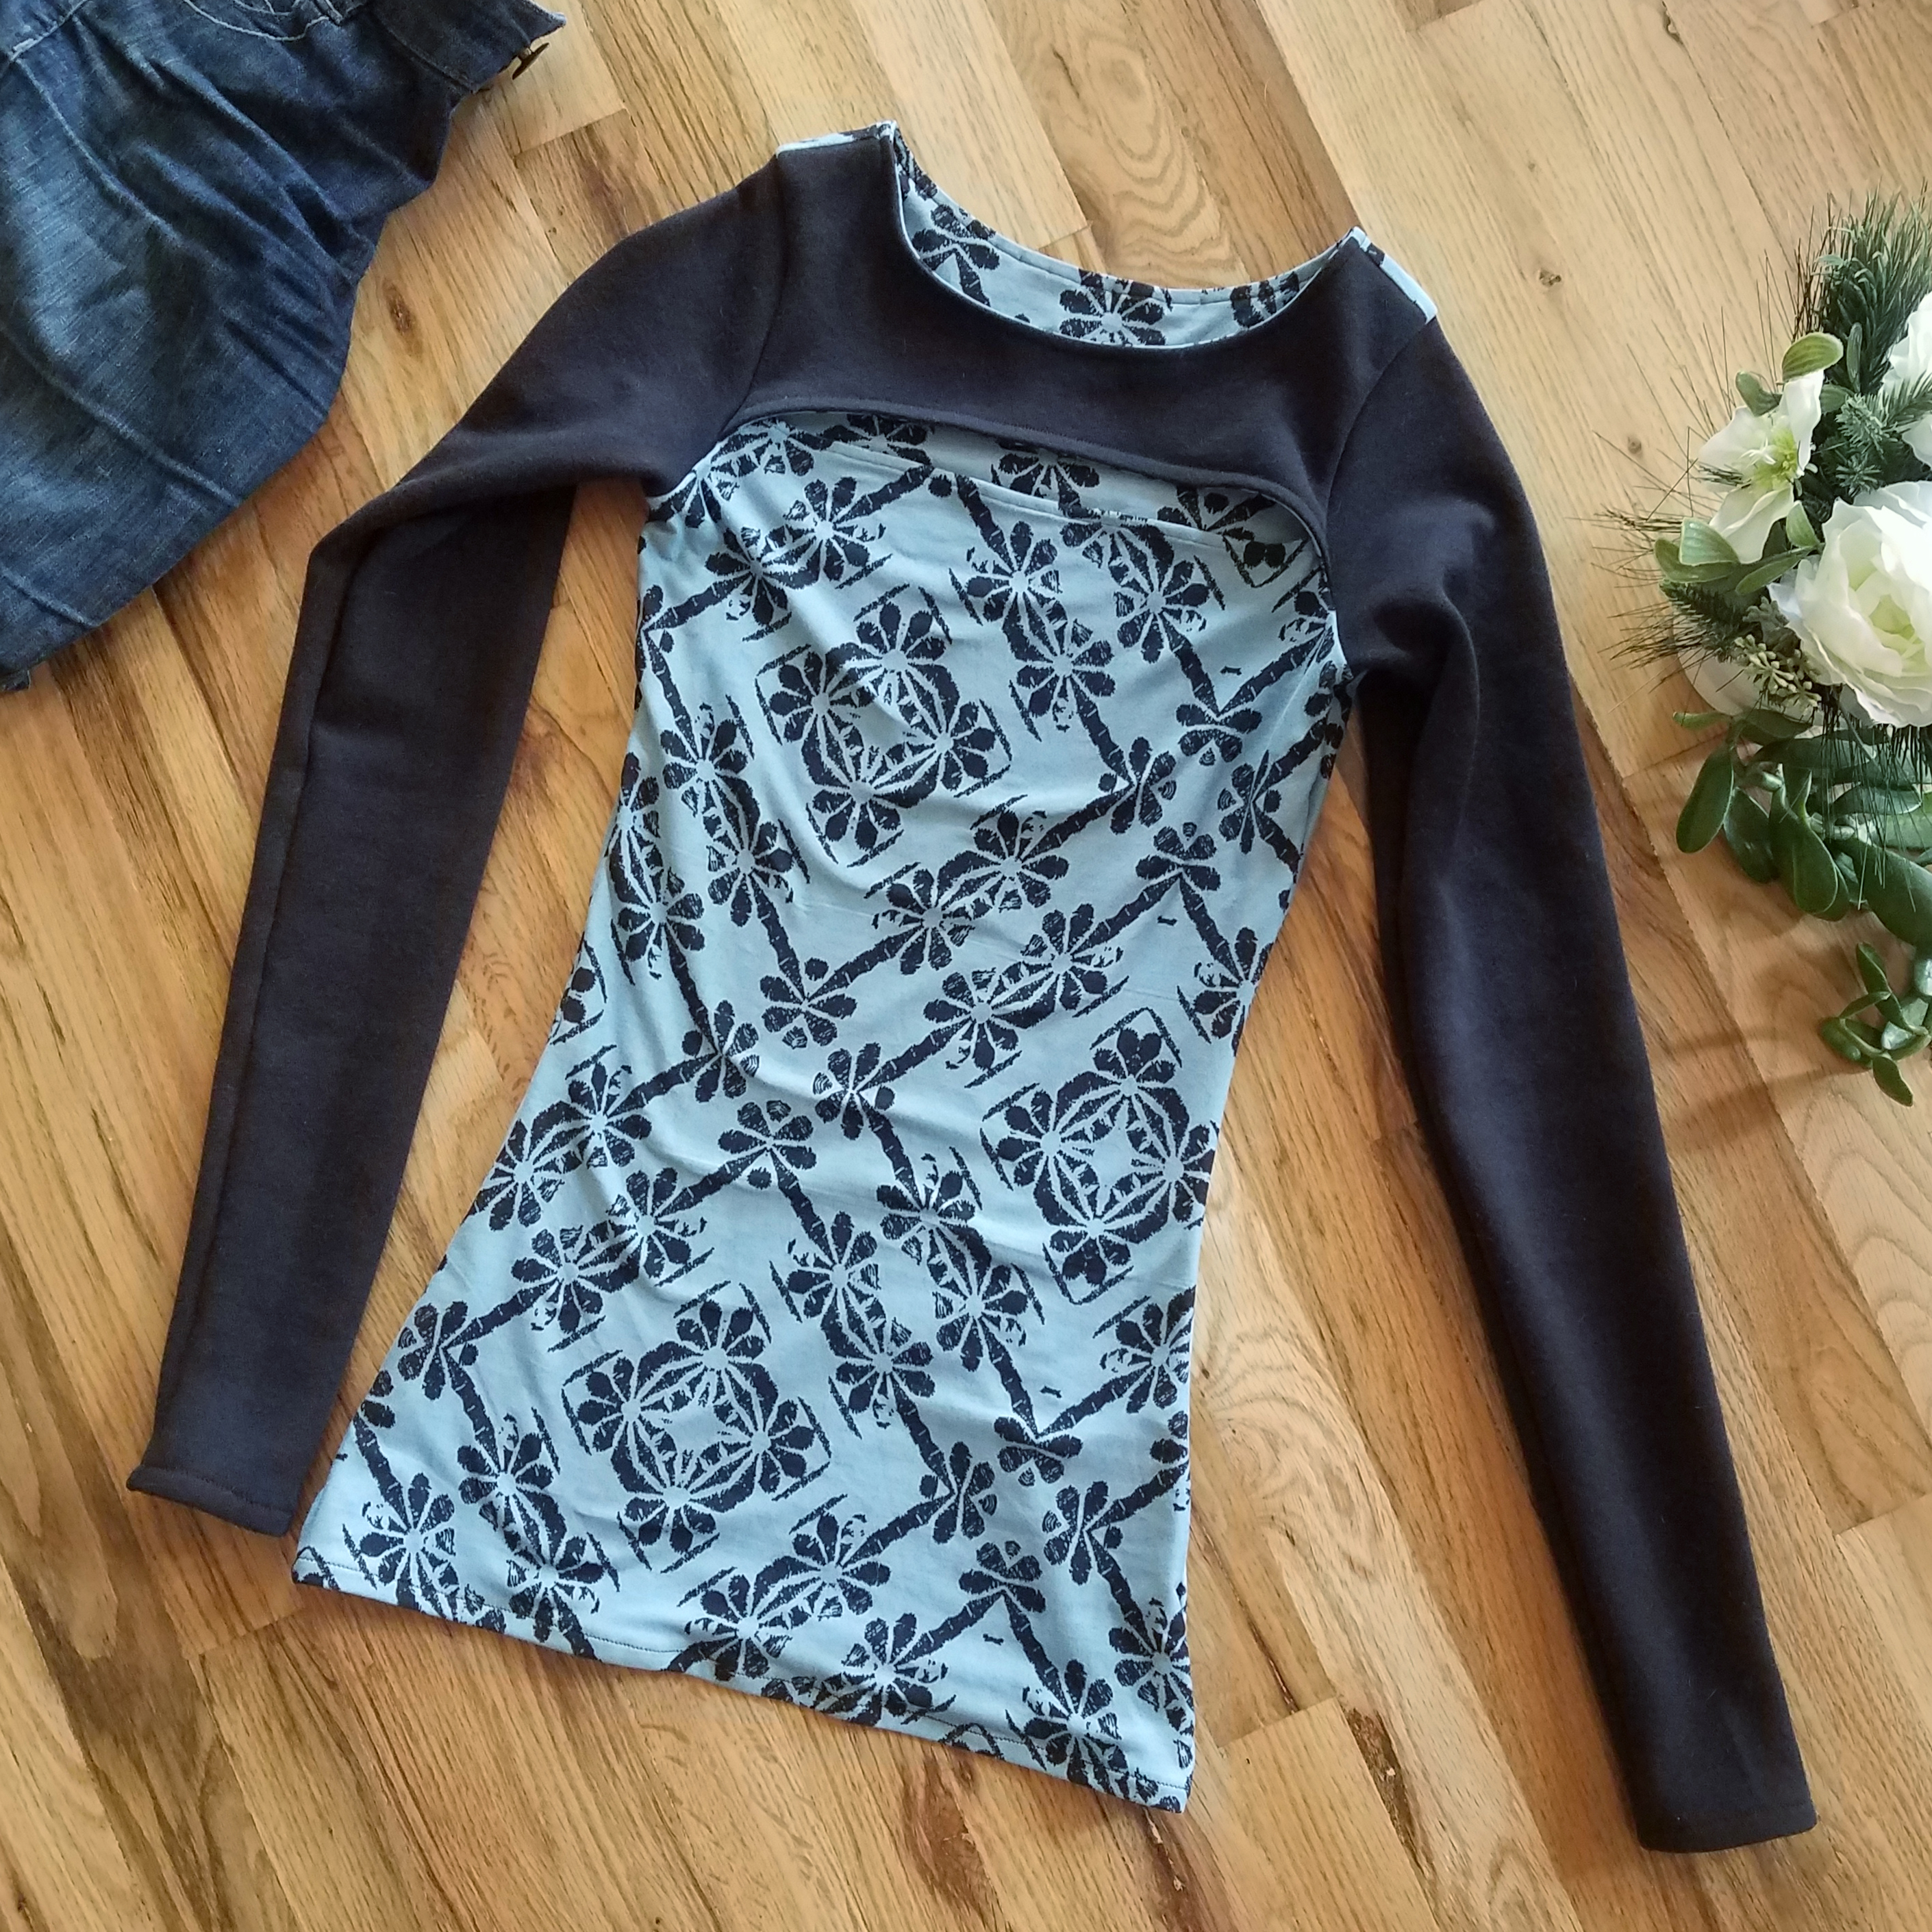
I took my existing front pattern piece from the Dandelion Tee (which was already graded and sized to my personal taste) and the top yoke piece of the front bodice from the Mix it Up Dress and laid them over each other. I matched up the bottom corners of the armscyes and rotated the patterns around that point until the center fold lines were parallel to each other. Then I taped them together and laid a blank piece of tracing paper over both of them.
I traced the top yoke piece exactly until I reached the side seam at the bottom of the armscye. That’s where I started to blend the lines of the yoke piece with the lines of the t-shirt. Once I hit the waistline (narrowest part of the pattern), I started following the tshirt line exactly.
I repeated the same process for the back piece, except when I reached the side seam at the bottom of the armscye, I moved this new back pattern piece I was working on to lay over the new front pattern piece I’d just finished, and traced the side seam I’d previously blended so they would match up.
It really is that simple.

About the Fabric
- The black stamped floral on steel blue is a double brushed poly from Made of Love Fabrics.
- I used the same DBP for lining the front and back.
- The black is the “wrong” side of a shimmer reverse french terry from Surge Fabrics. I chose to use the “wrong” side because I preferred the more matte, untextured look for this make. Also, the “right” looped side of this french terry, while pretty, tends to snag easily. While it’s not the softest texture to have against the skin, I preferred to keep those loops on the inside to avoid visible snags.
Other Pattern Adjustments
- I added 2 inches to the sleeves. Because I always do that. I NEED my extra long sleeves.
- I topstitched the top edge of the bottom yoke piece. The pattern doesn’t say to do this, and I didn’t do it on my first Mix it Up but wish I had to keep the lining from rolling outward.
Notes for Next Time
- The Mix it Up Dress has a narrower silhouette than the Dandelion Tee, which caused this particular mash-up to end up very fitted. The stretch of the DBP I used made that acceptable, but for a fabric with less stretch, it would definitely have to be sized up. I might size it up anyway just for some added ease.
- The way the yoke is constructed means all the front and back pieces of the pattern are lined. I’m not sure if I want to reduce that in the future and somehow just line around the bust area. It would definitely conserve fabric, and if I ever wanted a lighter/cooler version of this for summer, it might be a necessary adjustment. Maybe the solution to this lies somewhere between this version and my first Mix it Up with the waistband. If I treated the yoke bodice pieces as they originally are on the MIU pattern, then extend the waistband and draw it out in the shape of the fitted tee, that could possibly work. It would also allow for colorblocking opportunities.

Project Settings
Presser Foot |
Stitch# |
Width |
Length |
Needle |
Top Thread Tension |
Application |
|---|---|---|---|---|---|---|
standard zig-zag (A) |
5 |
1.0 |
4.0 |
blue tip |
4 |
seams |
standard zig-zag (A) |
0 |
3.5 |
5 |
blue tip |
4 |
basting |
overedge (C) |
6 |
5.5 |
3.0 |
blue tip |
4 |
edge finish |
1/4″ foot |
2 |
3.5 |
3.5 |
blue tip |
4 |
topstitch |
applique (F) |
5 |
1.0 |
4.0 |
blue tip |
4 |
sleeve hem |
Leave a Reply