I did a variety of dumb things yesterday on this project. Thus, it took longer than it needed to, and I’m a little shocked I didn’t have to re-cut any new pieces. I must be leveling up in Recovering From Stupid Sewing Mistakes. (It’s a thing.)
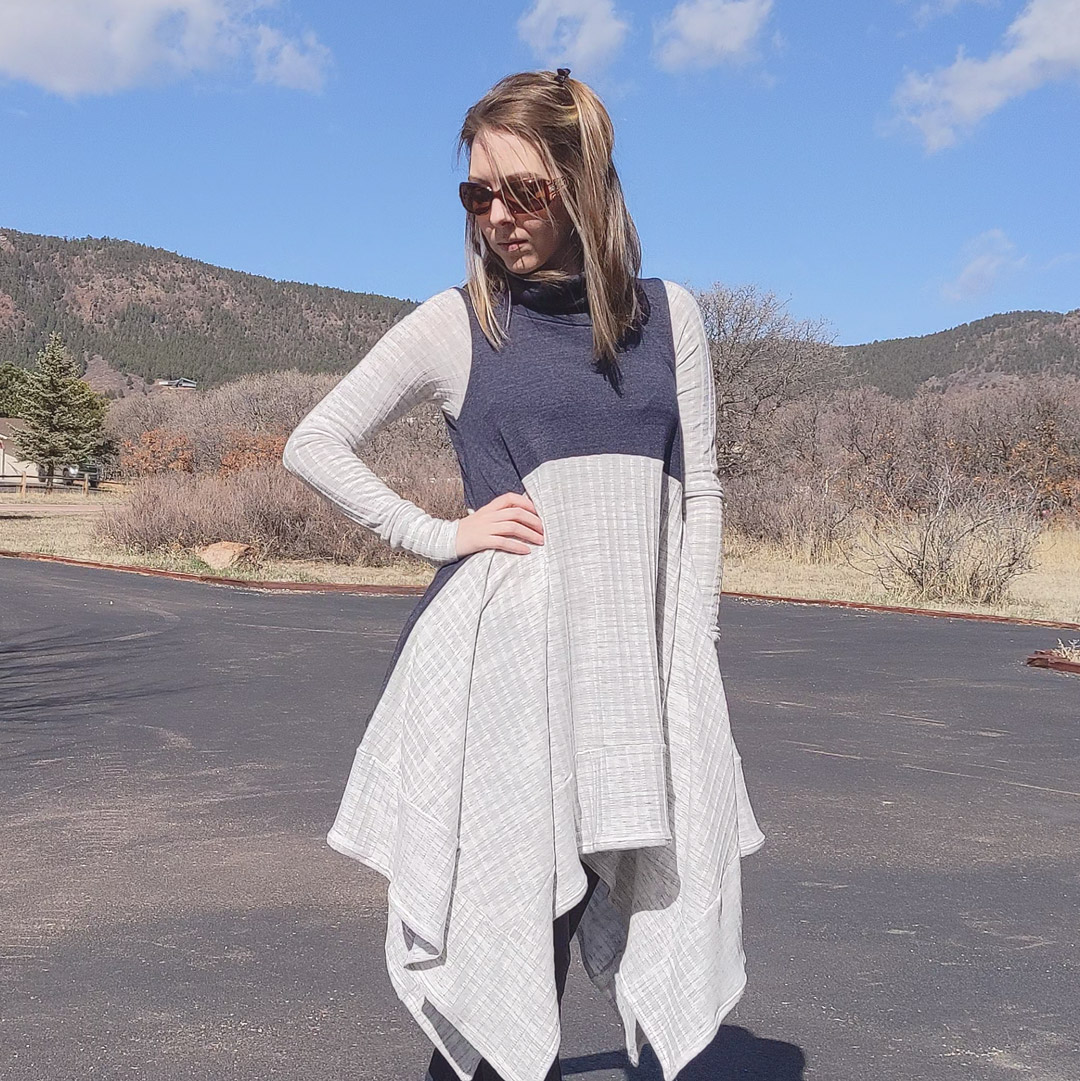
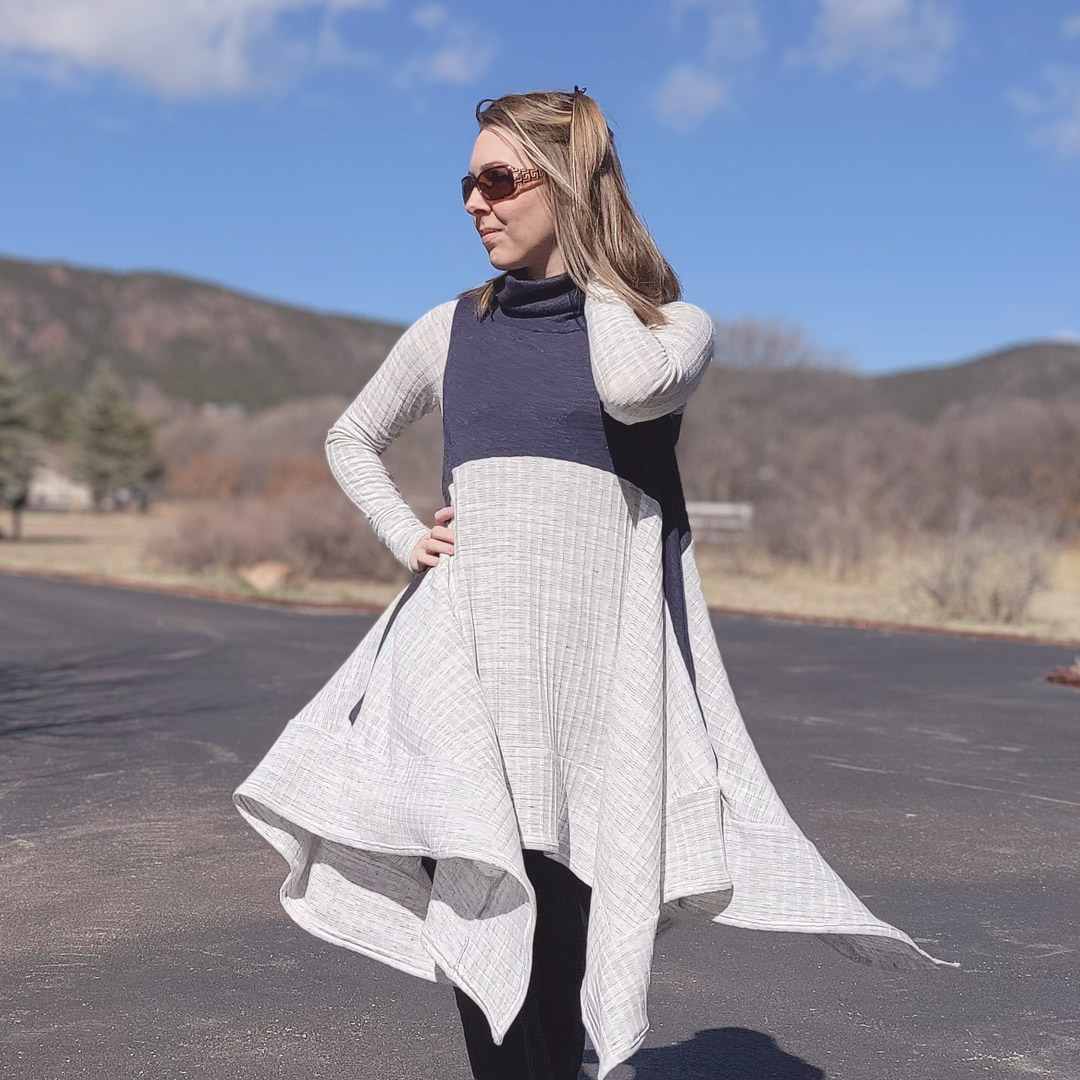
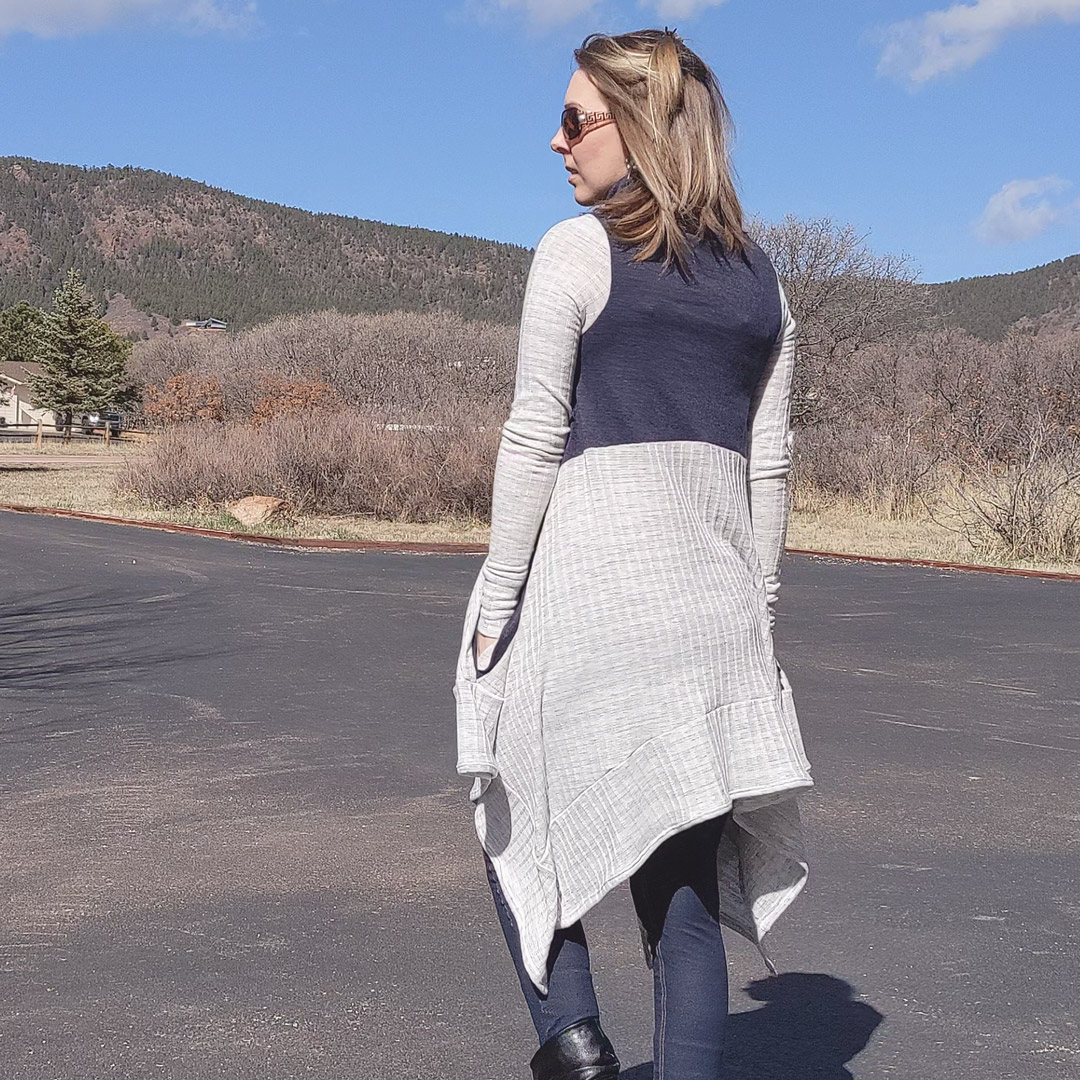
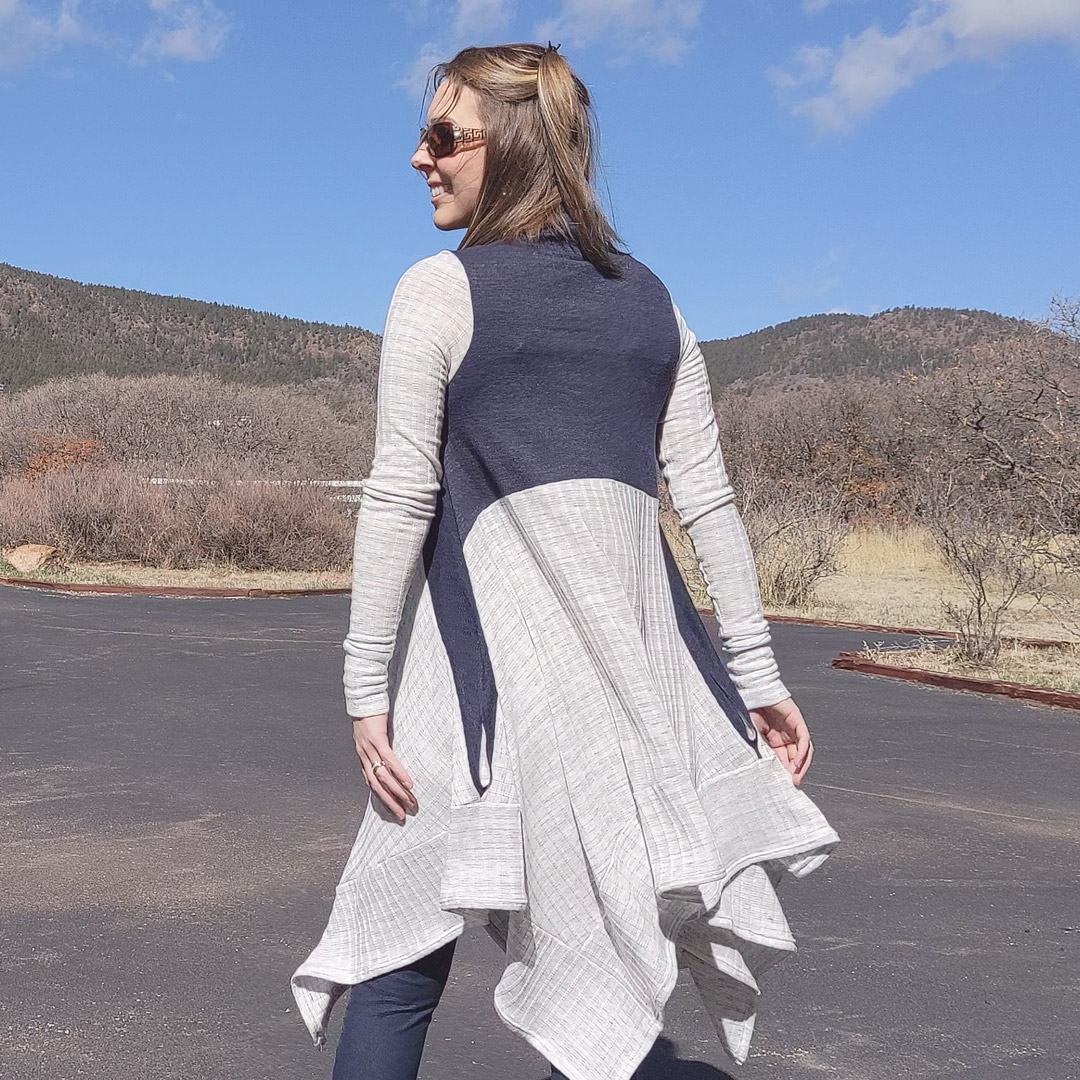
This whole project started as I was wearing my original Ginger Dress to work one day, and as I was walking through the office, I found myself searching for pockets in all the wonderful folds of fabric. Ginger Dress with pockets. This, I shall make.
About the Fabric
Boho Fabrics had a spring clearance sale, which means I basically got 4 yards of this marble ice rib knit for free. It is so beautiful. I’m such a fan girl for Boho’s sweater knits.
MAIN: Marble Ice 9×4 Brushed Rib Knit Fabric
- Weight: 9.5 oz
- Horizontal Stretch: 100%
- Vertical Stretch: 50%
- Contents: Poly, Rayon, Spandex Blend
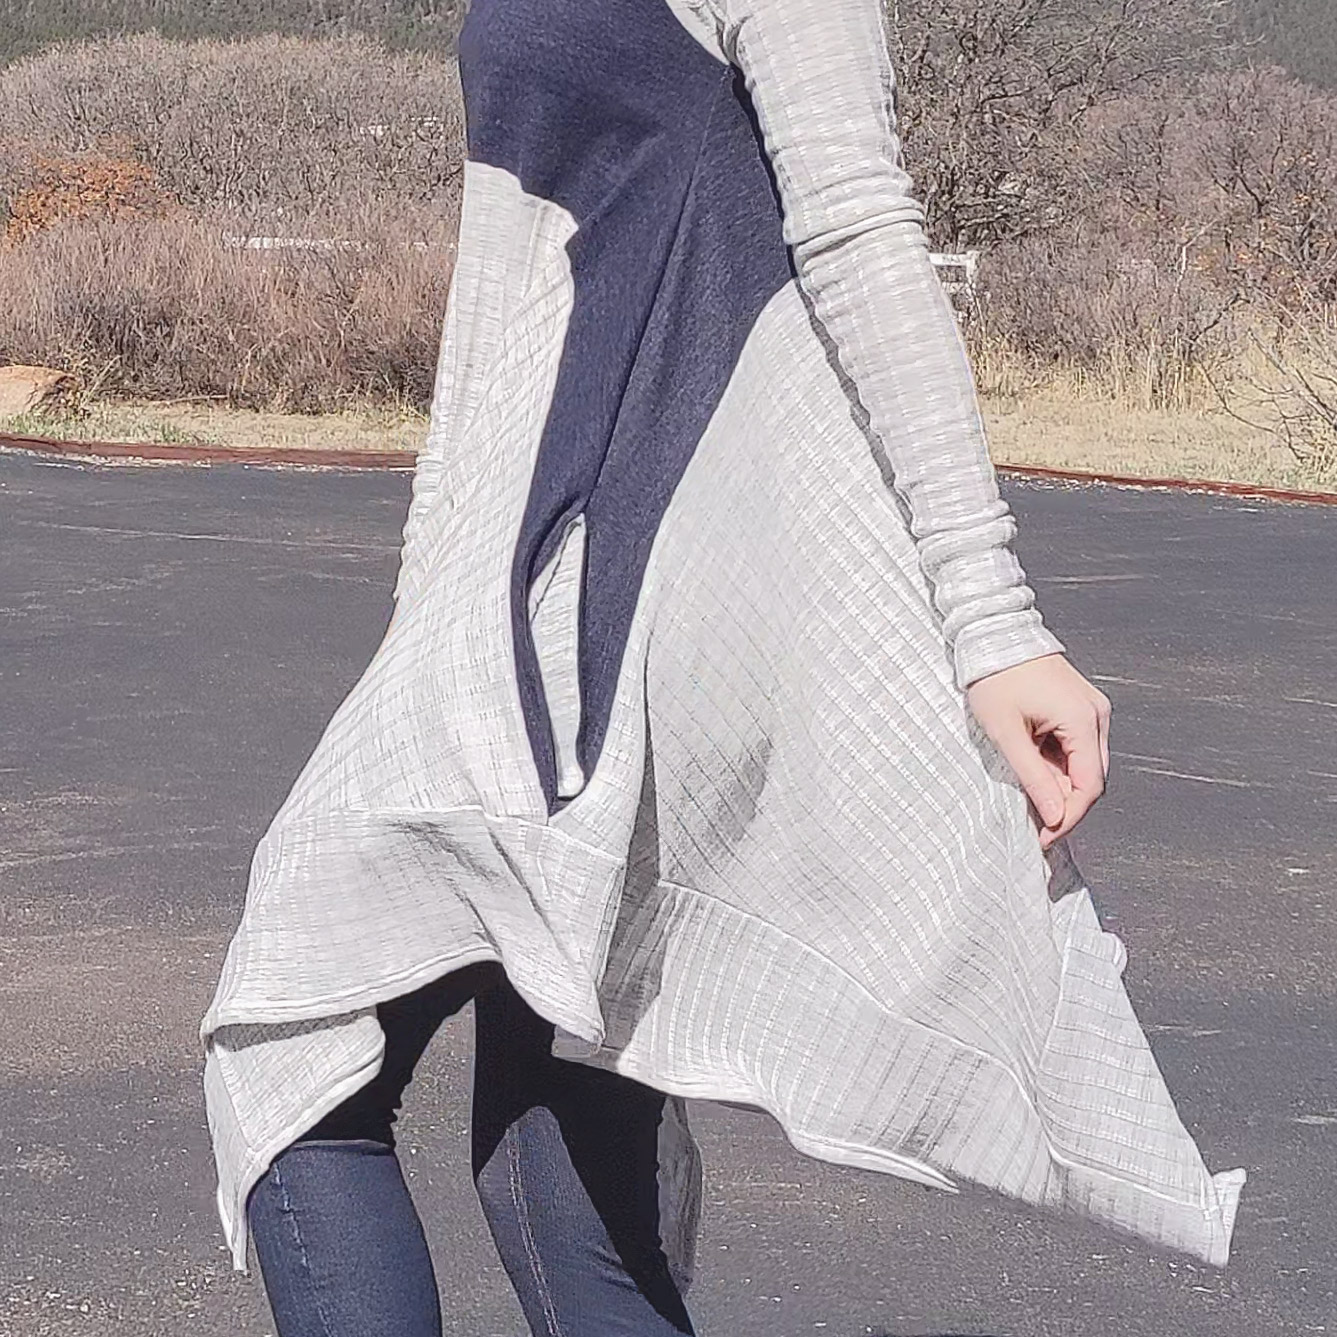
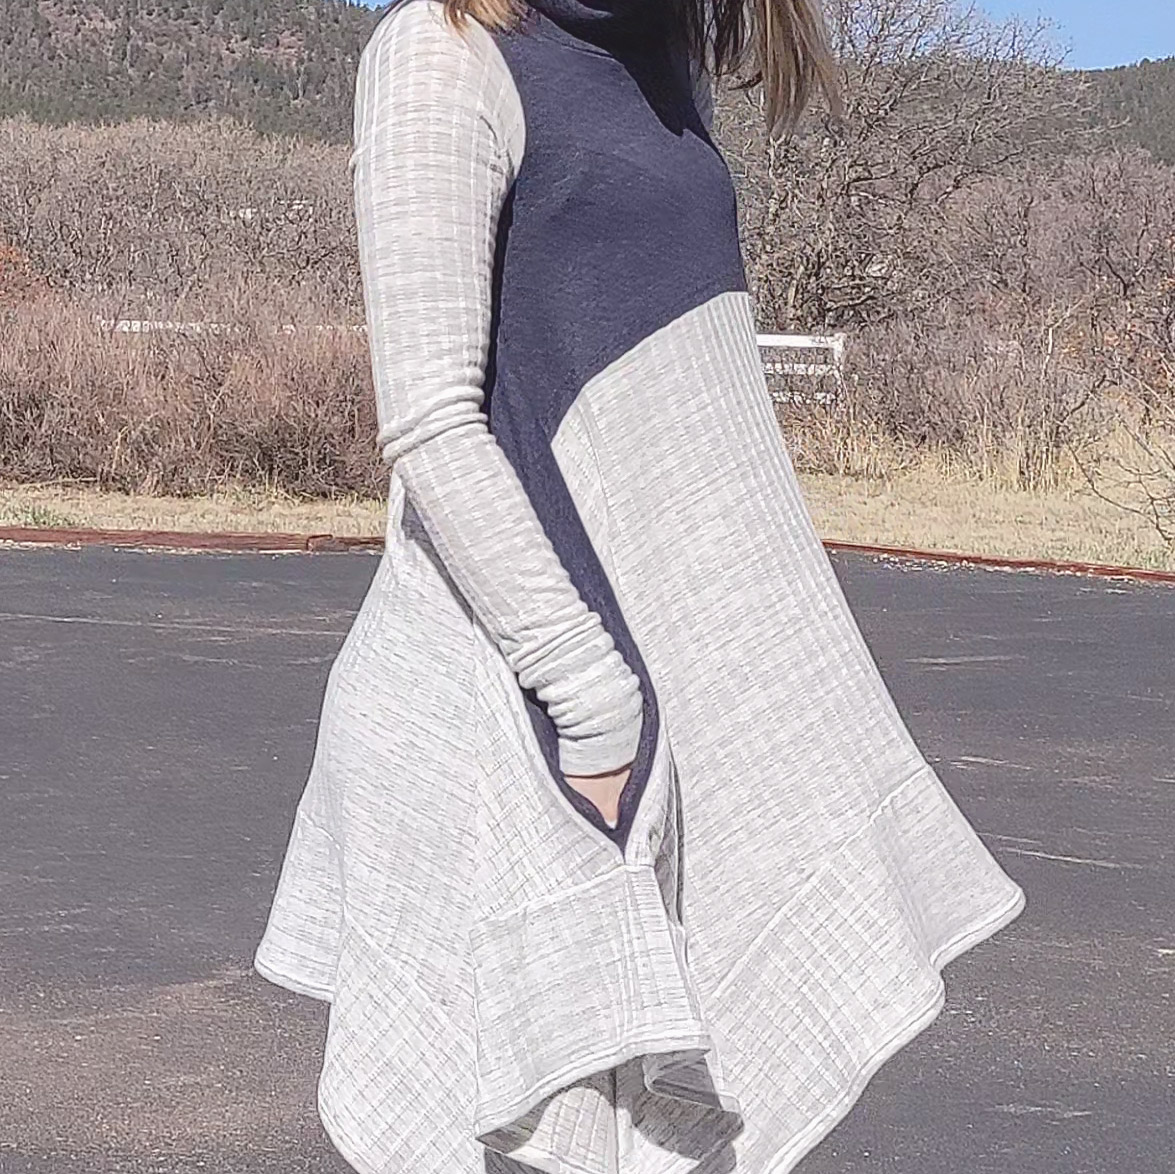
It looked like the brushed side of the fabric was intended to be the face, but I could not pass up using that incredible softness against my skin. Good choice in the end, because the other side has this lovely luster to it which looks beautiful as the face. I made sure the brushed side of the fabric would serve as the interior of my pockets, too. So tactilely satisfying.
The drape is gloriously fluid, which is more than evident in my photos. As a lighter sweater knit, it makes for a great transitional piece. I wouldn’t wear this out in freezing temps without a coat, but as the weather tries to decide between winter and spring, this fabric shines.
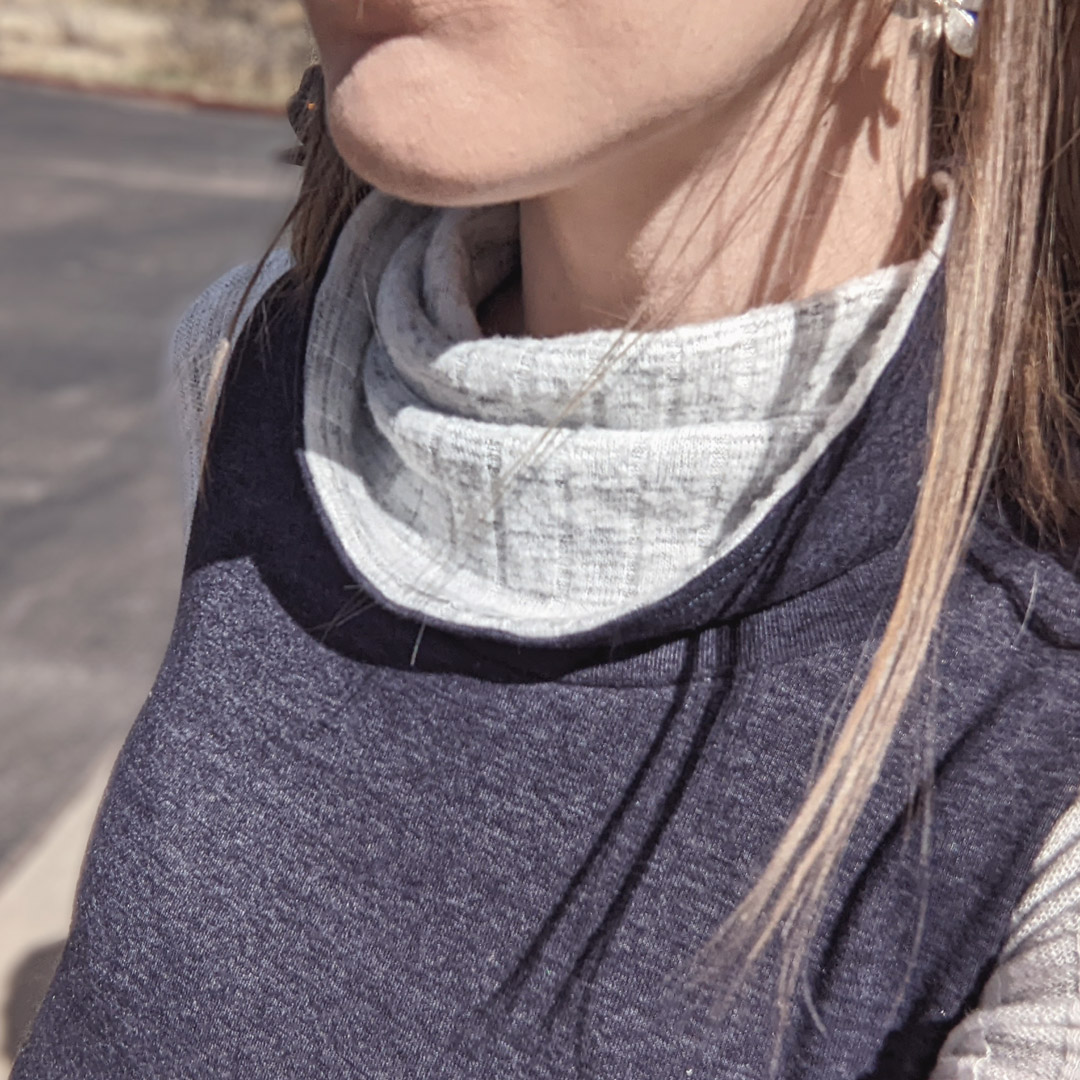
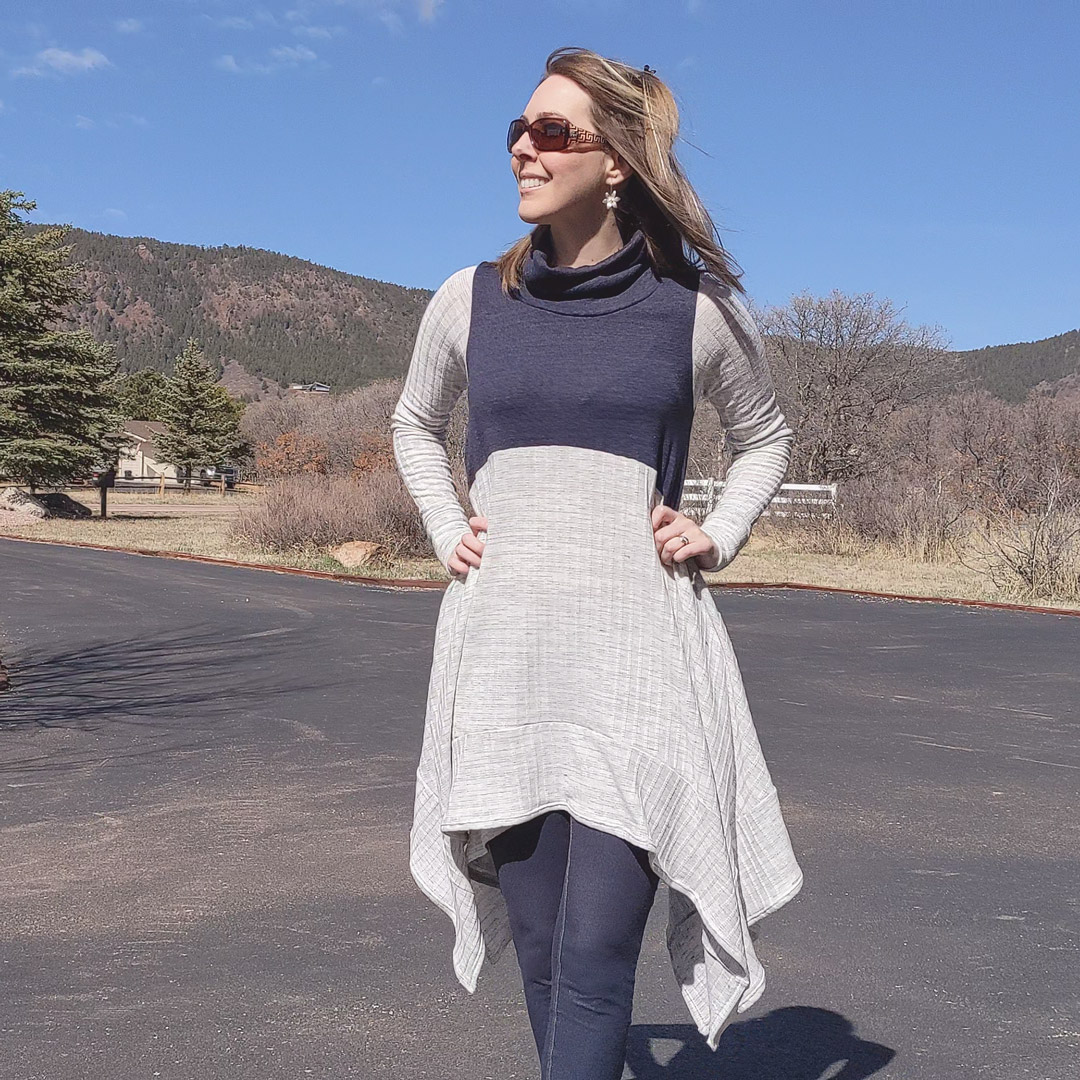
It was more sheer than I expected, so I changed the design I had in my head to utilize the navy blue for a color-blocked section of the bodice instead of the bottom trim.
COLOR BLOCK: Titan Navy Blue, 1×1 Rib Knit
- Horizontal Stretch: 125%
- Vertical Stretch: 25%
- Weight: 9 oz
- Contents: Cotton/Spandex
This knit has a little bit of heathering which gives it something of a denim look. Both sides are smooth (no brushing) and it behaves very nicely while sewing.
What I Did Differently
- Sized up from a 4 on my original to size 6. That was just what I needed to relieve the slight snug feeling around the shoulders and bust.
- Lengthened sleeves by 2″ from original pattern.
- I measured 6.5″ down from the bottom of the armscye and drew a perpendicular straight line across the pattern in order to colorblock the bodice.
- I mashed the pockets from the Duchess Jacket into the pattern.
- Like my original version, I lengthened the neckband to 10″ to create a cowl and constructed it with a lining.
What I Did Stupid
- I attached the pockets to the bottom of the skirt instead of the side seam at first. I had to unpick all four pattern pieces, which could have been a lot worse. Since I almost exclusively use my lightning stitch at the longest setting, it’s not the worst thing to unpick once you identify the bobbin thread.
- I sewed the side seams of the sleeves together before attaching the sleeves to the bodice. This is when looking at instructions can save you some sew-drama. On this pattern, you attach the sleeves on the flat, and then sew the side seam of the sleeve continuously into the side seam of the skirt. I had serged those seams so they were actually much easier to unpick.
- I attached one sleeve to the wrong side of the bodice and didn’t catch it until it was half serged. So I had to unpick that, rearrange the pattern piece, and diligently re-serge the pieces which were then missing the seam allowance along half the sleeve cap. Not fun, but I managed.

Serge vs. Machine
I made my first Ginger Dress before I had my serger, and ohmygushlemmetellyou the utter joy of serging the trim along the bottom. What a massive time saver! Those are some long seams, and to have to go over them twice with a sewing machine gets old quick.
Serger |
Sewing Machine |
|---|---|
|
|


Project Settings
Sewing Machine
Presser Foot |
Stitch# |
Width |
Length |
Needle |
Top Thread Tension |
Application |
|---|---|---|---|---|---|---|
standard zig-zag (A) |
5 |
1.0 |
4 |
blue tip |
4 |
seams |
adjustable edge (SE) #6 |
5 |
1.0 |
4 |
blue tip |
4 |
cowl understitch |
overedge (C) |
6 |
5.5 |
3.5 |
blue tip |
4 |
edge finish |
standard zig-zag (A) |
1 |
3.5 |
3.5 |
blue tip |
4 |
pockets |
1/4″ foot |
1 |
3.5 |
3.5 |
blue tip |
4 |
pocket topstitch |
standard zig-zag (A) |
1 |
3.5 |
3.5 |
double knit, wide |
4 |
hem |
Serger
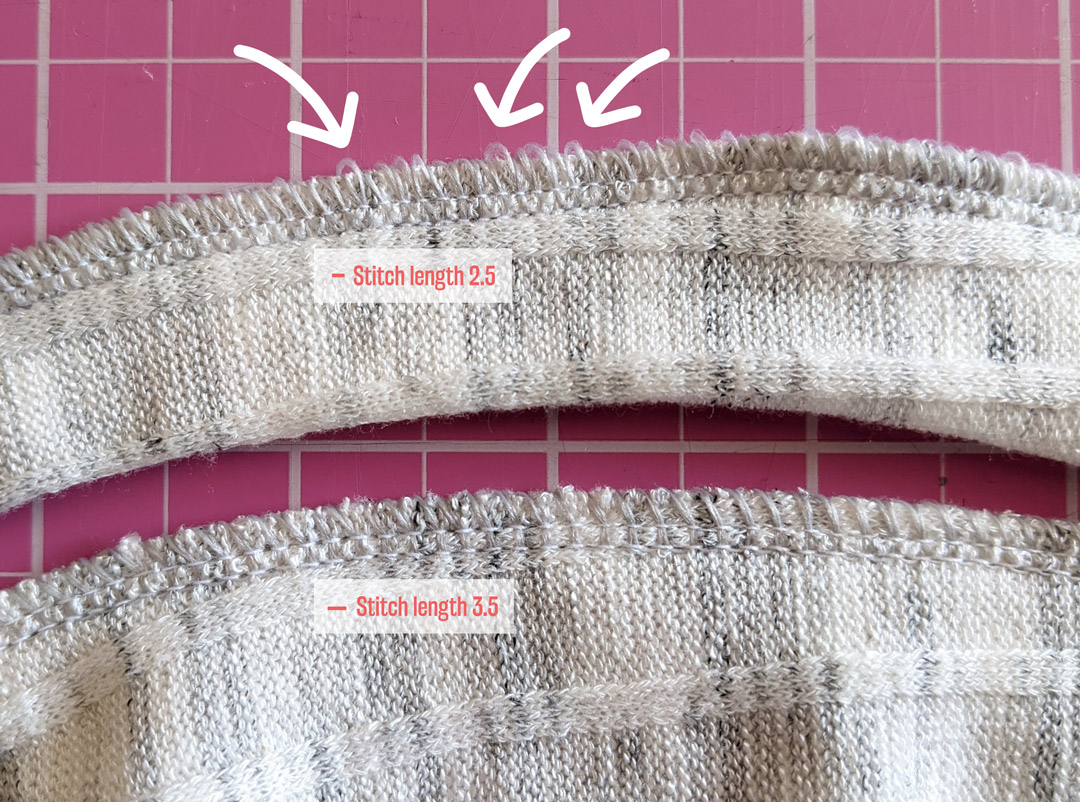
I’ve been finding I don’t stray very far from my superstretch stitch when I serge knits, but this time I had to tweak the stitch length. My looper thread was randomly hanging off the seam. Lengthening the stitch solved the problem.
Stitch |
Needles |
Finger |
Threads |
Tension LN |
Tension RN |
Tension UL |
Tension LL |
Cut Width |
Stitch Width |
Differential |
|---|---|---|---|---|---|---|---|---|---|---|
super stretch |
R, L |
B |
3 |
3 |
2.5 |
— |
0.5 |
6 |
3.5 |
1.5 |
Leave a Reply