
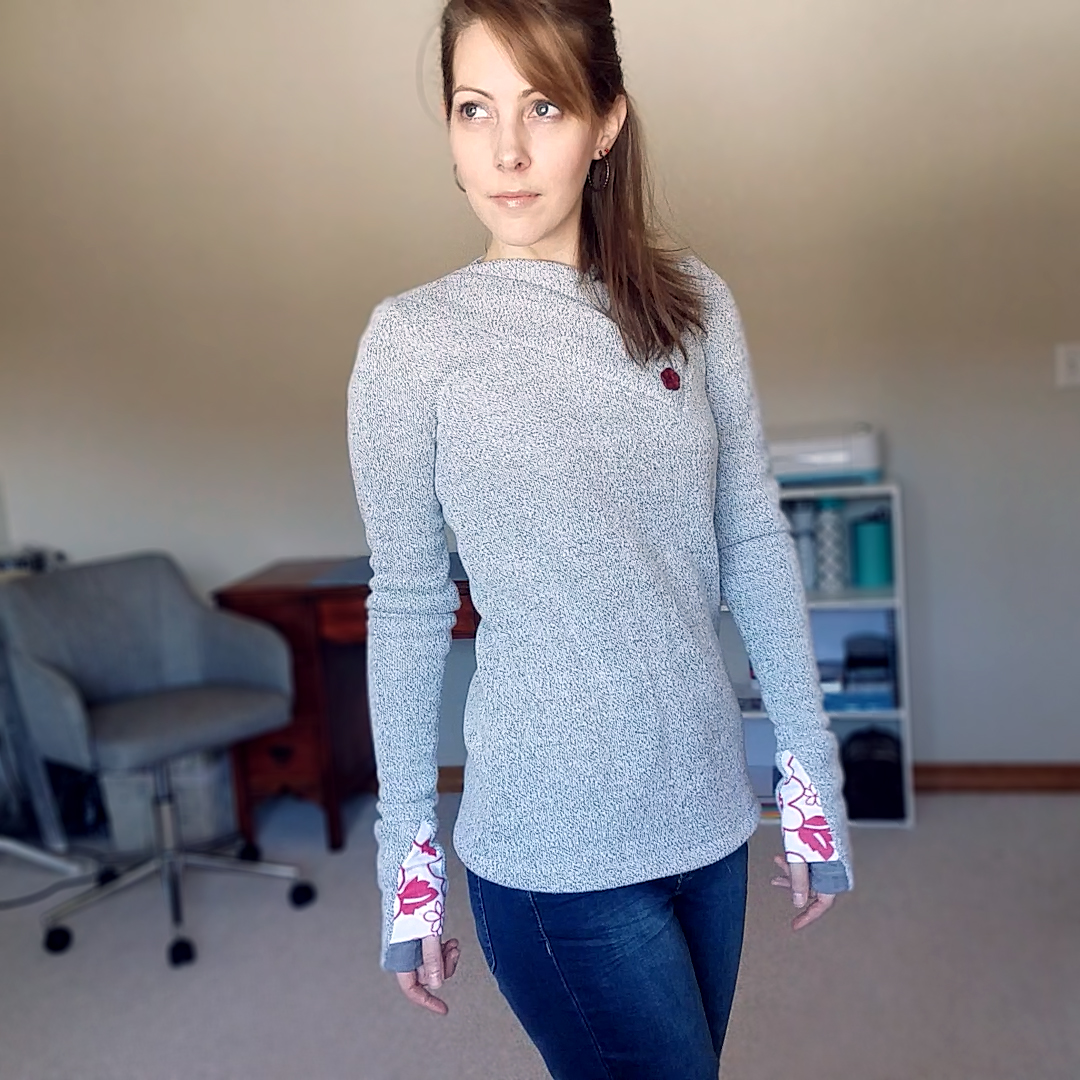
The pleated neckline and decorative buttons sucked me in with this pattern: The Malala wrap collar sweater by DIBY.club. (That and the 20% off coupon I had.)
How were the instructions?
As my first DIBY Club pattern, I was floored at the instructions. They are very well designed and easy to follow, and stuffed full of bonuses, like walkthroughs for doing a full bust adjustment, lengthening/shortening, beginner tips, measuring yourself, grading between sizes, and so on. A beginner picking up this pattern might feel overwhelmed at the wealth of information in it, but they would learn a ton on just one pattern. That’s great quality. It also includes links to videos, such as constructing the pleated neckline, and more generic ones that cover how to baste stitch.
I am admittedly notorious for rewriting instructions. I have no hesitation in crossing out stuff and writing over with words that make more sense. I only had to do that here once in a step that said the bodice should be inside out. It actually should’ve read right side out.
How difficult was the pattern?
The neckline is the most difficult part, but the included video makes it a breeze. The most time-consuming thing, as usual, was prepping the pattern: printing and assembling, tracing (I always trace so I preserve the originals. It’s quicker to trace than tape 40 pieces of paper together.), grading, and adding length.
The pattern includes a generous number of options: shirt, tunic, or dress length, 3/4 or full sleeves, hem band and sleeve cuff options.
What I Changed
- I added 2 inches to the bodice since the pattern is drafted for a height of 5’5″.
- I added 1.5 inches to the sleeves since I have an obsession with extra long sleeves. In retrospect, I probably didn’t need to do this because…
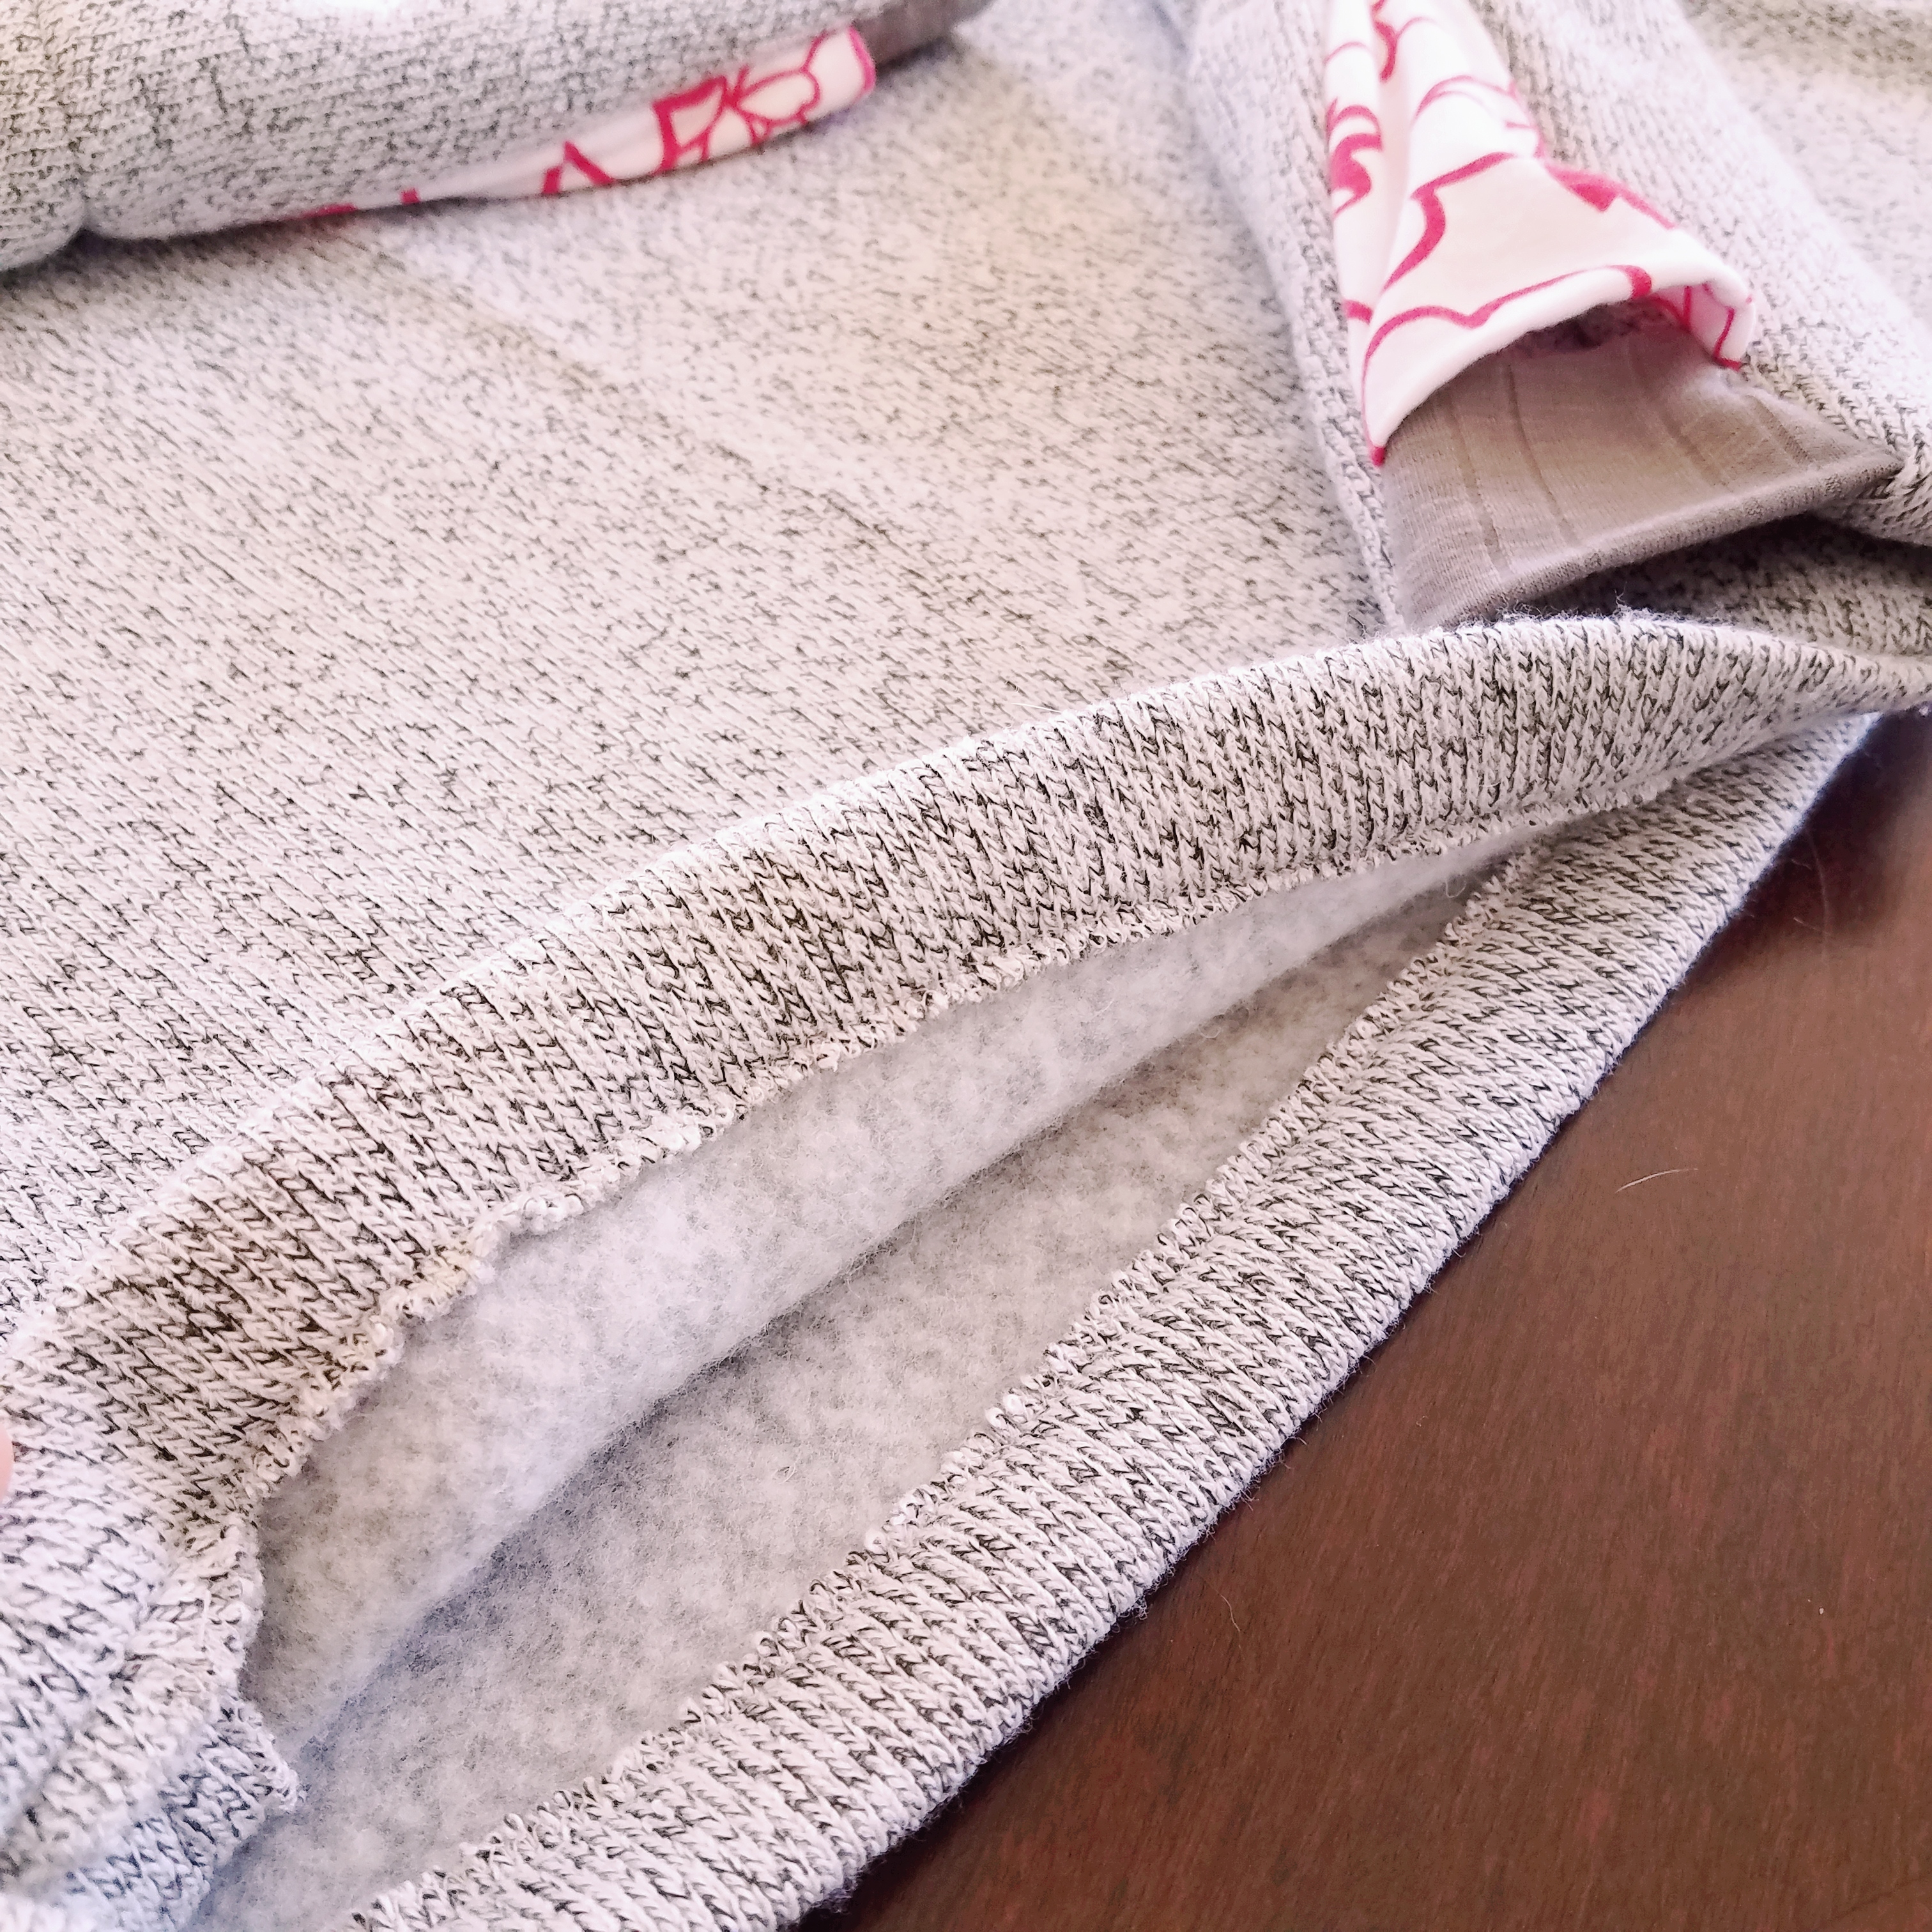
- I added the Cedar thumbhole cuffs (size 8) from the Thumbhole Cuffs Pack by Sinclair Patterns. With these added cuffs, I didn’t really need the added length in the sleeves.

Minor Issues
My main fabric has a little less stretch than the recommended 40%, which makes the sleeves just slightly more snug than I would prefer. I also forgot that my lightning stitch is left-aligned on my machine, so instead of a 3/8″ seam, I ended up with a 1/2″ seam on one sleeve.
Final Thoughts
The neckline is the selling point on this shirt. Thicker fabrics like the type I used can add a bulky feeling to it when worn, but it’s not constricting. I’d tell you what kind of fabric I used, but I don’t really know. It was on sale at Hobby Lobby. You’ll see in the photos it has a rib knit face and a brushed back, so whatever name you wanna put to that, go ahead. The sleeves and armscye are a little snug, so going with a minimum 40% stretch in your fabric as recommended will help mitigate that.
It would be cool to add some in-seam pockets like on the Orono top from Itch to Stitch. As it is, I’m super happy with how this turned out. This is definitely a go-to on cold winter days.


Project Settings
Presser Foot |
Stitch# |
Width |
Length |
Needle |
Top Thread Tension |
Application |
|---|---|---|---|---|---|---|
standard zig-zag (A) |
5 |
1.0 |
3.5 |
blue tip |
5 |
seams |
standard zig-zag (A) |
6 |
1.5 |
2.0 |
blue tip |
5 |
collar |
standard zig-zag (A) |
0 |
3.5 |
5.0 |
blue tip |
5 |
basting |
standard zig-zag (A) |
1 |
3.5 |
2.0 |
blue tip |
5 |
stay stitch |
button (T) |
6 |
5.5 |
0.2 |
blue tip |
5 |
buttons |
overedge (C) |
6 |
5.5 |
2.5 |
blue tip |
5 |
edge finish |
applique (F) |
5 |
1.0 |
3.5 |
blue tip |
5 |
cuff to sleeve attachment |
Hi! I love your Malala sweater and I’m trying to replicate it. Do you know how much fabric you needed in total? I find the pattern a little confusing. Thanks!
Oh gosh, that was a while ago, and I did have a good amount left over from what I bought. I think I bought four yards of that fabric and I had enough left for a cropped bolero, too. Of course, the size/options you’re making and the width of your particular fabric will always be a factor. Assuming you’re size 20 or less and you use the same options I did, three yards should be plenty.
How did you get the neck to lay flat? I’ve followed the instructions but I have a bit of a bulge below the buttons.
Hi Pamela! That angled part below the buttons is a lot like sewing a v-neck, and it does take a little extra finesse to avoid bulges and puckers. Honestly, they still happen to me now and then. I wrote a post with some tips for sewing v-necks (https://www.deborahjsews.com/v-neck-sewing-tips-adjusting-the-pattern-neckline-and-tips-for-sewing-a-flawless-v-neck), so maybe that can help you out.