Unpicking stitches is an unavoidable part of the sewing life. Some stitches are easy to contend with, while others—like the triple zig-zag—will probably make you want to burn whatever you’re working on rather than salvage it.
I recently completed a pair of Peg Legs in a Brazilian performance knit fabric that I absolutely love, but the waistline turned out a lot more snug than I preferred. I had used a combination of a triple zig-zag for the seam, and regular zig-zag to finished the raw edges. I debated if I wanted to even attempt unpicking it or just cut it off and deal with 0.5″-0.75″ inches of fabric I would lose on the waistband and the top of the legs, then decided to be a good little sewist and at least try.
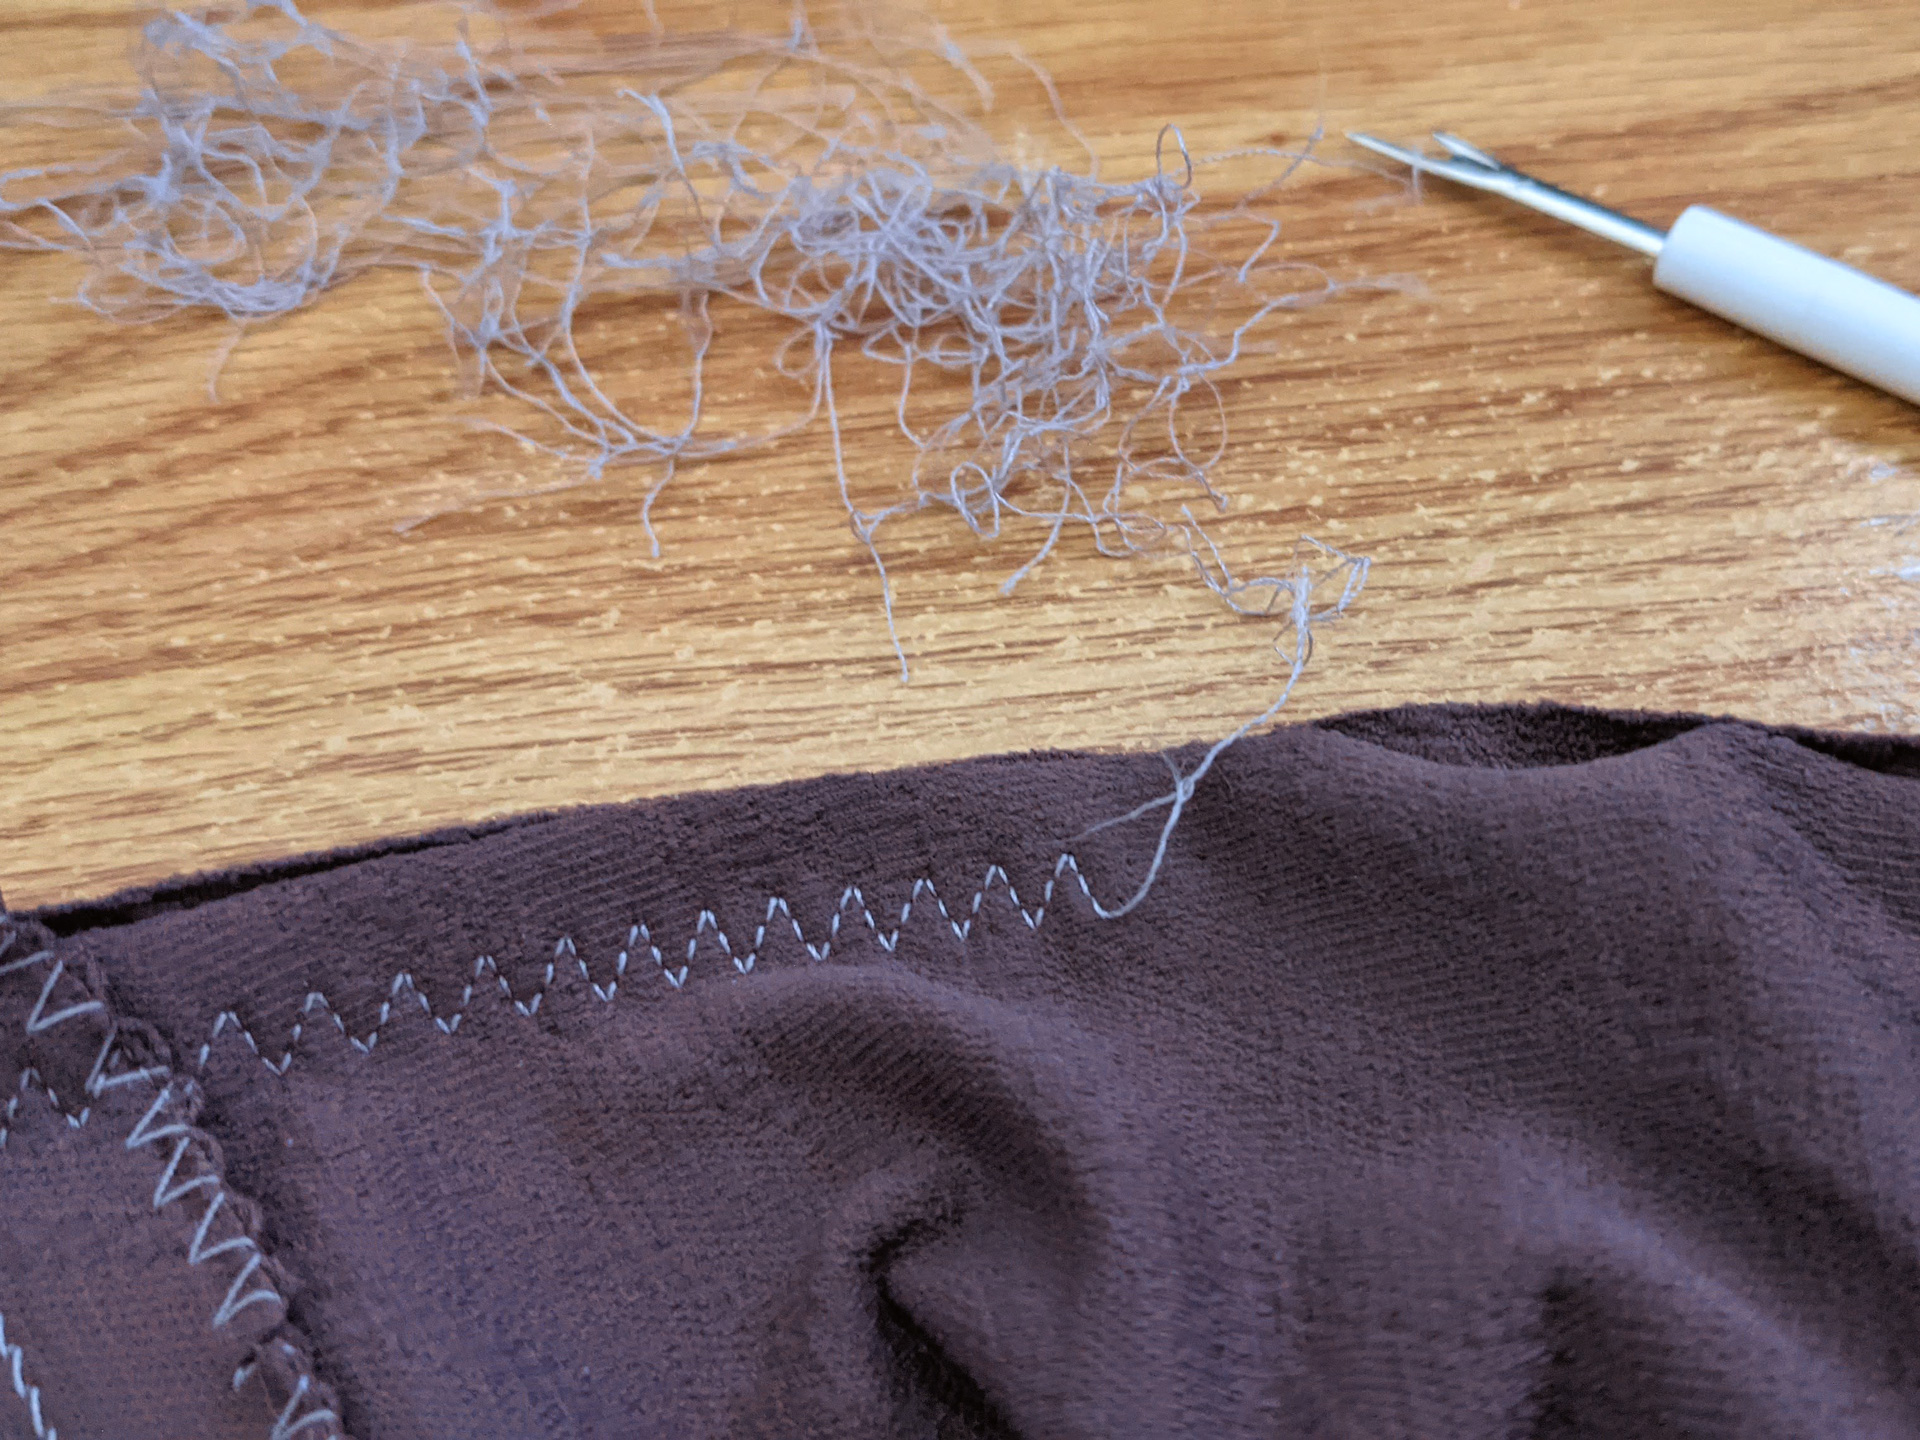
The regular zig-zag stitch on the edge finish was easy to remove. The triple: not so much. But, there are a few tips that will make unpicking the triple zig-zag a lot easier.
Begin by cutting the bobbin thread.
I had started unpicking the needle thread, which meant I had to go stitch by painstaking stitch. As soon as I switched to unpicking the bobbin thread, I could do larger sections at a time. The reason for this is the bobbin thread on any stitch typically functions as the thread around which the needle thread(s) “lock.” Think of a vine wrapping up and around a stick. You can snip the vine from around the stick one bit at a time, or you can cut the stick and slide it out from the middle of the vine.
How to identify your bobbin thread
Identifying your bobbin thread is easier with some stitches than others. There are a few ways to do it.
- Visually. Some stitches are way obvious, such as a twin needle straight stitch. You’ll have two rows of straight stitches from the needle threads, and a single row of stitches on the other side from the bobbin.
- You might remember which side of your fabric was facing down when you were constructing the seam. This is easier with fabrics that have an obvious back vs. face. Whatever side was facing down will have your bobbin stitches.
- The bobbin thread doesn’t look as “detailed.” On the triple zig-zag, for example, you can see between the photos below that the 3-stitch pattern on one side is very defined, and more muddled on the other side. The muddled/less-detailed side is the bobbin thread.
- Good ol’ trial and error. If you’re snipping sections at a time and trying to pull the snipped thread out but it’s not behaving, try the other side of the stitch to see if it’s easier.
The Technique

Bobbin thread
- Once you identify your bobbin thread, it’s pretty straightforward. Snip the bobbin thread in intervals. The less complex the stitch, the longer the the interval can be. You can see with my triple zig-zag above, I kept the intervals relatively short.
- Free up a thread tail along each section that will be easy to grasp. I use a small pair of pliers to grip the tail, and then pull the thread parallel to the stitch until it slides out.
- Once you remove the entire length of the bobbin thread, your needle thread on the other side can be pulled right off in one continuous piece.
A Final Tip
Put on some background noise—music, a binge-able TV show—or sit outside if the weather’s nice… Whatever environment you can create that you enjoy (or even look forward to) being in and makes the time pass will help a lot towards powering through pulling stitches without pulling your hair out.
And take a break if you need it.
This saved me so much time, and my sanity!