Tossing out a favorite pair of jeans is one of life’s first-world tragedies. Even worse is when the only thing that favorite pair of jeans suffers from is one ugly hole. Really? Throwing away an entire pair of jeans I love because two square inches of it turned to crap? There must be a better way.
Better than the classic denim patch…
Better than those embroidery hacks I’ve seen…

Better than cutting them off to make shorts…
Better than attempting to make more holes so it looks intentional (and thus renders them unwearable at work)…
Enter The Better Way
I found this post that lists 15ish ways to mend jeans, and on that list was this fabulous patchwork idea from 2013 by a Spanish chick named Sylvia. I knew this was the winning idea.
How I Did It
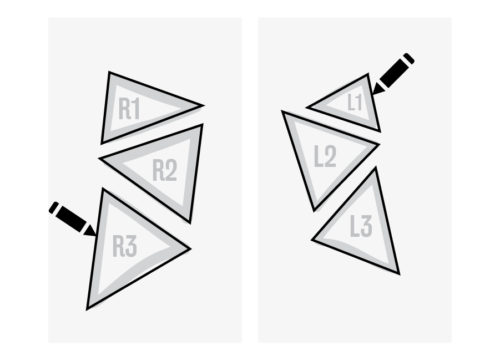
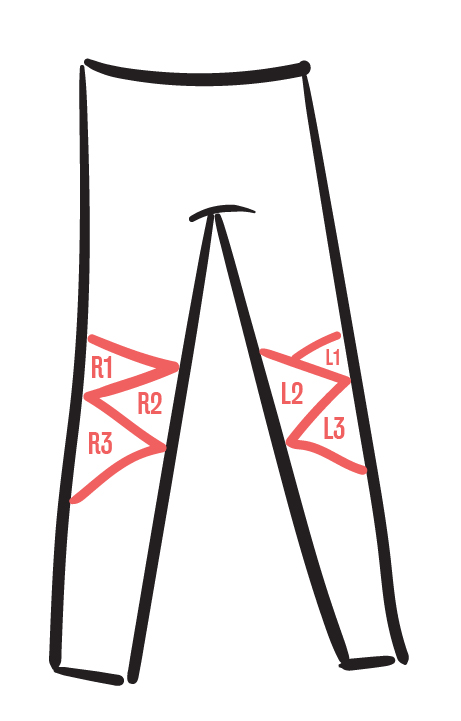
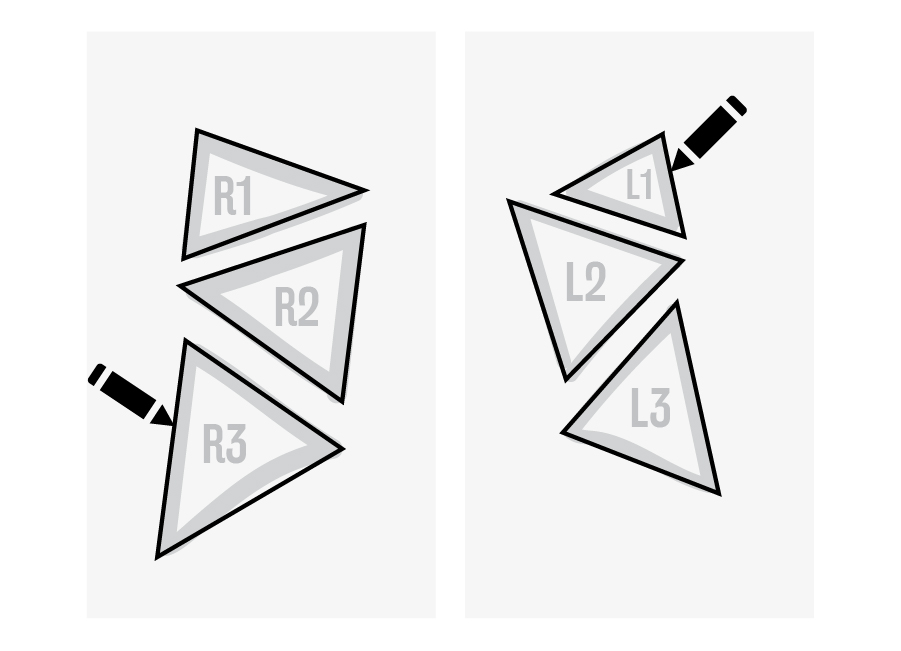
- I put on the jeans and chalked out some lines for my patchwork pieces. When I landed on something I liked, I drew over them with a water-soluble marker and numbered them. R for right leg, and L for left leg.

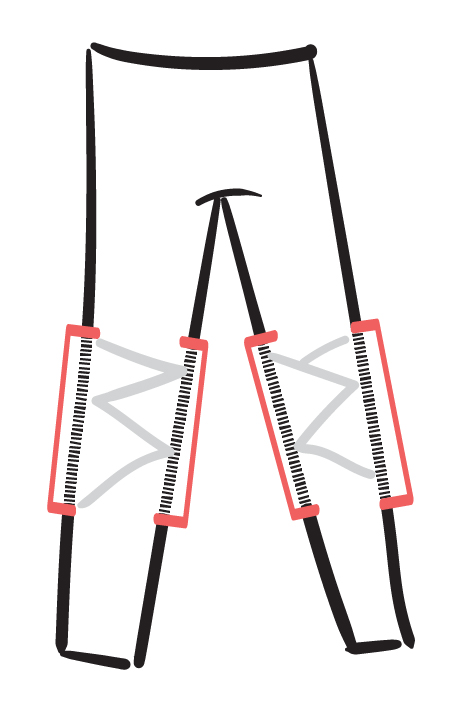
- Took off the jeans and stuck pins at the extremes of where my patchwork would be so when I turned them inside out, I would know where to start and stop ripping out seams.
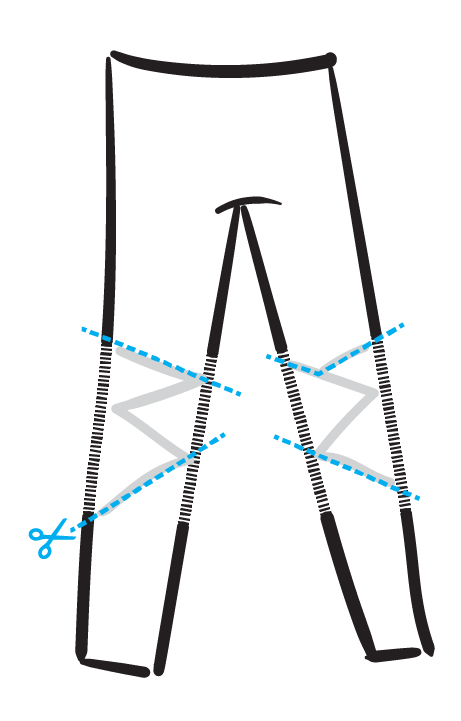
- Ripped out the side seams at the indicated areas.

- I cut out the patchwork area of each leg (front only!)

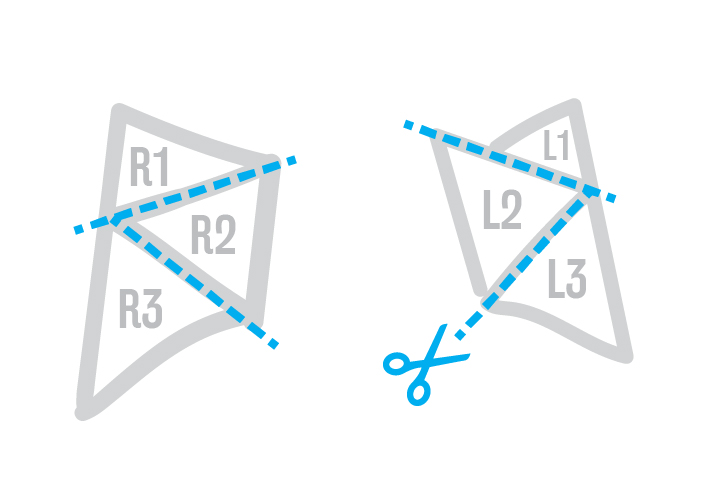
- Then I cut each patchwork piece apart.

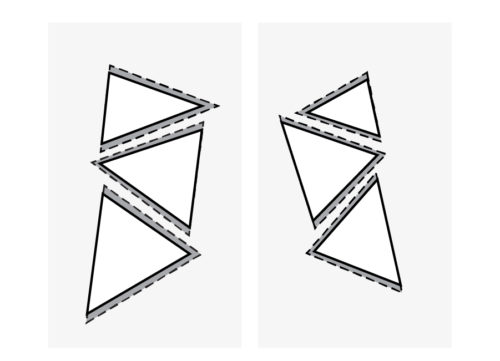
- I laid some tracing paper over each piece and traced. I used a ruler to create straight lines since the knee areas of the original denim were distorted and stretched from many years of wear.
- After tracing, I added a 0.25″ seam allowance where each piece would overlap. I didn’t need to add any to the sides because my original pieces included that seam allowance already after I ripped out the seams and laid the original denim flat.
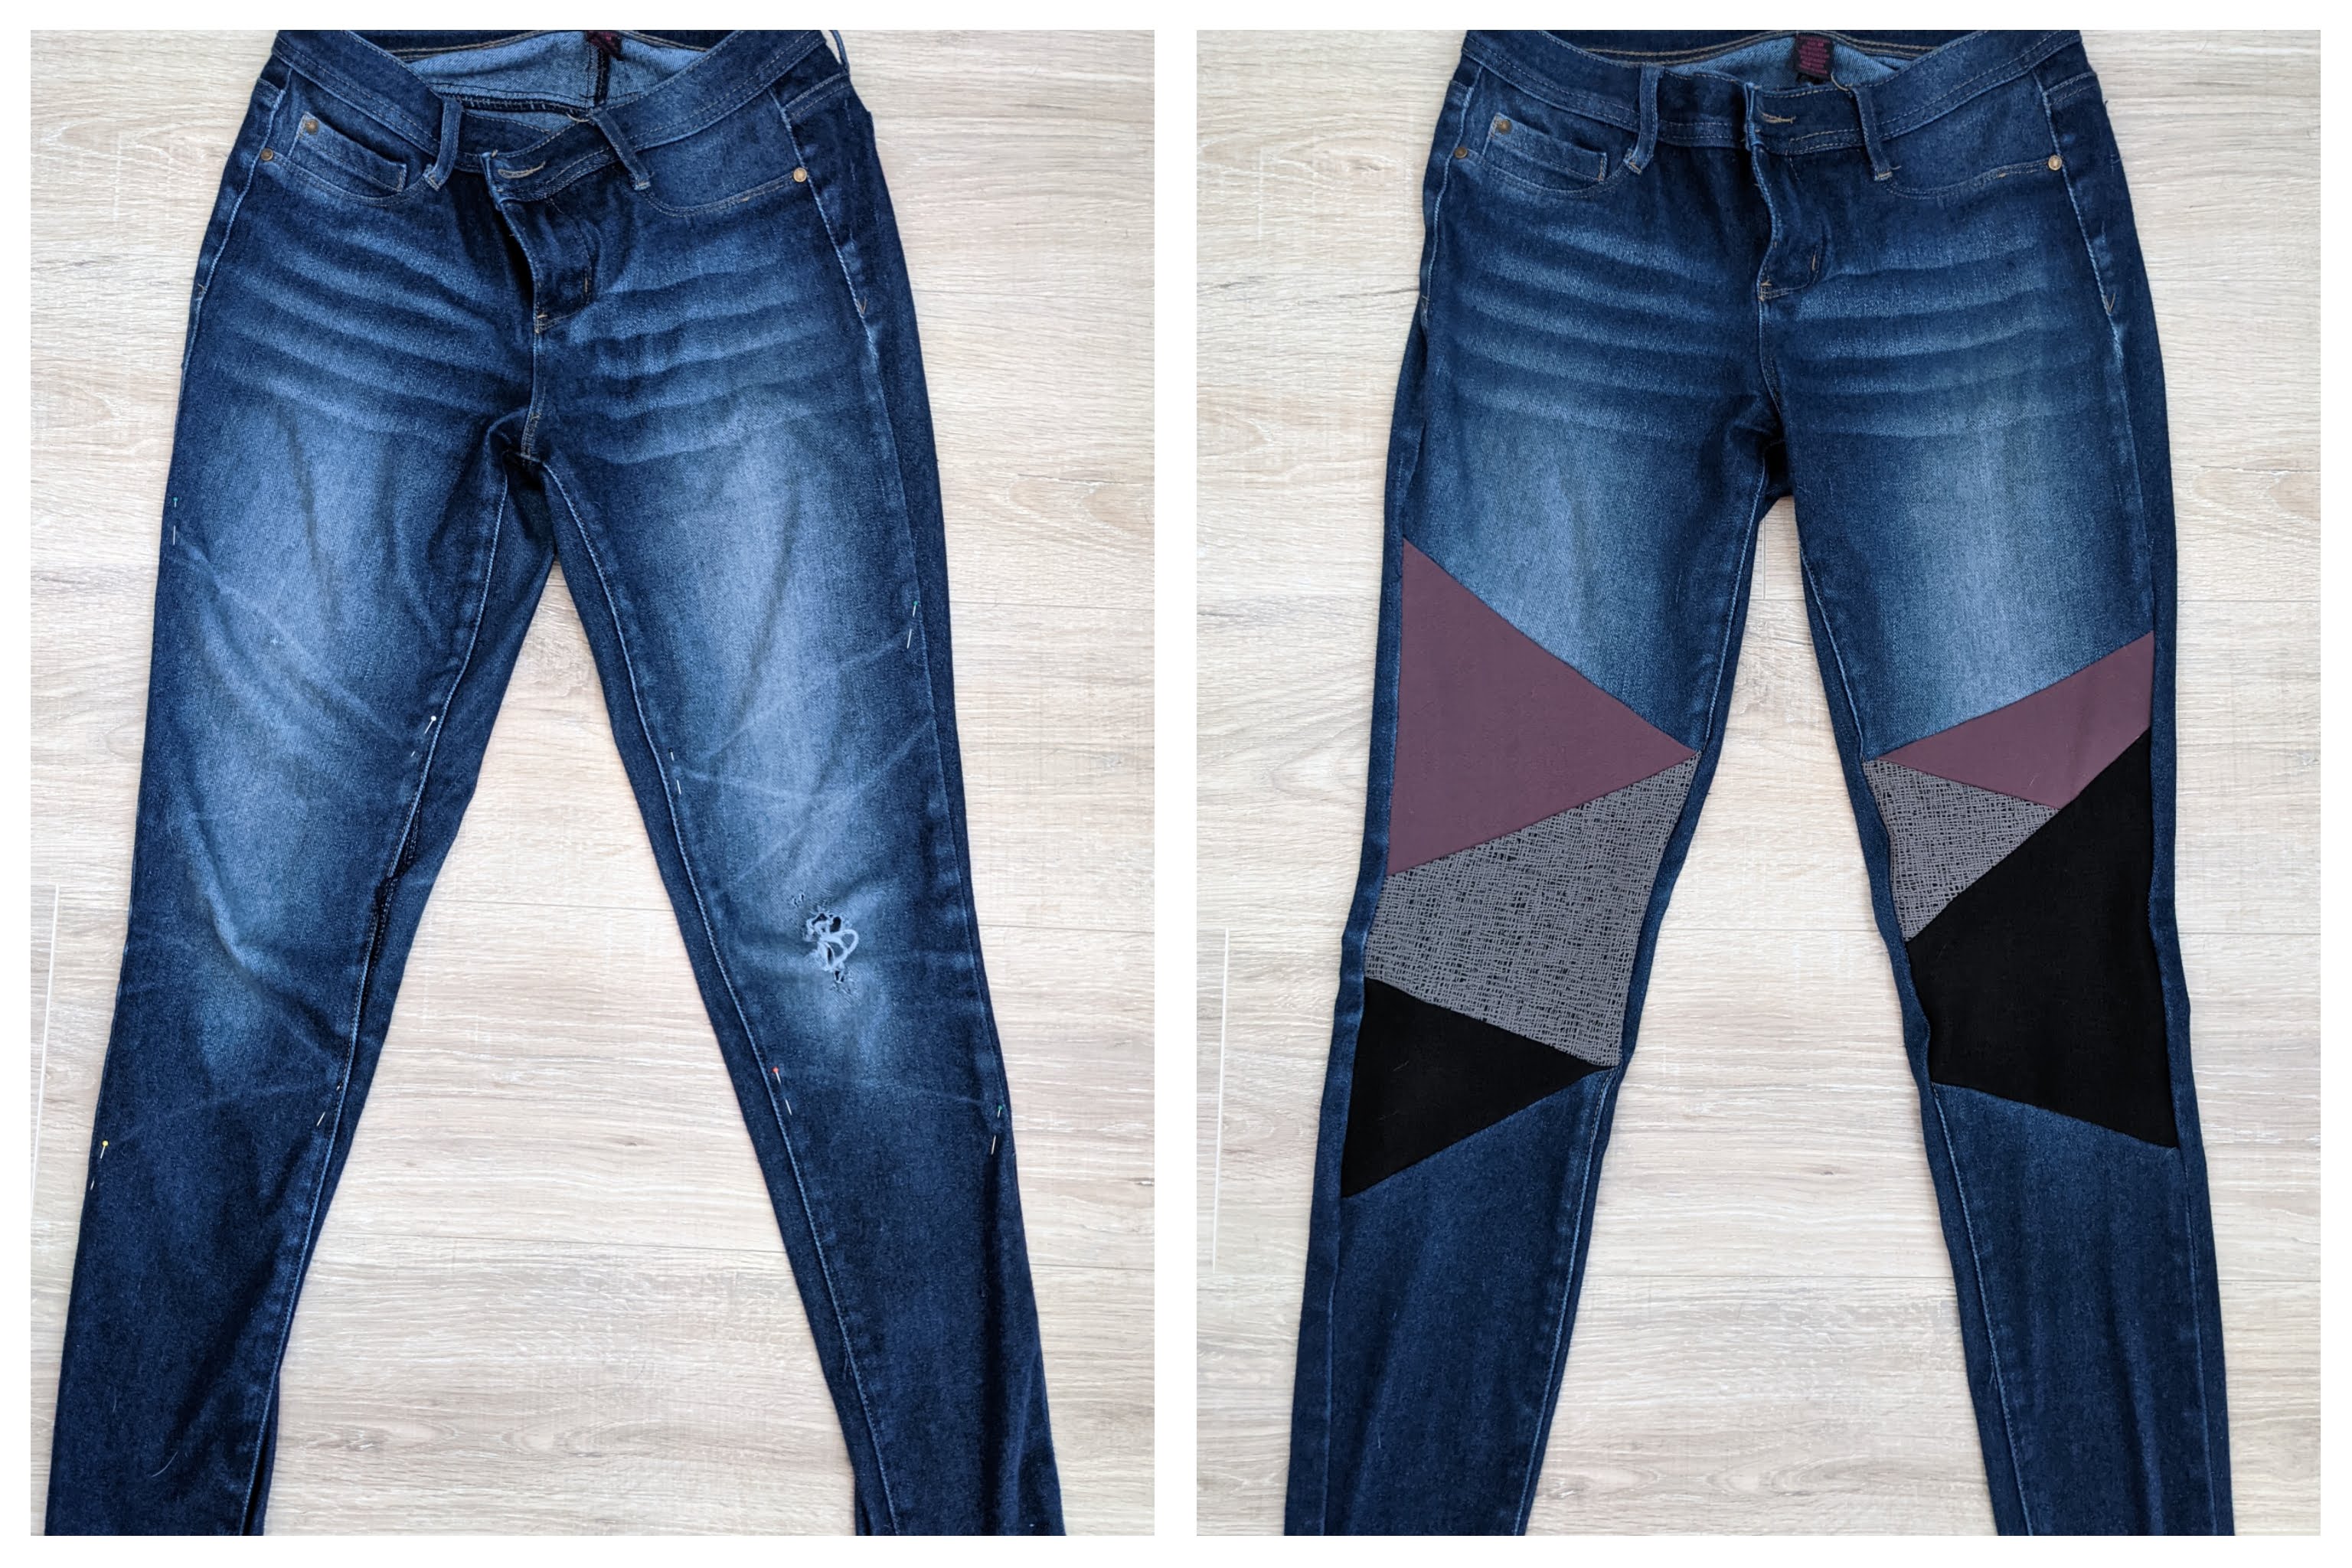
- I cut out these new pattern pieces from my tracing paper and used them to cut my fabric scraps for my patchwork. I used scraps from my So Sew English Brazilian performance knits. The gray and black are opposite sides of the same fabric.
- With right sides together, I sewed together each patchwork piece until I ended up with one large patchwork piece for each leg.
- I turned the jeans inside out and began with the top seam. I stuffed the patchwork piece inside the leg, right sides together, lining up the top of the patchwork piece with the top raw edge of the cut in the pant leg. Sewed that seam.
- I pulled the patchwork piece out of the pant leg and folded the bottom edge up so I could pin it right sides together with the bottom raw edge of the cut in the pant leg. Sewed that seam.
- Then I pinned the side seams together. I started and ended those side seams a little beyond where the patchwork was, following the original seam.
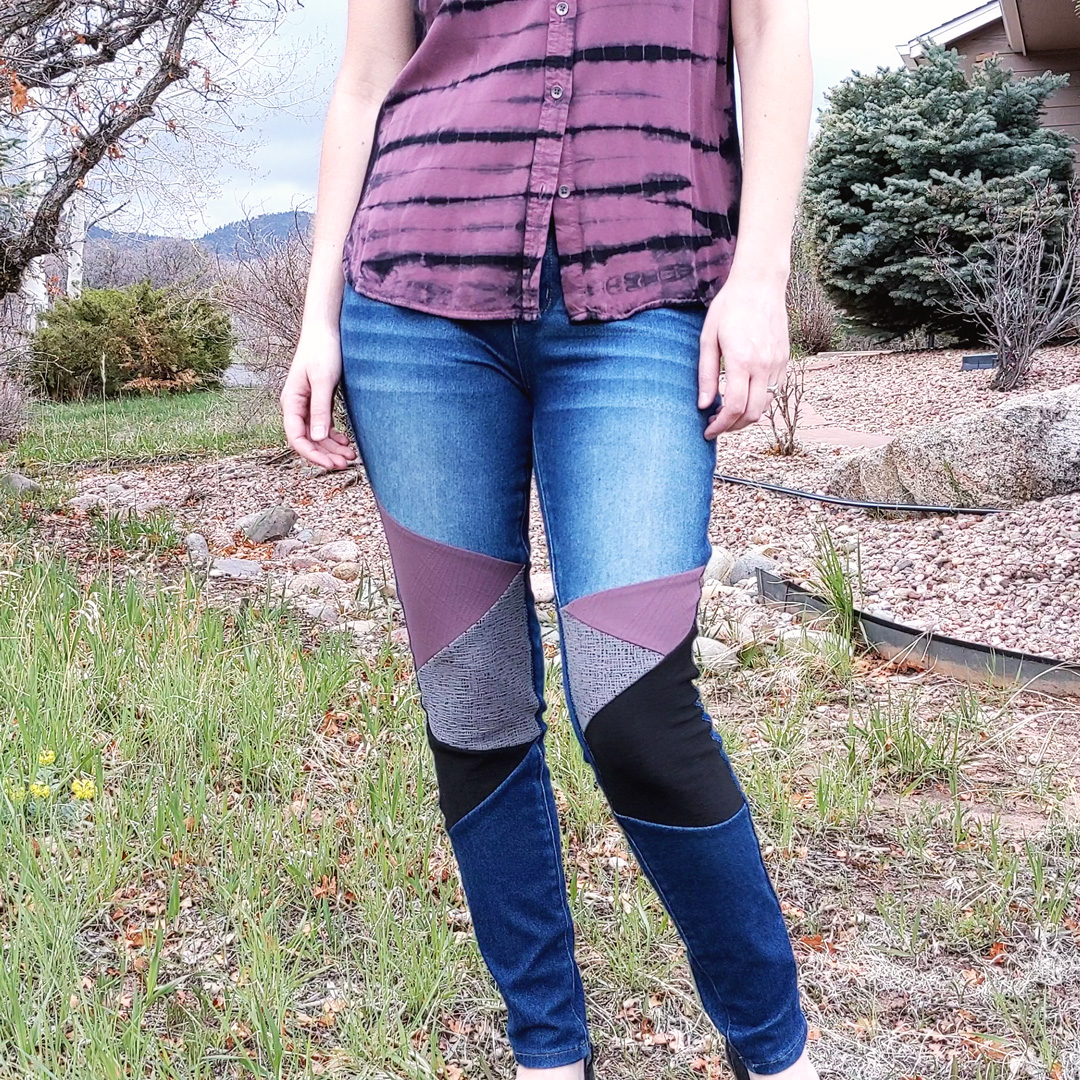
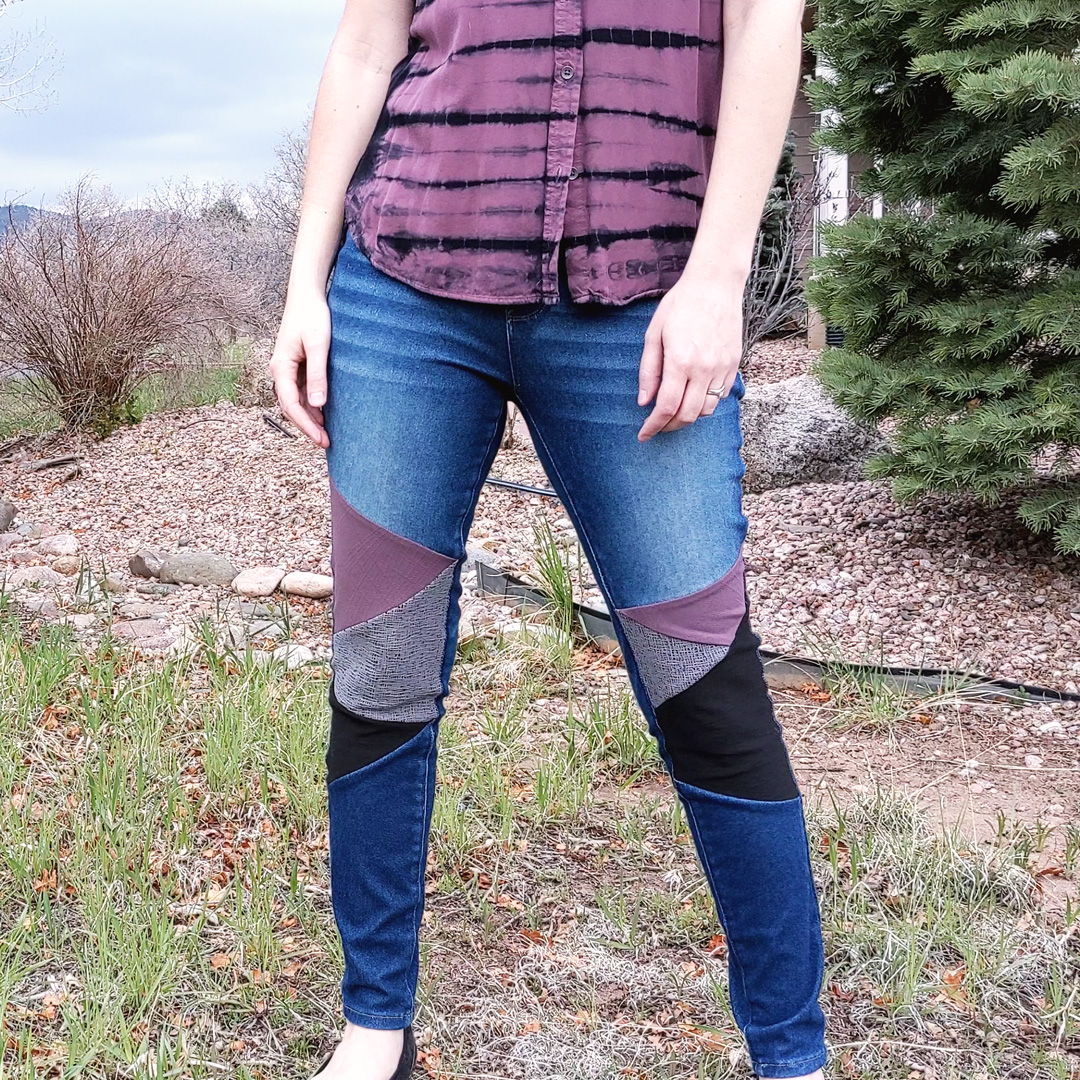
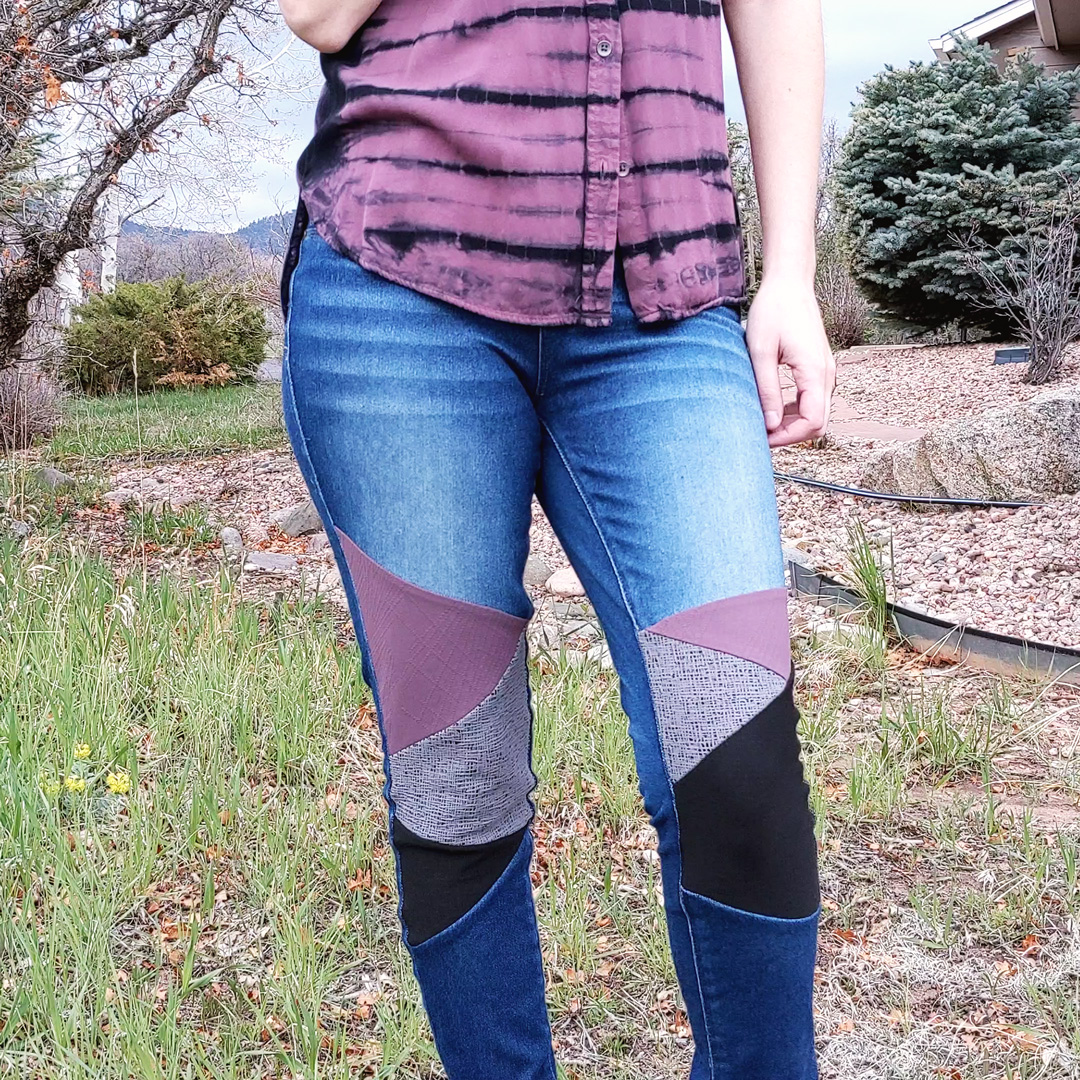
- Repeat with the other leg. Turn right side out. Revel in your old-new-jeans.


Project Settings
Presser Foot |
Stitch# |
Width |
Length |
Needle |
Top Thread Tension |
Application |
|---|---|---|---|---|---|---|
standard zig-zag (A) |
5 |
1.0 |
4 |
blue tip |
4 |
seams |
overedge (C) |
6 |
5.5 |
3.0 |
blue tip |
4 |
edge finish |
overedge (C) |
6 |
6 |
3.0 |
blue tip |
4 |
side seam edge finish |
Leave a Reply