Fast fashion is the death of so many things, not the least of which is fun clothes. It took a while for me to consciously realize what the problem was when I would shop for clothes, but when every trip found me passing over most things and reimagining better versions of those things, I finally realized the answer was just make it myself.
So I learned, from humble beginnings sewing my first seam on some woven cotton that grew into three seams and a poor excuse for a hem, to layering technique on top of technique, until I finally graduated to knits and clothing patterns.
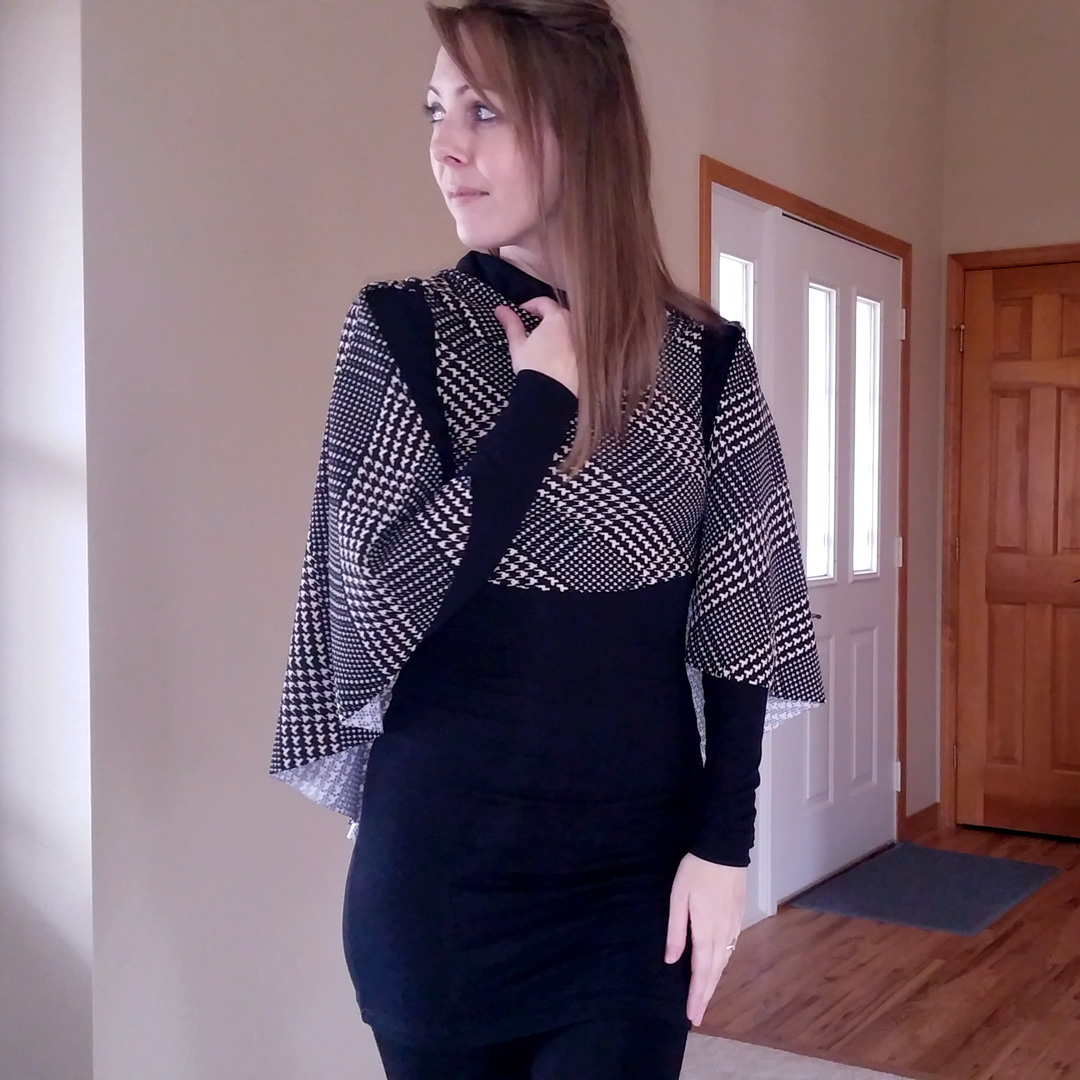
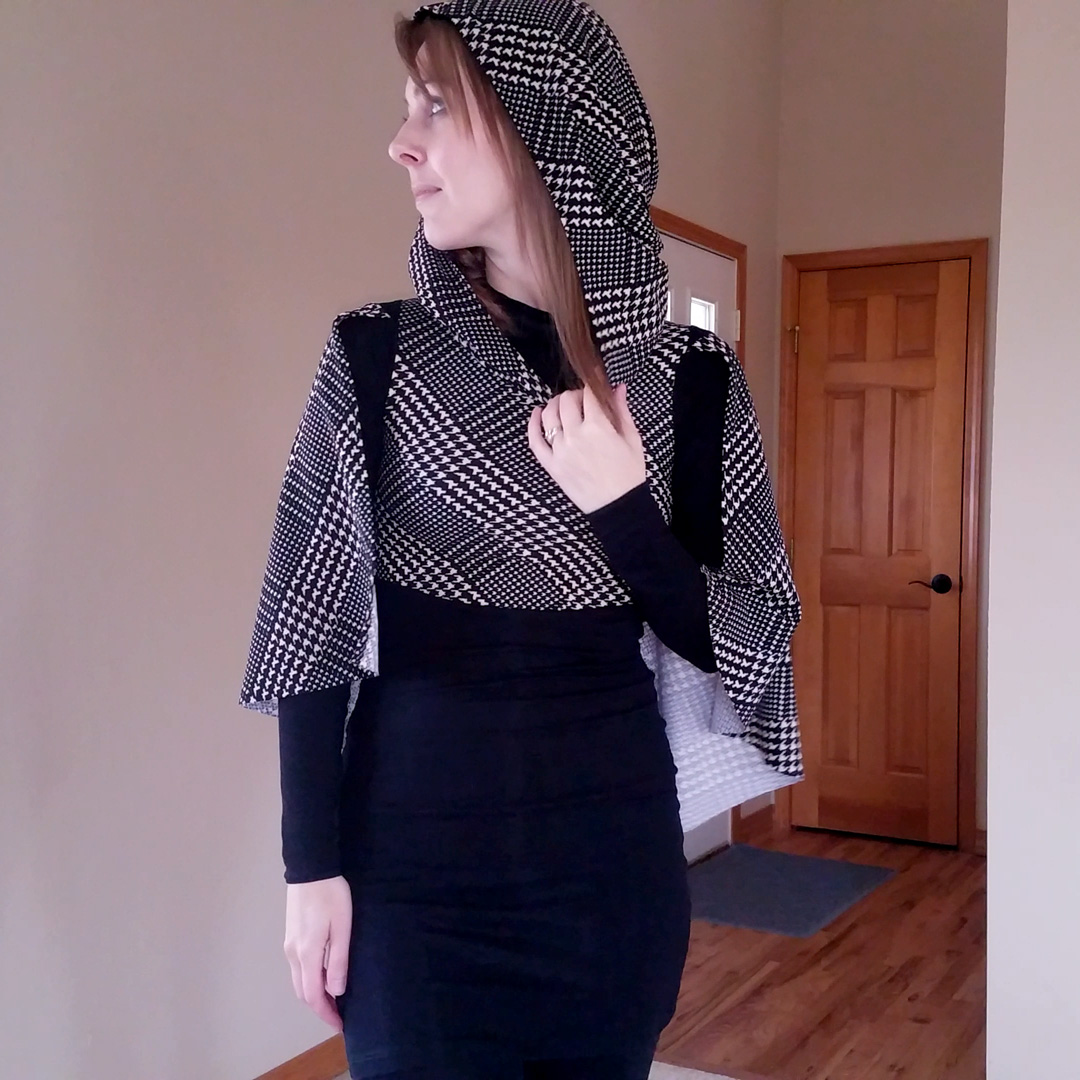
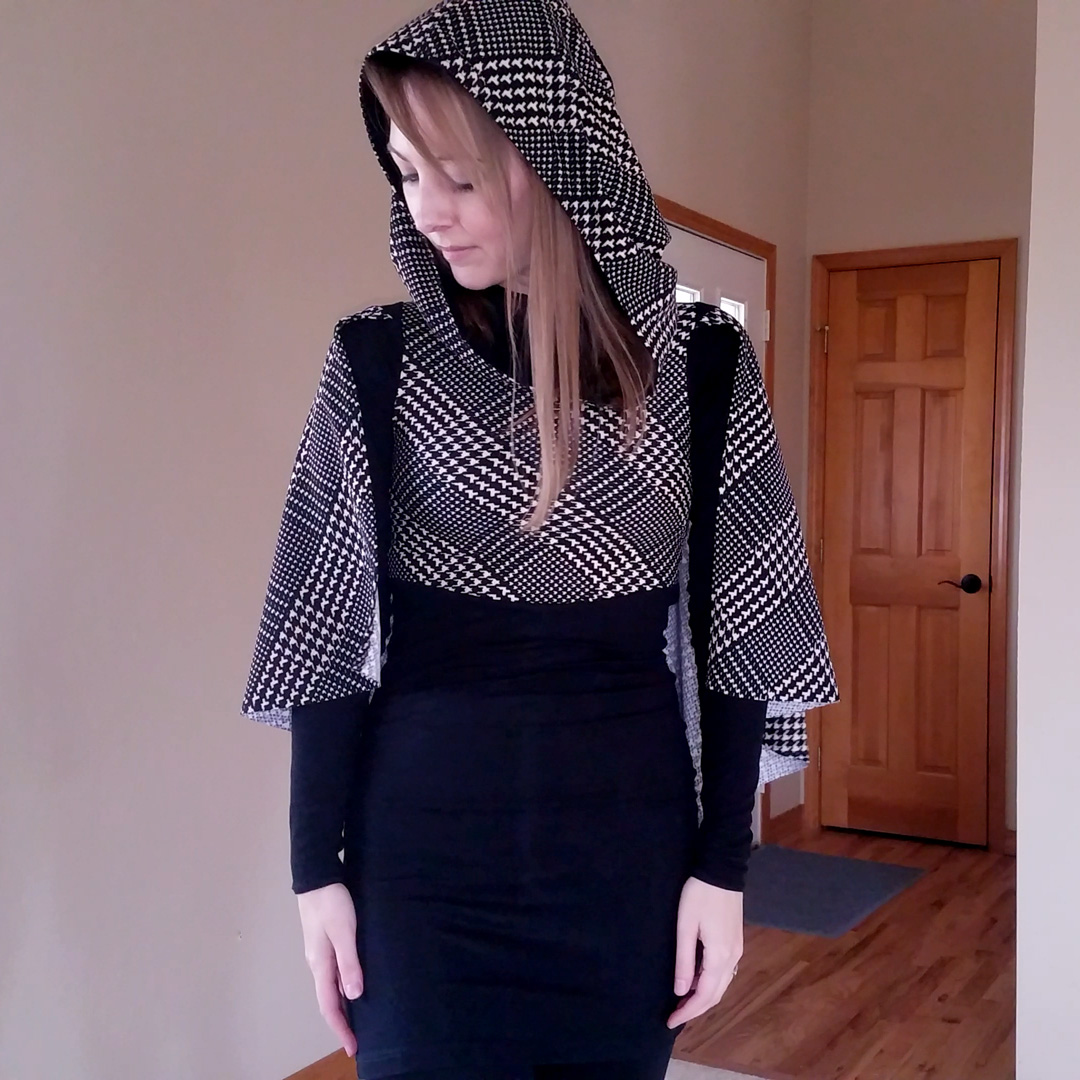
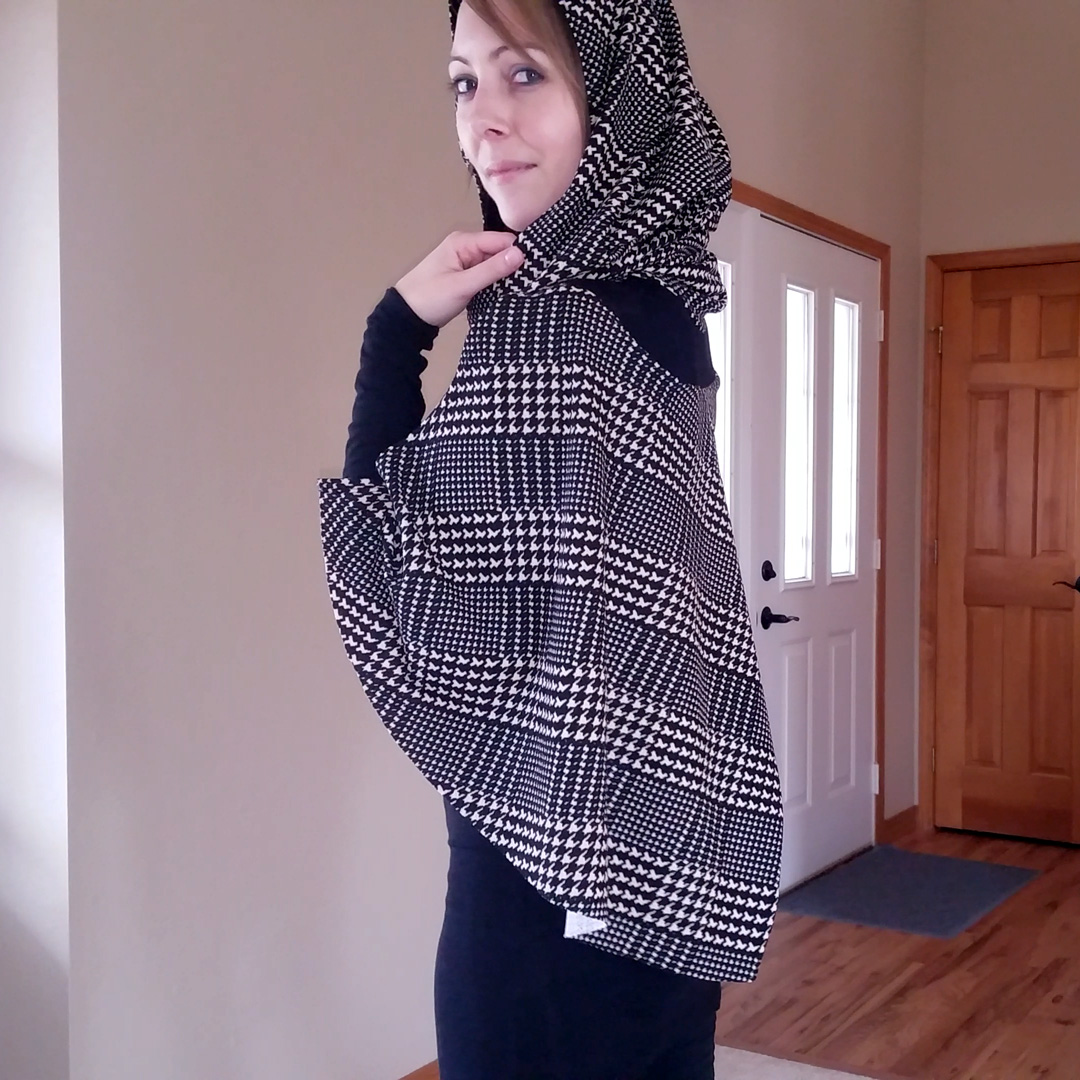
And now I can make T H I S:
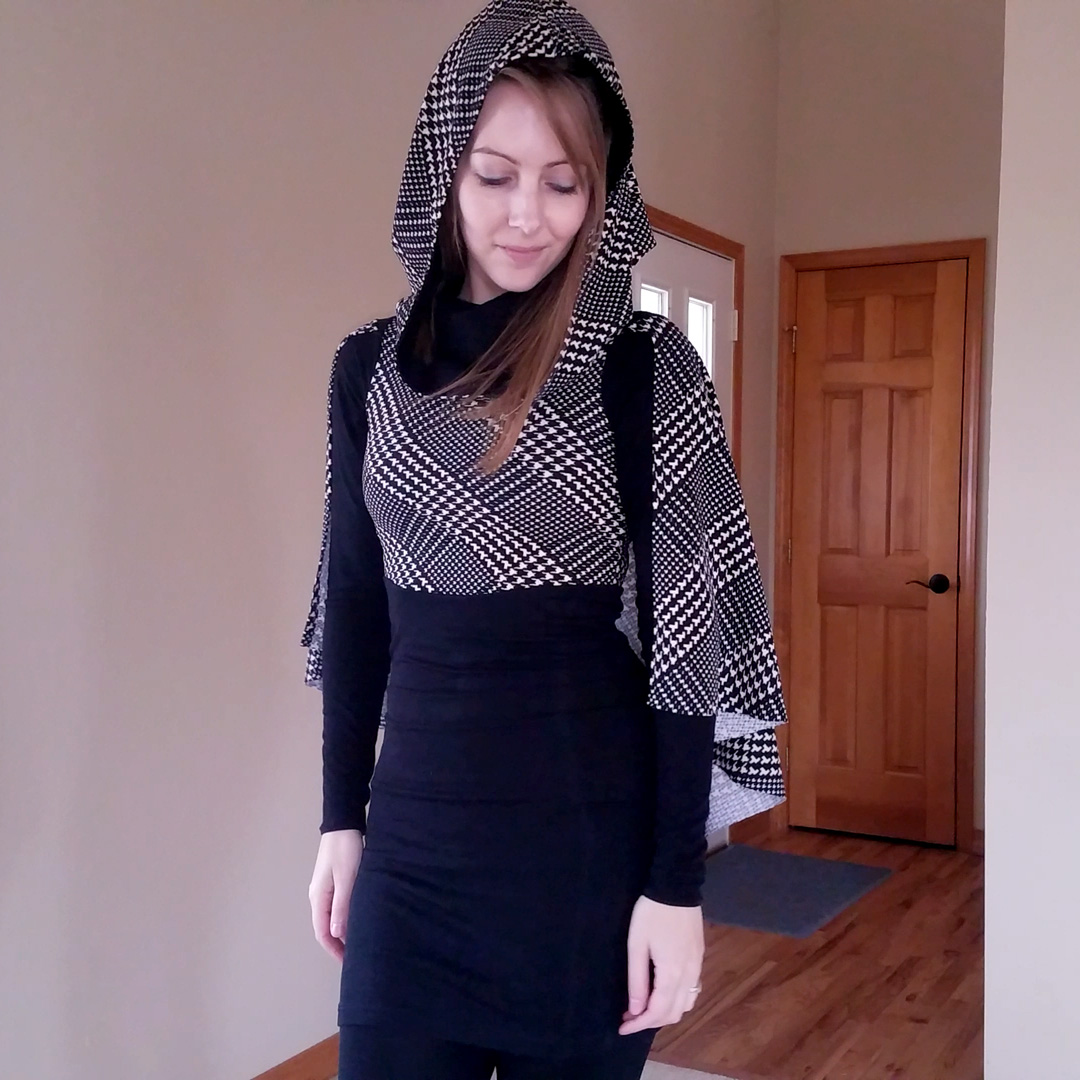
I’m Going to Nerd Out About Capes
I think I may have missed my ideal fashion era—or maybe it just exists in my own fantasy world: full of capes and straps and details and utility and contoured waists and fit and flare and layers and fagoting (don’t get your undies in a bunch; that’s an actual decoration technique.) Or maybe we can just call it steampunk and leave it at that.
Not that this cape is steampunk, but wearing it makes me feel like I stepped out of some fantasy story and I never want to take it off. Steampunk aside, capes are so underrated. I think everyone secretly loves any excuse to wear a cape. Because it’s fun.
And clothing should be fun.
Who says you can’t wear a cape? Who says you can’t toe the line between everyday and costume? Pair of jeans and t-shirt: borrrinnng. Cape: something about this day is going to be awesome, even if it is just simply wearing a cape.

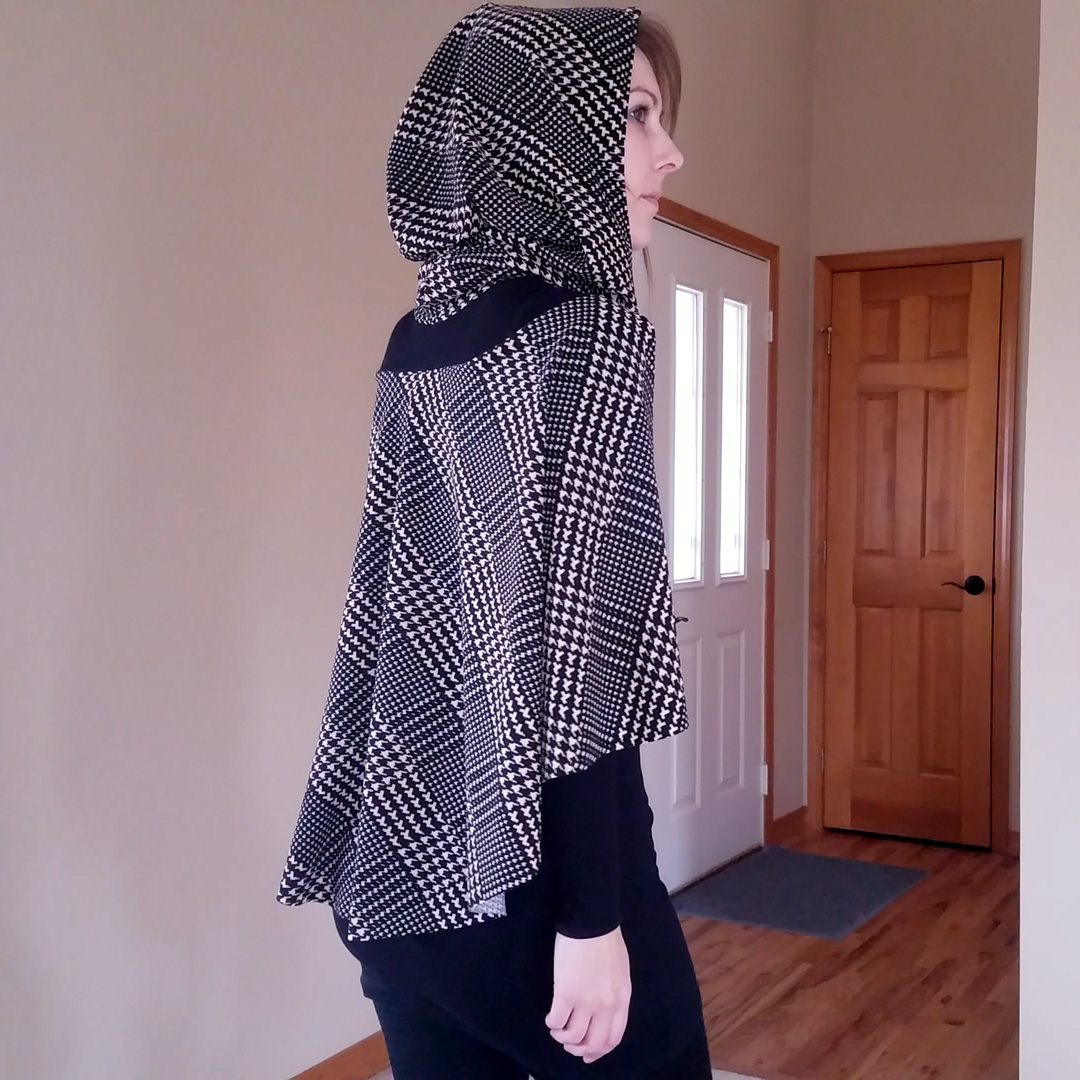
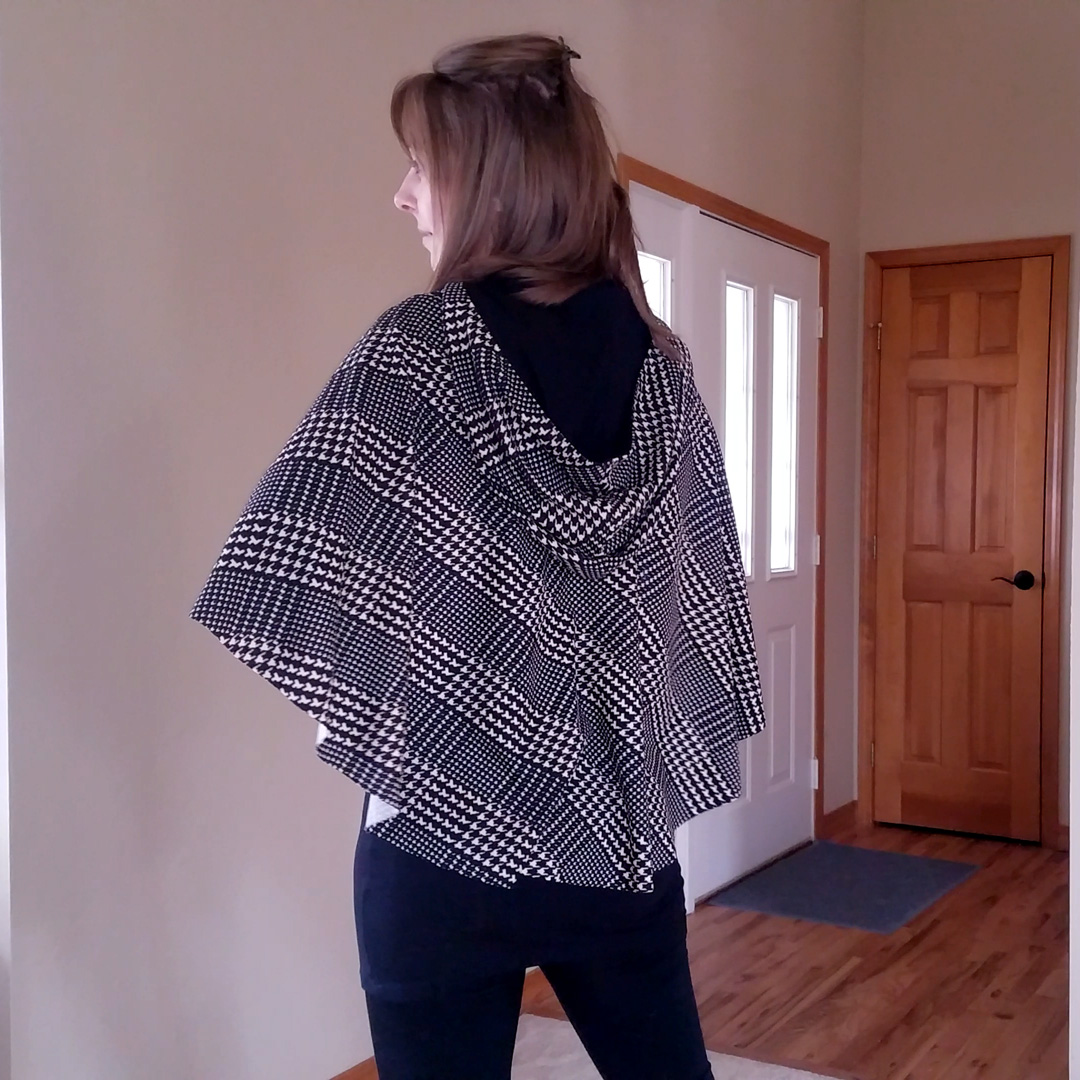
The Cape That Inspired the Nerd-Session on Capes
So, the Revelry from the awesome George + Ginger Patterns. It looks a tad complex, and at times it is. If you’ve never sewn a garment before in your life, you might be overwhelmed by this one. There were some head-scratcher moments even for me, but I attribute a lot of that to the terminology. Top back bodice, top front bodice, bottom back bodice, top back/bottom back bodice… #crosseyed. Sometimes you need to assign a single letter to things. How much clearer to say “piece B” versus “top back/bottom back bodice. Too many tops and bottoms to keep track of in my brain.
Other than that, no huge complaints on the pattern. I think some instructions for pinning were accidentally duplicated, but I knew the end result I was supposed to have at that point.
About the Fabric
- Houndstooth Liverpool from So Sew English. This is my first time using liverpool. It’s reminiscent of ponte as far as the hand and drape go. The texture isn’t as smooth as with ponte. Good stretch with excellent recovery. Warm, but also lighter than ponte, almost like it has a slightly looser weave.
- Black rib knit from Made of Love. Lightweight with good stretch and recovery. The spandex fibers give one side of it a little bit of a luster, which I employed on the lower bodice/skirt. Really comfortable and adds a nice counterbalance to the heavier weight of the liverpool, which was especially important as I lined the hood.
What I Did Differently
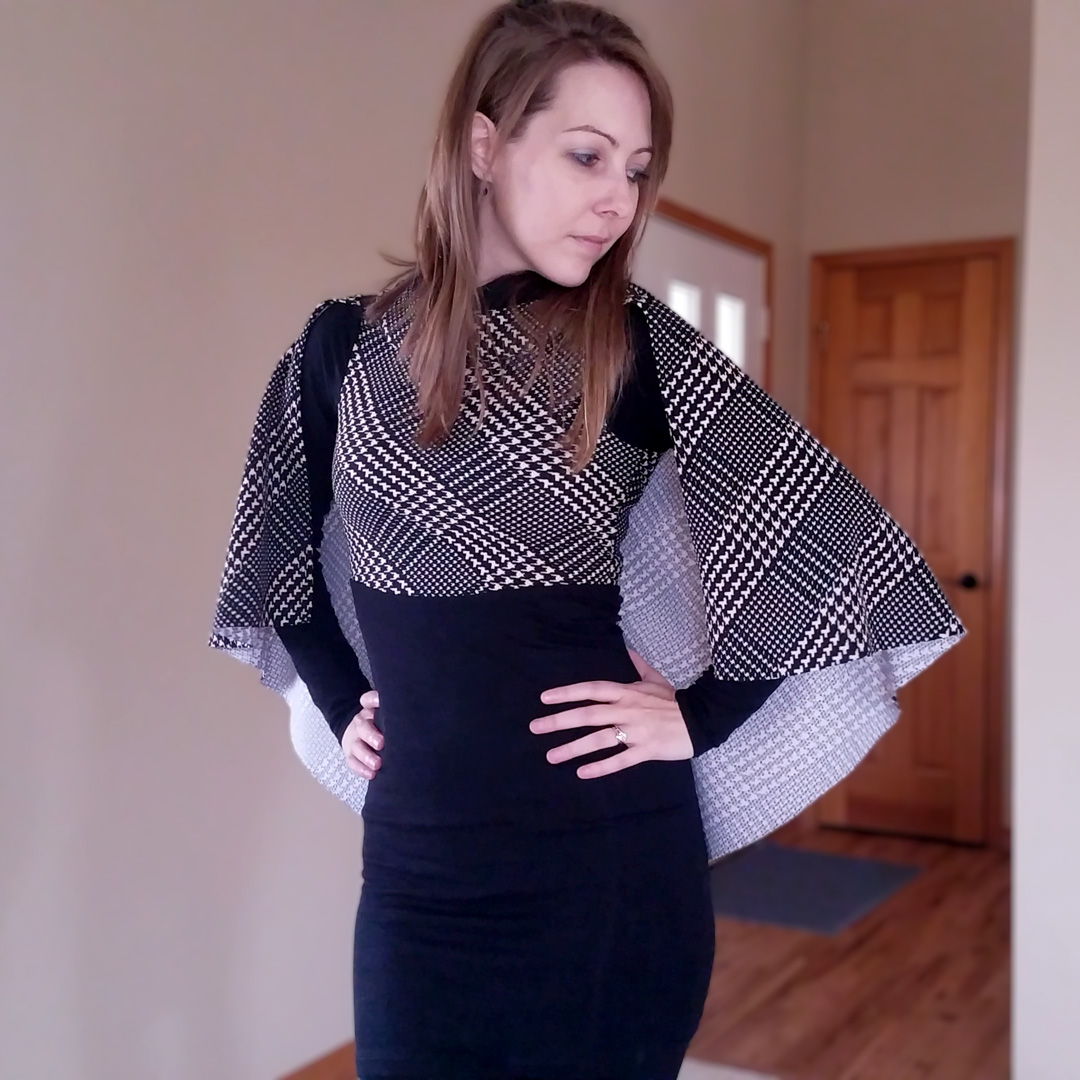
Considered an add-on bodice, I think this top is meant to pair with the bottoms from the Mix It Up Dress. But I didn’t go that route.
First, I mashed the bottom of the 40K Sway Top. Ended up with too much fabric at the side seams, so I re-contoured the problem area and landed on something satisfactory. But as I wore it and admired the cape, the bottom was not complimenting anything else that was going on. I thought maybe a certain pant would help, but alas, it did not.
So I snipped off the 40K Sway bottom.
Next, I pulled an off-the-rack fitted sweater knit tunic I like out of my closet, turned it inside out, laid it flat, and traced the bottom half of it. I mashed it with the top contours of my first try, cut, sewed, and even on the hanger it was definitely the right way to go.
- Skipped basting. The point where the instructions say to baste the cape to the back bodice, I just pinned it instead and then sewed all three layers—back bodice, cape, front bodice—in one step. This had the added bonus of helping me see how the seam allowances were (or in my case, were NOT) lining up. The top of the bottom-back-bodice was sticking out an extra 0.25″. So…
- Increased the seam allowance along the bottom of the top-back-bodice to 0.5 because the raw edge of the cape was about 0.25″ shorter than the raw edges of the bodice pieces. Meaning, if I had sewn a 0.25″ seam allowance as called for, I would have had trouble catching the entire cape in the seam.
- Only partially hemmed the cape. As an afterthought, I hemmed the straight edges of the cape, mainly to mitigate folds that were sticking up at my shoulders as it draped along the front of the arms.
Notes for Next Time
- I may need to size up to a 6. The shoulder seams sit a little high unless I tug them down. It’s not uncomfortable, but where the back bodice pieces and cape meet, I’m also getting a little bit of rolling and that definitely indicates the fit is a tad small.
- Try the full cape. This is the half cape option, but I definitely want to give the full cape a shot.
- Consider different bottom options. I did spend quite a while just mulling this over after I made the Sway bottom. I didn’t want to do a bottom that would compete with the drama of the cape and hood, and I’m actually REALLY happy with how the fitted tunic came out. But, I am curious how the handkerchief peplum (or mini) from the Mix It Up dress might work. I saw someone else’s make use it and it seemed nice. I’m not sure though. Hard to change up the fitted tunic when I love it so much.
- Lengthen the sleeves. I didn’t do this when I usually do, and even though they are sufficiently long, they’re not Deb-long.
- Attach some thumbhole cuffs. I think I’m going to make a removeable pair of thumbhole cuffs out of my leftover liverpool and rib knit. But on my next version, maybe I’ll sew them right on. (In which case, DON’T lengthen the sleeves.)
Project Settings
Presser Foot |
Stitch# |
Width |
Length |
Needle |
Top Thread Tension |
Application |
|---|---|---|---|---|---|---|
standard zig-zag (A) |
5 |
1.0 |
4 |
blue tip |
4 |
seams |
overedge (C) |
6 |
5.5 |
3.0 |
blue tip |
4 |
edge finish |
standard zig-zag (A) |
2 |
3.5 |
3.5 |
twin stretch |
4 |
hems |
Leave a Reply