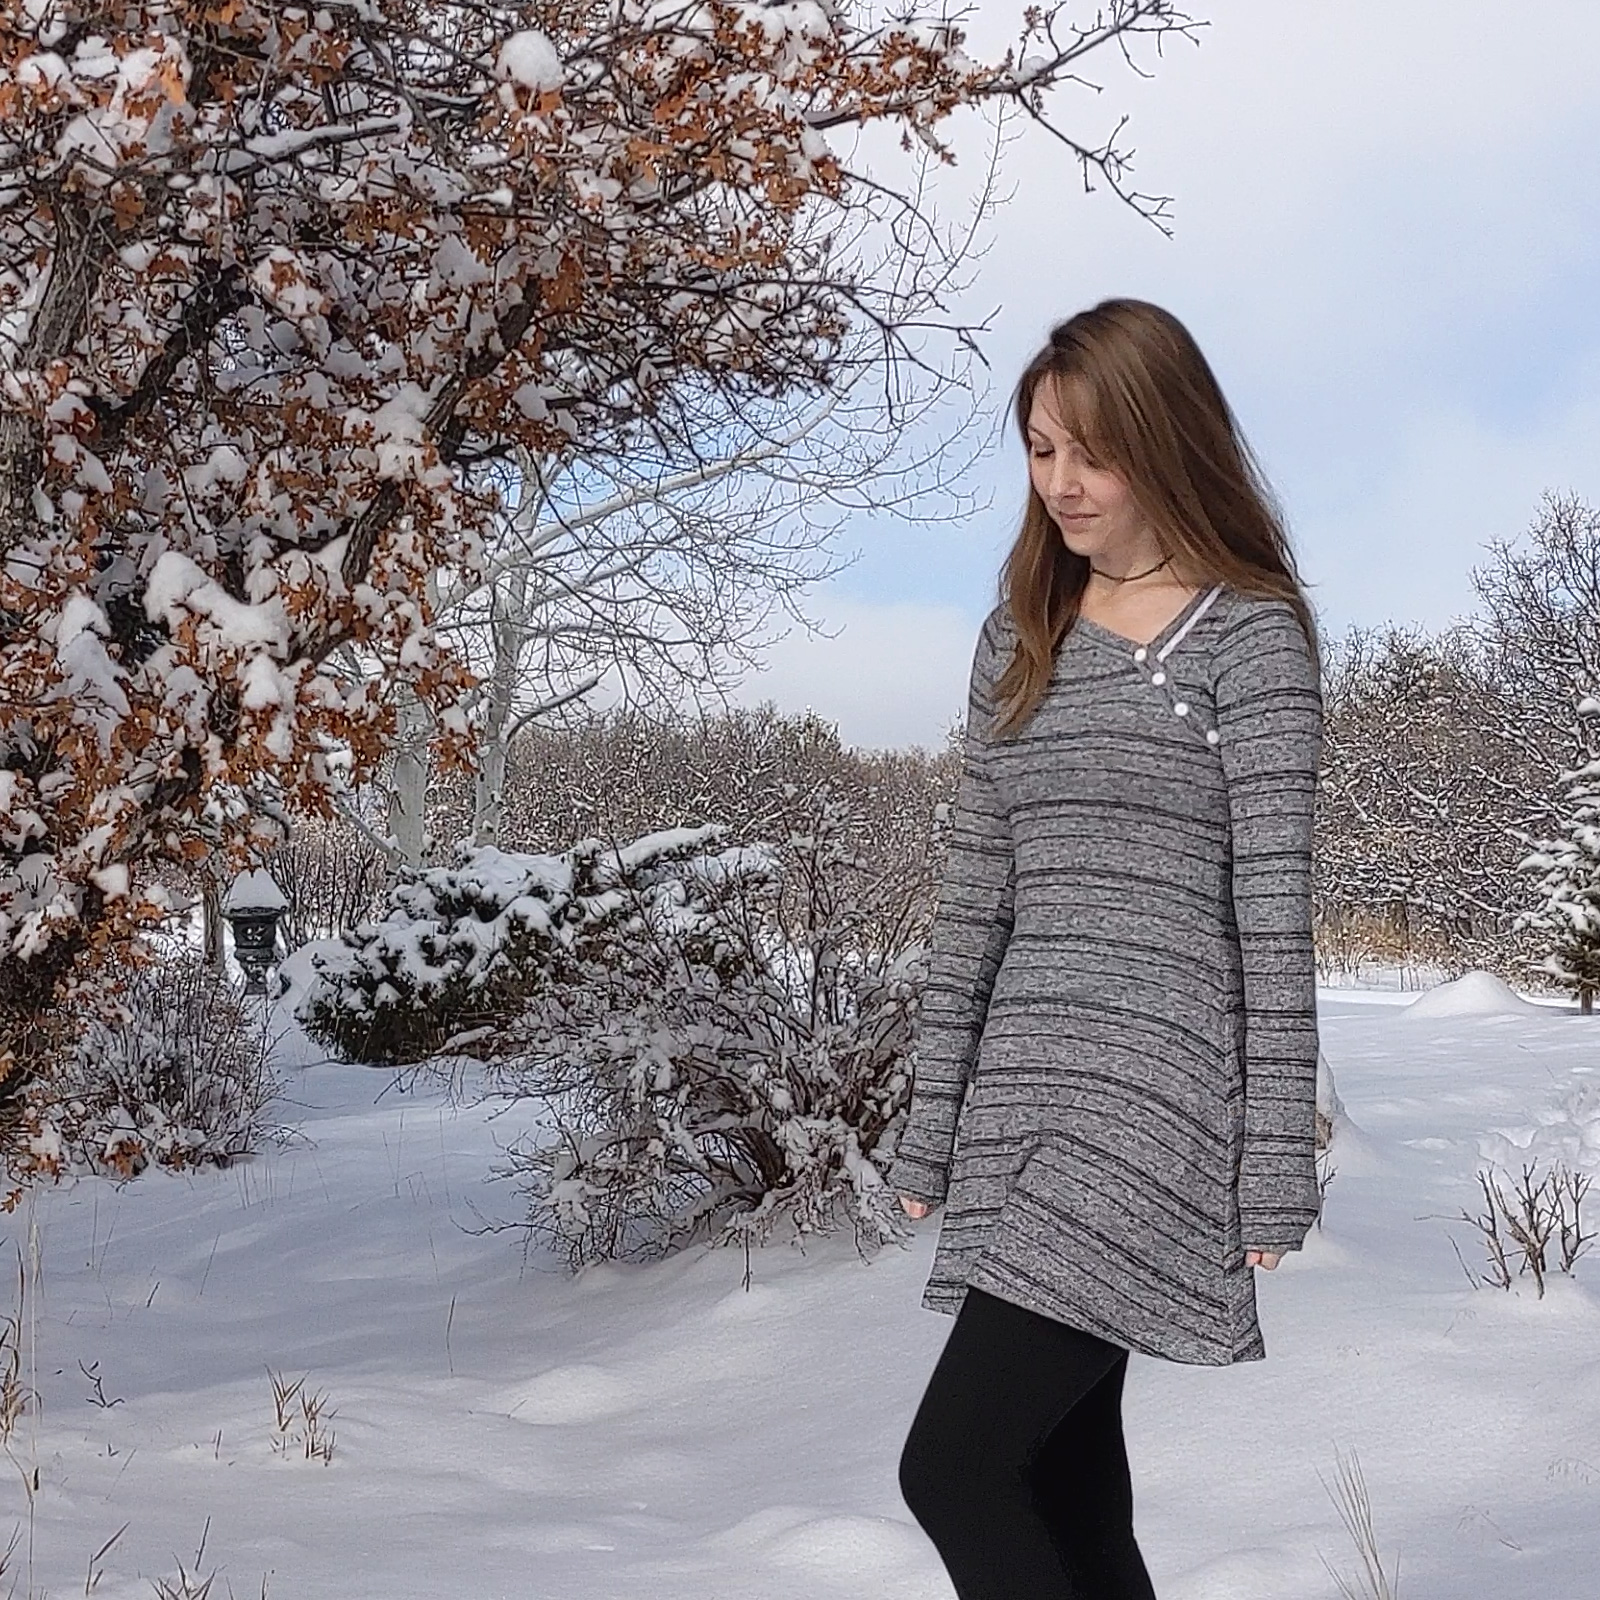
Yesterday was so good for my soul, home on a Saturday with the hubby gaming downstairs, dogs snuggled up, perched in my sewing room watching gentle, fluffy snow drifting from the sky, the mountains veiled in the background, sewing up a tunic version of George + Ginger’s 40K Sway Top.
About the Fabric
2 yards of Charcoal Stripe on Heather Grey Soft Stretch Brushed Sweater Knit from Cali Fabrics
- light to midweight
- polyester, spandex
- 4-way stretch: 100% horizontal, 35% vertical
- Wonderful drape
- Good recovery
- Can be a little tricky to control if you’re not comfortable sewing with knits. Pro tip: always start your seams with a little piece of stabilizer or tissue paper.
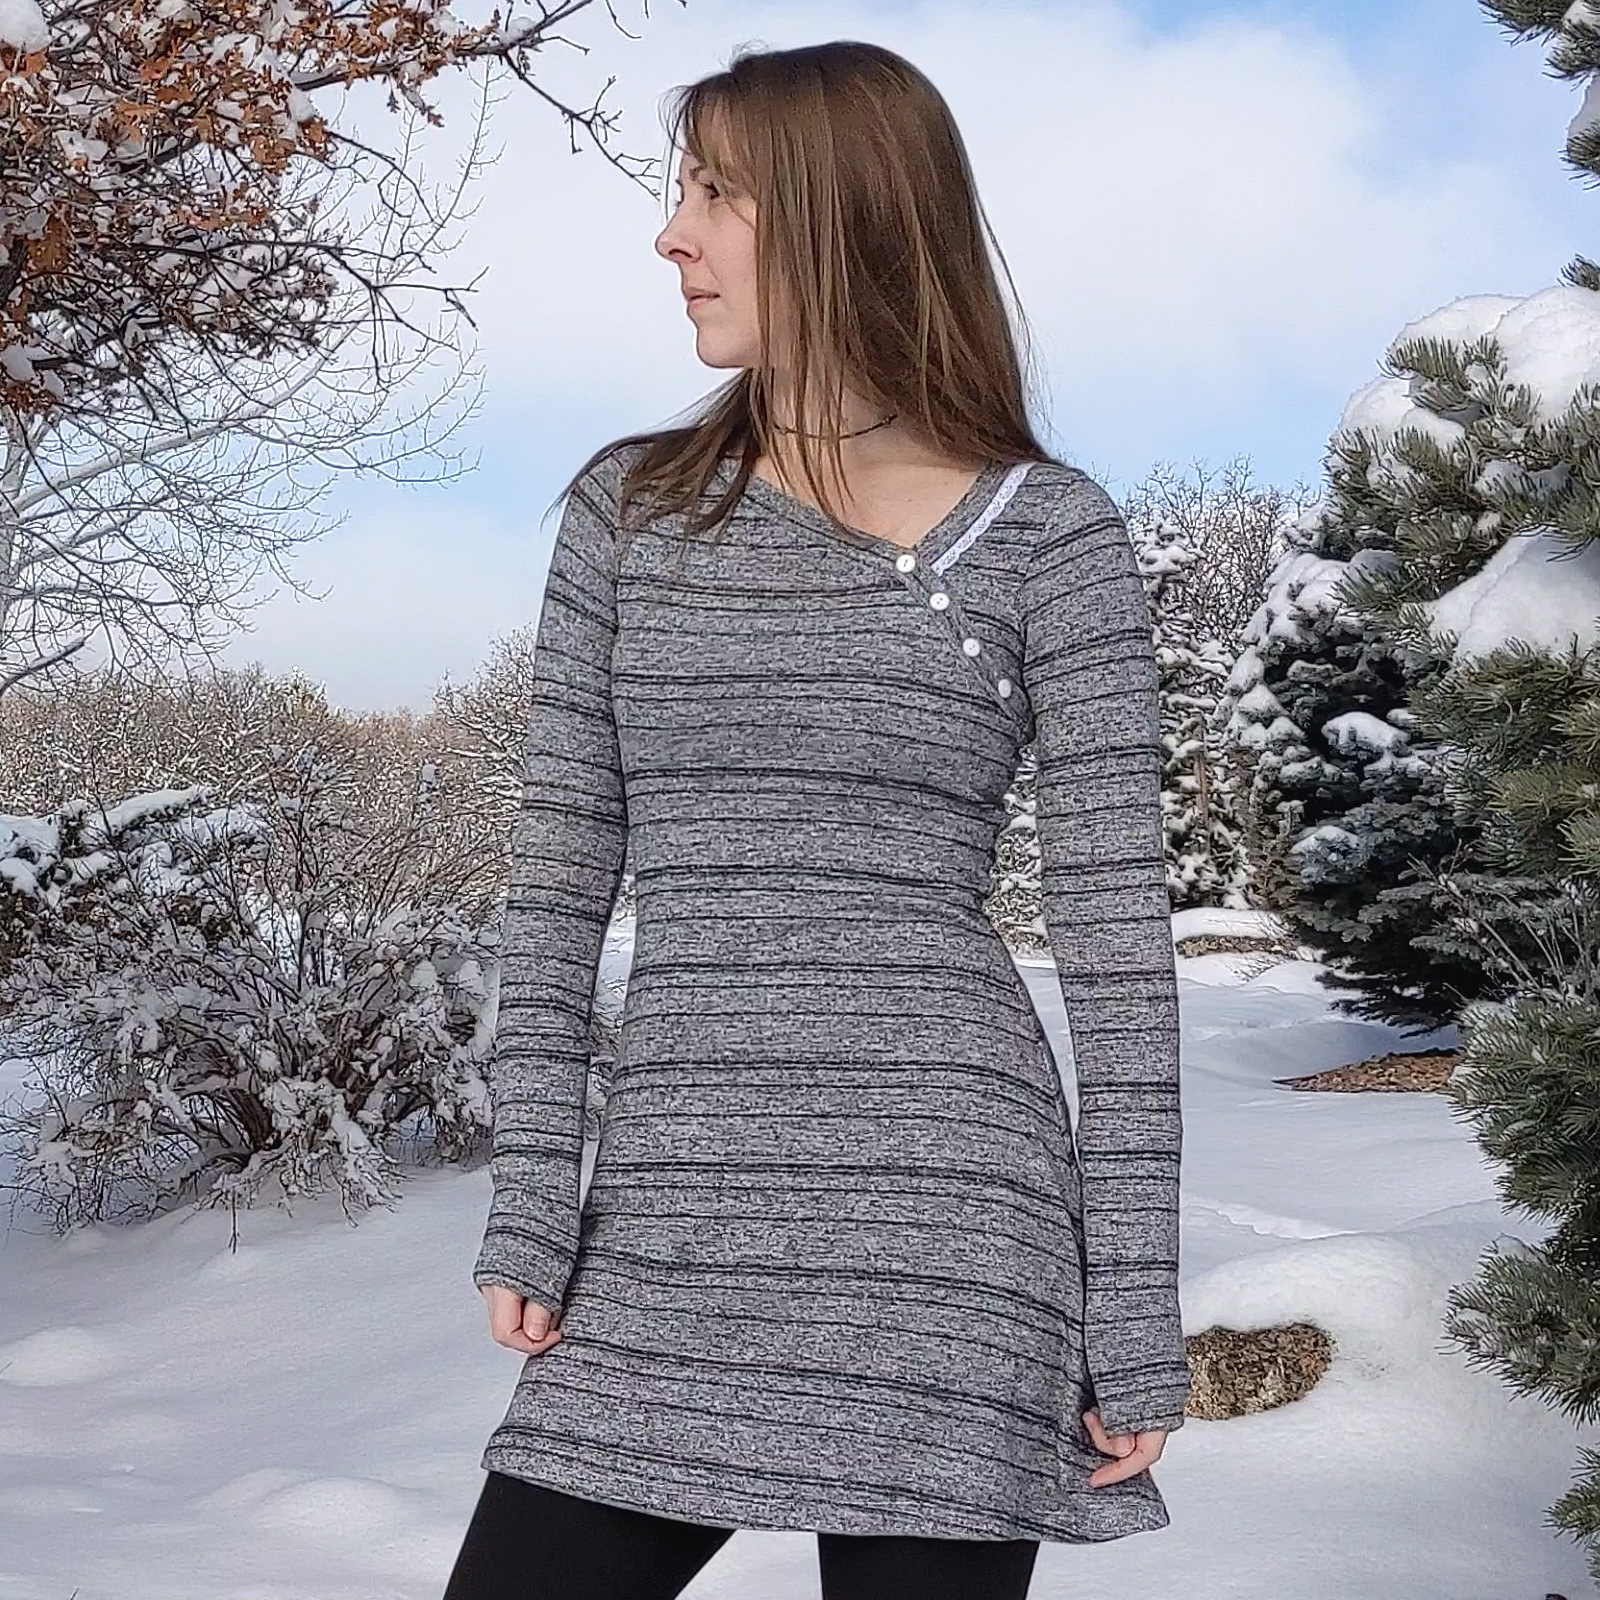
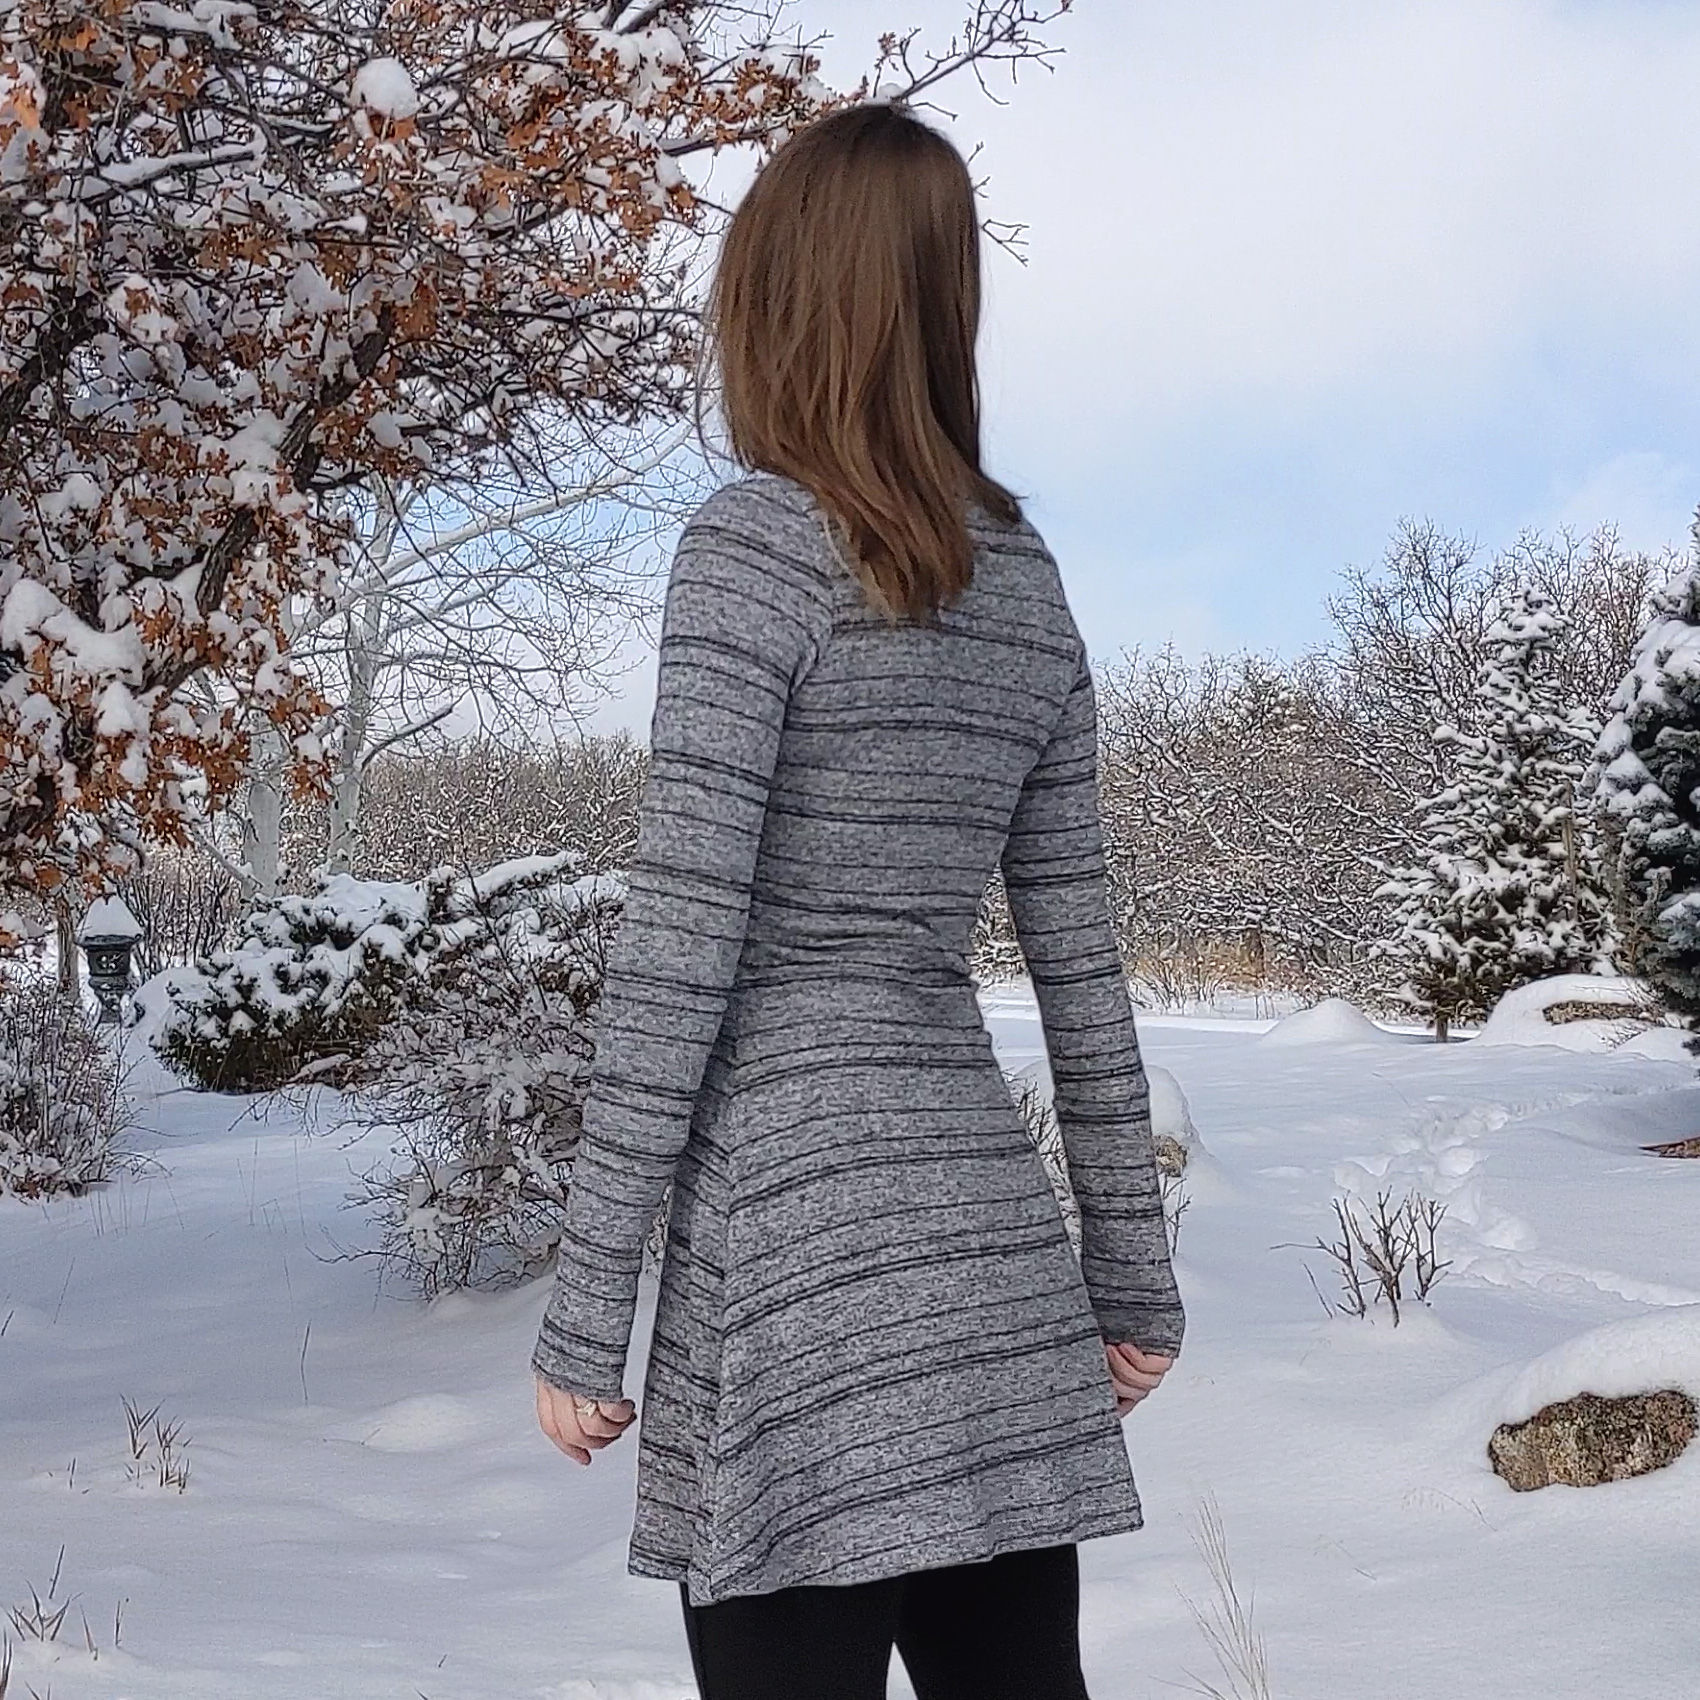
The brushed side is on the face of this fabric. The back of the fabric is a heathered gray, and I do wish the brushing was on the back for some added warmth. That’s my only critique. I love everything else about it.
Notes About This Make
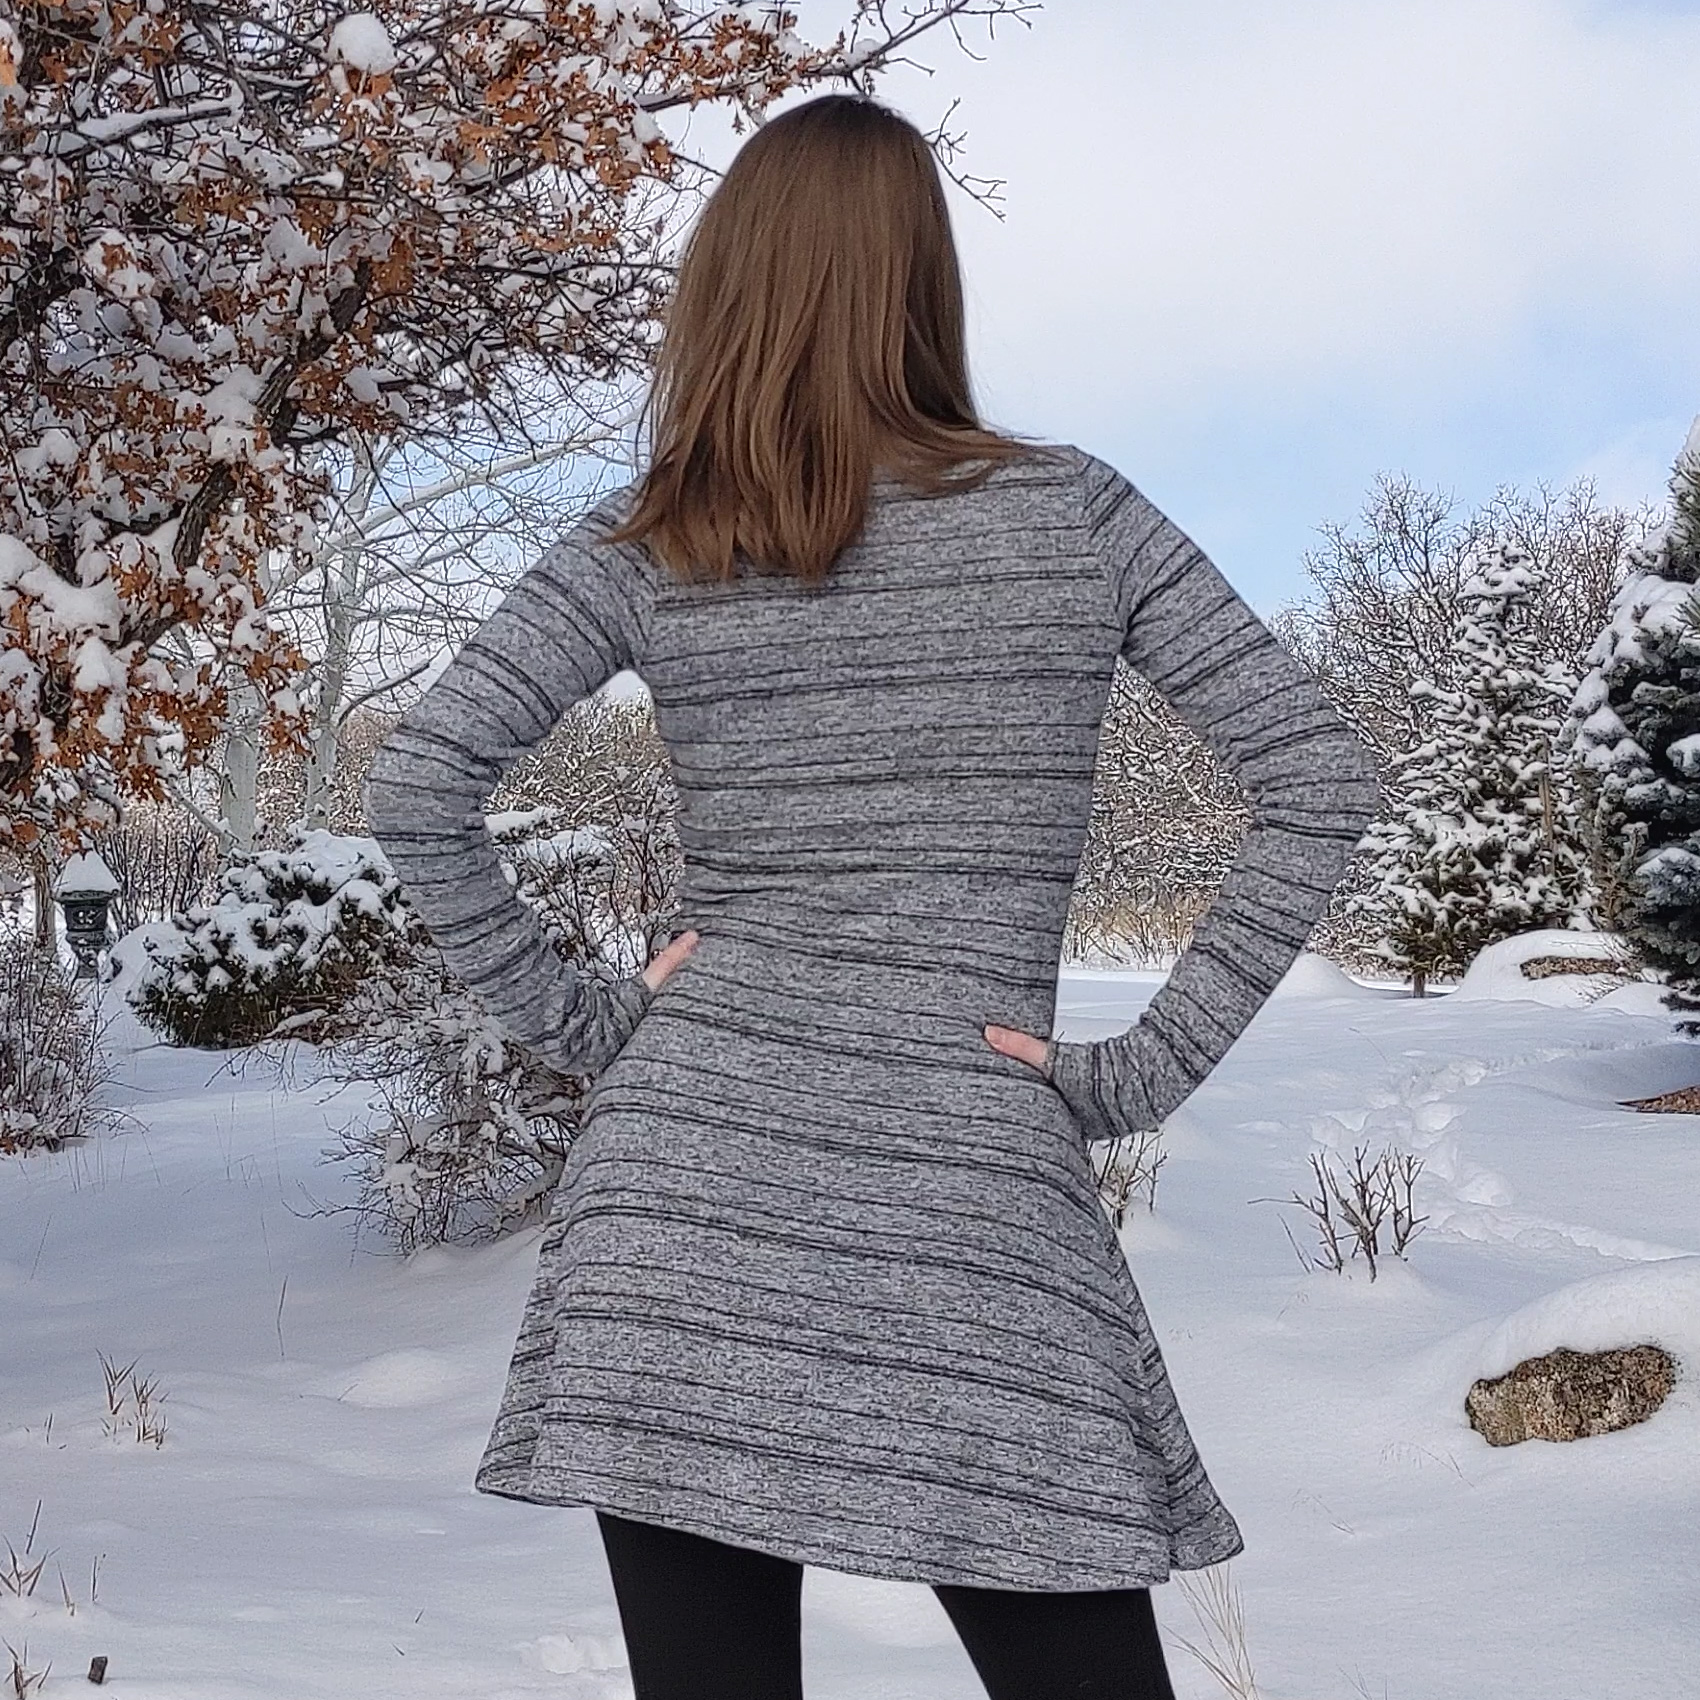
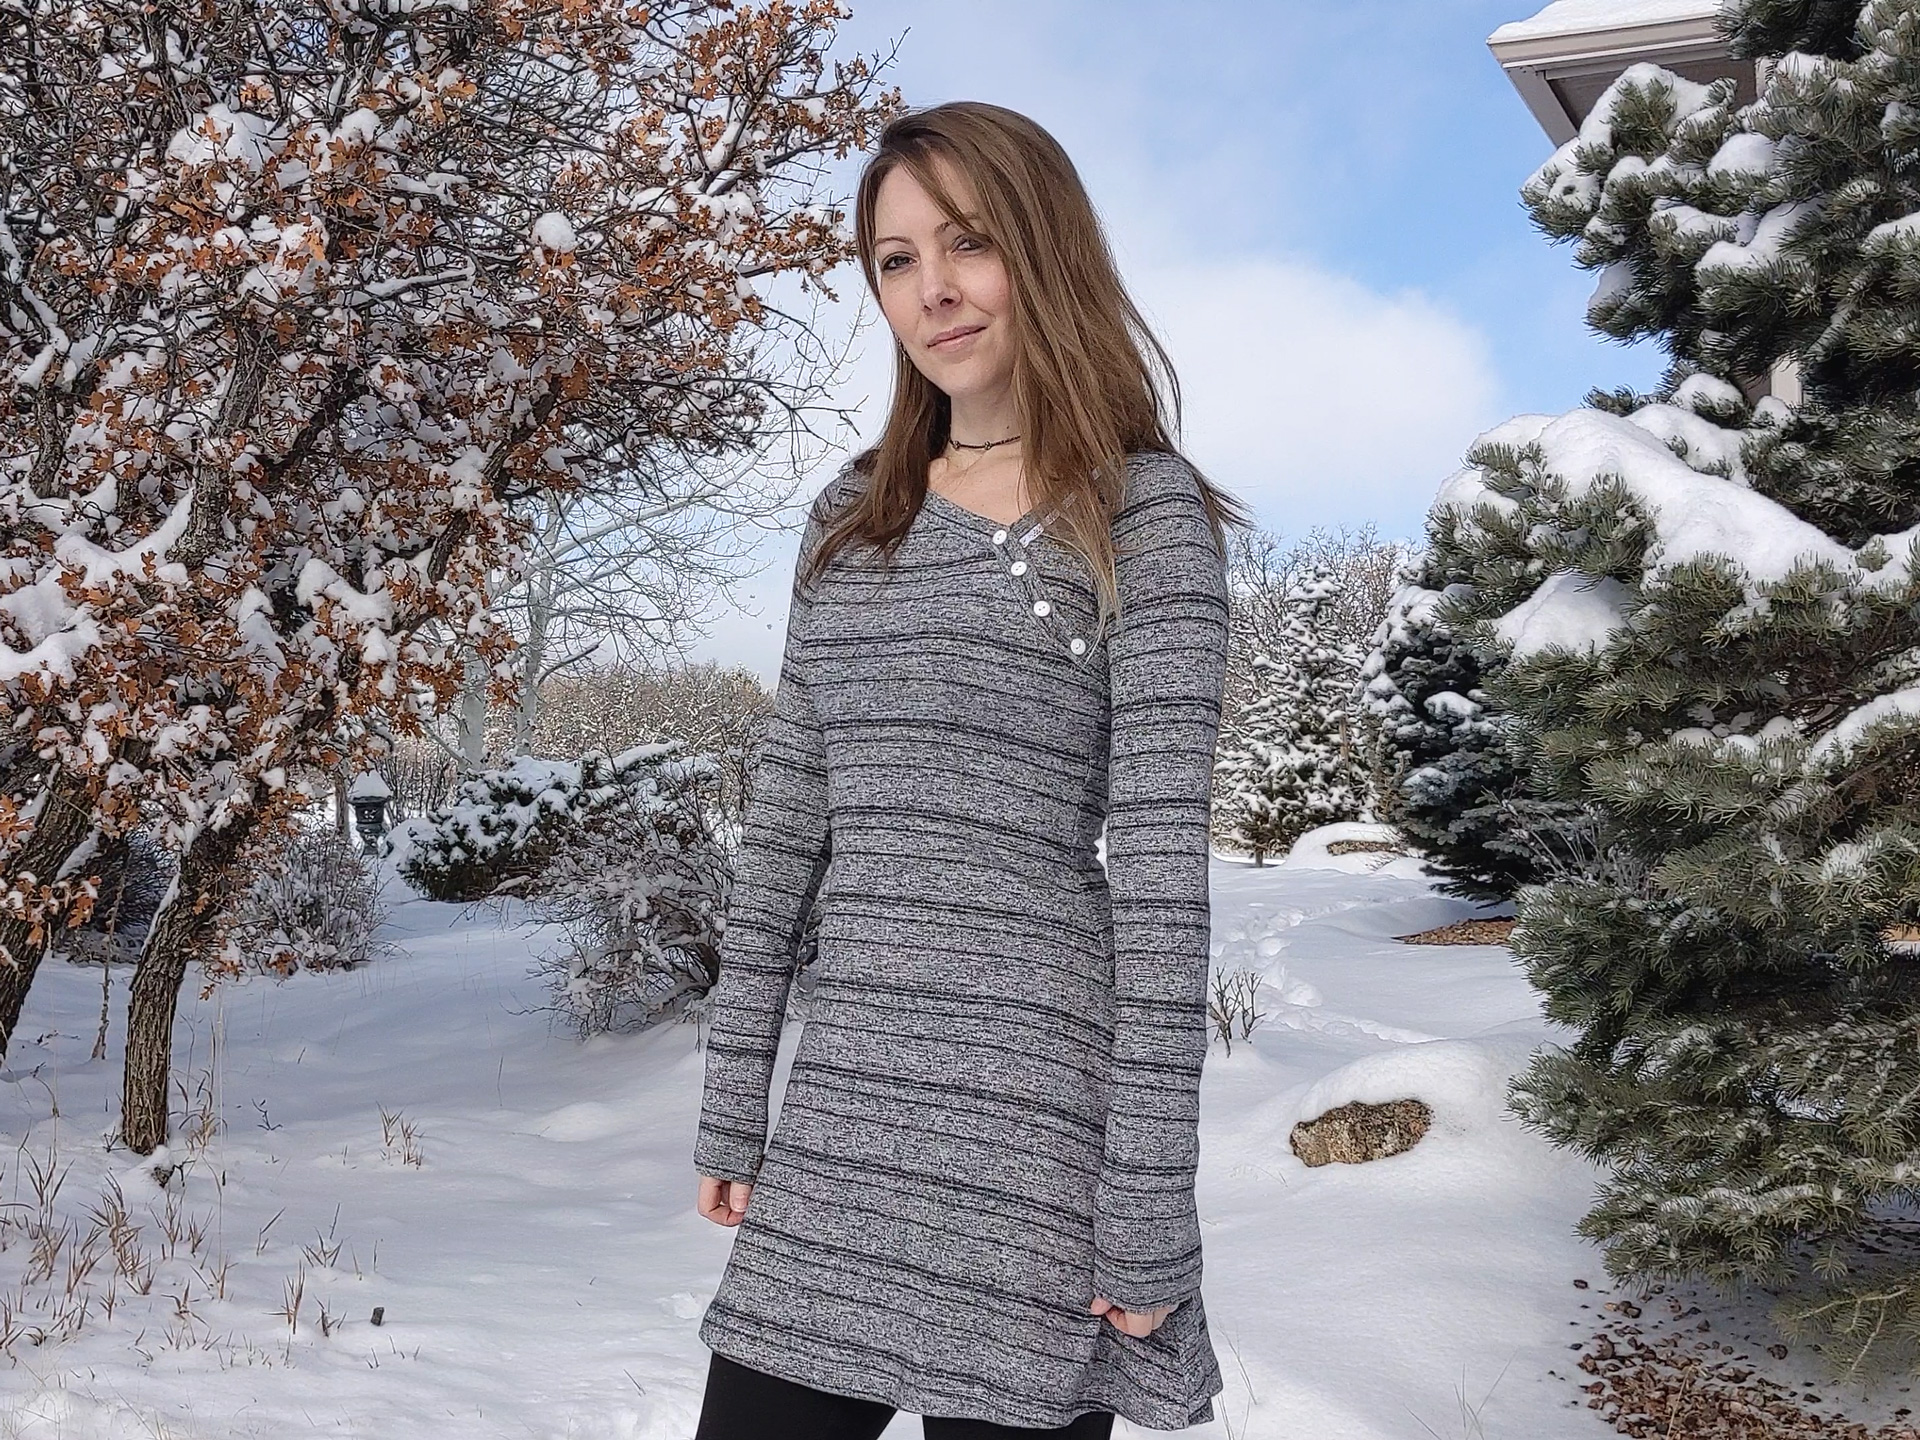
I mashed the 40K Sway Top (free from George and Ginger Patterns) with the modified skirt from my Nyoka Dress (Sinclair Patterns.)
My first 40K Sway Top was a size 6 which fits perfectly. For this make, I wanted a bit more negative ease to be sure I got the shaping I wanted. Baggy a-line tunics are a no-no in my book. So I traced out a size 4 of the Sway Top. Using the super helpful bust/waist/hip markings on the pattern, I laid my tracing of the Sway Top over my skirt pattern piece from my Nyoka Dress, lining up the waist marks, and taped some more tracing paper to the Sway Top piece in order to add the skirt to it. Then it was just a matter of tracing and blending lines.
- I used a size 4 with no grading.
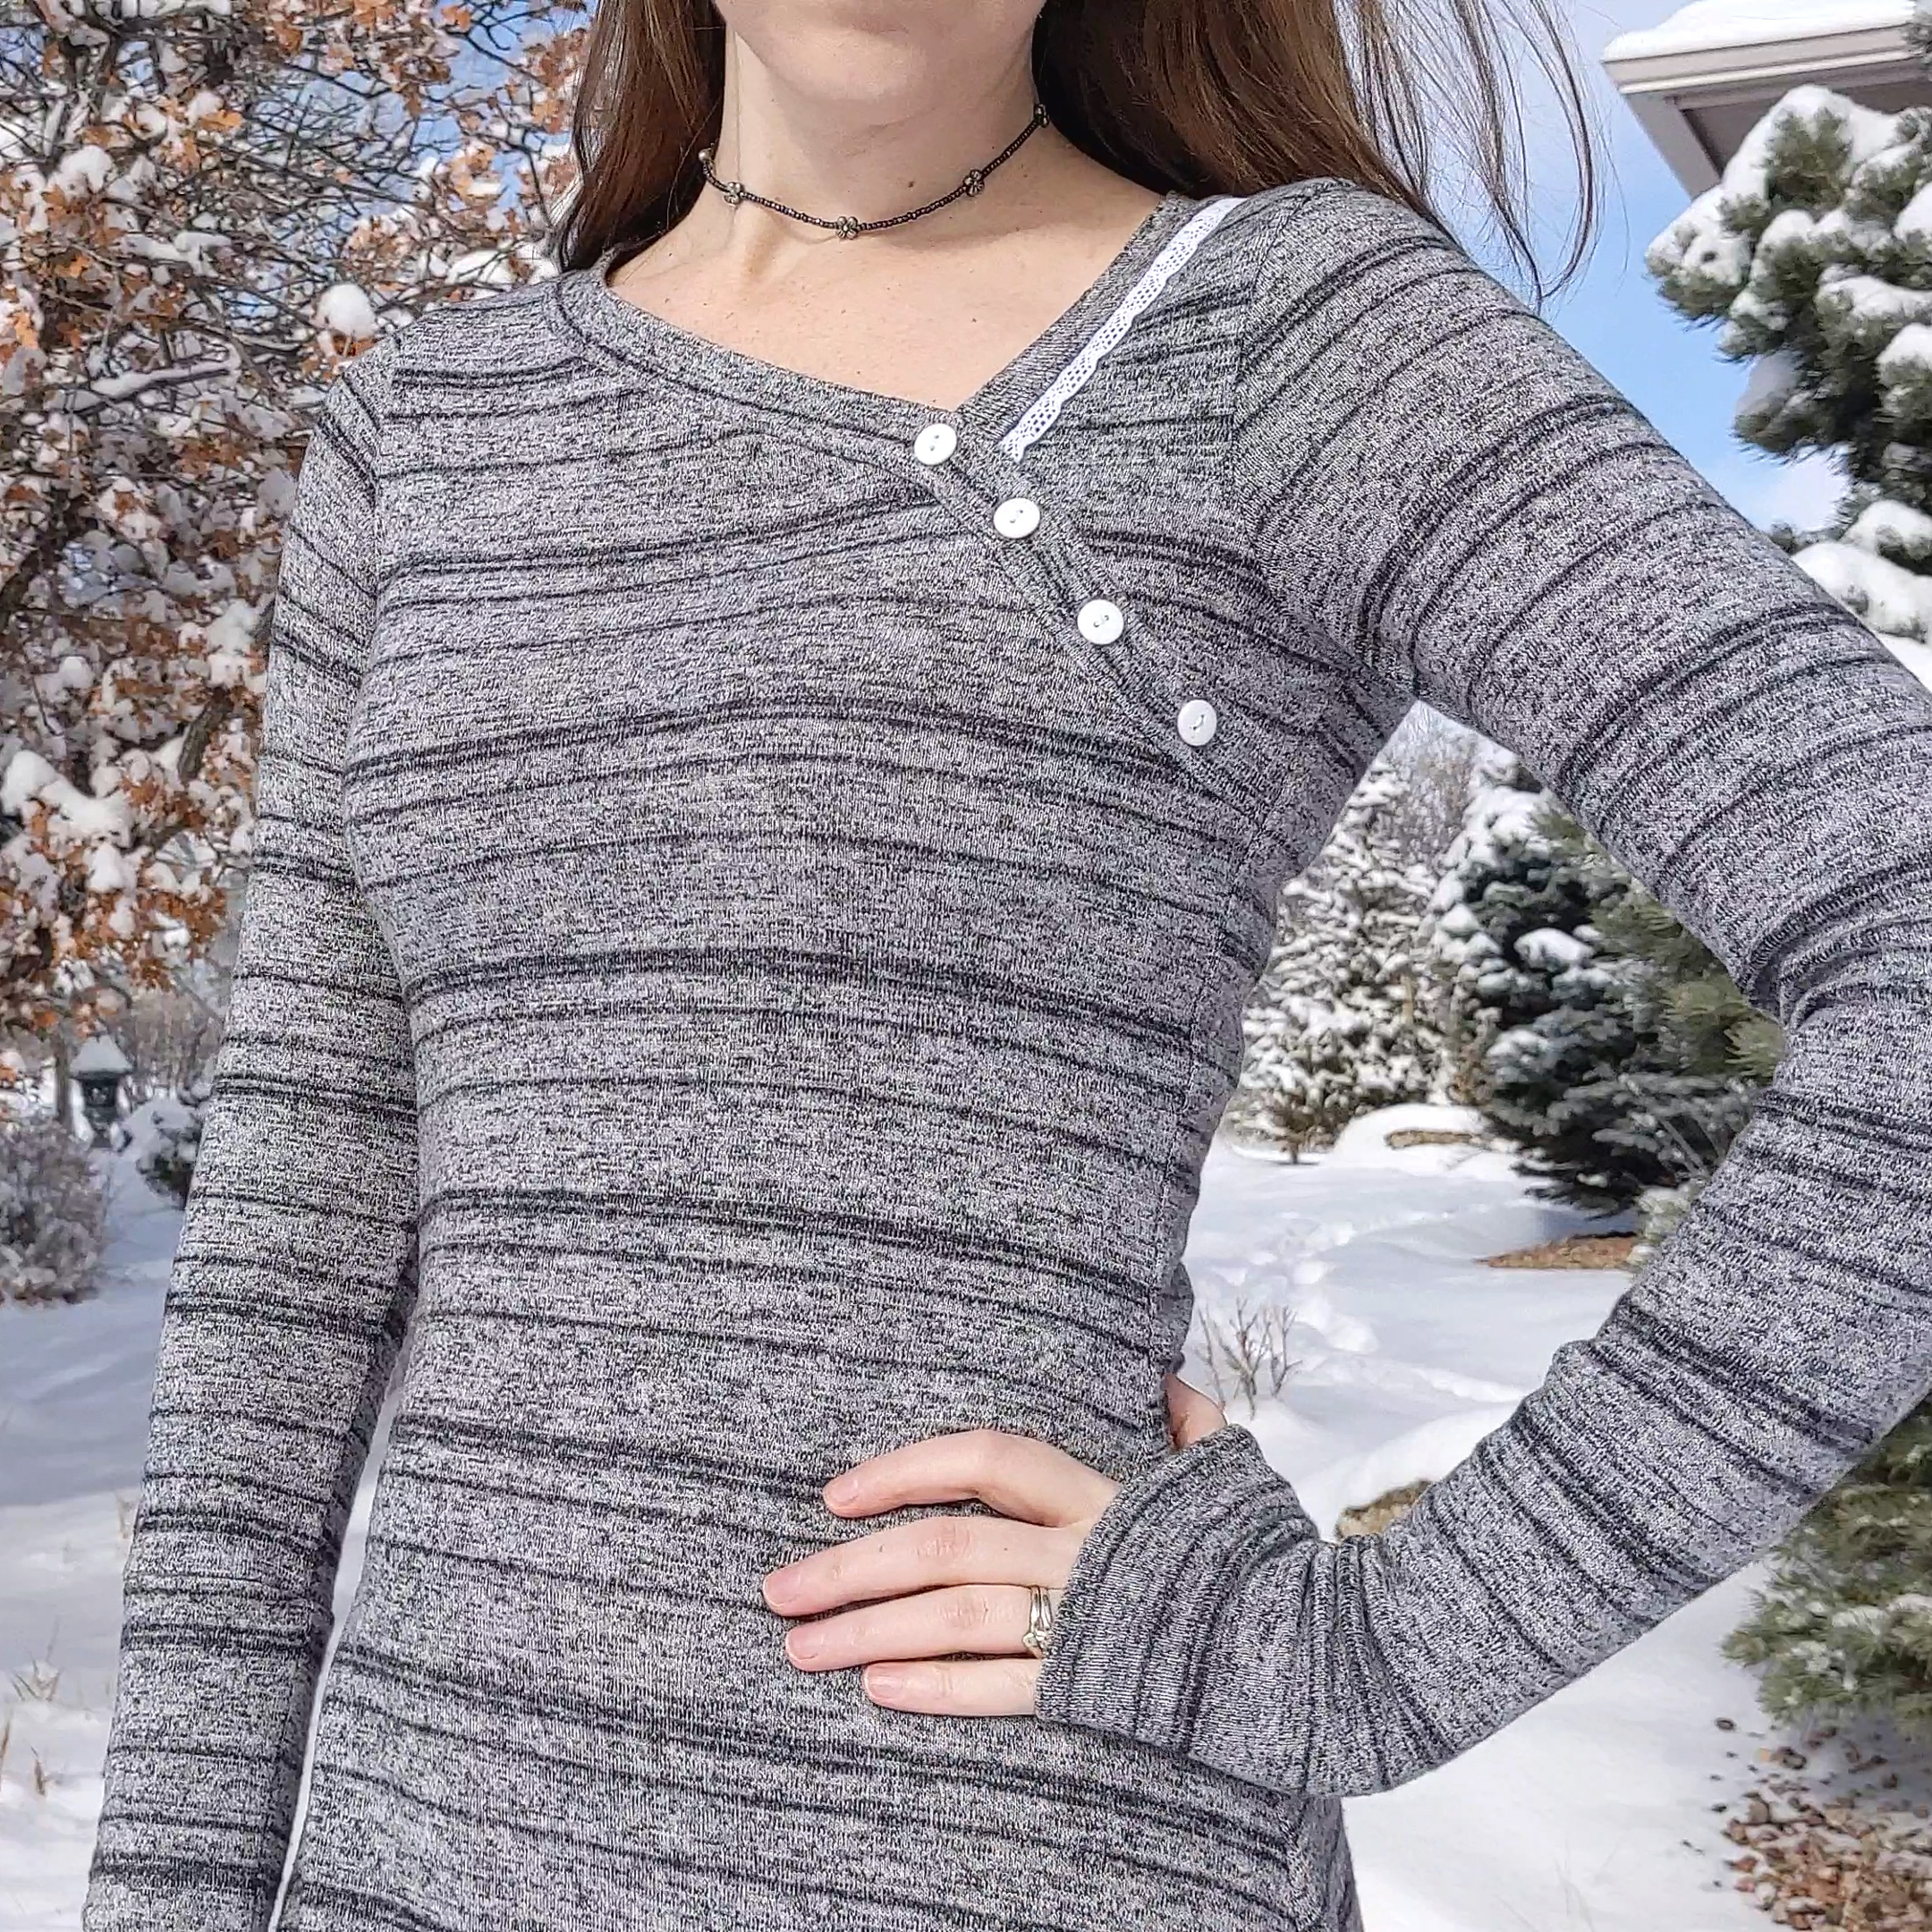
- I used a 0.5″ seam allowance along the sides of the bodice. Everything else—including the sleeves—is 0.25″ seam allowance.
- I did not topstitch the neckband this time. After adding the buttons, the neckband laid perfectly flat with no gapping.
- I added 1″ to the sleeve cuffs.
- I skipped the same things I skipped on my first 40K.
- I folded the hem up 1″ two times (so a total of 2″) to eat up some of the length.
- I used little pieces of Wonder Tape to hold the buttons in place as I stitched them on.
- I used the same technique as last time for attaching the shoulder lace.
- I didn’t even plan that black line running along the center of the neckband. Chalk that one up to divine intervention.
Notes for Next Time
- Before finishing the neckband seam, sew the shoulder piece to the seam allowance. Then I can finish all those pieces in the next step at the same time.
Project Settings
Presser Foot |
Stitch# |
Width |
Length |
Needle |
Top Thread Tension |
Application |
|---|---|---|---|---|---|---|
standard zig-zag (A) |
5 |
1.0 |
4 |
blue tip |
4 |
seams |
overedge (C) |
6 |
5.5 |
3.5 |
blue tip |
4 |
edge finish |
standard zig-zag (A) |
2 |
3.5 |
3.5 |
twin stretch |
4 |
hem |
button (T) |
6 |
2.4 |
drop feed dogs |
blue tip |
4 |
buttons |
Leave a Reply