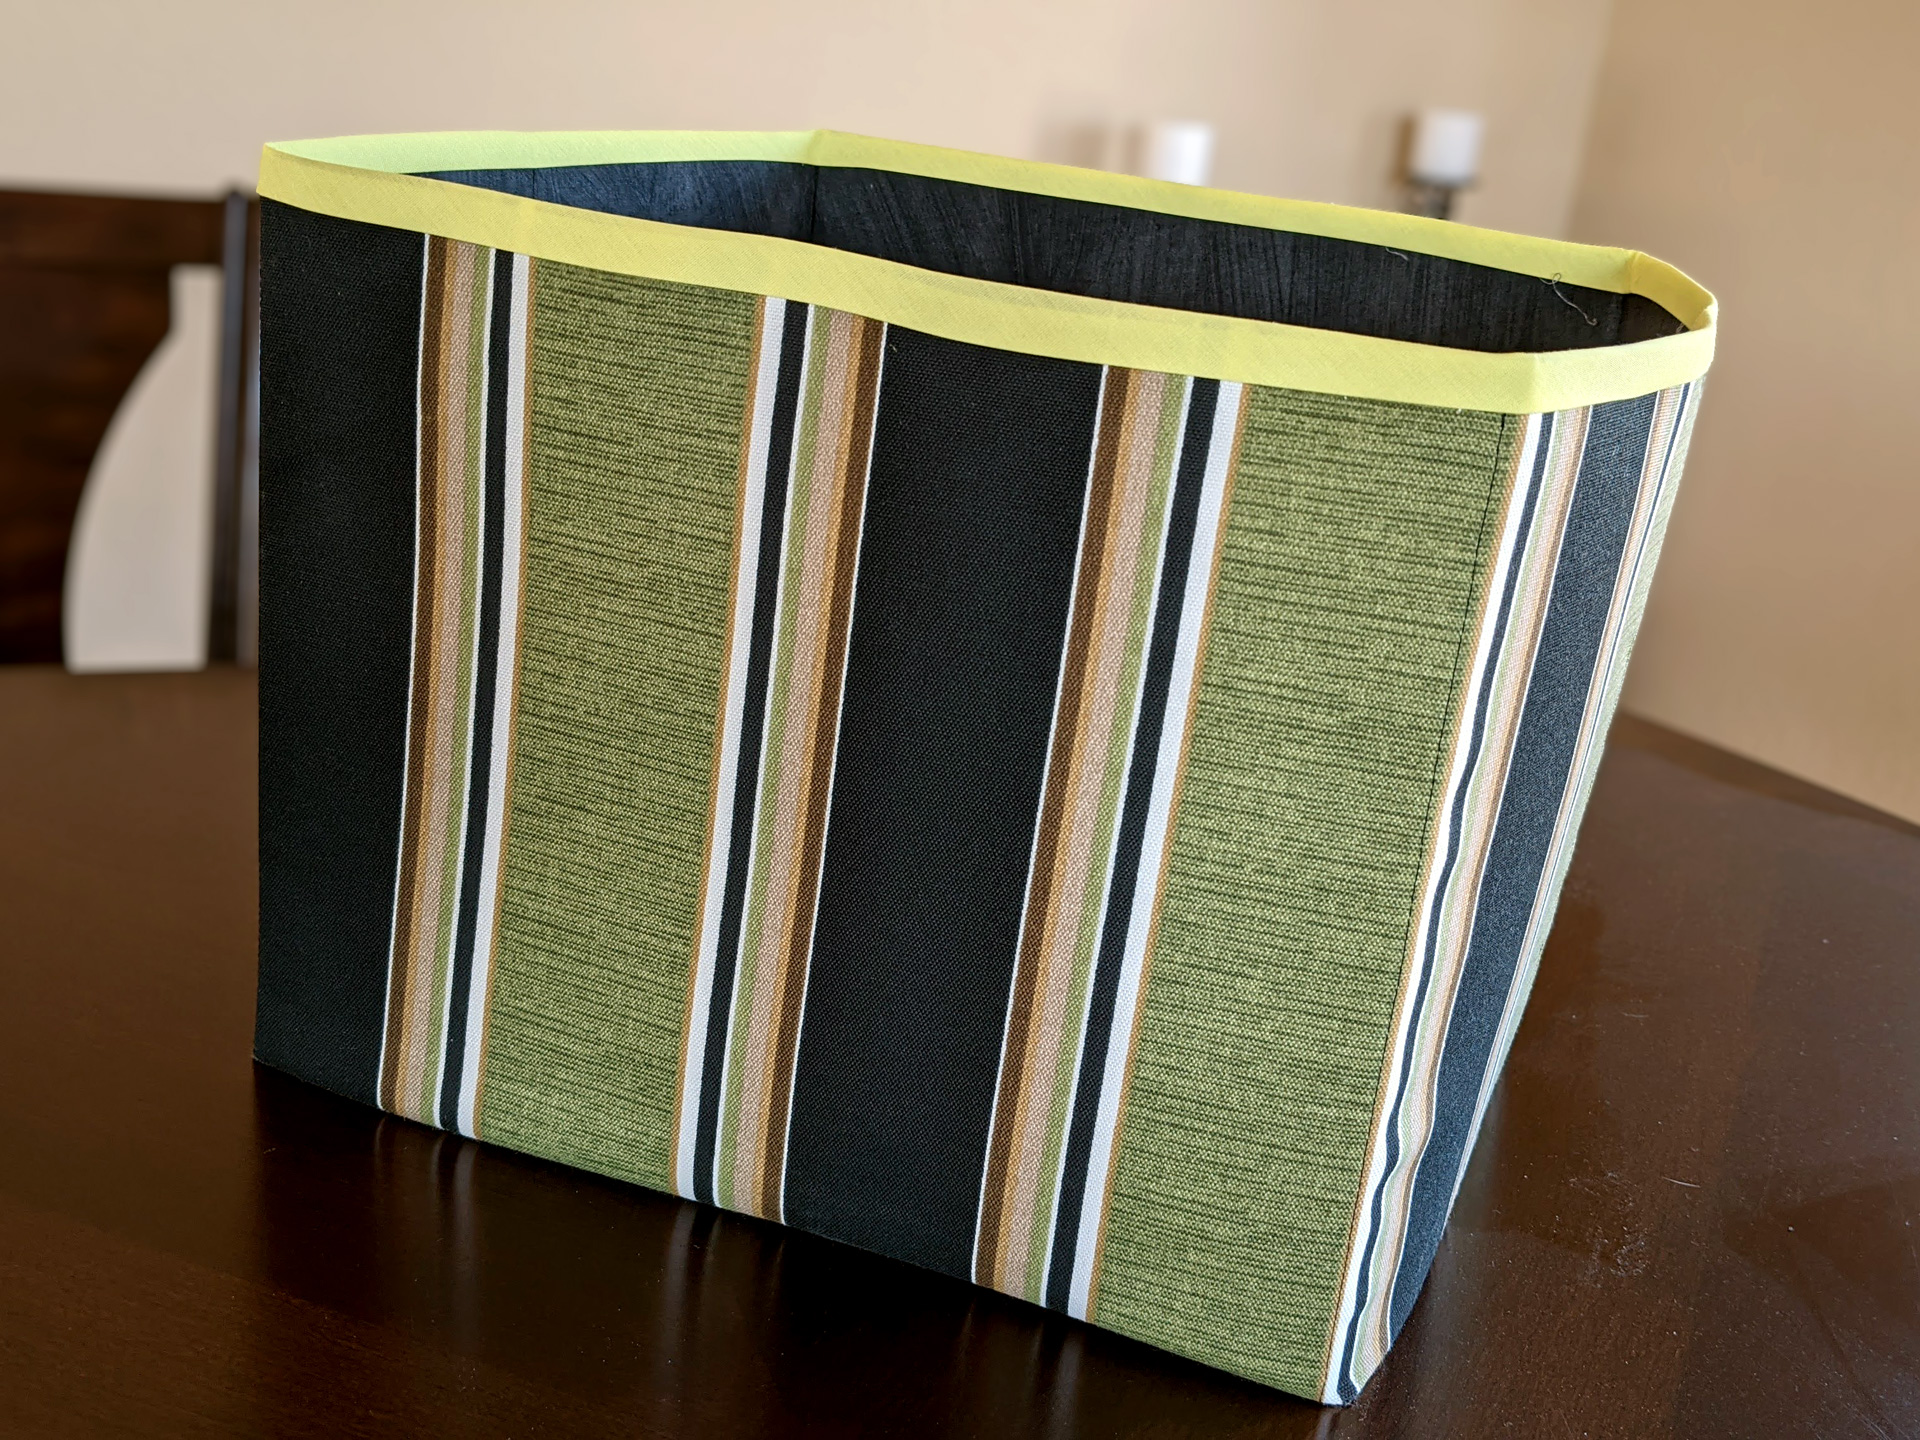
Being able to make my own storage boxes at any size is one of the awesome things about sewing.
For a year now, I’ve had this collection of lightbulbs going rogue in our pantry. Most of them we inherited from the previous owners of our house. I finally got around to corralling those suckers in a custom-sized box. I also used the opportunity to price out what a box like this would cost were I to make them and sell them. I’ll get that out of the way and say: way too freaking much.
All was not lost, though. I uncovered some shortcuts that save a bunch of time.
Pre-Fuse the Fusible Tape to Bias Tape
One of the time-sucks to making these boxes is the bias binding around the top. Even if the plastic canvas inserts weren’t in the way, sewing it on isn’t a good idea because it’d be a straight up pain trying to maneuver a small box around the sewing machine. So I always go with fusing the bias tape around the top.
Steam-a-Seam vs. EZ-Steam
I took some time to compare Pellon EZ-Steam II to Warm Company’s Steam-a-Seam 2, paying attention to the ease of working with each one and the finished results. Using some scrap fabric and bias tape, I applied EZ-Steam to one side, and Steam-a-Seam to the other side. The clear winner is Steam-a-Seam.
- The Steam-a-Seam backing peels off MUCH cleaner. EZ-Steam tends to get hung up on areas of the tape that gobbed up during production, and then shreds, leaving a film on the adhesive you have to scrape at to re-start peeling the backing.
- The finished bond with Steam-a-Seam is permanent. Comparatively, EZ-Steam is peeling right off of the test fabric.
- Steam-a-Seam is made in the USA, if you care about that kind of thing.
Time-Saving Tip
Rather than cut the bias tape to the length I need per project, I decided to apply the fusible tape to the entire length of the bias tape I had. I left the backing on and stashed the bias tape until I was ready for it. Then all I had to do was cut the length I needed, and iron it onto the box.
Goodbye Slip-Stitch (Ladder Stitch)
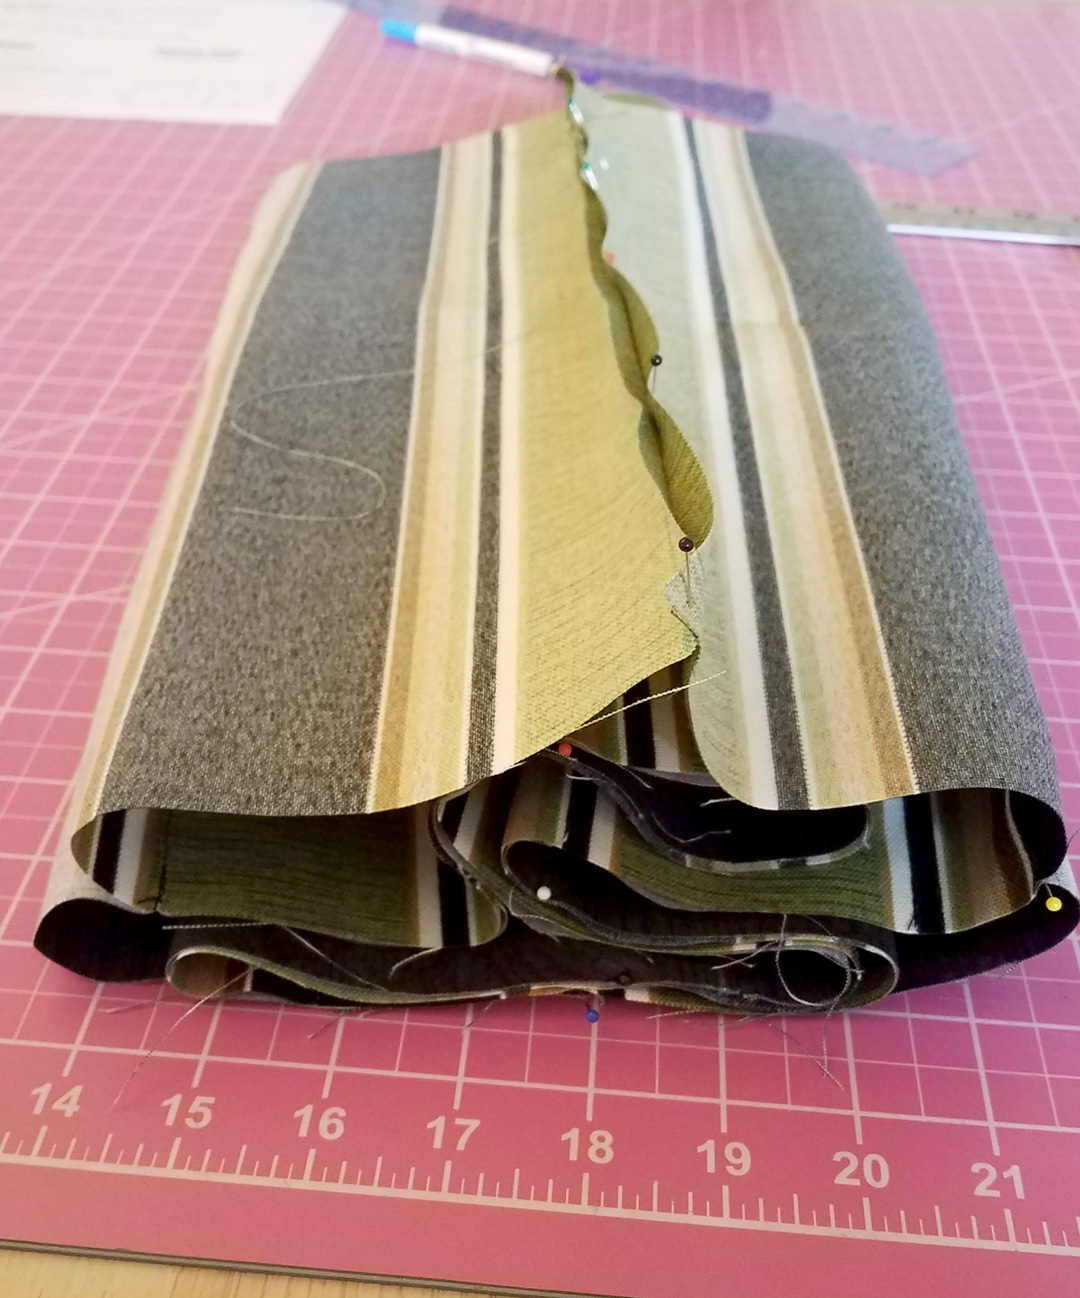
Up until now, I’ve always hand-sewn the outer fabric closed with a ladder stitch, which also sucks up a lot of time. It finally dawned on me that with a little bit of folding and turning things inside out, I could close the outer fabric using my sewing machine.
With right sides out, fold the unsewn outer flaps back, enclosing the rest of the fabric. Pin the outer flaps right sides together, making sure the enclosed fabric is out of the way. Then sew on the sewing machine. Then simply turn the entire thing right side out.
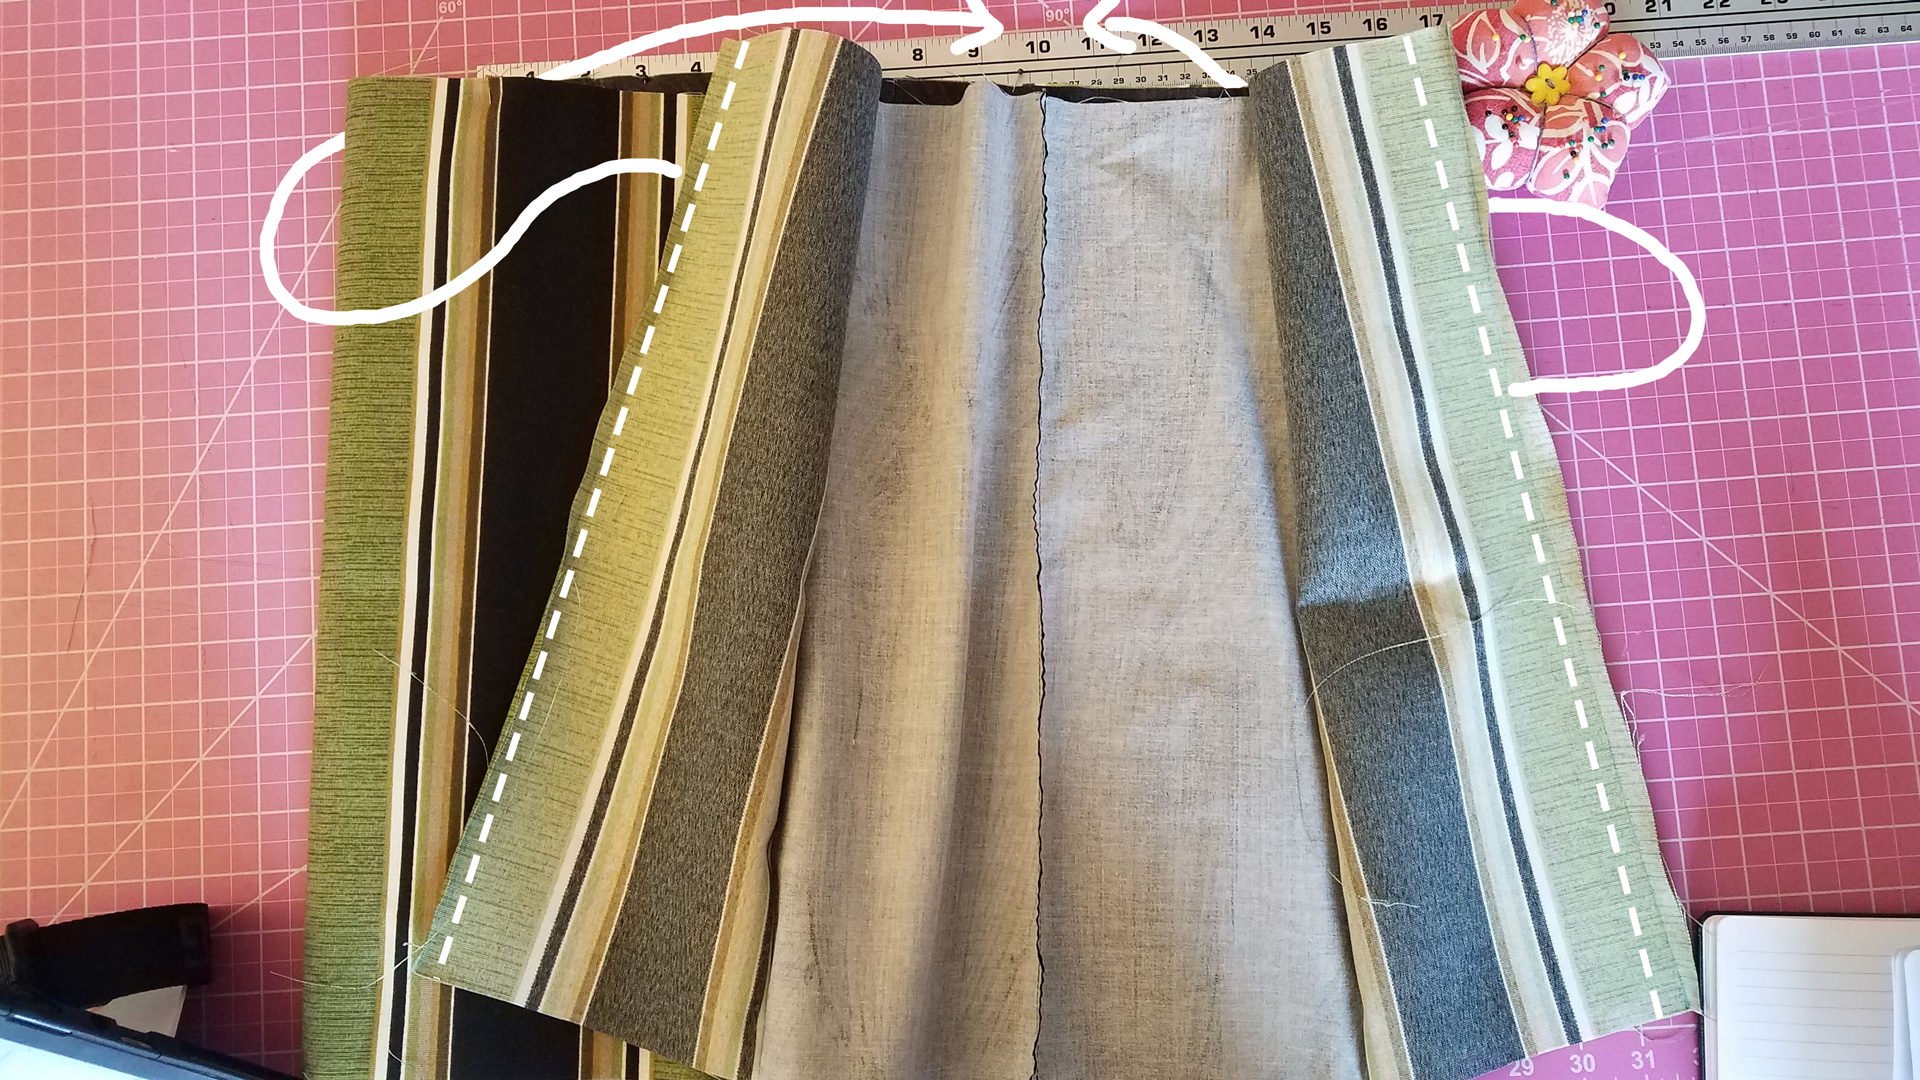
With right sides out, fold the unsewn outer flaps back, enclosing the rest of the fabric.
Pin the outer flaps right sides together, making sure the enclosed fabric is out of the way.
I do wish it made sense to make and sell these, but the material cost and labor involved land me on a price point no one should pay for a fabric storage box. So this little idea will live on the world of DIY tips and tricks.
Leave a Reply