McCall’s sucked me in yet again. How? What was it about this pattern that made me take the horrific plunge?
Well, I am always a fan of one-piece outfits. A dress is the ultimate put-one-thing-on-and-done, and I like this one because I can pair it with a bolero or cardigan and wear it to work. Nice length, nice layering potential. Yeah, just something about it I really liked. I also liked the alternate tie-front views for a more “me” version to wear outside of work.
And so off we went.
Muslin Necessito
A test garment is a literal requirement for all “big four” patterns. I mushed together some muslin fabric leftovers and part of an old curtain to gauge fit and do a quick run-through of the instructions. I skipped all lining pieces for this and just made the outer bit.
About the Fabric
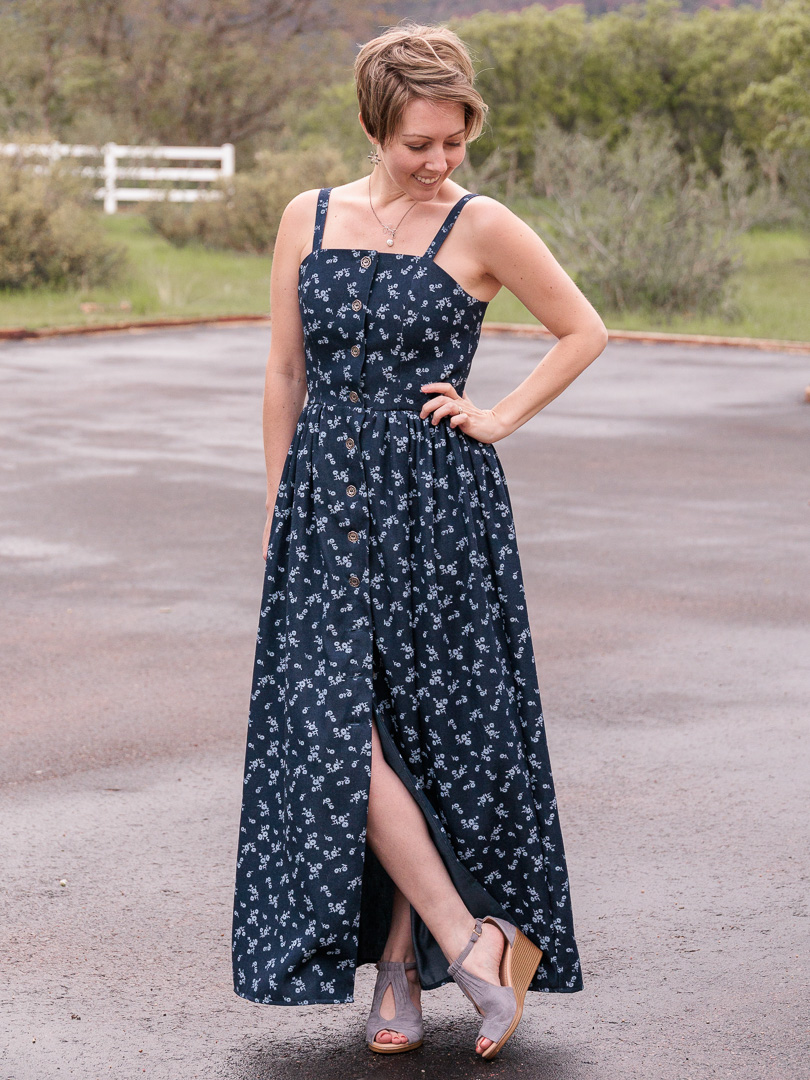
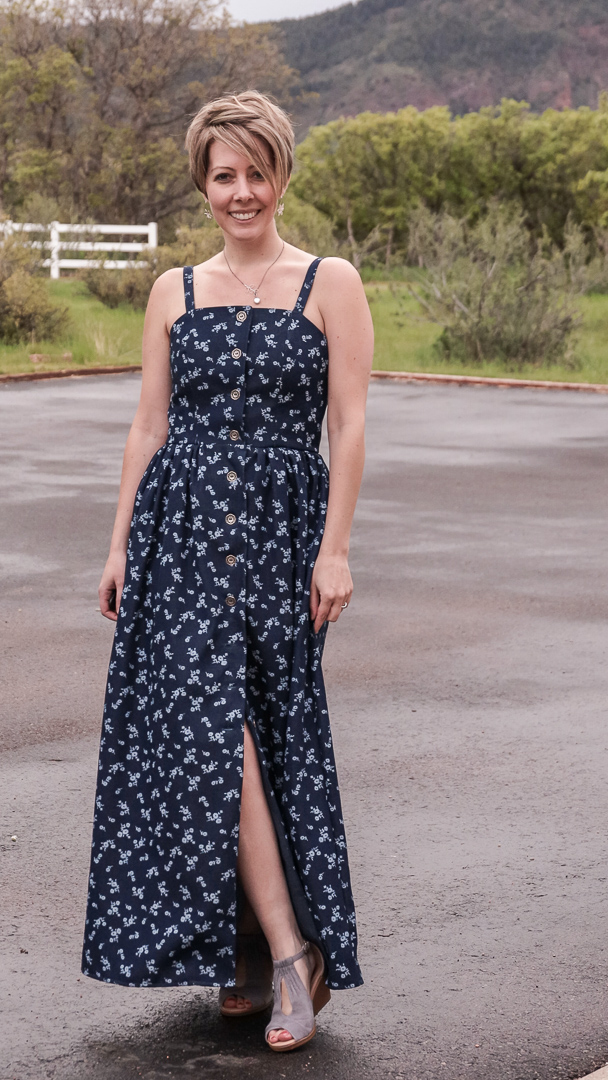
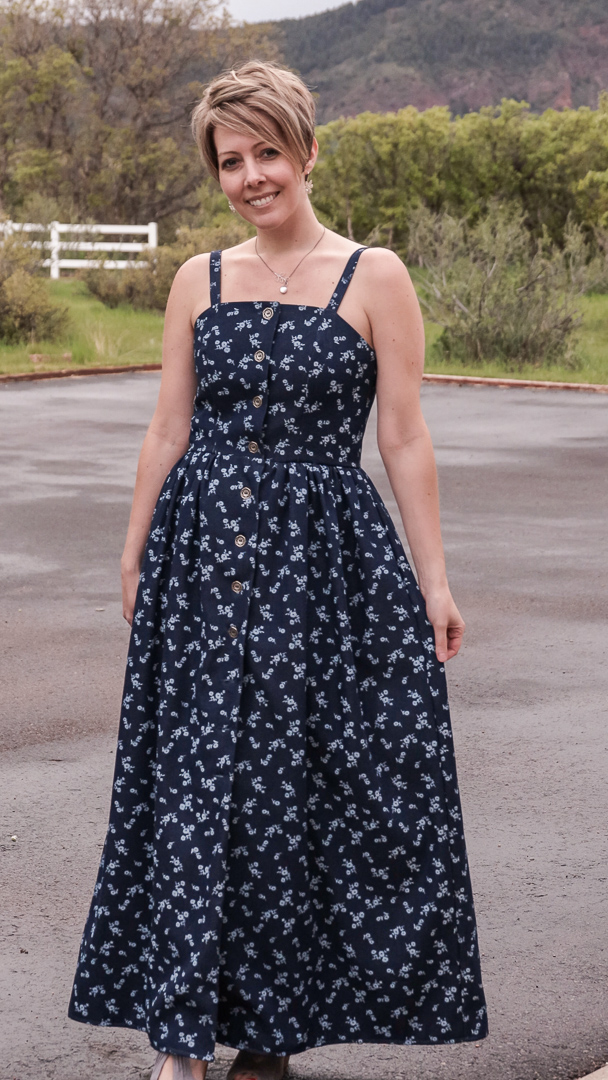
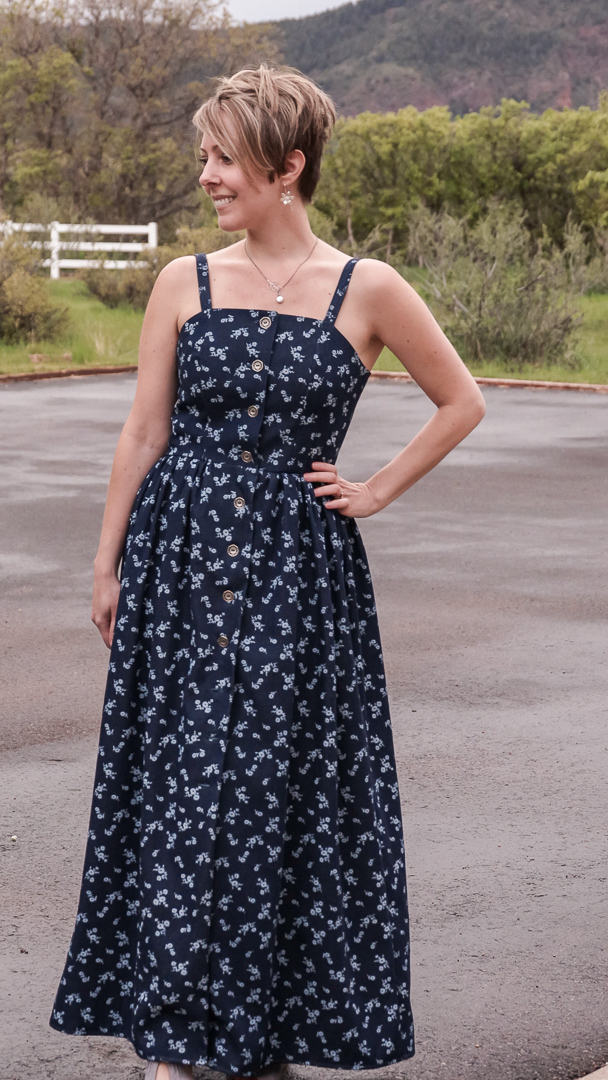
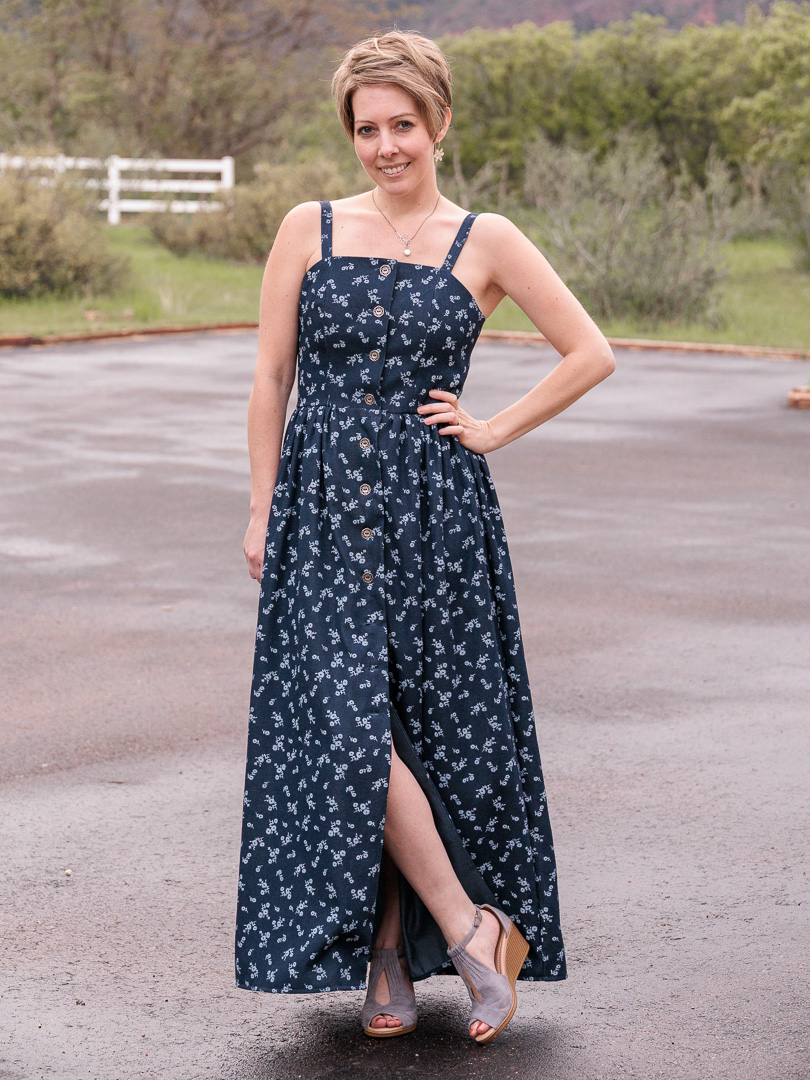
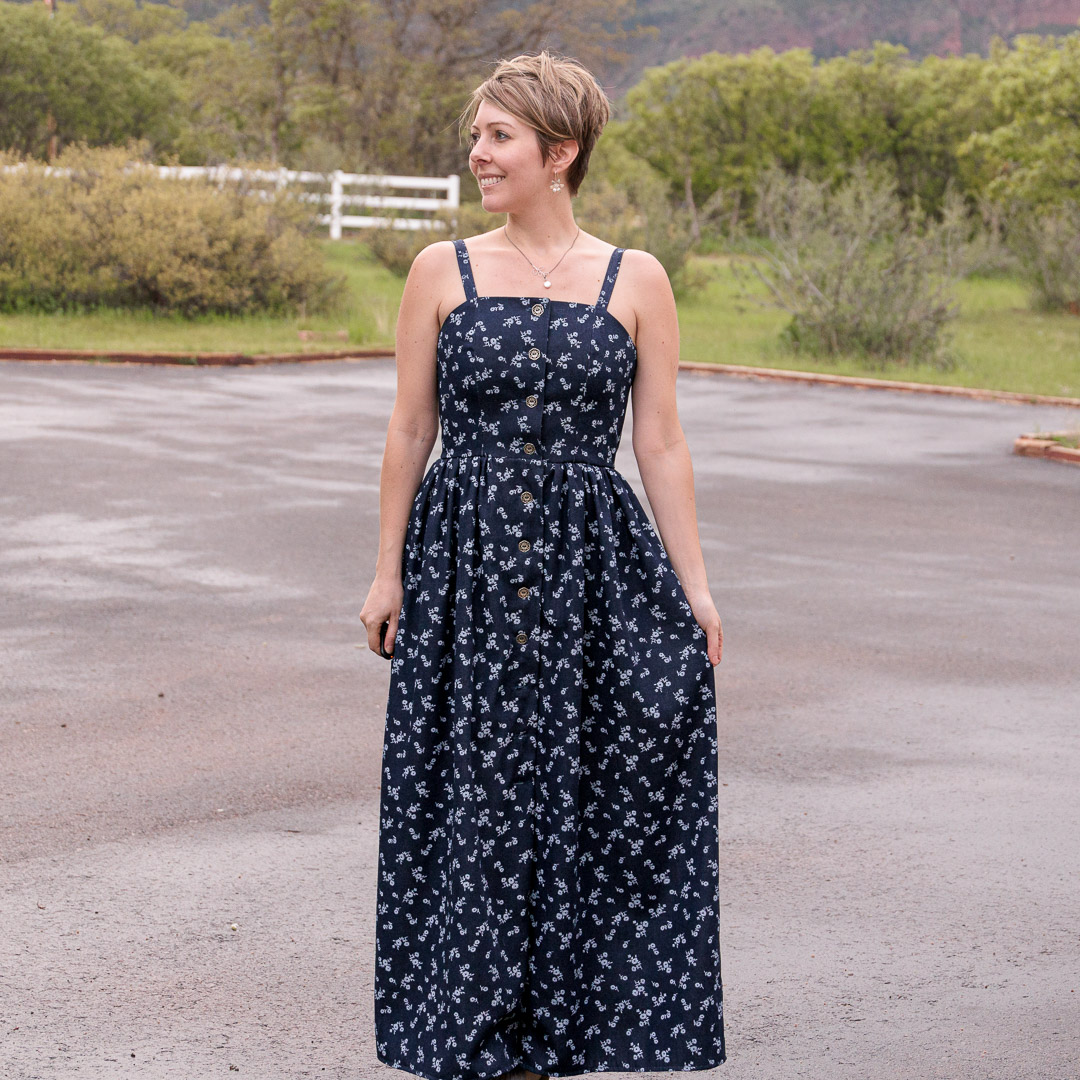
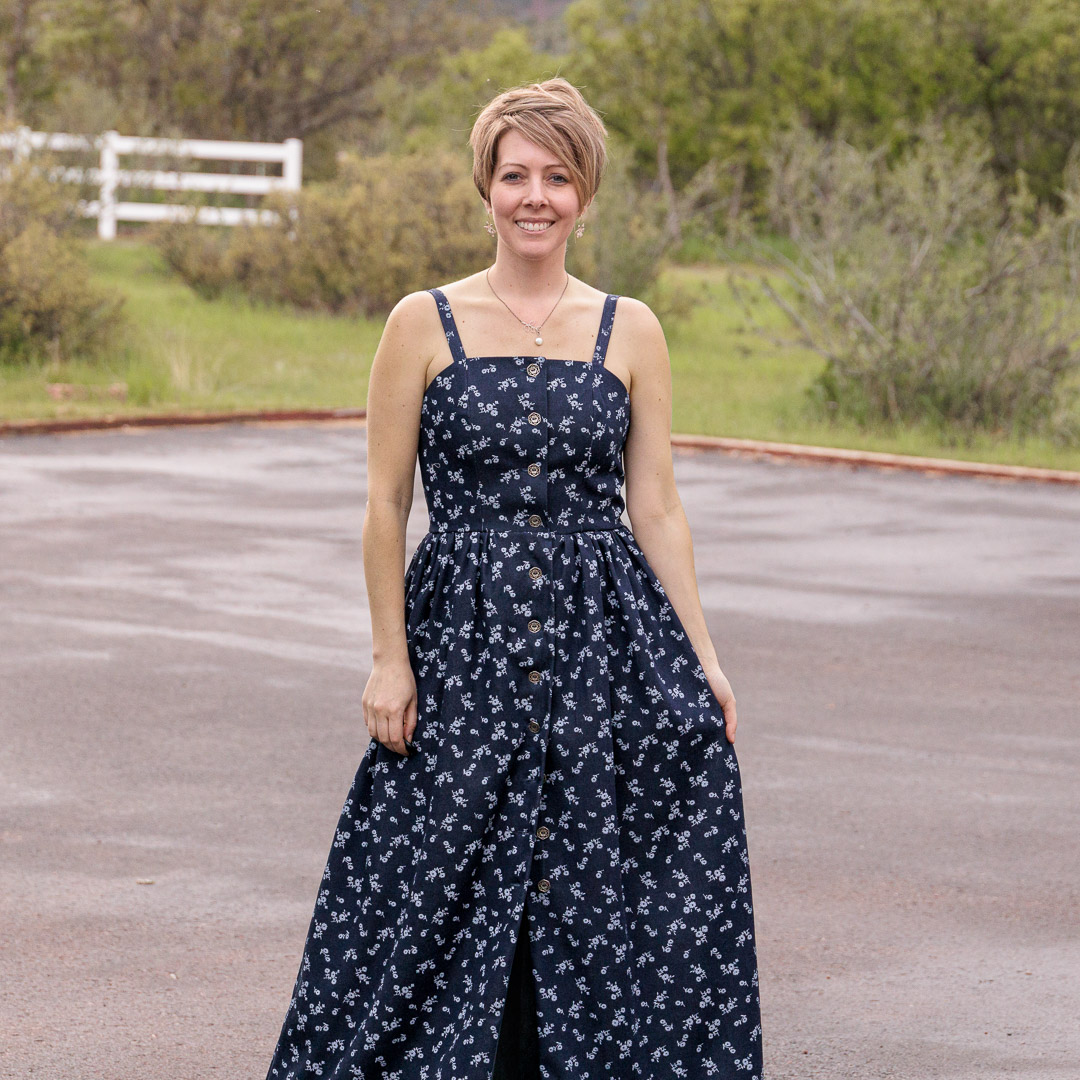
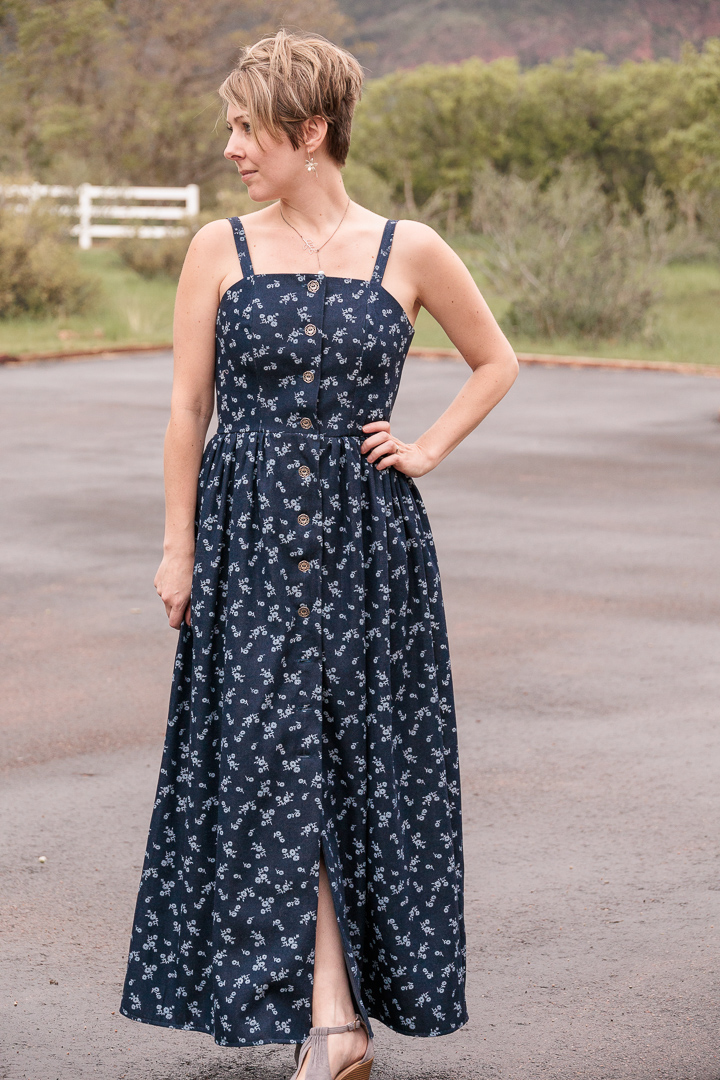
Main: 3 yards White Daisy Floral on Indigo Designer Midweight Chambray from Cali Fabrics
- FABRIC CONTENT: 100% Cotton
- FABRIC WIDTH: 60″
- WEIGHT: Midweight
- STRETCH: None
This is my first time using cotton chambray. This particular chambray is heavier than I expected; it’s almost denim-like. I should have read the description closer—it does say structured, but I was blinded by the cuteness of that print. For all it’s structured midweightiness, it actually hangs quite nicely as a skirt while feeling breathable and strangely float-y.
Edit: It pains me to say this fabric did not hold up well through the wash as far as the print goes. The flowers have all faded. It’s probably my own fault since I don’t do anything special to anything I launder: wash cold, tumble dry low. I’m not sure if it was the wash or the dryer that faded the flowers, but it’s a bummer.
Lining: To save on unnecessarily using the chambray (and also reduce bulk), I used some leftover quilting cotton that I had from the pencil roll I made for my nephew.
About the Pattern
Honestly…it wasn’t the worst. It didn’t seem quite as extra as other big four patterns I’ve made. Maybe I’ve just learned to filter out the extra in my brain as I read these. I also bought the PDF version instead of the traditional printed tissue paper version, so maybe the digital instructions just felt cleaner and clearer for some reason.
Trouble Spots
- The skirt facing. I don’t know what it is, but I feel like every pattern in existence glosses over the most complicated/crucial steps, either by omitting pictures, or lumping a thousand steps into one overly-truncated explanation. The key part with the skirt facing after pinning the bodice to the skirt is to fold the facing over so the right side of it lays against the right side of the skirt with the bodice sandwiched between. I was a half second from destroying the whole dress before I realized it wasn’t right. I had even serged about a half inch before I caught on.
- Front bodice seams. It’s not the easiest seam since one piece is curved and the other is straight. The instructions say to staystitch but I skipped that; makes it simpler to ease the curve to fit.
- Understitching bodice. After attaching the main fabric and lining, it becomes a little challenging to understitch as far as possible. You can’t get all the way into the corners.
Overall, it’s a pretty simple sew and it comes together pretty quickly. The most time-intensive part is the gathers.
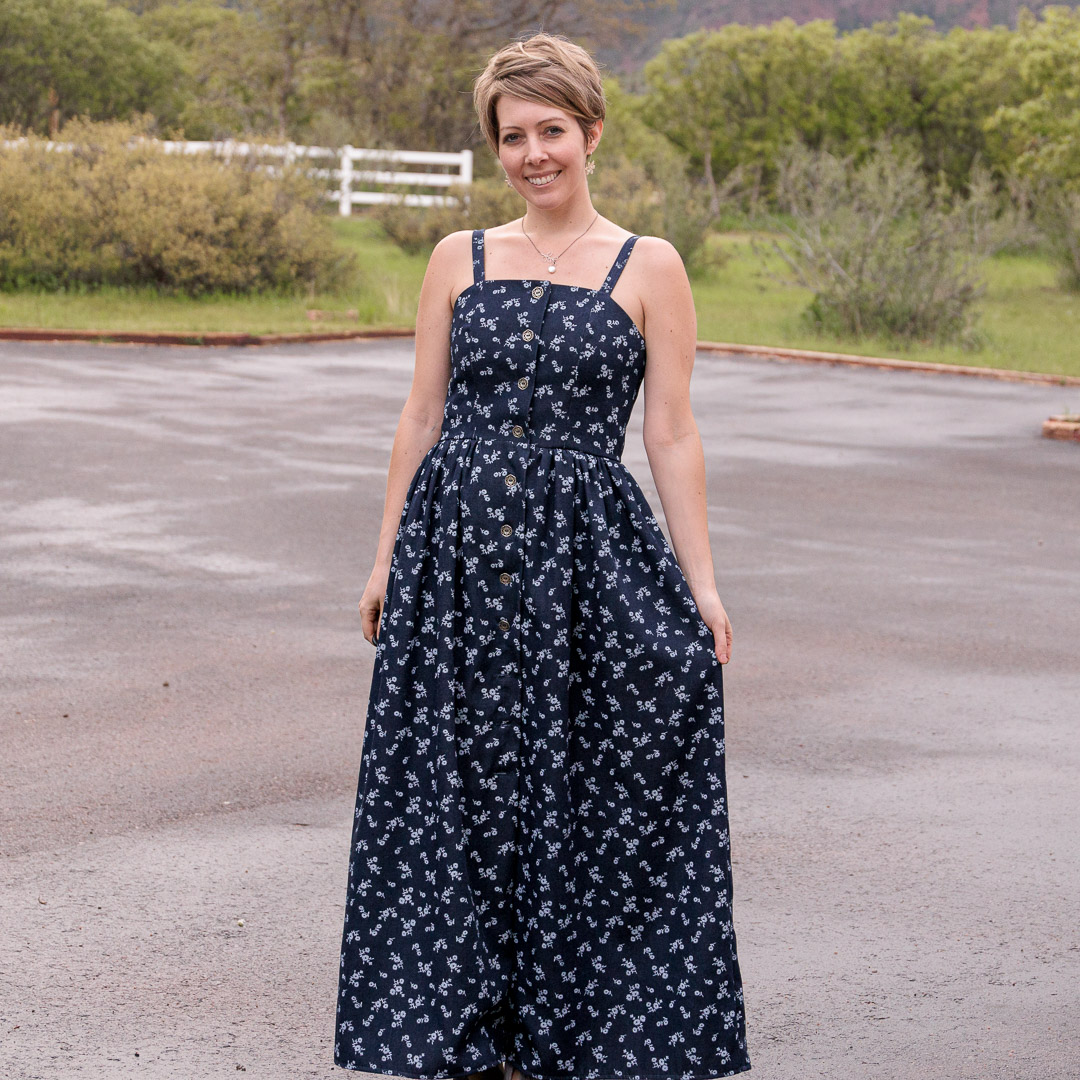
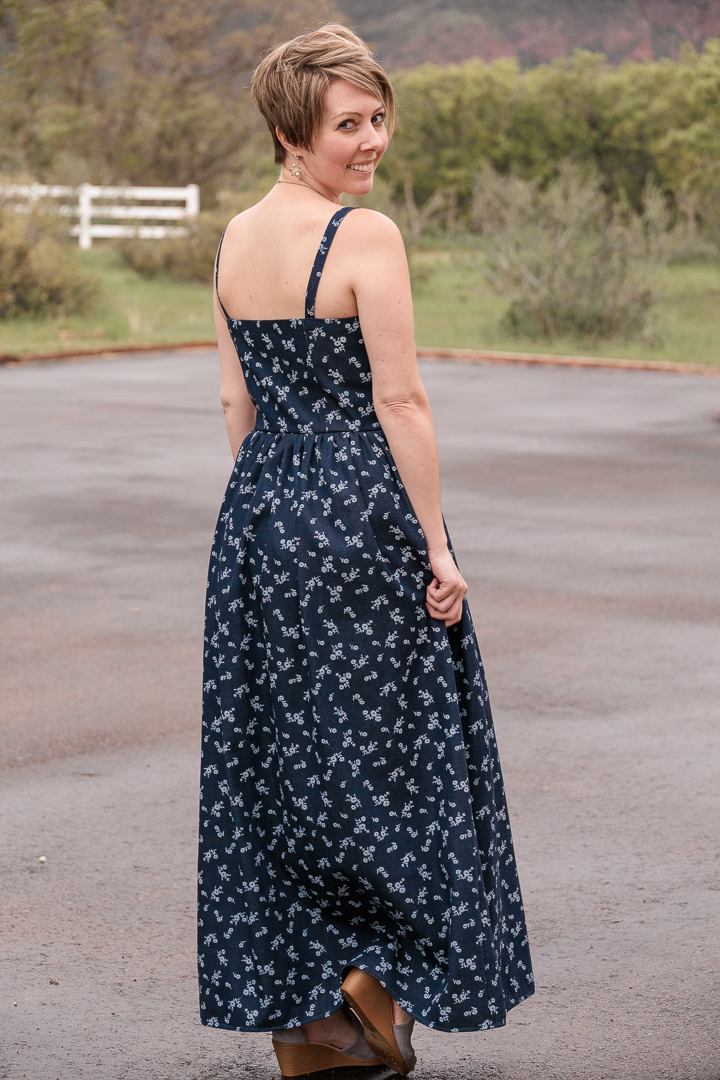
About This Make
- size 12 graded to 14 at waist and below
- view C
- no pockets
What I Did Differently
- Skipped all the extra. Staystitched nothing.
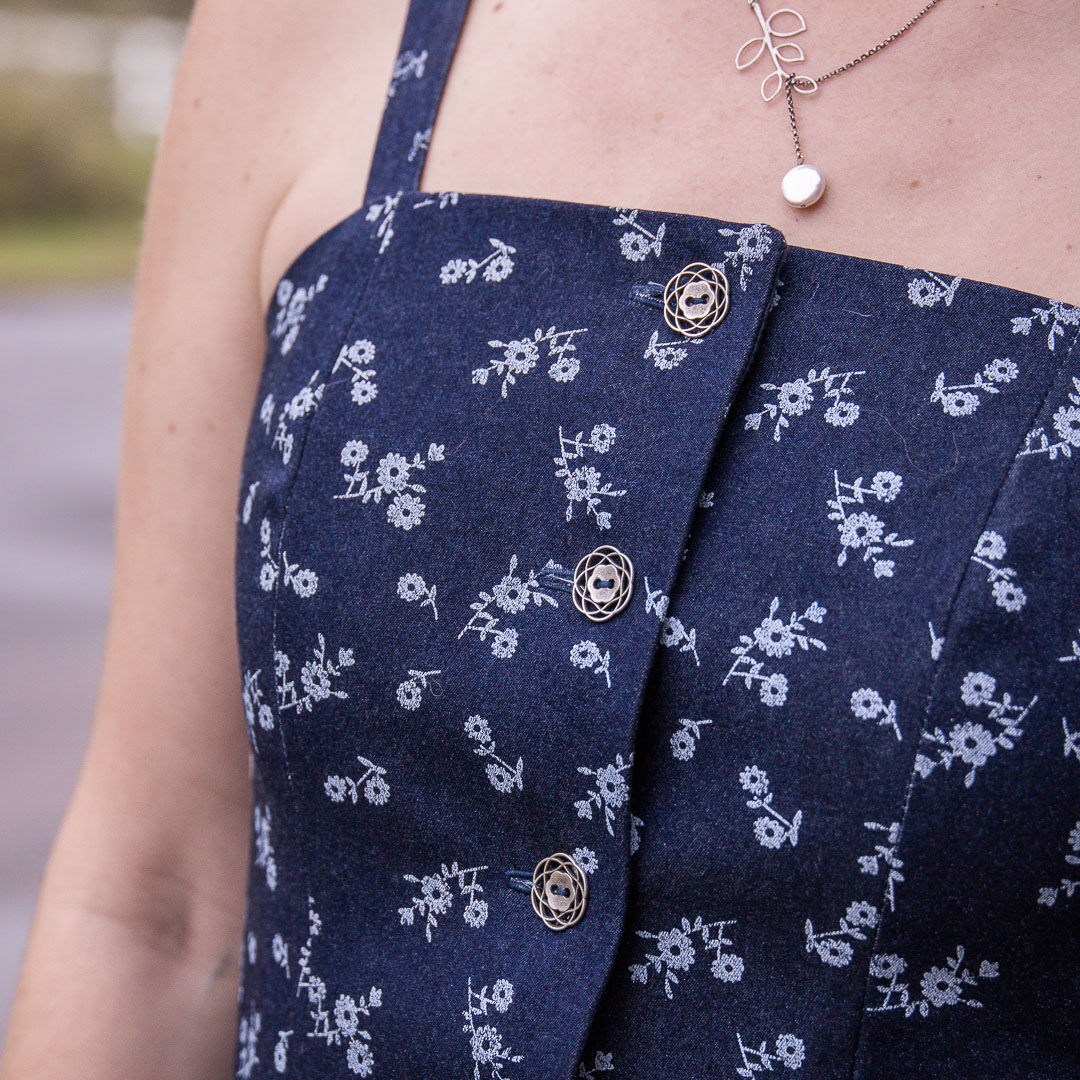
- Added bra cups in between the main fabric and lining.
- Lengthened the skirt by 8″.
- Shortened the shoulder straps by 1.25″.
- For hemming the skirt, I started a few inches in from the bulky edge with no lock-o-matic stitch, and stitched backward to the edge, then forward to continue hemming. Works so much better than attempting to start a hem on a bulky edge.
Notes for Next Time
- In-seam pockets would be awesome on this. View B comes with those, so I could just swap them in.
I absolutely adore this dress, and I think it’s the maxi length that pushes it over the top for me. That and I don’t have to mess with a bra. It’s so comfortable! I was so ready to wear it when it was finished, but I had to wait for the perfect buttons to be shipped.
Project Settings
Sewing Machine vs. Serger
| Sewing Machine | Serger |
|---|---|
|
|
Sewing Machine Settings
| Presser Foot | Stitch# | Stitch Width | Stitch Length | Needle | Top Thread Tension | Application |
|---|---|---|---|---|---|---|
| standard zig-zag (A) | 1 | 3.5 | 3.5 | 90/14 | 4 | seams |
| standard zig-zag (A) | 0 | 3.5 | 5 | 90/14 | 4 | baste |
| standard zig-zag (A) | 0 | 3.5 | 3.5 | 90/14 | 4 | bra pad tack |
| button foot (T) | 6 | 5 | drop feed | 90/14 | 4 | buttons |
| adjustable edge (SE#3) | 1 | 0 | 3.5 | 90/14 | 4 | understitch |
| adjustable edge (SE#8) | 0 | 0 | 3.5 | 90/14 | 4 | hem |
| buttonhole foot (R) | 18 | default | default | 90/14 | 4 | buttonholes |
Serger Settings
| Stitch Name | 4-thread overlock |
|---|---|
| Needles | R, L |
| Finger | B |
| Threads | 4 |
| Tension Left Needle | 4 |
| Tension Right Needle | 4 |
| Tension Upper Looper | 4 |
| Tension Lower Looper | 4 |
| Cut Width | 6 |
| Stitch Length | 2.5 |
| Differential | 1.0 |
| Application | seams |
Leave a Reply