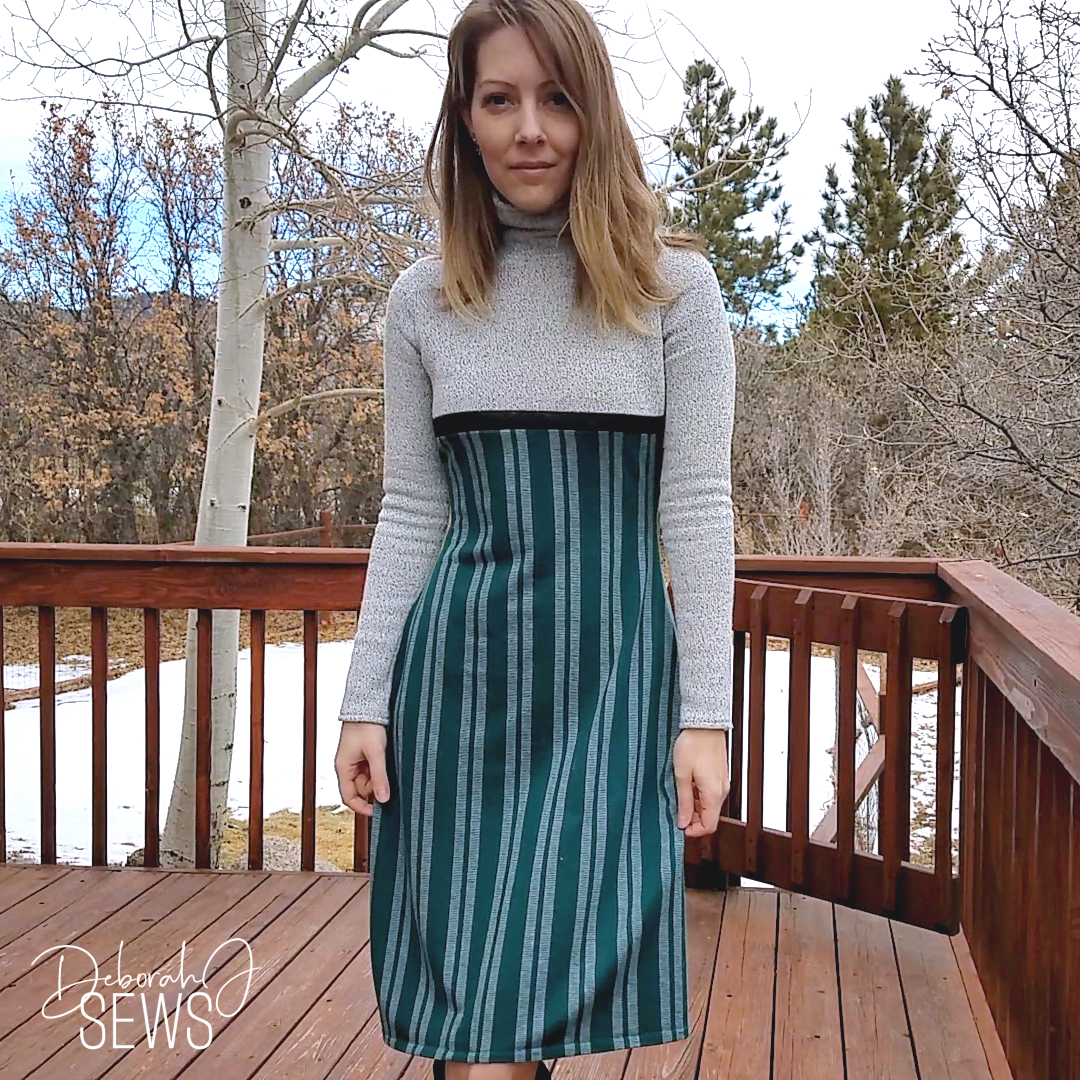
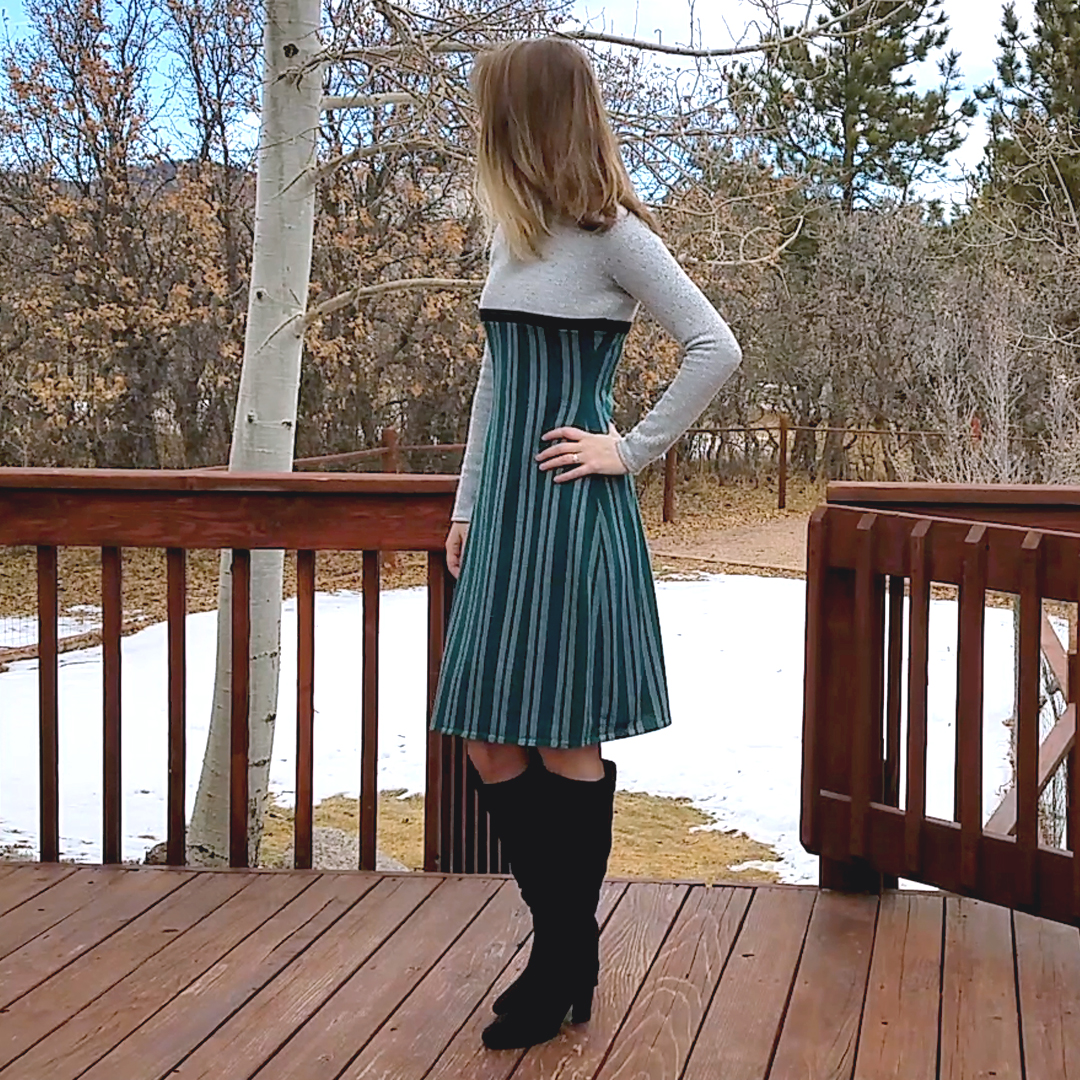
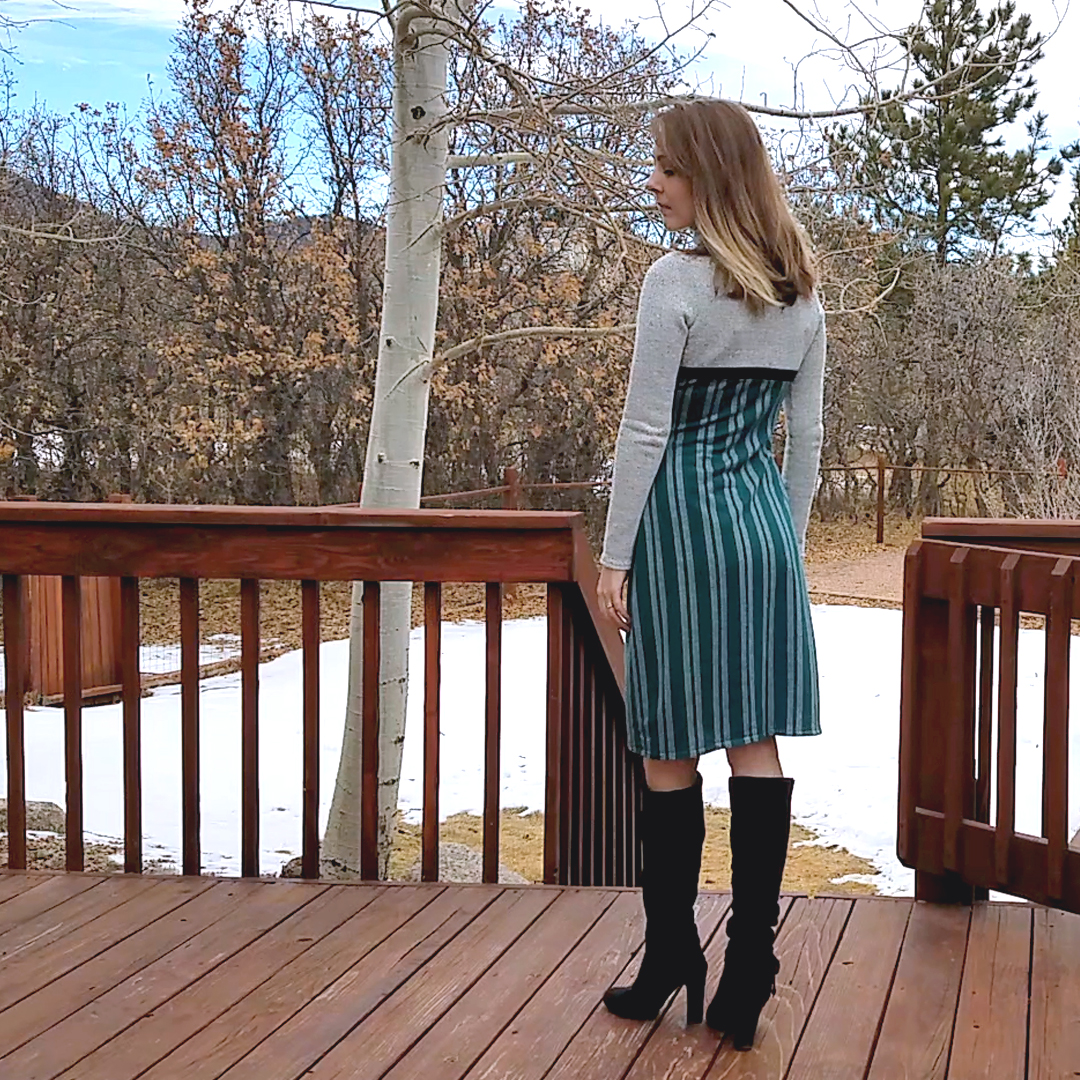
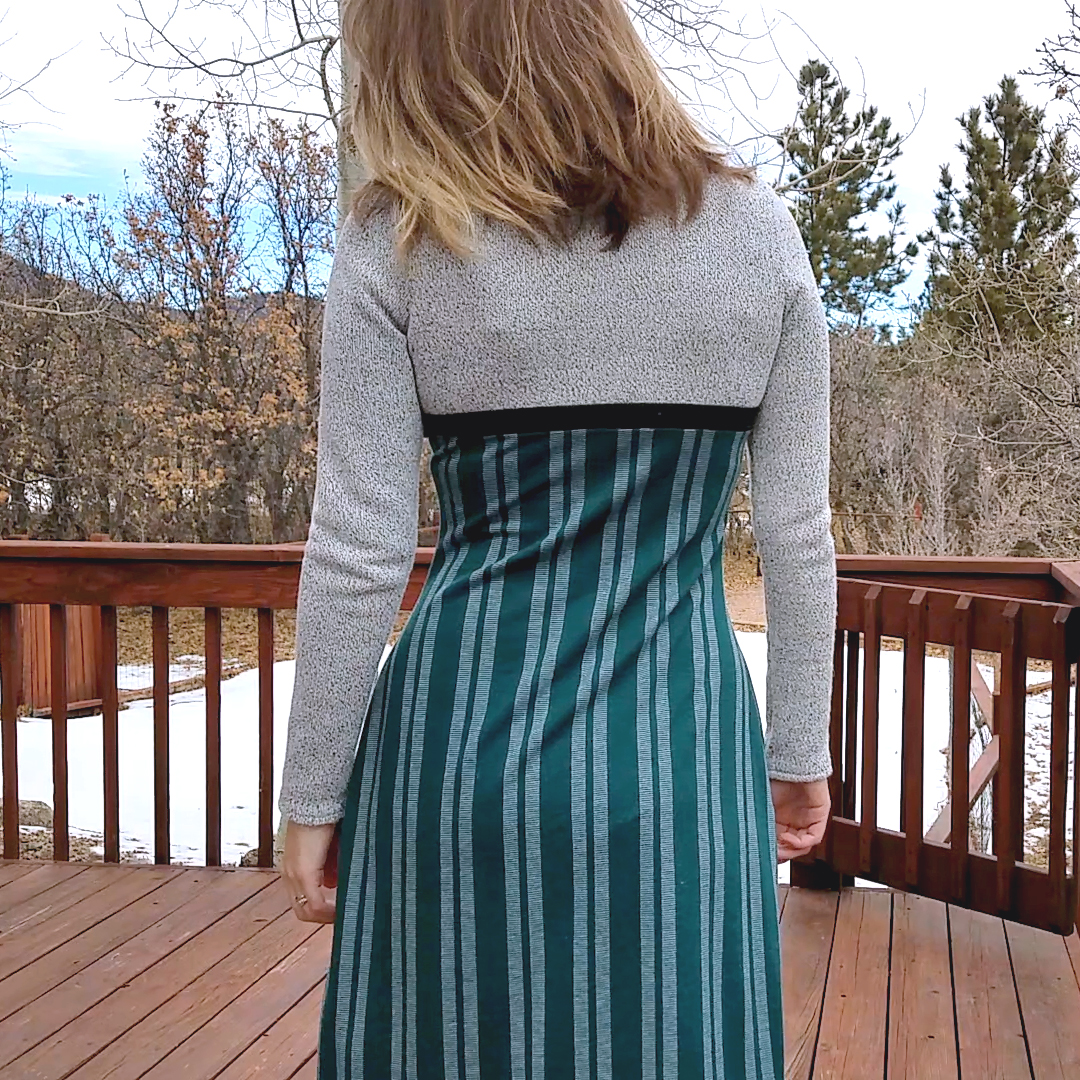
My third Dandelion Tee (Millicent Joy Patterns) features a high waist hack that I’m relieved looks as good as it did in my head (albeit a bit higher than I envisioned.) It was incredibly easy to do.
1. Decide how thick you want the band and where you want it to hit on your body.
I wanted my final band to be 1″ thick and to hit just under my bust. So I cut two band pieces (one for the front bodice and one for the back bodice) 2″ wide (allowing for a 0.5″ seam allowance on top and bottom to attach to the bodice and skirt respectively) and long enough to extend over the width of my pattern piece. (The pattern piece is cut on the fold, so be sure to take that into account!) I used a fabric tape measure to guesstimate how far down on the bodice I’d have to mark my pattern pieces. I went about 4″ up from the waist (narrowest part of the pattern.) In the future, I’m going to adjust that and do about 2″ instead since this band hits higher than I intended.
2. Mark your pattern.
I used a pencil and marked a line on my front and back pattern pieces 4″ up from the waist.
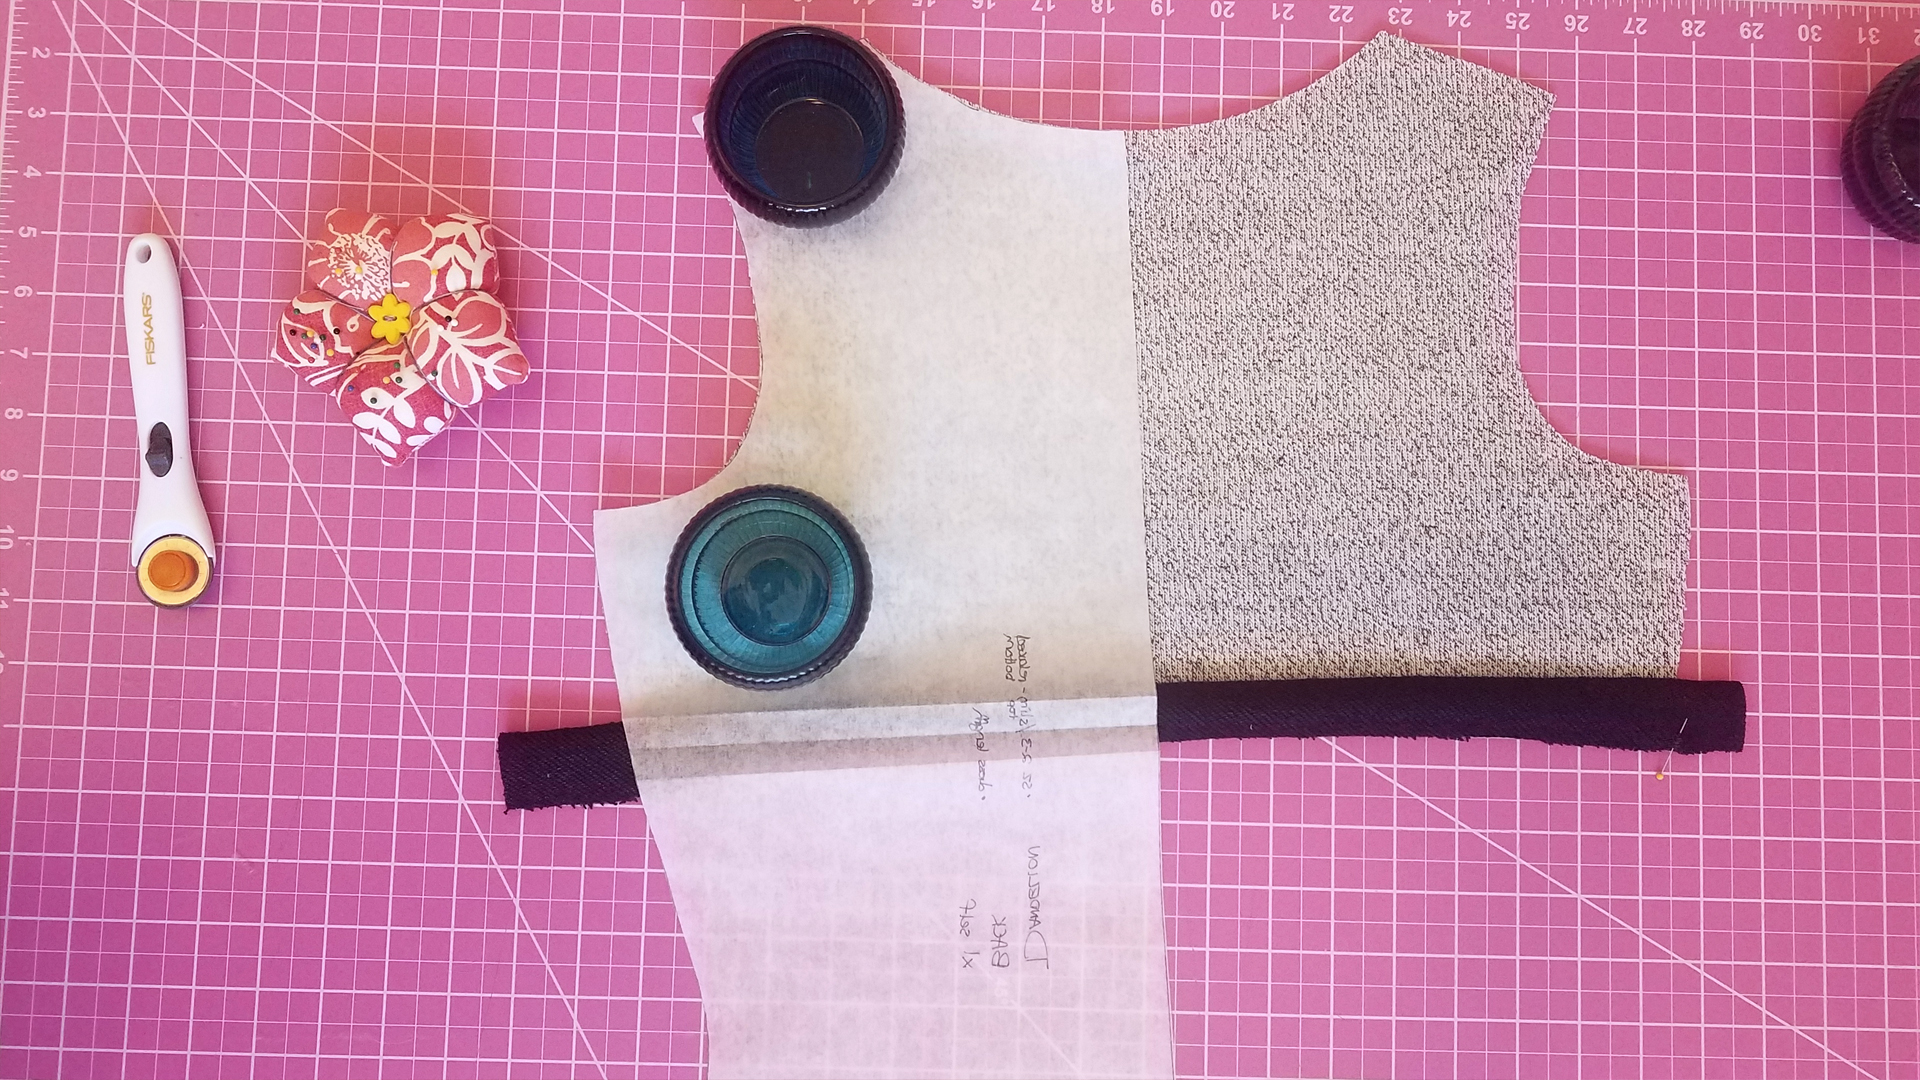
You can see the folds on my pattern piece. I have three shown here, but you only need the center one. That’s where my 4″ line is marked.
I made a fold along my marked line to help with cutting my fabric in the next step.
3. Cut your fabric.
I folded my pattern piece out of the way while cutting. For example, for cutting the bodice (pictured in step 2), I folded the skirt part up and cut along the straight bottom first. When that cut was done, I folded the skirt back down so the pattern was flat, and then cut the rest of the piece.
For cutting the skirt, I folded the bodice part down and cut along the straight top first. When that cut was done, I folded the bodice back up so the pattern was flat and then cut the rest of the piece.
So I ended up with 9 pieces:
- 2 sleeves
- 1 front bodice
- 1 front skirt
- 1 back bodice
- 1 back skirt
- 1 turtleneck
- 2 bands
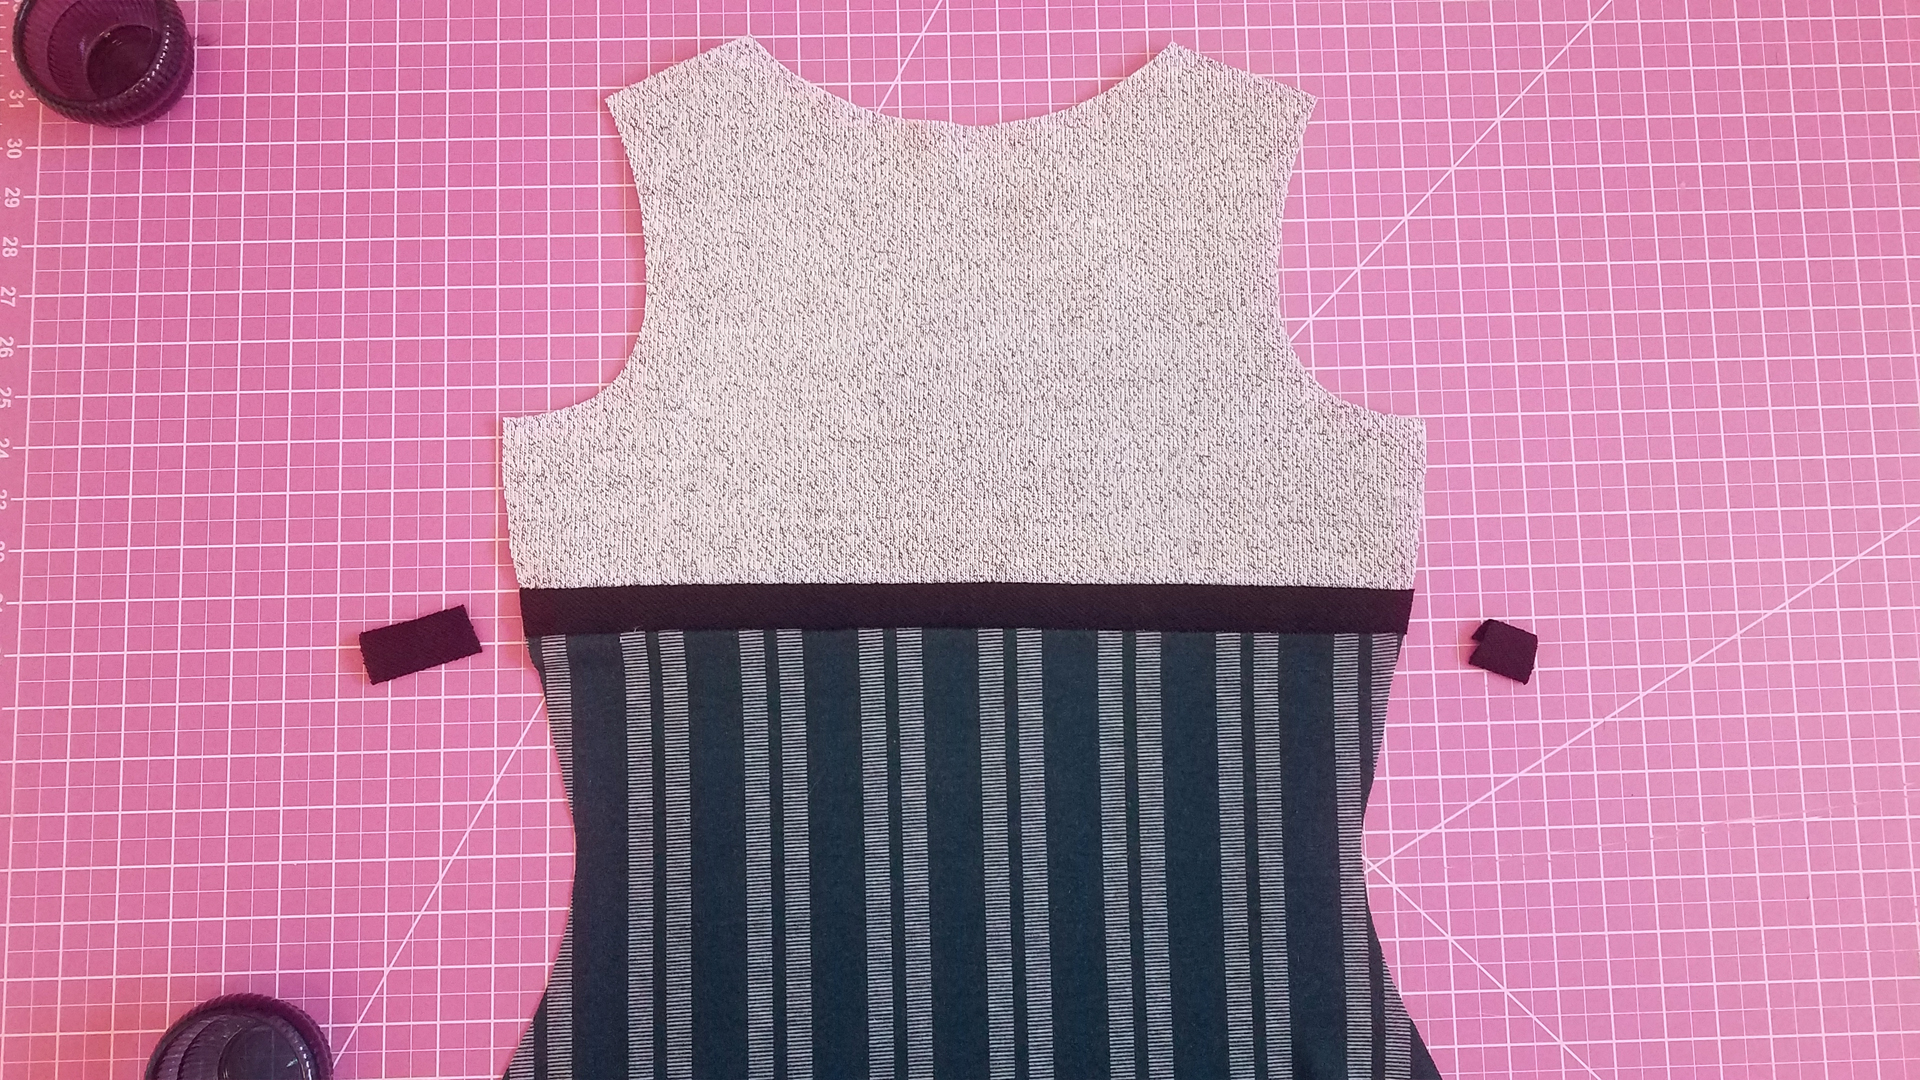
4. Attach the band to the front bodice. Repeat for the back bodice.
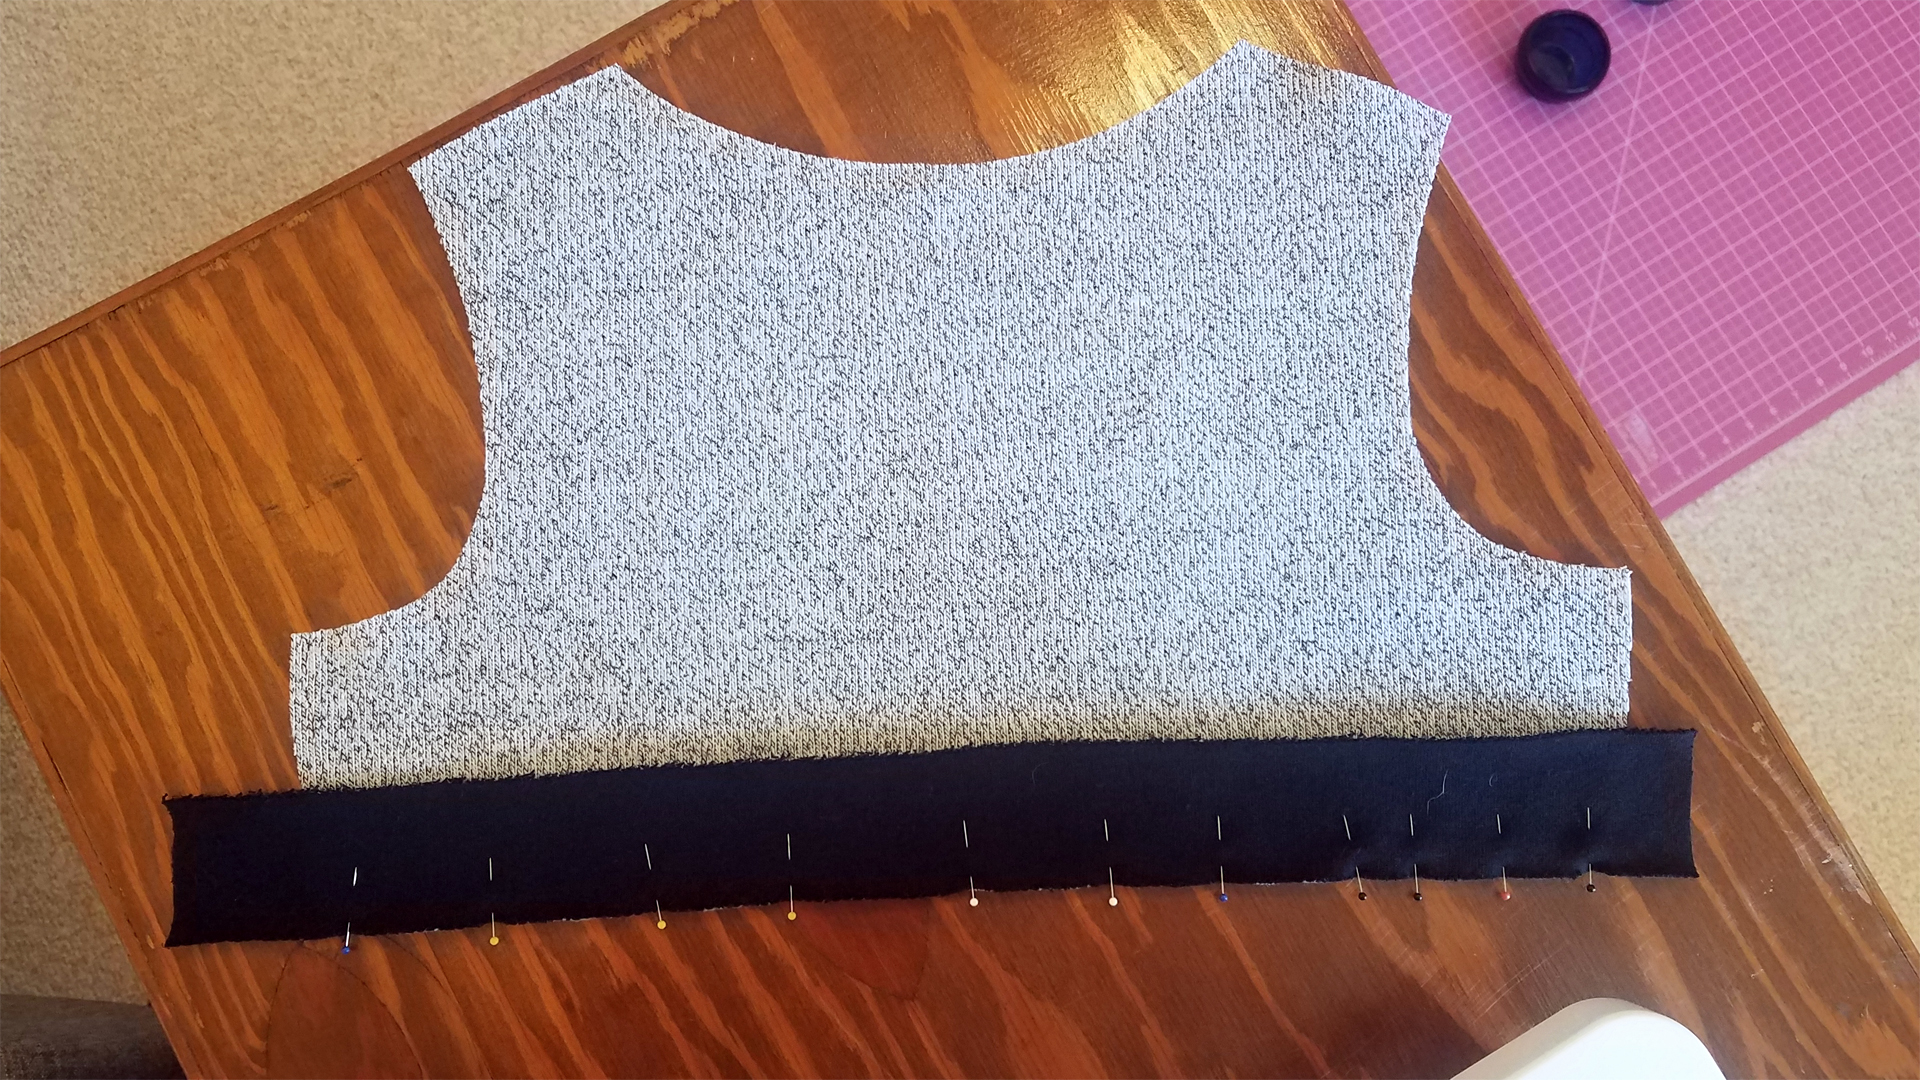
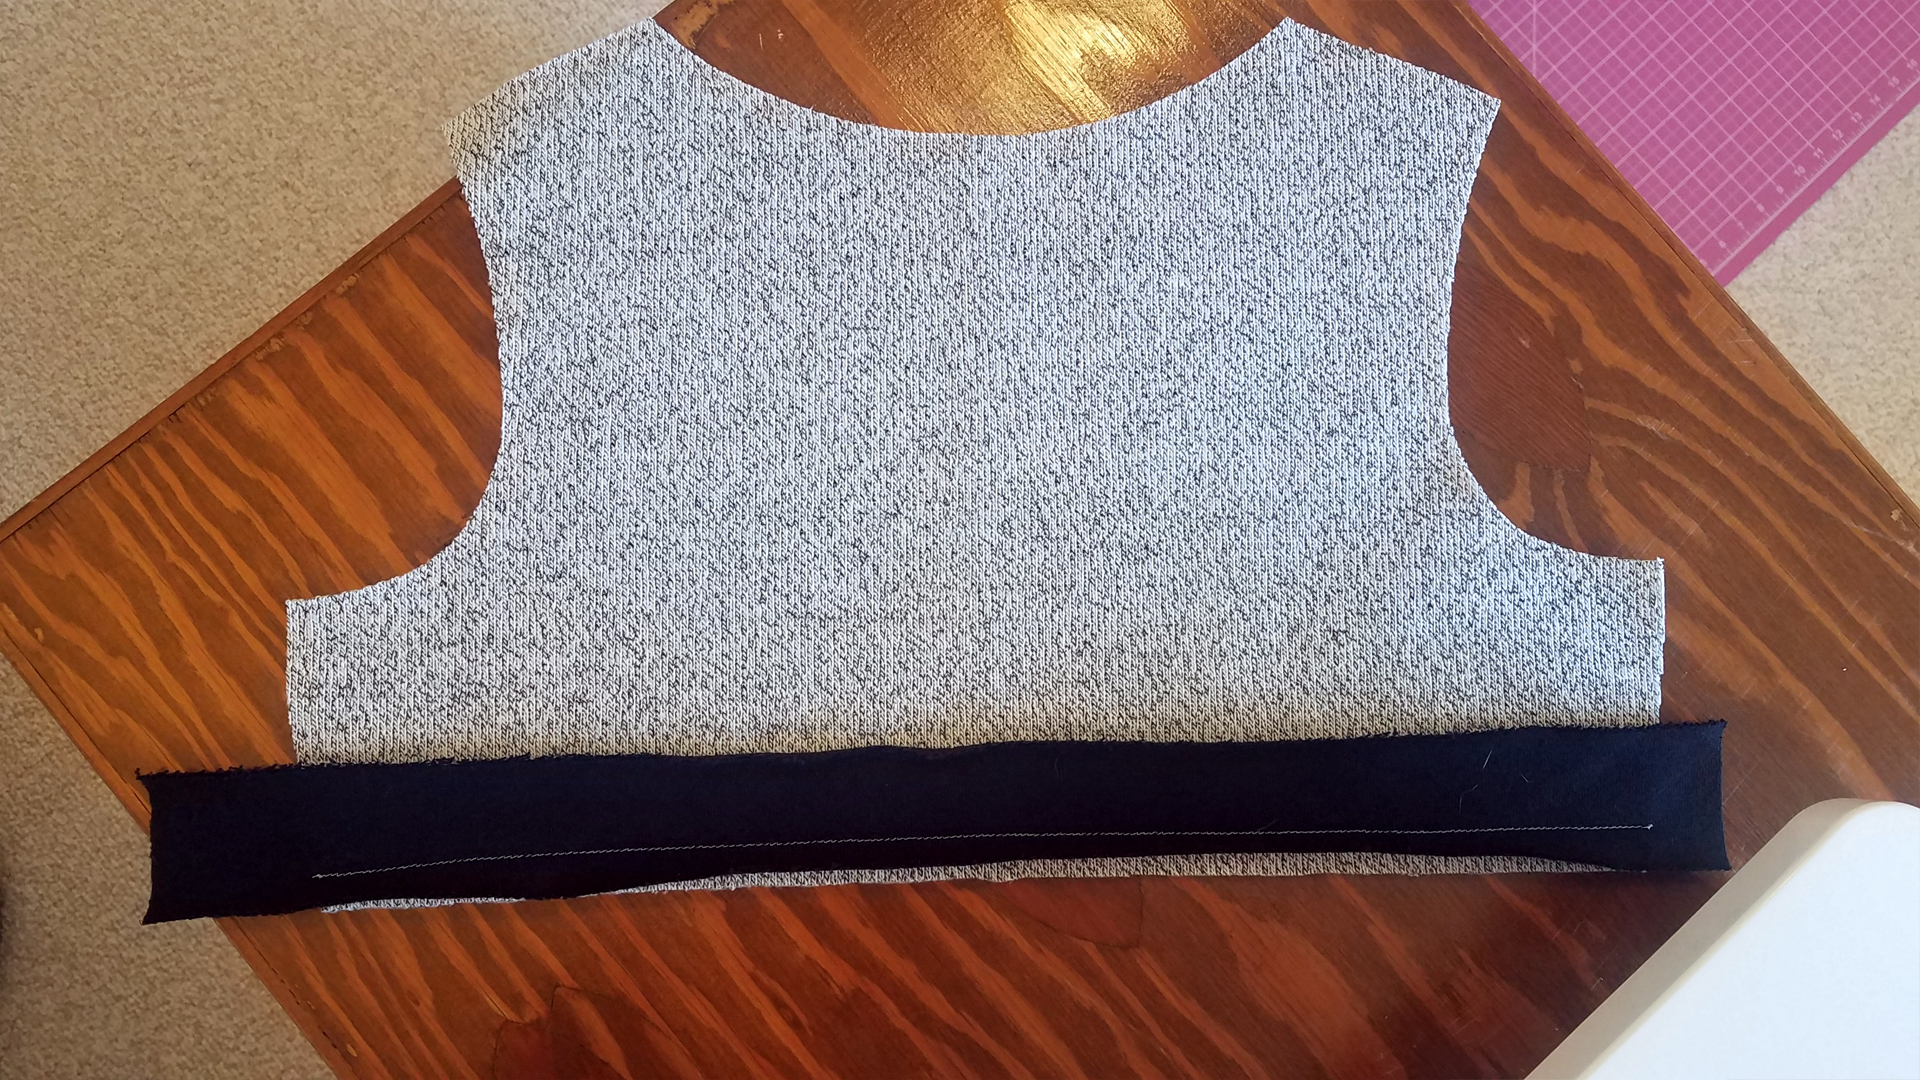
I pinned one of the bands to one of the bodice pieces, right sides together and raw edges lined up, then sewed using a lightning stitch (which is quickly becoming my favorite stitch) with a 0.5″ seam allowance (pictured below.)
5. Line stuff up.
I laid my pattern pieces on top of the bodice, lining up all the edges, and then used a pin to mark the edge of the pattern along the band (right and left sides.) This helps line up the skirt properly for the next bit.

Mark the edge of the pattern on the band. I used a pin, but you can use chalk, or a marker, or whatever your little heart desires.
See the yellow pin on the right? Don’t forget to flip the pattern piece over and mark the other side too.
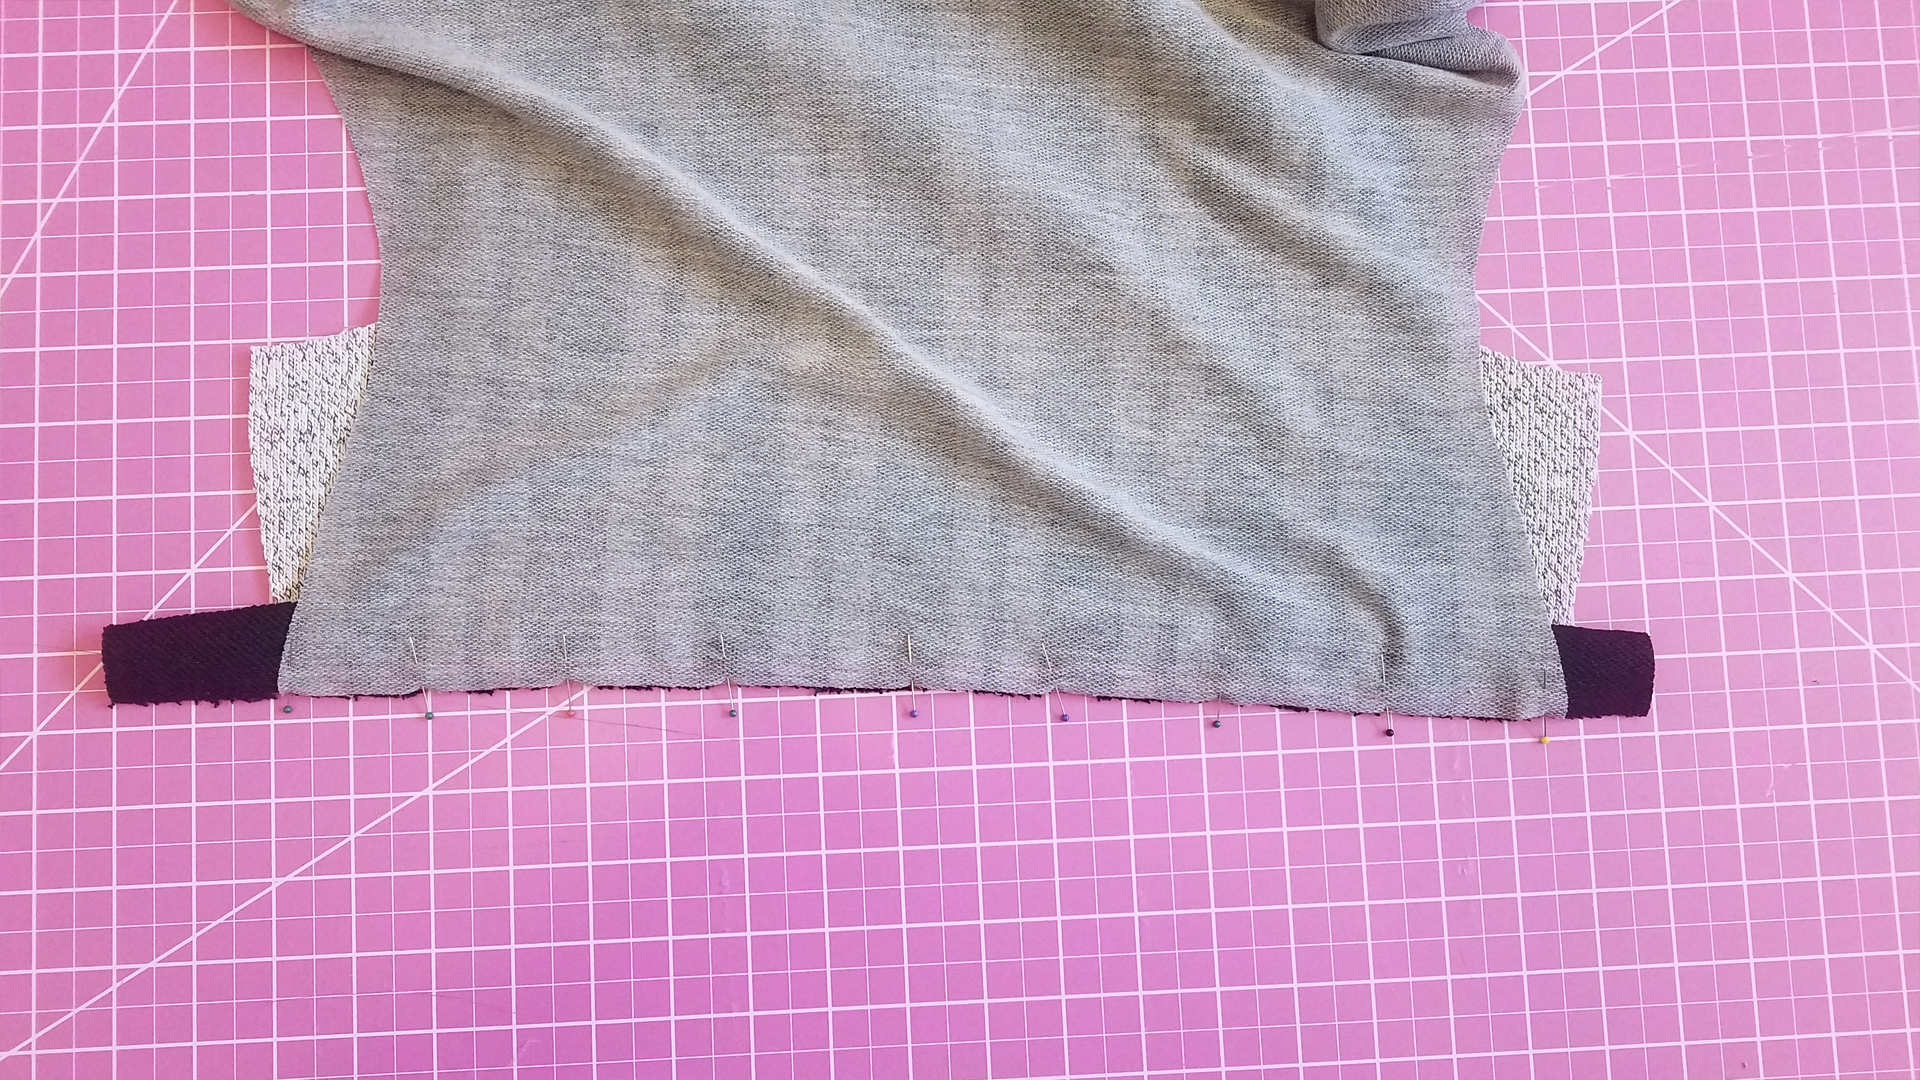
6. Attach the skirt to the band. Repeat for the back.
You can press the band down to make it behave better before you attach the skirt. My fabric was rolling quite a bit so I had to roast it into submission.
Pin the straight top edge of the skirt to the bottom edge of the band, right sides together, making sure to line up the right and left sides of the skirt with your marks from step 5. Stitch with a 0.5″ seam allowance with your favorite stretch stitch.
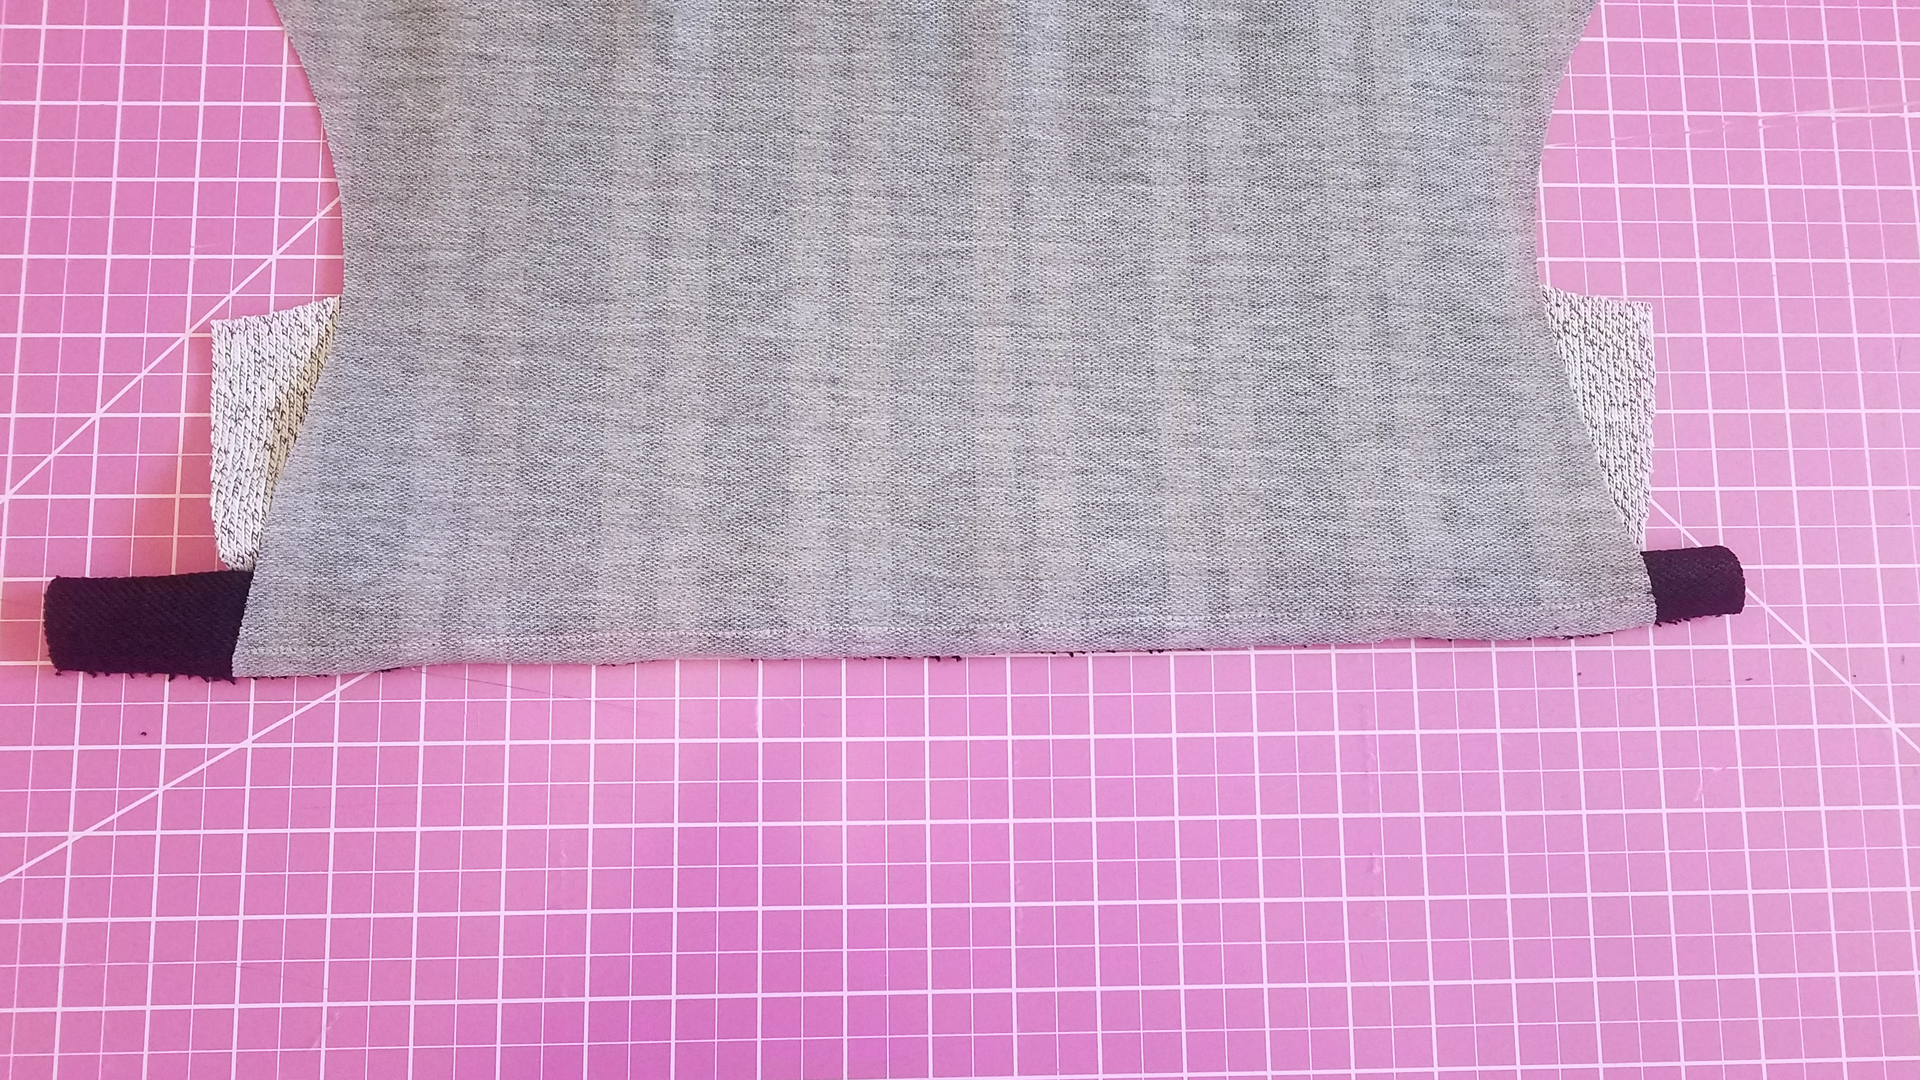
My thread is gray so it blends in pretty well, but this is just showing the finished seam.
7. Press and trim.
Press the band seams flat. Then trim off the excess fabric from the band. Voila! Your front and back pattern pieces are ready to go for the rest of the pattern instructions. Just be extra diligent that the front and back bands line up when sewing your side seams.


Notes
When tracing this pattern, I used my graded, fitted pattern I already had made for my two previous tees. I traced that out down to the waist, and then switched over to the relaxed fit dress-length pattern to trace out from the waist down, grading so it would float out more at the hips and legs. I’m thrilled how it turned out, especially with the drape of this particular french terry. It is incredibly comfortable, and the brushed sweater knit for the top makes it warm too.
I’m going to throw together some detached Cedar thumbhole cuffs with the leftovers of that french terry. This is a hard outfit to not wear every single day.
Project Settings
Presser Foot |
Stitch# |
Width |
Length |
Needle |
Top Thread Tension |
Application |
|---|---|---|---|---|---|---|
standard zig-zag (A) |
5 |
1.0 |
3.5 |
blue tip |
~4 |
everything |
Leave a Reply