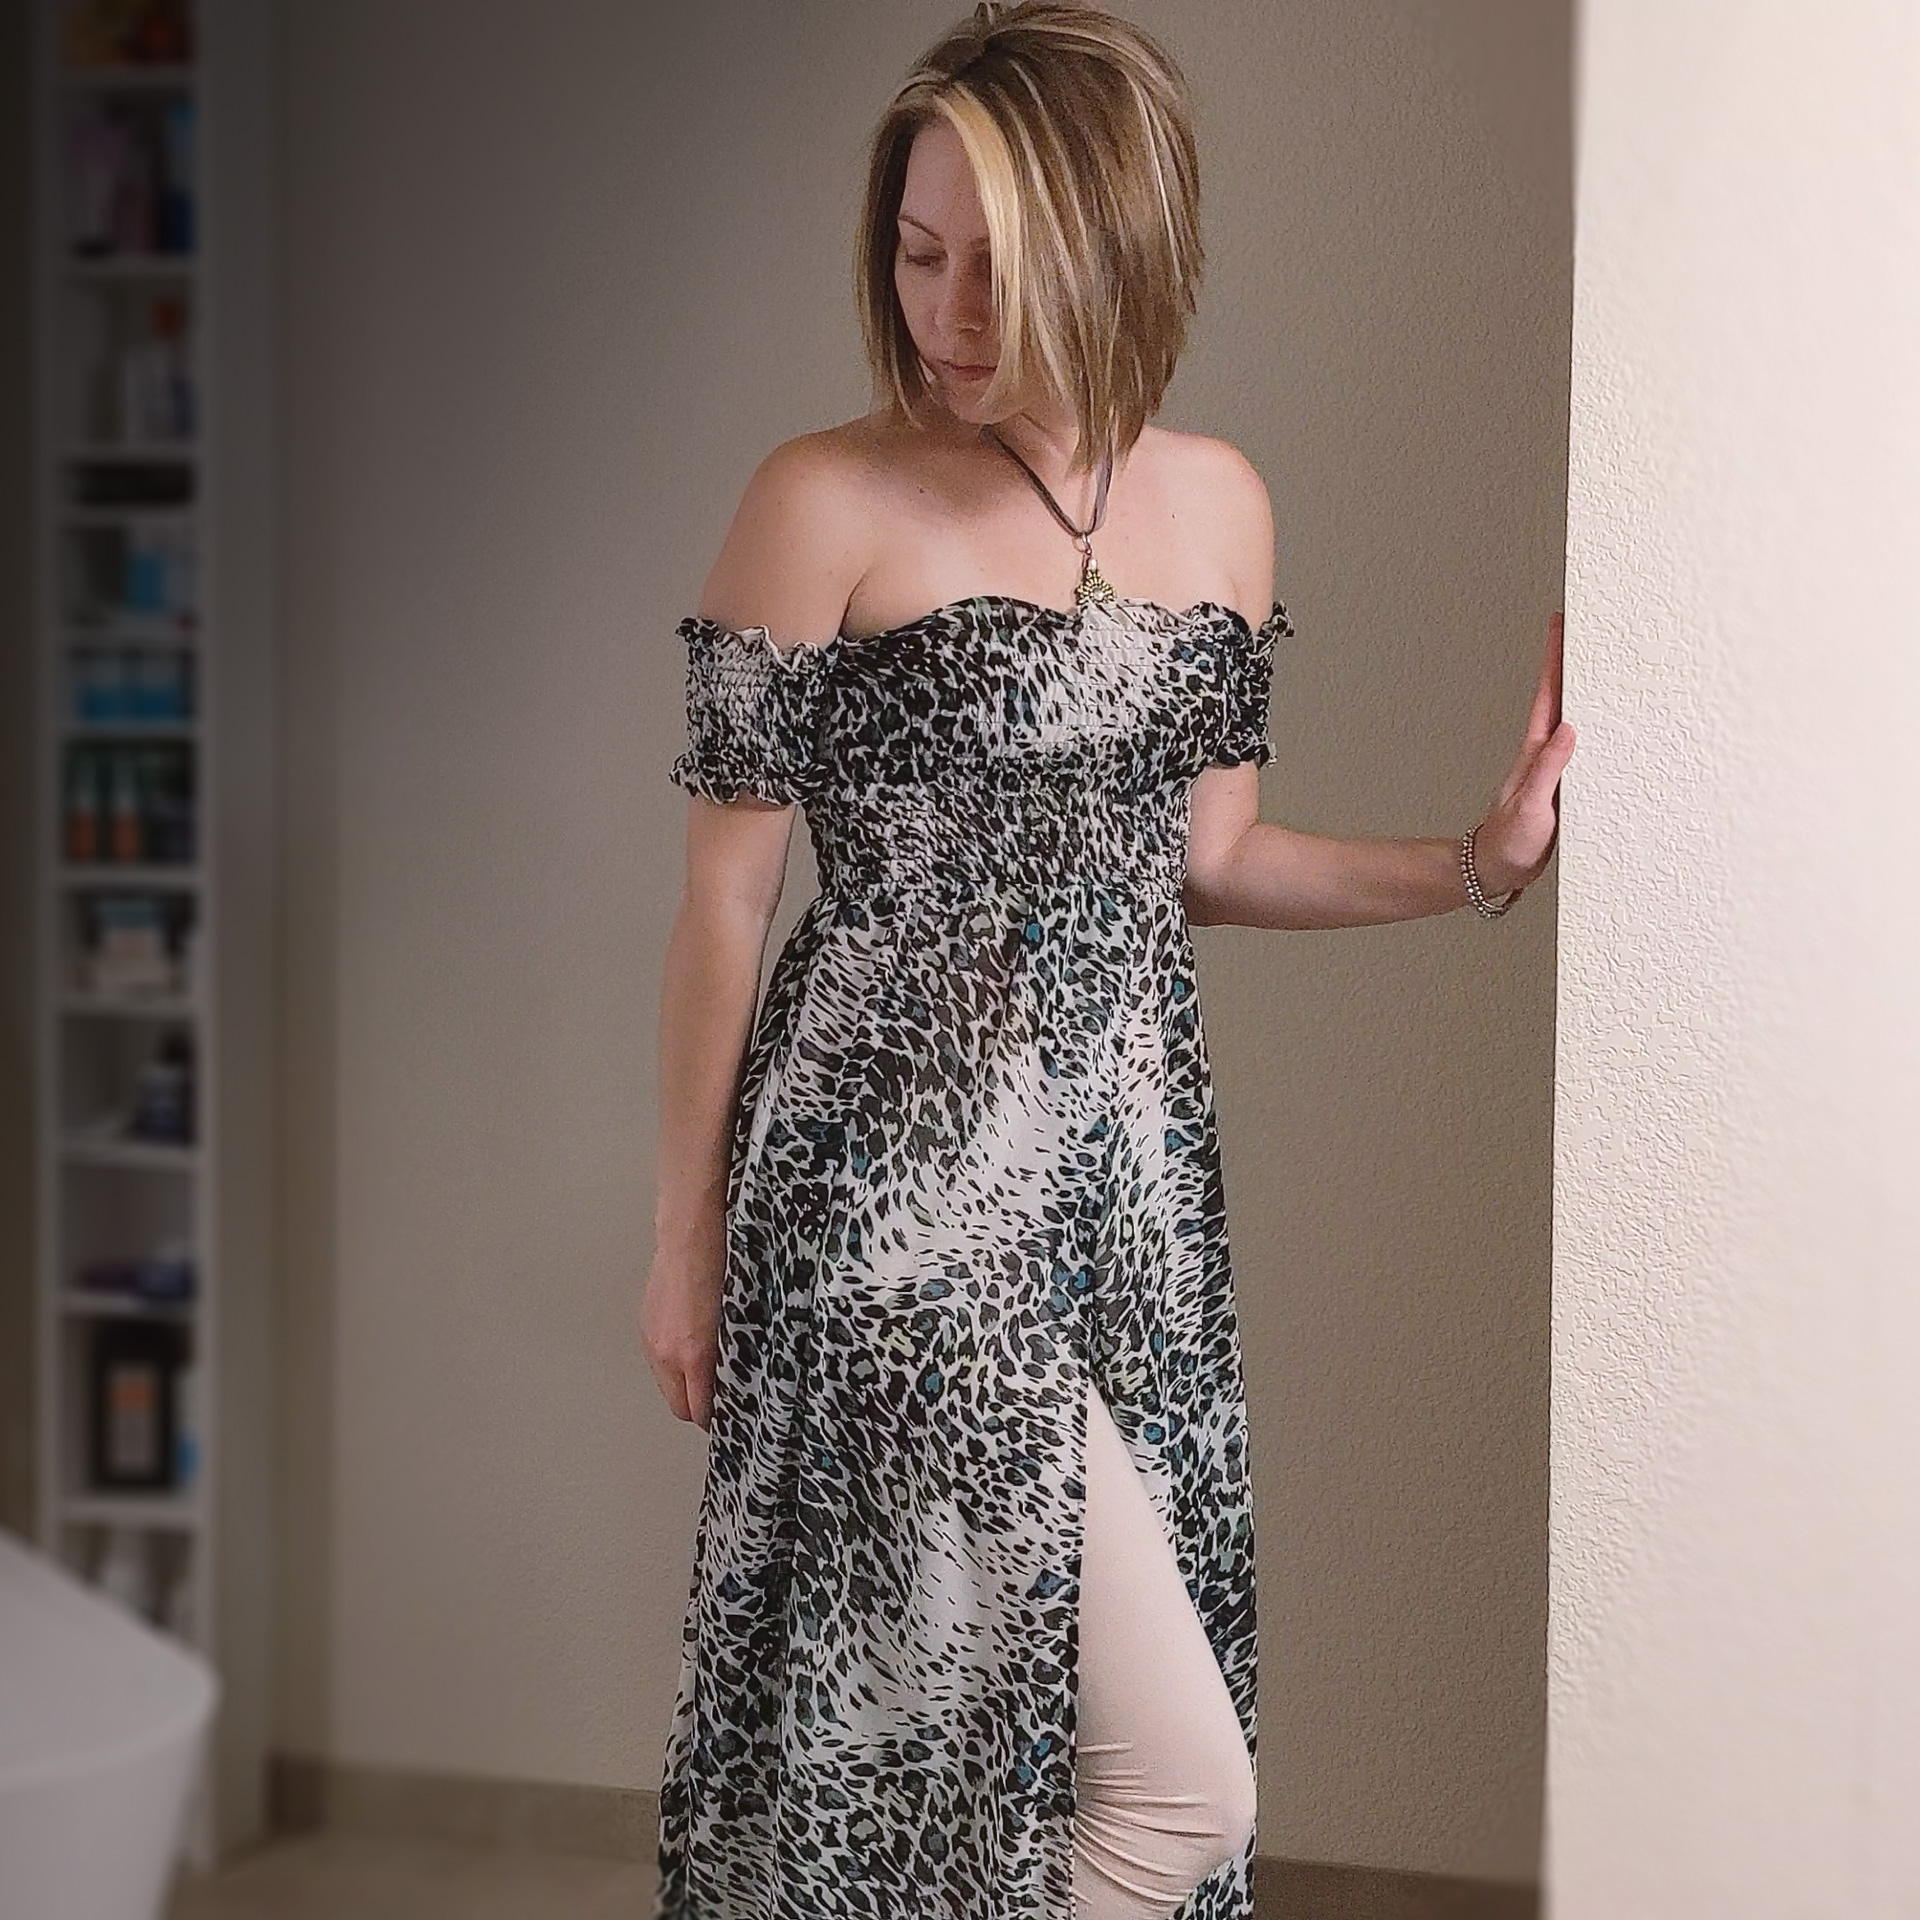
I don’t know why Ellie & Mac discontinued their Boho Spirit Dress, but I can come up with some legit reasons all on my own. First, let’s bask in the triumph.

It’s actually wearable. There were a few moments during construction when I was convinced it may not be. I actually really like it, too. I will have to throw together some sort of high-waisted shorts to layer beneath this—maybe with some lace trim.
Why We Make Muslins

Fabric reserved for my final version: Asphodel Trace Cotton Voile by Art Gallery Fabrics (from Cali Fabrics)
I don’t always make muslins. More often than not, I actually don’t, but there are a few things that convince me to make them:
- A brand new pattern that uses techniques I’ve never done before and/or seems more technically challenging than usual.
- My final fabric is pretty expensive and/or is really beautiful and out of stock.
- I want to nail the sizing/fit/adjustments on my final version.
For the Boho Spirit Dress, I have never shirred before and my final fabric cost a bit more than I typically spend per yard. I also love the print and the vision of this dress in this fabric in my head requires a muslin to bring it to life.
Here’s some tips on shirring, plus a quick and easy technique for hemming chiffon.
About the Fabric
- 3 yards Multi Leopard Print Chiffon from Cali Fabrics
- FABRIC CONTENT: Polyester
- WEIGHT: Very Lightweight
- STRETCH: none
Leopard print really isn’t my thing, but I do like the colors on this, and the pattern is varied enough to not look like your traditional leopard print. It was $4.99/yard so I snagged some for an affordable muslin.
I wouldn’t exactly recommend using chiffon for a muslin. It is notoriously difficult to work with and basically any other woven would’ve made this test a lot easier.
What’s so difficult about chiffon?
- It’s incredibly lightweight so it can pucker very easily while sewing. Also, be sure to use a light needle. I used the lightest I have, which is a 65/9 sharp.
- It’s really shifty.
- It frays like mad at cut edges, which gets really annoying the more you mess with because it creates these long, fine, fringe-y fibers that get in the way of everything, including getting snagged all over your sewing clips—which you’ll probably want to use instead of pins because pins basically just fall out of chiffon.
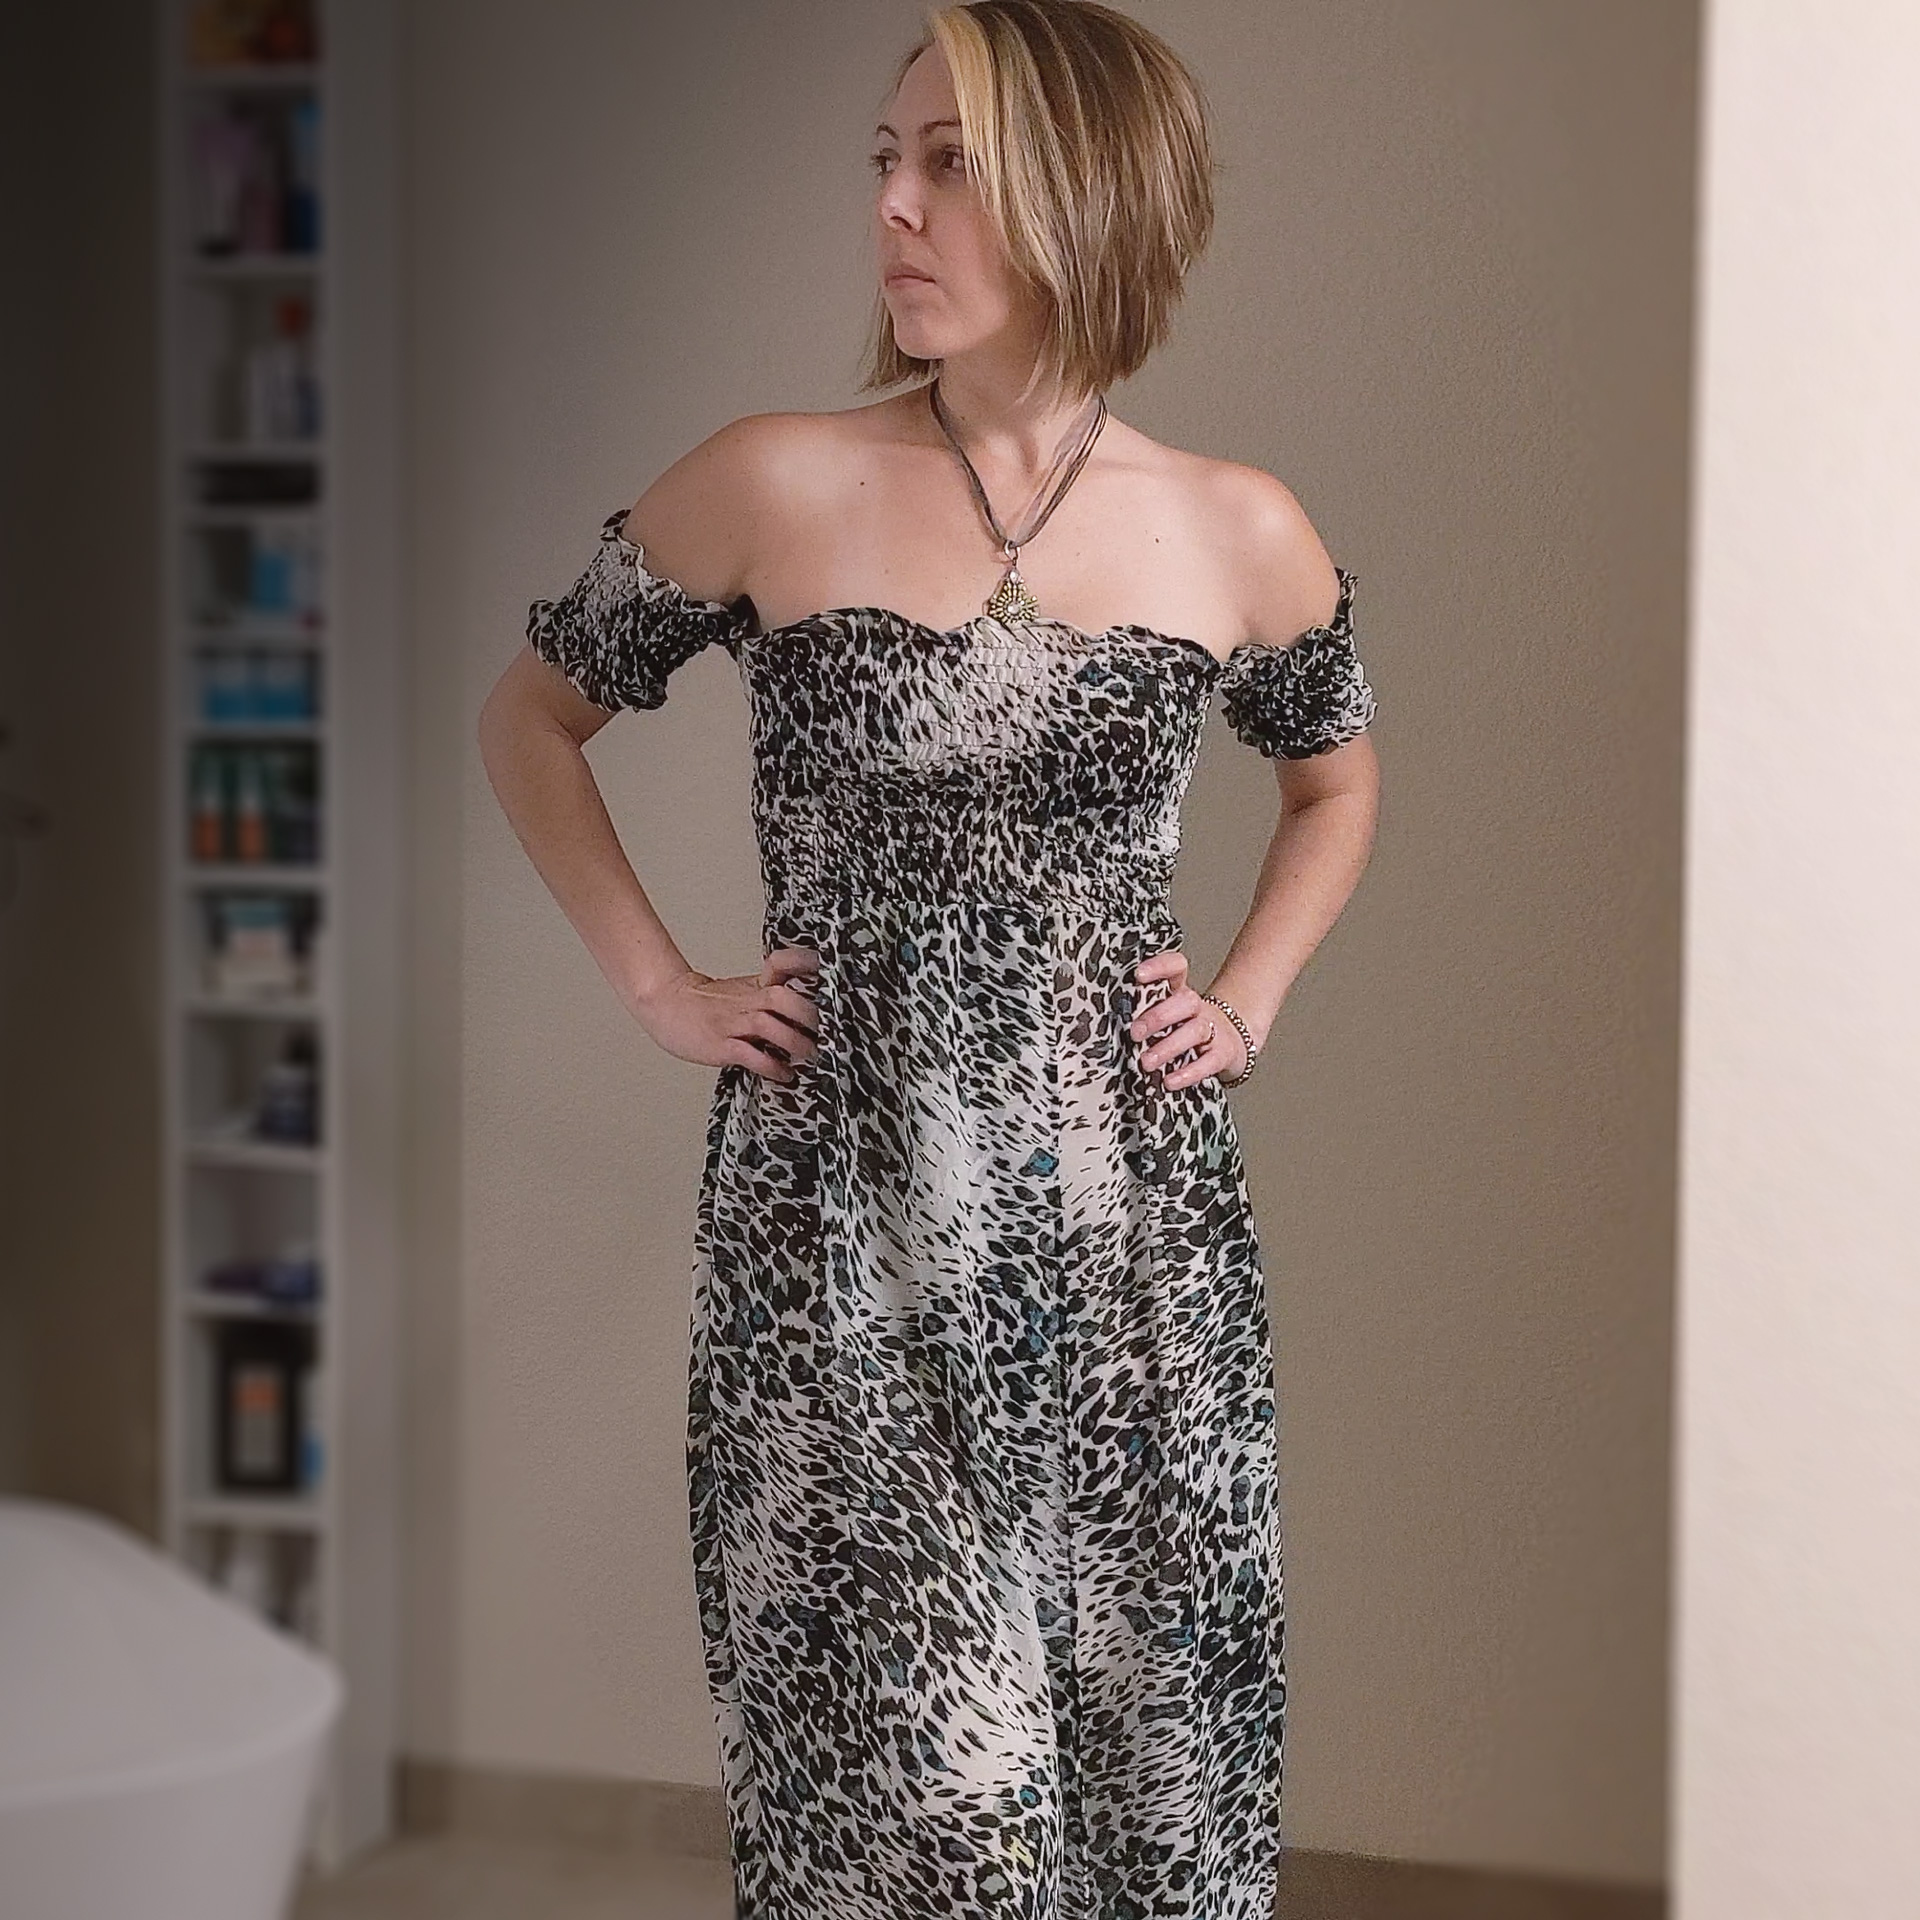
About the Pattern
Love the dress, hate the pattern instructions, and here’s why:
- The instructions make zero mention of hemming the skirt. No step for hemming the bottom of the skirt, no step for hemming the front opening of the skirt. It’s up to you to realize this needs to happen at some point before attaching the skirt to the bodice.
- I didn’t need to blast any of my shirring with steam. I think if I did that, it never would have fit around my body.
- Attaching the skirt to the bodice. I wanted to chair someone in the face during this whole fiasco. At this point, you’ve shirred your bodice and constructed your skirt. Now they tell you to “sew a gathering stitch” and gather the skirt to match the width of the bodice. Did I mention the bodice is shirred? Because it is. Which means it’s a lot smaller than your body. If you gather the skirt to the width of that tiny bodice and simply sew it on there…it’s not going to stretch. You’ll never get the thing on!
So here’s what I did differently:
- For attaching the skirt to the bodice:
- Sewed a long basting stitch around the top of the skirt at 1/4″ seam allowance.
- Quartered the bodice.
- Clipped the 4″ overlap on the front of the skirt, then quartered the skirt.
- Clipped the bodice to the skirt at the quarter marks.
- Put the thing on.
- Tugged the bobbin thread of my basting stitches to gather the skirt to the size of my body and knotted the ends of the basting threads.
- Barely wiggled out of the thing.
- Clipped the remaining raw edges to each other and made a few minor adjustments to the gathers to even them out.
- Sewed the bodice to the skirt at 5/8″ seam allowance using a lightning stitch while stretching the bodice.
- Removed the basting stitches which didn’t want to come out very easily and I may have lost my religion for a moment.
- Trimmed the 5/8″ seam allowance down to about 1/4″ to get rid of all the raggedy frayed chiffon fringe.
- Finished the edge with a zigzag stitch and overcast foot.
- When sewing the side seams of the skirt, I used wonder tape along the seam line to prevent puckering.
- Shirred at 1/2″ intervals. The pattern calls for 1/4″ to 1/2″.
Notes for Next Time
- Add 3″ to the bodice. It’s way too short for my taste.
- Completely rework the construction: construct the skirt and bodice and sew them together BEFORE SHIRRING. Then shirr the bodice around the free arm. Sleeves can be attached at the very end.


Project Settings
Presser Foot |
Stitch# |
Width |
Length |
Needle |
Top Thread Tension |
Application |
|---|---|---|---|---|---|---|
standard zig-zag (A) |
1 |
3.5 |
3.5 |
65/9 sharp |
4 |
seams |
standard zig-zag (A) |
6 |
5 |
3 |
65/9 sharp |
4 |
edge finish |
overedge (C) |
2 |
0.5 |
3.5 |
65/9 sharp |
4 |
bodice/sleeve/skirt hems |
overedge (C) |
1 |
0.5 |
3.5 |
65/9 sharp |
4 |
bottom skirt hem |
standard zig-zag (A) |
0 |
3.5 |
5 |
65/9 sharp |
4 |
skirt gathers |
standard zig-zag (A) |
5 |
1 |
4 |
65/9 sharp |
4 |
attach skirt to bodice |
standard zig-zag (A) |
1 |
3.5 |
3.5 |
65/9 sharp |
4 |
shirr (decrease bobbin tension 1/2 turn CCW, +elastic thread in bobbin) |
Leave a Reply