There are many options to bind loose paper together: staples, spiral, report covers with those little bendy metal things, binding bars… Not very inspired. A creative way to bind loose paper together using fabric and a sewing machine turns out to be quite simple, too.
 What You’ll Need
- woven (non-stretch) fabric
- sewing machine with a heavy needle (I used a 110/18.)
- thread
- paper
How To Do It
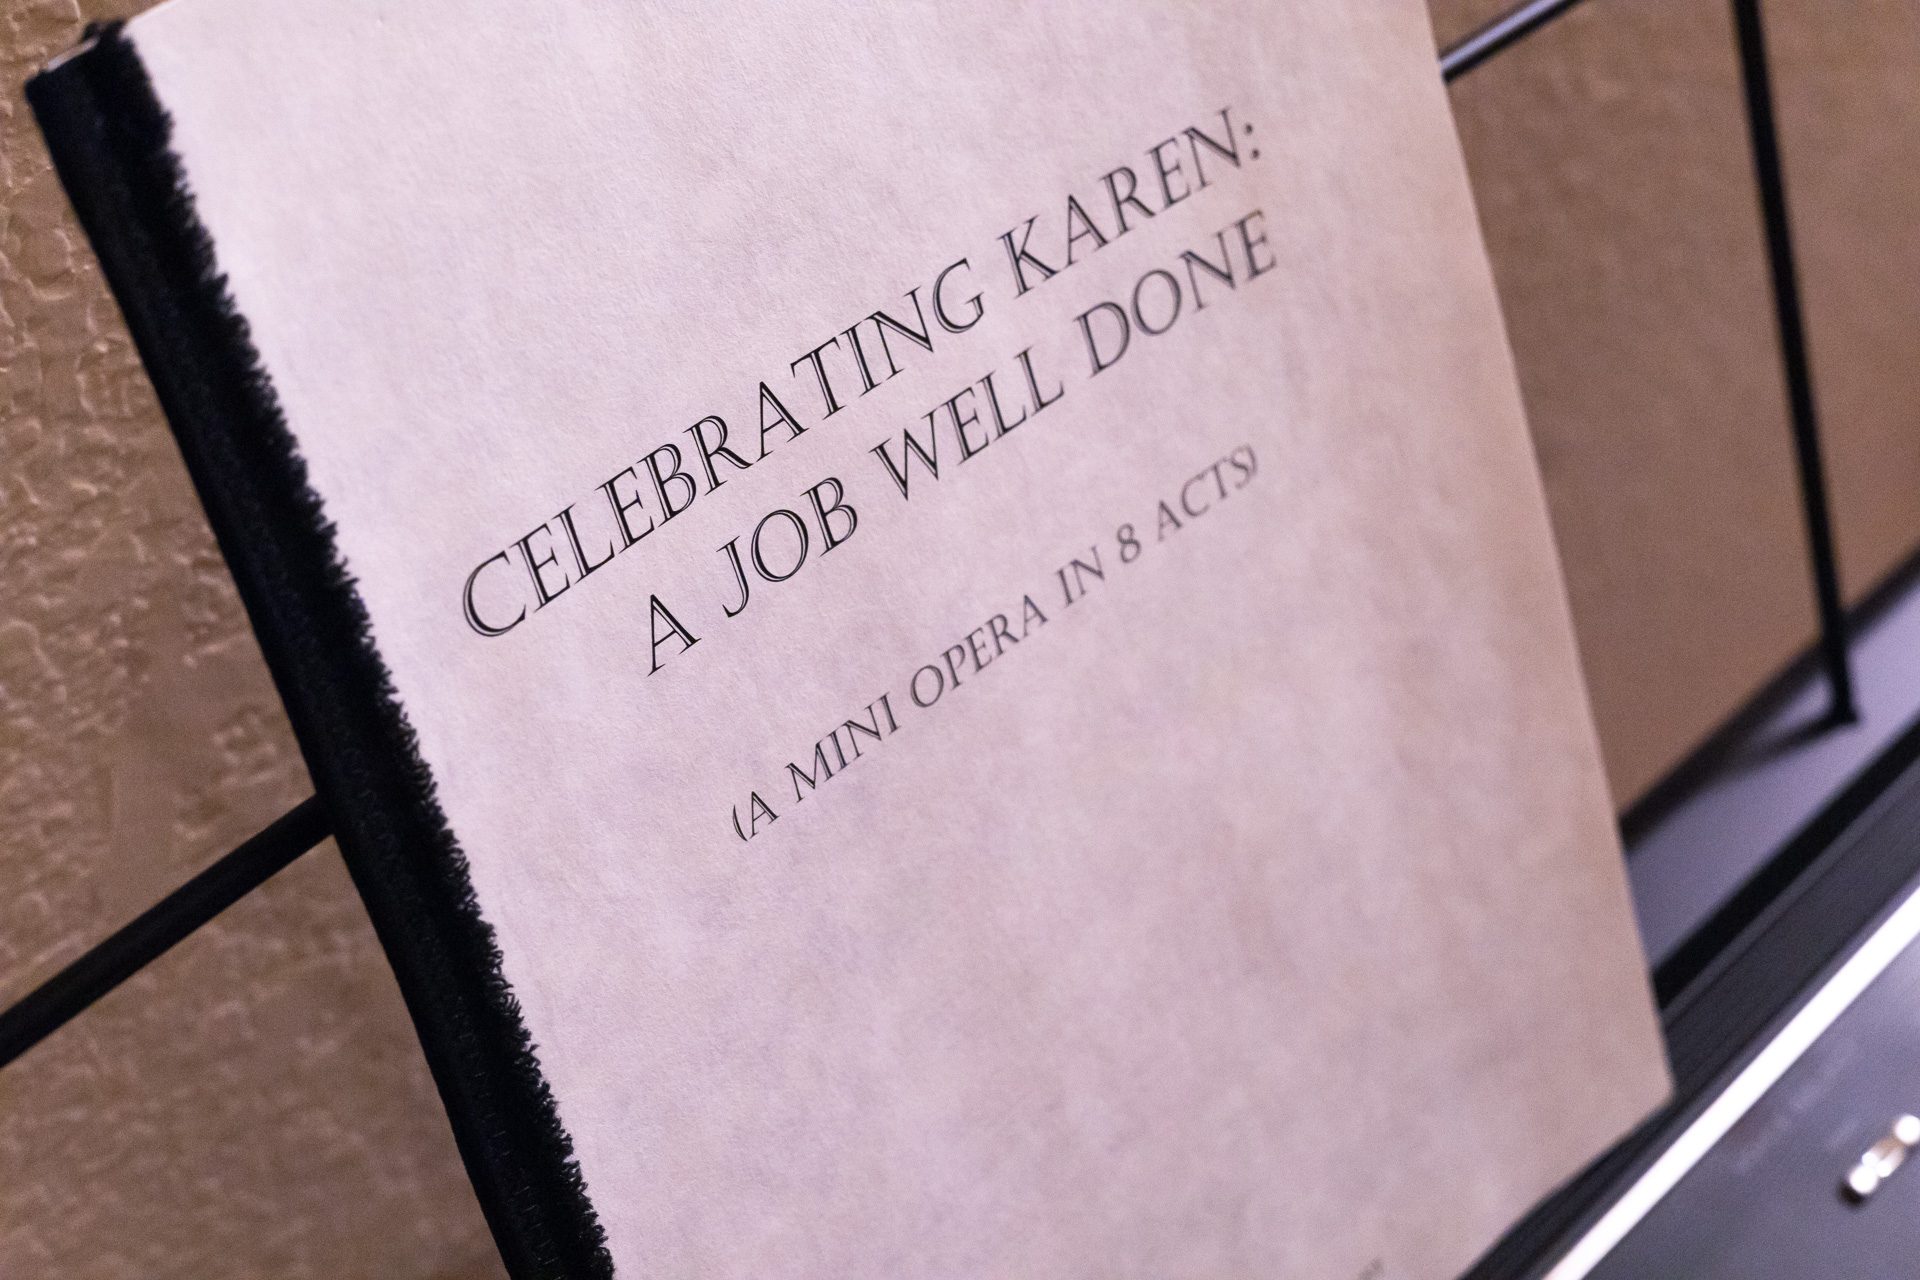
- Decide on the width of your binding. You don’t want this to interfere with whatever is printed on your paper. I chose a final width of 0.5″.
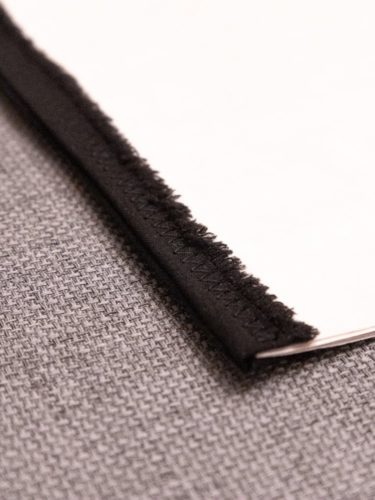
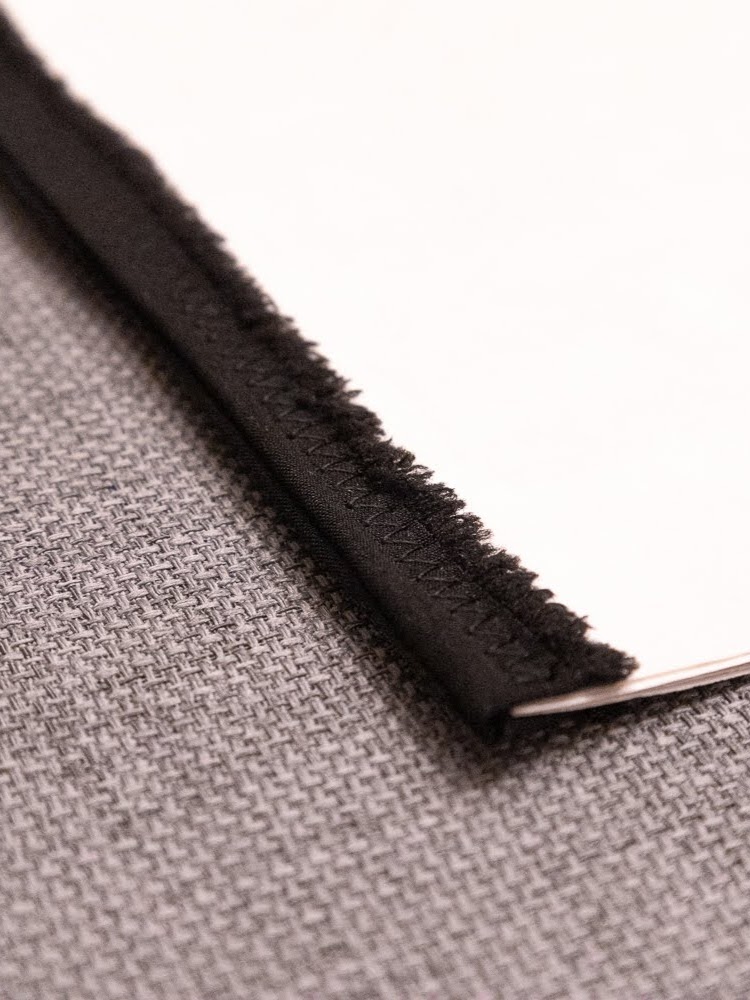
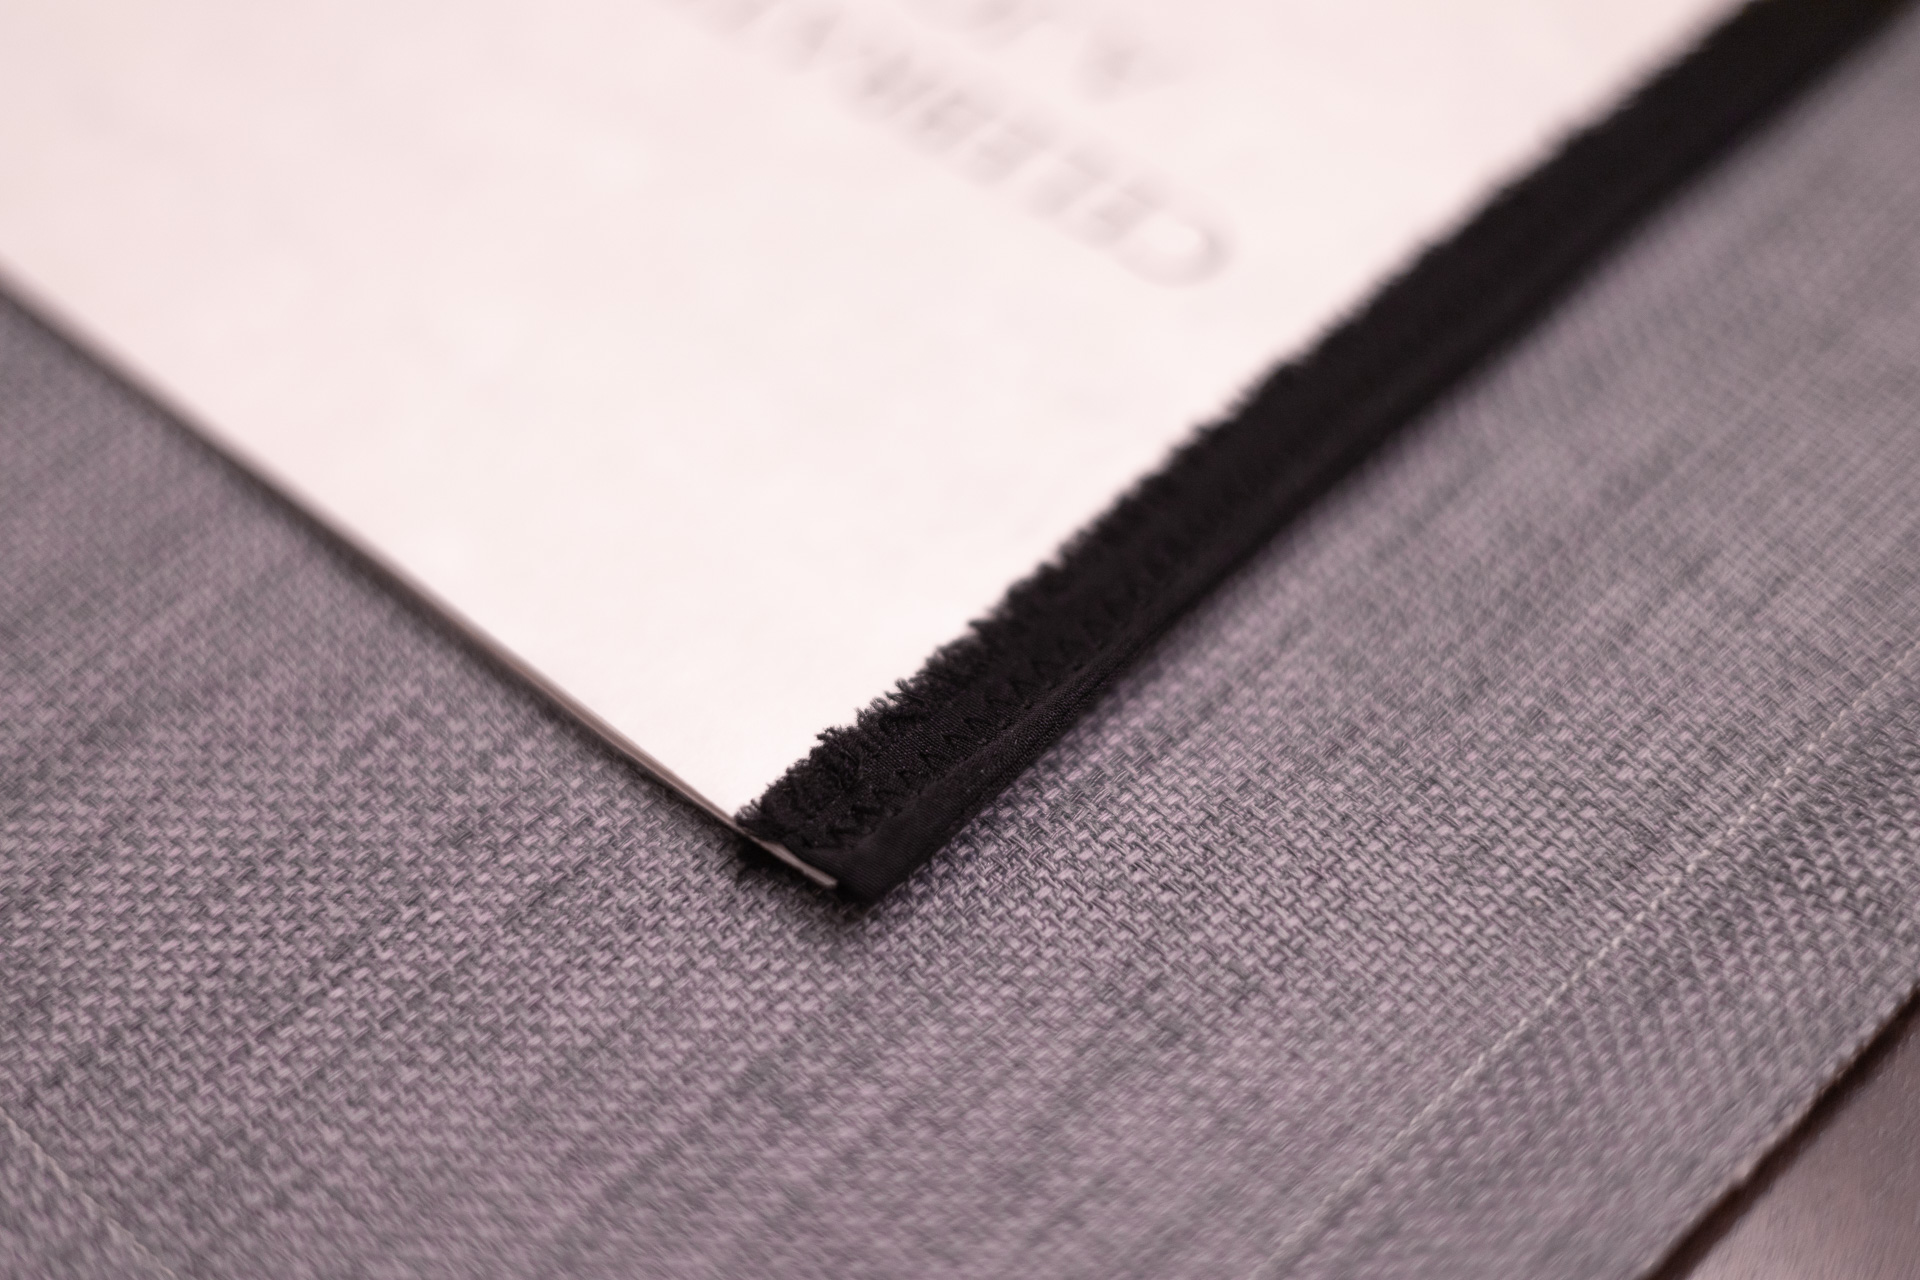
- Cut your fabric. As wovens fray and unravel, I decided to utilize the selvage for an interesting edge detail that wouldn’t fray when finished. I cut two pieces 0.75″ wide by 12″ long.
- Sew the fabric together. I wanted that fringe finish on the front and back, so I cut two pieces of selvage and sewed the long cut edges together at a 0.25″ seam allowance, starting and ending a half inch from each end (so the stitching was only 11″.)
- Wrap the paper. I pressed my fabric so it would hug the paper with the seam of the fabric running along the spine of the paper. I folded the ends under and clipped the fabric to the paper to hold it in place. *Tip: you can use Wonder Tape to help hold the ends in the place after folding under. You can also use it all along the full length of the binding to ensure a very neat finish. I did not, but I wish I would have. It came out almost perfect, but a little adhesive help would’ve taken it to the next level.
- Sew the binding to the paper. Using a simple zig-zag stitch (I used a width of 4 and a length of 2), sew down the length of the binding. Backstitch and lockstitch at each end to make sure nothing comes unraveled.
That’s it. Super easy and adds such a nice touch!

Leave a Reply