When did this idea get stuck in my head? /thinking
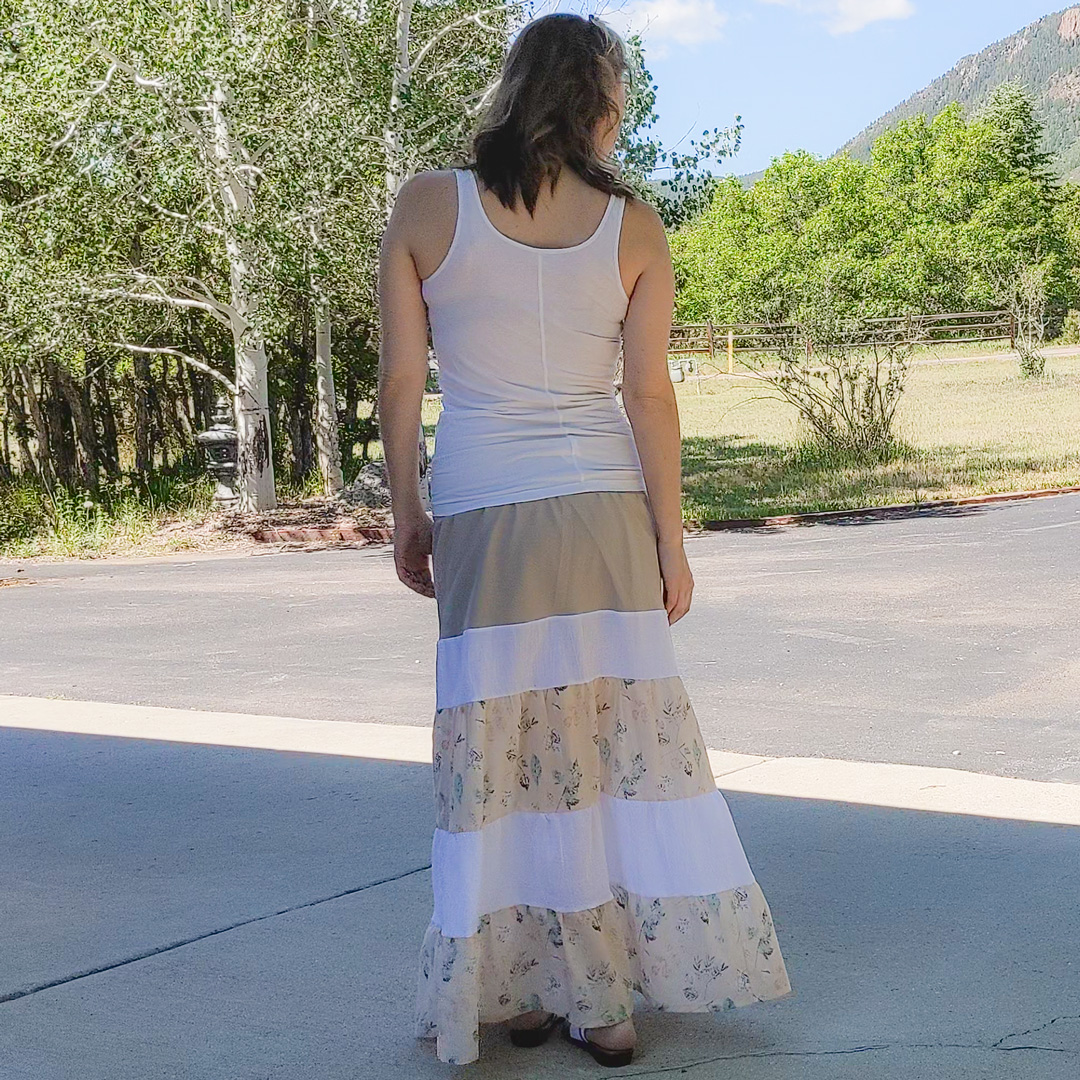
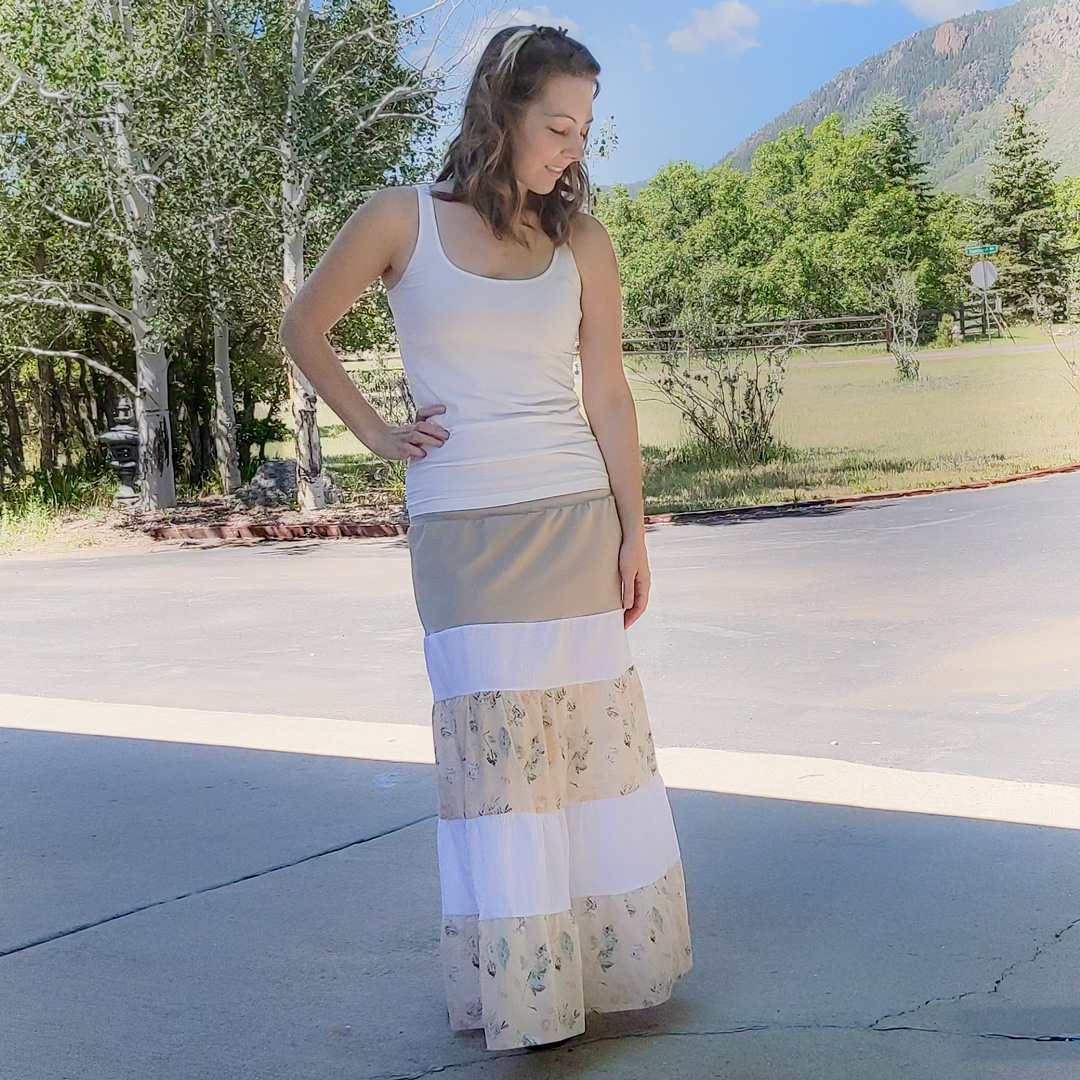
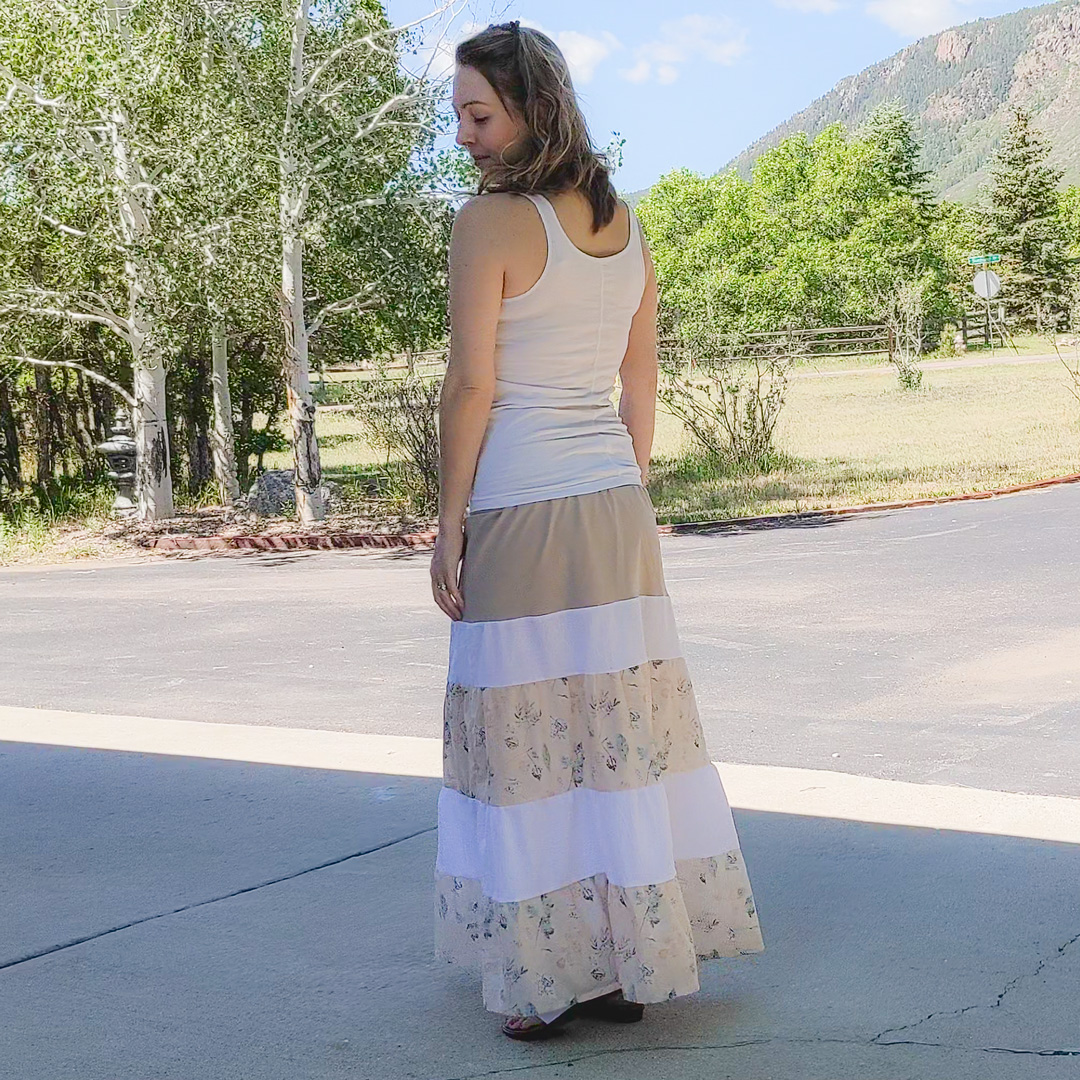
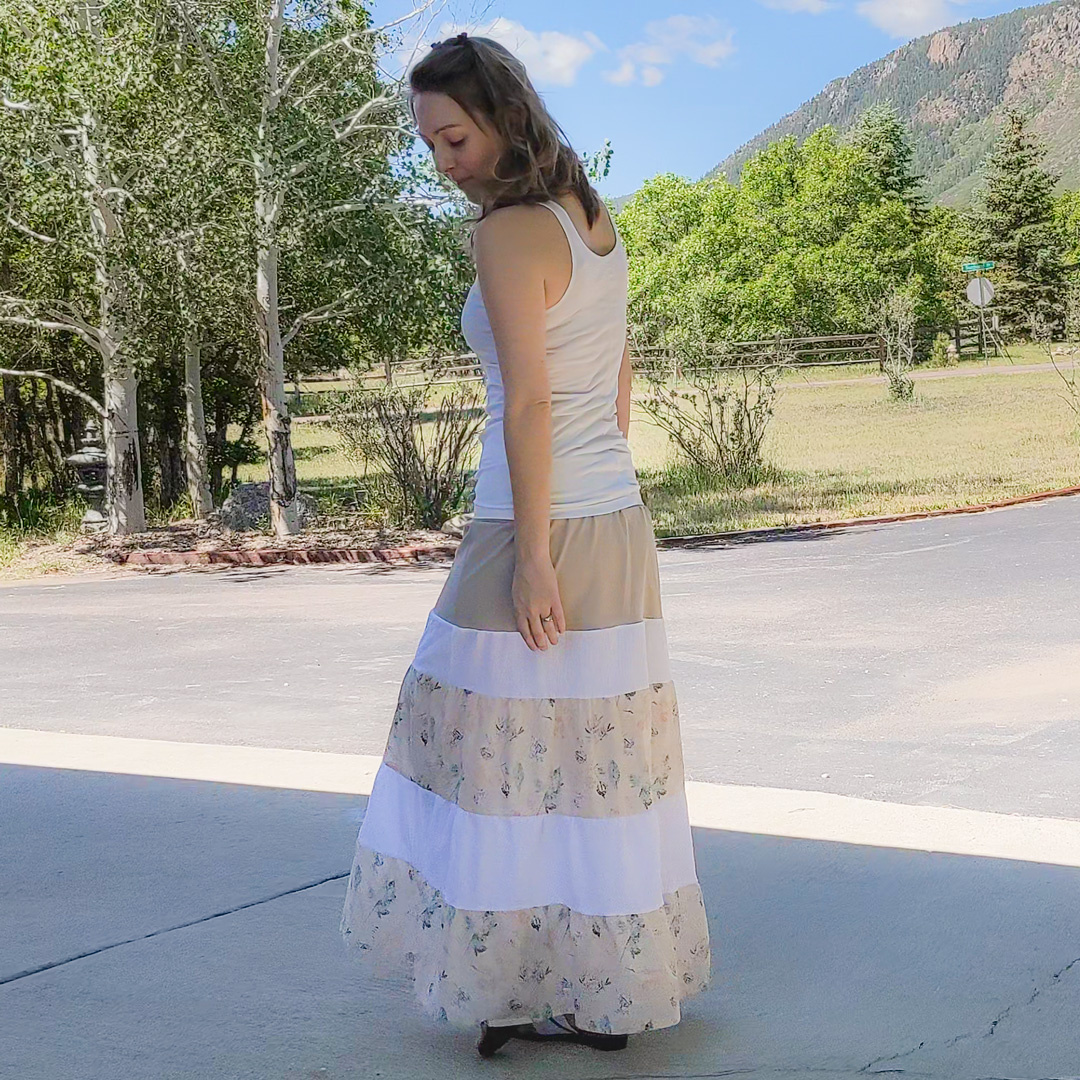
Dunno. But it’s been in there the last several times I’ve worn a store-bought tiered maxi I got from I-don’t-even-remember-where. That’s what I used to self-draft this version.
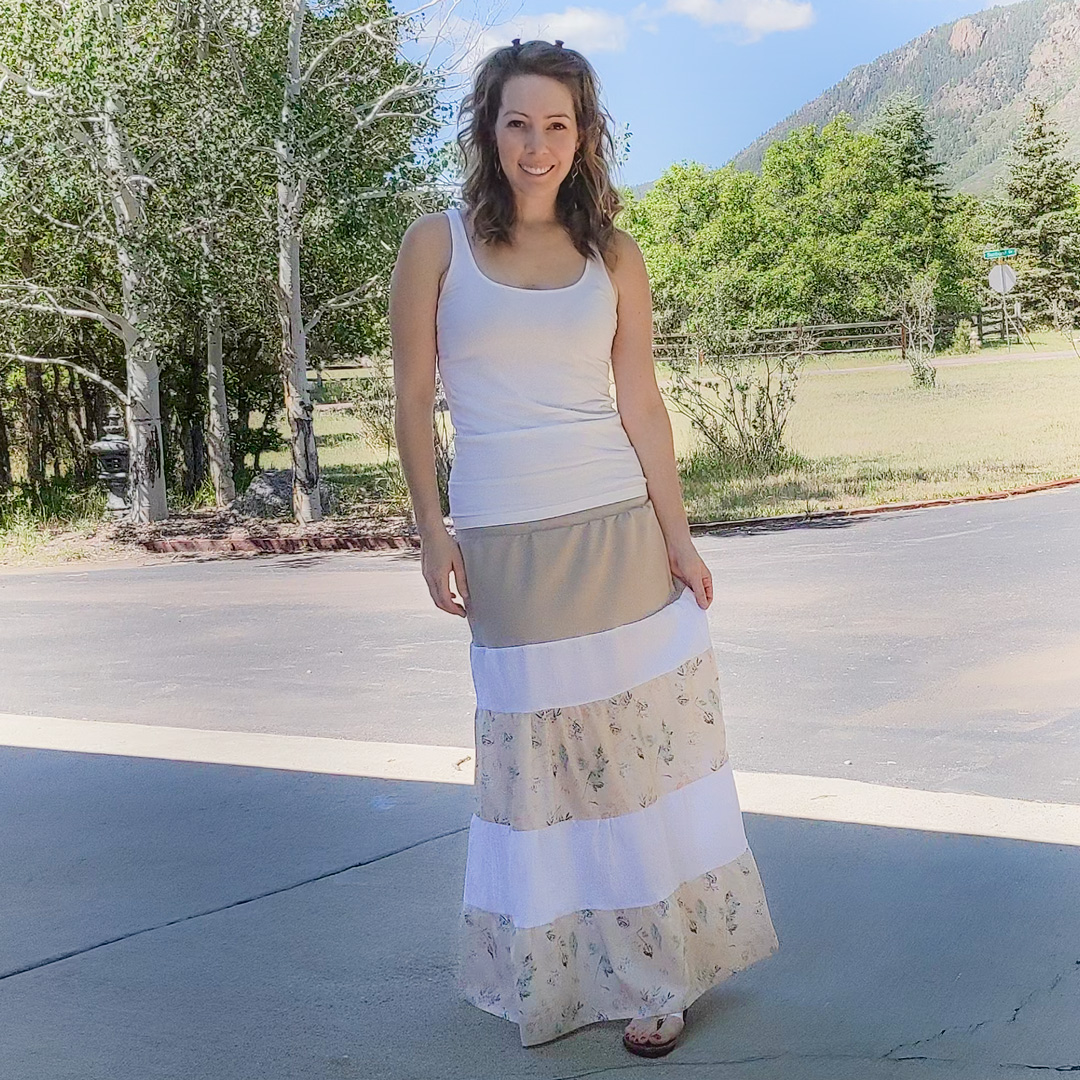
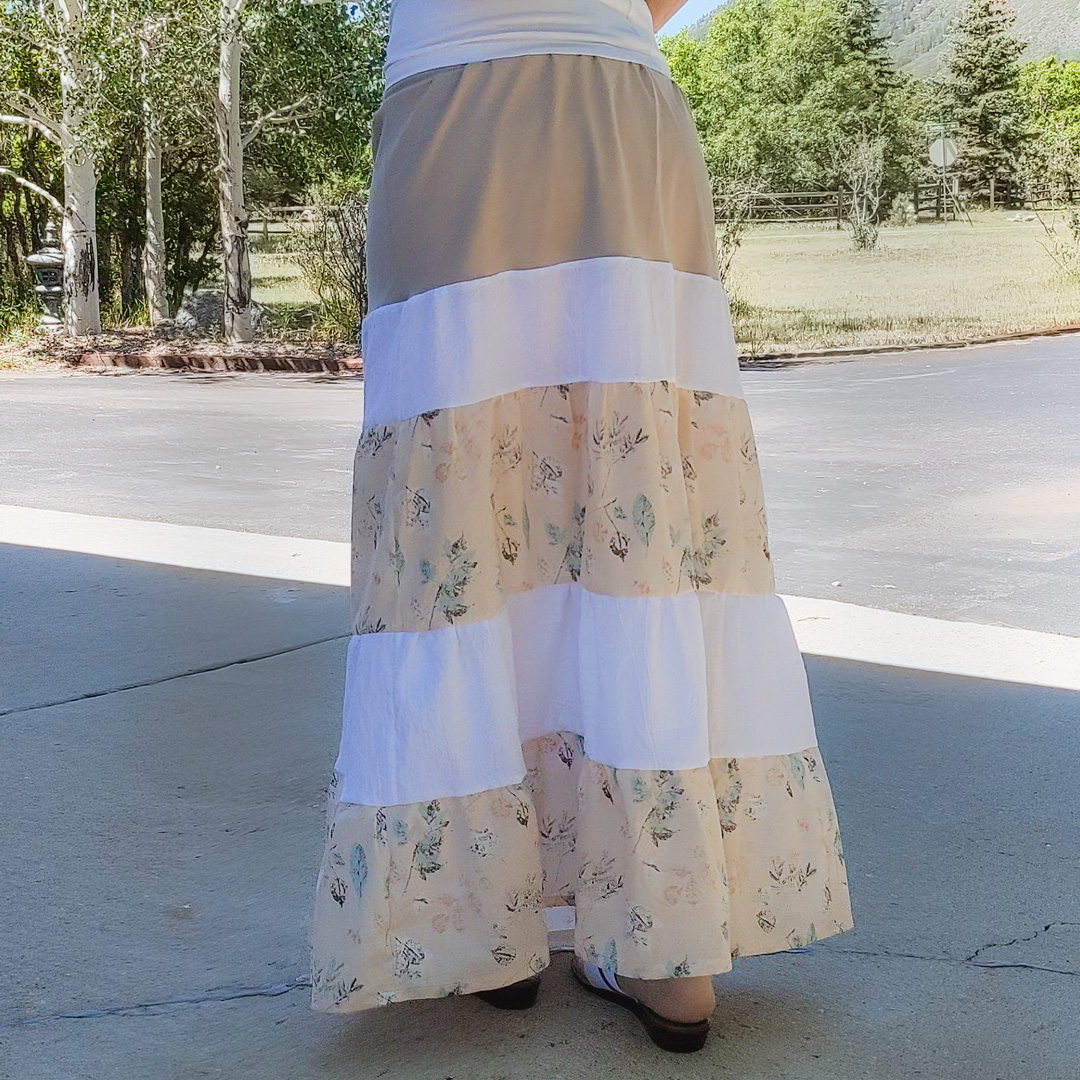
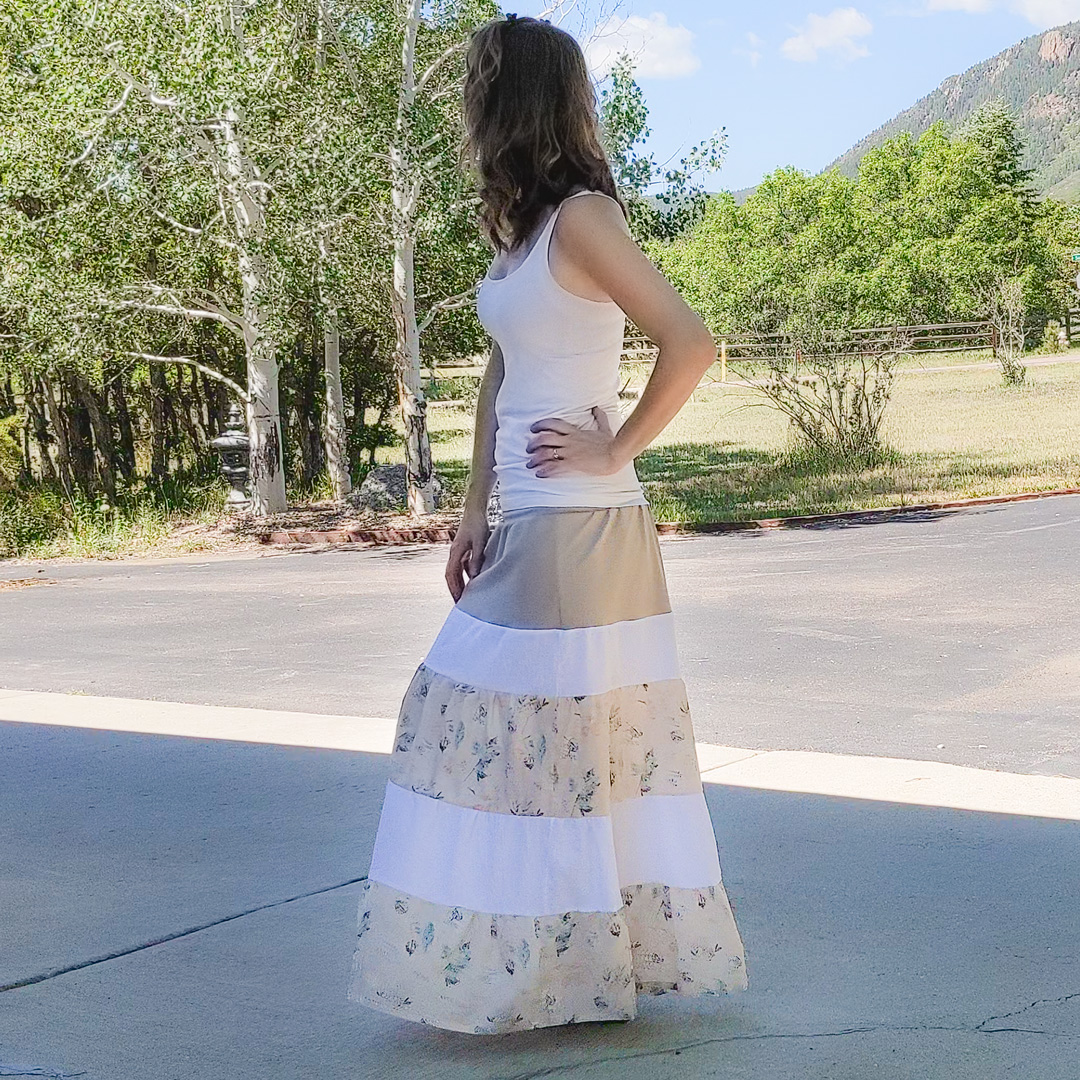
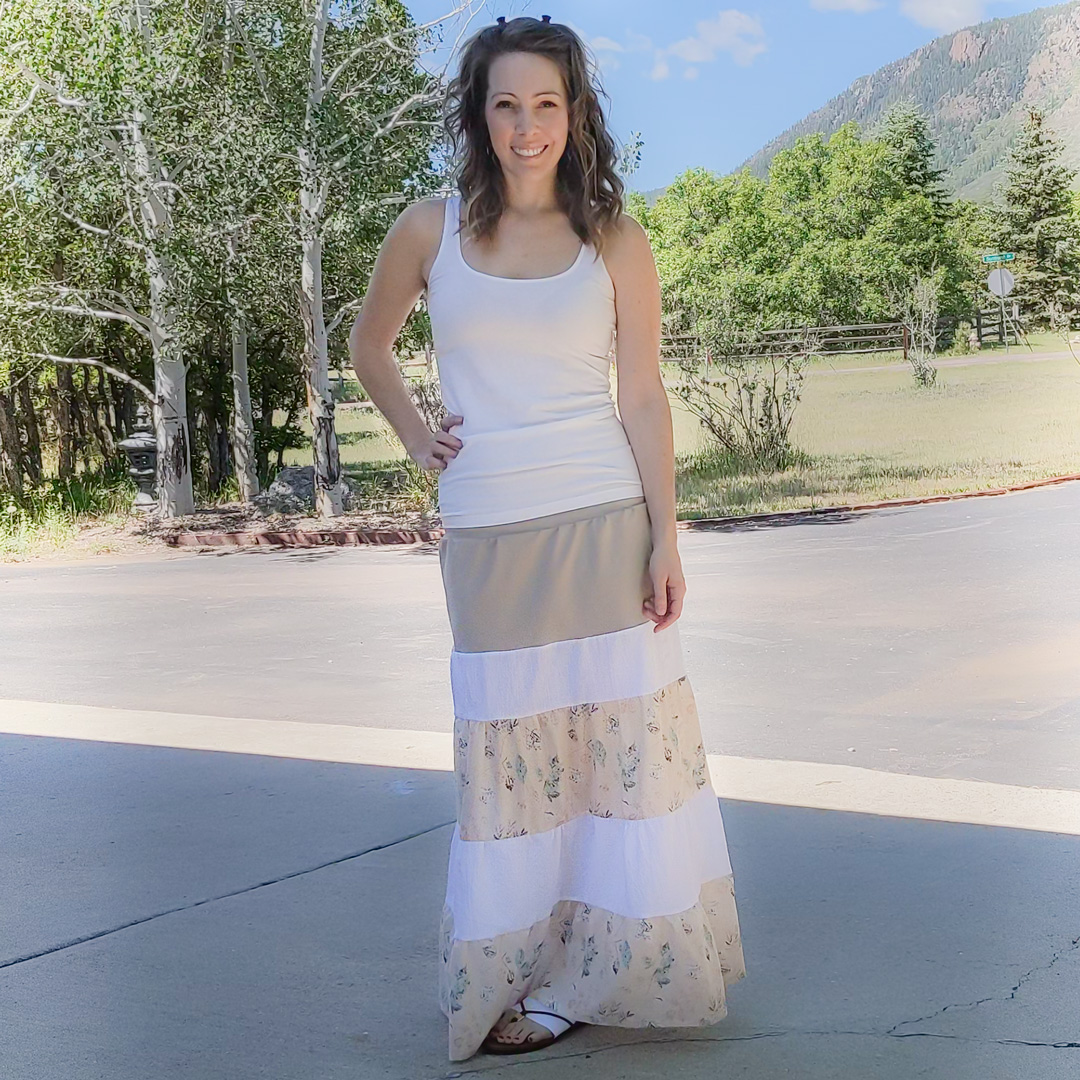
About the Fabric
I used a combination of knit and woven fabric, all from Cali Fabrics.
Waistband and Tier 1: Sand Brushed Tactel Midweight Athletic Knit
- CONTENT: Tactel/Spandex
- WEIGHT: Midweight
- STRETCH: 4-way 125%
Tiers 2 and 4: White Soft Washed Cotton Gauze
- CONTENT: Cotton
- WEIGHT: Lightweight
- STRETCH: none
Tiers 3 and 5: Arborescent Seasons Cotton Voile by Art Gallery Fabrics
- CONTENT: 100% Cotton
- WEIGHT: Lightweight
- STRETCH: none
I’m not thrilled with the drape of the knit; I need to find something that lays with more fluidity but still has a snappy recovery like athletic knits.
The voile and gauze, though—ah-mazing! They are perfect for summer: so light and airy and breathable they almost feel like they’re not there. They were great to work with, too. Easy to gather and easy to sew with (as most wovens are.)
About the Make
- I laid out the store-bought version on my cutting table and measured the height and width of each tier + the waistband.
- I sketched and mathed a bit.
- I made a muslin out of muslin and some leftover athletic knit. Took a few tries to land on what I wanted for the waistband and first tier, and I think I still want to mess with it for future iterations.
Final Measurements
- All measurements include 1/4″ seam allowance.
- Tier 5 includes extra 1″ for hem.
Piece |
Width |
Height |
Qty |
|---|---|---|---|
Waistband |
33 |
8.5 |
1 |
Tier 1 |
21.5 |
8.5 |
2 |
Tier 2 |
24 |
5.5 |
2 |
Tier 3 |
31.5 |
9 |
2 |
Tier 4 |
37.5 |
7.5 |
2 |
Tier 5 |
46.5 |
9.25 |
2 |
Construction
- Sew waistband short edges right sides together.
- Sew tier 1 short edges right sides together.
- Repeat for tiers 2 through 5.
- Baste top of tier 5 at 1/8″ seam allowance. Do front and back pieces separate for easier gathering.
- Gather top of tier 5 to fit bottom of tier 4. Pin tier 5 to tier 4, right sides together, and sew.
- Baste top of tier 4 at 1/8″ seam allowance. Do front and back pieces separate for easier gathering.
- Gather top of tier 4 to fit bottom of tier 3. Pin tier 4 to tier 3, right sides together, and sew.
- Baste top of tier 3 at 1/8″ seam allowance. Do front and back pieces separate for easier gathering.
- Gather top of tier 3 to fit bottom of tier 2. Pin tier 3 to tier 2, right sides together, and sew.
- Baste top of tier 2 at 1/8″ seam allowance. Do front and back pieces separate for easier gathering.
- Gather top of tier 2 to fit bottom of tier 2. Pin tier 2 to tier 1, right sides together, and sew.
- Baste top of tier 1 at 1/8″ seam allowance. Do front and back pieces separate for easier gathering.
- Gather top of tier 1 to fit bottom of waistband. Pin tier 1 to waistband, right sides together, and sew.
- Fold hem up half inch, fold up another half inch to enclose raw edge and sew hem.
Notes for Next Time
- Maybe try some shirring for the waistband/tier 1. Or find a smocked jersey to try. I need to mull over what to try for the waistband and tier 1 that will avoid elastic but have enough recovery to stay fitted without being uncomfortable, AND how to transition from the waistband to tier 1 without tier 1 being fitted. I’m thinking of using knit fabric for the waistband only, and widening tier 1 for gathers along the waistband. With a nice stretchy stitch, that should allow for expansion around the hips without causing tier 1 to be fitted. That’s my theory, anyway. I’ll have to test it before constructing an entire skirt.
- Widen each tier for more dramatic gathering.
- I might be able to get away with adding an inch somewhere. Maybe on tier 2.
Project Settings
Sewing Machine vs. Serger
| Sewing Machine | Serger |
|---|---|
|
|
Sewing Machine Settings
| Presser Foot | Stitch# | Stitch Width | Stitch Length | Needle | Top Thread Tension | Application |
|---|---|---|---|---|---|---|
| standard zig-zag (A) | 5 | 1.0 | 4 | blue tip | 4 | knit seams |
| standard zig-zag (A) | 0 | 3.5 | 5 | blue tip | 4 | knit gathers |
| standard zig-zag (A) | 0 | 3.5 | 5 | 75/11 | 4 | woven gathers |
| standard zig-zag (A) | 1 | 3.5 | 3.5 | 75/11 | 4 | hem |
Serger Settings
| Stitch Name | 4-thread overlock |
|---|---|
| Needles | R, L |
| Finger | B |
| Threads | 4 |
| Tension Left Needle | 2.5 |
| Tension Right Needle | 2.5 |
| Tension Upper Looper | 3 |
| Tension Lower Looper | 3 |
| Cut Width | 6 |
| Stitch Length | 2.5 |
| Differential | 1.0 |
| Application | seams |
Leave a Reply