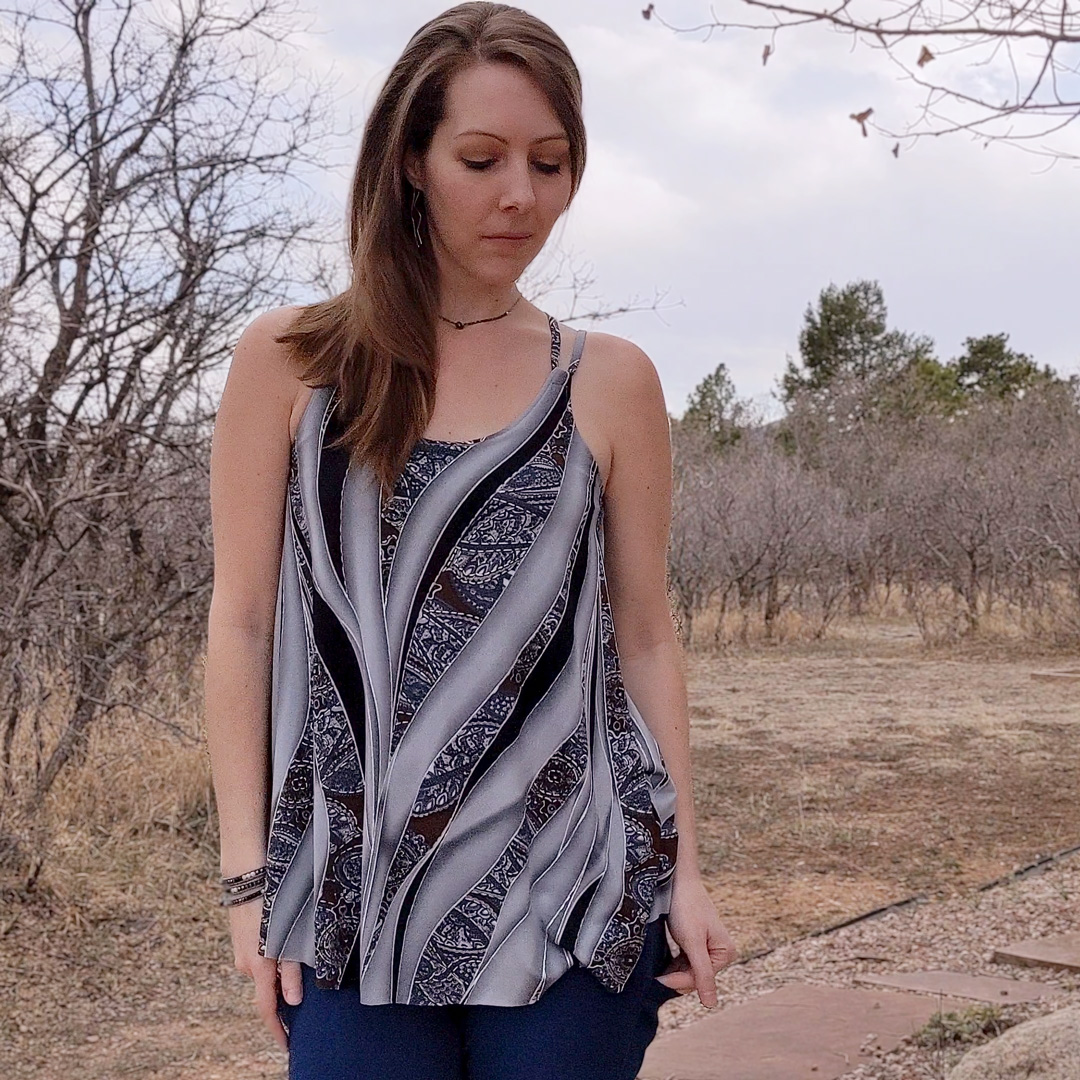
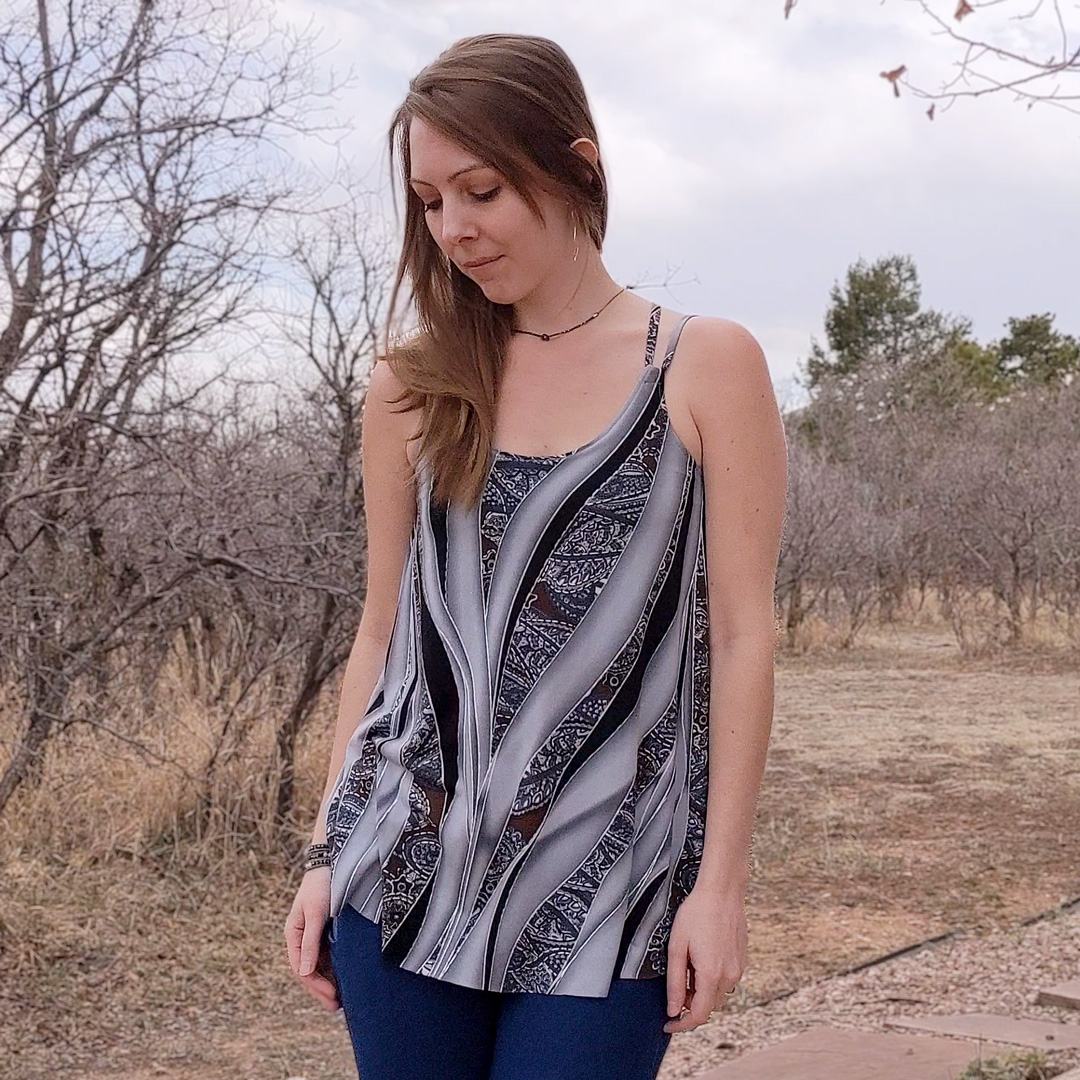
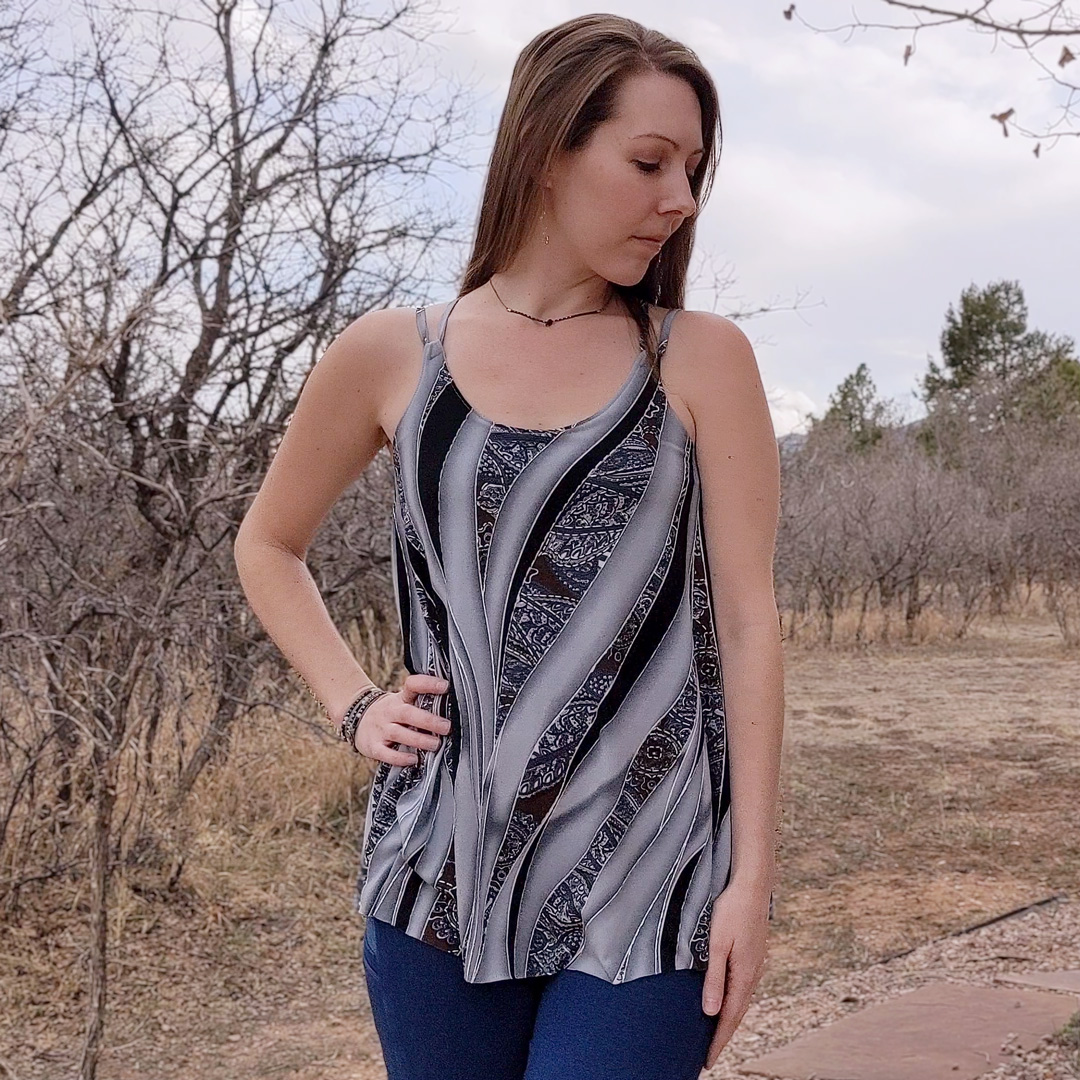
Catalina Tank #3 is all about this Grey, Black, Brown, and Metallic Silver Swirl and Paisley Print from Cali Fabrics.
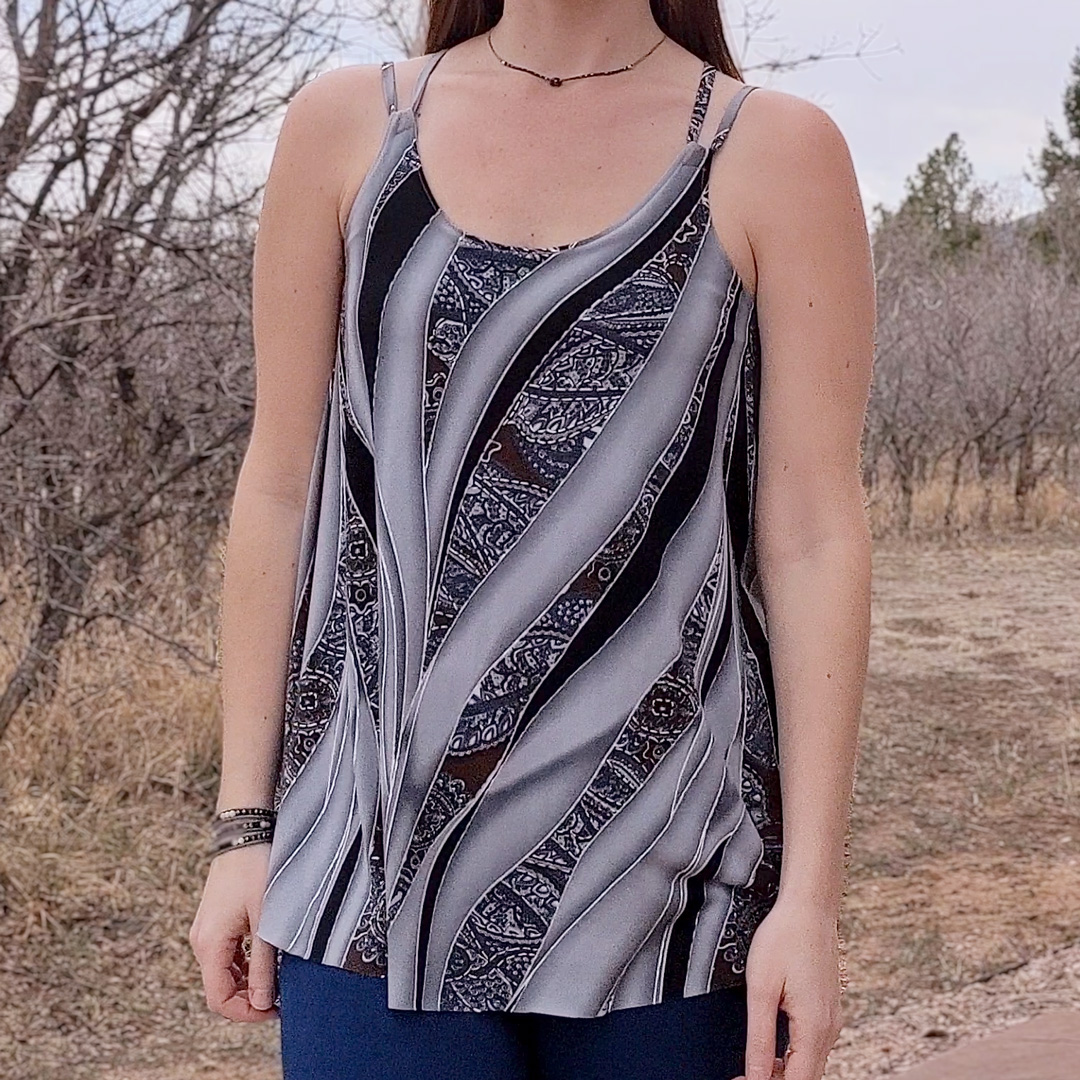
The colors, the lines, the wisps of silver, the movement created by the slashes through the paisley… It’s such a work of art. And the material does it justice. Light and flowy with a cool, smooth hand makes it the ultimate summer top.
More About the Fabric
- 3 yards of Grey, Black, Brown, and Metallic Silver Swirl and Paisley Print
- Content: Poly/Spandex
- Light Midweight
- Horizontal stretch: 150%
- Vertical stretch: 25%
The fabric details say to hand wash it, but that didn’t sink in until after I chucked it in the machine on my usual new fabric cycle (cold/cold; medium spin + tumble dry low.) No harm, no foul though; it came out just fine.
For the shelf bra, I used some pebble gray swim (nylon spandex) from Boho Fabrics.
- Contents: Nylon/Spandex Blend
- Horizontal Stretch: 100%
- Vertical Stretch: 130%
- Weight: 9.5 oz
The color coordination between the two fabrics is spot on, and the swim fabric is an ideal choice for a shelf bra with it’s ample stretch, snappy recovery, smooth feel against the skin, and moisture-wicking and quick-dry properties.
About This Make
I replicated everything from my last Catalina:
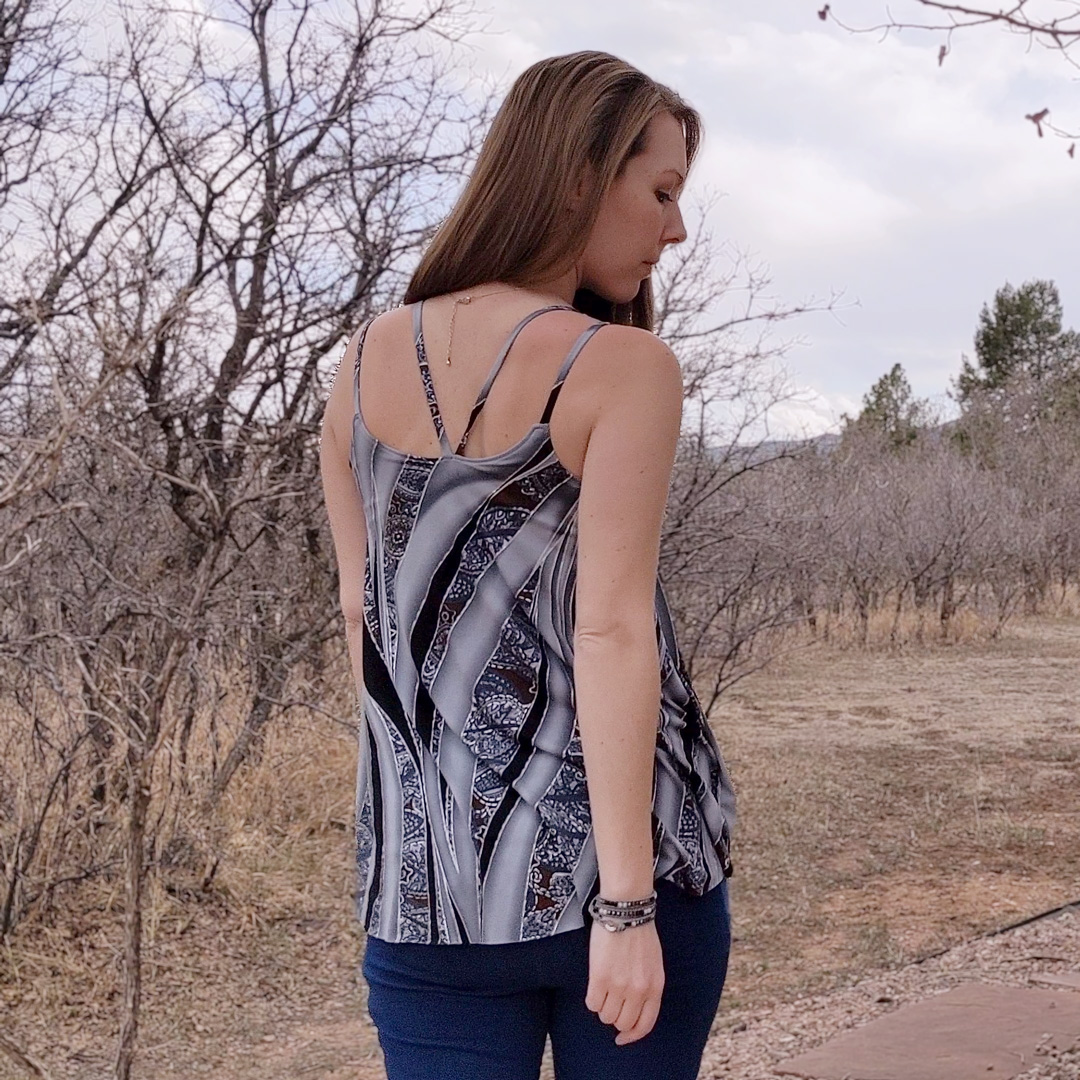
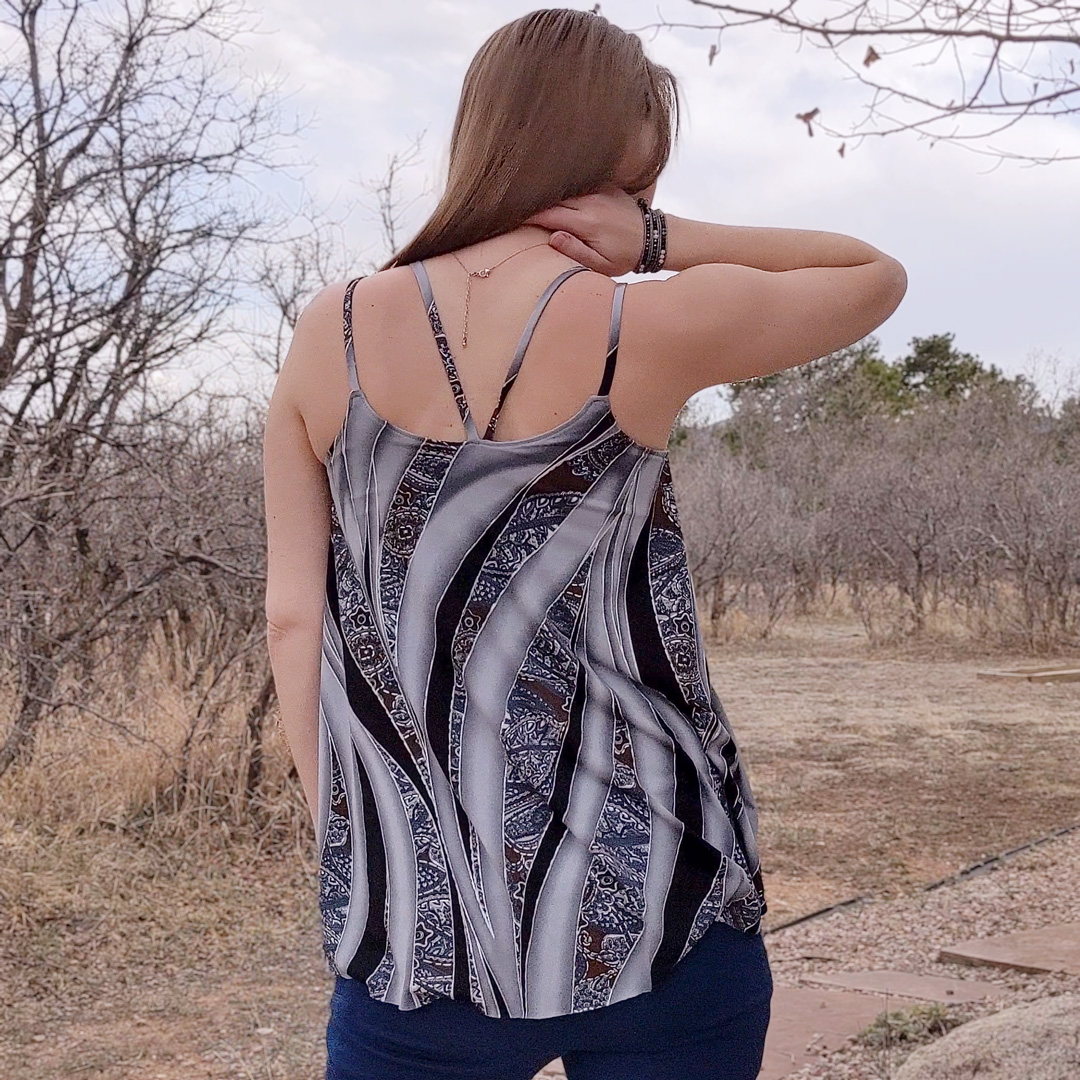
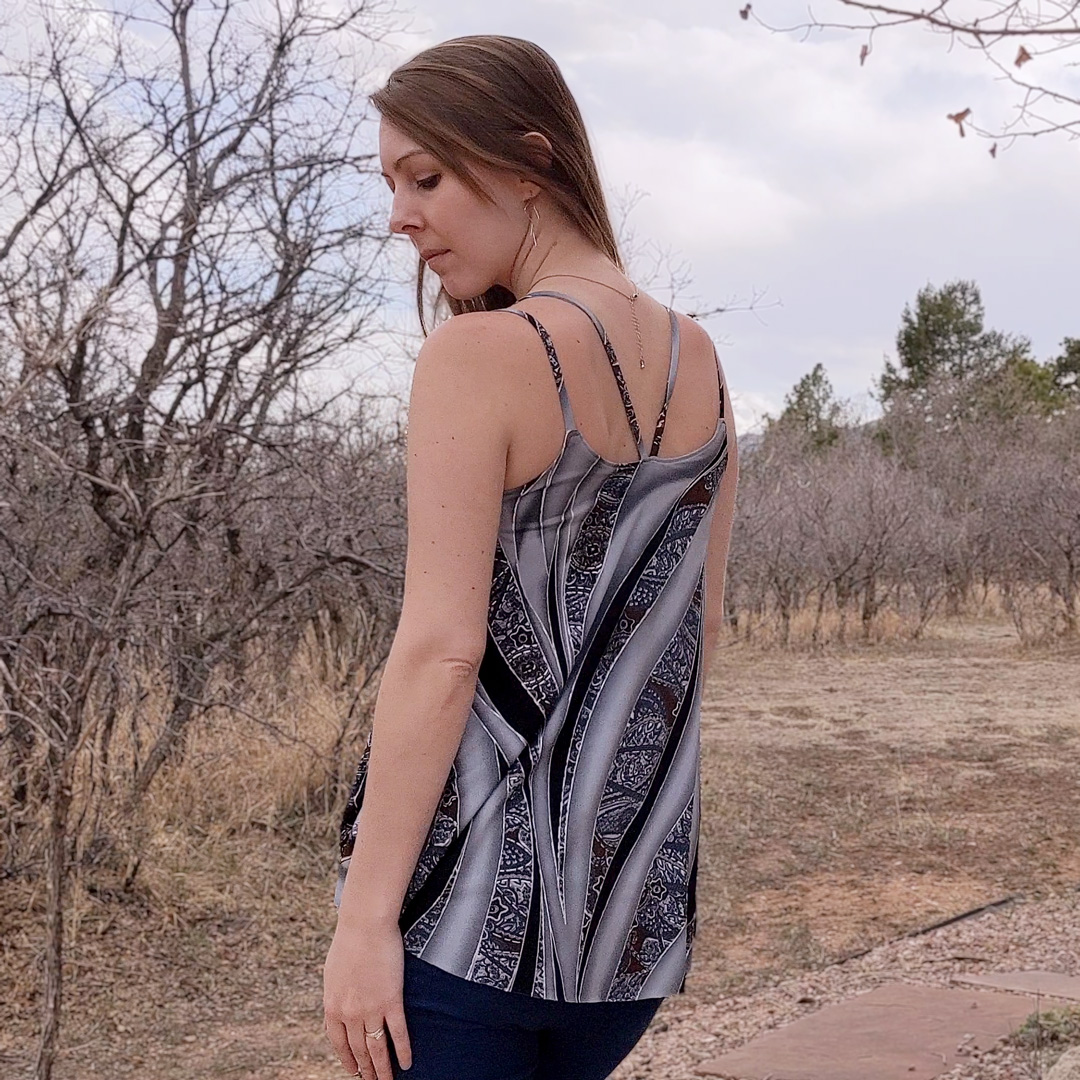
- Shelf bra is sized at XS and the tank is graded from XS (bust) to S (waist and down.)
- Used my self-drafted fabric band for the shelf bra instead of elastic.
- Shortened the straps by 1″. (I made this modification to my pattern piece this time rather than cutting at the intended length and then trimming.)
- I also snipped off the sharp points on the pattern piece for the back because they were stupid. So now the straps join on a happy 0.25″-ish straight line instead of two awkward pointy triangles.
- I anchored the straps to the middle of the back side-by-side rather than one on top of the other. There’s really no reason to bulk them up on top of each other.
- I relied on Wonder Tape for
- constructing the straps
- anchoring the straps rather than basting
- In my previous makes when sewing the shelf bra to the front bodice, the bodice fabric tends to have a little excess compared to the bra fabric. Previously, I’ve just kept the raw edges lined up anyway and ignored the slighty “baggy” effect created by that excess fabric since it stretches when worn. This time, however, I eased the excess out which meant the raw edges didn’t line up perfectly around the curves of the front bodice straps. After attaching the shelf bra, I just trimmed the extra bodice fabric so the seam allowance was even.
I’m currently debating what to use the rest of this stunning fabric for. I’m torn between a Be Invincible skort, and a Gaia Tank Top. I may not have enough for the hi-lo open front skort I’m envisioning, which leaves me with the Gaia. I’m pretty sure I’ll aim for the skort first.
Project Settings
Presser Foot |
Stitch# |
Width |
Length |
Needle |
Top Thread Tension |
Application |
|---|---|---|---|---|---|---|
standard zig-zag (A) |
5 |
1.0 |
4 |
blue tip |
4 |
bra, top seam, straps |
1/4″ |
0 |
3.5 |
3.5 |
blue tip |
4 |
strap foldover finish |
overedge (C) |
6 |
5.0 |
3.0 |
blue tip |
4 |
edge finish |
adjustable edge (SE) |
5 |
1 |
4 |
blue tip |
4 |
topstitch |
Leave a Reply