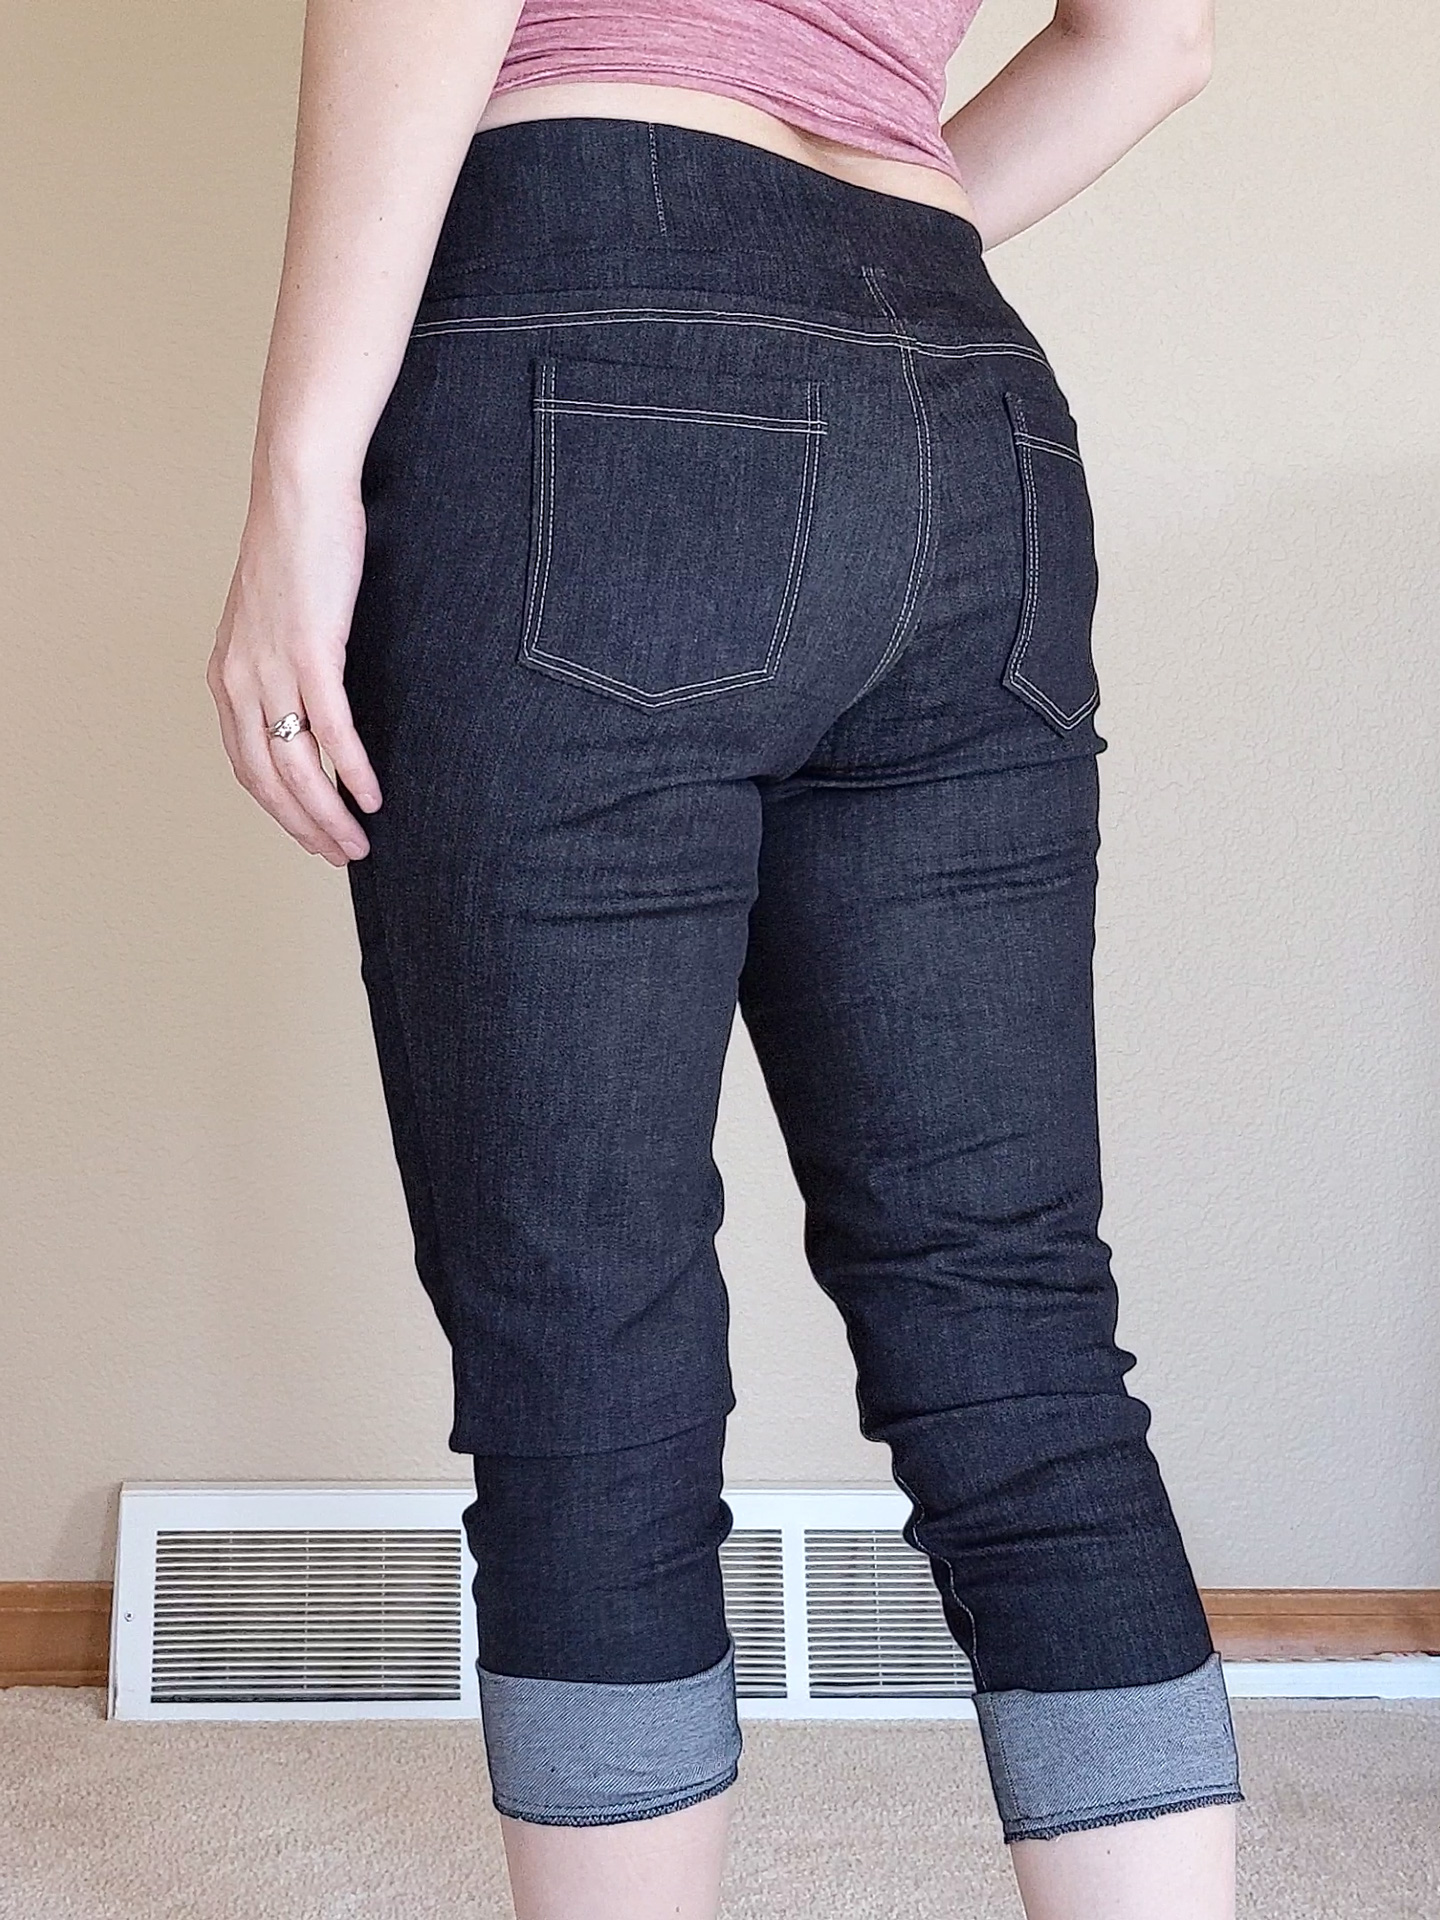
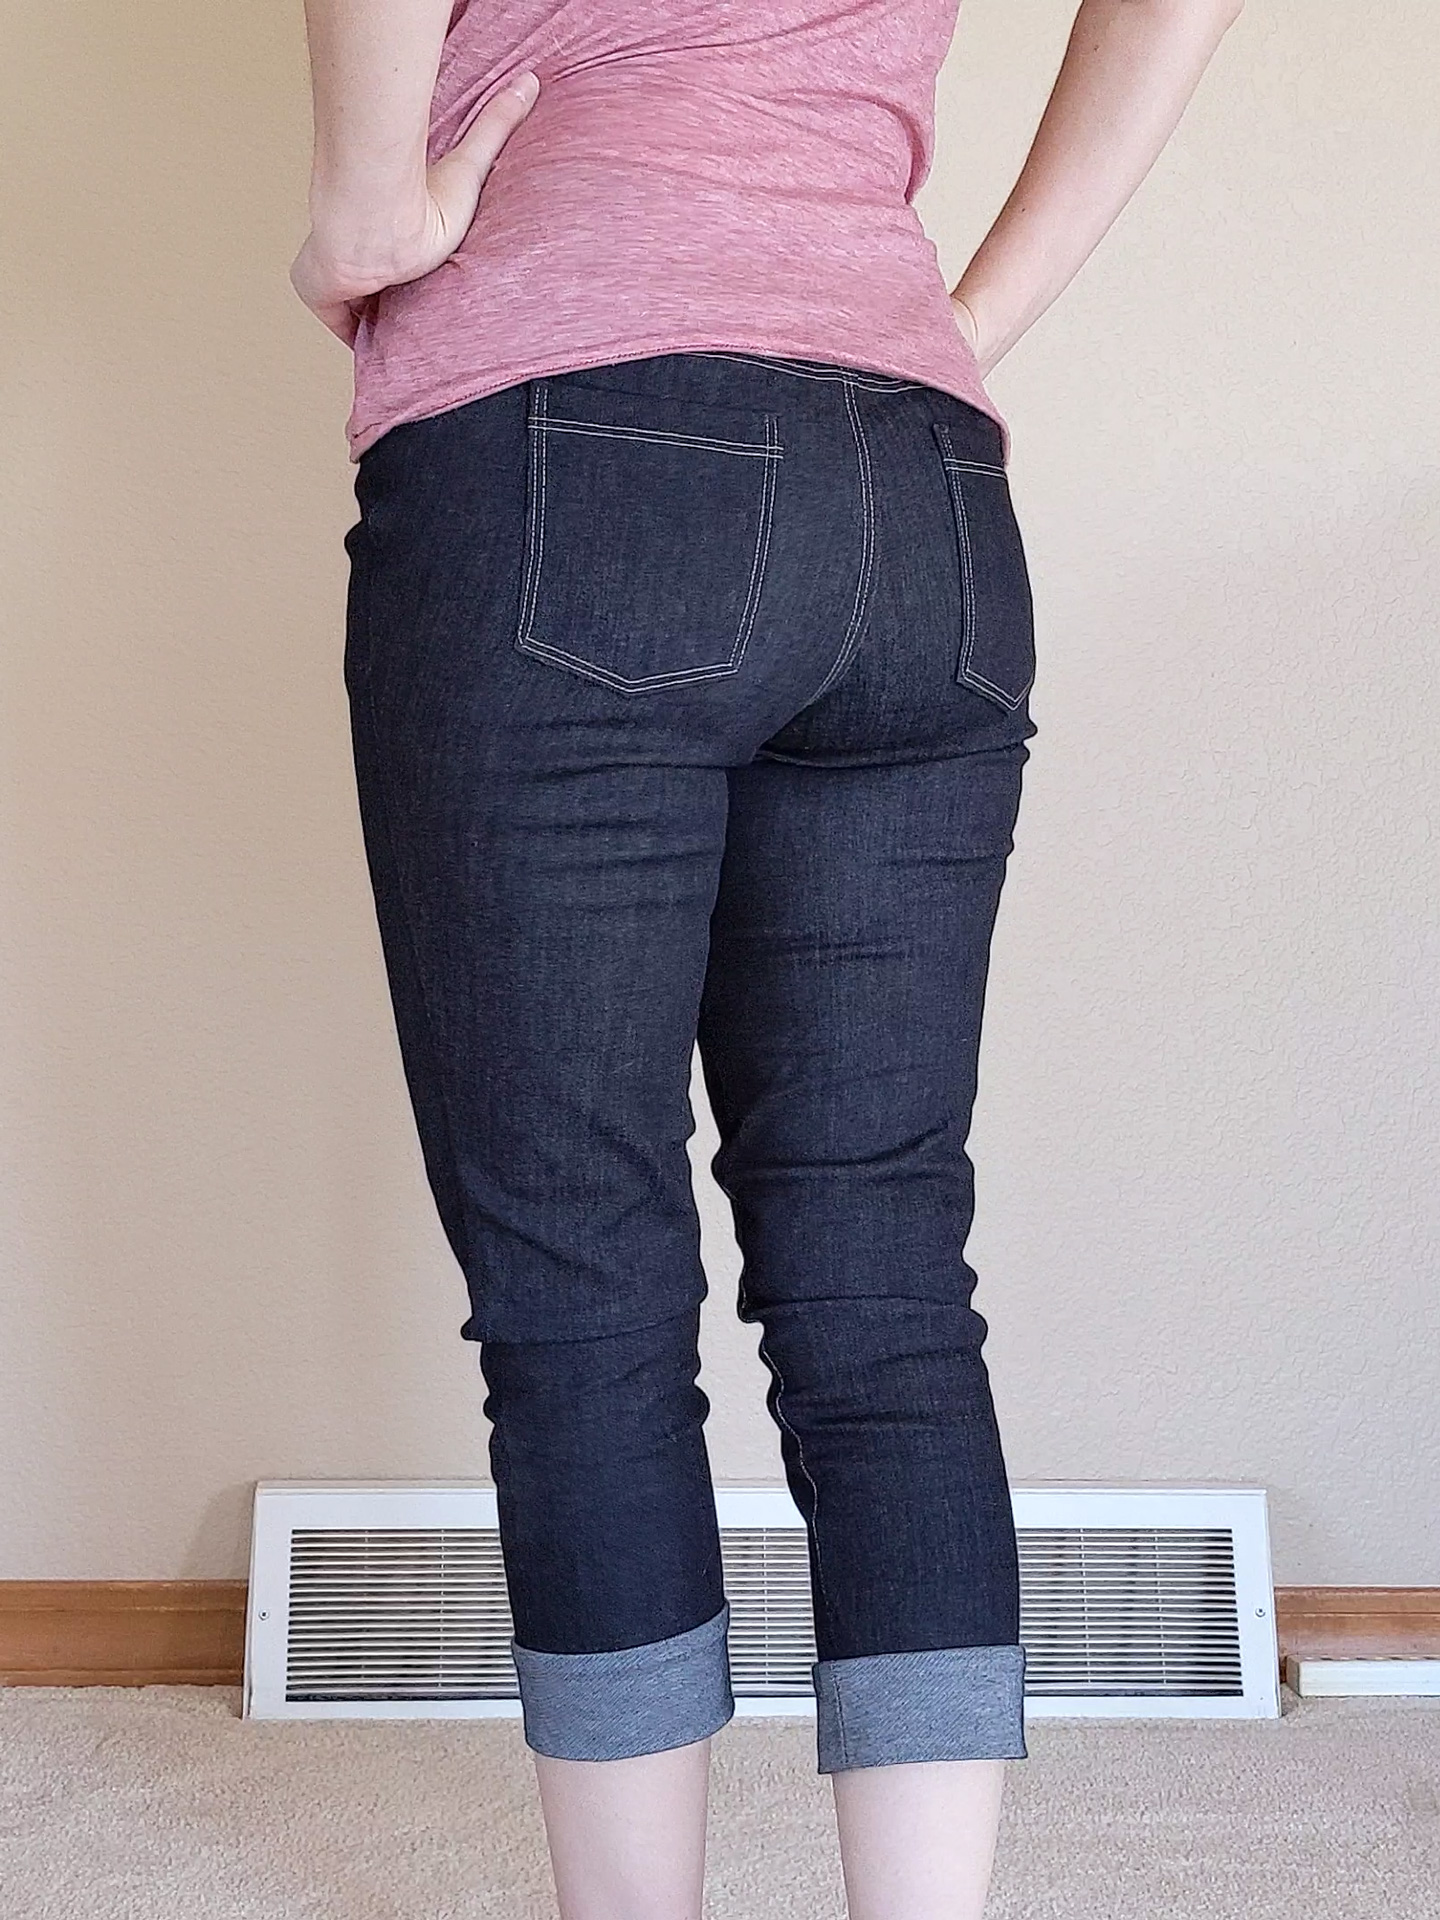
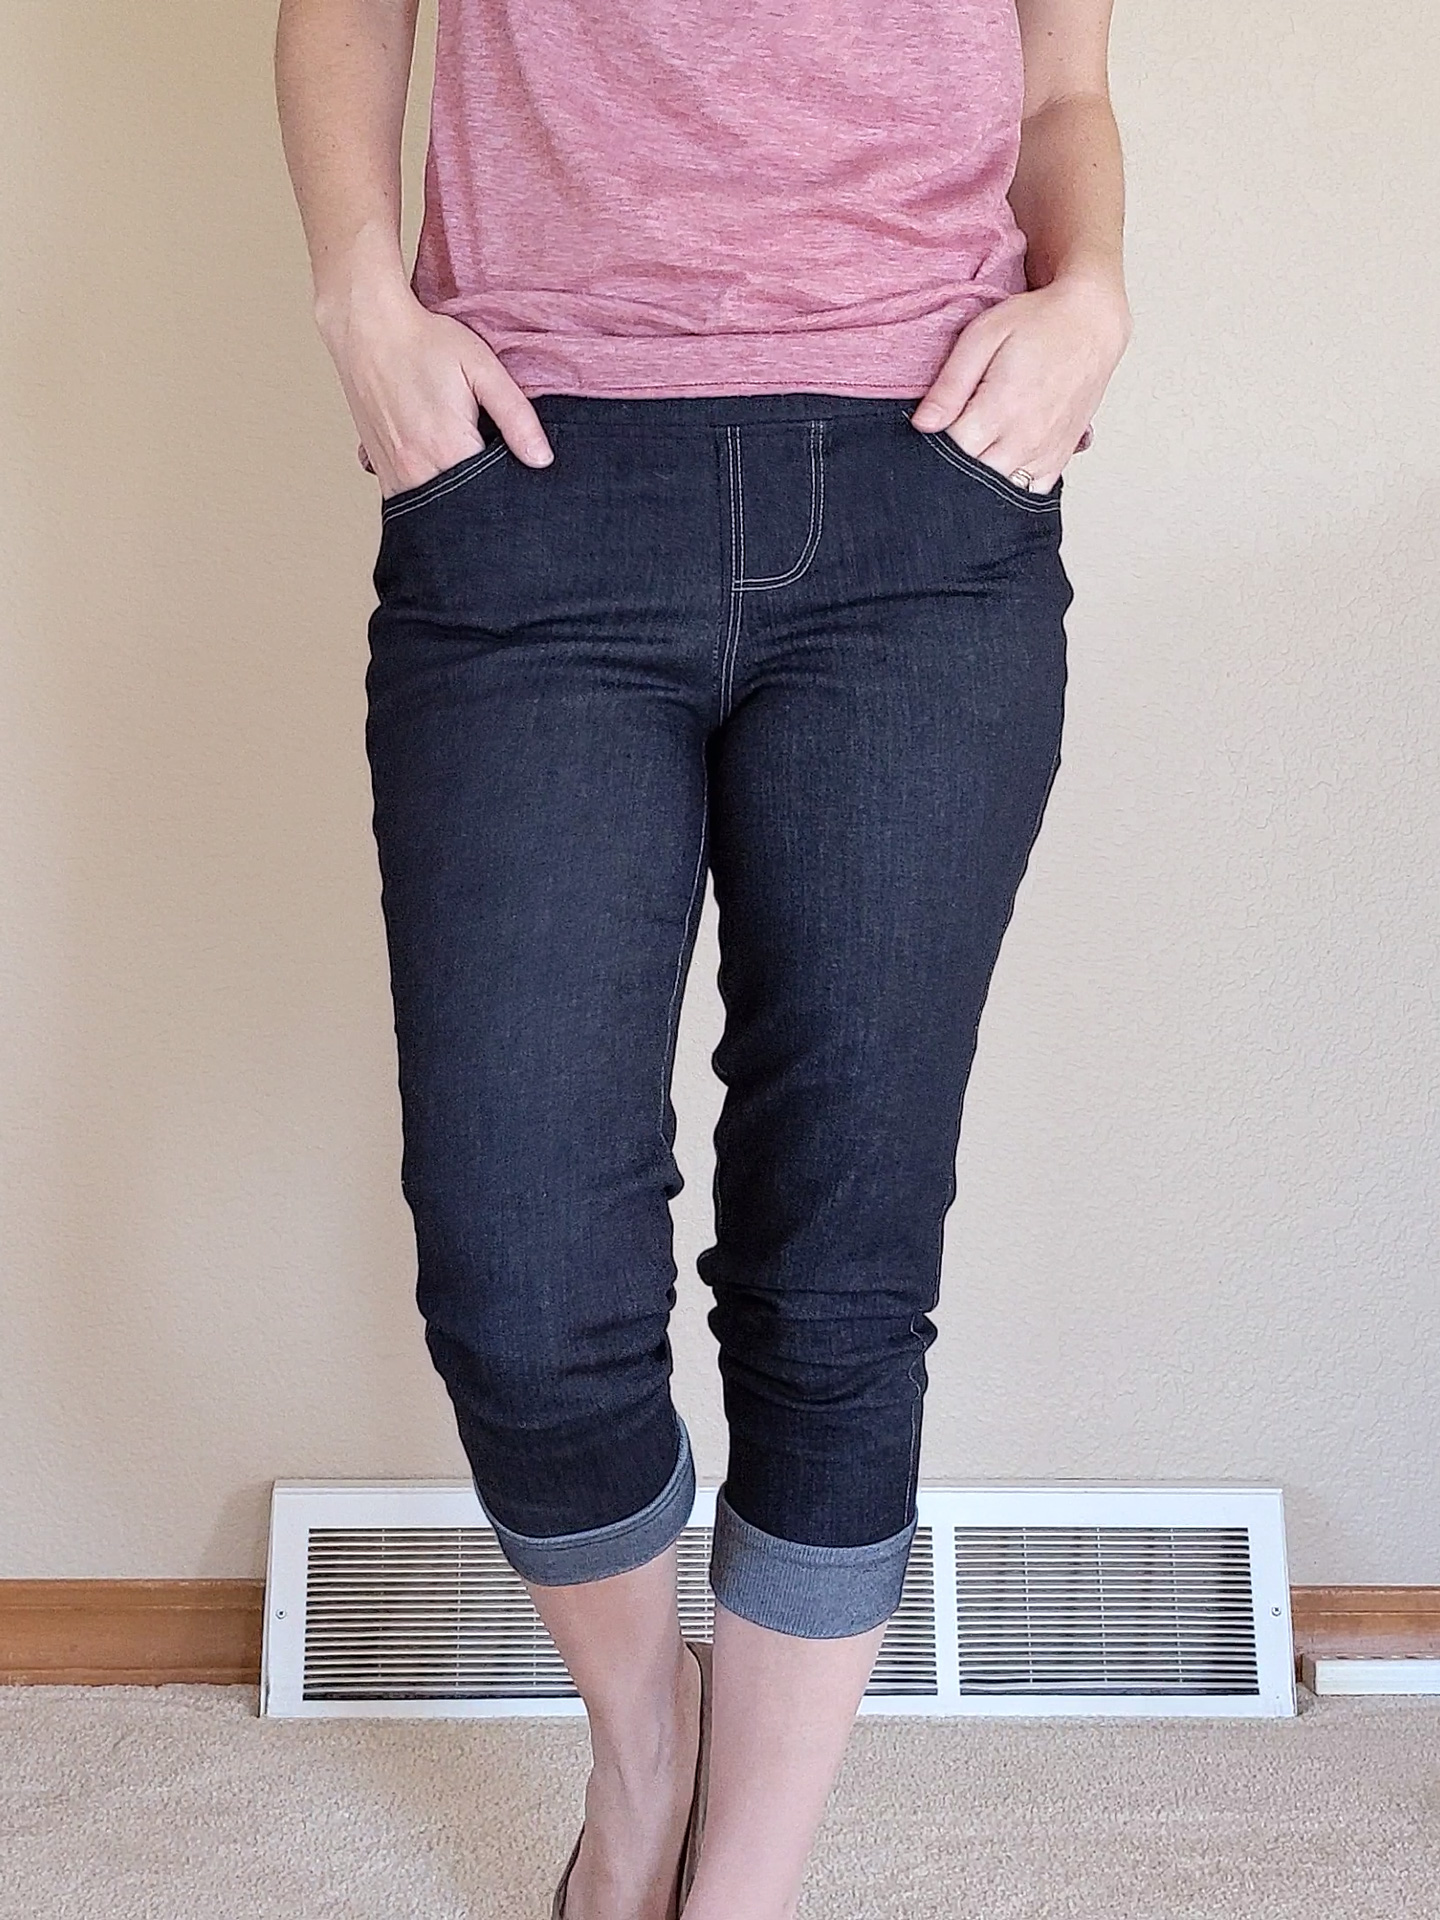
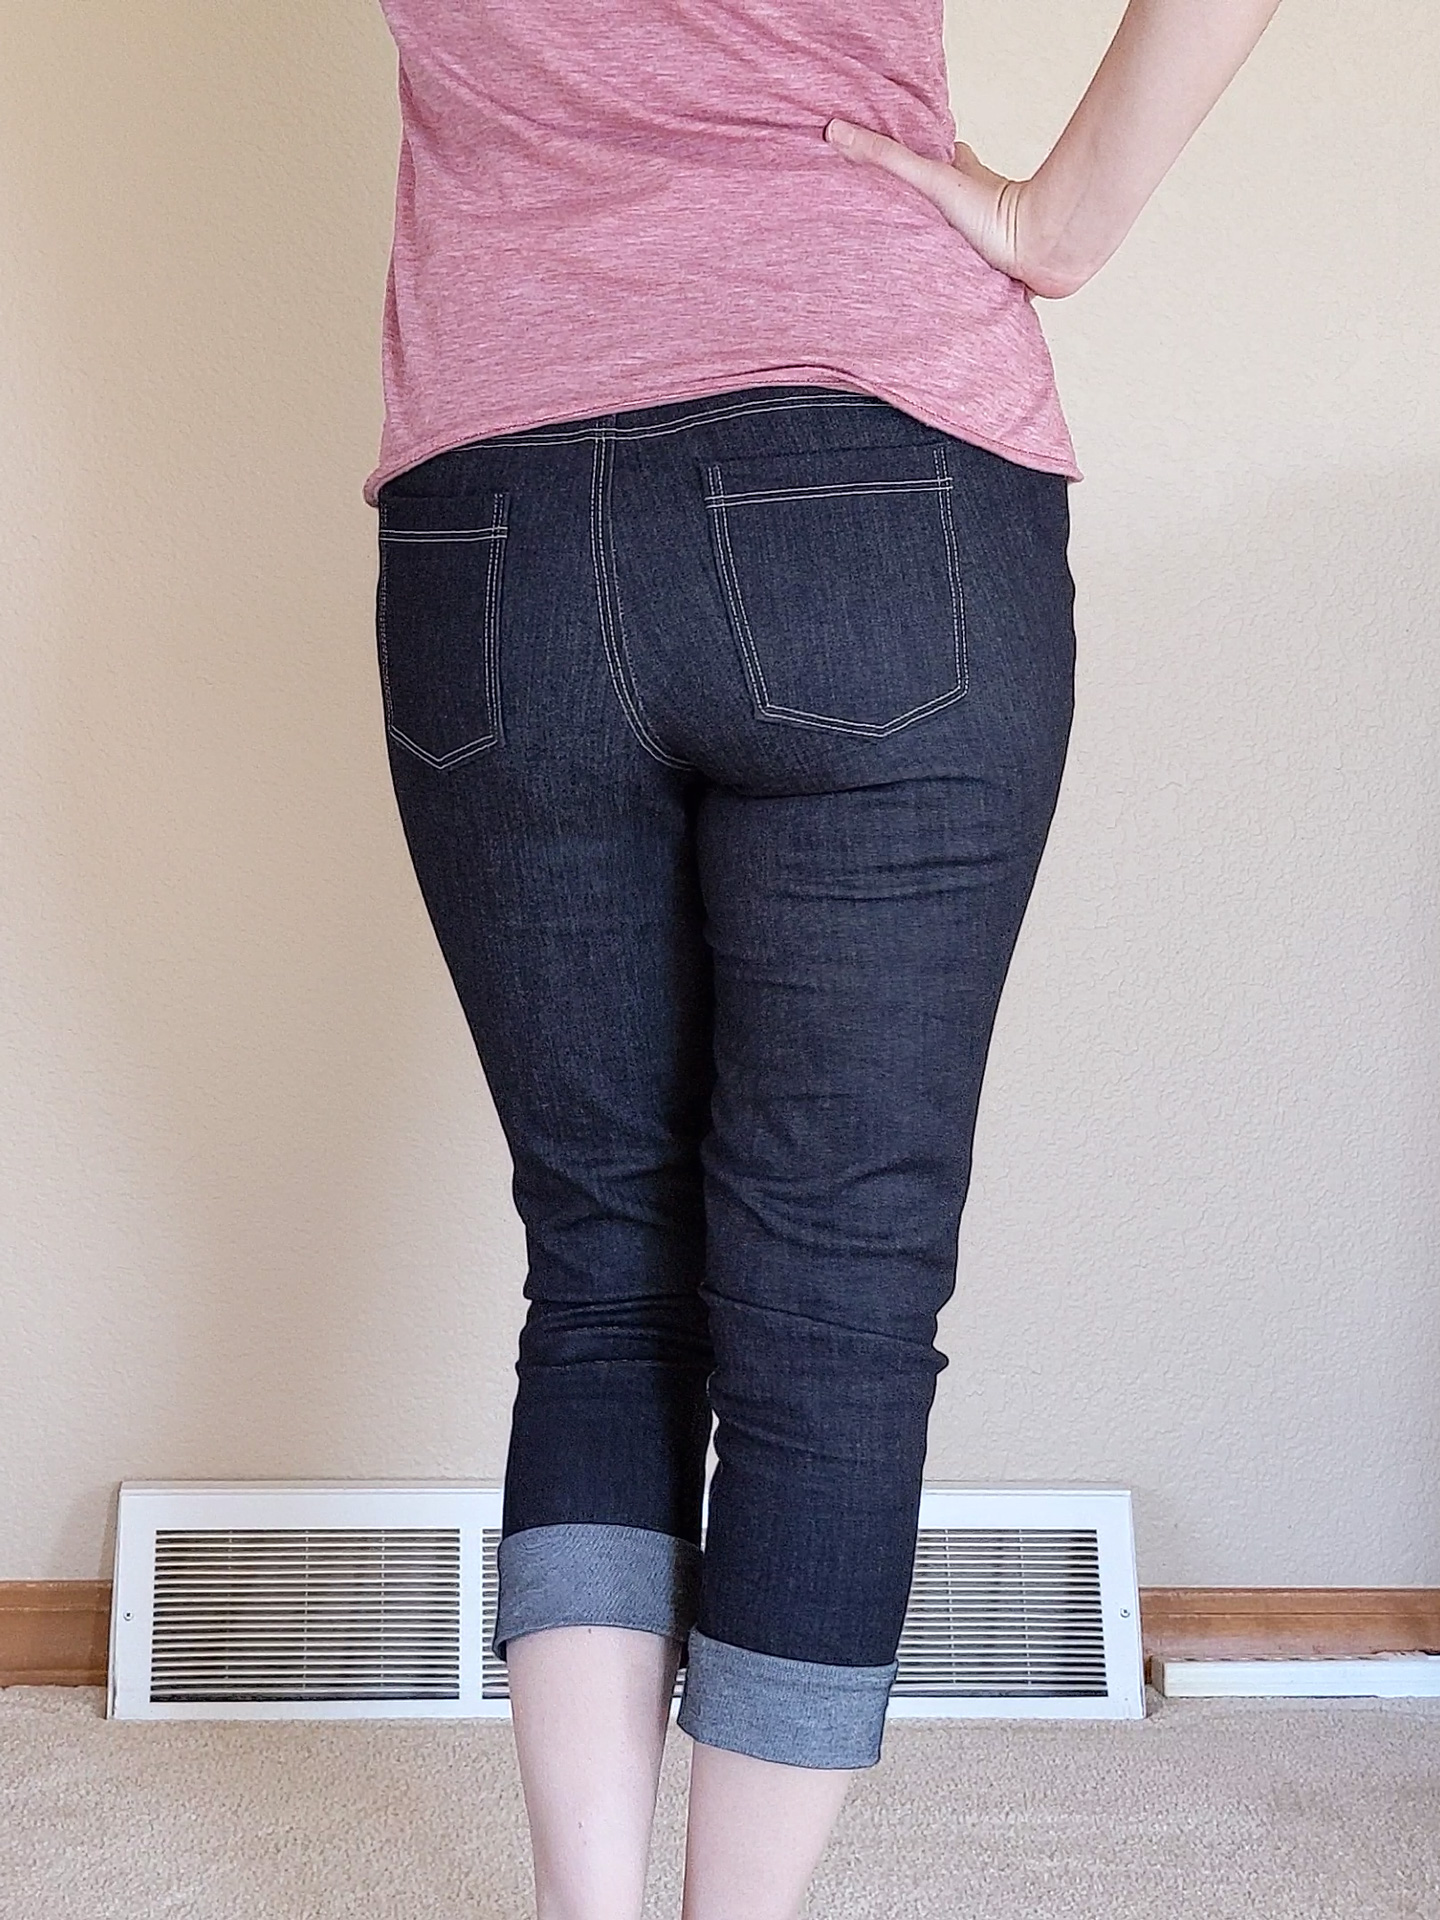
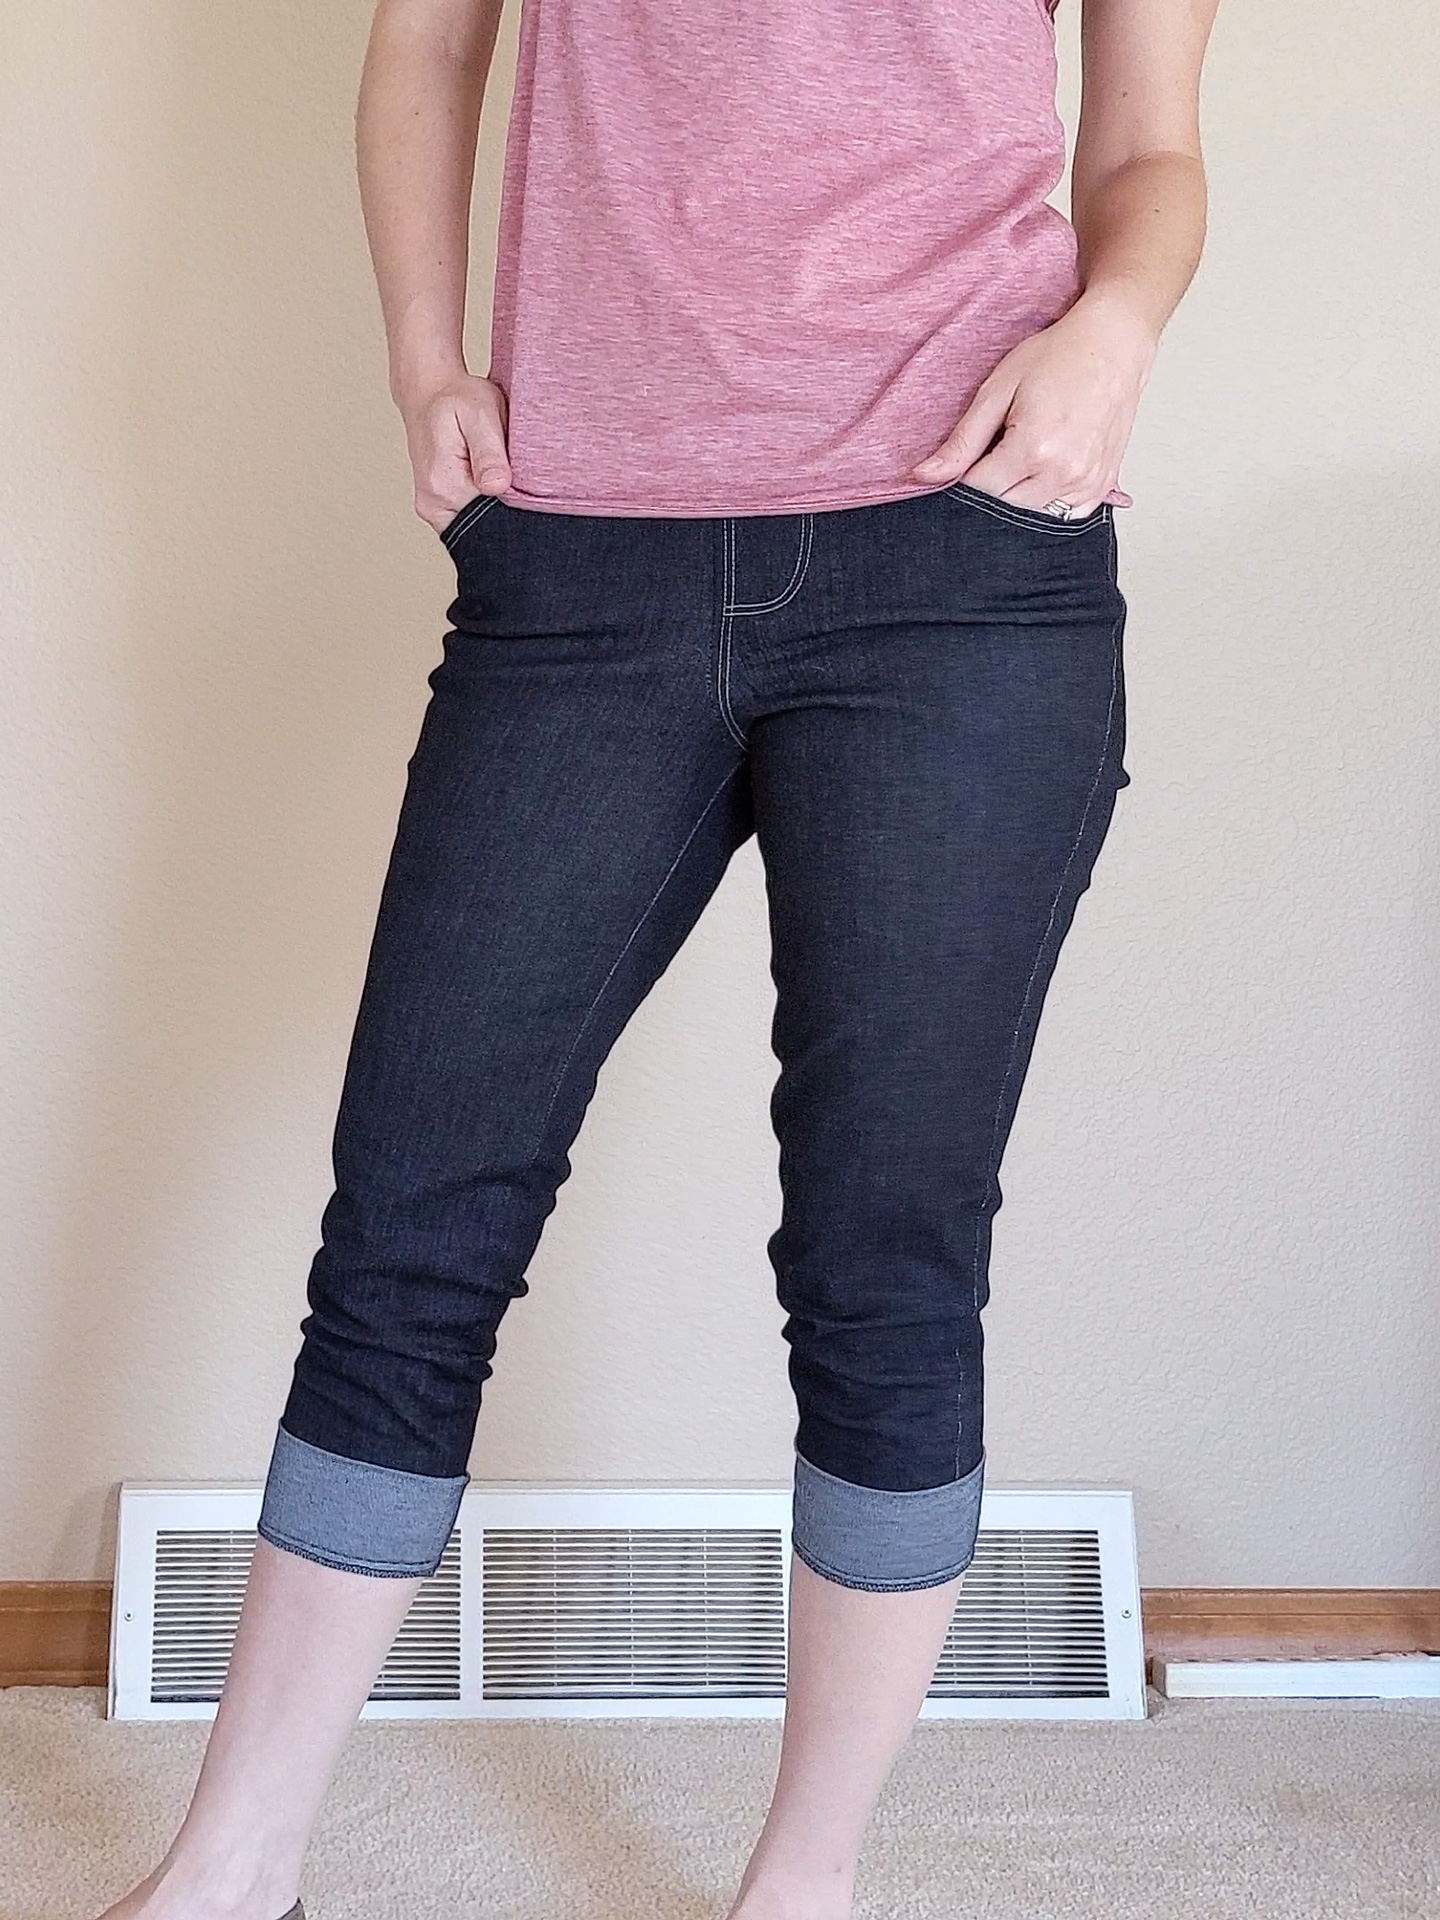
Meet version 2 of my denim capris:
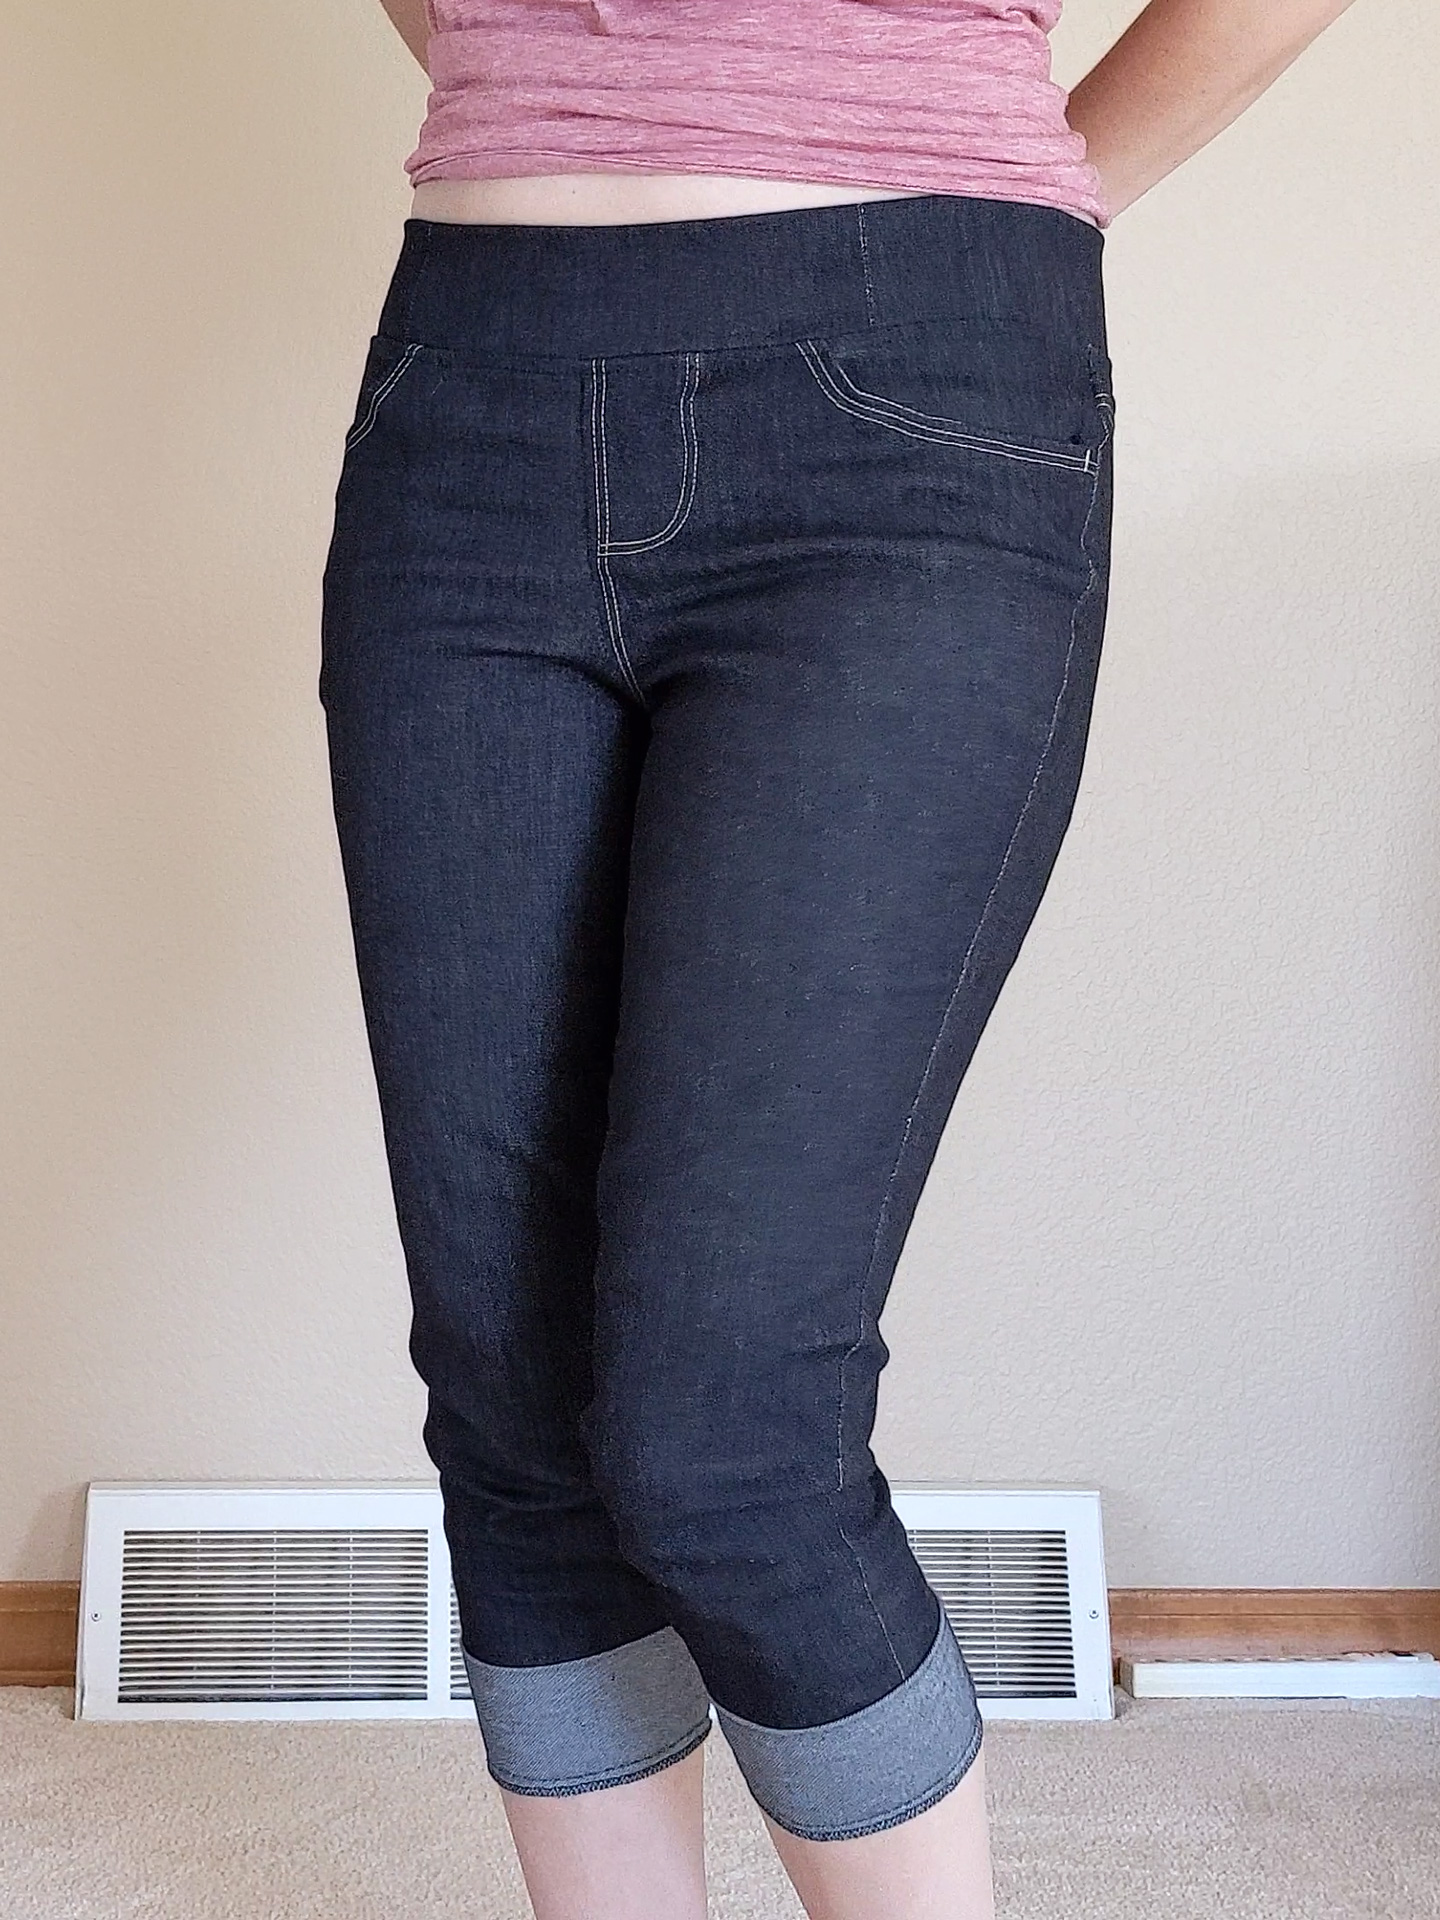
I am 100% happier with these over my first version. They are so much more comfortable! I may have to chop off the contoured waist on my first version and attach a waist like I did with these to make them more bearable to wear. That contoured waist is way too constricting and I hate where it hits around my torso, especially sitting down!
What I Did Differently
- Graded between sizes:
- Large at the top/waist
- Medium around the crotch
- XXL at the knee and down
- The cuffs are made from a polyester/spandex jegging fabric from Made of Love, which is much lighter than the denim with more stretch. Coupled with the increased size around my calf, they’re far less constricting than the cuffs on version 1. I also attached them differently. I used my overedge stitch (#9) to finish the bottom raw edge, and I did not anchor them along the side seams this time. This allows me to flip them down for a little added length, or up if I want a little shorter look with the edge-stitching showing.
- The waistband is much simpler this time. There’s no contouring going on here; it’s just your standard rectangle folded lengthwise. I did self-draft it, though. I calculated 85% of the circumference of the top of the pants and added in 1/2″ seam allowance. I was also down to the last bits of this denim fabric, so I had to cut the waistband as 4 pieces and construct it. You’ll notice 4 vertical seams on it, which I offset from the center and side seams of the pants because I think it looks nicer.
- Redrew the pockets to taper in a little bit more at the bottom.
- Increased the overlap of the front pocket facing to make sure the lining wouldn’t peek out of the pockets at all.
- Pivoted while topstitching the pockets. It seems a little hairy pivoting fabric around a corner using a twin needle, but it worked better than I thought.
- Topstitched the yoke seam allowance all in one shot. The directions have you topstitch the seam allowance down on each side of the yoke separately, but there’s no need for that. You can just wait until the yoke is attached to the pants, and then topstitch the whole thing at once. This guarantees the stitching will line up across the center seam.
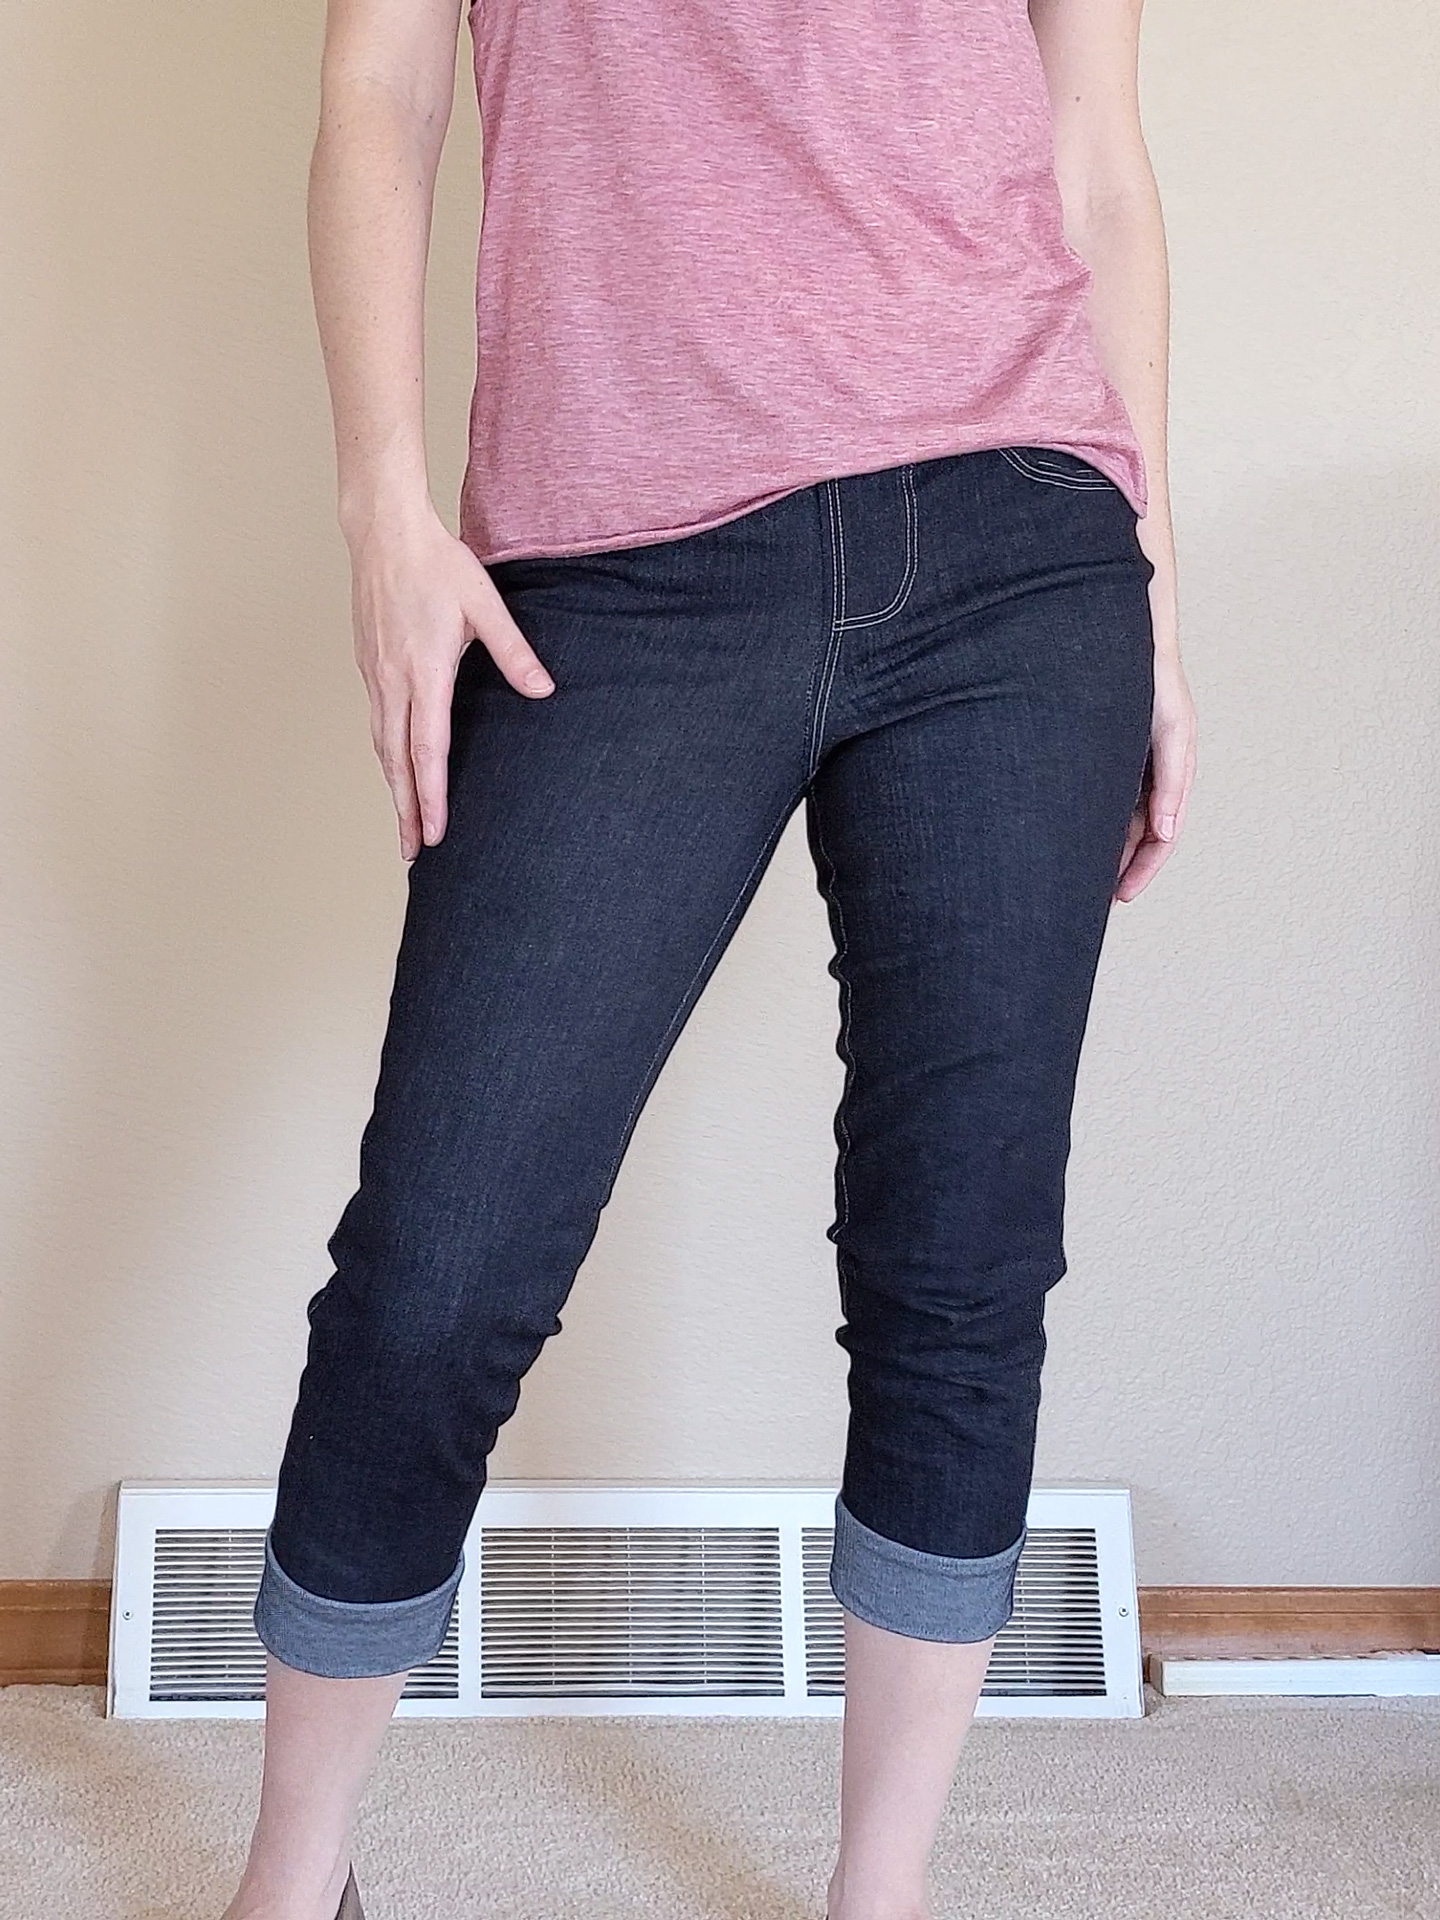

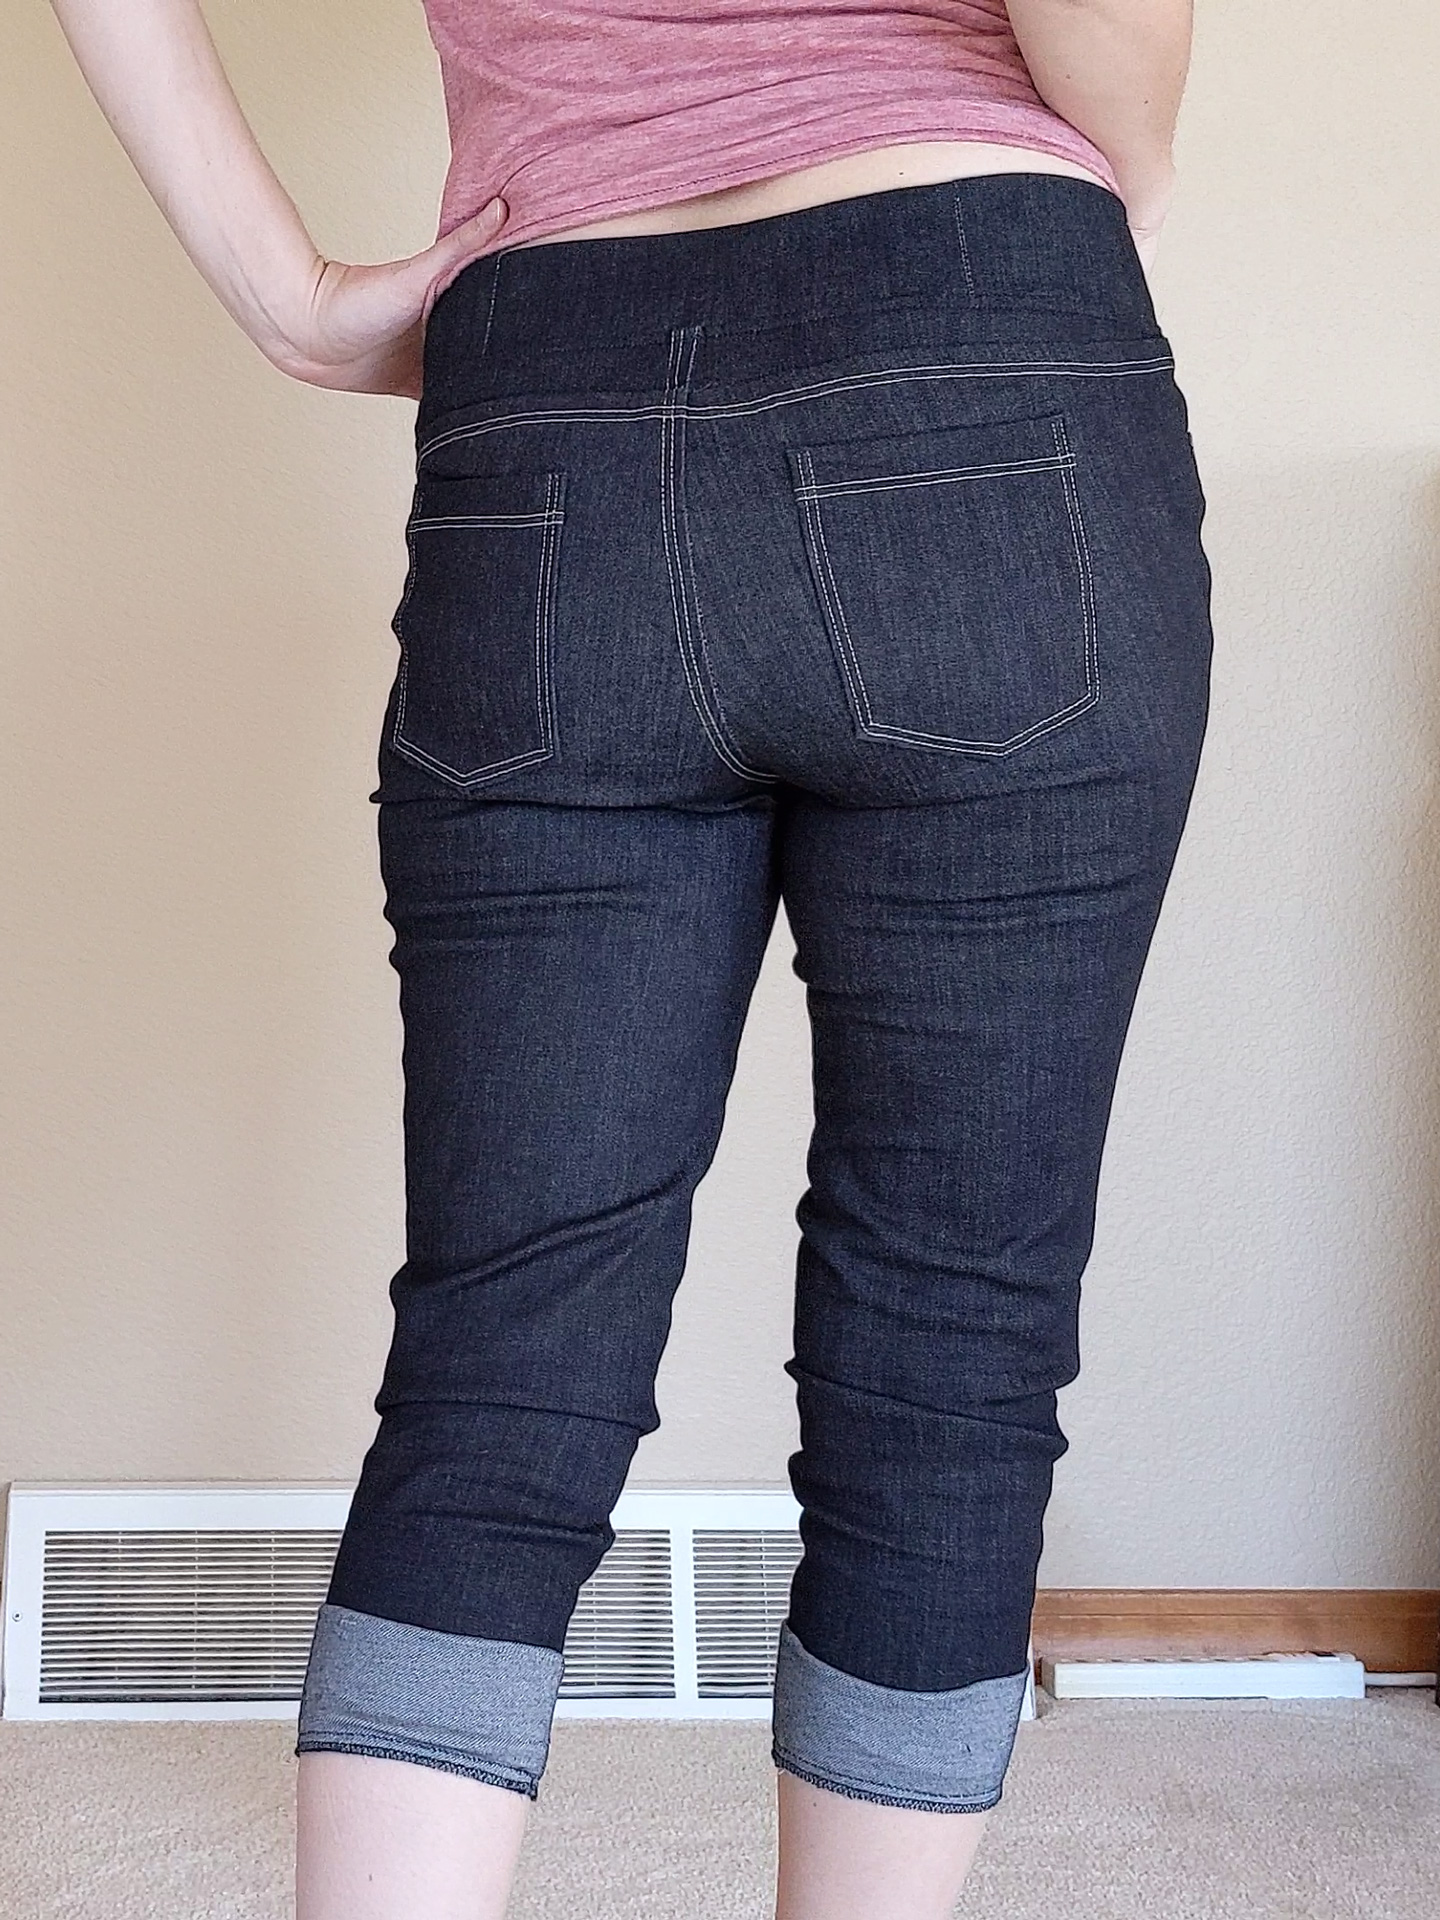
Optimizing the Waistband
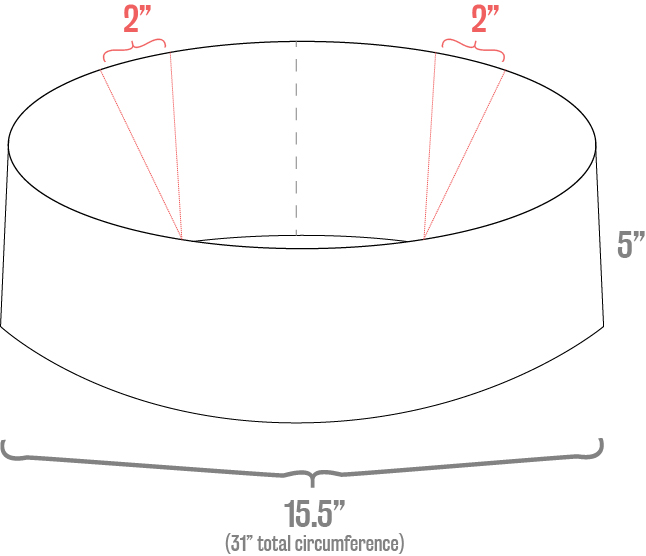
Well, as time has gone on, I grew to hate that waistband. It did not keep the pants in place; as soon as I sat or moved around, I had to yank them back up. So I unpicked, redrafted, and reattached, and after many wearings, I’m completely satisfied. So much that I want to make another pair, full length, doing the exact same thing.
The key: high waist with two back darts for shaping.
Cut pattern piece: 31.5″ x 10.5″ (x1) (includes 0.25″ seam allowance)
Finished band: 31″ circumference, 5″ high
Darts: 1 dart each midway between side seams and center back, pinching out 2″ each and sewn the full height of the band. This works so well for my shape because my spine curves inward so much at the waist. The sewing term for this is ‘swayback‘.
Project Settings
Presser Foot |
Stitch# |
Width |
Length |
Needle |
Top Thread Tension |
Application |
|---|---|---|---|---|---|---|
overedge (C) |
9 |
6 |
2.5 |
purple tip |
6 |
pocket denim facing finish |
1.4″ |
1 |
3.5 |
3.5 |
purple tip |
4 |
pocket denim facing attach |
overedge (C) |
2 |
3.5 |
3.5 |
purple tip |
4 |
pocket facing edge stitch |
1/4″ |
0 |
3.5 |
5 |
purple tip |
4 |
basting |
standard zig-zag (A) |
5 |
1 |
4 |
purple tip |
4 |
seams / waistband topstitch |
standard zig-zag (A) |
2 |
3.5 |
3.5 |
double stretch, wide |
4 |
topstitching |
standard zig-zag (A) |
1 |
3.5 |
3.5 |
90/14 sharp |
4 |
pocket french seams |
standard zig-zag (A) |
6 |
2 |
0.3 |
purple tip |
4 |
pocket tack |
overedge (C) |
6 |
5.5 |
3.5 |
purple tip |
4 |
edge finish |
Leave a Reply